
Overview
Are you an aspiring animator, looking to make something cool to share with the Guacamelee! Gold Edition community? Look no further! With this guide, you can learn how to make your .swfs come to life in the magical Mexican world of Guacamelee!
Introduction
Hey there! So you want to bring some custom seasoning to your Guacamelee! experience?
Your path will be fraught will danger and peril… but don’t fear, because we’ve written a handy
tutorial to help guide you through the process. All you need is a copy of Adobe Flash CS5.5
(Or higher). If you’re new to Flash, it might be helpful to follow this link to get up to speed:
[link]
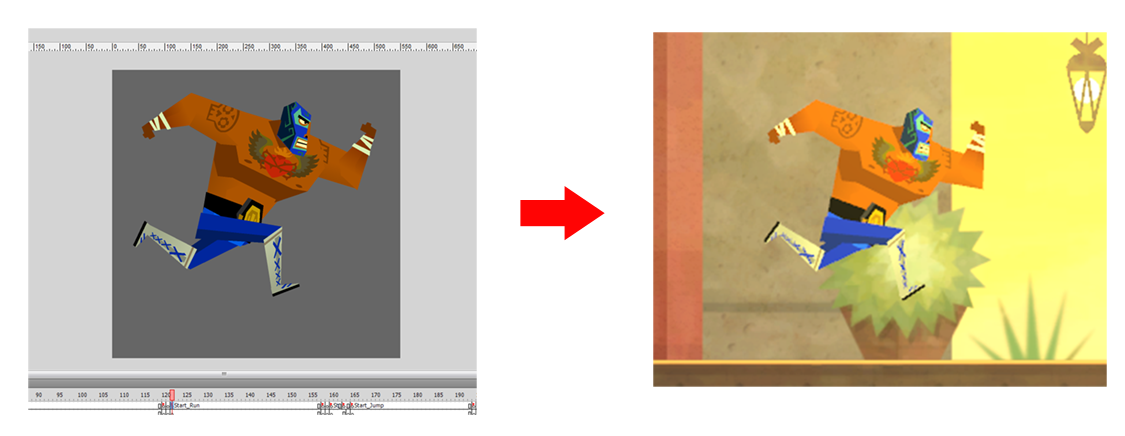
The animation in Guacamelee! is produced in Adobe Flash, and the exported swf is imported
into our game engine. Each character FLA file contains all the animation required by the game,
with each action instance layed out one after the other in the timeline.
To start, open Windows Explorer and navigate to “[Steam_Install_Direcorty]SteamAppscommonGuacameleeGuacSkins”. Open the provided ‘Player_Juan.fla’, ‘Player_Tostada.fla’,and ‘chicken_Player.fla’ files in Flash. You’ll see all animation for the Player will be contained on the ‘ANIM’ layer. This is where you will be making your changes.

Hulls and Frame Labels
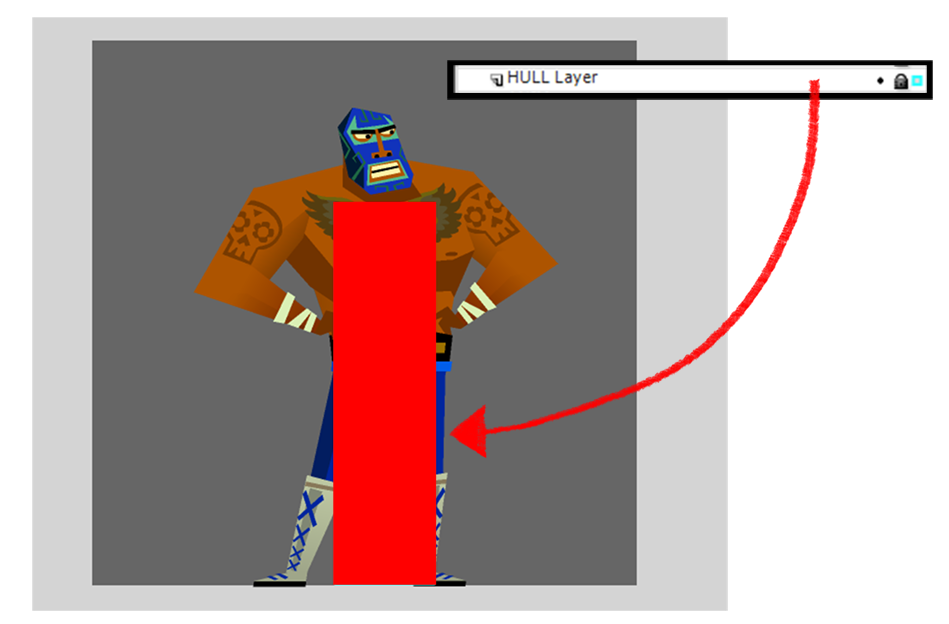
Note the ‘HULL Layer’ above ‘ANIM’. This layer contains hitbox information for the Player
character to properly interact with the game environment. It’s not necessary to modify this
layer, but note how the hitboxes line up with the Player visuals. If you have the Player animation go too far beyond the boundaries of the hitboxes, then the character will not behave properly in the game.
The ‘Flags’ layer contains Frame Labels, which define the Start and End of each animation
cycle. Frame Labels are under the ‘Proterties’ tab. The code behind the Player character
expects the timing of these animations to stay the same to properly work within the game
environment, so please do not make any timing changes to the animation!

Importing and Publishing to Steamworks
Once your custom costumes are complete, export the animations as swfs. Now you need
to import your swf into the game. Open DBSwfImport.exe in the ‘CustomSkins’ folder, go to
File>New Skin, which will open a new dialog. Here you can designate your new skin name,
upload your new custom skin swf files, upload a preview image (376 by 452 pixels), and
a description.
The tool will convert your swfs, and create a .dat file in a ‘CustomSkins’ subdirectory
of DBImport.exe . Guacamelee! Gold will search for any user generated costumes in this
directory. Your costume will now be available in the game’s Costume Shop!

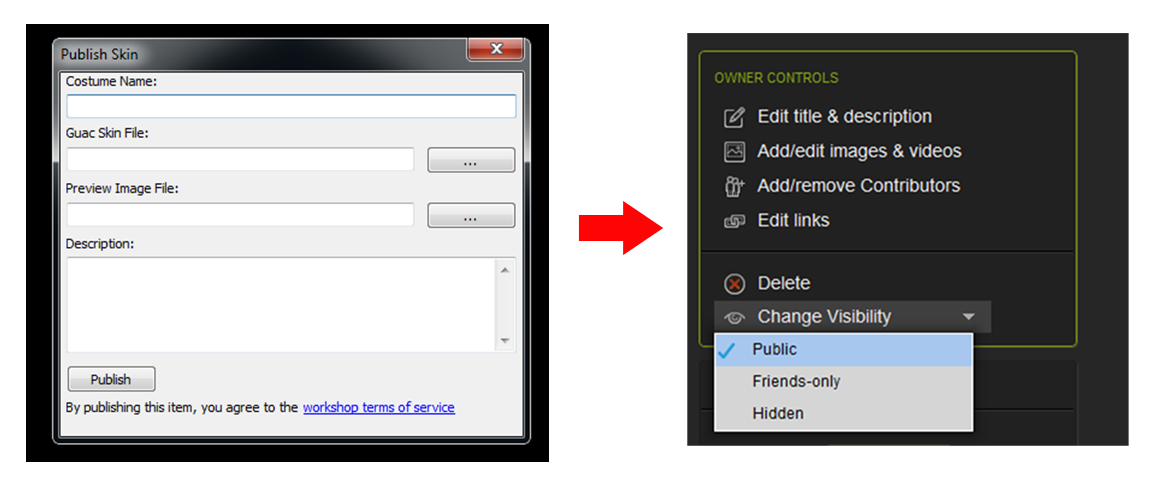
Additionally, you can publish your custom costume to Steamworks. First, make sure Steam
is open and you are logged into your account. Open DBImport.exe, and go to
File>Publish to Steamworks. Select your new costume .dat file, enter it’s name, preview image,
description, and click Publish. The tool should automatically bring you to the item in the
Steam Community Workshop for Guacamelee! Gold. However, the item will by default set to
“Hidden”. To share it with the community, select the “Change Visibility” dropdown menu
and click “Public”.
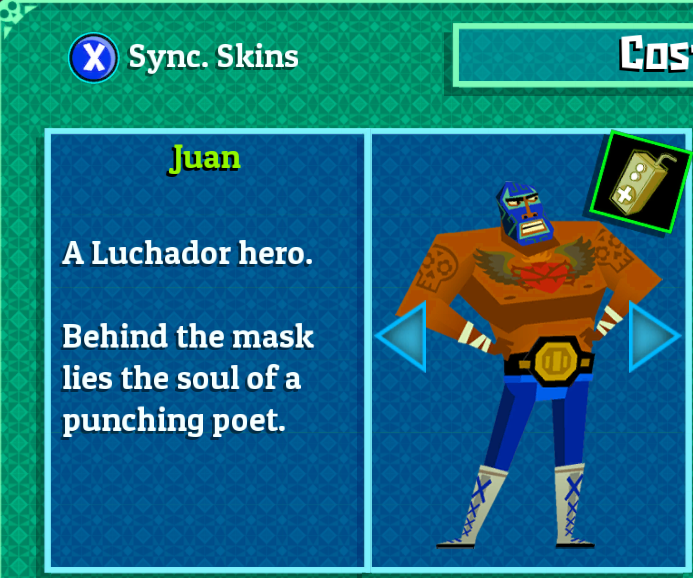
To download a user’s costume, select the Item, and click the “Subscribe” button. Once
a user’s costume has been subscibed to, open the game, and access the Costume Shop. Select
“Sync Skins”, and the new skin should be available!
In the game Costume Shop, each costume will be designated with an icon in the top right
corner of their preview image. The icon will indicate where the costume came from: Base
Game, Custom Skin on Local Hard Drive, or Steam Workshop.

That’s it! We’re excited to see the awesome costumes you will be sharing with us. Thanks for reading!