
Overview
Not really a walkthrough but more of a guide to Haven Moon that tries to give players subtle hints instead of direct spoilers.
Introduction
Haven Moon is a point and click adventuregame created by François Roussel. It is inspired by Myst and the stories of Jules Vernes. It’s the first game he ever created and he was the sole developer. As I’ve mentioned in my review I’m really impressed by this game and I hope we’ll see more games by mr. Roussel in the future.
While I find Haven Moon a good example of how a Myst-like game should be, one of it’s drawbacks is it’s linearity. In the original Myst you could visit several ‘ages’, each requiring you to solve a puzzle in order to acces them. If you got stuck trying to gain acces to one of the ages, or if you got stuck with the puzzles in one of the ages, you could always try another puzzle in the same or in one of the other ages. So back then it took quit a while before I really got stuck and needed a guide to proceed. In Haven Moon there is only one way to proceed so if you get stuck, there isn’t a lot to do.
One of the joys of these kind of games is the slow uncovering of secrets, getting to know how everything works and then progress further into the game. So to prevent other gamers getting stuck completely and giving up Haven Moon, I decided to create this guide. If you just want a quick and dirty walkthrough you should check out the pinned discussion in the forum. While this guide isn’t spoiler free, I’ll try to give subtle hints and nudge gamers forward instead of just feeding the correct answers.
The guide consists of five sections:
In the first section I’ll give some general tips on how to move around.
In the second section I’ll give an explanation of how the machines you can find on each of the islands work, without telling you exactly what you need to do.
In the third section I’ll give a series of hints on how to proceed. These are protected with spoiler tags so you can look for the hint you need to proceed without spoiling the rest of the puzzles. I had to split this into two parts because of the size.
In the fourth section I’ve put screen shots of all the notes that can be found within the game per island. Some of these give hints so I’ve protected them with spoiler tags. Browse these at your own discretion.
In the final section I’ve put a bunch of screenshots showing the various islands. They serve no purpose in this guide, I just thought they were pretty.
If I’ve made mistakes, give too many clues or too few, let me know in the comments and I’ll update the guide when I have the time.
Getting around (general hints and tips)
You can play the game almost exclusively with the mouse, just like RealMyst, using the left button to move forward and the right button to move backwards. When you aim the cursor at something you can interact with the cursor will become slightly larger and turn green. Use the left mouse button to activate buttons or to use an object in your inventory (no need to select it first). If you’re aiming at a wheel, the left button will spin it clockwise and the right button anti-clockwise.
If you want you can also use the arrow keys or WASD keys to get around, you can use the second tab of the games launcher to change the key bindings.
When you are aiming at something you’re sure you should be able to interact with but the cursor doesn’t change there are two possibilities. Once you solve a puzzle, the mechanism will lock. And some puzzles require you to solve another puzzle first. A good example is right at the start of the game. While you can interact with most objects, most of the mechanism won’t respond until you power them up.
Take your time to look around, hints are easily missed if you rush around. Especially be on the look out for the large T emblems. Some of these are slightly different and you’ll want to make a note of them. This will save you time solving one of the puzzles later on in the game.
The machines in Haven Moon
Teleporter
You start the game right next to the central teleporter. From this teleporter you’ll be able to travel to the teleporter pads on the other islands.

Power turbine
Everything in this island is powered by this turbine which gets it’s power from the current of the sea.
With the wheel on the left side of the turbine you can lower it into the water. With the large wheel you can change the orientation of the turbine.
On the right side is a sliding compartment with a gauge that shows you how much power the turbine is generating and a handle to lock the turbine into place.


Telescope
With the top handle you can open and close the view portal. The first wheel will set the rotation of the telescope and the second wheel will set the elevation. When you push the button the telescope will move into position. Once you have aimed the telescope at one of the beacons on one of the island you can use the power gauge to find the correct elevation that has to be set in the teleporter.

Beacon
Every island has a small harbour like this and the beacons are used to navigate from one island to the other using a small boat. While you won’t find this boat in this game (you’ll find out why when you read the notes), you’ll still want to activate them by turning the handle.

Air ship base
With the two handles you can set the stations that the air ship will travel between. It doesn’t matter which one you set on the left and which one on the right. Until you activate the teleporter you’ll only be able to visit the laboratory island and the canon island. The air ship can’t store enough energy to navigate directly to the house island, since it is located just beyond laboratory island.
Once you set the destination all you have to do is pull this handle to start the journey.


Teleporter
This one works be pushing the button in the middle of the construction and will always teleport you back to telescope island.

Library (Ateon teleporter 1)
The entire library dome functions as a teleporter, teleporting everything inside the dome. You use the handle to the right of the door in order to close it. And to activate it you insert the large key you’ve found in the base and then push the button. The large teleporter requires quite a bit more power to operate than the ordinary teleporters though. So it won’t work untill it’s properly powered up.

Lightning diverter 1
This device will transfer the power generated by the electric canon to the small teleporters that allow you to travel between the different islands. Once you’ve activated enough towers you can throw the switch to active the teleporters. The machine won’t activate when the power is unstable.

Walk ways
You’ll have to rotate the walk ways in order to get to all the lightning towers. Each of the handles rotates one of the walkways.


Lightning towers
These towers collect the energy from lightning strikes and send them to the electric canon to be transferred. You can activate a tower by turning the handle towards the light bulb.

lightning diverter 2
This device works just like the first lightning diverter, diverting more lightning power to the electric canon in order to power up the larger teleport domes.

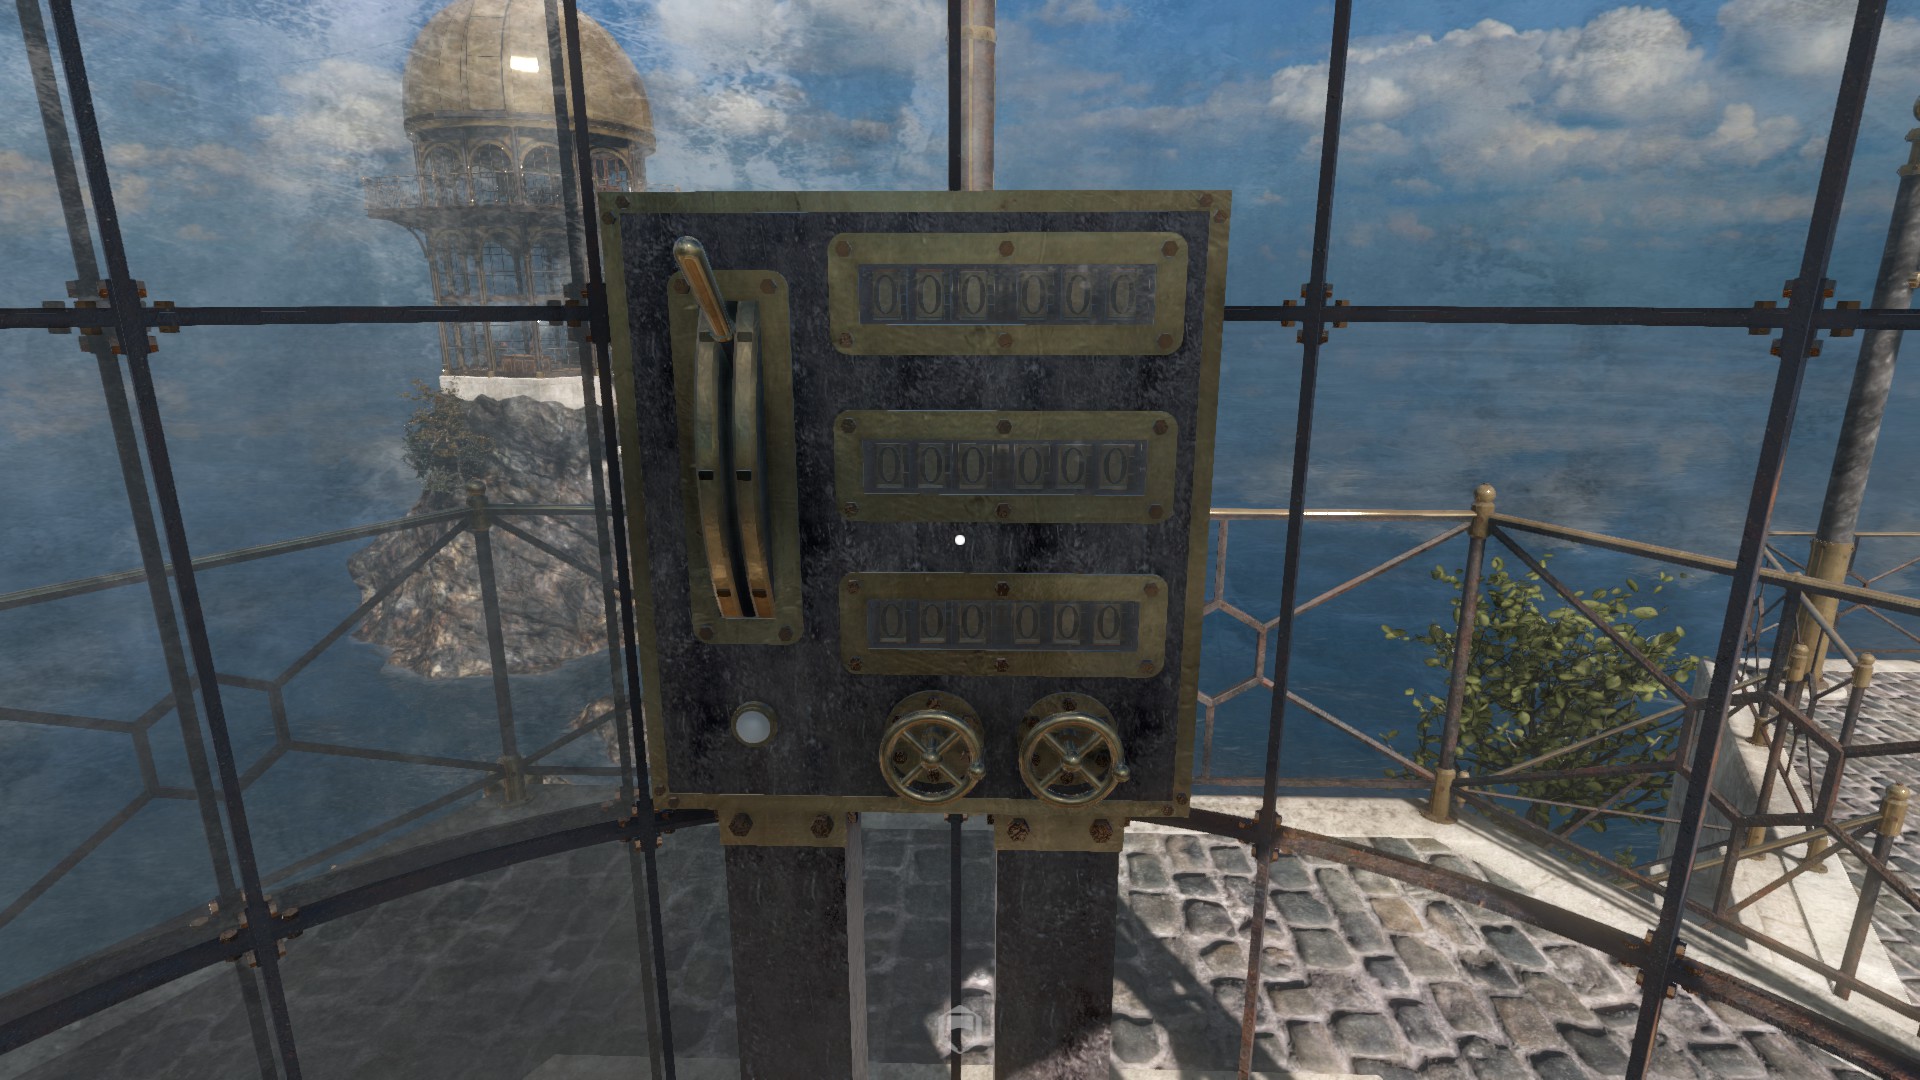
Electric canon
The electric canon delivers power to the teleporters on the other islands. In order to provide the larger teleporter domes with power it has to be aimed towards these domes first.
This is where you set the coordinates for the electric canon. The first wheel sets the coordination of the canon and the second wheel sets the elevation. Once they’re set you can push the button and the canon will rotate into the set position.


Pneumatic valve 1
There is a pneumatic system that operates house island. Air pressure is directed through pipes but can only activate one system at the time. You can use the handle to turn the system of or to power up one of the two systems.

Pneumatic valve 2
Only reachable using the teleporter, this valve allows you to direct power towards raising the vault.

The vault (Ateon teleporter 2)
The vault is a large teleporter dome, just like the library, and is operated in the same way.

Guide to Haven Moon (part one)
Telescope island
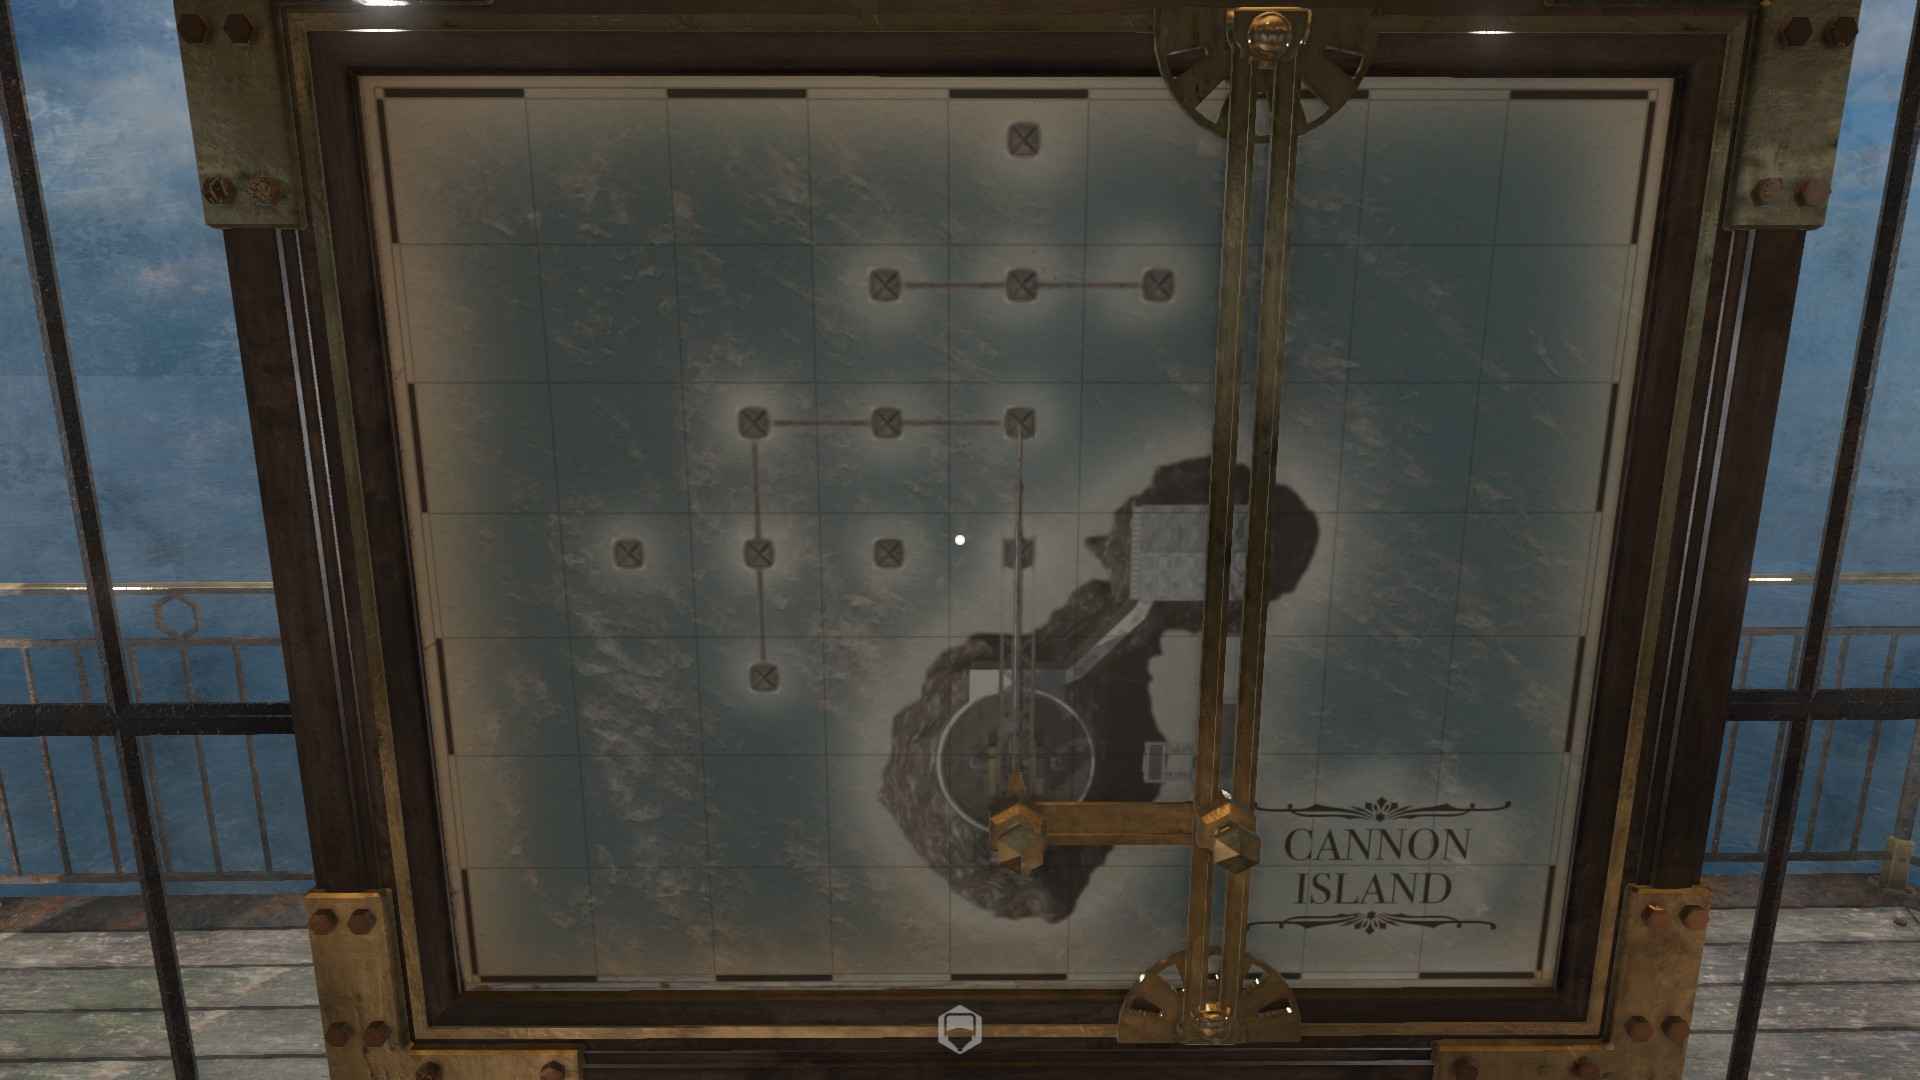
You’ve just arrived, so take your time to look around and get your bearings. Inside the telescope building you’ll find some notes that will give you your first clues and some maps giving you an idea of the layout of the islands.
You’ll notice that all the lights are off and that none of the machines will work, so what to do next?

- You first need to active the power on this island. Go to the turbine and activate it.
- Use the wheel on the left of the machine to lower it into the water.
- Use the large wheel in front of the machine to turn the turbine into the current.
- Open the hatch and monitor the gauge, turn the wheel until the power exceeds the required minimum.
- Throw the handle next to the gauge to lock the turbine into place and activate the power.
Now that you have powered up everything, where should you go now? - You need to use the air ship to travel to Laboratory island.
- Set the destination by using the two handles.
- Set one handle to base and one to laboratory.
- Go inside the air ship and pull the handle in the ceiling.
Laboratory island
Well you’ve made it to laboratory island but the teleporter pad isn’t working and there is a locked door with a combination lock. There is a note on telescope island that gives clues about the correct combination, but how to find it?

- First you need to activate the beacon down at the harbour which will give you the first digit of the combination.
- Now that the beacon is active we need to find out the three digits that make up the rest of the combination.
- It’s the coordinates of this island and you’ll have to back to Telescope island to find them.
- Aim the telescope at the flashing beacon and make a note of the coordinates.
- The first wheel will set the rotation of the telescope and the second wheel will set the elevation.
- You need to set the elevation to ‘0’ in order to see any of the beacons at the horizon.
Now that you have the combination you can open the door and explore the rest of laboratory island. There is an extensive library here with some notes on the top floor. Is there anything else I can do on Laboratory island?
- It’s time to activate the teleporters so you need to head to Canon island.
- Use the air ship to travel back to Telescope island and then set it to go from base to canon.
Canon island
Ok, you’ve managed to get to Canon island and you’ve found a locked door and a door that gives access to a mysterious device that seems to do nothing when you pull the handle. How to proceed?
- Did you remember to pick up the key you need to get to the rest of Canon island?
- It’s located on one of the other islands.
- It’s on Laboratory island where you just came from.
- It’s hanging on a hook right opposite the door of the library.
Wow, there are a lot of towers here and they seem to collect lightning. You’ve fiddled around with the controls of the walk ways and have turned some of the handles of the towers, but nothing seems to happen. What should you do now?
- You should turn all the handles so they are in the ‘on’ position.
- That is when the handle is pointing towards the light bulb.
- Look at the device in the room with the air ship, the power has gone up.
- But it won’t activate when the power is fluctuating.
- You have to turn off one of the towers and then throw the handle.
Back to Telescope island
Now that you’ve activated the teleporters it’s time to try them out. You have to input the correct coordinates into the ‘booth’ next to the teleporter. But what are the coordinates to the other island?

- You can find the coordinates by using the telescope.
- By aiming the telescope at the flashing beacon you’ll find the first coordinate.
- By raising the telescope you can find the second coordinate (elevation).
- Gently raise the telescope in 5 to 10 degree increments until you see the gauge go up.
- When the gauge reaches the maximum position, you’ve found the second coordinate.
- Input the coordinates at the teleportation ‘booth’
- You’ll find the coordinates to House island in the same way later on.
Well, you’ve found the coordinates to Laboratory island and used these to activate the teleporter. But how to get to the House island? You don’t have the coordinates, so you can’t use the teleporter yet and you can’t travel there with the air ship from Telescope island.
First you have to travel to Telescope island and use the air ship to travel to Laboratory island.
- Now leave the air ship at Laboratory island and use the teleporter to get back to Telescope island.
- Now you can set the air ship to travel from Laboratory island to House island.
- Just change the handles so one points at House and one at Laboratory.
- Now use the teleporter to get to Laboratory island
- And use the air ship to travel to House island
House island
Finally, you’ve made it House Island. You can see a beacon on top of the structure but no way to activate it. There is a machine with a handle but this doesn’t seem to do anything. I can see the teleporter pad down below, but there doesn’t seem to be a way to reach it. What should I do now?

- Get ready for some travelling from island to island.
- First you need to solve the ‘hidden’ puzzle on Telescope island.
- It’s located in the air ship base but you can’t reach it when the air ship is there.
- Use the teleporter to get from Laboratory island to Telescope island.
- Go to the air ship base and down the ladder.
- There is a large T emblem down there.
- You can turn the screws, but what is the correct configuration?
- You’ll find clues on other T emblems that look slightly different (remember my hint in a previous section?, hope you already made those notes)
- Look at the T emblems outside the air ship bases on Laboratory island and Canon island.
- Turn the four screws in the position indicated
- Fiddle around with the other two screws untill you find the key to House island.
Guide to Haven Moon (part two)
I had to split the guide section up as it was getting too big. This part continues at the point where you have found the key to House island but need to find a key hole in order to gain access.
Back on House island
So where to find the key hole so you can enter House island?
- First you need to direct the air pressure to the upper part of House island.
- Once you’ve set the handle to the correct position, you’ll notice a hissing sound when you move around.
- At the point where the hising sound is loudest you’ll find the key hole.
- It’s behind a screw that has a different colour.
- You did get the key from the hangar at Telescope island? Otherwise see part one of the guide.
You can now get into House island and marvel at all the beautiful rooms. But how to proceed from here?
- You should hear a hissing sound in one of the rooms.
- Change the position of the handle below if this isn’t the case.
- The sounds seems to come from the bedroom.
- One of the screws of the bedposts looks different.
- Activate it and insert the key and you’ll here a mechanism in one of the other rooms.
So you’ve made it to the elevator and can now go up to the control room where you see some handles you can turn. There’s also a key slot here but it won’t activate. You can go to the bottom of the base but there’s nothing to activate or is there?
- In order to raise the Vault you need to provide it with pneumatic power.
- Make sure the handle of the machine that directs the air flow is set to aim the air flow down.
- Now you need to get to the little Telescope island and use the teleport to get to House island.
- Make sure you’ve activated the beacon in the control room.
- Use the air ship to get back to Laboratory island and then the air ship to get to Telescope island.
- Use the telescope to find the coordinates to House island.
- Use the second wheel to set the elevation to ‘0’.
- Now use the first wheel to aim the telescope at the beacon of House island (four flashes).
- Use the second wheel to find the correct elevation.
- Use these coordinates to aim the teleporter at House island.
- Now you can activate the handle to change to air flow so it’ll power up the Vault.
- Take the teleporter back to Telescope island and use the teleporter to get to Laboratory island.
- On laboratory island take the air ship to House island.
Back on House island and onto Canon island
Now everything is set to raise the Vault and you can finally turn the key in the control room. Inside the vault you’ll find some notes giving you the coordinates to Canon island so you can now use the teleporter to get there.
You can now reach the harbour using the elevator and activate the beacon, though it serves no real purpose since you can’t use the boat and you already know the coordinates. You’ll find another little room with a device to redirect power to the Electric canon, but the power keeps fluctuating like it did before, perhaps you should experiment with the handles on the control towers?
You can also take the elevator up to the electric canon and there is a booth where you can input coordinates. Which coordinates should you use?

- Once you find the tower which is causing the power to fluctuate and turn it off you can activate the power to the electric canon.
- You can now aim the electric canon at either the Ateon teleporter on the library on Laboratory island or the on the Vault on House island.
- The choice is up to you: will you leave with all of the knowledge of the Menra society or with all of the riches of Ektor Turren?
THE END
Notes left by Ektor Turren
Telescope island


The note below contains important spoilers, so beware!


Spoilers, beware!


Screenshots
I took screenshots to use in this guide, but couldn’t use all of them. So I’ve included a bunch of pictures I took below.


Acknowledgements
First of all thanks go to François Roussel for creating this game.
I found a post in the discussion forum I used to get through this game, so a lot of thanks go to Binary Ninja and rgomez246 for posting the clues I needed. rgomez246 also wrote a walkthrough which you’ll find pinned in the discussion forum.
If I get any usefull responses in the commentary I’ll update this guide and post your names down below:
(space intentionelly left blank, for now)