
Overview
Advanced Launcher, HD textures, improved graphics, shaders, console commands, play as joker etc. “We are working hard on the next texture release, more info soon!”
Update Tease
[link]Intro

Guide Authors:
https://www.youtube.com/channel/UCL_-pwg6QbA5nD327B8Icww “I modify video-game graphics and am responsible for the NieR: Automata & Arkham City texture packs.”
https://www.youtube.com/channel/UCrgLLKg3jkaoDm2NBqf0Jcg?view_as=subscriber “I’m a 3D artist with a lot of experience regarding UE3/4 development, having worked and modded games using both of them. I’m mostly adding .ini tweaks and the like. I’m active in the Fallout NV, Resident Evil and Arkham modding communities in my spare time.”
Permission is NOT granted to redistribute our assets, or re-host them anywhere. We will take action against any stealing or re-hosting of our content.
We take a look at every questions or issues, but please refer to FAQ section first 🙂
The goal of this guide is to go all out and show the fans of the game how to get the very best experience possible with Arkham Asylum. We’ve allowed some options to let players tailor the game to their taste. We will go in-depth with the three main ways to improve graphics:
- Texture Mods
- Advanced BmLauncher
- Reshade Shaders
We will also discuss just about every great thing we could find online to be able to tweak the game to your liking: Console commands, Play as joker, FOV adjustments and much more.
- Don’t be overwhelmed by the length of the guide. If you’re only interested in one thing, find it in the sections list on the right. All downloads are kept in the Downloads section.
- We both own the Steam GOTY version of the game. We’re not familiar with other versions of the game, if you encounter any issues with GFWL or non-GOTY then let us know.
- You can use the texture pack without disabling depth of field or using Reshade – and vice versa. Keep the vanilla pallete if you prefer. This guide serves as a hub for covering everything.
- Please take note of your game’s install directory. Do this by right-clicking the game in your library. Select ‘properties’, now go to ‘local files’ tab. Select the ‘browse local files’ option. The game’s directory should be revealed in File Explorer.
We’re always welcome to reasonable criticism. It only helps the final results so feel free to comment your opinions.
DOWNLOAD
BmLauncher zip[neatodev.github.io] – by Frofoo
Texture Pack V4.1 334 mb (Zip format) [drive.google.com]
Texture Pack V4.1 334 mb (Rar format)[drive.google.com]
Reshade 4 Presets[drive.google.com] – Reshade injector by Crosire
File – 323mb[drive.google.com] ported by Catspaw & Floobagop
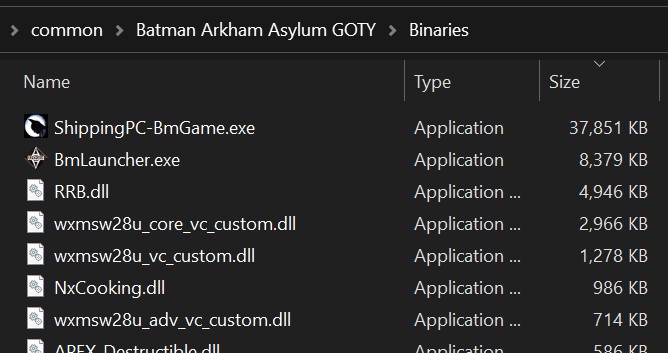
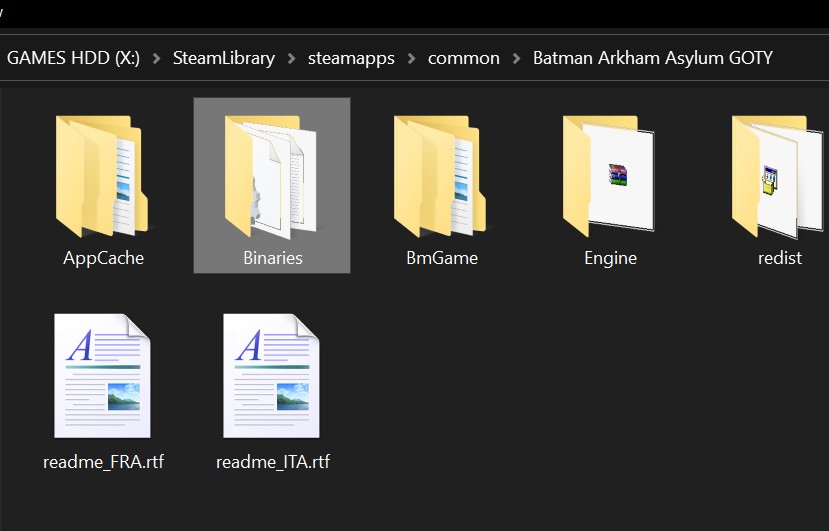
It’s vital that you know your game directory. If you don’t, right click the game on Steam, and select Properites. Go to the “Local Files” tab, and “Browse Local Files”

Open the Binaries folder. You should see these files. This is where the executables are contained, which is is important for the rest of the guide.
Texture Pack
What does a texture pack do?
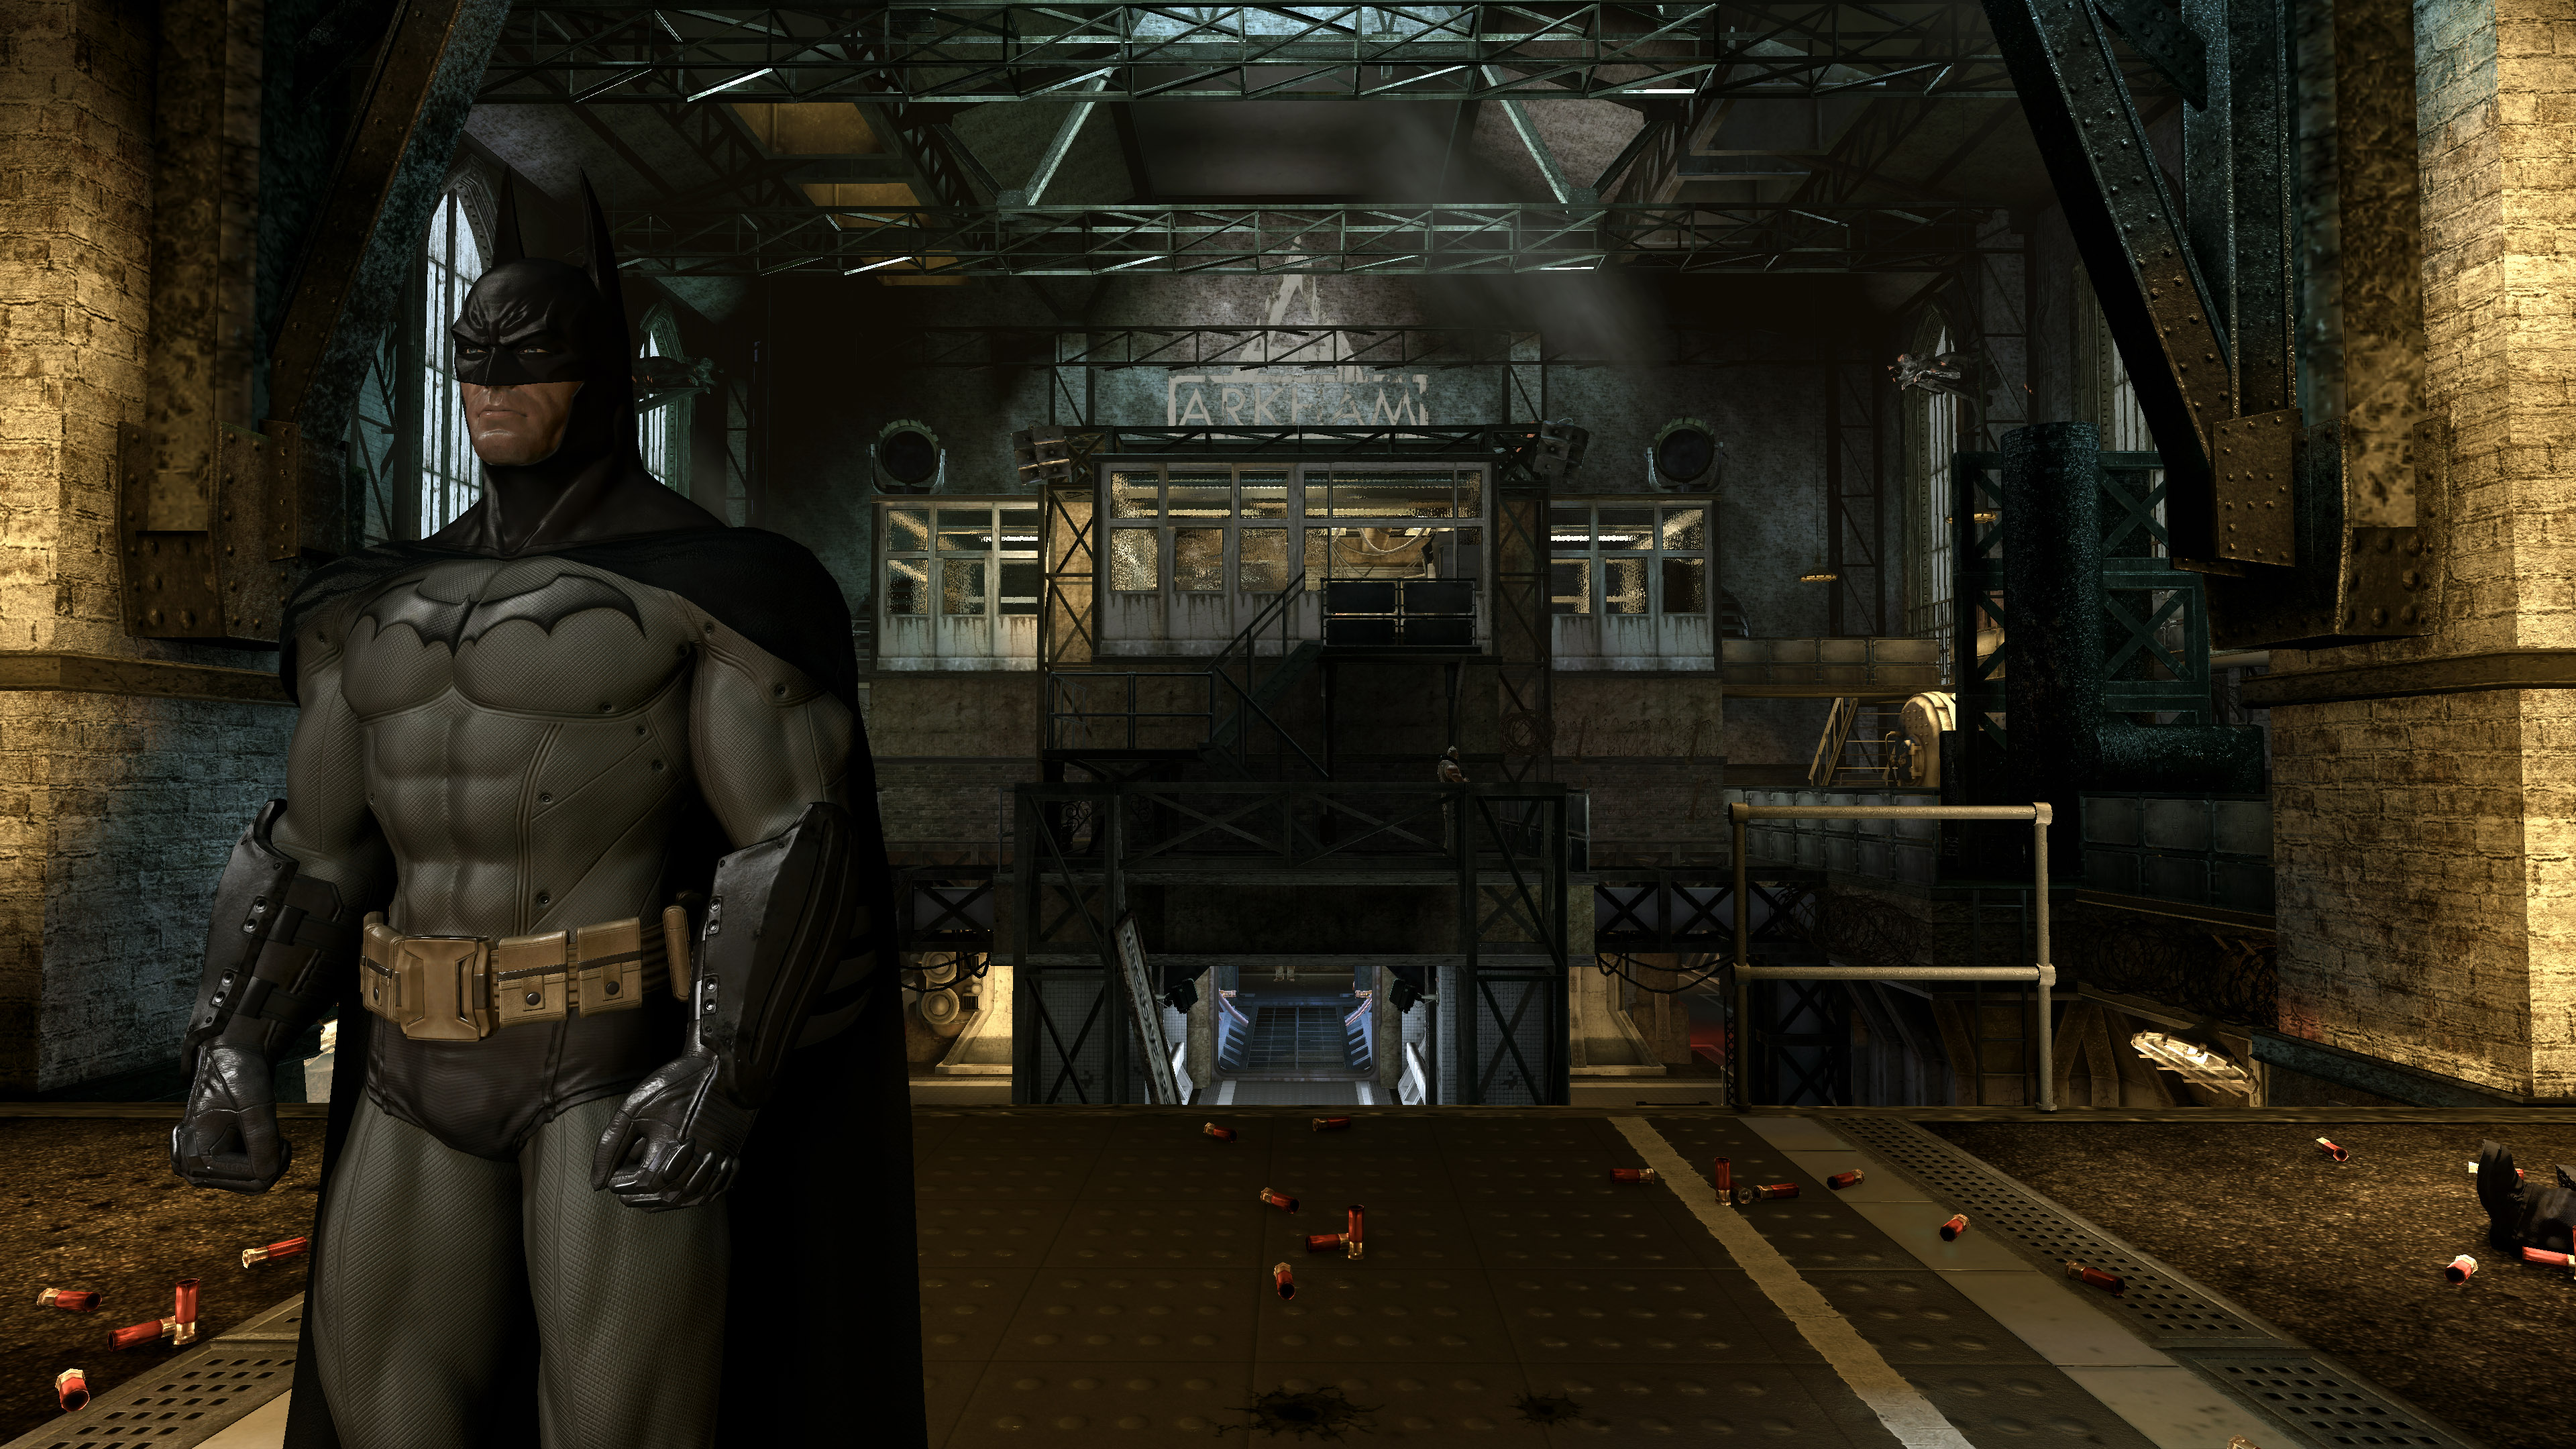
Increases texture quality on objects and characters throughout the game. Ever noticed in-game when a surface looks blurry or pixelated? Texture packs tackle this.

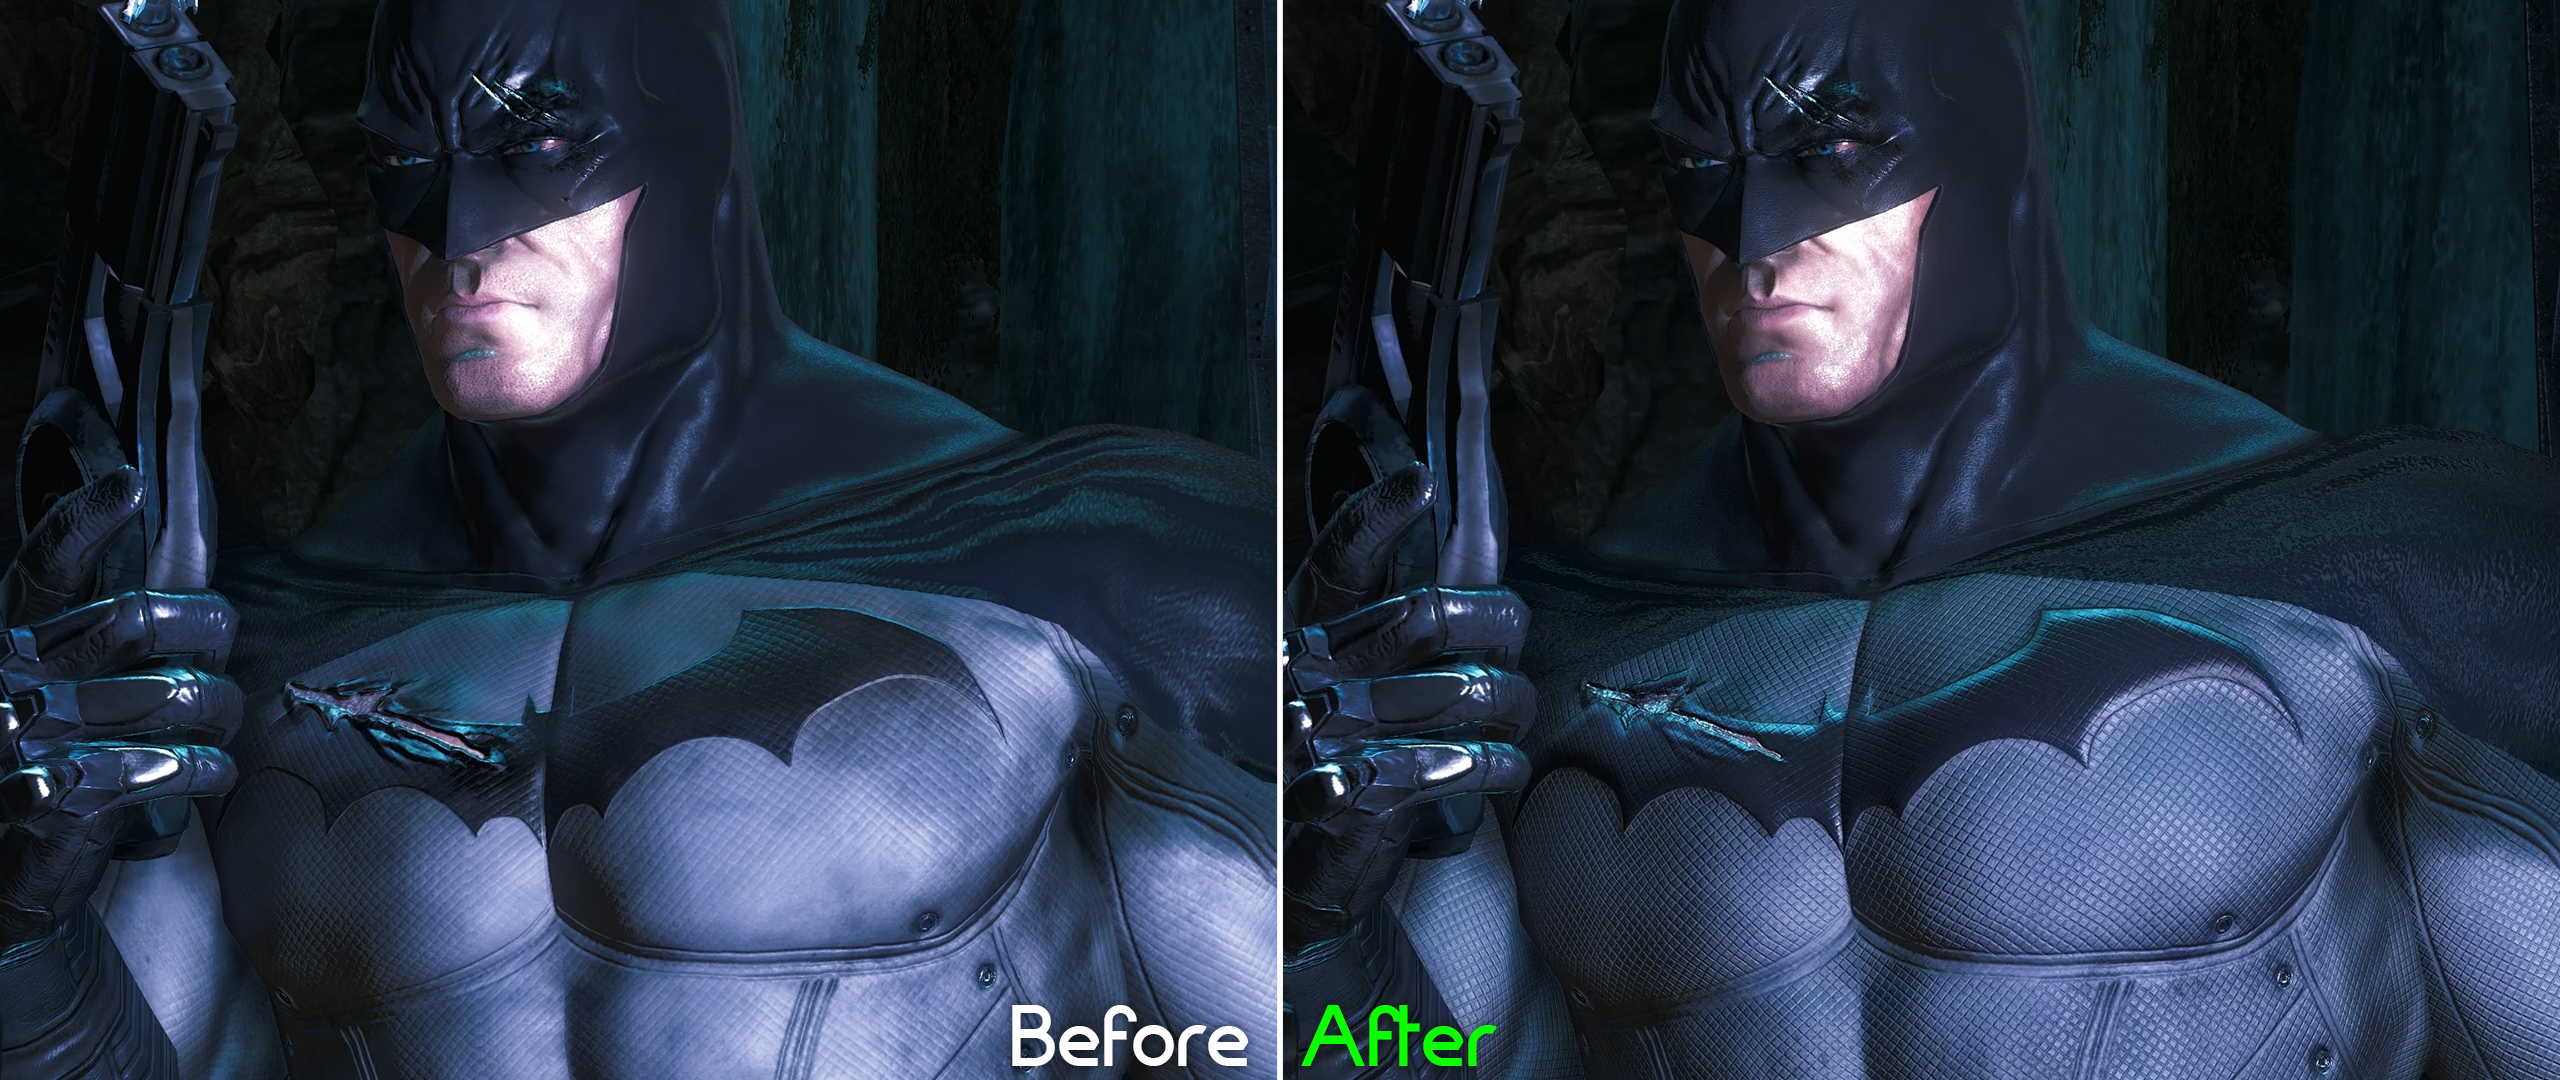 Remastered suit with velvet cape.


In the downloaded texture package, you will find the texture pack, a few capes and two remastered batman suits.
You can only select one batman suit and one cape. The cape textures are assigned to the same cape model, and the two batman suit textures are assigned to the same batman model. You can’t have the loaded textures interrupt each other. The lossless batman suit has less texture compression. It also takes longer to load.
Note that not all textures are updated
¬ Installation
“Texmod” is used to inject textures (better solution coming soon).
Texmod is included with the texture pack download. Open Texmod, run the application and select package mode. Select ShippingPC-BmGame.exe as target application.

Go to the smaller folder icon and use it to open the downloaded texture files of your choice. Run the game with selected texture(s). Only one cape and one suit can be selected (explained in custom textures section).

The more textures selected, the longer it will take to load the game. You will have a blank screen until all textures are loaded. After the game’s loaded, everything should run normally but with the added textures. Would advise installing the game on your fastest drive if this annoys you. Fast CPUs should also speed up decompression.
New BAA Launcher
Welcome to the new launcher! Designed by frofoo. The vanilla launcher is just too limiting.
-Texture pack support, improved graphical adjustments, fov hotkeys, increase fps cap and more!
Refer to the Downloads section for Batman Arkham Asylum – Advanced Launcher – make sure to download BmLauncher.zip in the downloads link of the page, ignore the source code files in the link.
If the vast amount of settings scare you, don’t worry. Hovering your mouse cursor over any setting will provide you with context.


The vanilla BmLauncher misses a lot of additional settings hidden in the config files. Config editing is a hassle for many. The “Advanced BmLauncher” created by frofoo is purposed to be a simple exe that covers every config edit in one interface: shadow adjustments, fov hotkeys, etc. Additionally, it applies necessary changes for texture pack support and skipping intro movies.
Advanced users are welcome to stick to config editing manually, though we recommend this launcher as it covers everything we could think of.
¬ Installation
Extract BmLauncher.zip – you should see BmLauncher.exe and NLog.dll.
Find your game directory: You can do this by right-clicking the game on Steam, and selecting properties. Select: Local Files > Browse Local Files. This will open your game directory in File Explorer. Open the “Binaries” folder.
You should find “BmLauncher.exe” inside the folder. Transfer the downloaded files (BmLauncher.exe and NLog.dll) to this folder. Overwrite when prompted. You can back-up the original BmLauncher before replacing, if you want to – or you can use the “verify files” option to revert to vanilla.
NLog.dll is used to help us with troubleshooting any issues by creating a log document. – It’s required for BmLauncher.exe to run.
You can now start the game directly from Steam, and it will prompt the new launcher automatically.
Advanced BmLauncher – Source Code[github.com]
Advanced BmLauncher – Read Me[github.com]
Advanced BmLauncher – Report Issues[github.com]
¬ Basics


“Max.Smoothed Framerate” functions like a frames-per-second limiter. The logic here is to use your refresh rate value, and add 2. For example, users on a 144hz screen should insert a value of “146”. I have “62” set here as i’m running a 60 hertz display.
Enabling this setting will lock the frame rate to your target frequency, should your PC be capable. Good for frame-time consistency. This will also eliminate screen-tearing.
– I believe this game runs with triple-buffered vsync, do correct me if i’m wrong. I haven’t tested thoroughly
Aka “texture quality” settings. I would expect almost any GPU manufactured within the last seven years to run with the highest detail setting just fine. The highest setting is also required for the texture pack.
The rest of the settings should be self explanatory. And yes, i’m aware languages isn’t technically a part of display settings. It just makes for a more organised UI.
¬ Additional Graphics Settings

Anyone who’s overwhelmed by the amount of settings, can stick to using one of the preset options.

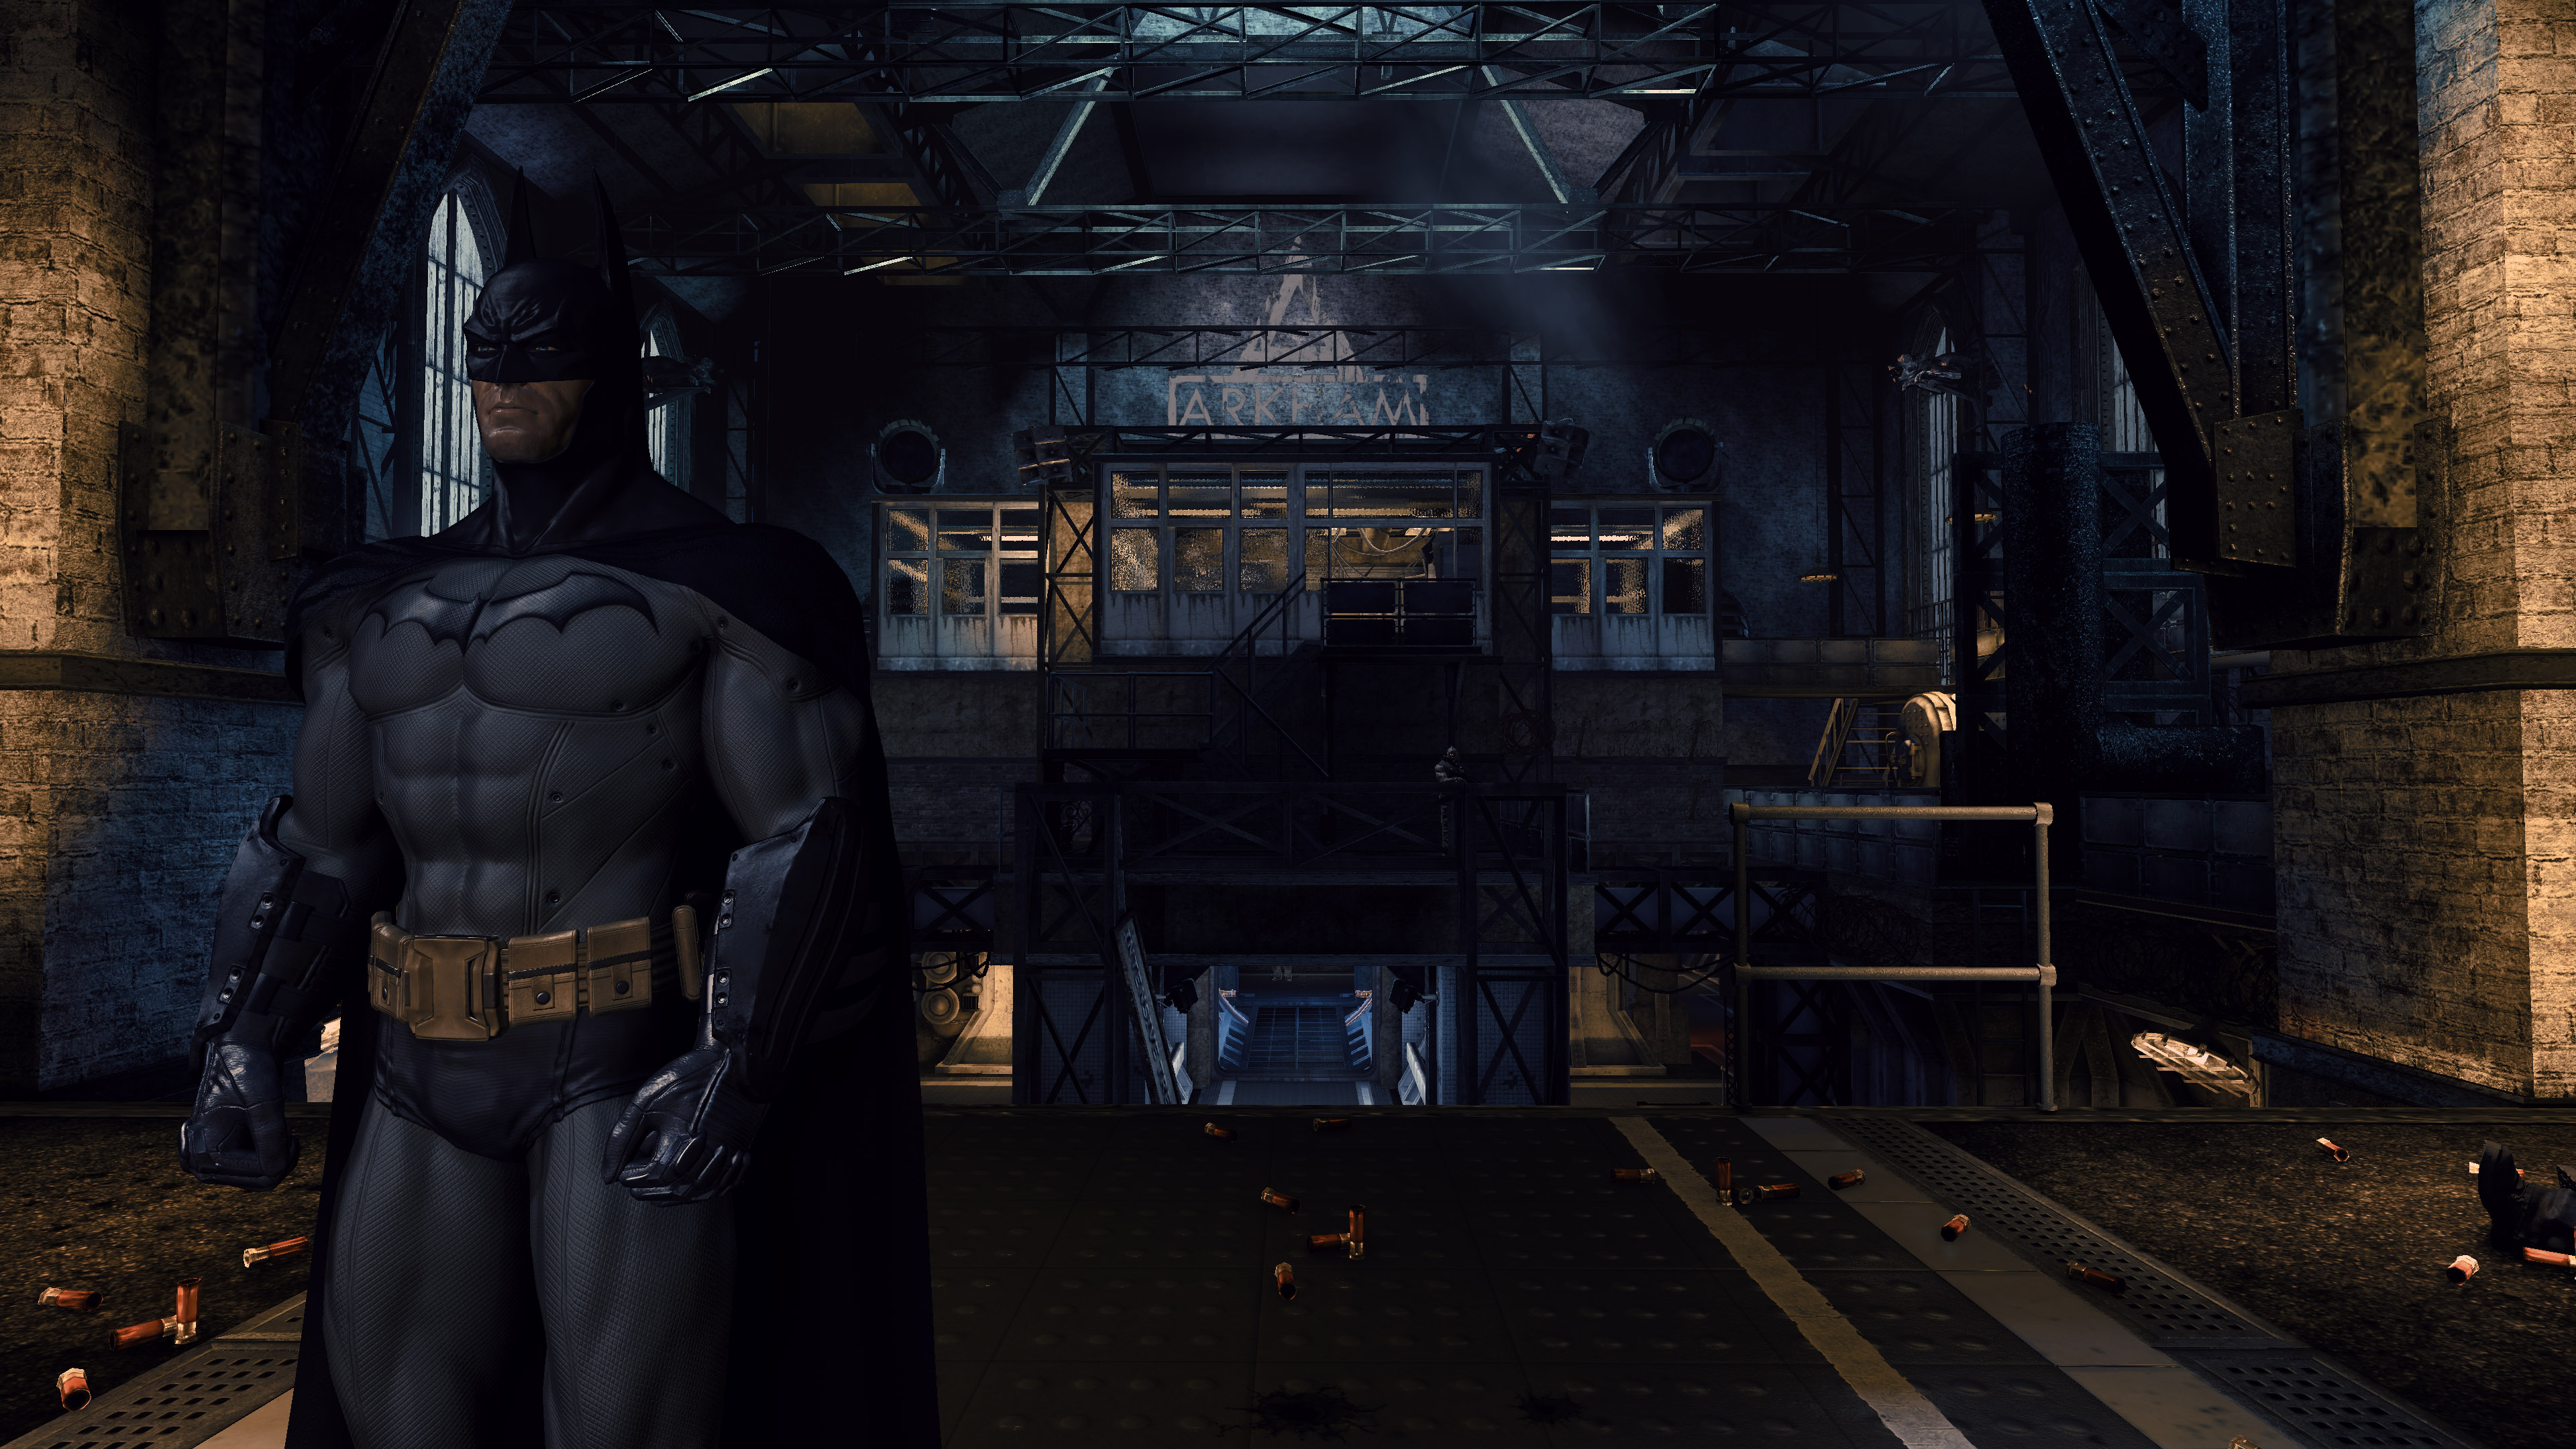
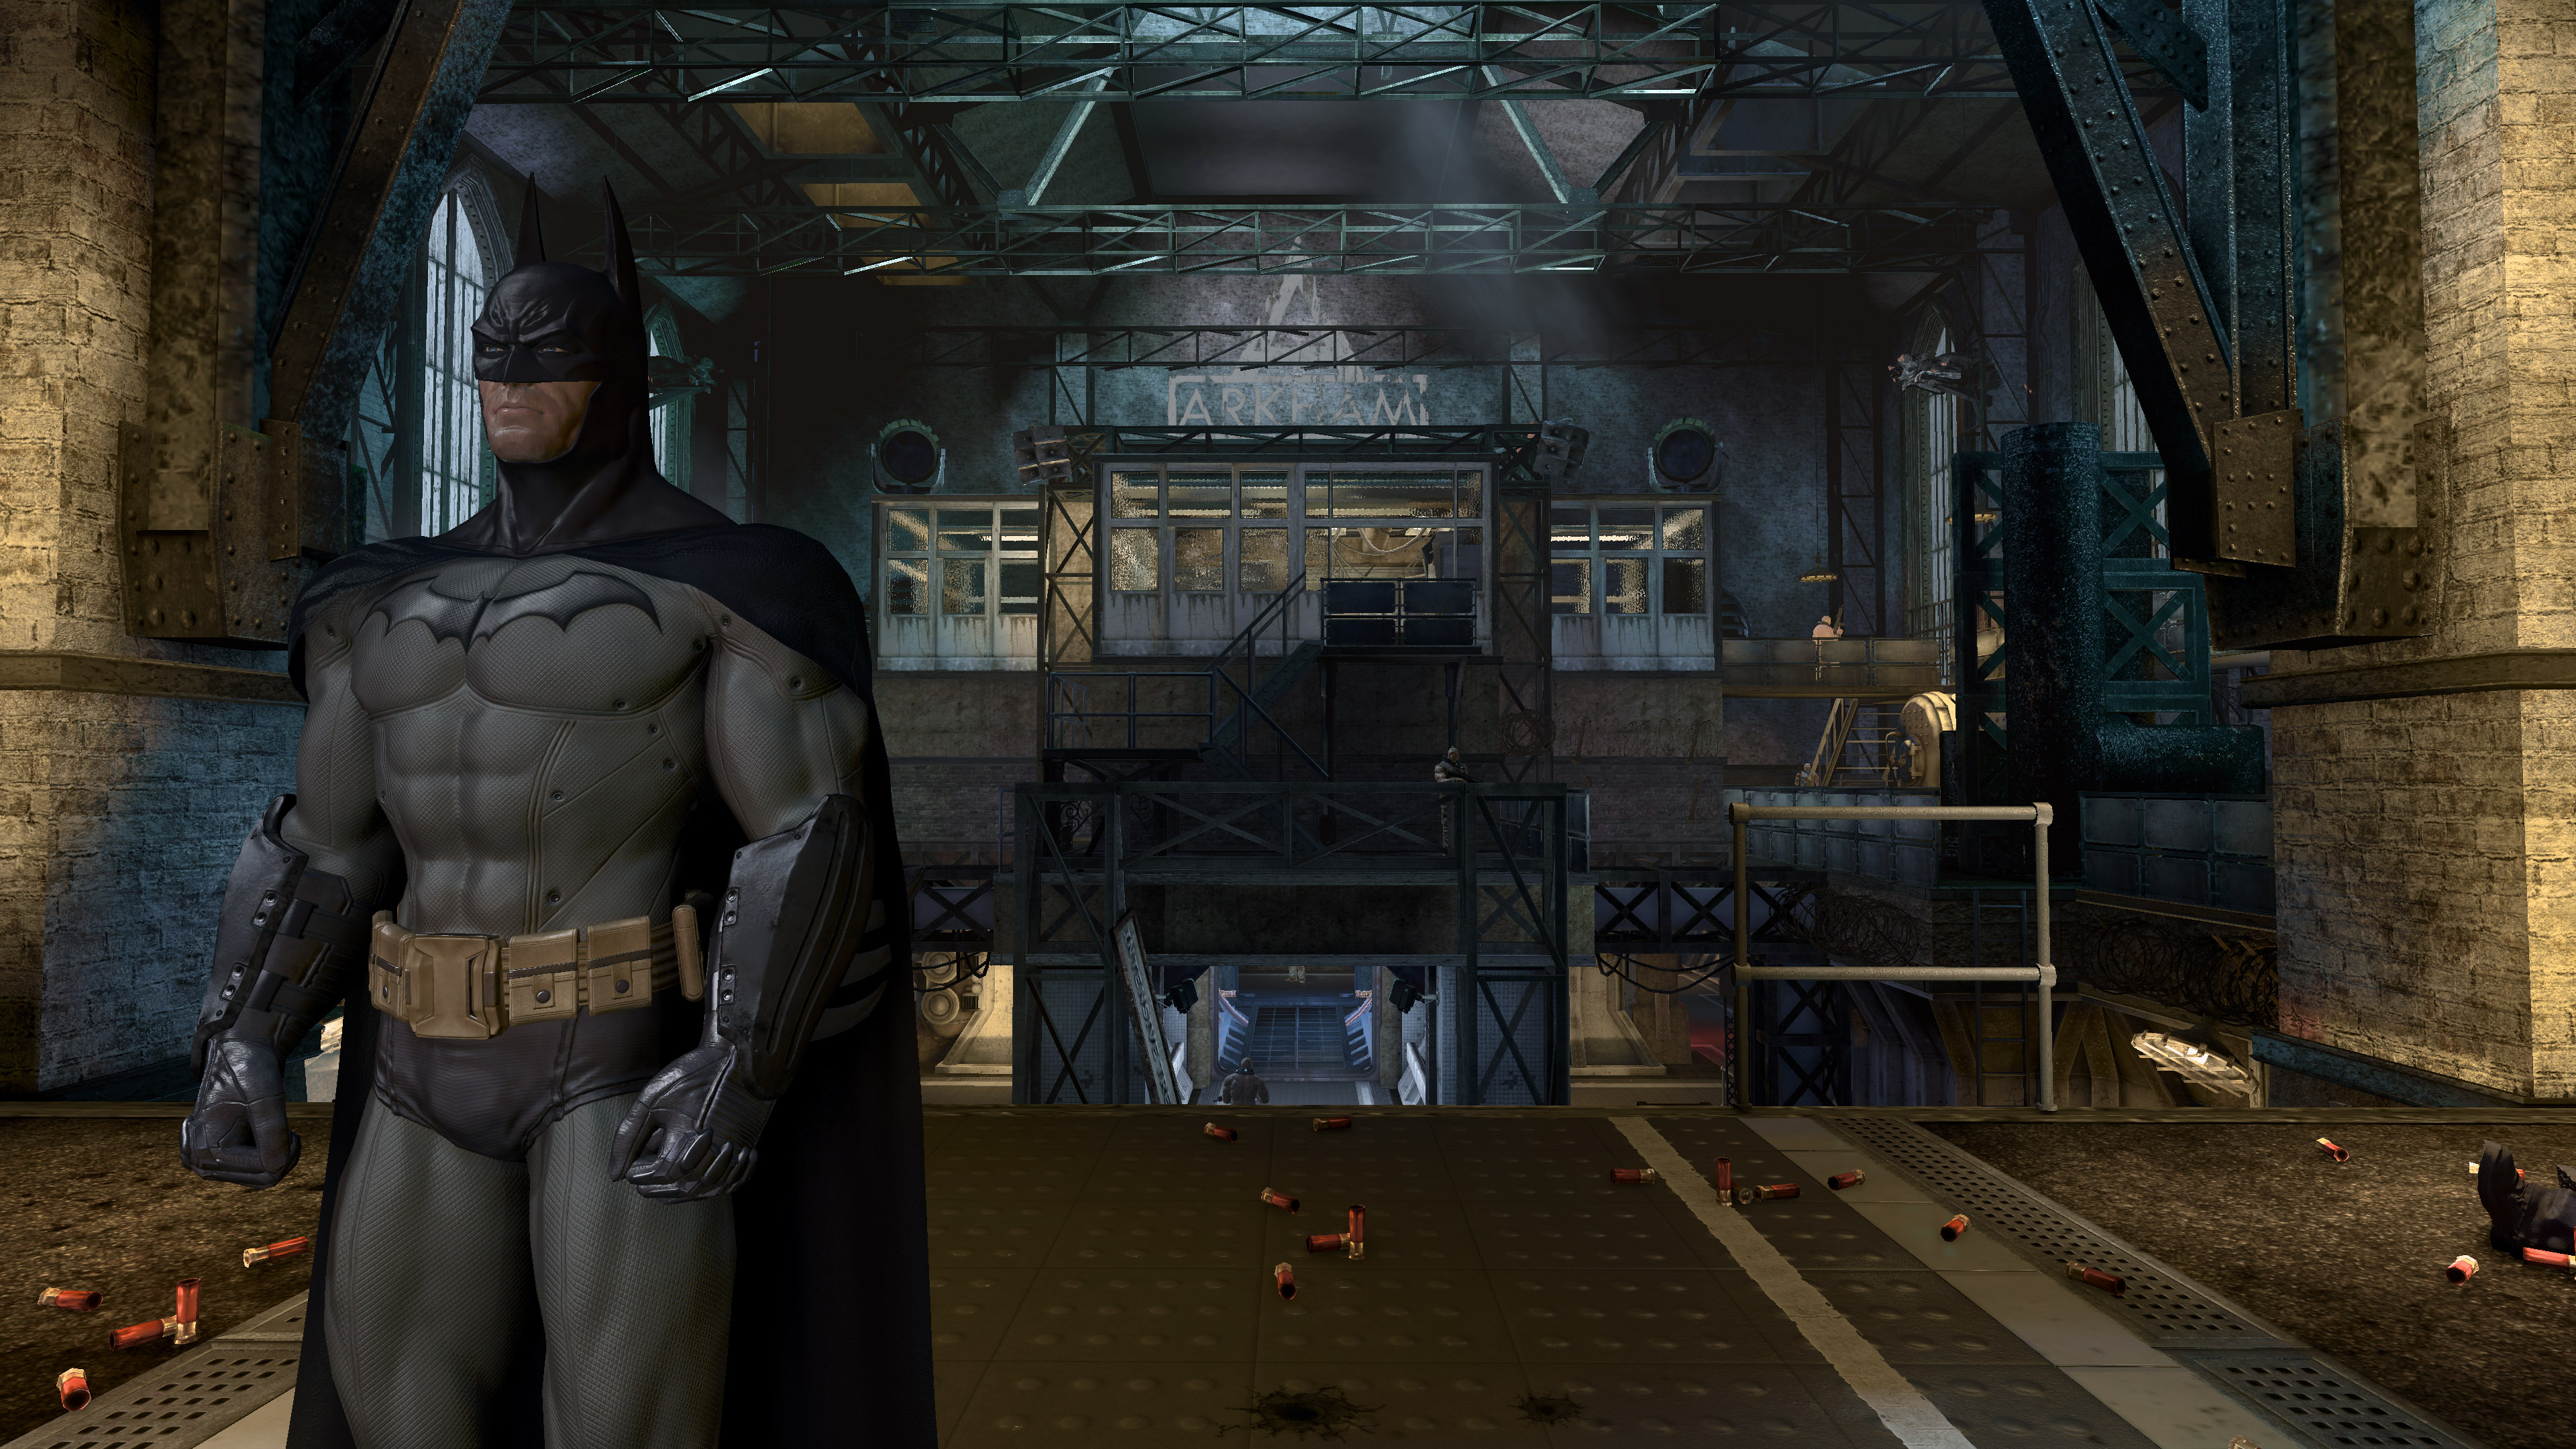
Uses blur to simulate depth. Most noticeable when you zoom in.
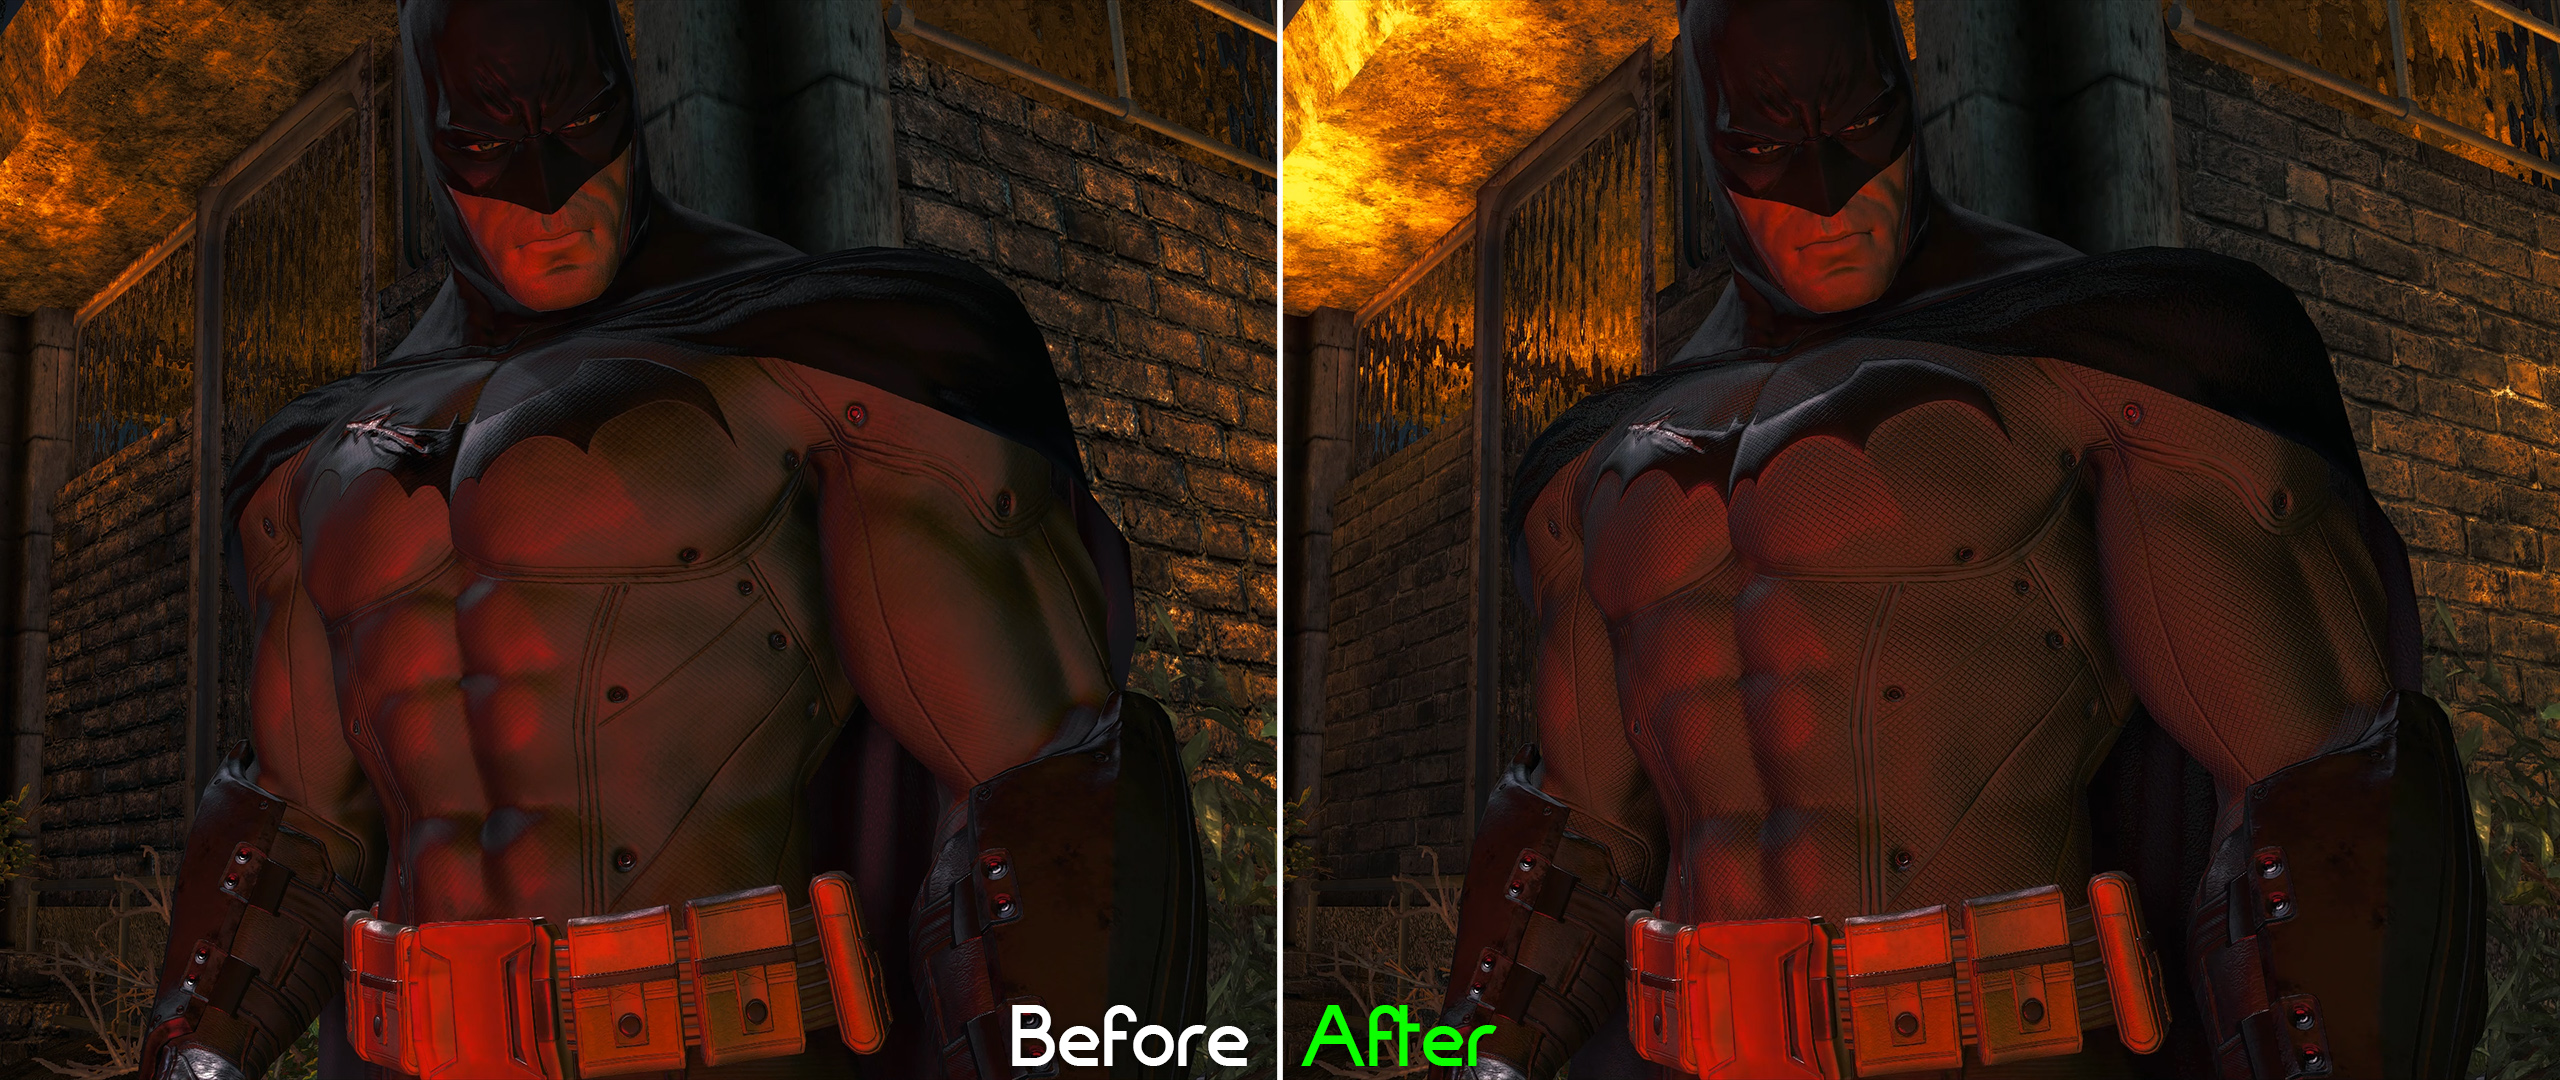
This effect is always enabled in the vanilla game. So why add an option to disable it? Simply put, the DoF effect is tied to colour grading.
The colours of the game appear more natural to life when DoF is disabled. No more strong tints (like blue or red or green, depending on the area). Of course, the colour tints are intentional on the game’s part, but some will prefer it removed as it’s rather strong. Disabling DoF will boost performance, by a small amount.
 Texture pack not injected for this comparison
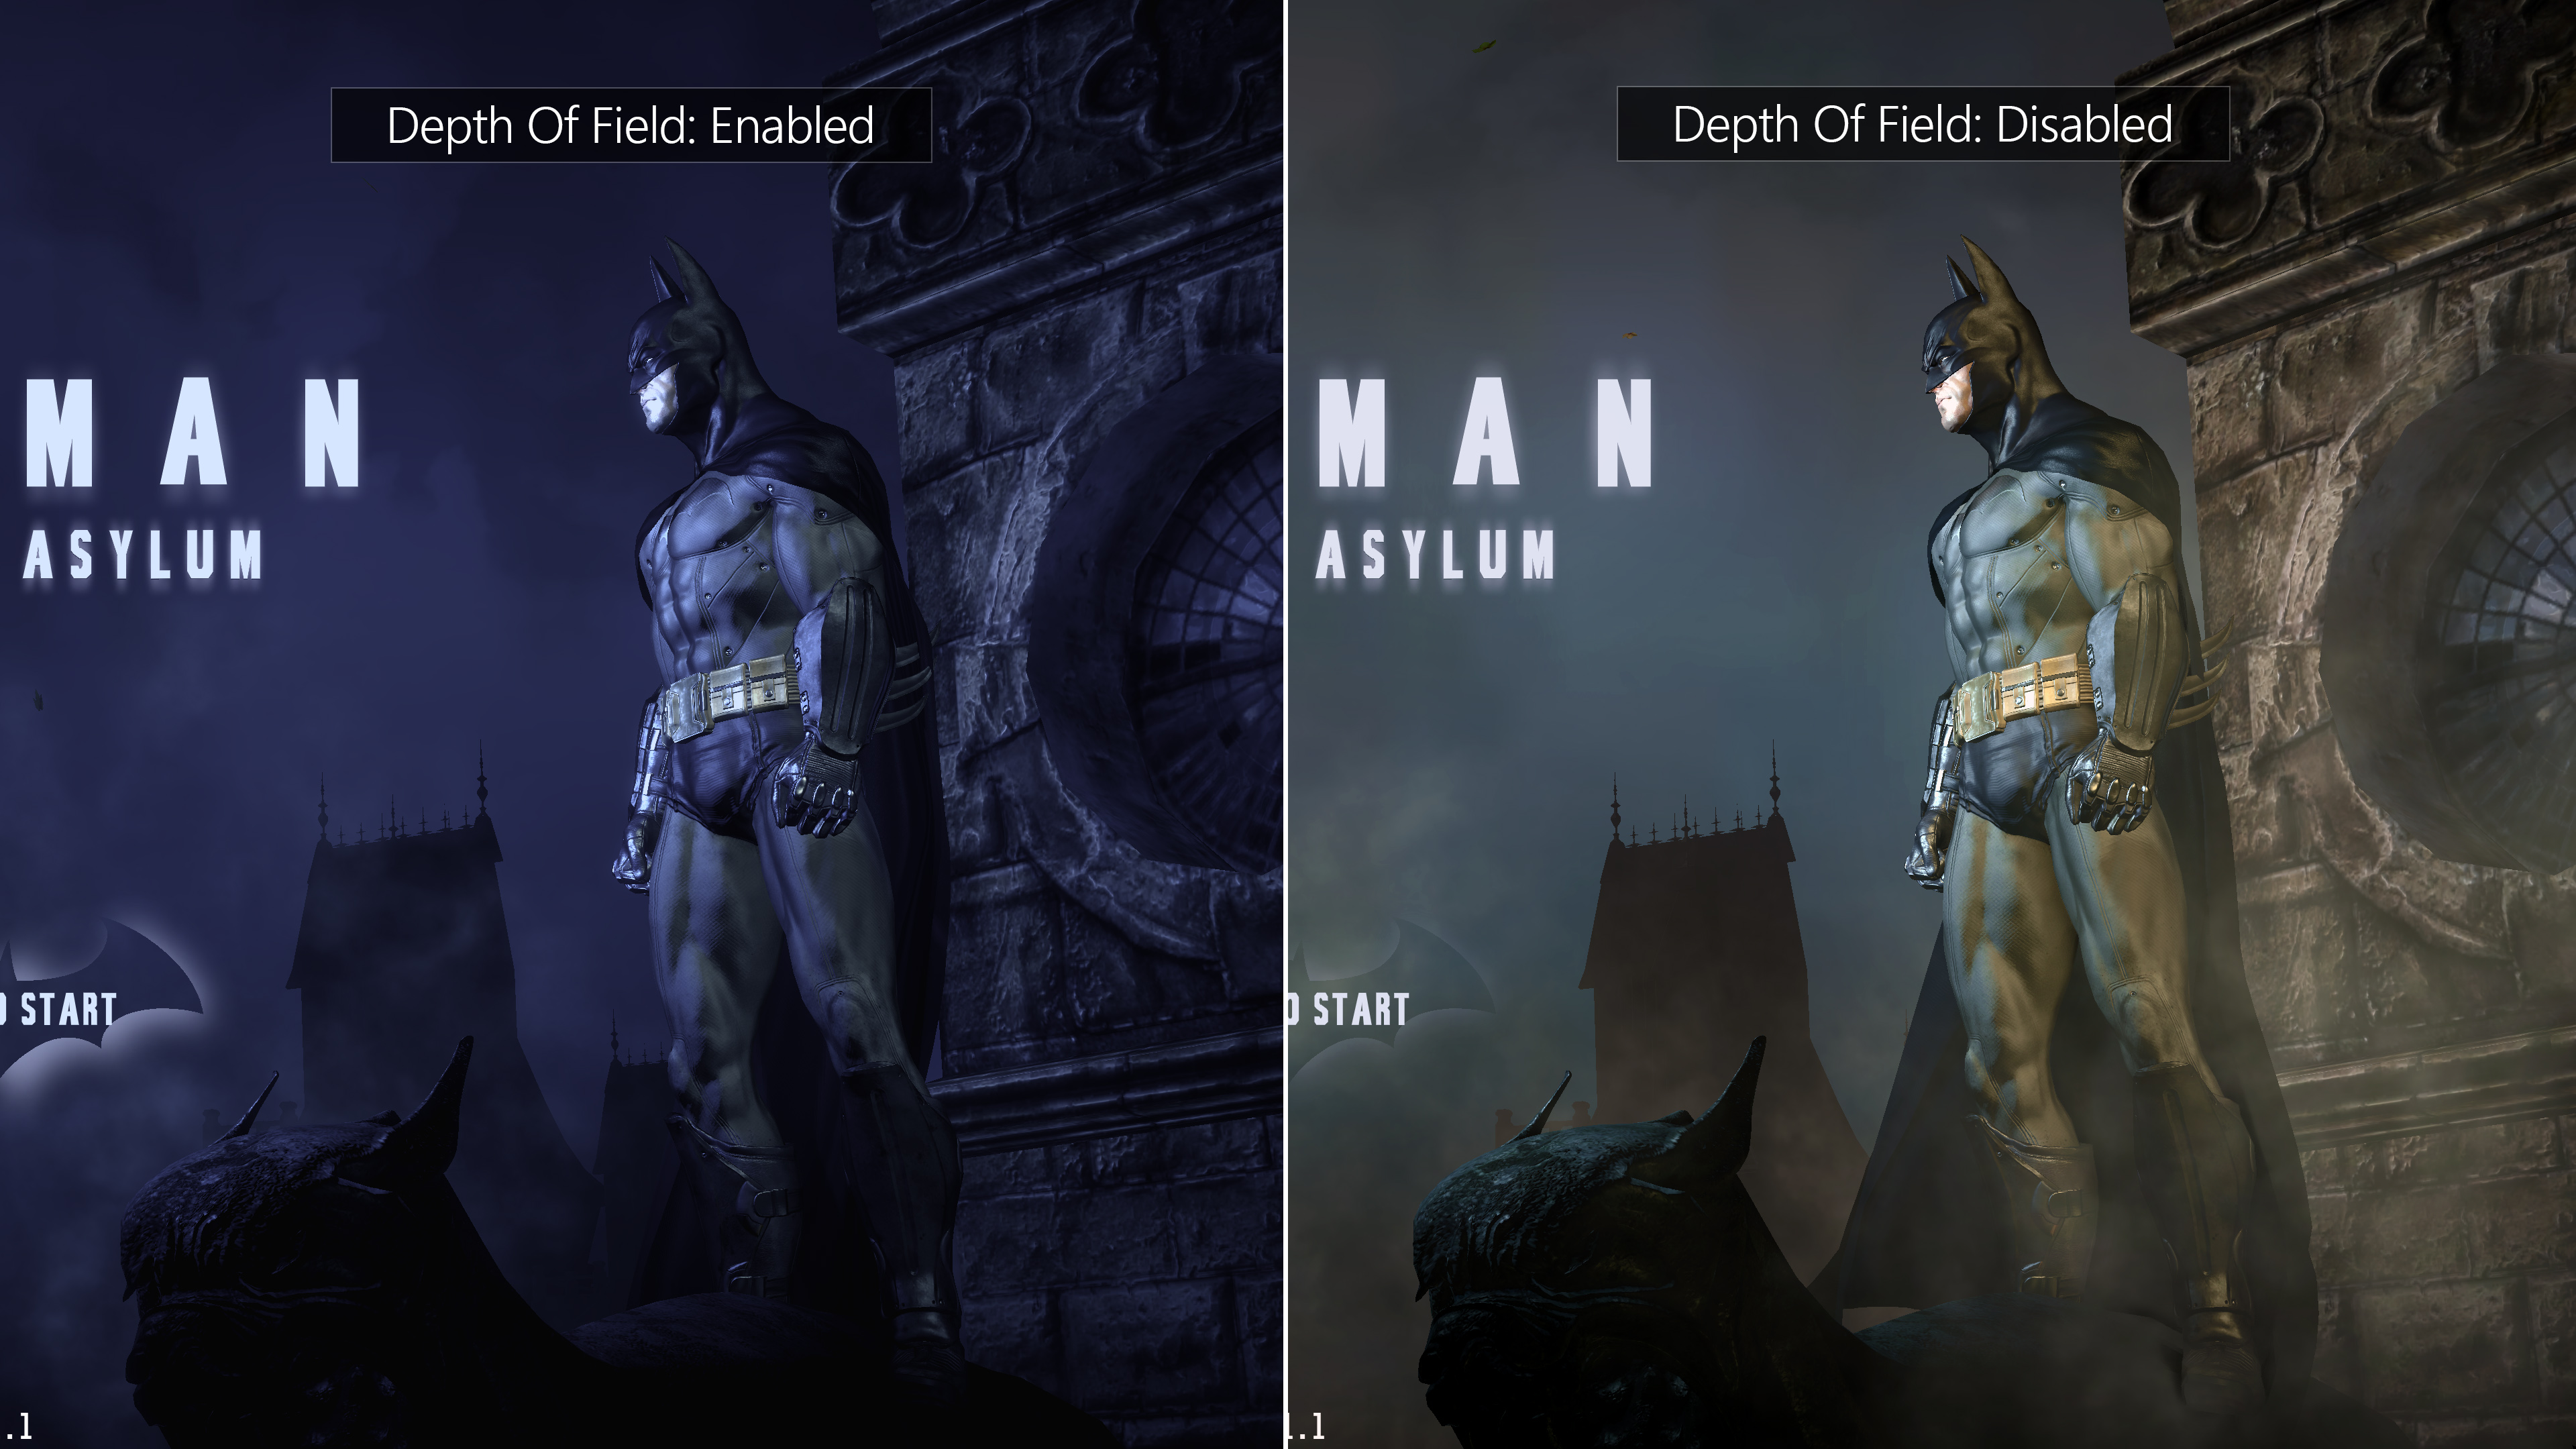
Some users also prefer to remove blur in their games. DoF in this game obscures your view distance, as it’s always active. If you’re using Reshade, i suggest disabling DoF for the best graphics. Reshade is also used to properly grade the game – refer to LUTs section for examples.
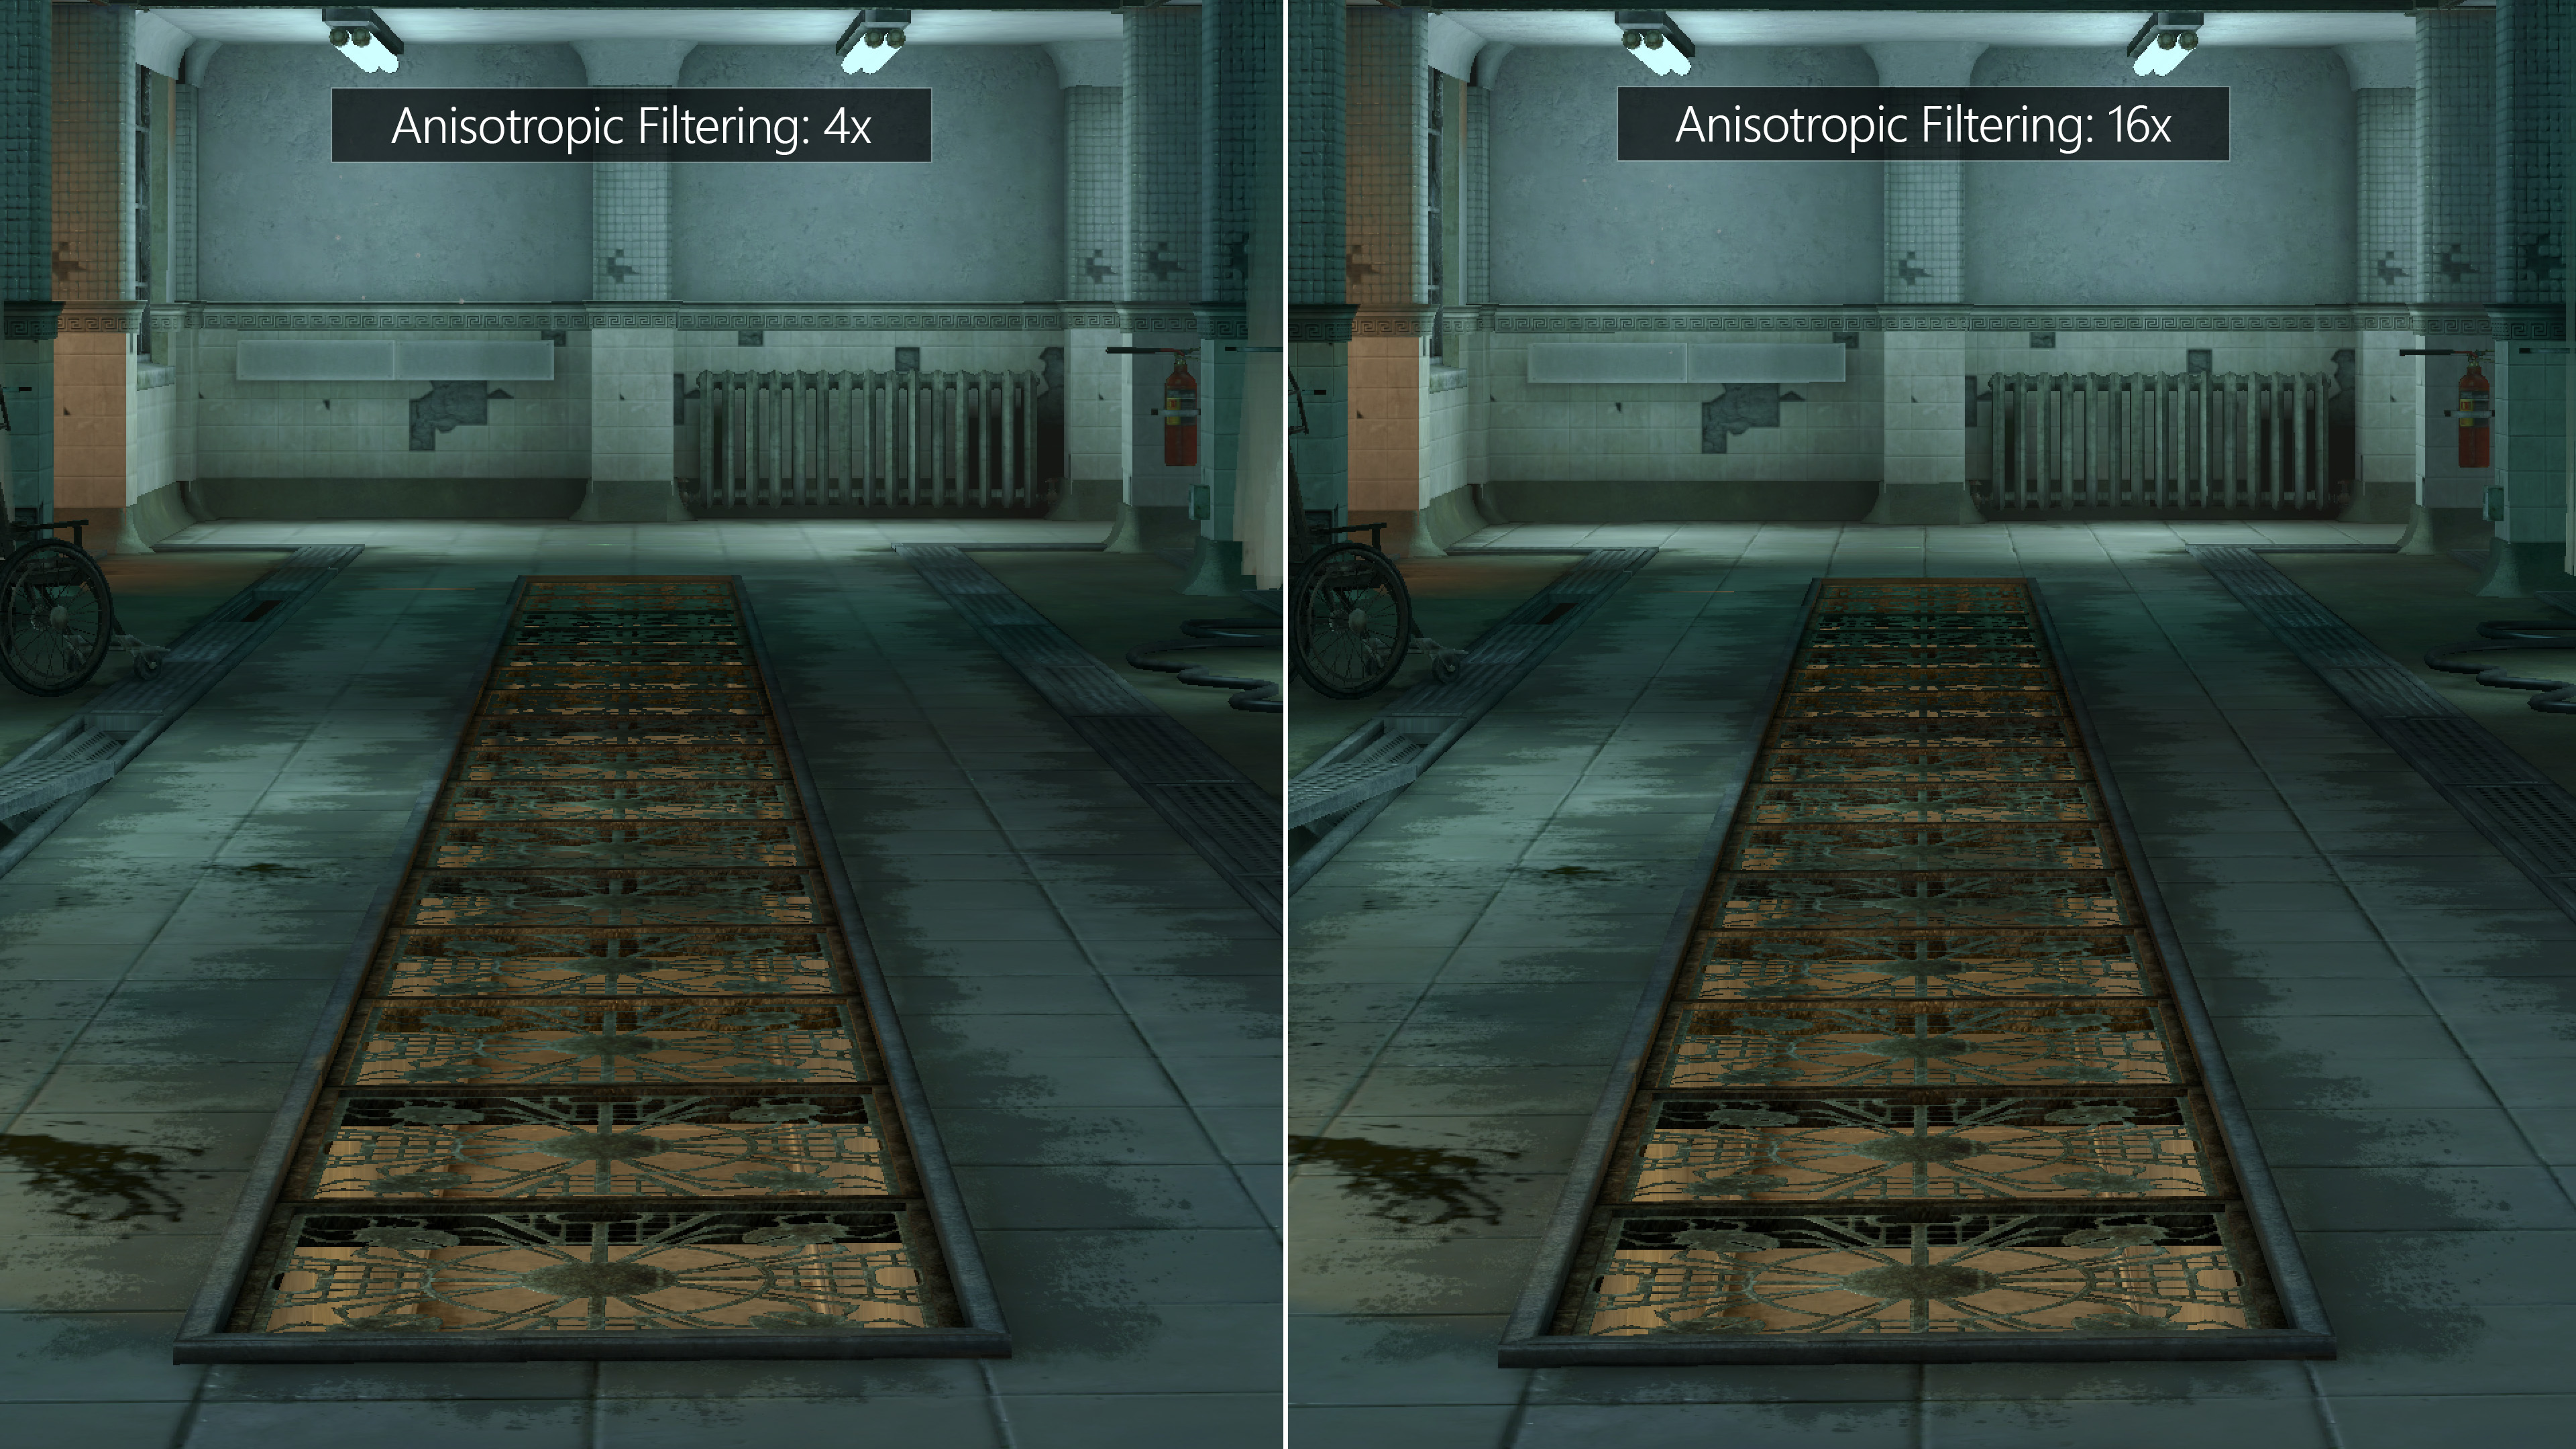
This will improve texture clarity over oblique surfaces. Vanilla game forces 4x AF. Pushing this up to 16x is a nice improvement, and is a free upgrade for any modern GPU.
Notice the blur build up of the ground tiles over distance with 4x?
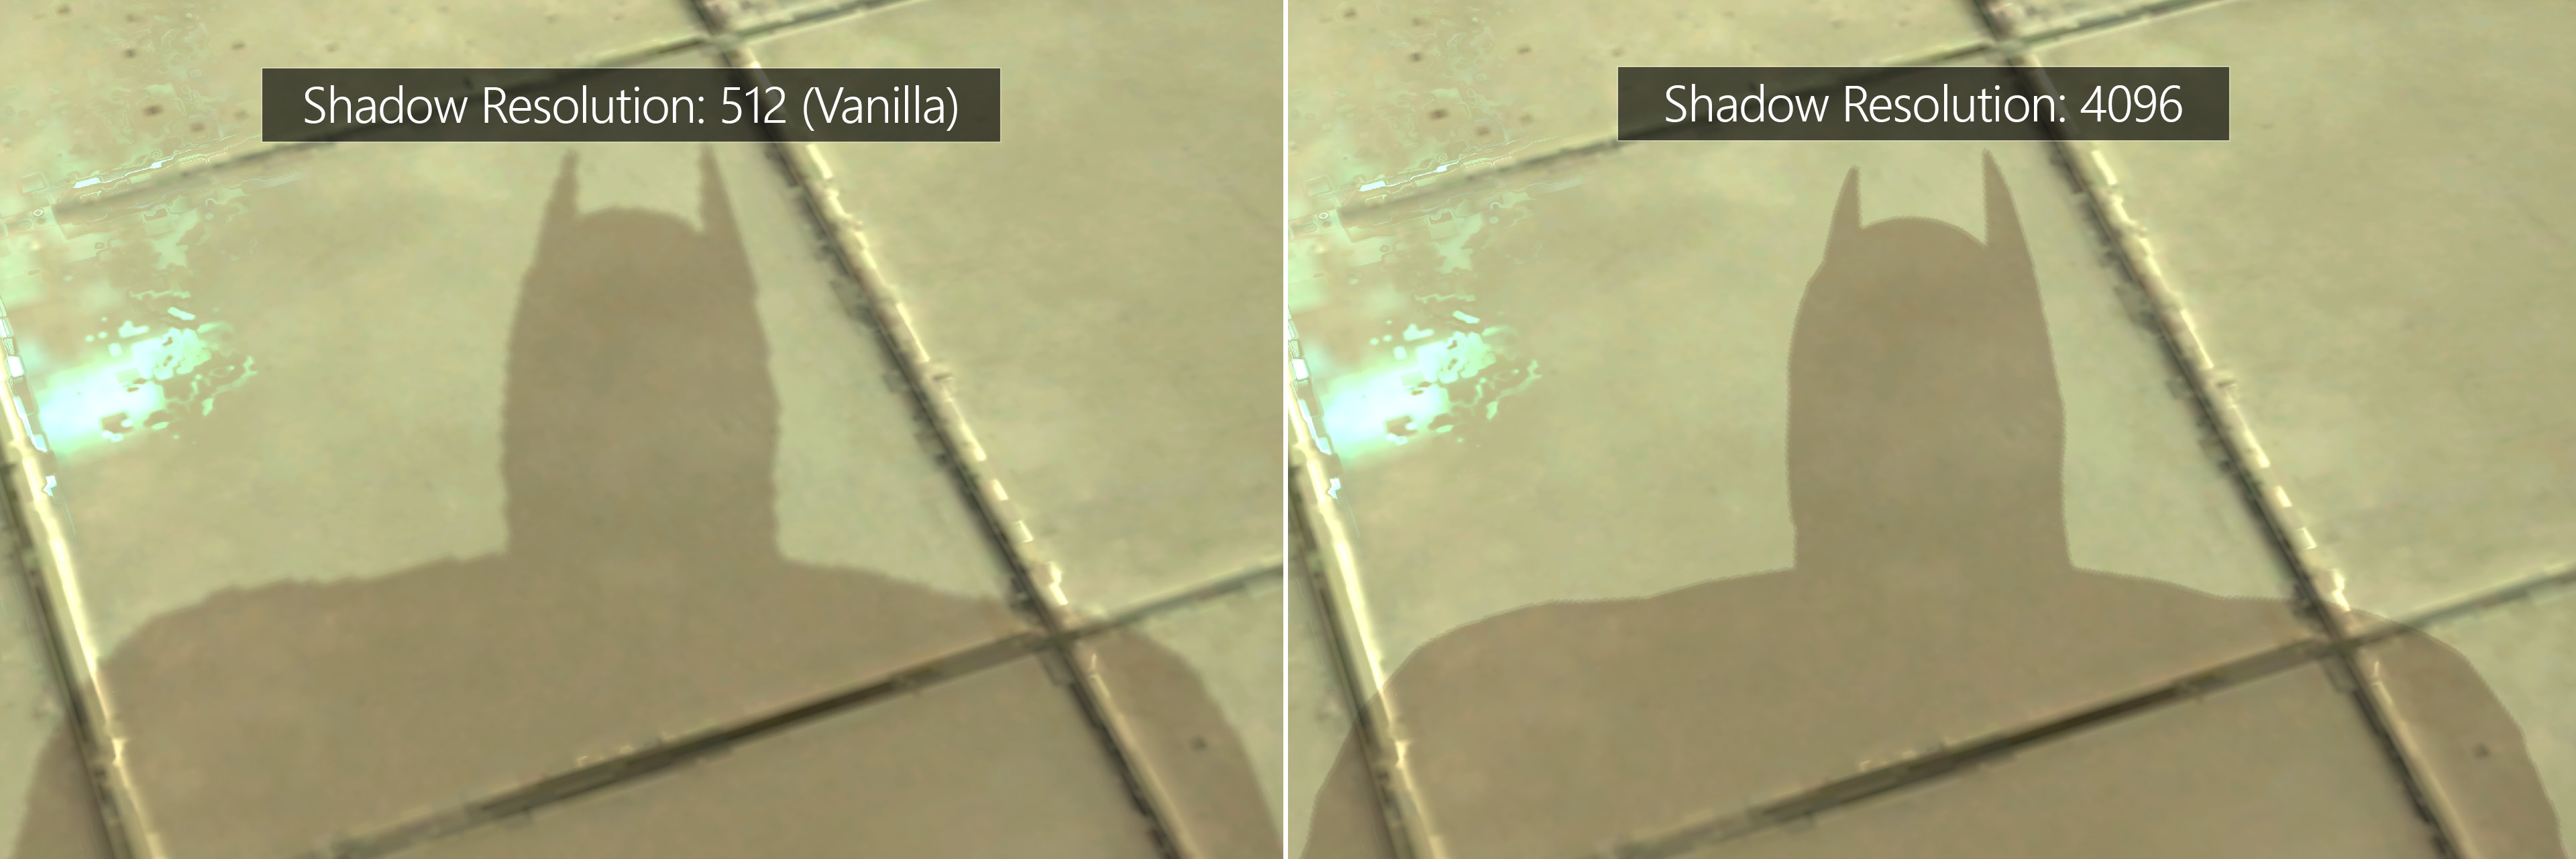
Vanilla game has a shadow map resolution of “512”, which means low quality shadows with evident shimmering.
We suggest a value of “2048” for a notable improvement to shadow quality – the filter radius is automatically handled based on the shadow res selected.
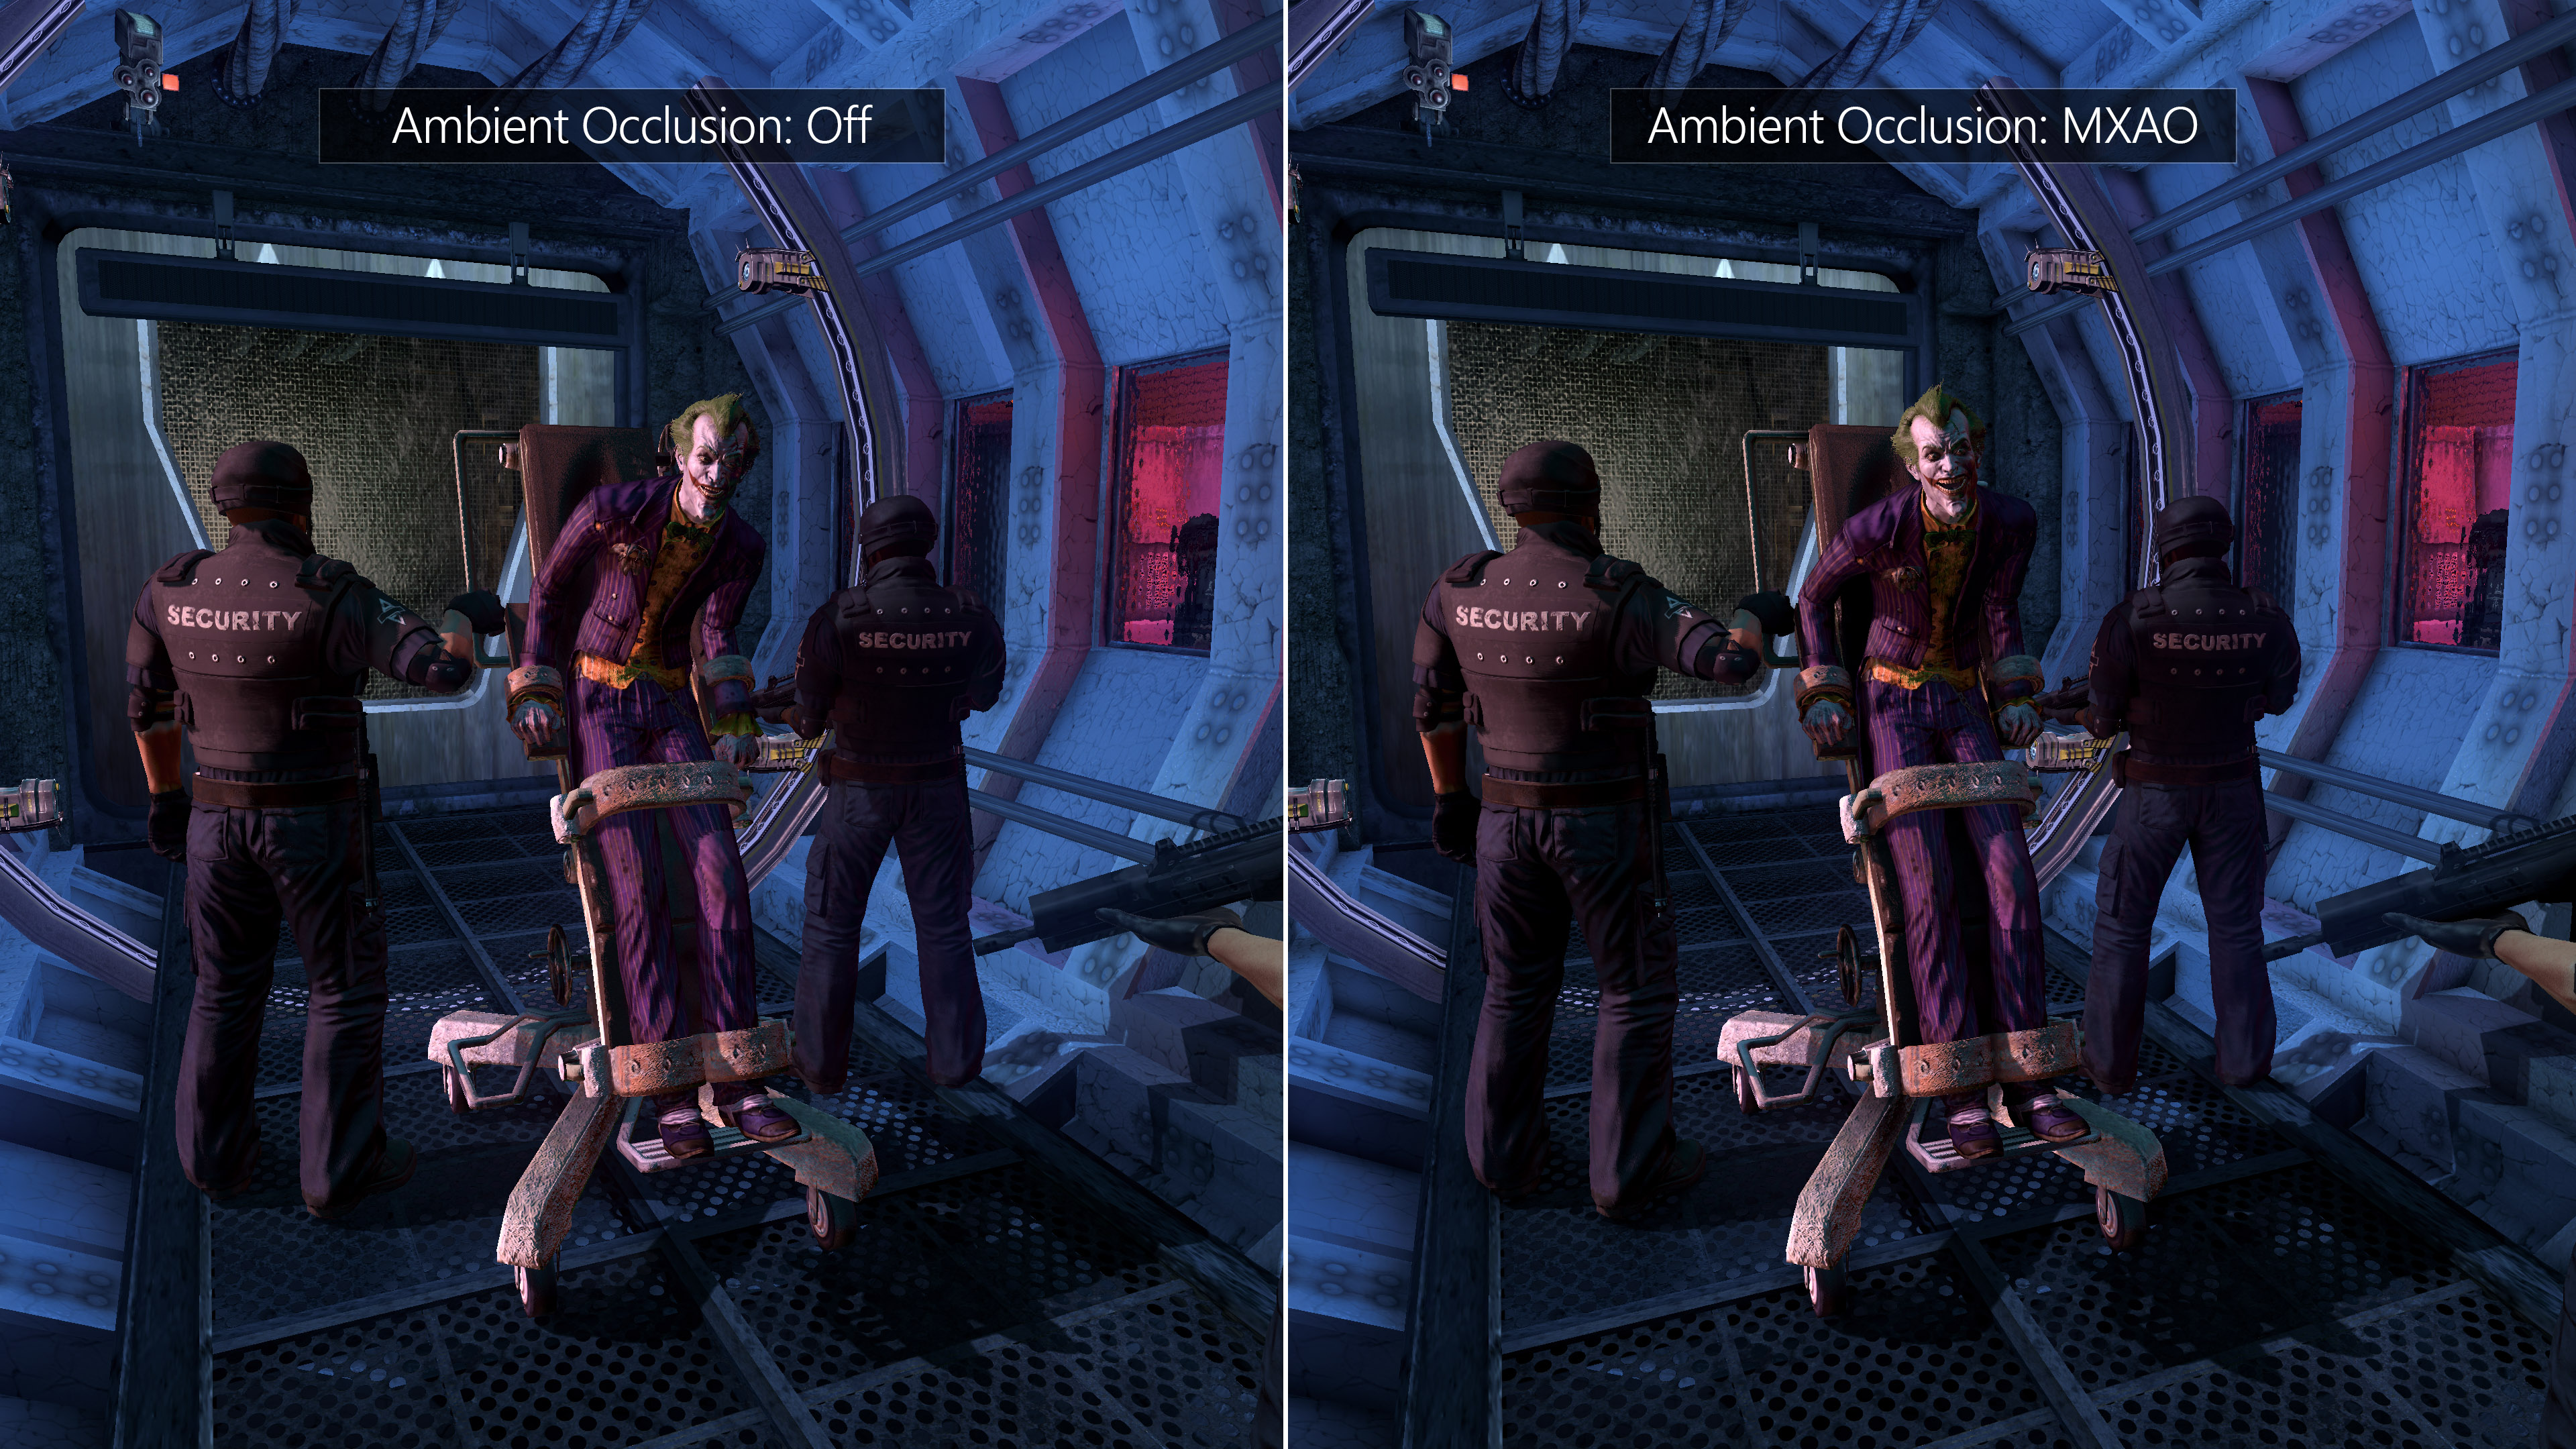
Horizon Based Ambient Occlusion (Overview)[www.geforce.co.uk]
This setting is exclusive to Nvidia GPUs, as it relies on NvAPI. Fear not, AMD users, Reshade is the alternative. Some Nvidia users will prefer HBAO+, and some will prefer Reshade AO – it’s subjective and i suggest checking both out. Please disable HBAO+ if you’re using Reshade AO.
HBAO+ does not work in windowed mode. Flag used is “0x00000030”.
¬ Launching The Game
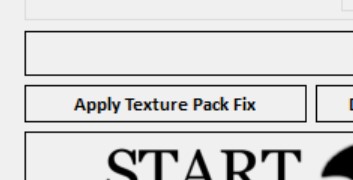
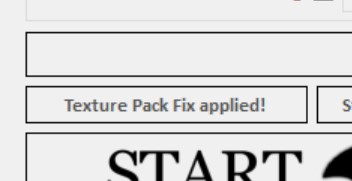
After you’ve set your preference, be sure to hit the texture pack fix. You can also click “skip intro movies”, which will remove startup intros and place you at the menu of the game instantly.

Soon as you’re ready, hit “START GAME” or “Apply Settings”.
“START GAME” will automatically apply all your settings, before starting the game.
¬ HuD & Field of View options
Nice extra for those who crave it. Launching the game with the Advanced BmLauncher installed will automatically enable these hotkeys.

Disabling the HUD means the healthbar and other UI elements will disappear. Certain areas require HUD for progression.
FoV – Field of View
The bigger the FoV value, the more you can see on screen. This has a negative impact on first person mode. Change to default FoV when you need to zoom in.
Reshade
Reshade[reshade.me] is a post-processing shader developed by Crosire for use in almost any game. It allows users to add custom post-processing shaders to games.
We’ve of course used this to our advantage.
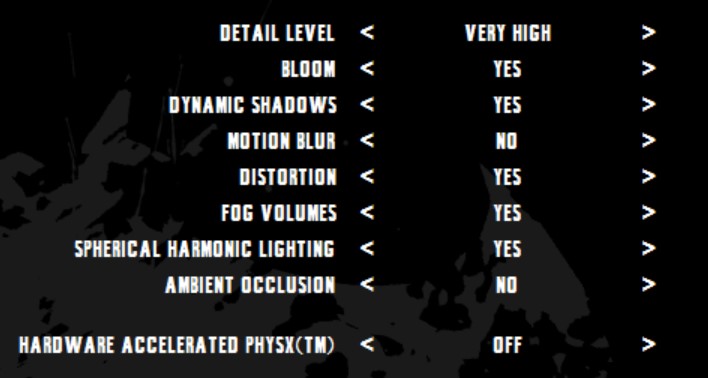
Suggested game settings for best Reshade results. Physx is optional – Anti-Aliasing and Ambient Occlusion must be disabled if you want to use MXAO. Different AA solution is included with Reshade.

Extract the downloaded file (from Downloads section), and copy the contents to the “Binaries” folder (where the game is located)
Launch the game. Reshade is now installed and ready 🙂

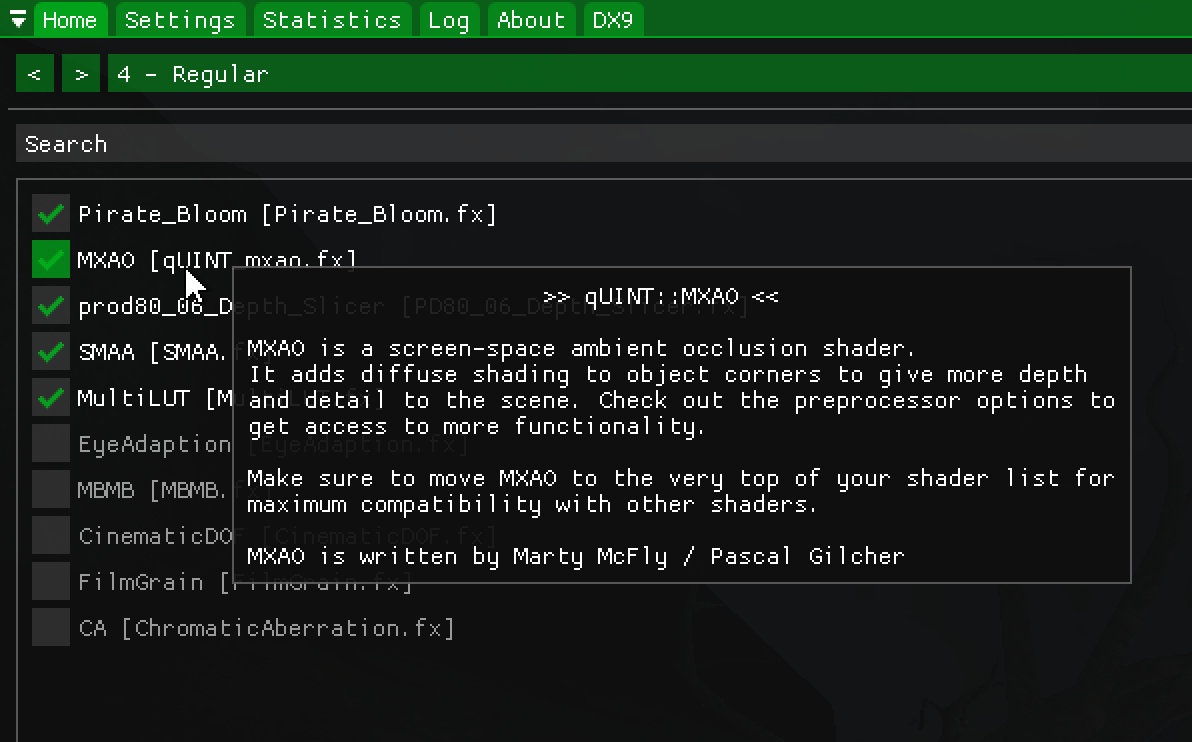
NOTE: Hotkeys can be configured in the settings tab of the Reshade window.
You can also toggle shaders manually with the checkbox. Disable MXAO if you want to use HBAO+. Presets names are at the top of the window (4 – Regular).
Note that performance issues might be present right now using Reshade. I haven’t had time to test consistency with the latest Reshade version. Please let me know if you do experience issues.
¬ LUTs
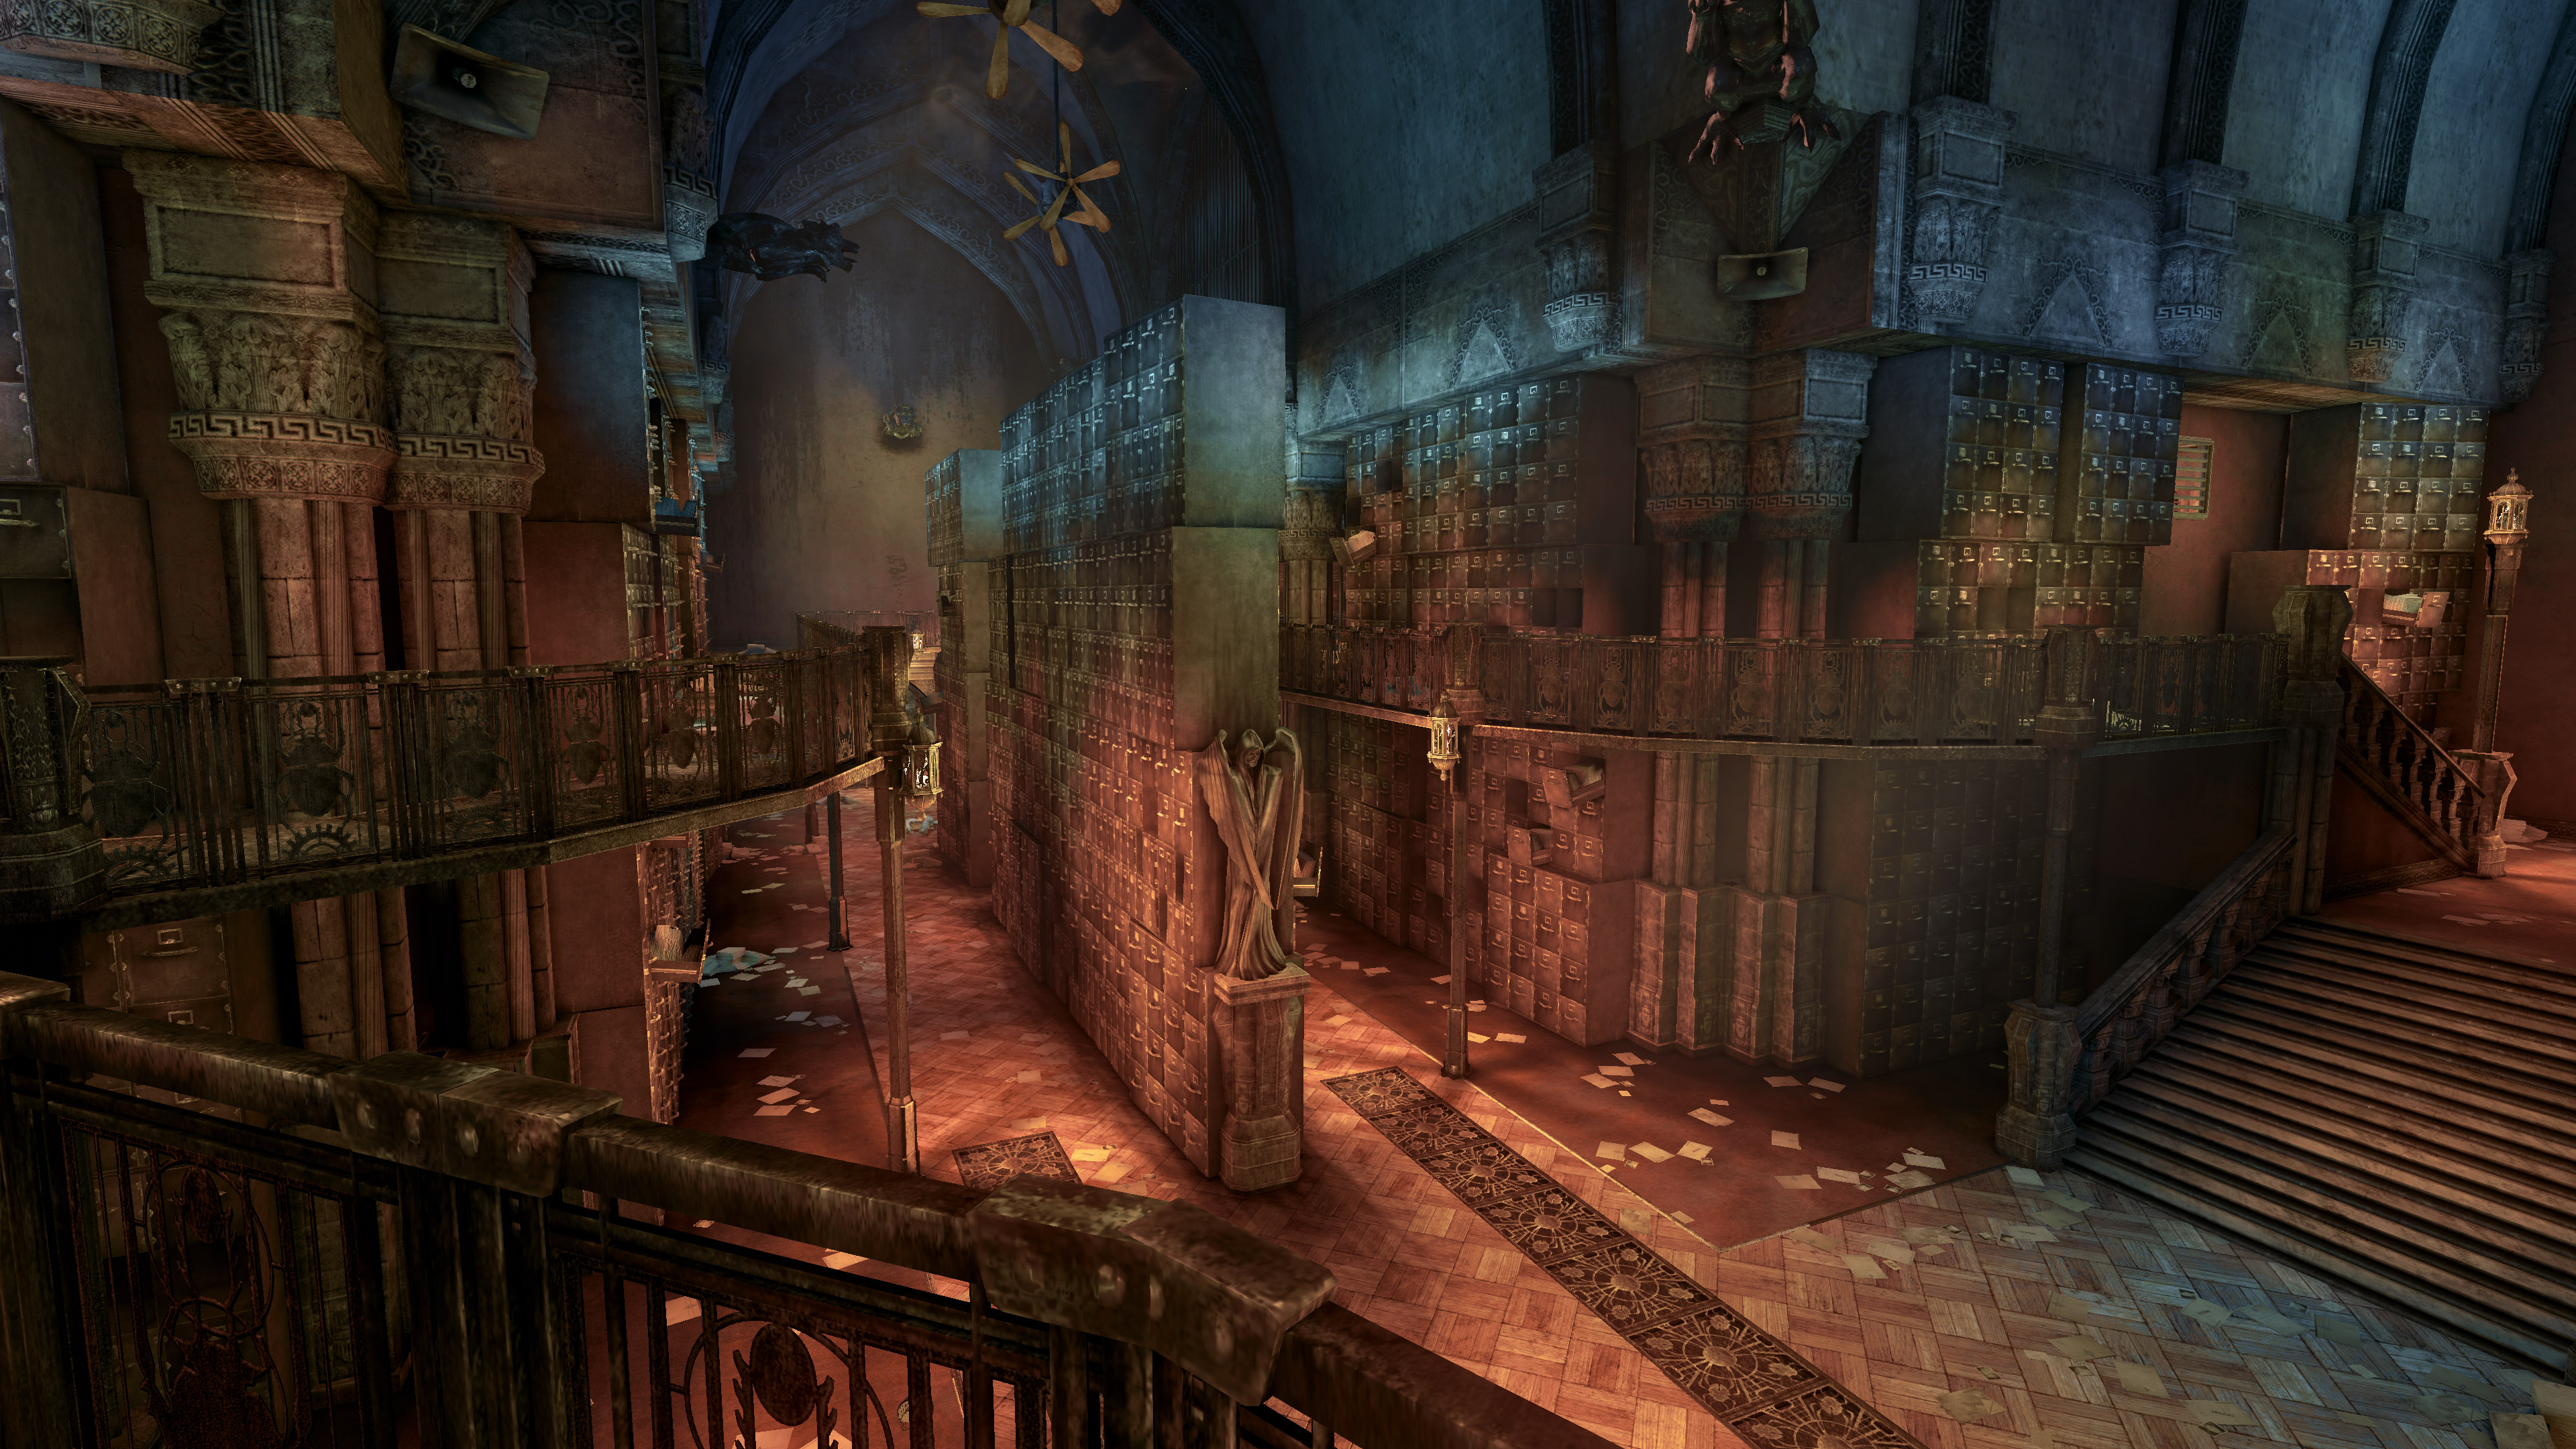
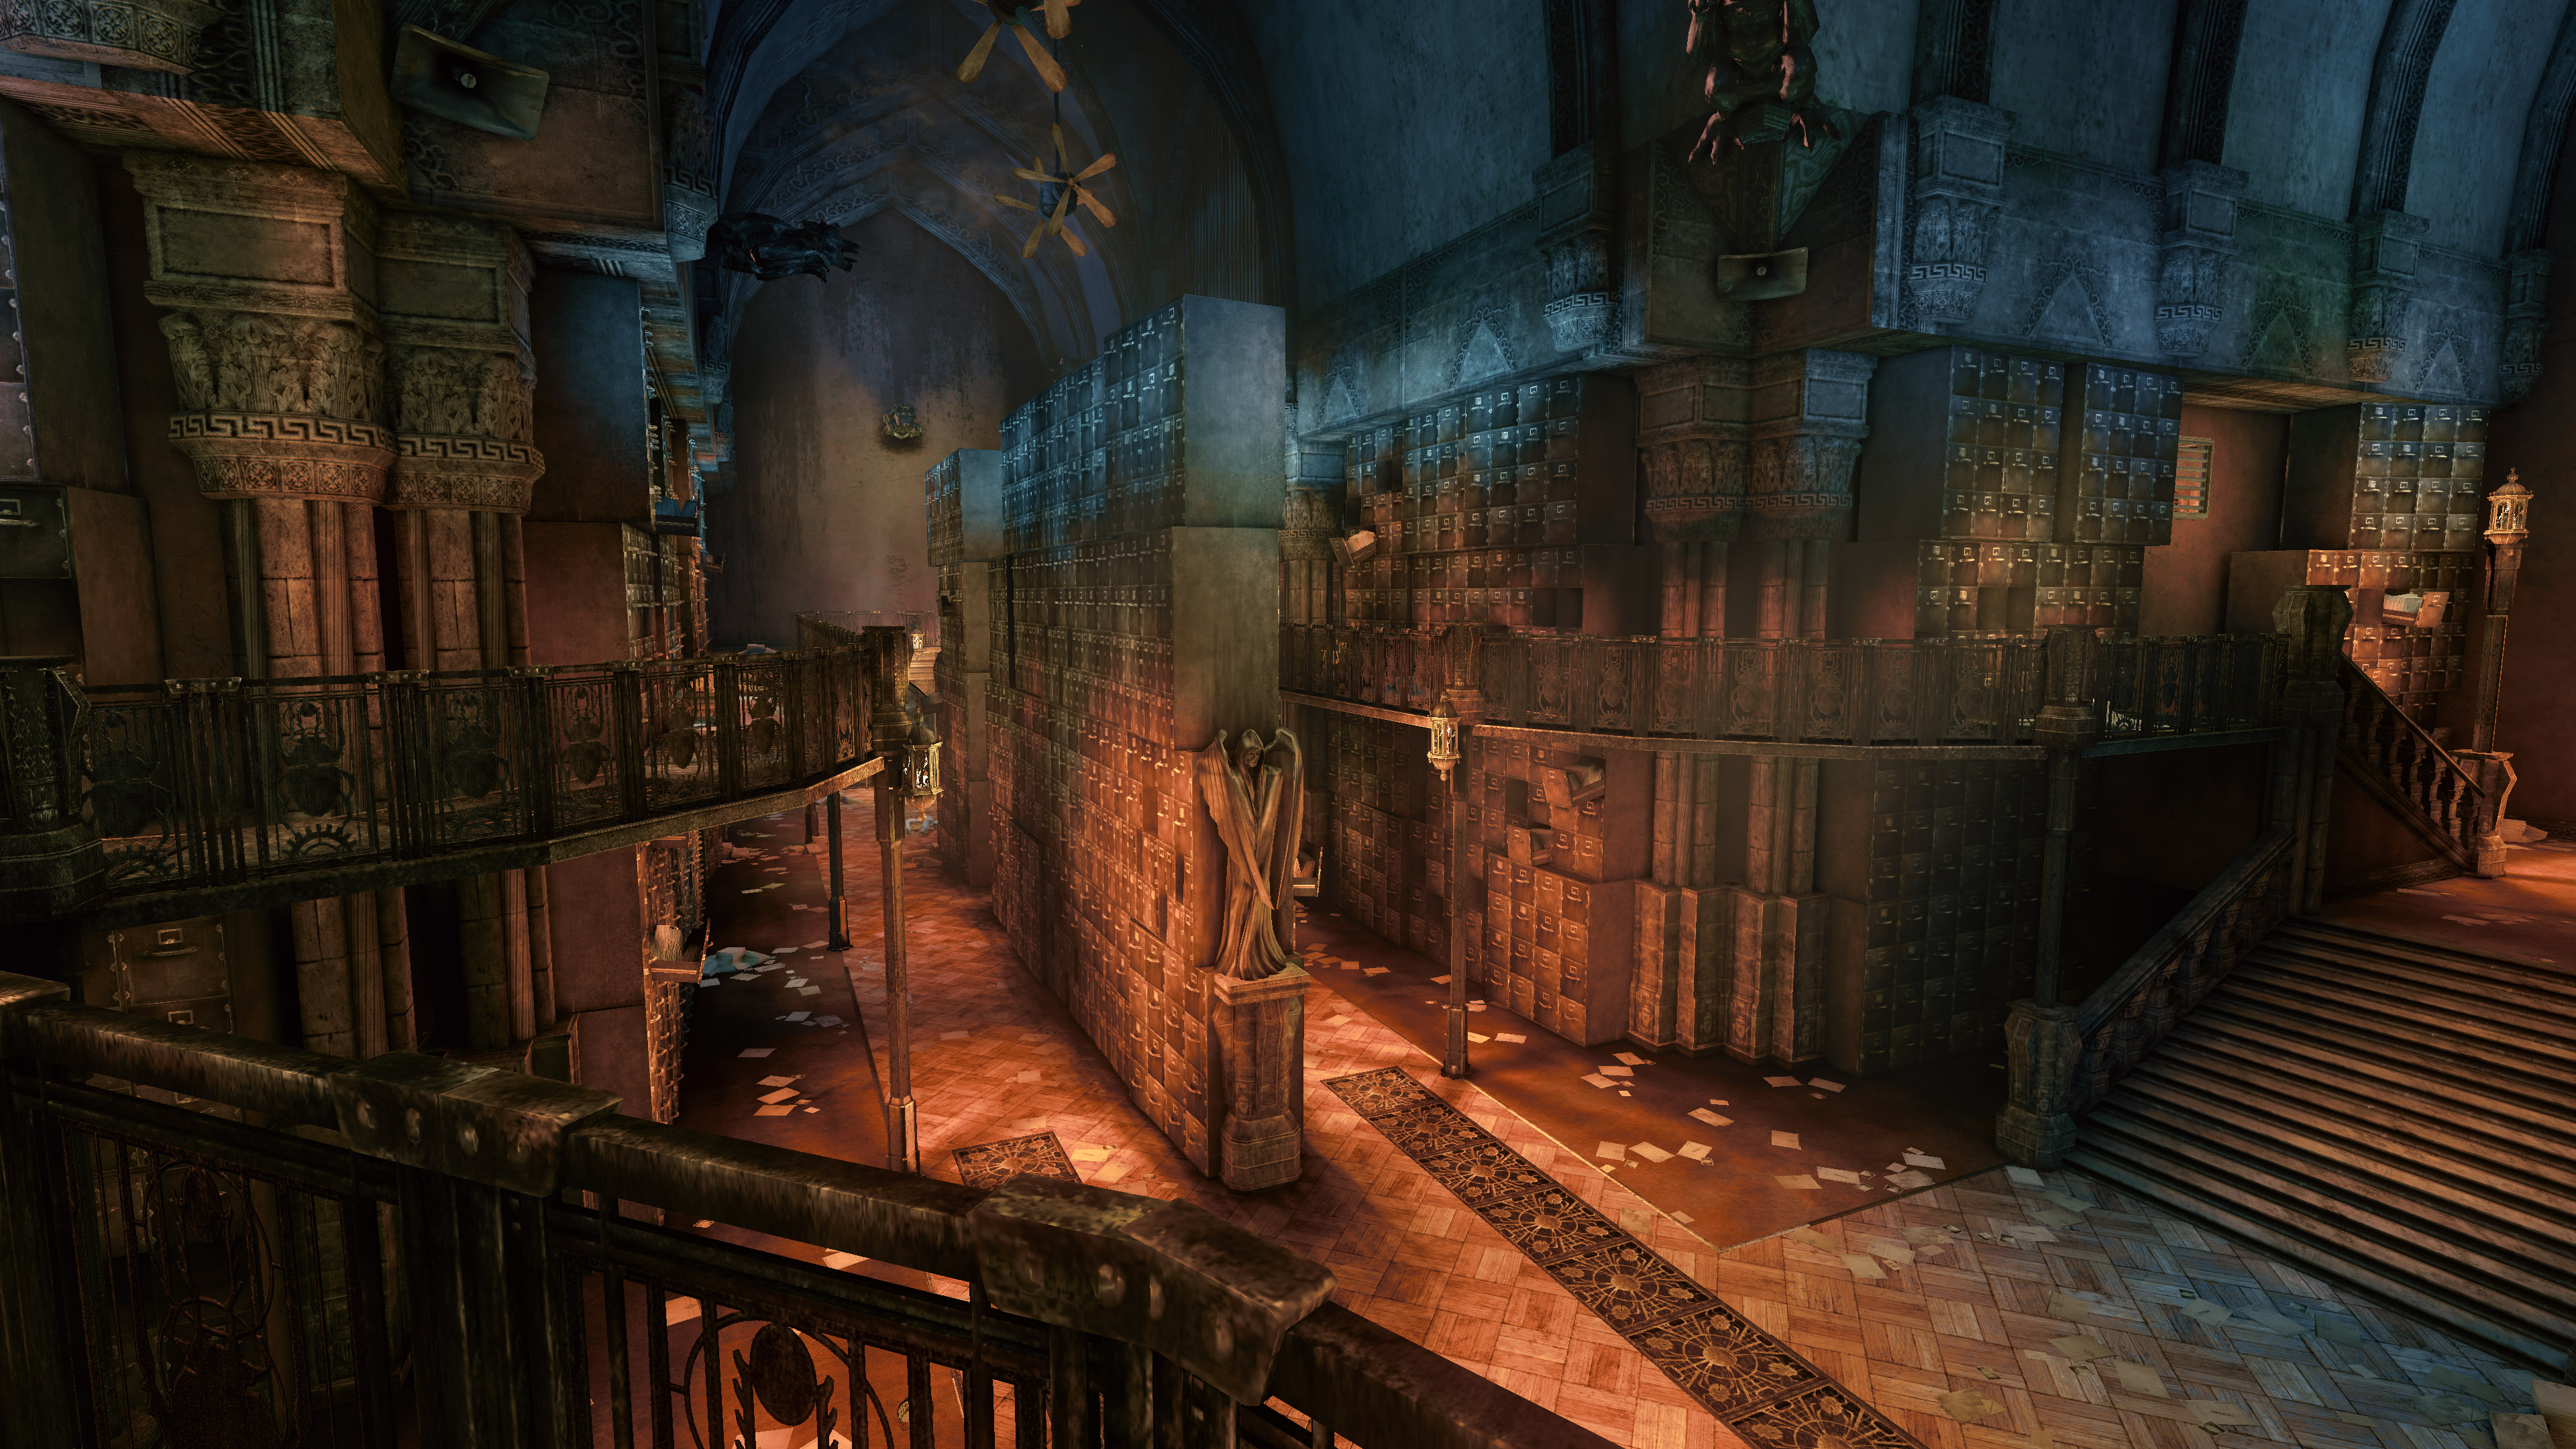
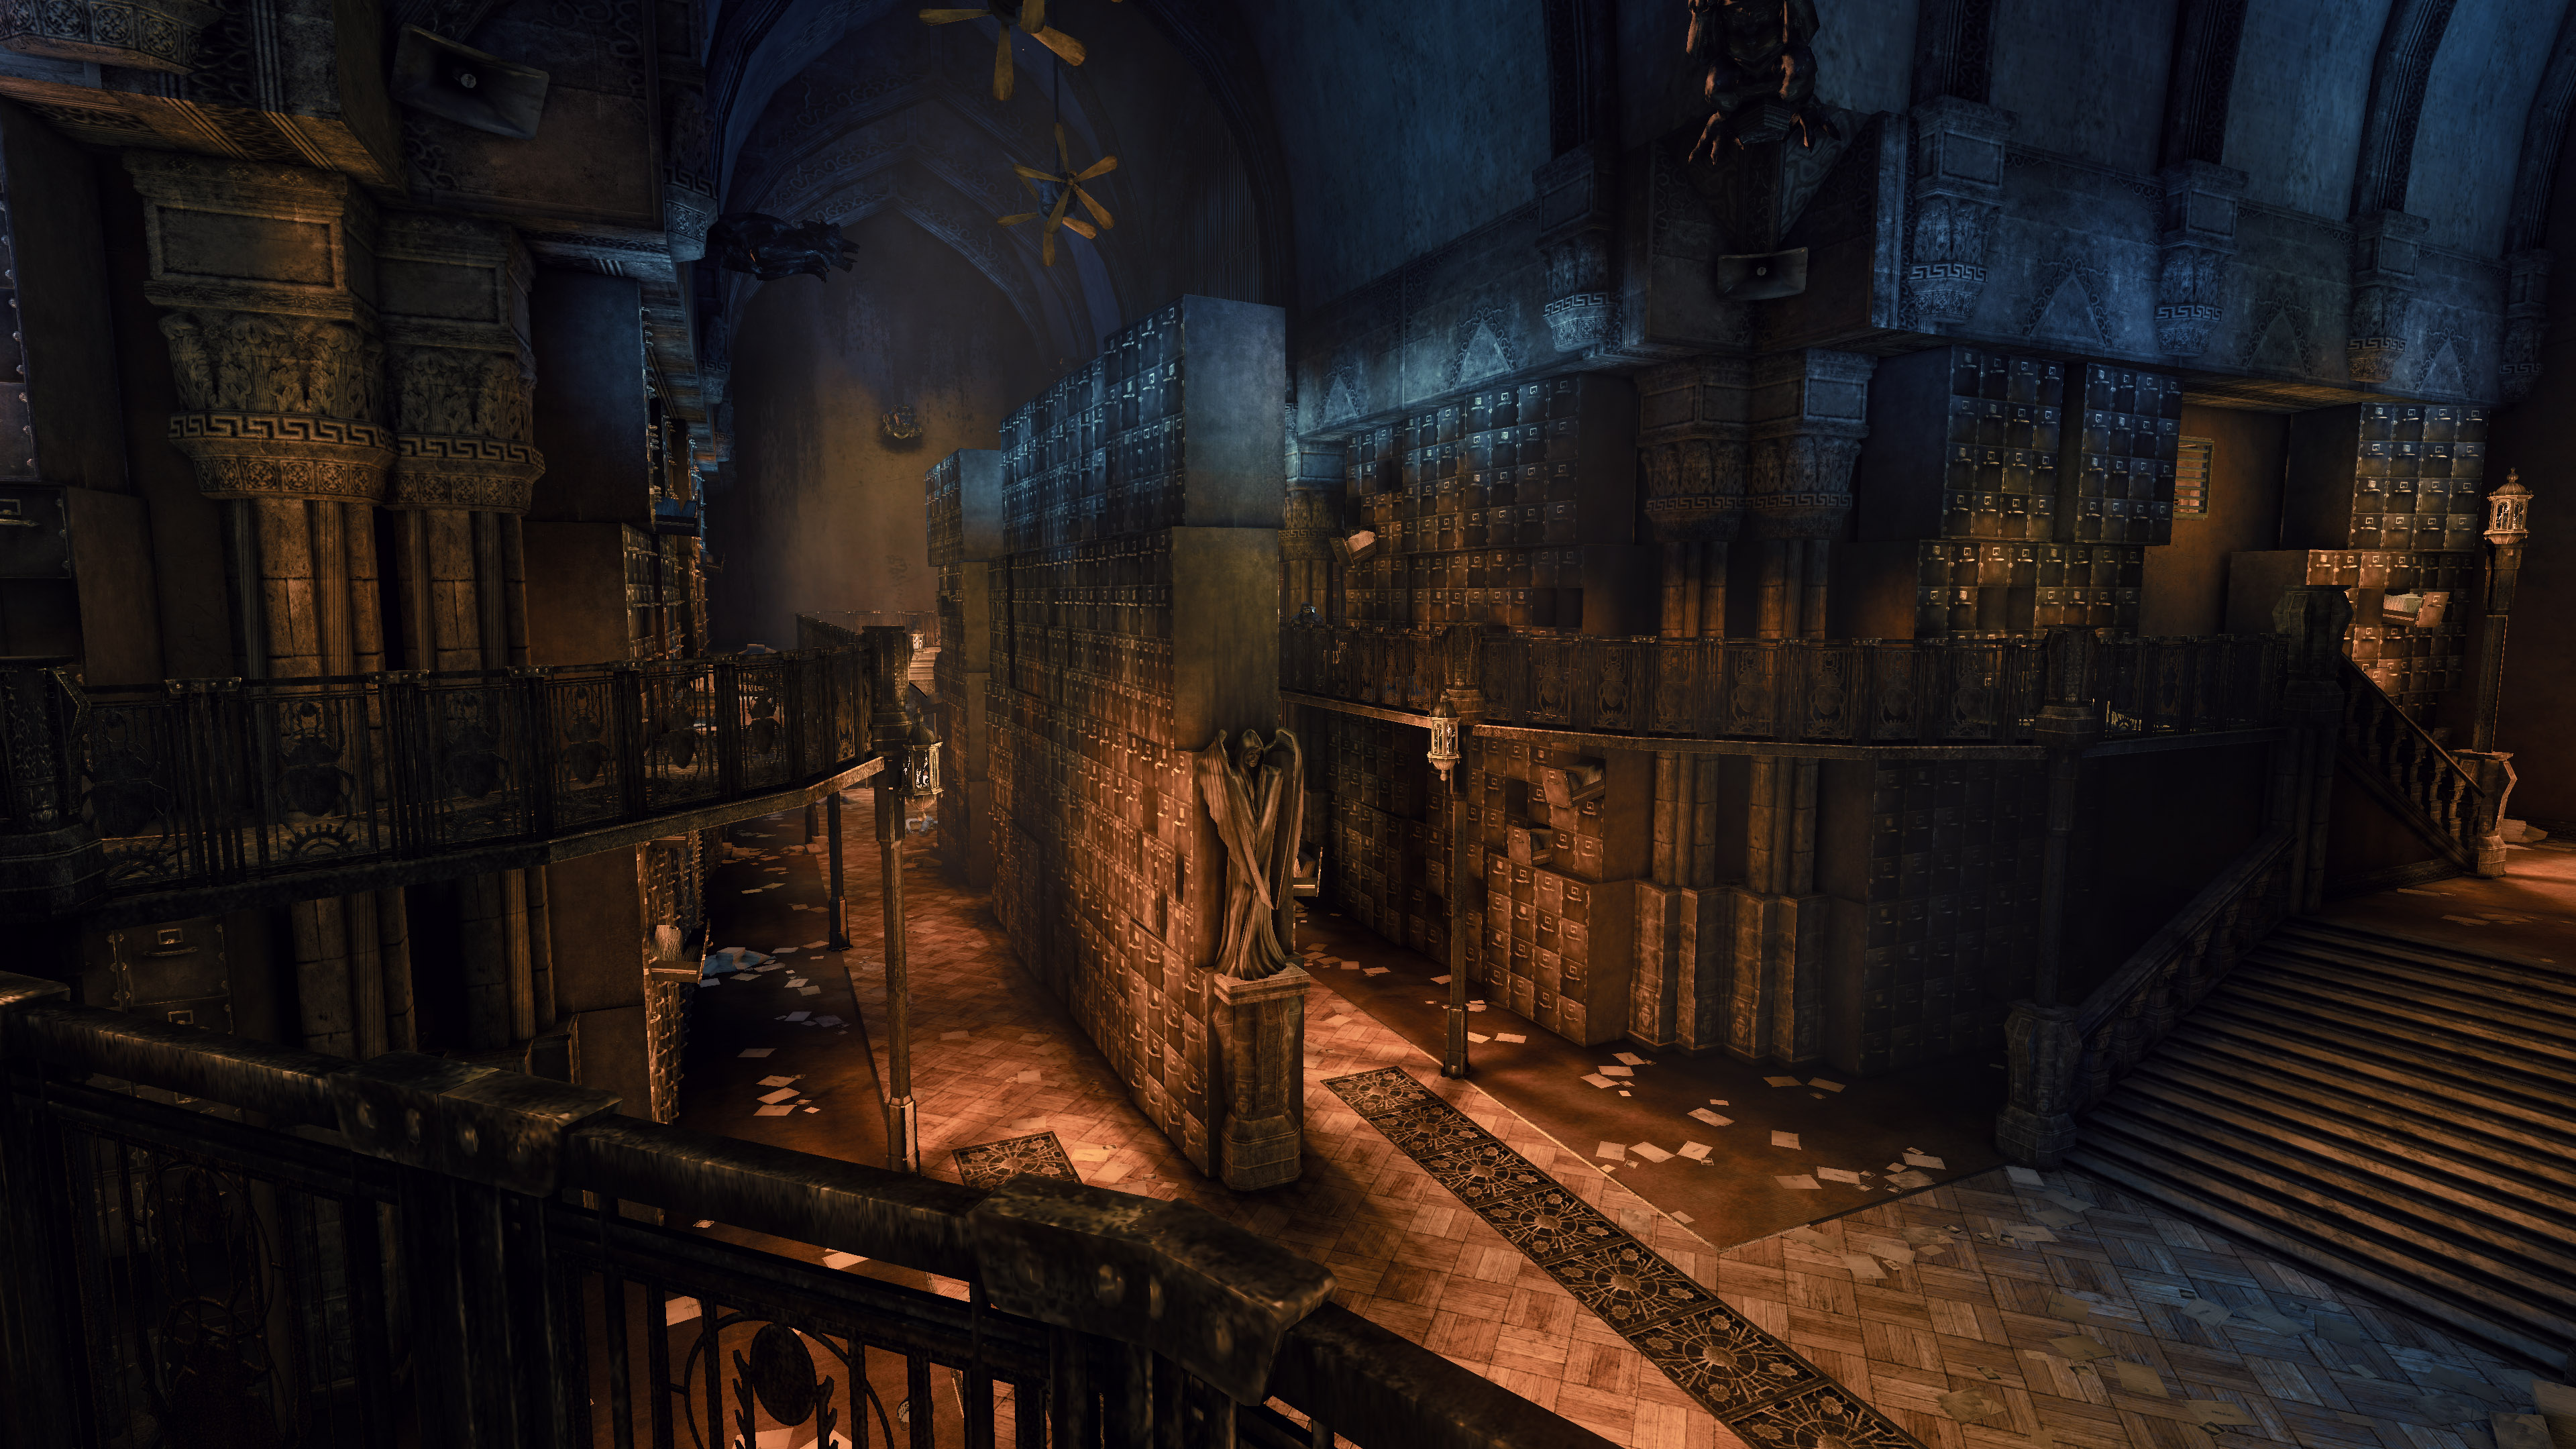
All comparisons are with DoF disabled. The game’s strong colour tints are tied with DoF, which is why the effect is disabled. I wanted to clear up the game and improve the colours.
MultiLUT explanation:
Shader that can rotate between multiple LUTs (Look Up Tables) – This is a colour reference chart you can edit to apply your own grading. It’s the definitive colour grading method in Reshade, mainly because it’s light on performance.
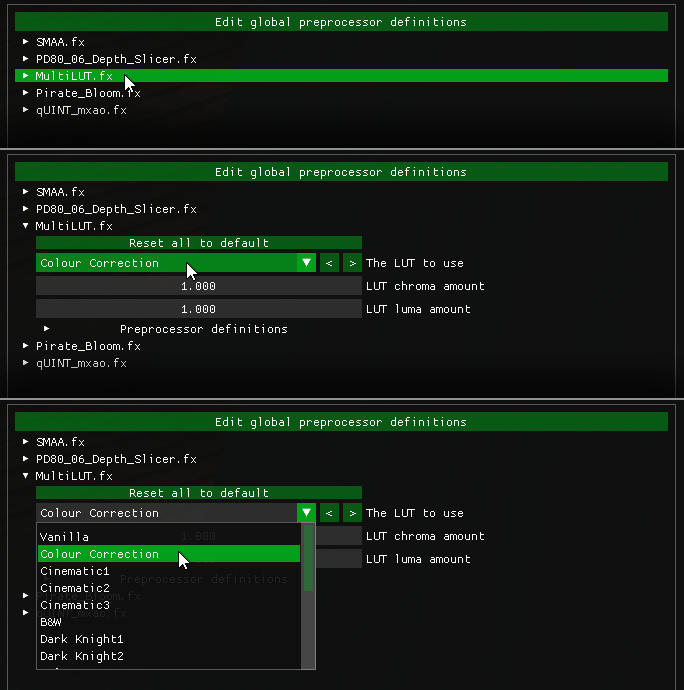
Performance Mode needs to be unchecked if you want to change LUTs
MultiLUT.fx Shader by Otis
Adobe Premiere is used to make all the LUTs listed here:
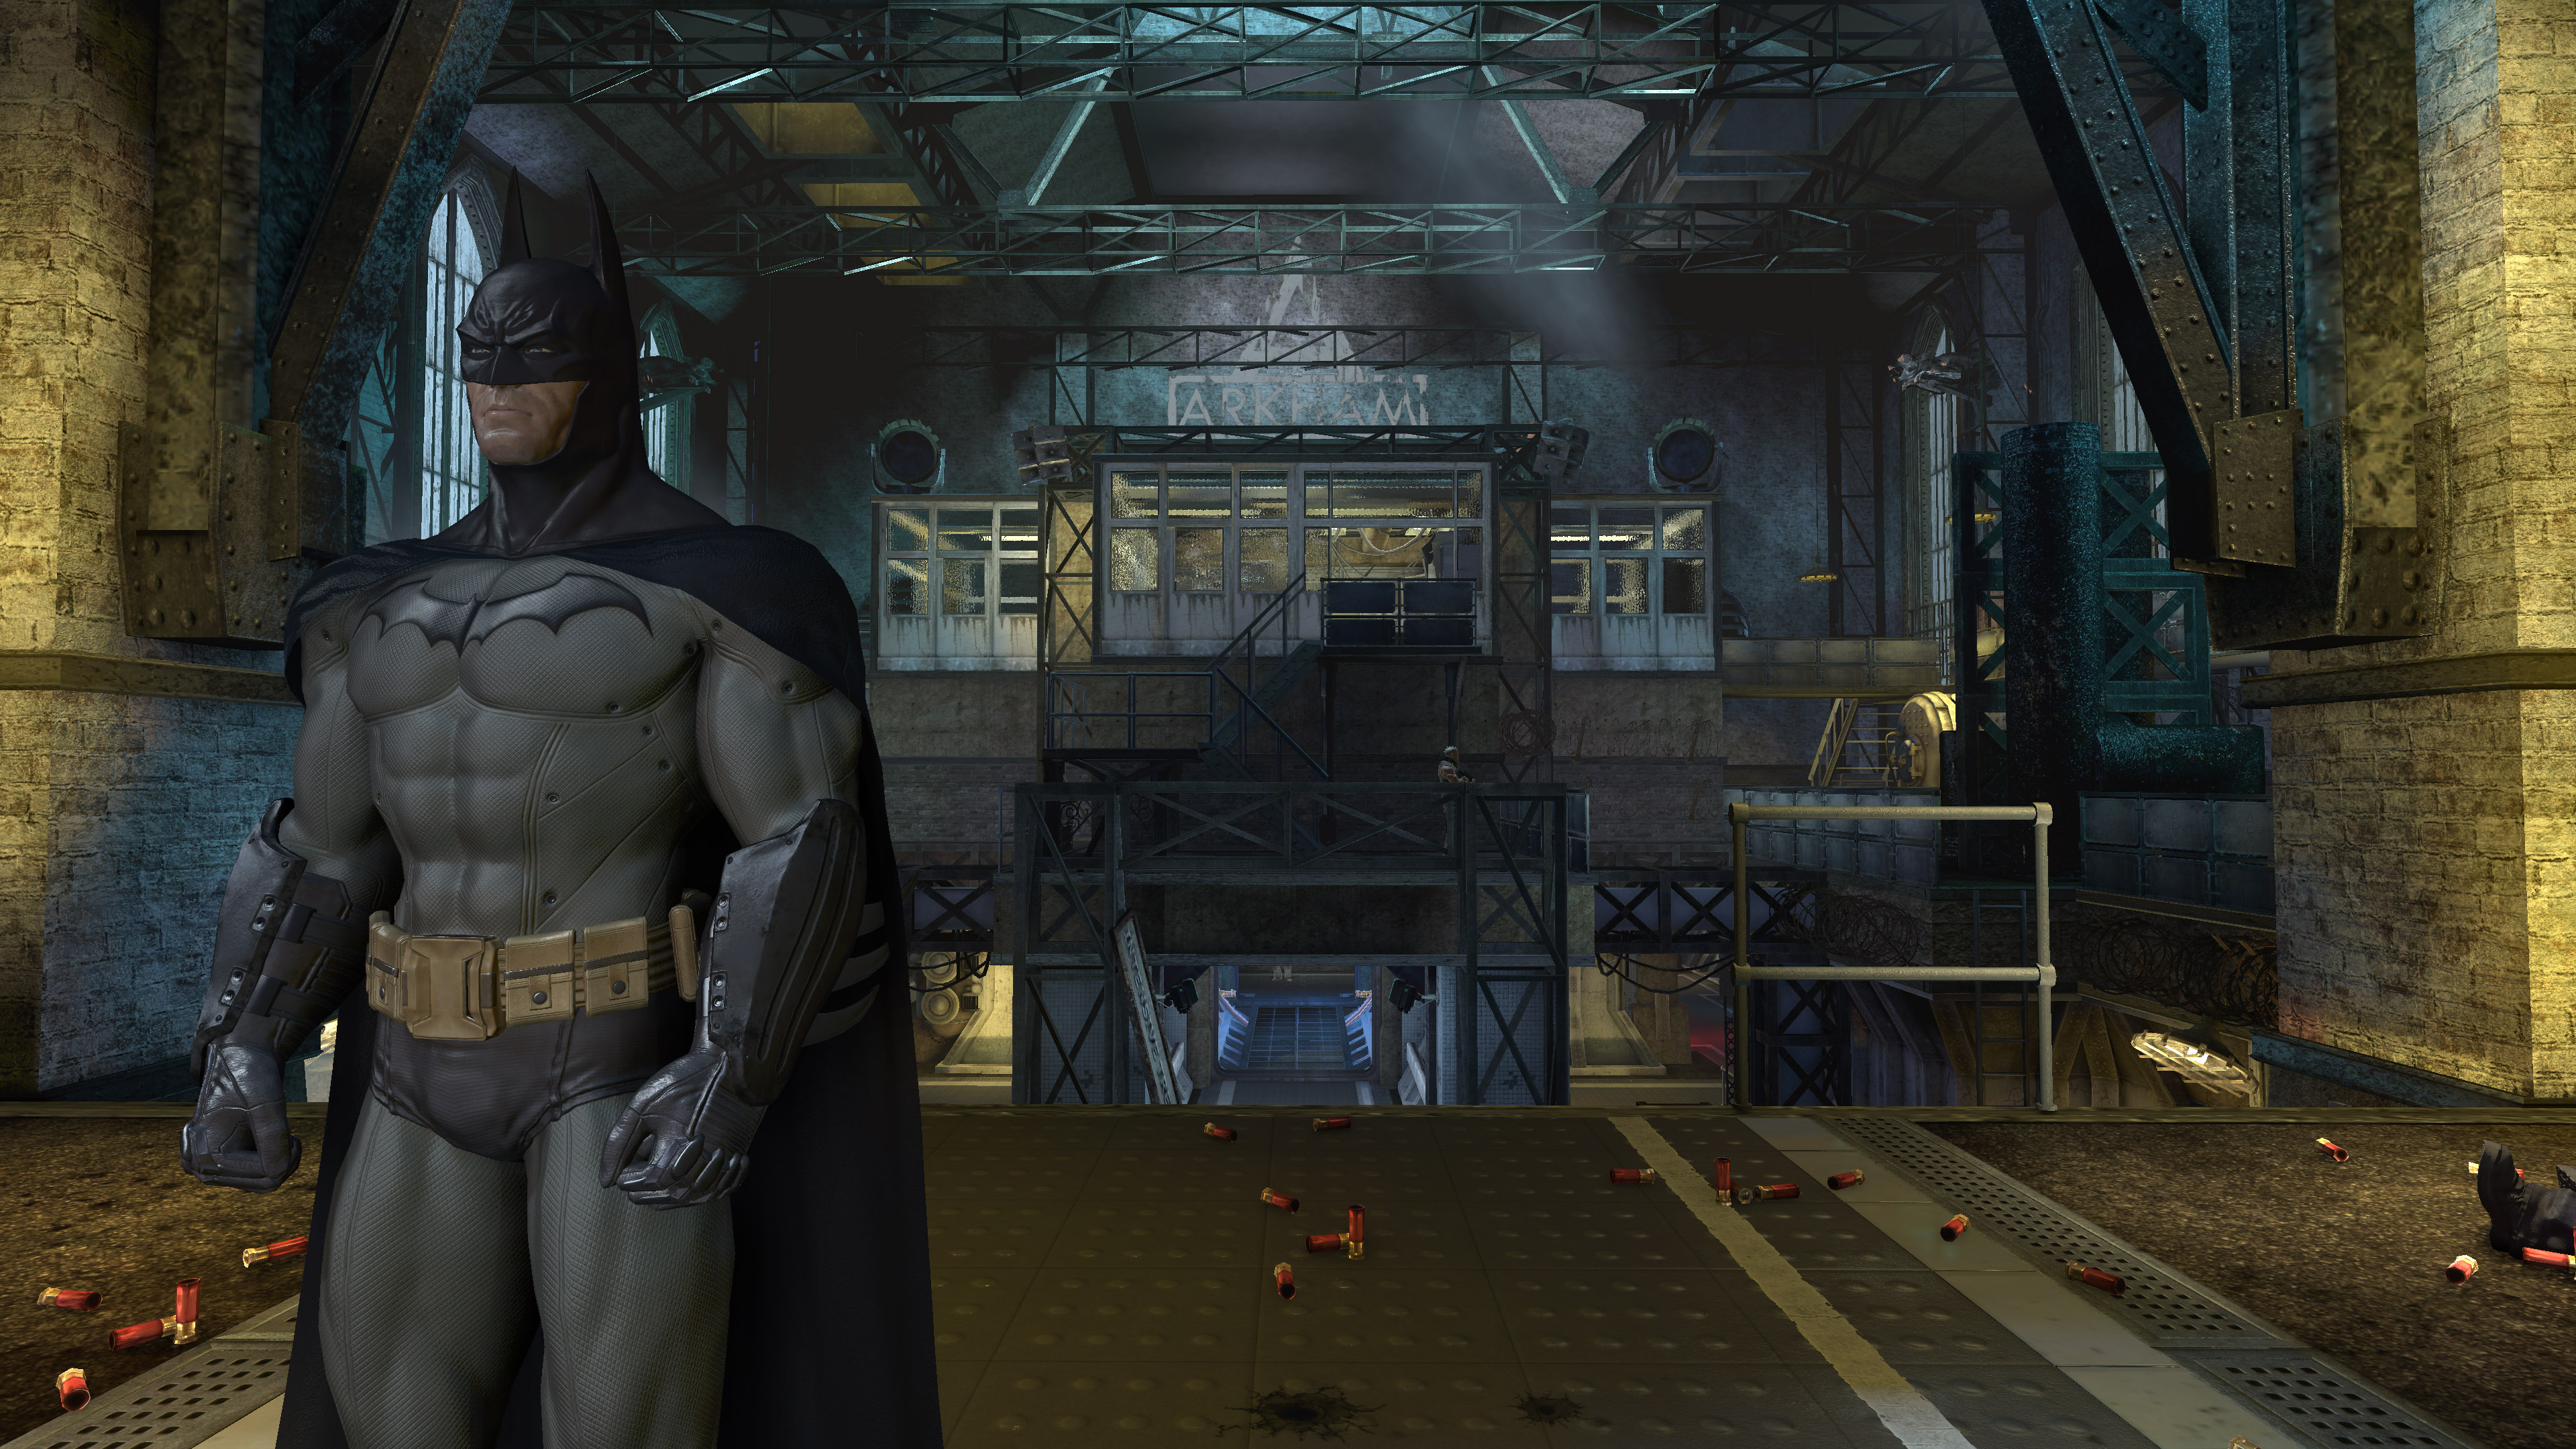
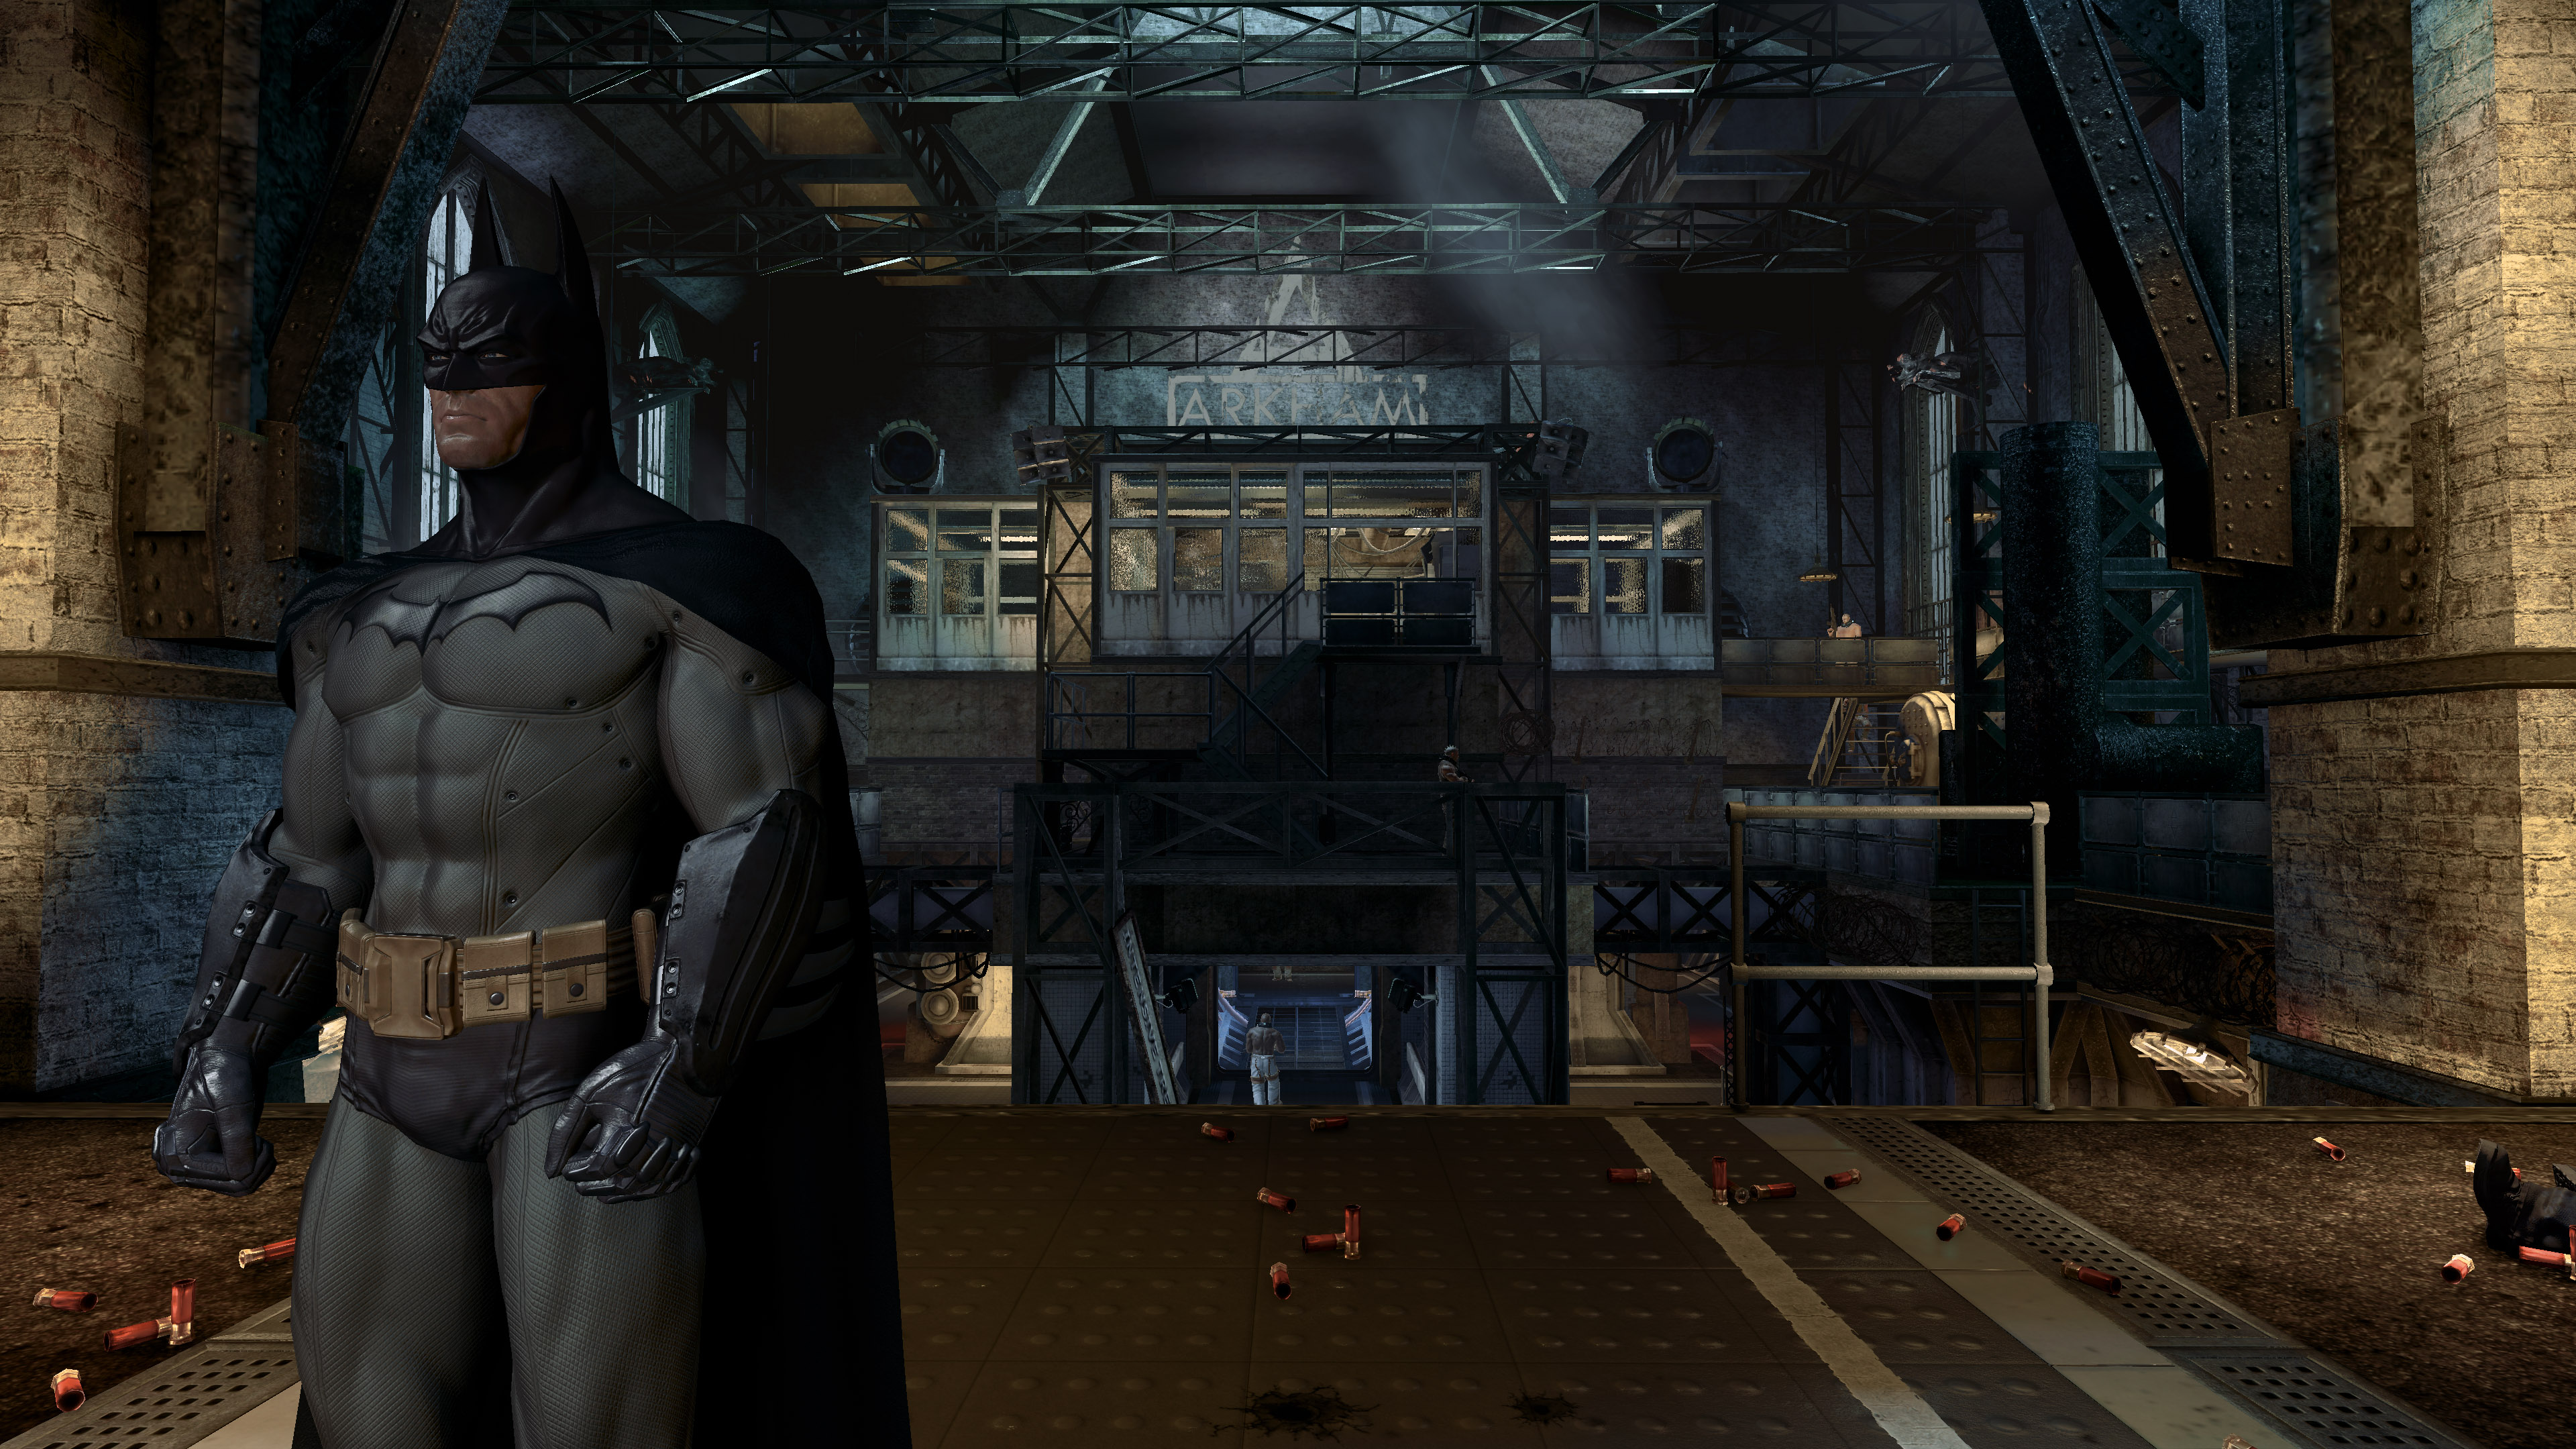
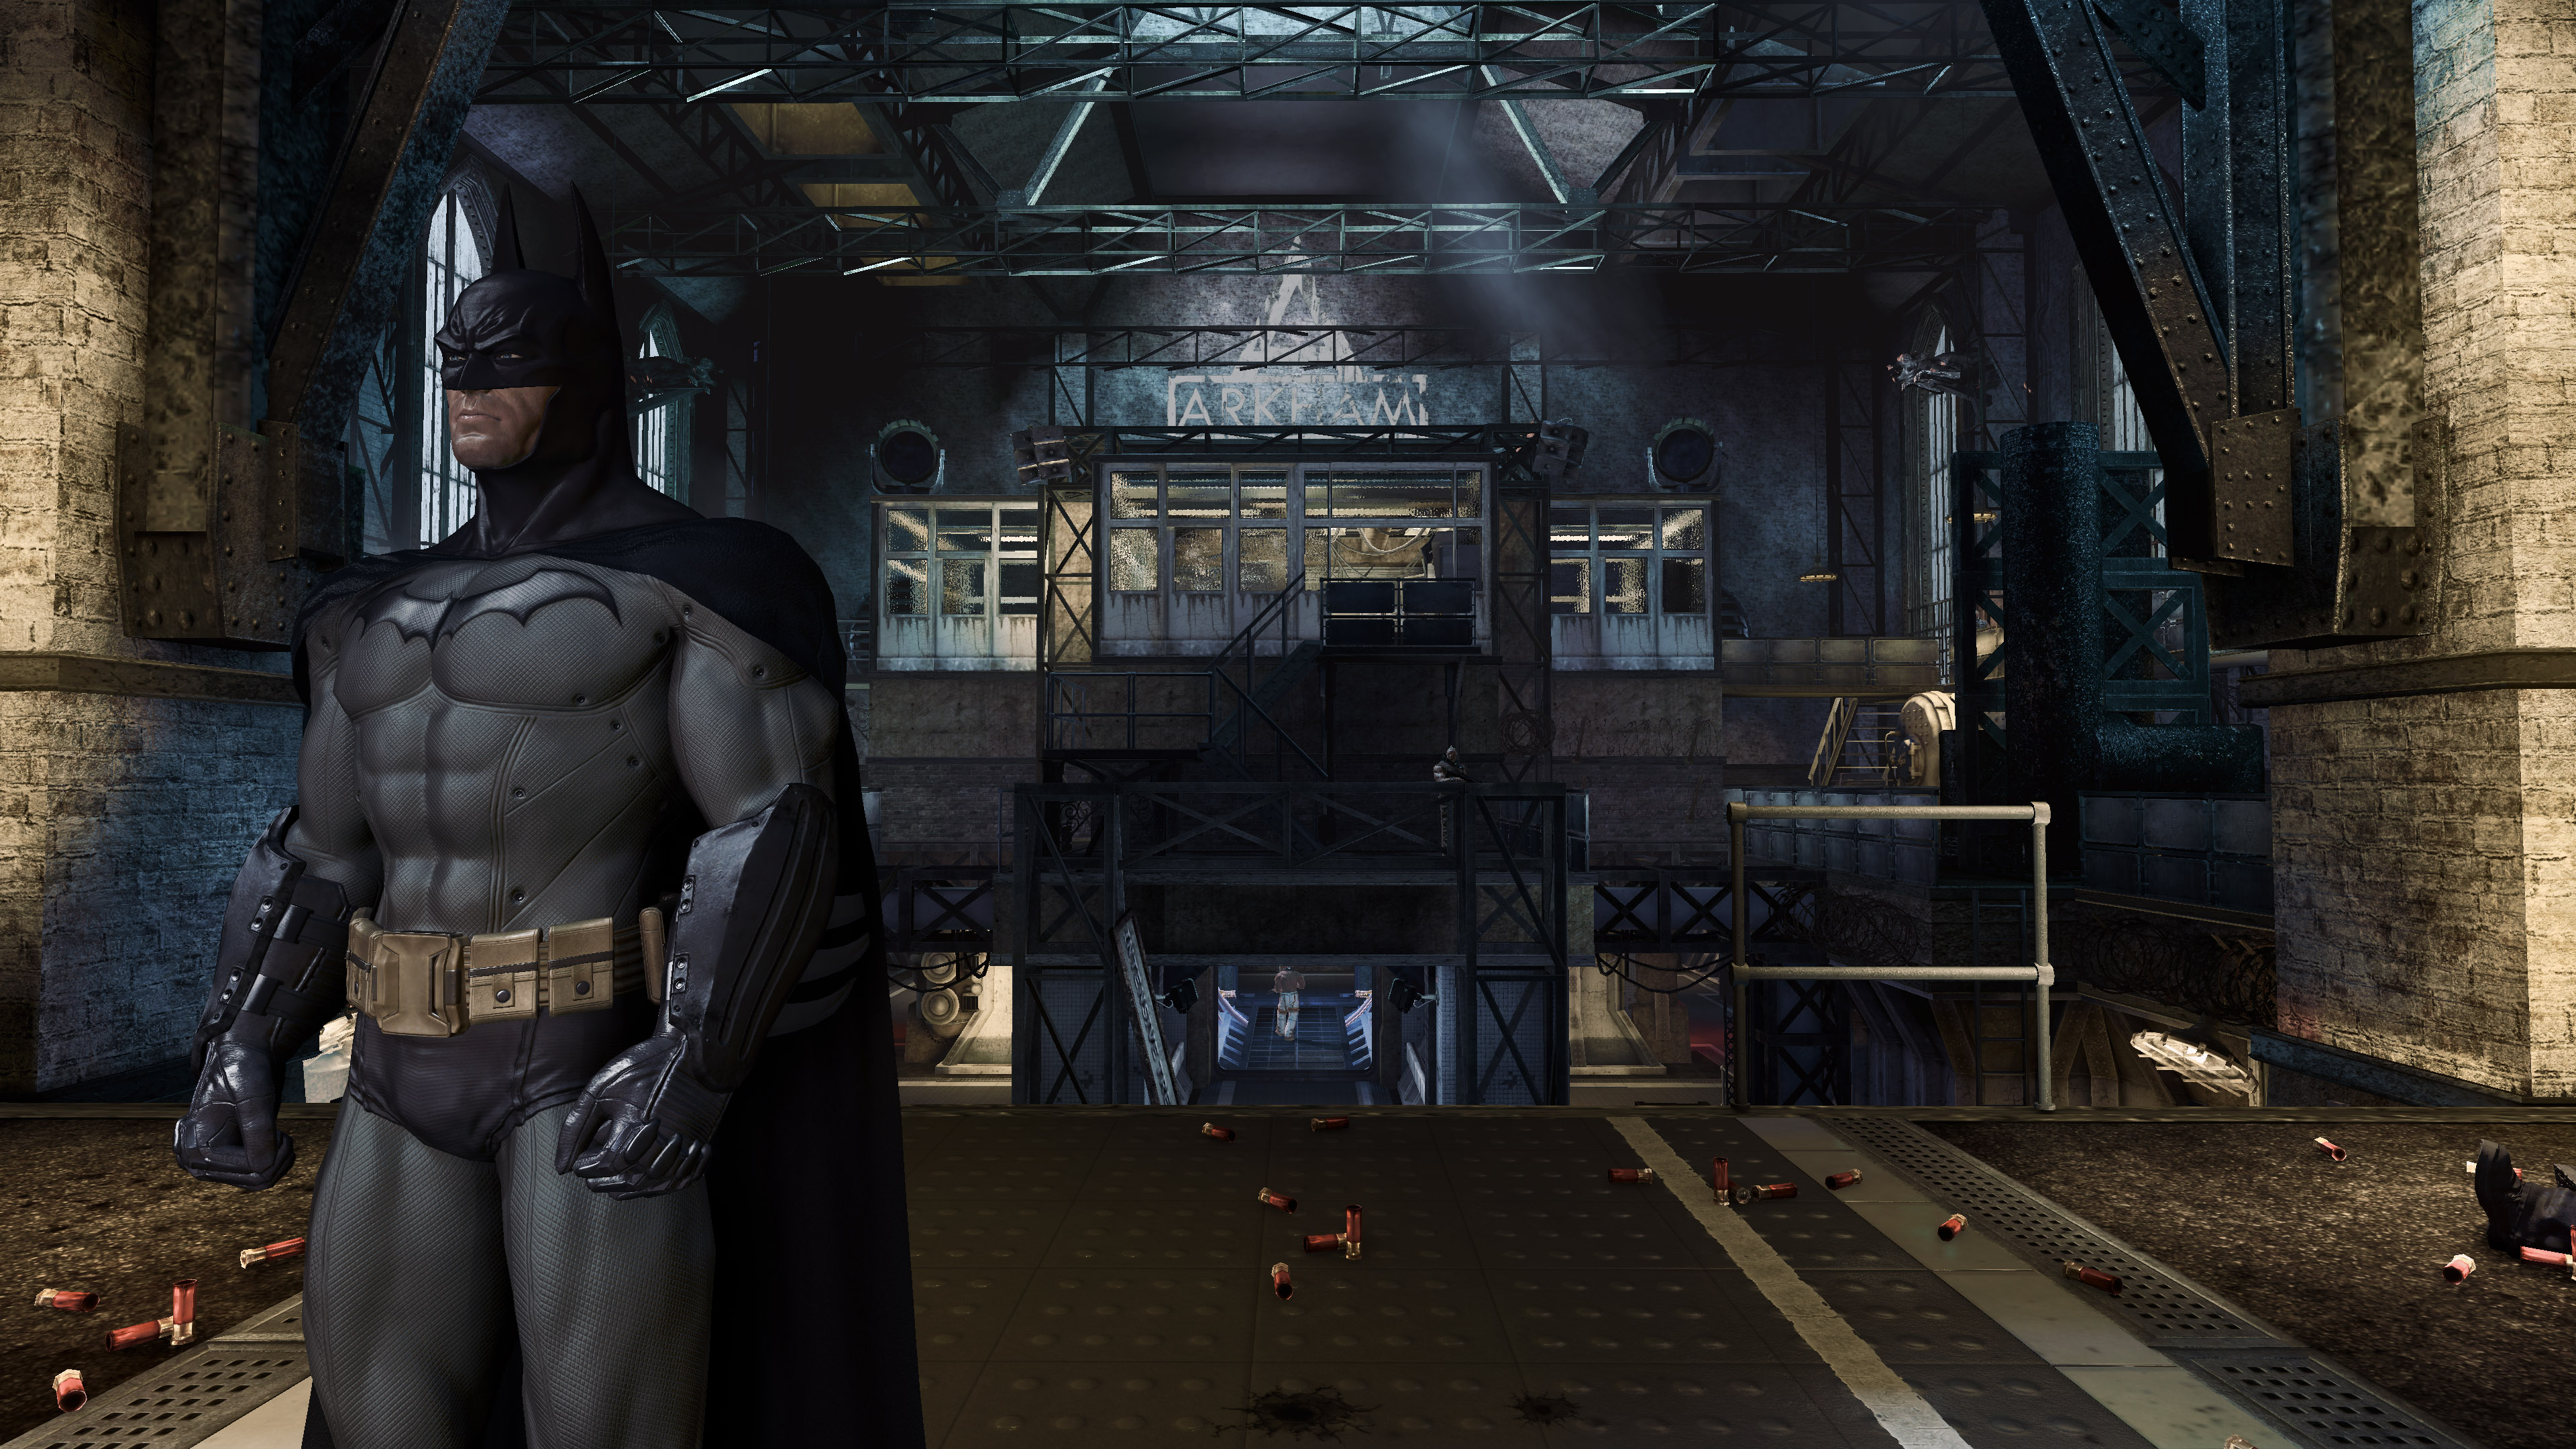

All comparisons are with DoF disabled. The game’s strong colour tints are tied with DoF, which is why the effect is disabled. I wanted to clear up the game and improve the colours.


¬ Shaders
Reshade shaders used to improve graphics
More Comparisons
I would have made a comparison with Asylum, unfortunately there seems to be an issue getting Reshade SMAA to work? I’m looking into it.


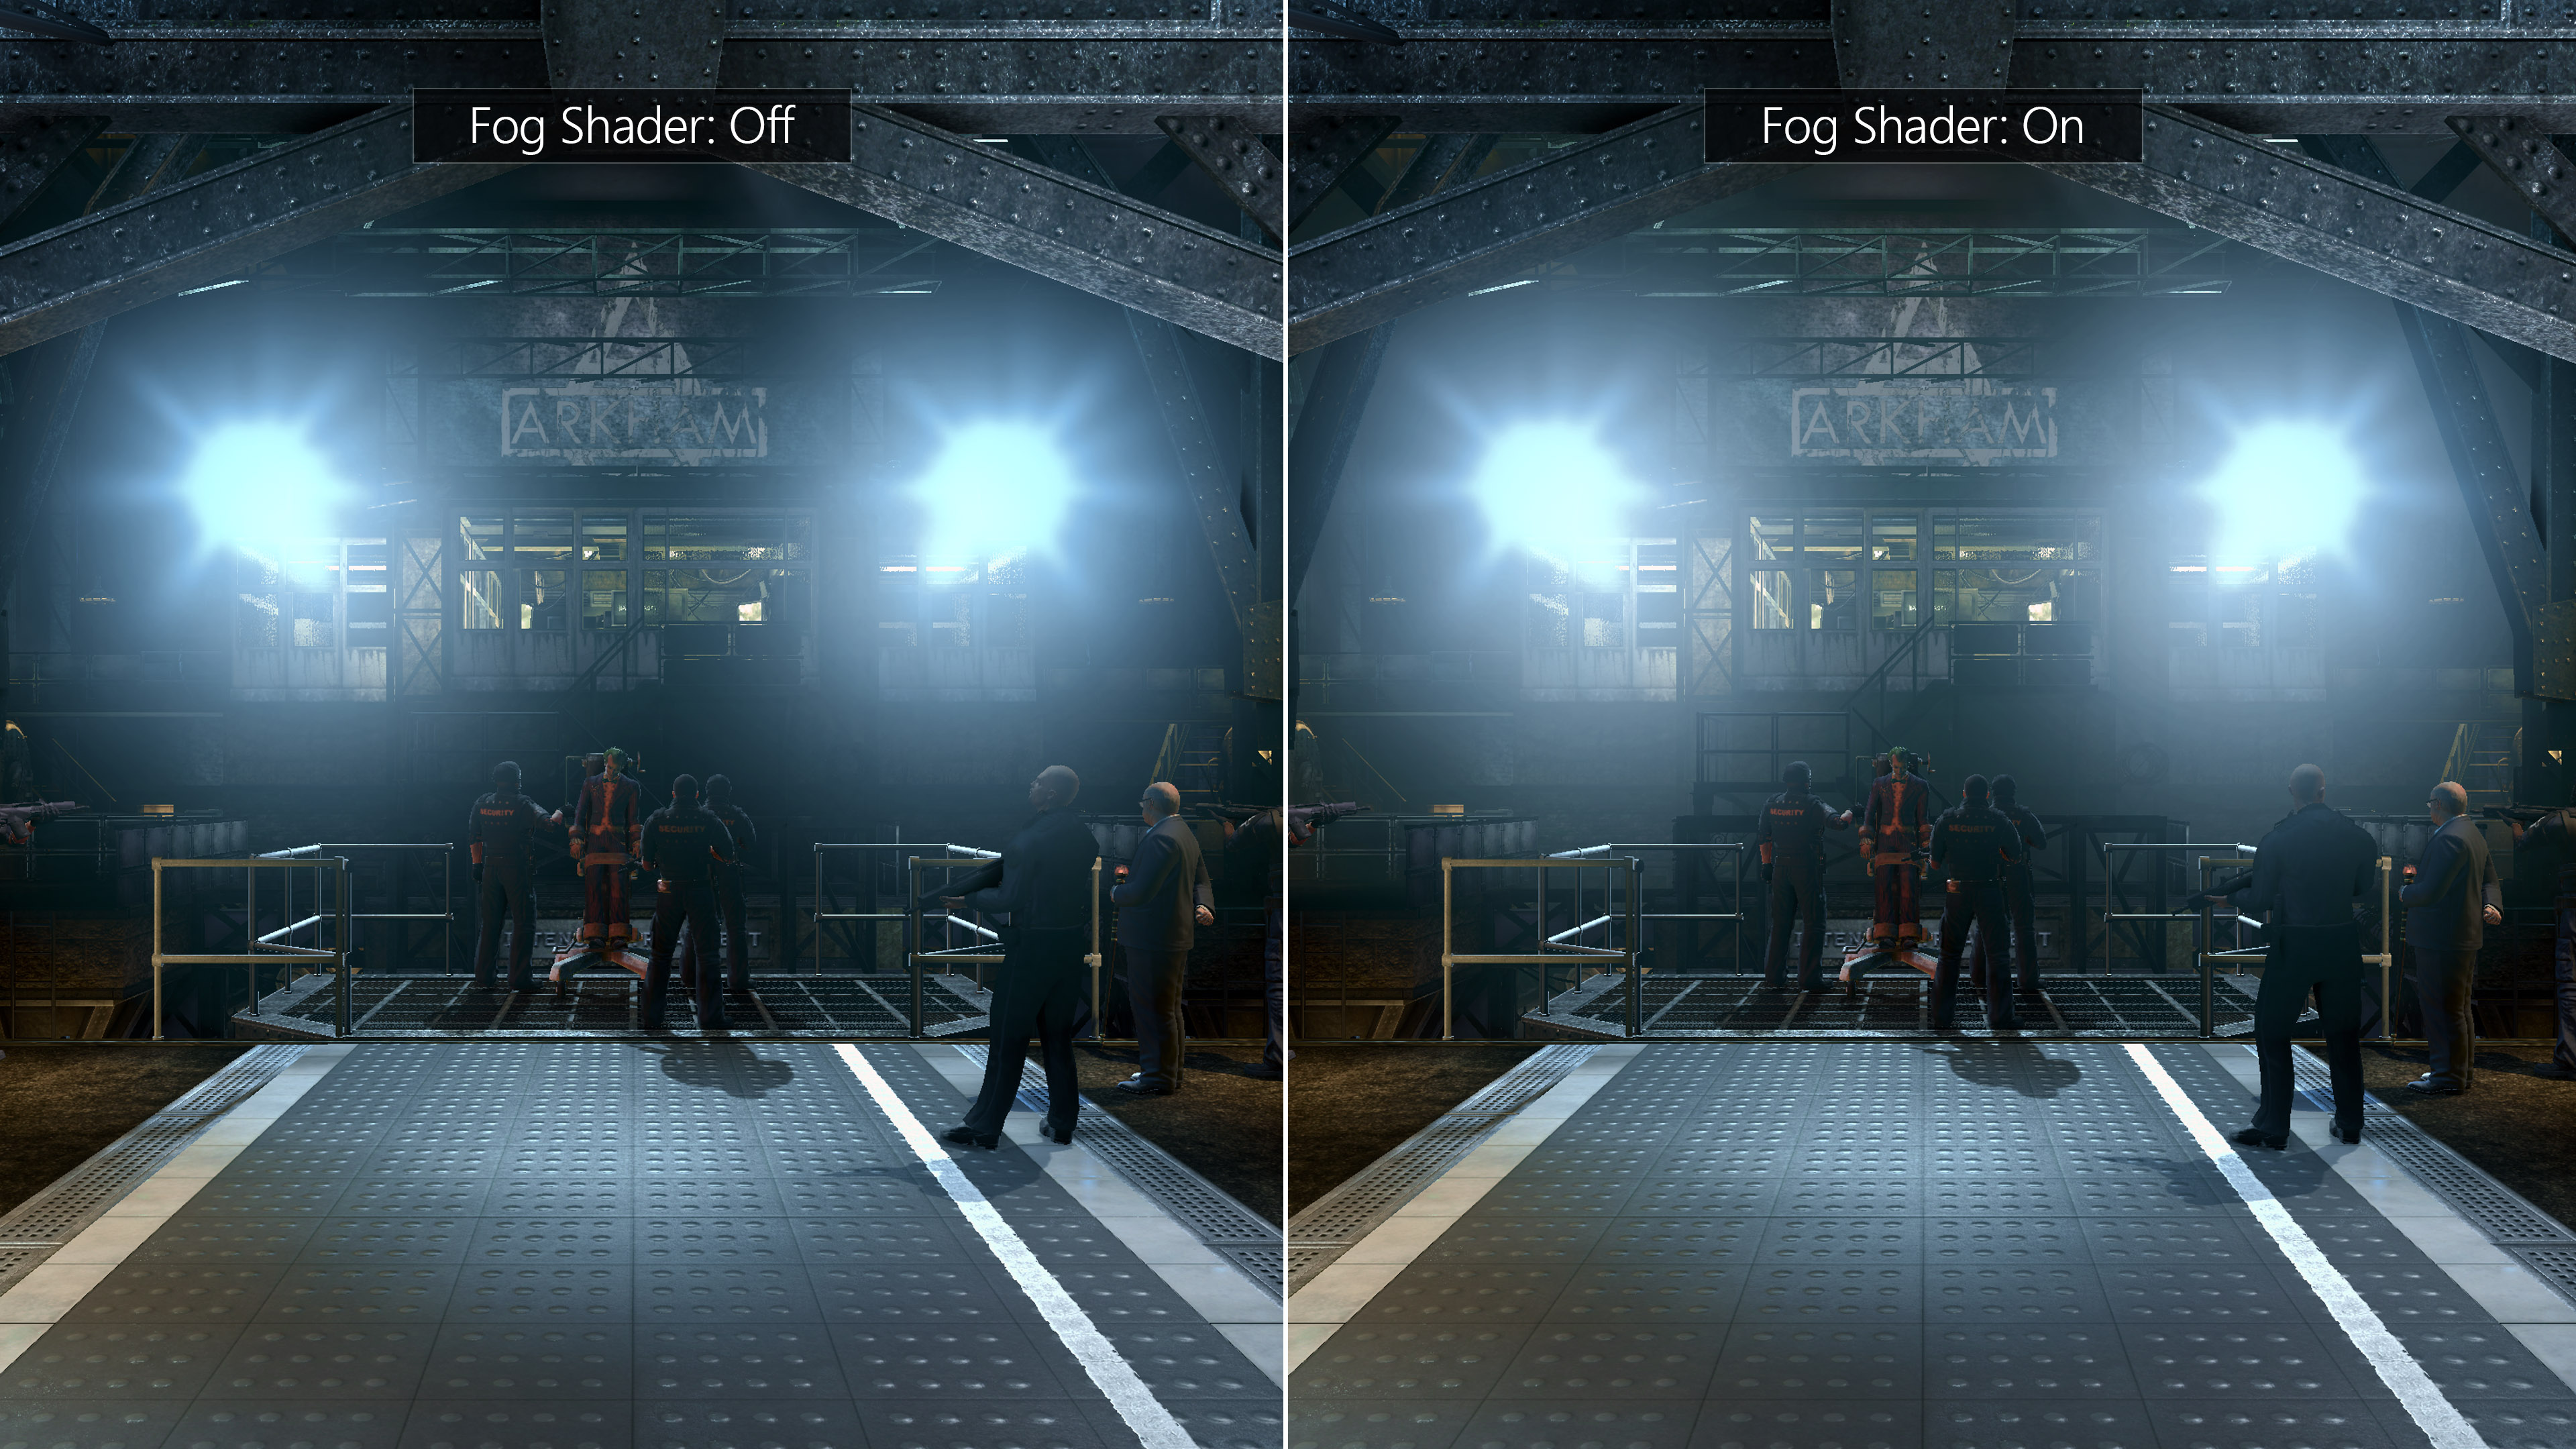
Shader used is “PD80_06_Depth_Slicer” by Prod80.
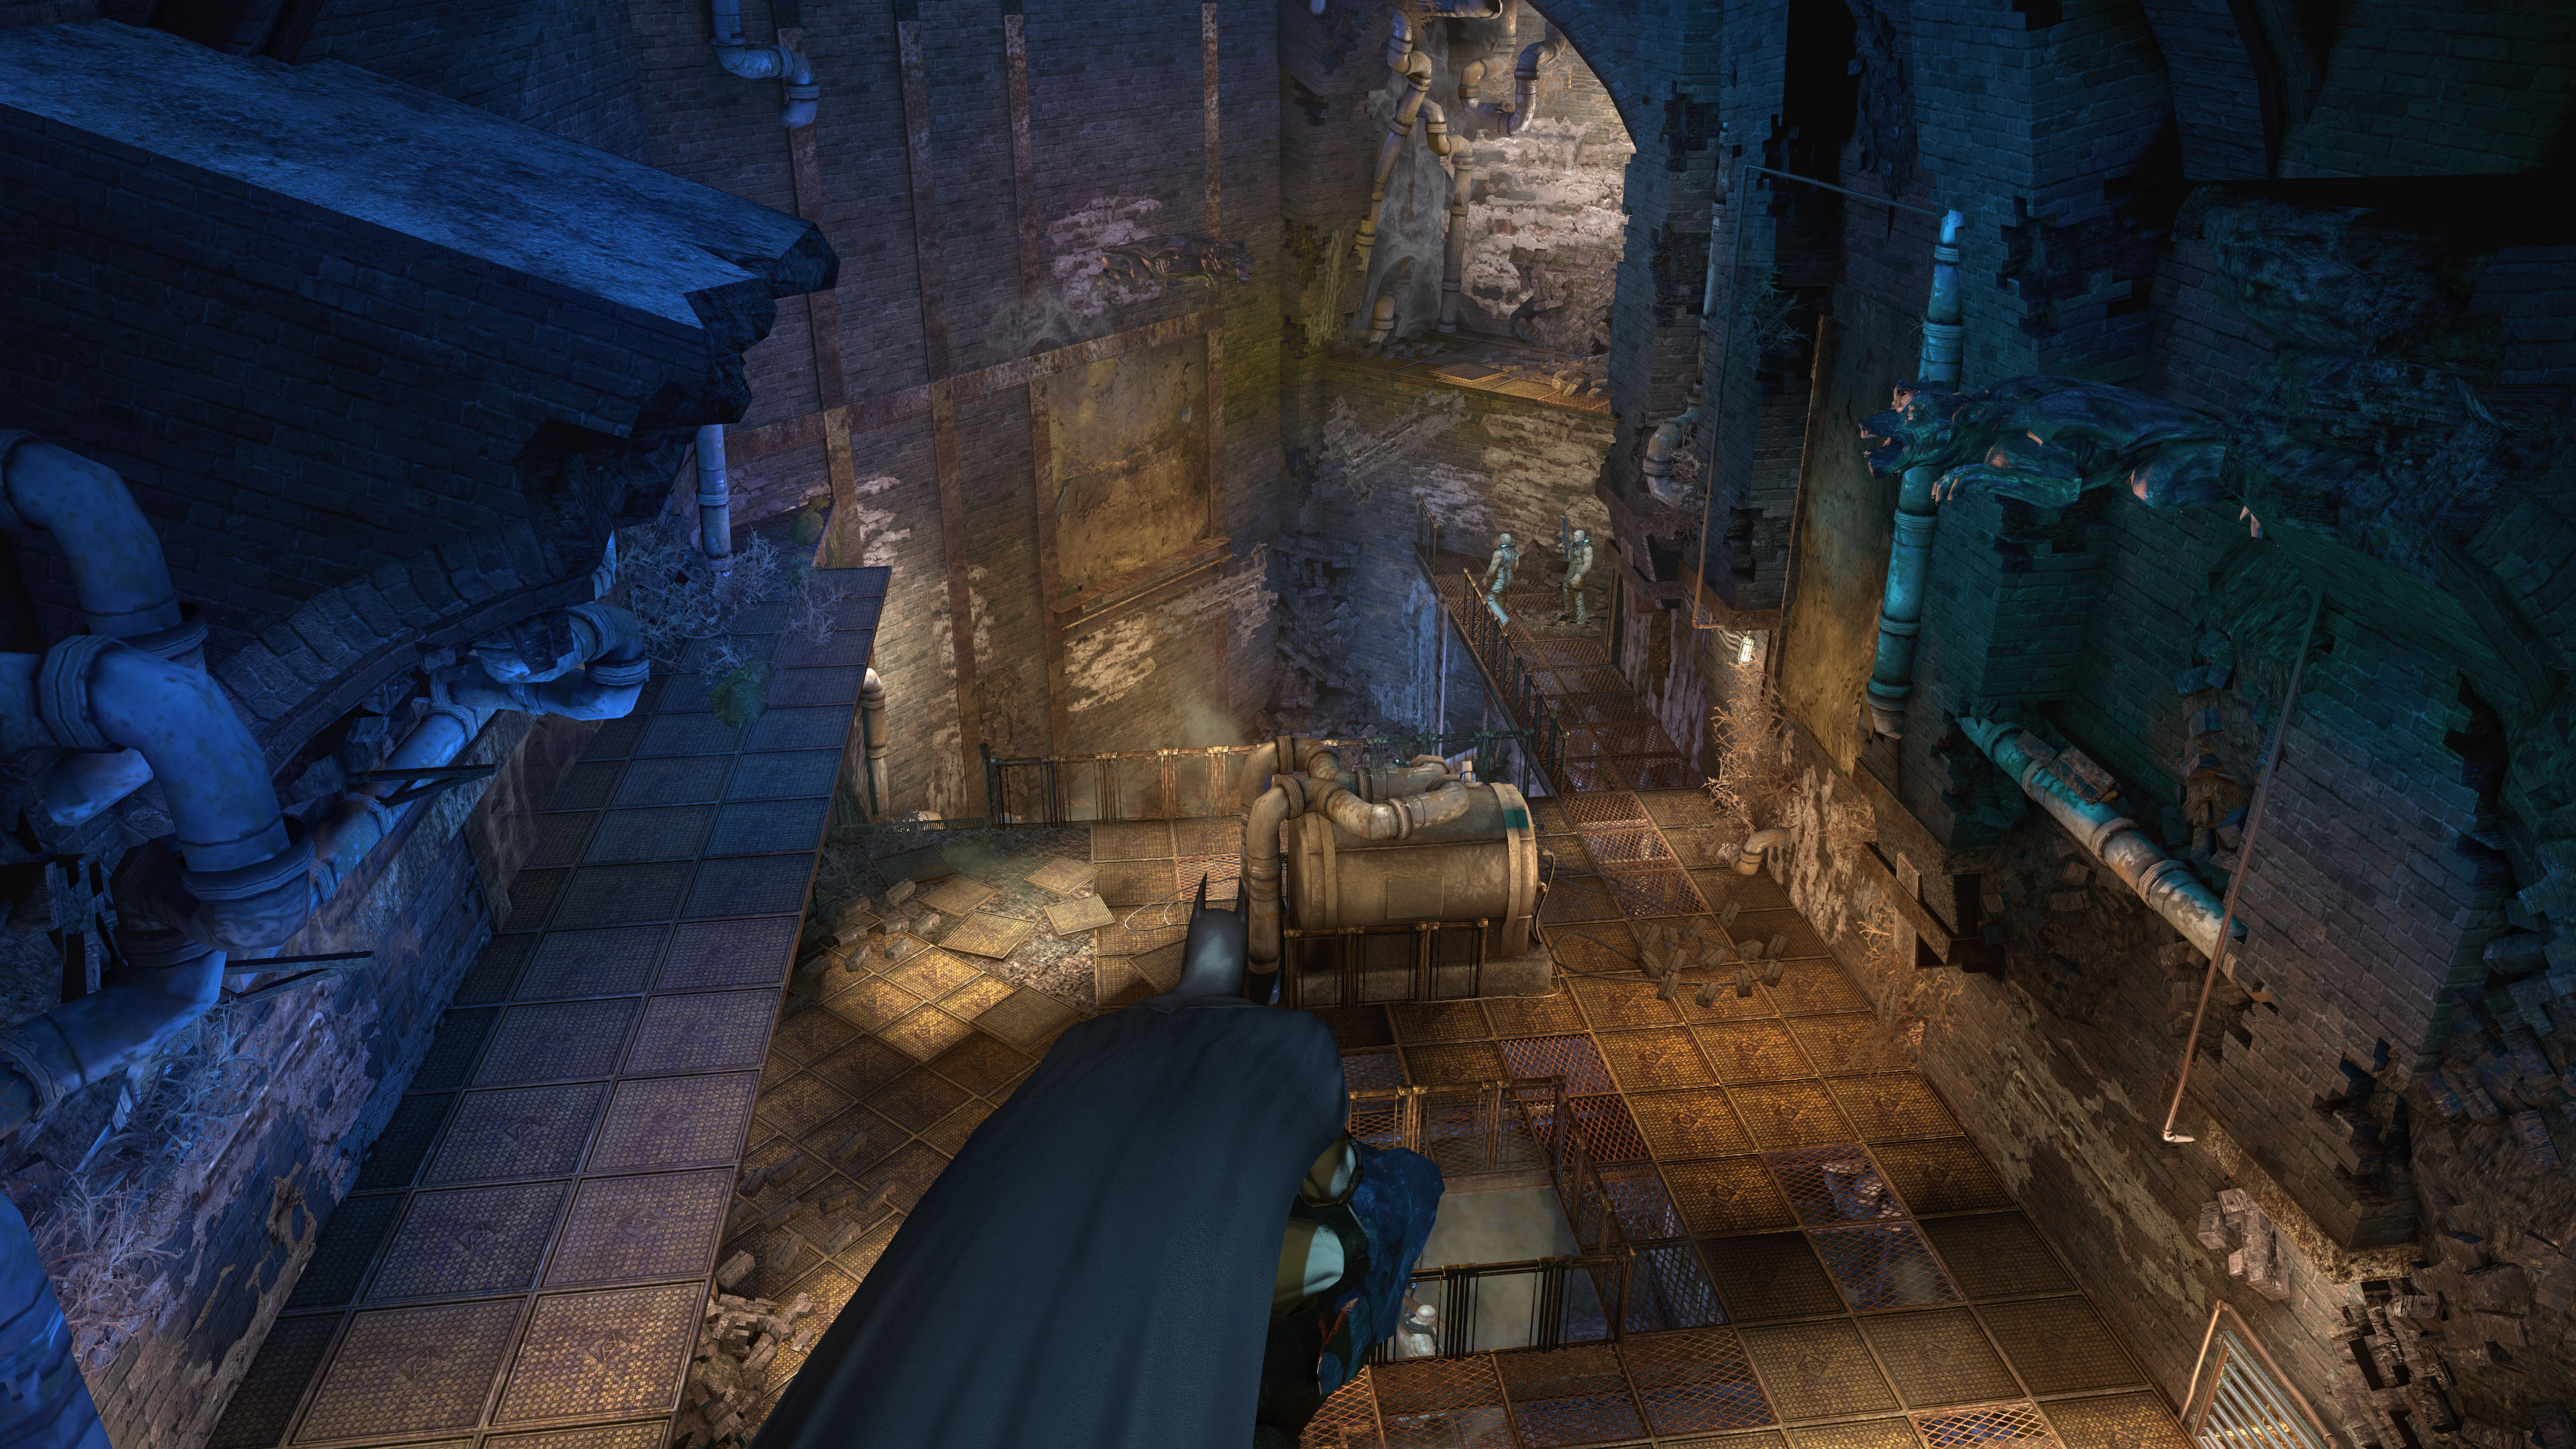
Light, or Eye Adapation simulates a greater depth of lighting to the game world. Look into a darker area, it will suddenly go brighter. Look into a brighter area, it will go darker. This is a highly common effect in current generation games such as Assassin’s Creed Unity & Uncharted 4. I’ve left this shader enabled only for the High-End preset. You can manually enable it in any other preset through the Reshade window.
Notice how the brightness changes automatically based on viewpoint? You may be wonder how Asylum benefits from this with a mostly dark world, but it does still work quite well. Hiding in vents and exiting for example, the lighting appears more rich.
¬ Presets Chart
You can scroll through the presets using “Page Up” and “Page Down”. MultiLUT/Colour Grading changes will have to be made on a per shader basis.
Presets are ordered by performance impact.
Additional
¬ Play as Joker + New Challenge Maps: Prey In The Darkness
For clarity, the ‘Play as Joker’ DLC was intended only for PS3. When Asylum eventually released for Mac OS, it included the same DLC. Someone ported the right files over for the Windows version, the game executable also had to be configured in the process. Additionally, the Prey In The Darkness challenges were ported over.
Extract and copy the download’s contents to SteamAppsCommonBatman Arkham Asylum GOTY
Overwrite when requested. This definitely works with the GOTY version of the game on Steam. I suggest testing this DLC on its own (ignoring texture pack, reshade etc) to help isolate any potential issues you may have. If it does crash, let us know your version of the game in detail. Delete the binaries folder and ‘verify integrity of game cache’ via Steam to fix the issue. This will mean having to download the Advanced Launcher and Reshade again.
Here’s a more elaborate guide:
[link]
¬ 4k Cutscenes
With the power of machine learning, pre-rendered cutscenes have been improved and elevated in quality. More info and download here:
[link]
Cutscenes were processed by the same user responsible for the Advanced Launcher.
Miscellaneous (DSR, Console Commands, Save Files)
As both of us have Nvidia GPUs we can’t provide any counterpart for this section for AMD users, sorry. It may possible to achieve same results with VSR and Radeon Pro, but we can’t test it unfortunately. Any feedback or help for AMD GPUs is welcome!
DSR, or how to get the cleanest, sharpest image possible:
Dynamic Super Resolution is a method made to achieve “downscaling” in a few clicks. If you have a 1080p monitor and a GPU that supports DSR, DSR will render the game at 4k (for instance) then scale back the image to 1080p. The benefits are tremendous, since the rendered frame contains much more fine details per pixel and also eliminates most forms of aliasing. A sharper, cleaner and more detailed image – provided your GPU supports it & is capable of achieving the desired framerate and target resolution of course.
Here’s how to do it:
- Open the Nvidia Control Panel (NVCP). Right-click in an empty space on your desktop and select NVCP, or look for the Nvidia tray icon in your taskbar.
- From the left panel, click on “Manage 3D Settings”. Follow the screenshots below: click on “DSR – Factors” and enable the ones you want. A “Smoothness” setting, right under “DSR – Factors” will now be available. You may want to play around with this setting. It’s a gaussian blur filter paired with FXAA in a nutshell, so the higher the percentage, the more blurry the image will look and vice versa. When set to 0%, you’ll get a sharper image but you may encounter some aliasing or texture shimmering. If you’re unsure, use the default setting.
Now just launch the game, select the resolution you want and profit!
You can combine DSR, HBAO and even ReShade but this will definitely have a hit on performance. With a R5 1600X at 3.95Ghz paired with a GTX 1060 6gb, 4k provides a perfect 60fps experience with the LightMode preset and HBAO enabled.
Console commands is a debugging tool which allows you to explore different interesting options in the game. Free camera movement and one hit batarang kills are an example of what can be done.
Console Commands found by Youtuber MrJAG
A written tutorial may be made eventually, but we’d prefer not to make this guide too long.
Allows you to load the game at different saved points. Replay your favourite parts of the game whenever you want to.
By Youtuber MrJAG:
LINK TO SAVEFILES (files hosted by MrJAG)[batmanarkhamgames.forumofficiel.com]
vs. Return To Arkham
An interesting topic to discuss. We don’t own Return To Arkham, but a comparison may be made when the texture pack is complete. For now, lets list the advantages and disadvantages of both the PC version and the Return To Arkham version (console exclusive).
Advantages:
Rain
Almost every texture updated
More shadows
Higher overall polycountDisadvantages:
Changed art style
Limited to 1080p
Still uses original 720p cutscenes in some cases to save budget
Some graphical bugs
Inconsistent frame rates
Advantages:
Much higher resolution
4k cutscenes
60fps and beyond
Physx
Updated textures are sometimes higher in resolution
Console Commands
Any controller or K+M
Faster loadingDisadvantages:
Low quality distant island objects
No rain
GPUnity & Evergreen’s other mods
This guide is managed by both of us, but we both have mods of our owns!
[link]
Bonus : Arkham Knight Preset[www.nexusmods.com]
“You can also subscribe to my https://www.youtube.com/channel/UCL_-pwg6QbA5nD327B8Icww to always stay up to date with my latest content.”
Nexus Mods[www.nexusmods.com] – this is where I’m the most active. Mostly Resident Evil serie & MGSV mods, some more Far Cry 3/4/5 coming!
I’m also active on ModDB, but not much.
“I also have a https://www.youtube.com/user/MakuuSleepwalker/videos where I post everything from mod showcases, closed betas, gaming related tutorial and the occasional guitar cover!”
FAQ & Troubleshooting
Q: Will you add more to the guide?A: Over the course of months we should be updating the guide. Whether we find something new or update more textures.
Q: When is the next update?A: We’re working on it! Textures will take some more time, but we now have a Launcher replacement, as well as updated Reshade presets.
Q: When do you think you will be finished with the texture pack?A: GPUnity: Literally no clue. Do not be surprised if I take another year. As mentioned before I can be busy and i also never want to rush the texture pack. Each character texture can take up a few full days worth of work to properly update (and in rare cases, more than a month). If someone does want to help me, then they can message me on Steam.
Q: Can you add rain?A: EVERGREEN: This is unlikely, unfortunately. UE3 games are “cooked” before shipping by devs which locks out the Unreal Editor and most of the time the console as well. The rain IS present in the game, so if we had access to editor we could add it anywhere, create whole new levels and much more – but again, this is very unlikely because it would require very high programming skills. We’re in touch with people that could help to add rain as a new shader, but this is WIP.
However, it could be done through hex editing too. If anyone wants to give it a shot, please get in touch!Q: Why are you using Texmod? Why aren’t textures integrated into the game’s files?A: We have an update coming soon that will address this.
Troubleshooting:> PhysX/Ultra Preset tanks the framerate down, even on Nvidia cards.Change the Physx settings to medium, for a notable improvement in performance. The ultra preset in the launcher automatically enables high Physx. Dropping shadow resolution to 2048 will also help. The difference between 2048 and 4096 is small.
You can also state your GPU to us in the comments, we’re knowledgable with Nvidia GPUs. If you don’t know your specific GPU, check what the Advanced Launcher indicates at the bottom left.
Since we both have Nvidia GPUs, please give us feedback if you have an AMD GPU. We want the experience to be as smooth as possible for everyone.It may help to download and install the LEGACY software PhysX driver. It’s NOT the same as the one bundled with usual GeForce driver. Since this Legacy driver runs on CPU, GPU manufacturer doesn’t matter.
You can grab it here[www.nvidia.com].Dark Cutscenes with Reshade:This is a side effect of the MXAO shader. Will try to fix this. You can reduce the impact by lowering the MXAO ambient occlusion intensity (in the Reshade window) – or you can use Nvidia HBAO+ and disable MXAO.
Reshade flicker:Caused by TV sequences. I’m trying to fix it. Please switch to the light mode preset or toggle Reshade effects off during these segments.
Advanced Launcher:Q: “Unhandled Exception: NVAPI_ACCESS_DENIED” when using BmLauncher, how do I fix this?A: This may come from a faulty driver install or outdated drivers. You should uninstall your current NVIDIA drivers with DDU[www.guru3d.com]
Then, download the latest available driver from Nvidia’s website and install it.We’ve tested the tool thoroughly and haven’t bumped into any problems. Please ensure you followed the installation process carefully.
If you’re still experiencing an issue:
Report it here[github.com]
or add and message the tool creator.
Credits
CREDITS (alphabetical order):
Main:
Frofoo – Created the Advanced Launcher and processed 4k cutscenes.
(more important credits to add after latest update is released)
Additional:
Aemony – for introducing me to Steam guides.
brussell (reshade) – EyeAdaptation shader.
Crosire – Reshade lead developer.
Catspaw & Floobagop – for the Play As Joker mod (quote taken from forum) “Special thanks to catspaw for his outstanding modding work and to Floobagop for researching and documenting the Mac version of the game.”
CeeJay (reshade) – ChromaticAbberation and FilmGrain shaders.
hecumarine – responsible for Assassins Creed texture pack and gave me advice on texture packaging.
Loxa (reshade) – made the surface sharpen and diffuse glow shaders.
luluco250 (reshade) – for MBMB (mouse based motion blur) shader.
Marty McFly / Pascal Gilcher (reshade) – made MXAO shader.
MrJAG (youtube) – console command findings and save files + video tutorials.
Otis_Inf (reshade) – made MultiLUT shader (based on Marty McFly’s LUT shader). Also made CinematicDOF shader.
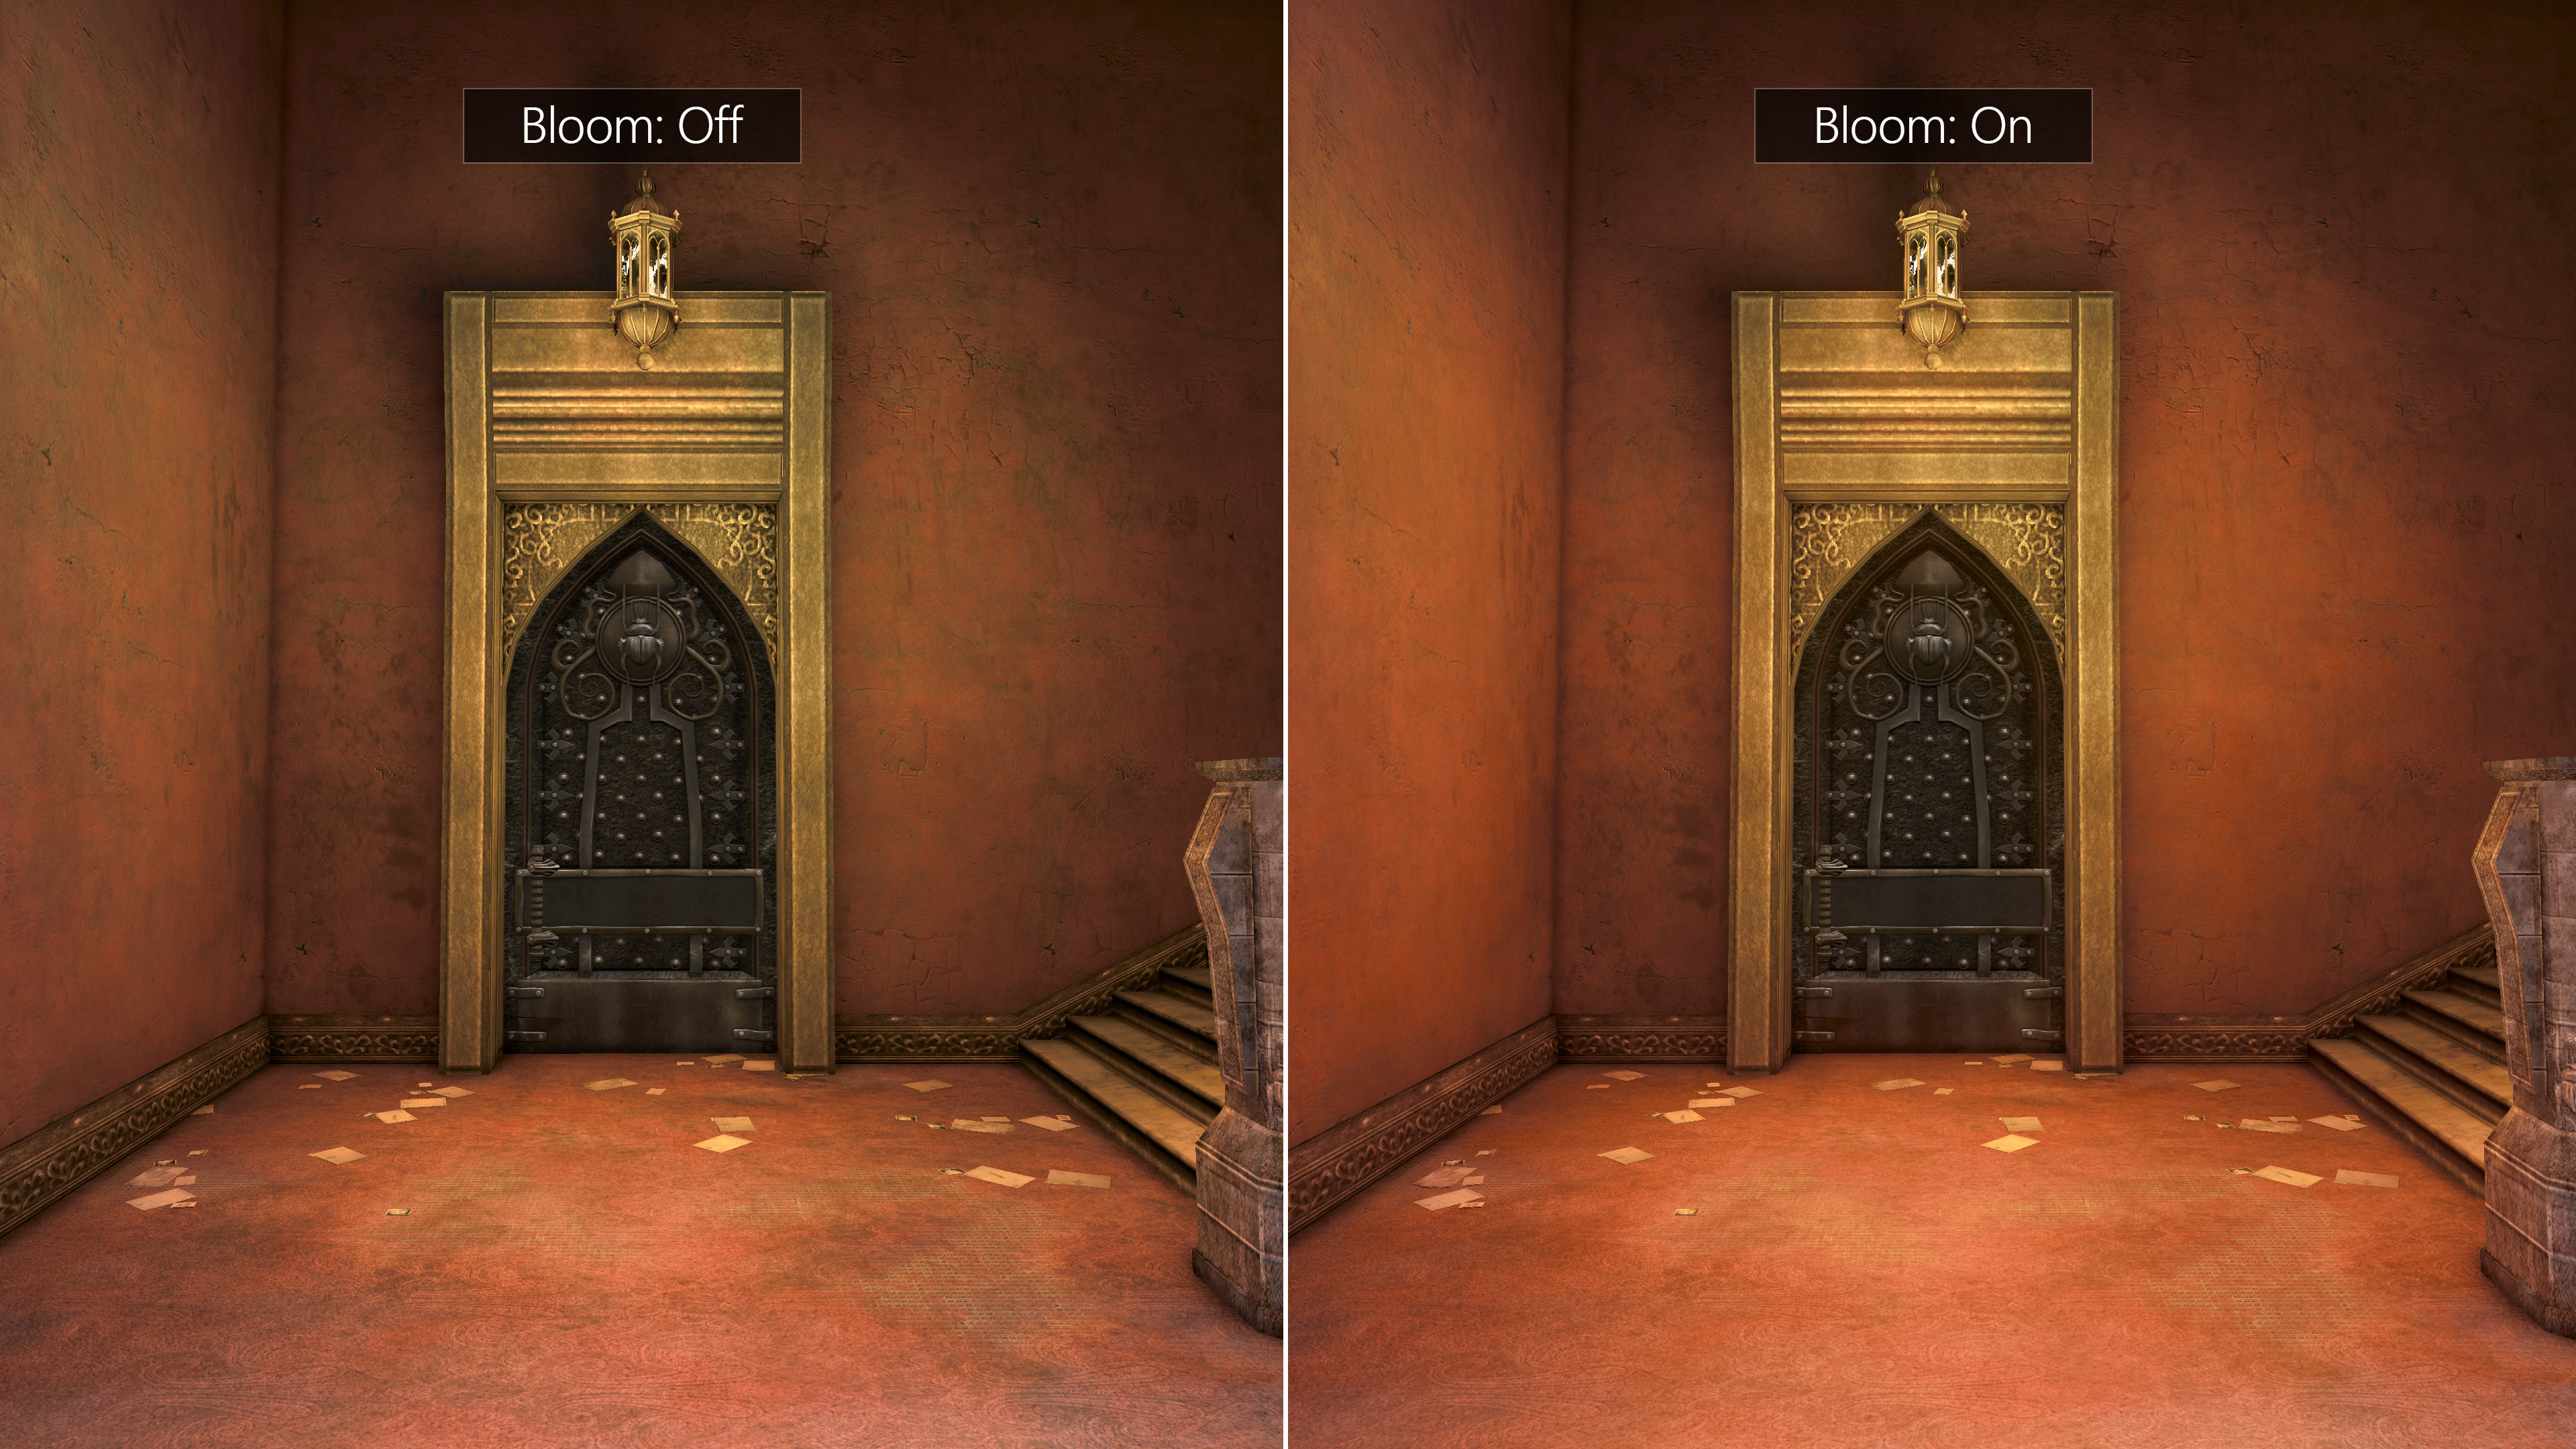
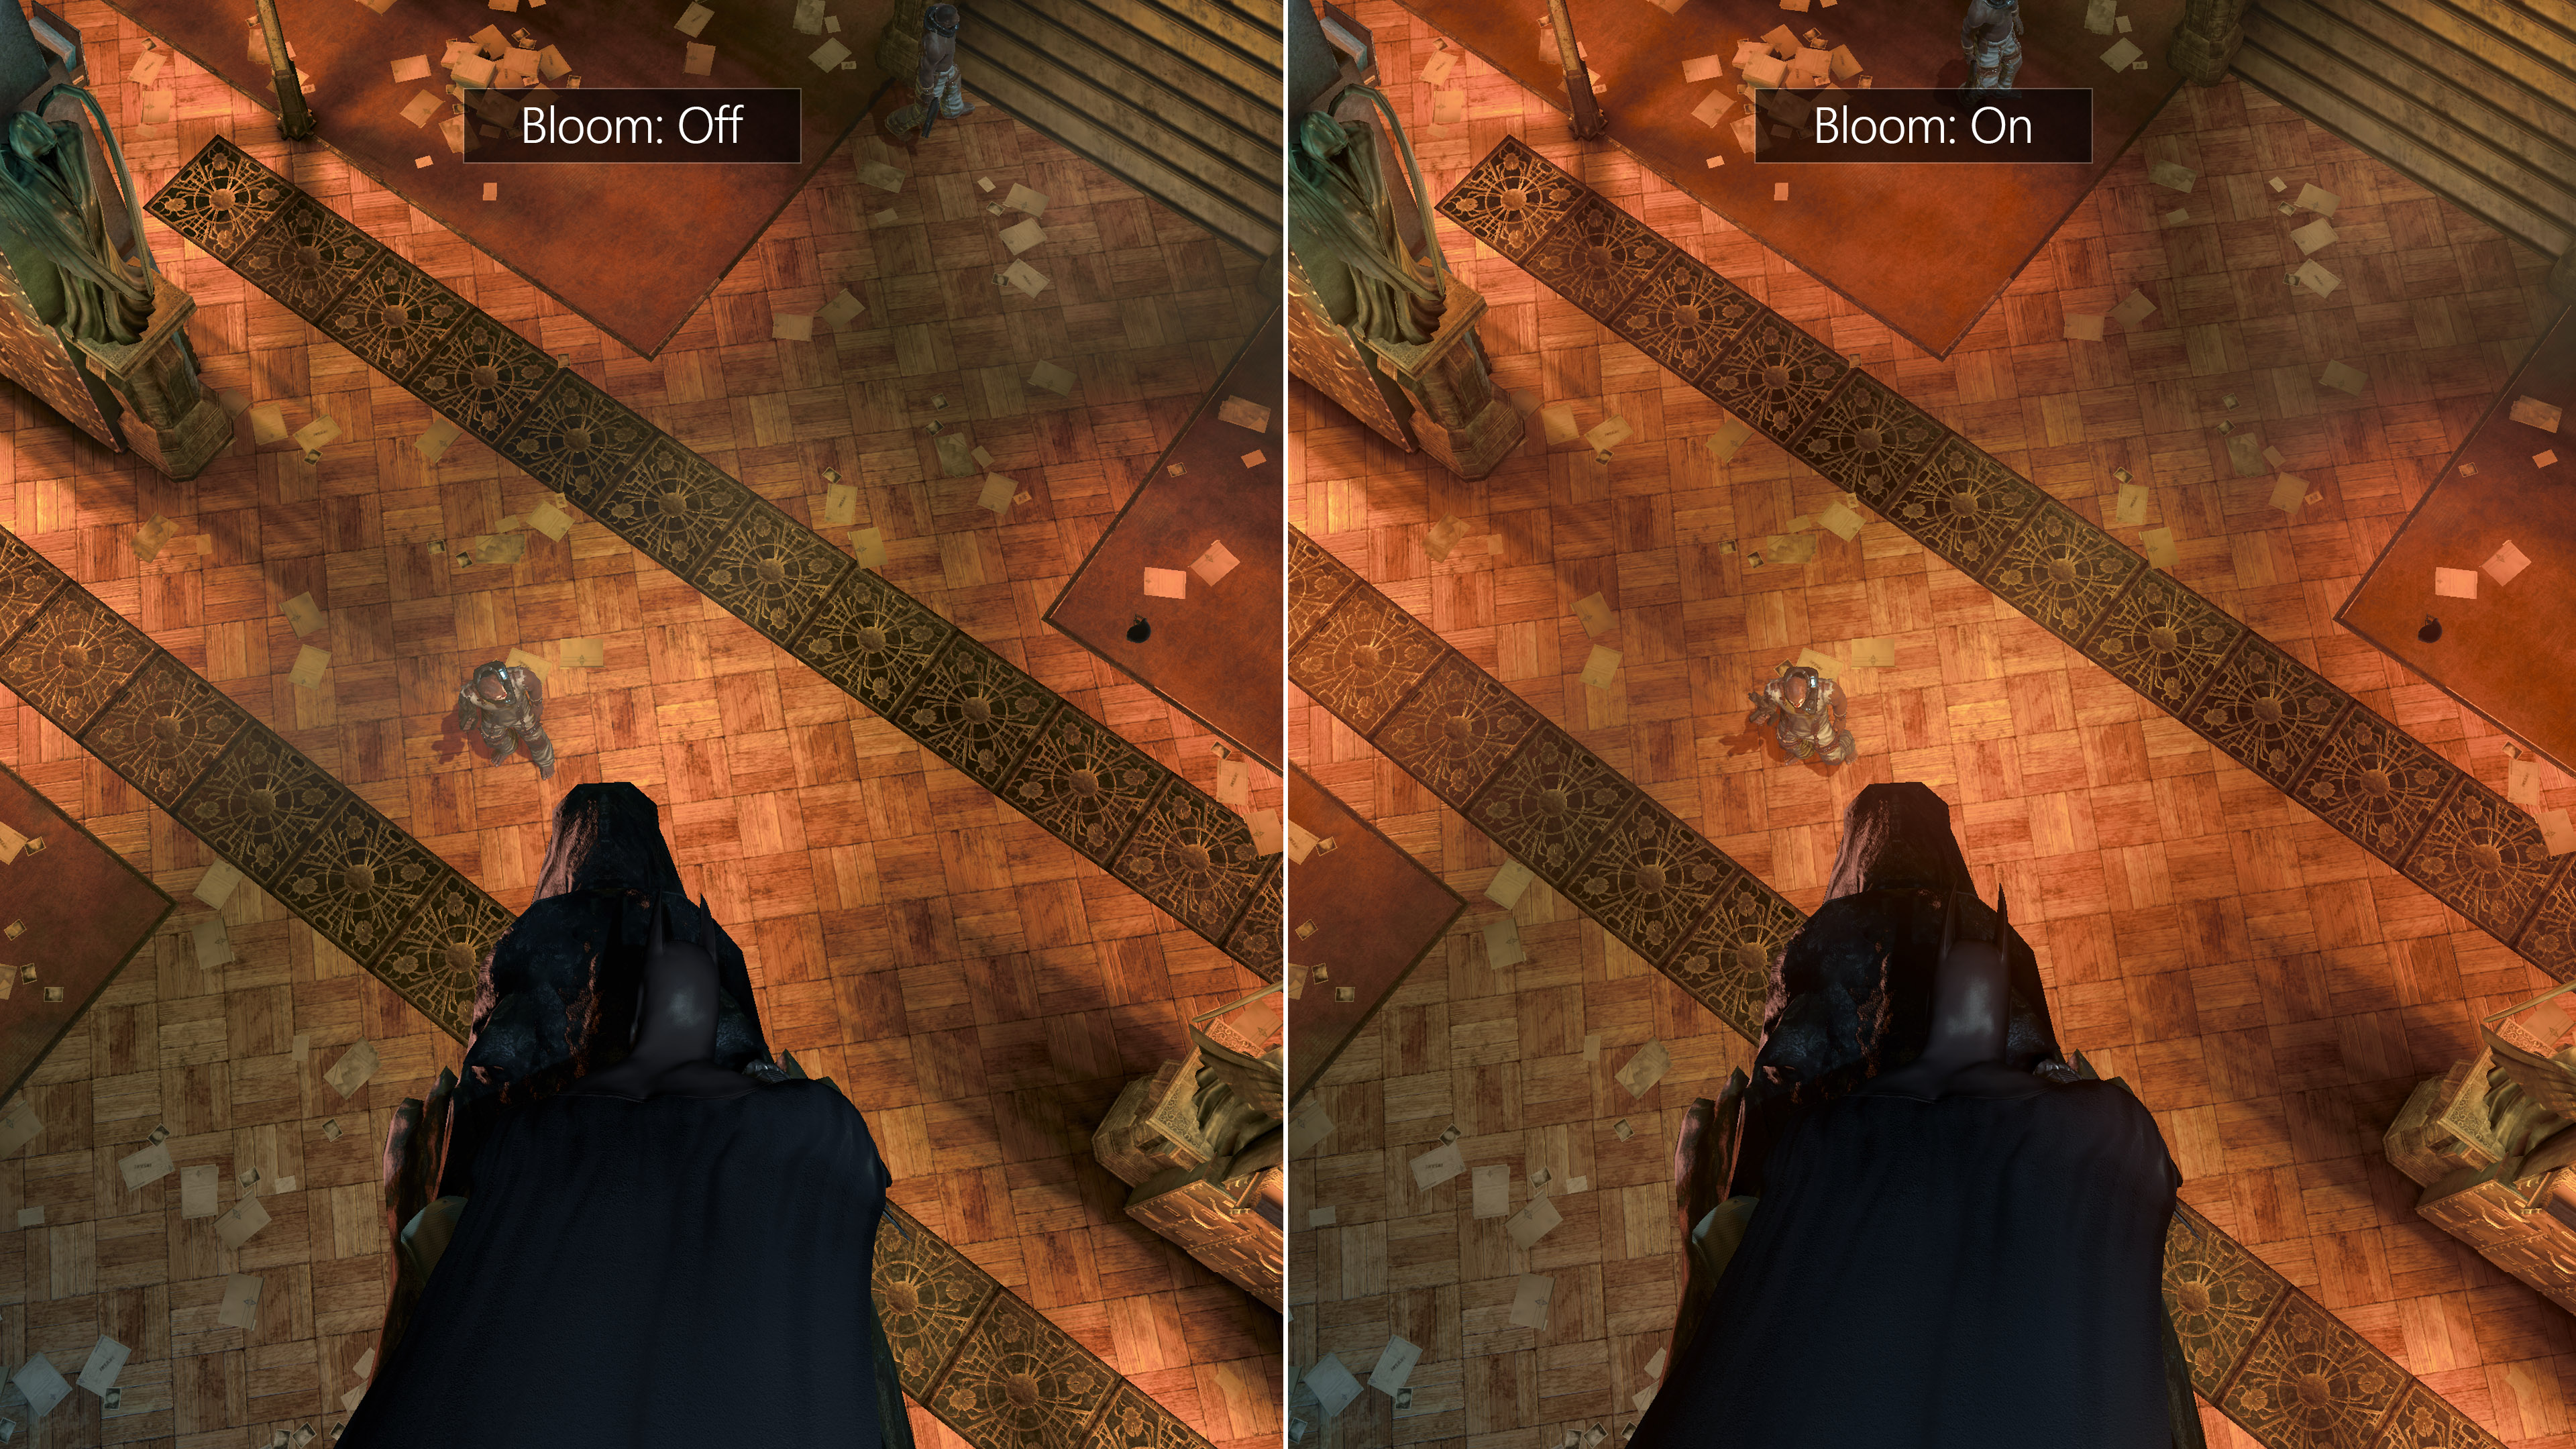
Pirate / PirateKitty(?) (reshade) – made Pirate_Bloom shader.
prod80 (Bas Veth) (reshade) – made PD80_06_Depth_Slicer shader- used to simulate fog.
Final Notes:
Asylum is under heavy progress right now. If you want to contribute to the mod, add me on Steam and message me for a Discord invite. I have opened a server for modding.