Heavy Assault Masterclass
Class Identity
Planetside 2 is a combined-arms, class-based game: each class fulfills a specific function that is determined by their equipment and abilities, and it gives them identity and a role that they play for their team.
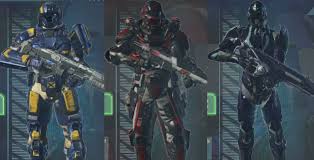 Then you look at the Heavy Assault (HA), and on close inspection it seemingly lacks identity. Perhaps you looked at it and thought this: "Heavy Assaults just kill things." I asked some players what they thought the role of Heavy Assault was prior to writing this guide, and that was the exact answer I received. But all classes kill things: that can't really be HA's entire class identity, can it? I believe that this perception is a superficial understanding of the Heavy Assault, and in this guide I would like to dispel the notion that Heavy is the mindless killing class of Planetside 2 by fully examining the unique role it plays in combat.
Then you look at the Heavy Assault (HA), and on close inspection it seemingly lacks identity. Perhaps you looked at it and thought this: "Heavy Assaults just kill things." I asked some players what they thought the role of Heavy Assault was prior to writing this guide, and that was the exact answer I received. But all classes kill things: that can't really be HA's entire class identity, can it? I believe that this perception is a superficial understanding of the Heavy Assault, and in this guide I would like to dispel the notion that Heavy is the mindless killing class of Planetside 2 by fully examining the unique role it plays in combat.Core Role
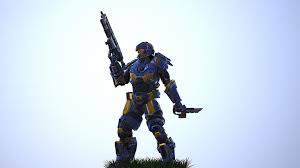 The Heavy Assault has an unspoken and subtle role that many people do not consider, but this role is why numerous veteran players identify the class as a means to achieve maximum impact. It is why so many players, when the base is about to fall and you have just under a minute to recap the point, rush to the terminals and grab their LMGs. The Heavy Assault's true purpose is this: survive to complete the mission. That sounds basic, I know, and all classes should strive for that goal. One could argue, even, that the MAX unit does it better, but allow me to illustrate how this purpose is applied to the Heavy Assault in a unique way that sets it apart from other classes.
Momentum / Sustained Combat
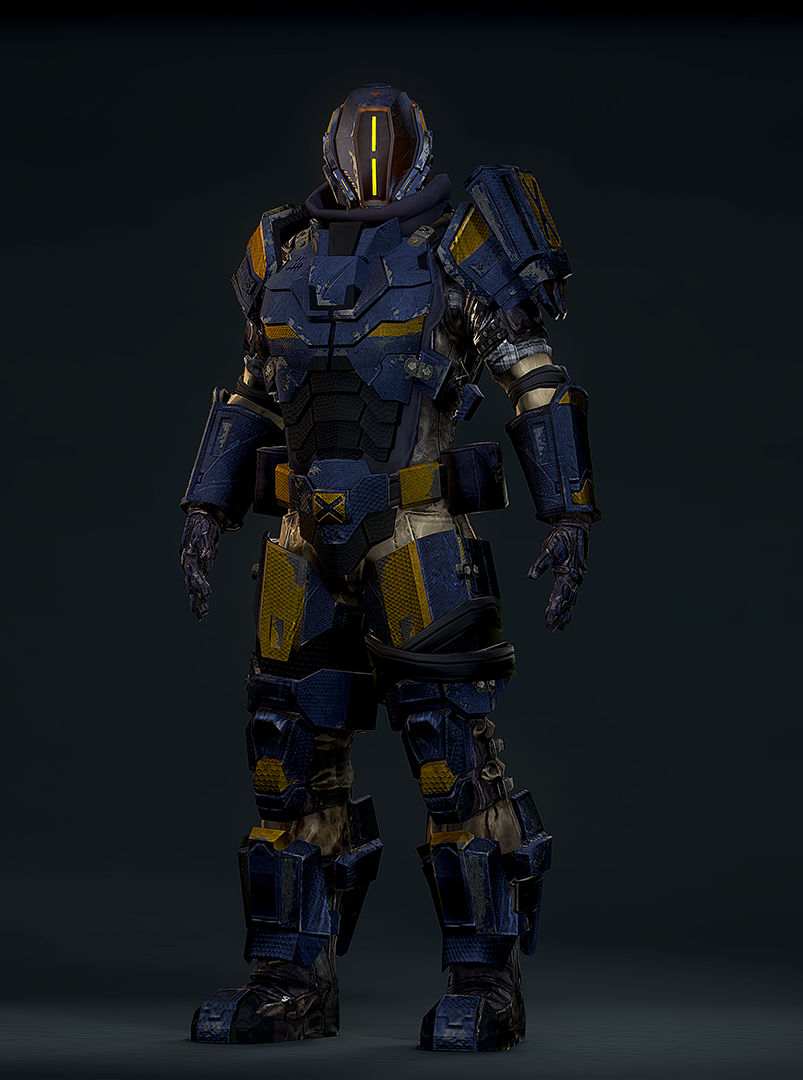 Momentum is the ability of a class to continue fighting without pausing. If you play enough of Planetside 2, you will quickly recognize how frequently momentum halts. You take too much damage and need to retreat mid-firefight, or you score a kill but have to hide while you reload. It happens a lot.
Many of the Heavy Assault's features seem to be specifically designed to counteract this and mitigate momentum loss during the flow of battle. Their overshield increases their health, and some of their shield options reactivate quicker on killing opponents, or do not wear out from taking damage. Rank 5 nanoweave armor, which is unlocked for the class by default, heavily increases their resistance to bullets (small-arms excluded). In addition, their high-capacity LMGs will not need to reload even after several kills. Because of this combination of abilities and weapons, HAs are more durable than other classes and can often power through multiple fights in a row without stopping to heal or reload. This is a trait which other basic infantry cannot imitate without great effort and skill.
Independence
Most classes need the assistance of support classes as fights drag on: they need medics to patch them up when they're hurt and Engineers to provide them with ammunition and cover. Heavy Assaults, however, can exercise a surprising amount of freedom and solidarity and still function well. Their LMGS have hundreds of rounds of ammunition in reserve, meaning that they rarely need ammo packs from Engineers, and their aforementioned durability means they don't have to rely on Medics, either. In addition, their rocket launcher enables them to deal damage to any opponent in the game, so they are a particularly fierce threat to MAX units vehicles. As a result, Heavies can comfortably split away from the main force and accomplish most tasks without any help.Objective King
All of these features make the Heavy Assault an incredible choice for accomplishing objectives. It possesses few discernible weaknesses, and boasts ridiculous strengths. Some classes simply have no tools to complete specific missions, but the Heavy Assault's equipment options enable it to accomplish any primary objective. In almost any situation, one could make a good argument as to why you should pick Heavy Assault.The MAX Comparison
A comparison should be made between the HA and the MAX: is this class just a worse MAX? MAXs are often used in a similar capacity to Heavy Assaults, so it's important to discern their differences.The MAX has some incredible strengths. It comes with natural-small arms resistance and a higher health pool, making it the most durable infantry class in the entire game. MAXs use two akimbo primary weapons and can equip anti-vehicular weaponry, providing them with unmatched damage output against any type of target.
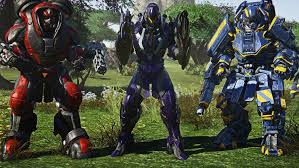 These benefits come at a steep price, however. MAXs have a nanite cost to pull them, and an extremely expensive one at that. They are slow to move and to jump, cannot capture points, and cannot be gunners for vehicles. MAXs can only be healed by Engineers; they take an extremely long time to revive after death, and cannot be raised with revive grenades. Their primary weapons are powerful, but individually have lower DPS - MAXs often pick the same weapon twice so they can increase their effectiveness against a specific enemy type, and lose the ability to effectively hurt other types of opponents as a result. These guns usually lack significant ammo reserves, making the MAX extremely reliant on the presence of Engineers to continue fighting. In summation, MAX units have many important weaknesses that reign in their power and make them dependent on allies to work optimally.
Heavy Assaults possess some similar strengths to the MAX suits: they are durable, make excellent point holding units, and boast strong firepower against all enemy types. They do this to a much lesser degree, but they also lack almost all of the MAX's weaknesses. They can hurt any type of target without reducing their DPS, and can perform all infantry related tasks. Their abilities lend towards independence and unilateral operation, the exact opposite of the MAX, and this gives them an entirely different method by which they operate.
In short, Heavy Assault is a much more flexible and independent class than the MAX, and it would be a mistake to view it as a just a weaker, cheaper MAX unit. The MAX is a specialized tool, and it will not transition from one task to another easily or quickly. While it is deadly, its numerous limitations tether it to allied groups. Heavy Assaults cannot equal the raw power of the MAX, but they are completely free of restraints. Even though these classes can perform some of the same tasks well, they are not designed to do them in the exact same ways.
A Predatory Mindset
Because of this class's heightened potential and capabilities, you need to adopt a different mentality while playing it. This is the mindset: "I have teeth." When other classes see a Main Battle Tank (MBT), they scatter and run. This same is often true when encountering MAX units in CQC: if one rounds the corner, most basic infantry bolt for cover or vacate the premises altogether. But you are the HA: you have the tools to kill literally any opponent in the game. Your primary weapon has enough potential damage in the magazine to kill scores of infantry, and can grievously wound or destroy any lightly armored vehicle. Your rockets can harm heavy armor and can devestate MAX units. Unless it's a Bastion Fleet Carrier hovering in the skybox, you can bite back: you are never toothless. To get the most out of the Heavy, you have to internalize that everyone is your potential kill.
 I am not referring to mindless aggression: against a more skilled opponent, superior numbers, extreme distance or an armor column, you must adjust so you can secure the kills and survive. A lone wolf is dangerous, but it shouldn't attack an elephant head on. This mentality is one of constant and controlled aggression: you are not the prey, they are. You have the potential to hurt them, you just need the right moment to do so. Wait for that moment or try to engineer it yourself.
To sum up by way of example, if you are attacking or defending a point, the goal is to capture and hold the point, not just kill the people near it and die yourself. If the objective is to kill a Sunderer, your goal is to kill the Sunderer, not necessarily the players coming out of it. The Sunderer is your primary objective: if the sunderer is alive and deployed, you haven't won yet. This is why survival is secondary behind the main mission: it is often necessary to accomplish A, like in a point hold, but it is possible to complete some objectives simultaneously as you die or from beyond the grave, like destroying a Sunderer. Finally, killing players is necessary for maintaining objectives A and B: your higher goals often require that they die, but keeping it as the bottom priority will hold you back from recklessly endangering yourself or the mission by chasing kills that are not essential. This is not to say that you should develop tunnel vision, but rather that you learn to identify what is essential and what is not.
I am not referring to mindless aggression: against a more skilled opponent, superior numbers, extreme distance or an armor column, you must adjust so you can secure the kills and survive. A lone wolf is dangerous, but it shouldn't attack an elephant head on. This mentality is one of constant and controlled aggression: you are not the prey, they are. You have the potential to hurt them, you just need the right moment to do so. Wait for that moment or try to engineer it yourself.Priorities
It is imperative that you maintain control. A major reason that Heavy Assaults fail tactically in fair combat conditions is that they lose sight of their goals, putting themselves in needless danger to accomplish less important tasks. Here is an order with which you can prioritize your objectives:- Primary (A): Complete the mission. Primary objectives constitute things like "capture C point and hold it," or "destroy the Sunderer to the North." They are static goals that become more or less important in the course of a fight, but do not change without intervention from players.
- Secondary (B): Stay alive. You must stay alive to accomplish objective A: you are not allowed to die until objective A is complete, though you may put yourself into a situation where you will not survive afterwards (a kamikaze attack).
- Tertiary (C): Kill the enemy players. This is the "fun" part of the game, but is actually the least important tactical goal. It is only valuable to the extent that the enemy is trying to stop you from completing your primary and secondary objectives, and should always be sacrificed if fulfilling it prevents you from completing objectives A and B.
To sum up by way of example, if you are attacking or defending a point, the goal is to capture and hold the point, not just kill the people near it and die yourself. If the objective is to kill a Sunderer, your goal is to kill the Sunderer, not necessarily the players coming out of it. The Sunderer is your primary objective: if the sunderer is alive and deployed, you haven't won yet. This is why survival is secondary behind the main mission:
it is often necessary to accomplish A, like in a point hold, but it is possible to complete some objectives simultaneously as you die or from beyond the grave, like destroying a Sunderer. Finally, killing players is necessary for maintaining objectives A and B: your higher goals often require that they die, but keeping it as the bottom priority will hold you back from recklessly endangering yourself or the mission by chasing kills that are not essential. This is not to say that you should develop tunnel vision, but rather that you learn to identify what is essential and what is not.
Choosing Loadouts
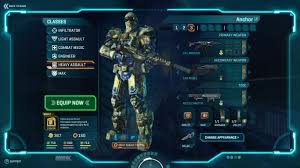
Your loadout defines the method by which you'll accomplish goals, and is one of the most important aspects of playing the Heavy Assault well. Effective use of your loadout can cause what is ordinarily an even match-up to become wildly distorted in your favor, and it is important to recognize the factors that make this so.
Objective A is the mission. All other considerations are simply to facilitate this one goal. Anything you bring that is not directly contributing this goal in the other considered categories might be superfluous and hold you back.
Opposition and the composition of the enemy force is important because you must have the tools required to deal with objectives B and C: surviving and killing players. Some Heavy Assaults equip poorly for this task and severely weaken themselves against what the enemy has brought. You must bring guns and upgrades that can kill your opponents well while defending you from their biggest threats. You can specialize to hurt specific opponents more, but doing so will make your strategy more rigid and inflexible, and might make you dependent on allies to cover your weaknesses.
Population Size is determined by two factors:
 Both have considerations. If you are facing numerous enemies, a high magazine size can help you fend off multiple opponents without needing to reload. If you have few allies, however, a fast reload time is helpful for making you less vulnerable: allies represent suppressing fire that can cover you while you're in your reload animations. High DPS is needed to stay competitive in 1v1 scenarios, but often comes at a price in some regard or another. It is up to you to determine which traits will help you the most in each situation.
While Location is the last thing you consider, this is the one that probably takes the most careful planning because it bears some of the most severe consequences in combat. Choosing the wrong gun for your fight can utterly ruin your chances of survival: if you bring a shotgun to an open field battle with limited cover, you will die and do almost no harm to the enemy before you go. Location can be subdivided into 2 factors:
 For cover, consider terrain, buildings, and vehicles, bearing in mind where you are ultimately trying to go. Am I planning on going inside a building to fight? If so, want to have a gun that can at the very least transition into a CQC environment. Am I staying in the open field? I need to bring something that can fight effectively at range. Is there ample cover to hide behind? I can take a gun with a heavier reload time. Do I have to move a lot to stay safe? I need a gun that has lower reload times so I'm not stuck in lengthy reload animations.
In short, the loadout must meet your expected needs. These adjustments will optimize you for your fight and make your engagements naturally favor you.
Pre-Battle Analysis
When choosing a loadout, there are 4 major points you must consider before you leave the terminal:- Objective A
- Opposition
- Population Size
- Location
Objective A is the mission. All other considerations are simply to facilitate this one goal. Anything you bring that is not directly contributing this goal in the other considered categories might be superfluous and hold you back.
Opposition and the composition of the enemy force is important because you must have the tools required to deal with objectives B and C: surviving and killing players. Some Heavy Assaults equip poorly for this task and severely weaken themselves against what the enemy has brought. You must bring guns and upgrades that can kill your opponents well while defending you from their biggest threats. You can specialize to hurt specific opponents more, but doing so will make your strategy more rigid and inflexible, and might make you dependent on allies to cover your weaknesses.
Population Size is determined by two factors:
- Number of Allies
- Number of Enemies
Both have considerations. If you are facing numerous enemies, a high magazine size can help you fend off multiple opponents without needing to reload. If you have few allies, however, a fast reload time is helpful for making you less vulnerable: allies represent suppressing fire that can cover you while you're in your reload animations. High DPS is needed to stay competitive in 1v1 scenarios, but often comes at a price in some regard or another. It is up to you to determine which traits will help you the most in each situation.While Location is the last thing you consider, this is the one that probably takes the most careful planning because it bears some of the most severe consequences in combat. Choosing the wrong gun for your fight can utterly ruin your chances of survival: if you bring a shotgun to an open field battle with limited cover, you will die and do almost no harm to the enemy before you go. Location can be subdivided into 2 factors:
- Engagement Range
- Available Cover
For cover, consider terrain, buildings, and vehicles, bearing in mind where you are ultimately trying to go. Am I planning on going inside a building to fight? If so, want to have a gun that can at the very least transition into a CQC environment. Am I staying in the open field? I need to bring something that can fight effectively at range. Is there ample cover to hide behind? I can take a gun with a heavier reload time. Do I have to move a lot to stay safe? I need a gun that has lower reload times so I'm not stuck in lengthy reload animations.In short, the loadout must meet your expected needs. These adjustments will optimize you for your fight and make your engagements naturally favor you.
Arsenal: Weapons
As you are upgrade your Heavy Assault, it is important to fill in gaps in your arsenal. Developing your loadouts should involve careful consideration so you do not waste your hard earned certs: you must consider what it is that you generally need to do and try to find good weapons that will serve you well in each strategy. As a general rule, new weapons are side-grades as opposed to straight upgrades, and they allow you to become more dominant in specific situations at the cost of a weaker impact outside of their intended use.
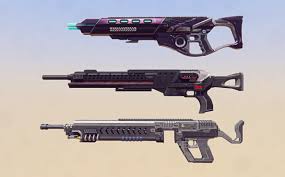
If all of your guns have high reload times, picking up a gun with a lower time to reload will give you that option if a battle gives you more opportunities to recover and top off your magazine. Guns like this are valuable in small fights where you need to be more independent and lack support from allies, as the faster reload means you will spend less time in a vulnerable reload animation where you can't fight back.
High magazine size guns are valuable in large fights where you have allies to cover you as you reload. Needing to reload less frequently means you will have more up-time as you fight, and will allow you to chain many kills together. Conversely, low magazine size weapons often give some sort of benefit to counteract having fewer rounds in the magazine, often in reload speed, hipfire, and DPS (Damage Per Second).
As a general rule, high RPM weapons are better in CQC (Close Quarters Combat). The closer the enemy is, the more that a high-firerate weapon will benefit you. The further away your opponent is, the more you can get away with lowering your firerate in exchange for increased damage or accuracy.
You may decide that getting an under-performing but good all-around weapon will serve you best: this is viable and inexpensive, but requires you to have excellent aim. Your gun's stats will be below average, so your Time To Kill (TTK) will suffer and be higher than that of an optimized gun.
The effectiveness of any given gun can be determined by comparing its stats to other available options and looking at the environments it will be optimized for. You should research the use of every weapon before you purchase it. Experiment with it in the training room to understand how it works, performs, and the ranges and situations it might be useful for.
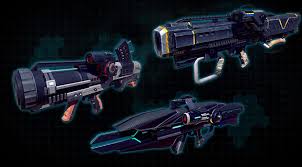 By default, HA's come equipped with a dumb-fire rocket launcher. It is acceptable to keep it this way, but the first recommendation I always make is to unlock your faction specific ground-to-air launcher with dumb-fire capabilities. This is the most flexible rocket launcher for your Heavy Assault loadout: it gives you a meaningful and consistent anti-air option, but it retains flexibility by allowing for dumb-fire against infantry and vehicles. It is a MUST have option for Heavy Assaults, and besides the medkit is the most important upgrade in the early stages of your loadout development.
The Decimator is the next most important tool option. The Decimator's explosive payload is incredibly high, and enables you to kill infantry with one direct hit. It devestates MAX units and vehicles as well; it can kill a MAX in two to three shots, and can even drop an ESF with a single rocket. It has a higher reload time and slower muzzle velocity than the default launcher, but with good aim it will yield better results.
All other rocket launchers are optional, and are probably even superfluous choices. Pick them up to adjust your playstyle against different types of opponents or simply for fun, but don't consider them necessary.
Primary
Heavy Assault weaponry is diverse, and they have an LMG for almost every situation. Each faction's starting LMG is one of the best-in-class, and is more than serviceable, but there are important factors you should account for when purchasing new LMGs.- Damage Model/Dropoff
- RPM (Rounds Per Minute)
- Magazine Size
- Reload Speed
- Recoil
- ADS and Hipfire Accuracy
- Cone of Fire/Bloom
- Attachment Options
If all of your guns have high reload times, picking up a gun with a lower time to reload will give you that option if a battle gives you more opportunities to recover and top off your magazine. Guns like this are valuable in small fights where you need to be more independent and lack support from allies, as the faster reload means you will spend less time in a vulnerable reload animation where you can't fight back.
High magazine size guns are valuable in large fights where you have allies to cover you as you reload. Needing to reload less frequently means you will have more up-time as you fight, and will allow you to chain many kills together. Conversely, low magazine size weapons often give some sort of benefit to counteract having fewer rounds in the magazine, often in reload speed, hipfire, and DPS (Damage Per Second).
As a general rule, high RPM weapons are better in CQC (Close Quarters Combat). The closer the enemy is, the more that a high-firerate weapon will benefit you. The further away your opponent is, the more you can get away with lowering your firerate in exchange for increased damage or accuracy.
You may decide that getting an under-performing but good all-around weapon will serve you best: this is viable and inexpensive, but requires you to have excellent aim. Your gun's stats will be below average, so your Time To Kill (TTK) will suffer and be higher than that of an optimized gun.
The effectiveness of any given gun can be determined by comparing its stats to other available options and looking at the environments it will be optimized for. You should research the use of every weapon before you purchase it. Experiment with it in the training room to understand how it works, performs, and the ranges and situations it might be useful for.
Secondary
Your LMG is your primary kill tool, and if the secondary is being pulled out it is most often to defend yourself from an unexpected attack while you are going through a reload animation. For this reason, high DPS is the most important feature of a Heavy Assault's secondary weapon. Pick guns that have high damage output and learn to switch to them if you are caught reloading.Tool
By default, HA's come equipped with a dumb-fire rocket launcher. It is acceptable to keep it this way, but the first recommendation I always make is to unlock your faction specific ground-to-air launcher with dumb-fire capabilities. This is the most flexible rocket launcher for your Heavy Assault loadout: it gives you a meaningful and consistent anti-air option, but it retains flexibility by allowing for dumb-fire against infantry and vehicles. It is a MUST have option for Heavy Assaults, and besides the medkit is the most important upgrade in the early stages of your loadout development.The Decimator is the next most important tool option. The Decimator's explosive payload is incredibly high, and enables you to kill infantry with one direct hit. It devestates MAX units and vehicles as well; it can kill a MAX in two to three shots, and can even drop an ESF with a single rocket. It has a higher reload time and slower muzzle velocity than the default launcher, but with good aim it will yield better results.
All other rocket launchers are optional, and are probably even superfluous choices. Pick them up to adjust your playstyle against different types of opponents or simply for fun, but don't consider them necessary.
Melee
The basic knife is perfectly serviceable, and needs no upgrade. In most instances, purchasing a new knife is detrimental because it will reduce your quick-melee damage, which is the way you will most frequently use it.
Arsenal: Ability, Suit, Grenade, and Utility
Ability
All Heavy Assault overshields slow the Heavy down while they are deployed, and will deplete in energy over time. They have unique traits that are all worth considering, and as of now all have their niche.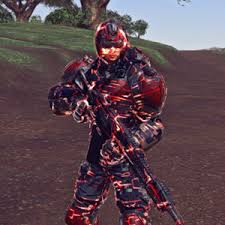 Nanomesh Shield
The Nanomesh Shield Generator is the default shield option - it gives 450 extra health which replenishes itself automatically while not engaged, and has a shorter time to replenish than any other shield option. It can be used reactively after a fight has already started, and is great when you have good cover to protect you while you regenerate. The Nanomesh Shield takes damage on hit.
Adrenaline Shield
The Adrenaline Shield gives 450 additional health, and replenishes a percentage of its energy when you kill an opponent. It naturally recovers energy when not in use, albeit at a much slower rate than Nanomesh. This is a much more aggressive shield than the Nanoweave Shield: it forces the player to land the killing blow on opponents to reap its full benefits, and punishes hiding to recover with its long recharge time. The Adrenaline Shield takes damage on hit.
Resistance Shield
The Resistance Shield provides a flat 35% resistance to all damage, and the shield's energy does not deplete with damage. The resistance it provides does not stack with resistances from any other source: make sure you take nothing else that provides damage resistance when wearing this. This shield is excellent, but it has to be used proactively: any damage you take prior to activating it will reduce the value you would have otherwise gained from taking it, and activating your shield after the fact will not gain that value back. This shield opens up your suit slot since your resistance armors don't work with it, and pairs nicely with Grenade Bandolier and Advanced Shield Capacitor.
Suit
Suit options for the Heavy Assault are varied, and are largely based on opponent composition and terrain. I will only cover the ones that I think benefit the HA in an extreme way.Nanoweave Armor
Nanoweave Armor provides a 20% resistance to sniper rifles, and increasing its rank adds additional classes of guns that the resistance is applied to. Nanoweave for HAs is max rank by default, and is a great option for people on a low budget or who just don't know what to bring to a fight, particularly if it is in the open field. It only works, however, if the bullets strike your body: heashots will ignore Nanoweave resistance completely. Nanoweave Armor will not stack with other forms of resistance.
Flak Armor
Flak Armor provides a 20% resistance to explosives, and includes more kinds of explosives with each progressive rank. It is extremely useful when you are being shelled by vehicles with HE ammunition. It is also valuable when you are defending a room and are holding doors: infantry will often throw grenades through doorways to clear them, and flak armor can potentially save your life in this scenario. Flak Armor will not stack with the Response Jacket implant: do not equip them together.
Grenade Bandolier
Useful if you are attacking point rooms in buildings. All of the Heavy Assault grenades benefit from having more of them, particularly the Concussion Grenade.
Advanced Shield Capacitor
Advanced Shield Capacitor allows your shields to start recharging 1 second sooner, and to regenerate up to 50% faster at max rank. This is ordinarily a somewhat weaker option for Heavy Assaults because it contradicts a lot of their built in advantages - it wants you to hide and recover whereas the rest of your kit generally wants you to push aggressively. The resistance from the Nanoweave and Flak armors is often too good to pass up, but the Resistance Shield provides the luxury of picking this option without sacrificing that crucial damage reduction. It gains the best of both worlds, but it comes at the risk of punishing the reactive use of your shield.
Grenade
Heavy Assaults can access four grenade types:
- Frag Grenade: a high explosive option for hurting infantry and destroying deployables. It boasts a large explosion radius, but has significant damage dropoff towards the edges of that radius. It is the default grenade and is a good all-around anti-infantry option.
- Concussion Grenade: a crowd-suppression grenade that blurs vision, numbs hearing and decreases mouse sensitivity. It will invert an opponent's controls if they're still under the effects of a previous concussion grenade. This stands out as being particularly strong compared to the other grenade options in infantry fights.
- Anti-Vehicle Grenade: an explosive grenade designed to hurt MAXs and vehicles. It magnetizes to machines when it comes into contact with them. It stands out as a particularly niche and weak grenade option in most circumstances, and does lackluster damage.
- Havoc Grenade: a grenade that disables mechanical repairs for 6 seconds. Use it when MAX units and Engineers are plentiful.
Utility
Medical Kits / Restoration Kits Medical Kits are likely the most important utility option for Heavy Assaults. Using one will heal you to full health instantly: they will help you regain momentum quickly when you are low, and can allow you to survive when you are retreating while under fire. The Medical Kit is the start of your ability to operate independently on the battlefield for long periods of time: unlocking at least 1-2 of them should be a high priority.
I do not recommend Restoration Kits on Heavy Assault because they are slow acting: while they will give you sustain in a fight, they only work on your health bar, not your shield, so the additional time it takes to reach full health compared to the Medical Kit makes it more dangerous to use. It takes a niche build to make them work, utilizing either the Resistance Overshield or the Carapace implant. It is not generally worth your effort to unlock multiple Restoration Kits unless you have one or both of those upgrades.
C4
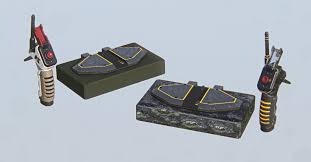 C4 is niche choice for Heavy Assaults. Their rocket launchers are already very powerful and effective at dealing with vehicles, even from a distance. C4 demands that you get close to target, takes time to prime, and deprives you of the sustaining power of Medkits. It has incredible power against MAX units, can be used to make traps, and deals much more damage in a shorter time than rockets. It should be used situationally, and not as a general rule unless you are surrounded by Combat Medics or have a loadout designed to compensate for the lack of Medkits.
Arsenal: Implants
Because of the class's innate flexibility, Heavy Assaults can make good use of most good use of most implants in the game in the right circumstances. Generally helpful implants for the HA include but are not limited to:
- Symbiote
- Firestorm
- Bionics
- Carapace
- Assimilate
- Regeneration
- Battle Hardened
- Enhanced Targeting
- Ocular Shield
- Nanomesh Specialist
- Athelete
- Survivalist
Tactics and Application
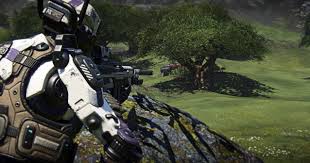 The gear enables the Heavy Assault to accomplish almost any task. Let us now move on to methodology with which to use it. We'll break methodology into two parts: assessment, and tactics.
Assessment
When assessing a fight, take it step by step and do it from a safe location or from the respawn screen so you are not under pressure to fight.
- Establish Objectives
- Adjust Loadout
- Execute Strategy
Tactics
Tactics are executed adjustments to the plan that occur on the battlefield rather than in the spawnroom, and are the strategy with which you accomplish your goals. We will focus exclusively on objectives B and C here, as tactics for objective A are so wild and varied that it would take a whole separate guide to discuss them.
Objective B: Survival
Not an exhaustive list, but here are some things to remember to do during the flow of combat that will help you live long enough to complete your objectives.
- Always remember to activate your overshield when taking fire. Even if it is low on energy: whatever little energy you have left in your shield may be the difference between life and death. This is especially crucial for Resistance Shield users, who need to activate before they ever take damage for their shield to work. The only circumstance that you should not do this is if you asses that movement speed is more important than your remaining health pool for your survival.
- Retreat liberally at medium to long range. This may seem cowardly, but you are not truly running from the fight: you are dictating the terms of engagement. If the enemy is winning, reset the fight to the best of your ability so you can start the fight again in a way that favors you. Look for allies or an exit, start popping Medkits as fast as they reload, or weave and use cover. Jumping into turrets and allied vehicles can often protect you as well. Do whatever you have to do to keep your health total above zero while you get yourself to safety. Sometimes this is not an option and you will have to slug it out, but if you can, hide.
- DON'T run when losing 1v1 CQC fights. When the enemy is only feet away from you and you are not near cover or an exit, do not even bother attempting to run away. Your sprint animation will disable your weapon, making you harmless, and your direction will be predictable because you will be moving away to an obvious place of safety. Instead, if desperate for your life, weave in an erratic zig-zag pattern toward your opponent, using your guns + quick melee or a wielded melee weapon to try and score the kill. If you are very close to cover and have allies or an escape route just beyond it, it may be safer to retreat, but aggressive foes will chase you and likely kill you if you can't lose them.
- Assess the enemy's aim. If an enemy gets the jump on you but is taking a long time to kill you and you are a good shot, it is sometimes worth trying to outgun the opponent rather than retreating. This is the primary response of players with good aim, but this strategy is a huge gamble if the enemy is of equal or greater skill. If they do bad initial alpha damage, this may be worth it, but make your assessment very quickly.
- Don't fight outnumbered. Unless you absolutely have to, avoid engaging multiple targets at once. This is disastrously bad, as it stacks the DPS from multiple weapons on you simultaneously. If multiple enemies start to shoot at you, immediately disengage and hide.
Objective C: Kill Players
The reason people play this game! As you fight the enemy, here are some strategies to maximize your Heavy's potential:
- Find chokepoints. Heavies can put massive numbers of bullets down range, so find areas that funnel players through tight spaces and light them up as long as you are able. Burst your shots as needed to keep your accuracy, though some guns do not require this. Rockets are particularly useful here if you have friendlies to hold back the tide of enemies; they can strike at the base of doorways and corners to hit foes hiding behind them, and can be used to peek and score kills without exposing yourself for more than a second or two to enemy gunfire.
- Line them up. When fighting multiple opponents, maneuver when possible so that enemies have to fire past allies to hit you. They may strike their allies in the backs and help do your job for you.
- Fire from cover. Any part of you obscured by terrain is a part of you the enemy can't hit, demanding greater accuracy from them. Firing from above on a roof, or from behind rocks and trees can defend your legs and part of your torso from enemy fire.
- Abuse the overshield. When confronted by non-Heavy Assault classes (besides the max) you can be more aggressive and attack them more liberally. The other classes have an uphill battle versus Heavy Assaults with their smaller health pool, so do not be afraid to attempt to intimidate or overpower them. In a numbers game, they will lose.
- Open with rockets. Rockets do not need to land directly to do massive damage - alpha damage from a rocket can end a fight instantly even at long range. Feel free to liberally fire off rockets as an opening salvo and, without reloading your launcher, switch to your primary to continue the engagement. Mixing rockets into your other infantry DPS can be very disruptive and difficult to react to if the enemy was not expecting it.
Concluding Scenario and Remarks
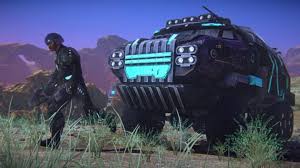 We will bring this all together with a hypothetical scenario: a small outpost defense on Indar. You and 10 other teammates are holding against a 12 man squad in a Sunderer. The Sunderer charges up to your base and deploys behind a lone tree, and infantry pour out of it and take the A point. The mission is to win the battle: what do you do?
You quickly open up your map and proceed through your priorities list so you can do the following:
- Establish Objectives
- Adjust Loadout
- Execute Strategy
- Objective A
- Opposition
- Population Size
- Location
Opposition: your opposition is a 12 man squad, entirely infantry based, with no vehicle support. You equip Nanoweave Armor and a Concussion Grenade to breach, and unequip your ground-to-air launcher in favor of the Decimator. You leave your faction-specific default secondary in place, and equip an adrenaline shield to increase your momentum between kills. For implants you choose Assimilate and Battle Hardened to improve momentum still further and to make it easier to score kills.
Population Size: you consider the population size as you look at your weapon choices. You initially chose a low capacity magazine LMG with high DPS. You quickly realize, however, that your 10 allies have no medics, and that most are flanking the building to try and get to the rear entrance. You're going in with minimal backup, and the enemy has population advantage. You quickly swap to a high-DPS, high-capacity magazine weapon with a long reload time to enable you to chain kills without reloading.
Location: you then look at the surrounding terrain and the nearby buildings as you consider your attack plan. There is only one building, and it has four windows and two doors. The rest of the terrain is sparse and open, but there are some points of cover between spawn and the building.
With all preparations in place, you rush out the door and make a dash for cover.
As the enemy fires at you, they are distracted by your allies pushing to the sides of the building. One of their Heavy Assaults still notices you coming and guns you down: you're dead. "This will work, just try again." You respawn and rush out again, and this time you make it up to the front of the building. Your allies are pushing the back door by climbing the stairs, but are in a standstill. Rushing in, you clear the first floor and realize all opposition is on the upper balcony, which has no railing. Looking at the wall, you throw your Concussion Grenade high on the wall and bounce it up onto the point, immediately rotating to push the indoor stairs. There are 2 troopers: you strafe sideways so they are in standing in a line, and the rearmost trooper cannot see you through his ally. Exchanging fire, you kill both soldiers, your Adrenaline Shield recharging with each kill, and proccing your Assimilate implant once. You have momentum. You hear the concussion grenade go off, and you follow your momentum through by immediately pushing instead of reloading and regenerating. The enemy is disoriented and spinning, but some in the corners of the room were not hit. Your allies, hearing the concussion, rush into the room and engage.
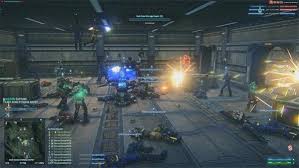 Your group quickly drops 5 of the enemy, but you take heavy damage and are now at 43 out of 100 rounds in your magazine. Objective 2! You can't fight if you're dead, and there are no allied medics. You drop down the stairs and use a medkit, swapping to your LMG immediately and pointing it up the stairs in case the enemy comes. You do NOT reload, because you know that your reload time is high, and you assess that 43 rounds is more than most guns can even have in a magazine: you can't afford to risk dying and have the means to defend yourself. As soon as your shields start regenerating, you push again and finish off the remaining opposition with your team. Objective complete.
The battle isn't won, however, and you reassess the situation: the Sunderer is their spawn and has to go. The new primary objective is: destroy the Sunderer. You take to the windows and lay suppressing fire, and notice that the tail end of the Sunderer is visible from behind the tree. Allowing your allies to deal with the spawning infantry, you fire rockets repeatedly into the Sunderer from the safety of the building until it is destroyed, and clean up the remaining troops with your comrades. Victory.
Closing Remarks
Thank you for taking interest in my guide. I return infrequently to edit and refine this guide as I grow as a player and as Planetside 2 changes. This game is always evolving, so any feedback regarding out of date info is appreciated. I hope that the tips I've provided here help you in the fight and improve your Planetside 2 experience.~Gafired
More PlanetSide 2 guides
- Certing for beginners (no longer updated!)★ 5 (712)53k views620 ♥15 minUpdated Dec 11, 2022
- All the available free loot codes for PlanetSide 2.★ 5 (762)50k views1k ♥3 minSpanishUpdated Jul 4
- Cert Farming 101 - crops not included★ 5 (568)43k views690 ♥52 minUpdated Aug 13, 2015
- Welcome to PS2, You Suck★ 5 (458)26k views432 ♥29 minUpdated Feb 5, 2021
- Leading a Public Squad★ 5 (1.3k)23k views742 ♥7 minUpdated Jul 11, 2014
- Factions: The Basics★ 5 (246)21k views140 ♥5 minUpdated Apr 25, 2015




This guide was created by its original author on the Steam Community. Are you the author and want it removed? Request removal.