
Overview
Stuck on one of Hitman’s assignments? If you don’t want to read verbose FAQs and pagelong narratives, this concise guide gives you just the nudge you need without any hand-holding, so you can get back into the game as quickly as possible.
Introduction
This is the first of a possible series of compact guides, covering all missions of Hitman: Codename 47, IO Interactive and Eidos’ first entry to the Hitman series of stealth action games.
However, when you’re in the thick of the game and just waiting to see what will happen next, you might not be in the mood to read long narratives and step-by-step explanations. All you want is that little nudge, the hint you need. Apart from their length, I also found that many of the FAQs out there completely disregard the stealth aspect of this game, and try to get you to play it like a Doom clone. The least helpful of them just repeat your mission objectives, interspersed with “take out all the soldiers.” And they misspell Colombia!
In that situation, I hope that you will find use for my little compact guide. What it tries to be is a walk-through distilled down to just those essential hints that you might have missed. The crucial bits of information that you need to be able to progress in the game.
Spoiler warning: Due to the nature of the guide, the information will be highly concentrated, and spoilers follow like the clappers. Tread carefully! Once you’ve found the spot where you’re stuck, read just one sentence further, and no more. Chances are the next few words will already spoil the following puzzle or challenge, which you would have had much more fun with had you worked on figuring it out yourself.
Only resort to opening this guide if you have tried a mission at least half a dozen times, slept over it, and tried to approach it from all angles you can imagine.
While Codename 47 almost always gives you several paths to reaching your goal, it is much more linear than its sequels. There is always one strategy that was clearly the one intended by the developers and level designers. You might be able to complete missions in a different way, but it will usually be the much, much harder way. If you are having a very hard time in a mission, or if your unfinished strategy takes much longer than 10 minutes already, chances are you’re on the wrong track. None of Hitman‘s missions take much longer than 5-10 minutes to complete, if you know what you have to do.
That being said, there are many possibilities to solve some of the steps in different ways. The strategies in this guide are just the ones that I find easiest. If you have an idea for a strategy that you think might be better or more fun, by all means, try it out! This is a big part of the game’s fun factor. You can always return to missions you’ve already completed, and try another approach.
The depth of play, and the bulk of time spent playing, is not completing missions, but figuring them out! Always keep this in mind when playing Codename 47. Trial and error is part of the game.
Kowloon Triads in Gang War

Your job is to assassinate the chief negotiator of the Red Dragon triad, who is meeting with representatives of the rival Blue Lotus triad in a city park.

Once you assassinated the negotiator, the alarmed guards will call to a helicopter with a machine gunner. Even if you throw away your rifle immediately and make it back to street level before the chopper arrives, the gunner seems to magically know that you’re the assassin (since you’re the only one wearing a nice suit, I guess?) So all you can do is avoid him.
From the lift, don’t take the straight route back to your car. Instead, run the full circle of the outer road along the east, north, and west of the map, circling back to your car in the south. Because the helicopter follows you only very slowly, you should be able to get all around the map before the gunner can start shooting at you, telling all other guards who you are.

Ambush at the Wang Fou Restaurant

Your mission is to kill a Blue Lotus triad envoy on its way to apologise to Lee Hong and the Red Dragon triad for the happenings in Chiu Dai Park.
The simplest way to accomplish this mission is to follow the suggestion of your controllers: use the car bomb. Conveniently, all the Blue Lotus triad members not leaving by car stand guard at the same road corner, so you can take them all out in just one blow.

Now the guards won’t complain if you linger about near the car. Get to the driver’s door, take out the car bomb when the guard’s looking the other way, and place the bomb. Then head back to the spot where you started the mission, ready the bomb’s remote detonator, and wait for the car to leave the same way it arrived—the corner where the Blue Lotus guards stay watch. Blow the bomb at the right moment to take them out all at once. Since there is a delay of about a second, hit the trigger after the car has passed the crosswalk. Then return to your car.
The Massacre at Cheung Chau Fish Restaurant

With the triads on the brink of all-out war, the police chief fears for the balance of power (and his bribe money), and wants the parties to negotiate a truce. Your mission is to kill the police chief and make it look like Lee Hong’s deed. This will ensure that the Red Dragon triad lose all police protection, and their leader is vulnerable enough for you to take him out of the equation.
This is the first mission that gives you a glimpse of typical Hitman gameplay. While the steps you need to perform are still very much predetermined, you’re allowed to let your imagination take care of the details. There are many ways to achieve your goals, and this is just one suggestion. If you think you know a better way, go ahead and try it!
Once the negotiators start arriving, guards will block the entrance and search anyone who enters the restaurant, so you won’t be able to bring a weapon. Think back to classic mobster films to figure out how to get around this: you’ll have to stow away a weapon somewhere in the restaurant beforehand.

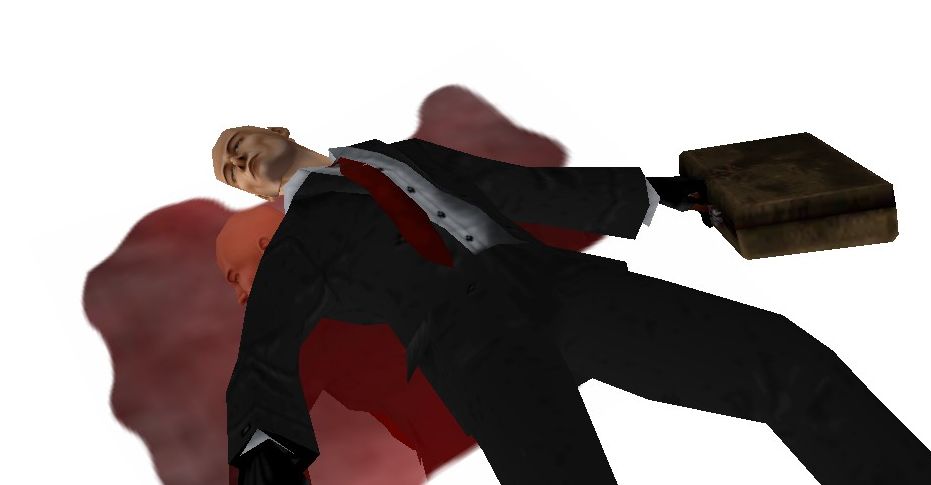
The Red Dragon emissary approaches from the north-eastern corner of the area. Right before he turns the corner onto the road the restaurant is on is the best time to take him out—no patrolling officers, the only passerby walking in the other direction, and a sewer chute closeby to the north. Be sure to use the knife, garotte, or silenced Beretta so as to not alarm anyone. Drag the body away to the chute, take the amulet and clothes, then drop him in.

Another possible approach is to enter directly through the bathroom window. That way, you won’t even have to hide a gun. Just be sure to unlock the bathroom door beforehand, and see that the patrolling guards don’t catch you climbing in.
Depending on whether any guards saw you shoot from the bathroom, the escape can be as easy as walking out the front door unsuspected, or as hard as having to climb back out through the window, then running and weaving between the buildings back to your car, evading fire (see the map below).

The Lee Hong Assassination

With Lee Hong having lost his police protection, he has no more influence in town. You should now be able to get close enough to him at his headquarters behind his restaurant, provided you can get past the guards that stayed loyal to him. Your employer also wants to have a jade statuette in Lee Hong’s possession, symbolic of his power.
You need two key pieces of information to find the jade statuette. First is, of course, the combination to the safe’s lock. There are four safes in the entire complex. Three of them are decoys and will sound the alarm if you try to open them, even when using the right combination. So you will also need to know which safe to approach. The right safe changes every time you play this mission!

The easiest guard to do away with is the one standing by the door in front of the entrance to the bar. Wait for the patrolling female guard to enter the bar, crouch behind him, and take him out silently with the knife or garotte. Drag him into the room behind him, and be careful before opening the door when leaving, lest the patrolling guard might see his body. Take his clothes.
There are numerous access points to the basement level, both elevators and stairs. Check your map. The CIA agent is being held in the octagonal room to the south. There is one guard in front of the door. 
Before heading for the safe, you need to get the combination. The briefing mentioned one of Lee Hong’s weaknesses: prostitutes. The barman should have given you an invite to the “massage parlour” on the second floor. It doesn’t matter that you’re dressed up as a guard or triad member, both the barman and the guards to the brothel will treat you like any other customer. Since you’re dressed as a guard or a triad member, no one will bother you, even when you help the prostitute escape (just follow her, she doesn’t need your help—some damsel in distress she is).
Once you have the safe combination, you can make your way to the one that contains the statuette.
- If the agent told you to go to the safe at madam’s place on the second floor or the storage room on the first floor, you’re in luck. There is just one guard at each of them. No one will come looking.
- The safe in the VIP area meeting room is pretty easy as well. The guard on the upper level moves between two positions. Wait until he stops at the window, and until after the guard in front of the safe has made one of his regular “looking back” moves. Take out the upper guard silently. Then sneak and drop behind the safe guard, and kill him as well. You might want to drag the upper guard’s body down to the safe as well, so the guards outside can’t see him if you open the double doors.
- The final possibility is the safe in the guard’s quarters, one floor above the VIP area. It is standing in the guard’s break room and guarded by two stationary and one patrolling guard. Wait for the patrolling guard to enter the passageway with the lift, and silently take him out. Then enter the break room, ready any gun you like and shoot both guards before they get a chance to shoot back. Don’t worry about the gunfire, usually no one will be alerted, and if they are, they’re few and easy to take out.

Once you have the statuette, bring it to the herbal shop owner north of the restaurant. Along with some platitudes, he’ll give you a flask of poison in return for the statuette. Lee Hong and his bodyguard will arrive for dinner right that instant. Unfortunately, you’ll have to kill a civilian to perform this next task on the down low. Follow one of the waiters to the restroom, and kill him silently. Check your timing; both waiters regularly head for the bathroom, so you should make sure you have enough time to hide his body in one of the stalls, before the other one arrives and you have to kill him as well. Dress up as a waiter and head for the kitchen. Use your flask of poison on the soup bowl and bring it to Lee Hong.

An alternate way to solve this part of the assignment without killing a civilian is to head for the roof, take out the four guards there, and then shooting Lee Hong through the skylight. Depending on whether anyone saw you, whether you can change your disguise in time, and whether you manage to sneak past bodyguard Tzun later on (it’s possible, but somewhat dependent on luck, to do this in the boathouse on your escape), you might get out fine. Or try taking out Tzun at the same time!
Lee Hong nervously patrols the rooms of the upper floor in his HQ. I found the best way to take him out is to hide behind his office desk and shoot him with a silenced gun. Shooting him from this direction should make him fall back into the corner of the room, usually without alerting any of the other guards. If he lets go a death scream, some of them might or might not come looking. Take out only the ones that come rushing in, the others won’t know what’s going on. Holster your weapon and walk out of there nonchalantly. The elevator to the dock with the speedboat is behind a metal door on the lower level.
Find the U’wa Tribe

You need to recover a mythological statue from a downed plane, in order to win the favours of the natives.
With large outdoor environments and poor visibility conditions, Colombia provides a very different experience from the rest of the game. What makes things more difficult is the eagle eyes of your opponents. Enemy soldiers can spot you from a distance where, through the fog, they are completely invisible to you. As if that weren’t enough, they’re also quite good shots.

Head towards the weapons cache northwest of your insertion point (the one closest to you only contains 5.56mm ammo, which doesn’t fit the AK47 7.62mm you should carry in this mission). Two guards are standing nearby. Take them out using the big tree trunks for cover. No one else will be alerted. Grab a uniform—you’re now safe unless you do something stupid (which you won’t do until later on), so run through the jungle at your leisure. I also usually head for the weapons cache to the far west, since it contains 7.62mm ammo for the AK.
Next up is the crash site of the airplane. Depending on your luck, the guards might or might not have secured the site by the time you get there. Sometimes, they arrive shortly after the beginning of the mission, other times they don’t seem to find it at all. If no one is there, just pick up the statuette near the plane’s fuselage and move on to the village in the east. It’s not much of a problem if the site is secured either. Crouch behind the guard near the cargo door and take him out with the knife or garotte. You can drag him into the fuselage if you want, but he usually won’t be discovered either way. A good thing to know is that this is one of the few officers on the map, wearing a lighter-shade uniform with stripes on the shoulders. Wearing one of these will allow you to even carry an M60 or R93 (but not M16) without raising suspicion.
Approach the village chief with the idol in hand (he’s near the southeast corner of the village). In return for helping you find the drug lord, he asks you to also free his brother from the soldiers. Follow the river bank to the bridge (it’s quite a distance).

Careful not to shoot the prisoner! Once all guards in front of and on the bridge are dead, he will make his way back to the village on his own. You don’t need to follow him, no one will attack him. Don’t worry about the chopper, or the guard tower on the other side of the bridge. They never gave me any trouble. Rejoin the chief and his brother to complete the mission.
Now, there is one alternate strategy, pointed out by various guides around the web, that can potentially make the final mission in Colombia a bit easier. However, you have to follow it from the first to the last mission. If you are interested in learning about this strategy, read the spoiler paragraphs.
The Sniper’s Way: The key to the alternate strategy is to hold on to the sniper rifle from the guard tower until the very last mission, since you can’t buy supplies from the agency while in Colombia. This is of course made much easier if you are wearing an officer’s uniform. Luckily, one is among the casualties in front of the bridge. Disguise yourself and bring the sniper rifle all the way to the next mission but one.
The Jungle God

Pass the natives’ temple structures and enter the secret passageway to the drug lord’s camp, guarded by a leopard.

If you want to do the sacrifice, you can either use a dead soldier or a peccary. Peccaries are herding near the exclamation mark on your map in the west. Shooting a peccary will alert a nearby patrol, so be prepared to take them out as well. Bringing a peccary to the altar is probably quicker than using a soldier, since you can easily run (and even shoot a gun) while carrying it. Drop it, or a dead soldier, on the bloody spot and wait for the leopard to start feasting on it. You can now safely pass it and enter the small passageway.
The Sniper’s Way: If you’re not in an officer’s uniform, the guards near the bridge from which you enter the area will not let you carry a sniper rifle, so take them out quickly from behind using a handgun. Don’t forget to take your sniper rifle through the tunnel—what are you doing all this for?
Say Hello to My Little Friend

Now for your actual tasks in Colombia. You have to take out drug baron Ochoa in the middle of his heavily guarded camp, and blow up his drug laboratory before escaping on an airplane.
Encapsulation? The most important part to realise in this mission is that having a shootout in one area does not mean that the entire compound will be alerted. All you have to take care of is that these shootouts do not take place out in the open, where you can be spotted by patrolling guards or from the guard towers. Luckily, all of your tasks take place in buildings.
The Sniper’s Way: If you brought your sniper rifle to this mission, head a little to the left from your initial position, crouch, and aim for Ochoa’s mansion within the compound. Aiming through the second-floor windows, you can actually take him out from here without anyone noticing a thing (even if Ochoa fires back at you). Drop the sniper rifle afterwards—even officers aren’t allowed to carry them anymore here.
Since you’re still disguised, you can move around pretty freely. Run around the compound to its south side gate. If you need the extra firepower, head to the weapons cache (marked on your map) in the mountain recline. Once in the compound, first enter the nearest tent just up ahead and slightly to the right. Concealed within, you will find a silenced Beretta and, in case you need it, a bullet-proof vest.

The first task is to kill Ochoa himself. His mansion is just a bit to the east of the tent. Most doors are guarded, but if you approach via the veranda on the east, you can enter through the door facing north, and start taking out guards one by one. The one near the door you come in can be killed without alerting the one just around the corner, which you can take care of without alerting anyone else, and so on. It should be pretty easy to find a path through the house, killing guards along the way without alerting any other guards. There are just a few things to keep in mind: be ready to unholster your silenced pistol in case anyone comes running to investigate, and hide bodies out of sight before opening doors to uncleared rooms. But also don’t panic if things get out of hand. Ready your AK, find a good corner to take a stand in, and pick off the guards one by one as they swarm you. As long as no shots are fired out through windows, only the guards in or directly in front of the house will be alerted. All in all, there should be 8 guards on the first floor, 5 guards on the second floor, and 3 right outside the house.

Once he’s down, quickly enter his office and wait around the corner, as more guards sometimes arrive at this point. Take the bomb from the table, and read the letter from the professor that Ochoa has on his person (ready it in your inventory). Before proceeding to your second target, it is advisable to steal an officer’s uniform. Two of the guards on the second floor are (were) officers: the one in the bathroom, and the one in the room with the Beretta on the couch. Their uniforms are tan-coloured, in contrast to the usual green. Now you may leave the mansion and be amazed at the fact that no one on the outside is aware of what took place.
The Sniper’s Way: If you already took out Ochoa through the window, there is of course no end battle to fight here. However, since you’ll have to do away with the guard in front of his office door anyway, it’s pretty much inevitable to kill many of the guards in the house either way. If you can deal with the two guards in the hall silently, that’s good, but be prepared to make a stand once you enter the office, as others will come looking.
The second task of your mission is to blow up Ochoa’s drug lab, which is located in the bunker in the northwestern corner of the compound. 
All done! Walk towards the airplane hangar east of Ochoa’s mansion, where your ticket out of here, a single-engine plane, is waiting. Ready your remote detonator, fire, watch the laboratory explode, then run towards the plane and use the action key to take off before anyone starts shooting at you. Note: there is a bug that can crash your game when the bomb is detonated. As far as I can tell, it happens only if (a) you’re still in the bunker when you pull the trigger, which is a bad idea anyway, or (b) if you hit the fire button to quickly after taking out the detonator. If you wait for a few seconds before pressing fire, you should be fine.
Traditions of the Trade

Kill terrorist Franz ♥♥♥♥♥ and get the bomb out of the hotel.
This is probably the most freeform, and therefore best, mission of the game. Play around in this one, try out everything, and enjoy exploring the building, which is full of details and places not necessary for the mission!
You cannot bring any weapons but the piano wire into the hotel, but that’s okay since it’s all you need. If you talk to the desk clerk, you will see that your target is in room 202. There are several cleaners making the rounds on the second floor. Once one of them has entered a room, pick up the master key from the door (you’d think with an international leader’s conference around the corner, the hotel would make a bigger deal out of a master key that went missing…) Now you can get into almost any room. Head for the room adjacent to your target’s, 201, and step onto the balcony.

On the table, there are two letters to read, the key to ♥♥♥♥♥’ room, a do-not-disturb sign, as well as a dentist’s appointment card. If you had to take out the guard outside, put the do-not-disturb sign on the hallway side of the door, otherwise the cleaners will come in and discover the bodies! Drop the gun, you don’t need it anymore, and it will just trigger the metal detectors. But bring the empty bomb case that’s also in the room. One of the items on the desk is a hint on where the actual bomb is hidden (use F1 to look at the items). You can also hand ♥♥♥♥♥’ room key to the concierge and get two more letters—one is another clue to the bomb location, the other can net you a shotgun from the florist. It’s fun to try, but not really useful.

- If he’s at the thermal bath and sitting in the sauna, he’ll tell you about his weak heart. Turn up the heat using the valve outside, and give him a stroke. You don’t need to hide the body.
- If he’s at the thermal bath and swimming (well, drifting) in the pool, you can drown him in a cool cutscene. But watch out for other guests, and only do it when the fat lady’s view is blocked by a pillar. You can’t hide the body here, so don’t even try.
- If he’s eating at the restaurant or sitting at the bar in the casino, you’ll have to wait for him to go to the bathroom and kill him there. It’s best to hide him in a stall, although at least in the casino, I don’t think any other guests use the bathrooms.
Lift the key to the X-ray room from his body.
On the third floor head for the passageway on the roof, and enter the dentist’s through the open window. Use your garotte on the guard inside, then walk past the other guard to the X-ray chamber and put the bomb in the case. From now on, you won’t be able to pass metal detectors anymore, so find a path to the rendezvous point around them. I usually take the emergency staircase in the west wing of the hotel. It’s the easiest way to exit through the kitchen and via the backyard. When you use the main entrance, you’ll trigger the metal detectors, but the game will immediately switch to a nice cutscene, so this exit is just as safe.
Gunrunner’s Paradise

Find out the location of weapons smuggler Boris by following some Dutch clients. Smuggle a GPS locator device into their money briefcase, which the envoy will hopefully carry directly to Boris’ ship.
Take a silenced gun on this mission. Initially, walk straight ahead and cross the railway tracks. A gang member will approach from your right. Sneak behind him and use your knife or garotte to kill him, then take his clothes and weapon. 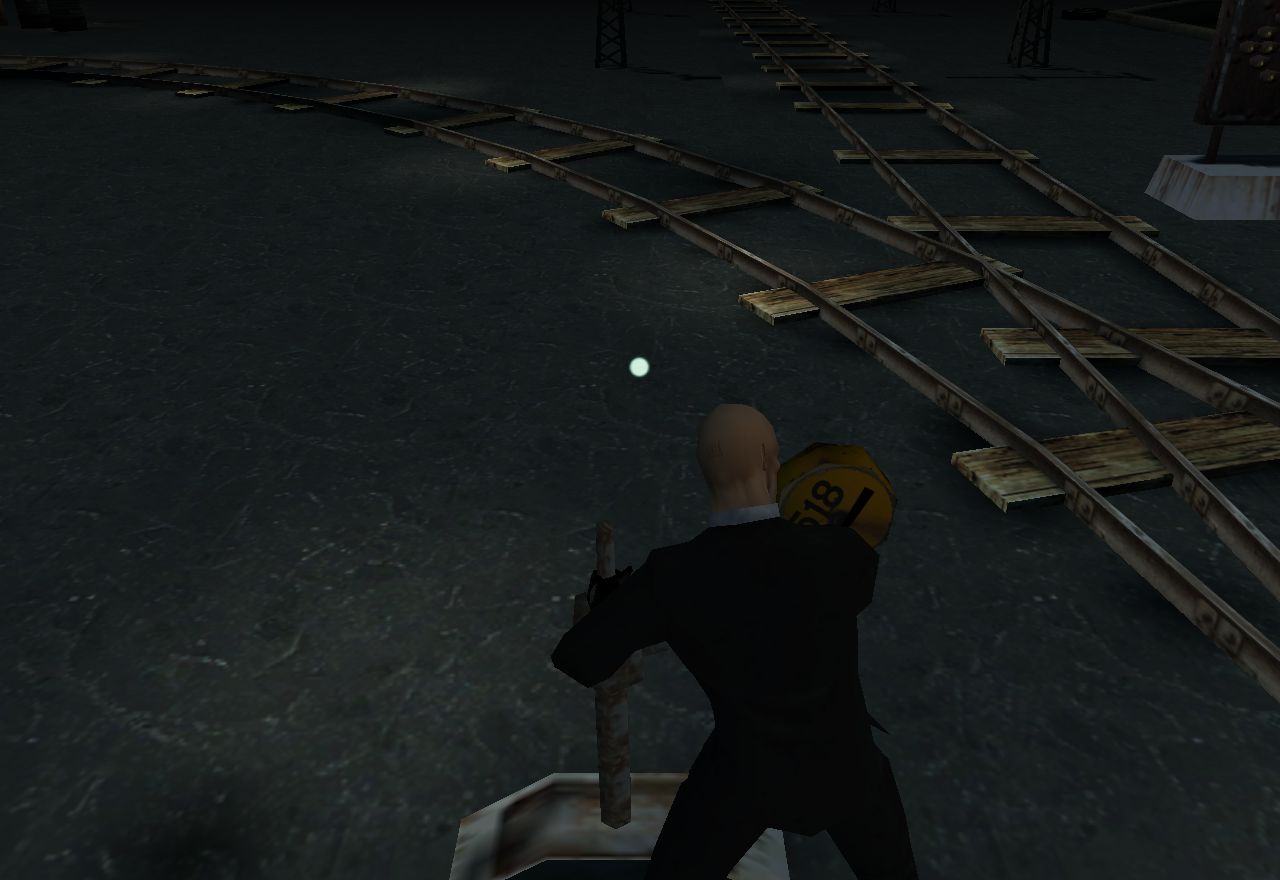
When the men drive off, a red dot on your receiver will show you the direction of the car relative to your viewing direction. There are several different warehouses, and the meeting may take place in a different one every time you play. Depending on which one it is, you may need to switch one of the two track switches behind the strip club to get the engine to break open the gates—check the track layout on your map to find out which. 
Open the left warehouse door, head in with an automatic, and take out all the gang members. Apart from the ones with the briefcase, there are four more guards in the back of the hall and around the corner to your right. As soon as everyone is dead, you will get the message that Ivan will arrive for the deal in 3 minutes. 
Ironically, the first time I played this mission I thought Ivan would enter through the other door, and “hid” all the bodies outside of the warehouse, near the gang members’ car. Of course, this is the exact side Ivan will arrive from. He walked right past the pile of bodies and back again without twitching—not as paranoid as the briefing tried to make me believe! (I believe he only gets scared if he sees bodies inside the warehouse.)
Plutonium Runs Loose

Find your way onto Boris’ ship, kill him, deactivate the nuclear missile and take the ship to international waters.
There are many guarded gates, numerous sentries that will notice if you take out the gate guards, generally a lot of guards that will find bodies of sentries that have tumbled from their vantage points, and quite a few dogs that aren’t fooled by disguises. The secret to the mission: not bothering with them. There is a weapons cache which, among other items, contains a car bomb that allows you to ensure Boris won’t get away alive no matter what, but I find it not worthwhile. After you’ve reached the weapons cache, patrols will stop making their rounds, which will make it impossible to use the easy way in that I will be describing.

A guard will be patrolling along the waterfront. Sneak behind him and take him out before he reaches the wooden crates, then drag his body behind them (don’t let him pass the crates, or another guard will see you kill him). Another guard patrols the same path. Wait for him, and do away with him before he reaches the crates as well. Now head for the northern of the two warehouses on this pier. When the first patrolling guard turns the corner after passing the limousine, let him walk a few steps, then kill him from behind. Holster your knife or garotte, let him lie there, and wait in the shadows for the next guard to arrive. Be ready to kill him silently as soon as he’s standing over the body. This might alert the guard at the limo. Just holster your weapon and deal with him in the same way. Otherwise approach him from behind later, and use a silenced gun. Now use the same tactic on the two patrols circling the southern warehouse. Do this on the side furthest from the ship, so nobody on or in front of it sees you.

Head for the stairs leading up to the ship. To the left, there is a lone skipper. Knife or strangle him from behind, drag his body behind the stairs, and disguise yourself as a crewmember. You could now move around on the ship pretty freely. 
You’ve got a few minutes to deactivate the nuke now. Board the ship and take out the guard on the second mast. There are only a few people left on the ship, but all are armed, so inch your way forward carefully. 

The Setup

Talk about a spoiling mission title! On the face of things, all you have to do is kill a psychiatrist in a mental institution in Romania. But not everything is as it seems.
So disguise was a key in pretty much every mission so far. But here, it’s all about knowing when to disguise yourself as whom, and doing so quickly. You can find out a lot about what to do, and where to find the tools, by observing and interacting with your environment. There are a lot of weapons around, but it’s not worth fighting at all here.

The place you’ll want to go to in this big building is the TV room. With the doctor’s key, you can enter the west wing on the first floor, and take the stairs one floor up. In the TV room, you will find an old acquaintance. Fetch the antidote for him, and open the doors with your key as he leads you to the cellar.
Meet Your Brother

Ah, the age old action game cliché of the “hard end battle”. The point at which the designers have run out of ideas, or simply feel the urge that their game needs one last level to keep the largest possible number of players, who sticked with the game so far, from getting to see the ending. As the most boring and pointless mission of the game (the only really boring one, in my opinion), I do not at all feel guilty for the fact that the way I complete it feels like a cheat. If the developers get this lazy in creating a level, I’m allowed to be lazy when solving it. Adding nothing to the game experience, it is a pure makeshift “we still need a finale” (no, you don’t) affair.

After the cutscene, head through the next gate on the right, then right again into the laboratory, through to the next room, out through the left side, and then into the first door on the right. This storage room contains a minigun with a whopping 1000 bullets of ammunition. Position yourself against one corner of the room and simply wait for one clone after the other to enter, and take them out. If you click your fire button once in preparation before shooting, the barrel will spin up and allow you to start shooting immediately when the clone enters. 
Once all clones are dead (count the ten of them, or wait until shooting one doesn’t immediately trigger the next “clone released” message), drag one into the metal room with the barcode scanner. This will give you access to the Professor’s “lair” (don’t enter the metal room on your own). The professor, believing you to be a victorious model 48, welcomes you. There are two different endings to the game. Read the spoiler if you want to know how to achieve them.
If you kill the professor before he manages to reach you, you will get the good ending. The professor realises too late that model 48 wasn’t an improvement over 47 after all, and gives a final monologue before dying. You get to watch the rolling credits.
If you let him tase you, you will get the bad ending. You wake up back in your cell from the beginning of the game. There is no escape, you are back in the system…
Acknowledgements and credits
This guide has been created and written by Daniel Saner, a Swiss computer scientist who has been playing computer and video games since he was 6 years old, and these days is mostly into older and lesser-known titles. Apart from games, he also likes to ramble about the music and old films he likes, always grateful for a channel through which to bother others with his opinions. His dislikes include writing autobiographies in the third person, and making tired jokes about third-person autobiographies.
The text of this guide is released under a Creative Commons 3.0 Attribution-ShareAlike Unported[creativecommons.org] license. This gives you the right to use, redistribute, and modify the work for any purpose, as long as you attribute the original work to me by name. If you choose to modify the work you must, however, clearly denote any modifications made by you as such, and share your modified work under the same or a similar license. Follow the link above for more a more detailed explanation in legalese. If you need an exemption from any of these clauses, feel free to ask by contacting me via Steam. The images do not fall under this license! I also do not own rights to any of the trademarks mentioned in the text.

My thanks go out to IO Interactive for creating the game, Eidos Interactive for producing and publishing it, and Valve Corporation for its redistribution, as well as giving me a vanity spot to publish this guide in.
You can visit me on the web at [link].