
Overview
This guide details the process of setting up a Half Life 2 Deathmatch Dedicated Server.
Obtaining Server Files
This process is the same for all source engine games. If you already have the server files or have installed a SRCDS via SteamCMD before and know how to download server files, you can skip this.
Steam now uses SteamCMD (formerly HLDSUpdateTool) to download server files.
Download SteamCMD for your respective Operating System:
Windows
Linux
After you have downloaded SteamCMD, extract the steamcmd.exe to a folder on your server drive.
Note: In this guide the directory will be the root of the Hard Drive: E:
This makes it easier to send the directory command as it is shorter.
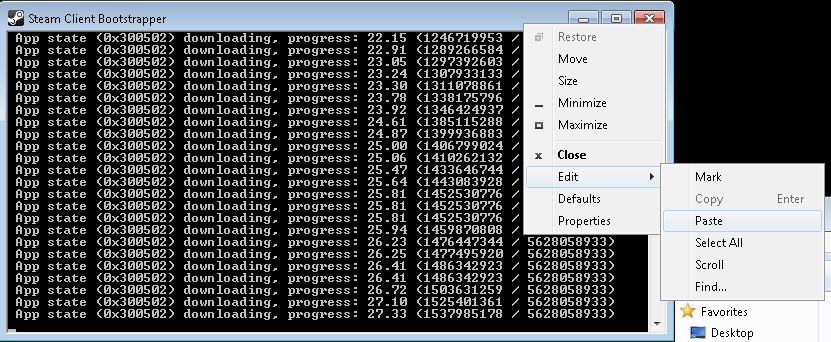
However, you can paste text to CMD prompts:
Run the steamcmd.exe to install the tool’s files, the dialog will appear installing files:
Note: Do not install server files within the SteamCMD folder.
While SteamCMD is downloading the tool, go ahead and setup your server directory. For the sake of this guide and ease of cd changes in the tool, I use the root of my drive: E:hl2mp
You can make a folder anywhere except within the SteamCMD folder!
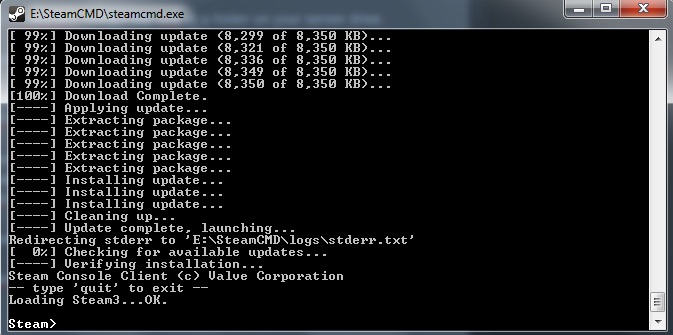
Once SteamCMD has completed downloading it’s files, the dialog box will resemble:
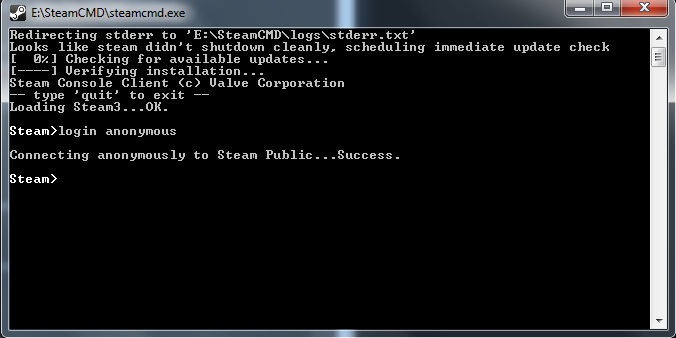
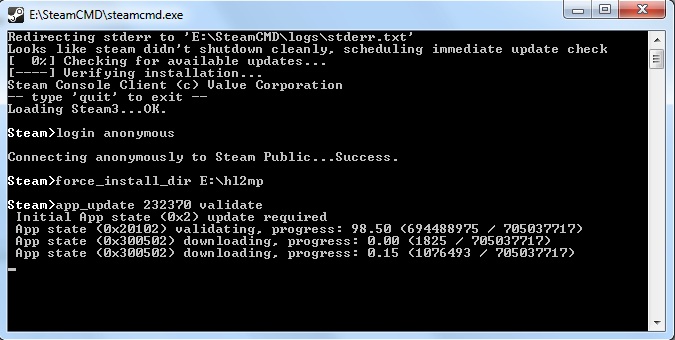
Half Life 2 Deathmatch uses the APP ID 232370, you can login anonymously to download the server files (see all app ID’s here):
Fun Time!
Assuming you have already created your server folder (E:hl2mp) send the following:
Note: Use your server directory!
Note: Here is a list of all Steam Application ID’s for reference to installing other server games. This process is the same for all game servers, they just have a different (unique) Application ID.
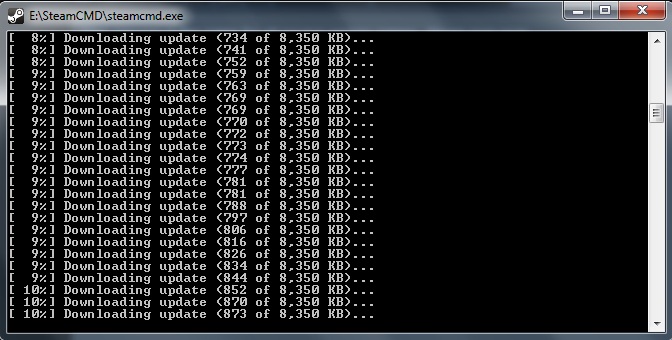
This may take some time to download all the necessary files, when complete it will resemble:
Send the quit command and hit Enter,
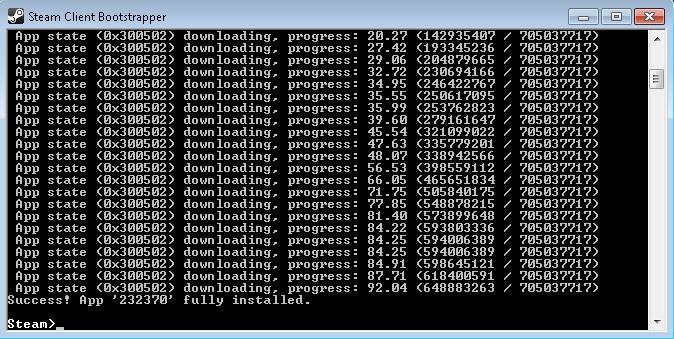
…this concludes the process of obtaining the server files.
Port Forwarding
There are many resources out there for Port Forwarding. This guide is aimed at servers that are hosting on a provider or system other than the game client. If you are hosting your server on a game server provider, you don’t need to worry about this.
Port Foward[www.portforward.com]
Server Configuration (server.cfg)
The cfg file is what contains the settings (in the form of cvars) for your server.
After installing your server, by default the server.cfg does not exist. You will need to create one (or see this server.cfg example[www.dropbox.com])
To create a new server.cfg, create the cfg within a text editor such as notepad,
or Sublime Text[www.sublimetext.com] and save the file as server.cfg
The file should be located at:
Create this file using notepad—simply right-click in the folder and select New⇒Text Document. Don’t name it anything yet; just open it.
For a complete list of Half Life 2 Cvars, see this.
One of the most important things to keep in mind while writing the server.cfg is the syntax. It is very simple actually:
// means the server will ignore everything behind // on that line, so if you want to stop using a variable, put // in front of it – this commonly referred to as “commenting out”
Every variable has to be put on its own line, or else it will not be read and/or give an error.
If you have spaces somewhere (the name of the server for example), be sure to write it between quotes.
Here are some explanations on the most important variables:
sv_maxupdaterate 100: This variable sets the maximum amount of updates the server will send to each client per second. If you set this to 100, your server will run optimally because the tickrate automatically adjusts this value. Having a tickrate of 33 will make this variable 33 as well. Thus, a setting of 100 for this variable is more or less a “one size fits all.”
sv_minupdaterate 20: This variable is the opposite of maxupdaterate. During the years I’ve been hosting servers, I’ve found out that when the updates drop below 20 per second, clients start to experience lag. That’s why we set this to 20; just like maxupdaterate, this value fits all servers.
sv_maxrate: This variable probably has the most impact on the quality of the server performance. It’s the maximum amount of data sent to one client per second. If you don’t have a great connection, you can set this variable to make your server run perfectly. As I explained above, this has something to do with the maxplayers of the server. To calculate this variable we use a formula; it’s simple and 90% accurate.
Here[www.dropbox.com] is an example server.cfg file you can download and edit.
Now when you start up the server by clicking the shortcut, the “couldn’t exec server.cfg” error shouldn’t appear.
Message of the Day (MOTD)
(This section will be re-written)
Every time a player enters a HL2:DM server online, a message of the day screen welcomes them. There’s a default MOTD, but if you’re paying for your own server, you probably want to customize it. This guide will show you how.
First, we’ll look at the actual MOTD screen:
There’s two sections that you are able to customize: the host banner on top and the message of the day which takes up the majority of the screen on the bottom. These two sections are actually just web pages (html files), which can be entered into the files on the server or hosted on your own web server/web host. The two files to control these sections are “host.txt” for the host banner, and “motd.txt” for the MOTD. You can find these in your server’s hl2dm directory at hl2dm/hl2mp/. Note that this is NOT the same directory as the server.cfg file that you use to change server settings. The server.cfg file is located in hl2dm/hl2mp/cfg/.
The default host banner and MOTD run off of Valve’s web servers. The default host.txt and motd.txt files contain only one line which is a URL to the website you wish to have displayed. You can either use this method if you have your own hosting or you can just fill the .txt file with HTML code. If you have multiple servers with the same banner, it’s best to use web hosting so you only have to change the banner in one place.
One very important thing to realize about the MOTD and host banner is that they change sizes depending on the resolution the player is running at. The following values are in pixels, you can click on the screen resolutions to see what the MOTD looks like on that resolution:
The ratio of width to height for the host banner is 5:1, and the ratio of width to height is 2:1. You have two choices with the host banner: either make it one large size and have it be cropped for people on lower resolutions (which is what I believe Valve does), or you can use some CSS in your HTML code to automatically resize the banner no matter what resolution a player is using. This is the method we use, and it’s a simple little trick.
Our host.txt file has just one line:
[link]Or you can create a simple HTML file:
<html>
<head><title>HL2 Deathmatch</title></head>
<body style=”margin:0px;padding:1px;background:#000000;”>
<img src=”[link] style=”width:100%;height:100%;” />
</body>
</html>
That’s all it is! The title doesn’t show up anywhere, so it’s not important. The body styling is to make sure the image appears in the very top left, with one pixel of padding, and a background color for when the image is loading. The image tag has a style of 100% width and height. If you go to that page in your browser, it’ll look really messed up. But since you know for a fact that every resolution has a 5:1 ratio for the host banner, it will always look fine and be in the same proportions. One little bug: on 1920×1080, when you first get into the game sometimes the banner is sized strangely (pic). Hopefully this gets fixed.
The MOTD section is the same as the host banner – it can be either a hosted HTML file (place the URL on a single line in the top of the .txt file) or you can just put the HTML code directly into the text file. All we have is a simple background image with some centered text, you can see it/view the source here if you need an example.
If your MOTD is not showing up, you might have to set motd_enable 1 in your server.cfg.
That’s all there is to it! Head to our forums if you need any help.
SourceMod & MetaMod
SourceMod[www.sourcemod.net]
MetaMod[www.sourcemm.net]
See the HL2:DM Plugins[www.sourcemod.net] that you can install on your server.
Adding Admins
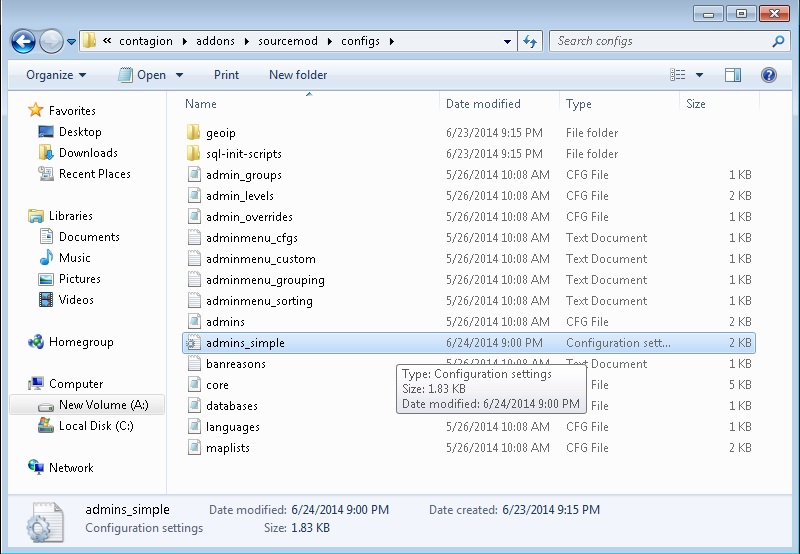
Edit the admins_simple.ini file, which is located in:
addonssourcemodconfigsadmins_simple.ini
You can use your Steam Name, however keep in mind that anyone can change their name to yours and connect to your server with admin flags.
I suggest using your SteamID[steamidfinder.com]. You can type status in the console which will return all connected players SteamID’s
That is MY SteamID for example purposes, just replace it with your ID.
After you edit that, just upload the addons & cfg folders to your server where the existing addons & cfg folders are. Failure to copy these files to te right location will result in SourceMod failing to load.
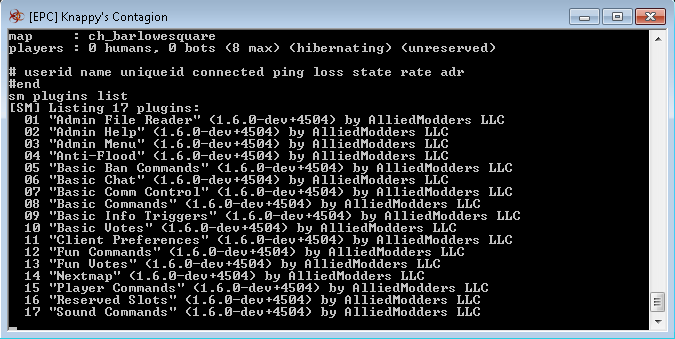
After you have uploaded the files, restart the server and send this command:
If Unknown Command sm is returned, then the files were not installed properly:
![[link]](http://i202.photobucket.com/albums/aa60/dmknappy/EPCBanner.jpg)
![[link]](http://i202.photobucket.com/albums/aa60/dmknappy/EPCBanner.jpg”)
You’ve just installed sourcemod and made sure that it’s working. For that you did the instructions in the Checking the Install chapter and issued some first commands in the server console.
Get more familiar with the console, either directly or preferably via rcon (e.g. by using HLSW).
Try at least these commands:
/gamedata
If an extension or a plugin is using functionality provided by the game engine, e.g. Respawn a player or equipping a player with a weapon, sourcemod needs to know a few “facts” (to be precise: offsets and signatures) about the function. These can change after valve releases an update. At this point you don’t need to know more about this, because sourcemod has an integrated updater, which automatically fetches the new gamedata files for you.
/logs
The holy grail of debugging your actions. Everything will be logged here. If someone asks you what the logfiles are saying or whether you get any errors: reproduce your problem, then take a look at the logfiles and just copy&paste the messages. Don’t try to be smart here and post what you think the given errors are saying, just post the lines. Or fix the problem yourself if you understand the error.
/plugins
All plugins (.smx files) in this directory will be loaded automatically when sourcemod starts. Plugins will also be reloaded on mapchange if their file has changed.
/plugins/disabled
Plugins in this sub-folder won’t be loaded. Move plugins from the parent directory to this one to disable a plugin and vice-a-versa. You will find some official alliedmods plugins in this directory you might want to install (e.g. rockthevote) and some others you want to disable by moving them here (e.g. funvotes).
/scripting
You can find the sourcecode to plugins in this directory, at least the original alliedmods ones. You don’t need to place any files here to install a plugin, but it is highly recommended to not only install the smx files, but also their corresponding sp file.
/translations
Not much to say about this folder, it contains translations for many languages. Plugins are encouraged to provide translation files, so you might need to copy some files in here when installing a plugin.
Launching Your Server
Note: exec is a handy parameter that can let you execute a specific cfg file when a server launches in addition to the server.cfg file.
Maxplayers is obvious and it’s standard set to 8. For Hunted and Panic modes you can have up to 16.
Although map is a cvar it must be set during launch otherwise the server is not ready to accept connections. There are currently 13 maps (based on game mode):
IP should be your internal ip (ip of the computer you are hosting the server on).
Port is obviously the port (or one of the ports) that you’ve opened with port forwarding.
The console parameter will let your server run in a cmd/command line style text interface. This is what most people do. I used to use the GUI interface in the past (the good ol’ CSS days) but I haven’t tried since then. Not even sure if it works anymore actually.
Important: If you move your bat files outside of the serverroot folder you need to supply the full path of the srcds.exe. As standard it will look for the exe file in the folder where the bat file is run from.
The game parameter tells the executable what game it should be hosting. It accepts either a path to a gameinfo.txt or a preset value (see this spread[docs.google.com]).
sv_lan will define whether your game is only available on your own local network or via the internet. It should be set to 0 unless you are only planning on running a local server. Normally this parameter defaults to 0 but I have been told that you can run into trouble seeing the server online if you don’t specify it.
Auto-Crash Restart Script (Optional)
Note: Replace the srcds directory and IP’s with yours!
Server Administration
Some basic console commands. You will more than likely use sm_admin (SourceMod) for your admin controls:
addip <minutes> <IP>
Bans a player by IP address for a specified number of minutes. Entering 0 for minutes is a permanent ban.
banid <minutes> <SteamID>
Bans a player by SteamID for a specified number of minutes. Entering 0 for minutes is a permanent ban.
banid <minutes> <SteamID>
kick Bans a player by SteamID for a specified number of minutes and kicks them from the server. Entering 0 for minutes is a permanent ban.
changelevel <map>
Changes the server to the specified map. For a full list of maps, type: maps * in the console.
dropclient <UserID>
Kicks a client by their UserID. To find a full list of UserID’s on the server, type: users in the console.
heartbeat
Manually sends a heartbeat to the master server.
info <SteamID>
Displays user information about the requested client based on SteamID.
kick <Player> or <UserID>
Kicks a user by Player name, or UserID. To find a full list of UserID’s on the server, type: users in the console.
listid
Lists all SteamIDs in your server ban list.
listip
Lists all IP addresses in your server ban list.
maps <partial name>
Lists all maps containing a partial name, for example: maps de_ would list all maps with de_ in their name.