Overview
After hours and hours of browsing through modding related forums and sites, I present to you a guide on how to fix most HL2: Ep2 issues regarding SteamPipe broken mods.Just to clarify, this does NOT cover SMod. SMod is a whole different story.
Introduction – About SteamPipe
As we all know, Valve always wants to break things, even when nothing is wrong with them. If you’re into Half-Life, you probably know about all the amazing mods the games have to offer (if you don’t, then why are you here?). The modding community was happy… that is before the summer of June 2013, when the Steampipe update happened.
SteamPipe is an update that ruined many mods that were released before June 2013. The problem is that it changed the way the game files were managed, so when a mod (pre-2013) tries to find those files, it won’t be able to. Fortunately though, the modding community managed to find a way to fix this and most issues.

Today I decided to make this guide which helps you fix the most common SteamPipe problems, which are 2.
NOTE:
1. Before you attempt to try those fixes, try out the mod BEFORE you do so. It could be already working.
2. If the creators of the mod have created patches for their mod, make sure you have the latest one installed.
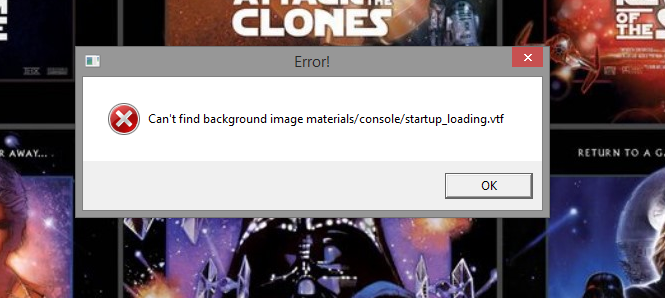
1. The mod crashes at the beginning.
This is the most basic issue of them all. The mod I’ll be using as an example here is Research and Development. (awesome mod) The most common way it happens is this: you open the mod, it’s a black screen and this message pops up:
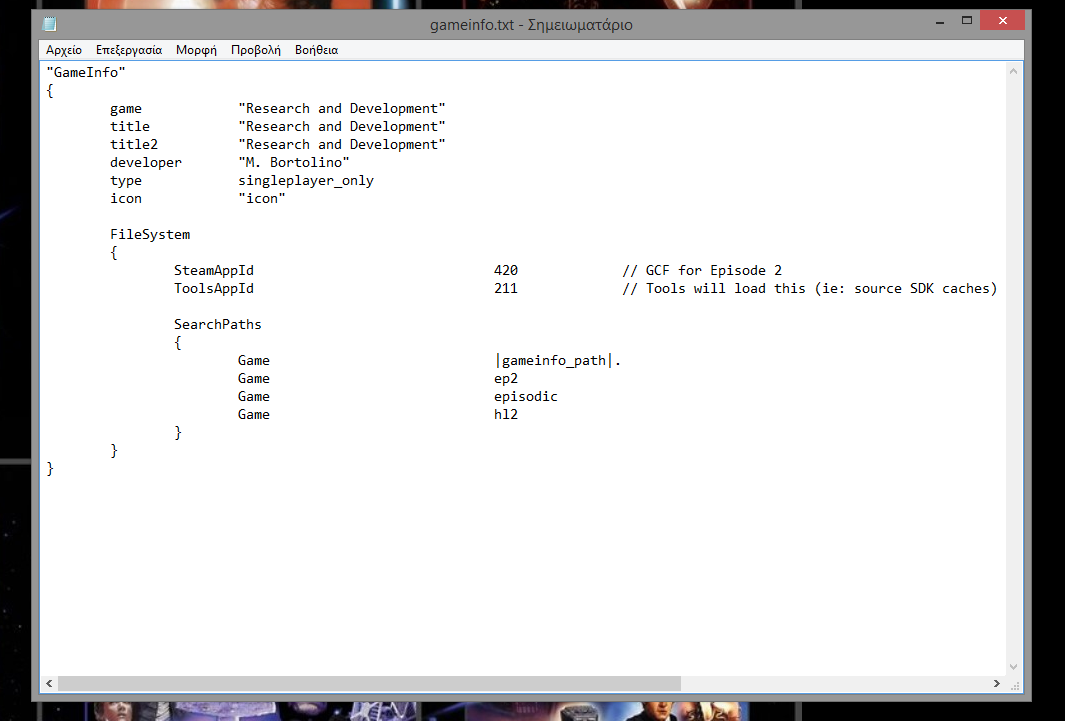
To fix this, go the mod’s directory (on the Steam/steamapps/sourcemods/your mod). You will find a gameinfo.txt file. Mine looks like this:
Yours could look different, but that’s OK. Now, you must edit the file from “Filesystem” to the end. Change it with this:
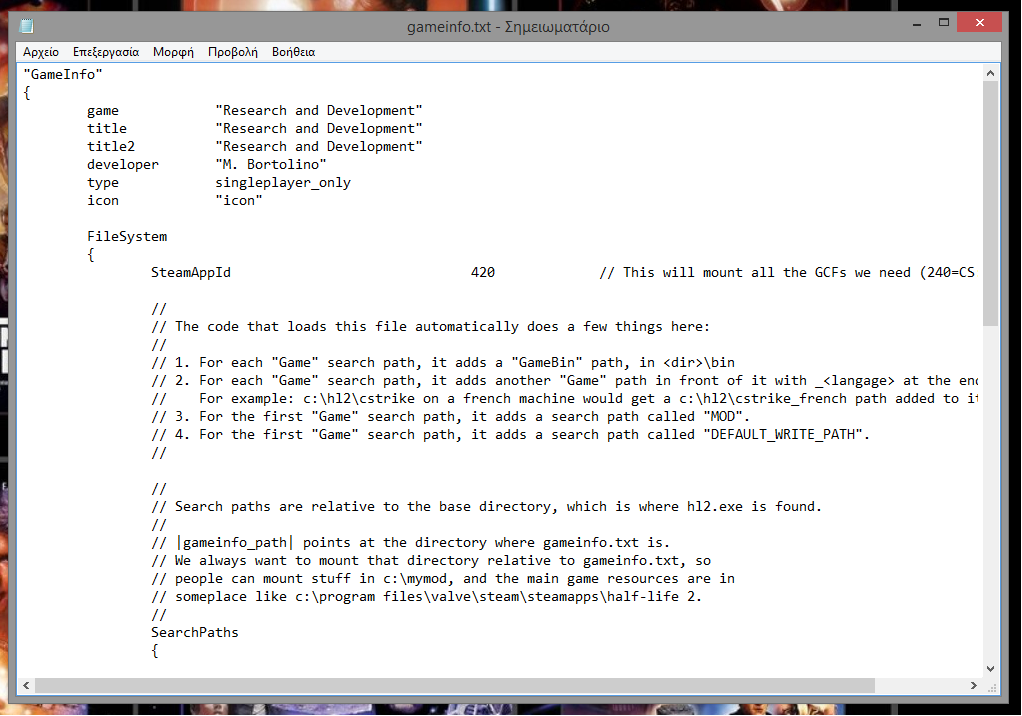
Now, your gameinfo.txt file should look like this:
Now, your mod should open up and work as usual.
2. Broken, corrupted textures.
BEFORE YOU BEGIN: If there are no corrupted textures in the mod you want to play, then you’re done.
This is mostly present on TCs (Total Conversions). These are mods that include a lot of extra content, like new guns, new enemies, new textures and completely new visual tweaks. So let’s say the mod works and it opens. You get to the menu, and it looks like this:
(The mod is Human Error BTW)

Look at this. There are ERROR signs and checkerboard purple-black textures almsot everywhere. In order to fix this issue, you wil also need to download a program called GCFScape:
[link]
This is a program where you can browse through diferent .vpk files (pre-Steampipe they were .gcf files). You see, the game files, like materials, models and sound are found in those .vpk files. You can browse through them only with this program. With this program, apart from browsing these files, you can also extract them wherever and whenever you want. So after you downloaded it, open it and click on “File –> Open”.
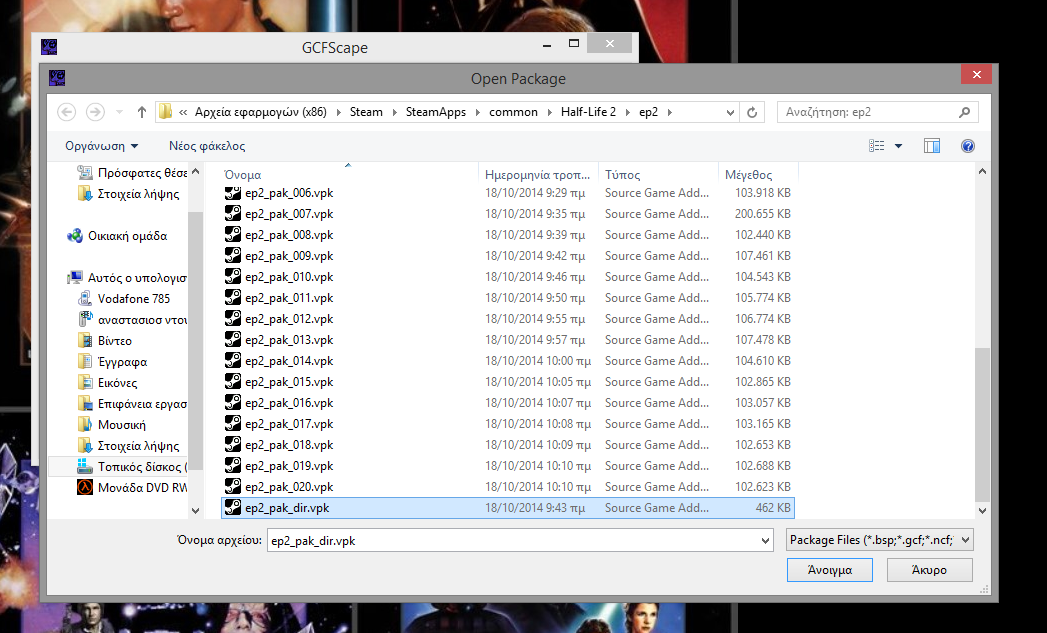
Next, we must find the .vpk file of HL2: Ep2. This file is located in C:Program FilesSteamsteamappscommonHalf-Life 2ep2. The file is called “ep2_pak_dir.vpk”. Even though you may find other files called “ep_pak_xxx” (xxx is a number), the one you need to open is the one that ends with dir.

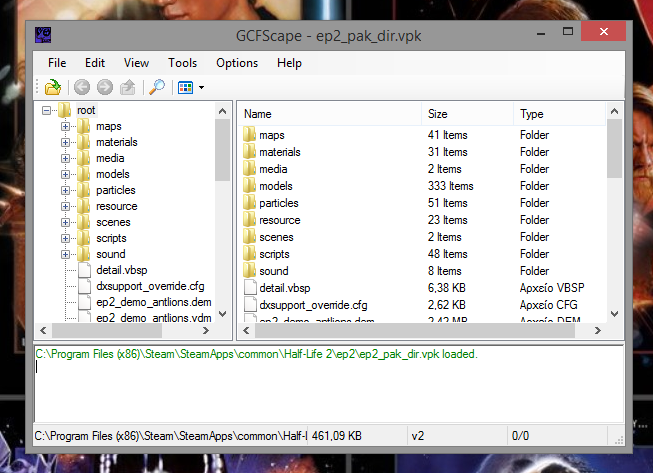
When you open it, you will be greeted with the game files we mentioned before.
Now, you need to extract the folders “materials” and “models” to wherever you want. I recommend the desktop. To do that, mark the files and right-click on them. Then click “Extract”.
Now wait for these files to extract. This takes time and space. You need 1 extra GB to extract them.


After you extracted them, open the directory of your mod (C:Program FilesSteamsteamappssourcemods”your mod name”) and drag the files “materials” and “models” into it. If you’re asked to overwrite some files, do NOT overwrite them.
Well done! The textures are now fixed! Here is proof:

After the fix shown above:

FAQ + Great Sites For Mods
Q: My mod still crashes.
A: Make sure you did everything correctly. If it still crashes, contact me.
Q: My mod doesn’t even show up in my Steam library.
A: Section #1 should work.
Q: The weapon names are messed up.
A: This is a really annoying issue, but it’s not SteamPipe related. The mod simply had that issue from the beginning.
Q: Can this guide fix SMOD?
A: As I mentioned before, SMOD is a completely different story, so probably not, unfortunately.
Q: The textures are still corrupted.
A: If the solution didn’t help, then you’ll probably need HL2 or Ep1, unfortunately.
Q: Where can I find more HL2: Ep2 mods?
A: Most people would say ModDB, but I say Planet Phillip (now runthinkshootlive.com). I REALLY like that site! The community is great, it houses almost 300 maps and mods just for HL2: Ep2. It even has the Hall of Fame, in which you can see the best mods out there. Not to mention the great recommendation system. Also, even though ModDB does have HL mods, they aren’t as many and the site isn’t exclusively for HL, unlike PP.
Thanks!
Thank you for checking this guide out! If you have an issue not listed here, then post a comment or contact me. Make sure you give a like! It really helps!
I also made a guide on how to get SMOD working and also CSS SCI FI 3: Hardwired. You can find it here:
[link]Hλppy Gλming! 😀