
Overview
I was asked by a few people to show the process about how I remade the maps from Dungeon Keeper. It’s simple, but mostly just time consuming and frustrating. I won’t be going over the scripting portion (Yet?), this will only cover the map building process.
Introduction

These maps recreate the original Dungeon Keeper campaign. You know, the game that kinda resulted in War for the Overworld being a thing. While many people on the workshop give it a go to recreate their favorite maps, and some probably using a similar method to mine, I’ve made it my goal to remake the entire maps block by block… Well, block by block when available.
Where to Begin
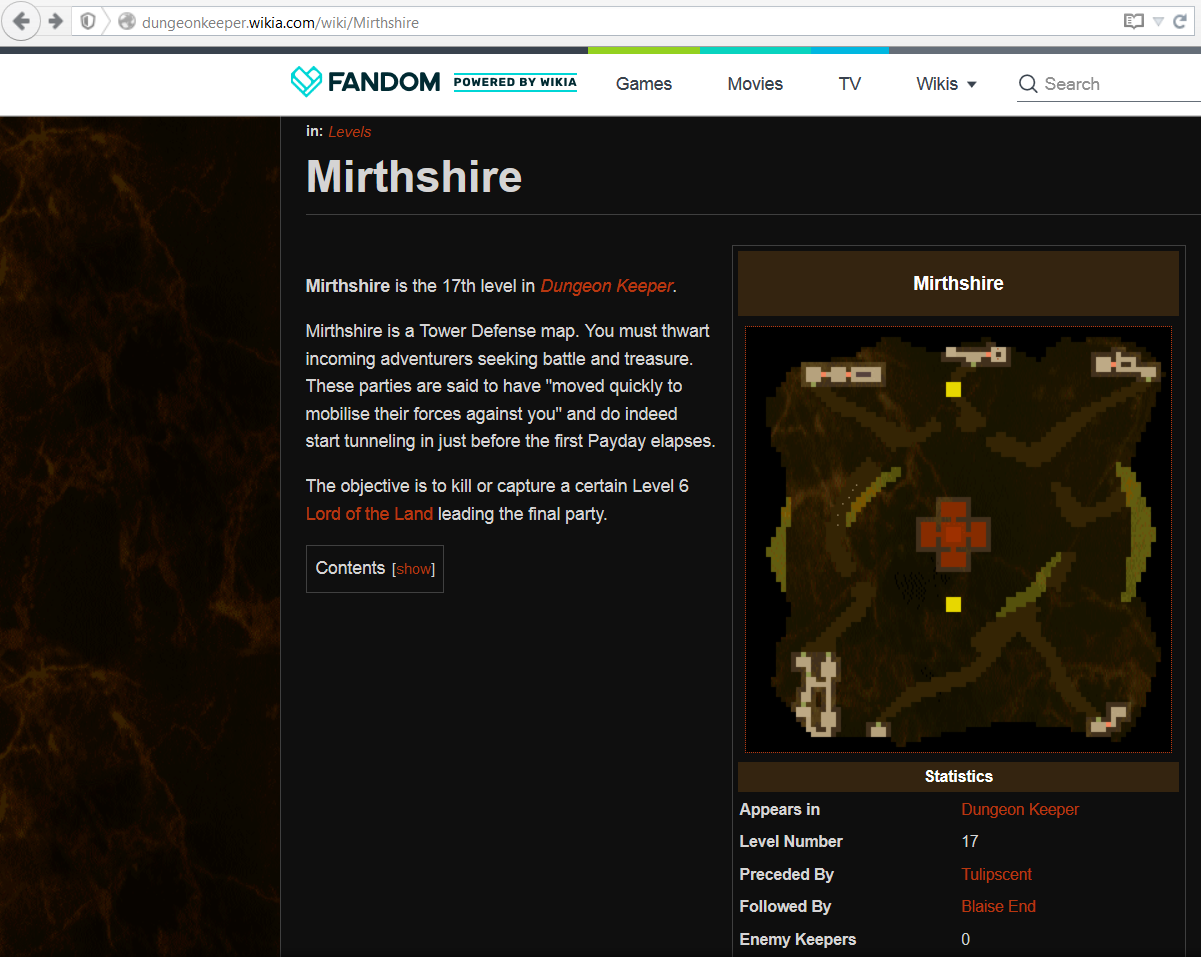
For this guide I’ll be looking at Mirthshire. Notice how the map is readily available.


Making the Map


The easiest part to start making, and the least entertaining, is the surrounding rock. Pick a corner, measure it, and just start counting. Without the transparent grid, it’s much harder to count the pixels and I’ve gotten lost many times before without the grid, and it was much slower, requiring me to go back into my image editor just to see if I was right or not.

With the grid, I can simply count in 2’s. Build the rock does take the most time, and it can be the most frustrating. with all the grays, counting, and eye strain after a while, it’s not uncommon for me to completely miss one or two, and realize that the map isn’t adding up with the image. This results in me going back and counting and figuring out where exactly I messed up. This can be simply just a few spaces back, to being near the very start of the process. I usually always fix this, but if the error requires too much backtracking and loss of progress, I decide to take the loss and risk some rock being off. As most of it will go unnoticed anyway, it bothers me little… but it does still get to me.

After the rock is done, it’s time to make… Everything else. It’s best to work on areas on the edges and then work inward. On Mirthshire, there’s plenty of Hero/Empire dungeons surrounding the outer wall, which makes it easy to count where they should be.

Doing dirt tiles can also be a pain. Aside from rock, dirt is probably the next offender when it comes to throwing off my count. There are sometimes moments where all I can do is just stare and look over the image repeatedly until I’m certain I have it down.

While this comes into player rarely, the dungeon heart is 3×3 in Dungeon Keeper, while the Dungeon Core is 5×5 in War for the Overworld. Most maps in DK provide an area around the Heart, but theres a few exceptions. Nothing can be fixed about that, unfortunately.

Gold isn’t much fun to work with either. Economy in DK and WftO are very different, especially with more things to build and buy in WftO. As such, every gold block is of medium (1000) gold. However, I do slip in High (2500) gold in most seams. Usually in the middle, or around areas that might be seen as dangerous. In the end, the player usually has other means of making gold.

Rooms work differently in each game. While I’ve so far been able to line up the rooms pretty easily (Barrakcs/Traing Room, Sanctuary/Temple, Spirit Chamber/Scavenger Room) they don’t work the same as their counterparts, one thing in particular being the fact that DK rooms could be any height and width as long as they were more than 3×3. Most rooms in WftO require 3×3, and then add a prop for every 2 added afterwards. For this reaon, I may adjust room sizes to make it less awkward and more efficient. It is a digging game though, so sometimes you just have to do some home improvement.

Artefacts are vastly different than the Magic Box counterparts.While you have the one of increase level, the rest are still missing. Transfer Creature, Multiply Units, Make Safe, Hidden Realm, Steal Hero, Reveal Map, Resurrect Creature. I have to be pretty creative with use, and usually do them as follows: Transfer Creature/Multiply Units/Resurrect Creature will grant spirit workers or sins
Make Safe will give you construction or defense artefacts
Steal Hero will provide you with a neutral hero of my choosing
Hidden Realm and Reveal map are usually just the luck of the draw at that point. Whatever I feel like should be in this map goes there.

Units are greatly different from each game. My exchange rate for them are as follows
- Beetle = Skaarg
- Fly = Oculus
- Demon Spawn = Gnarling
- Bile Demon = Beastmaster
- Troll = Chunder
- Orc = Augre
- Dragon = Sentinal
- Hound = Fire Skaarg/Babymoth (They’re usually found in lava)
- Horned Reaper = Democorn(Or other crucible unit)
- Ghost = Wandering Spirit
- Skeleton = Shambler
- Spiders = Shadow
- Vampire = Vampire/Necromancer
- Warlock = Cultist
- Tentacle = Bafu
- Archer = Huntress
- Thief = Templar
- Mountain Dwarf = Warden (Or Sapper)
- Tunneler = Sapper (Or Warden)
- Barbarian = Firebreather
- Giant = Juggernaught
- Knight = Highguard
- Priestess = Matriarch
- Fairy = Priestess
- Monk = Inquisitor
- Wizard = Wizard
- Samurai = Temple Guard

Unfortunately, the traps and defenses are very, VERY different. It’s even made harder that the wiki seldom includes traps in their descriptions. The only other option is to go through various plays on youtube or play through them myself. Considering that there really isn’t an equivelent for each of them anyway, this is where I embelish it with some WftO magic. I try to keep some things consistent though. Gargoyles replace boulders (usually accompanied with other defenses), gas traps are infernal urns, and lightning trap is… yeah. Lava traps just become. Lava. really isn’t a point there.
Finished!
[link]
And after that, we have a completed map! Ready to deliver nostalgia to you, and ready to be scripted and changed by map makers. I’ll upload a video soon of a timelapse of me making the map, until then, I hope this was insightful possibly? Regardless, only three more maps to make!