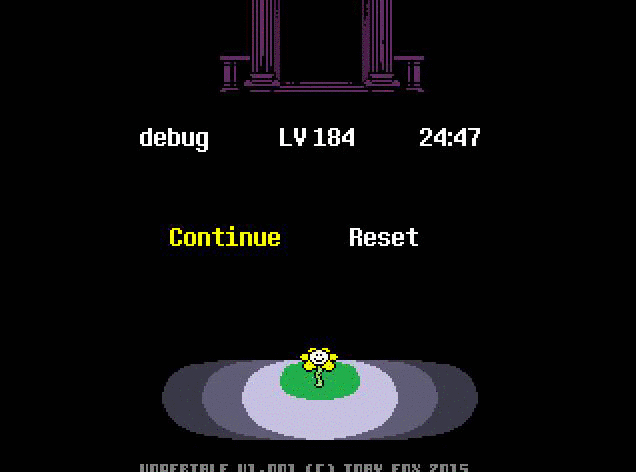
Overview
I have compiled a list of all the “dogchecked” codes that you cannot access through normal means, and have described what they take you to. Be forewarned, there will be a lot of crashing, and I’d recommend not going through some rooms if you are epileptic.
Forewarnings
If you do not want to run genocide or get its effects, do not go to rooms 24, 285, 286, or press F3 while in debug mode. Also, for the love of god, don’t change values all willy-nilly in your game unless you want to break it. Always, ALWAYS back up your game.
How to disable “dog-check” and enter debug mode.
Go to (C:/ProgramFiles(x86)/Steam/SteamApps/common/Undertale) When you’re there, make a backup of steamapi.dll somewhere- I’d recommend somewhere easy to access- then delete it from that folder. Then, open your hex editor, and drag the file data.win into the center of it. Looks like a confusing jumble of numbers? In the top left box of your Hex Editor enter those numbers, and then hit enter.
1) Using a hex editor, open data.win.
2) In the hex editor, travel to 0x0076DF58. Change “00” to “01”.
3) Still in the hex editor, go to 0x00BA4B98. Change “04” to “01”.
4) Go to 0x00BA4F18. Change “04” to “01”.
5) Now travel to 0x0071009C. Change “05 00” to “26 06”.
6) Now go to 0x00BD1378. Change “04” to “01”.
7) Save the edited file and close the hex editor.
Congrats! No more dog check.
Once you have this done, open up windows explorer and type in the top bar %appdata%. It might default to AppData/Roaming, so just back up and enter the “Local” folder. Scroll down, and there should be a folder called “UNDERTALE”. Keep this folder open, because you’ll need these files later.

Now, you’ll have to enable debug mode in order to get unstuck from certain spots when porting to rooms (Since you aren’t really meant to enter them, y’know?). To do this, in the same top left box in your Hex Editor, paste in this number: 007748C4. Once you’ve done that, press enter. You’ll select a box, and now simply type “01”. Enter your game, and press U. If you turn blue, you’ve done it! Here[tcrf.net] is a list of all that debug mode does, and it can vary based on the current state of the player. Take note, that by using this you are more vulnerable to crashes if you try and break the game.
Debug mode now shows the number of seconds spent playing in the top left hand corner.
For instance, warping out of the ruins and to Flowey before you exit will cause… well… this (turn up your volume, it’s pretty quiet.):
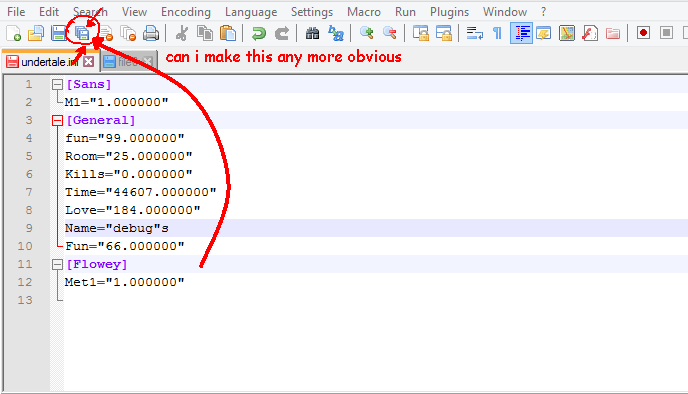
Now, let’s go about the process of actually changing your room number via values in the game. First, you’ll need Notepad++[notepad-plus-plus.org], which is one of the easier ways to view the values in the files we need. We’re finally going to go into the AppData/Local/UNDERTALE folder and open some files from there. After you’ve installed Notepad++, right click a file called undertale.ini, and file0. These are the two main files you will be working with. The undertale.ini folder is easier to comprehend since it has categories for you. (I’d also recommend running this on a fresh file, otherwise there will be a good bunch of categories for each character.) You’ll see a [General] Tab, which will look like this:
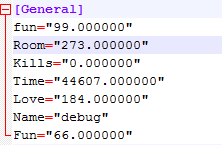
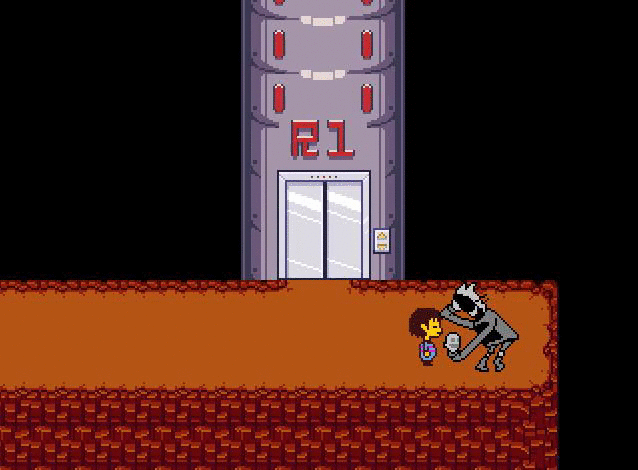
Ignore the first “fun” value. But, what you’ll want to do with your current “fun” value is capitalize the “F” and set it to equal 66, like mine. Also, set line 36 to 66 as well, in your file0. These lines are referred to as “flags”, 36 being flag5, and so on. After doing this, it will enable you to see the gaster_follower NPCs across Hotland. Here are the three you’ll see in Hotland:
If you set it above 90, you’ll be able to see the mkid_goner after running from Undyne’s spears and going back to where you departed from the raft. He has a different response if you talk to him whilst holding an umbrella.
Now, to change rooms,
Note: in order to go to the room you changed it to, you will need to exit, reenter the game, then continue, which will then put you in a location within that room.
, you will need to go into the file 0 and the undertale.ini. file0 looks a little more intimidating, so we’ll tackle that first. It’s actually really easy, as the room value is near the bottom (Line 548).
You’ll need to have that set to the room number that you want to go to, as well as the “Room=”number.00000” in your undertale.ini. They will need to be the same. Once you’ve made the changes to both, hit the “save all” button which looks like this:
Alright, now on to the actual room codes.
The normal, non-dogchecked rooms.
These are all of the rooms that you can access legitimately or without being dog-checked. Make sure you have debug mode as you may get stuck upon getting in a room. Also note that going into any of the beginning rooms past room 5 will skip triggers for Toriel to guide you through, so you will not be able to exit normally. You will have to warp out of the Ruins basement door by pressing INS on your keyboard. Also, do not talk to Flowey unless you want to get stuck in an error dialogue box.
Lastly, any spike puzzles will look like they’ve already been lowered, but they are actually incorrectly sprited. You will have to complete them. On the three rocks being pushed, the talking one will not move back, so you will have to get past collision around it and continue on.
4: The beginning flowerbed that your character falls onto.
5: The first Flowey encounter room.
6: The entrance to the Ruins.
7: Starting puzzle room that Toriel does for you. (isn’t actually here)
8: The end of the switch puzzle room that Toriel has labels for.
9: The dummy room in the Ruins.
10: The end of the long spike puzzle that Toriel guides you through.
11: End of the long room that Toriel ask you to walk through. You’ll be in front of the pillar she normally hides behind.
12: In front of the leaf pile save point in the Ruins.
13: Monster candy room in the Ruins. Below is room 12.
14: Beside the first floor trap puzzle in the Ruins.
15: The first rock pushing puzzle.
16: The beginning of the floor puzzle where you have to walk on a certain path.
17: The three rocks pushing puzzle with the talking rock. Refer to the beginning of the section on how to get past it.
18: Mouse hole save in the Ruins.
19: The spot beside where you would normally encounter Napstablook.
20: The spider bakesale room in the Ruins.
21: The short hallway with the three froggits that tell you how to make your game fullscreen.
22: The floor trap with a switch in one of the holes puzzle. Second on the top.
23: The first colored switch puzzle. You don’t need to press any of them.
24: The second colored switch puzzle. The switch is behind the first pillar to the left near the door.
25: The third colored switch puzzle. Press the red switch up top.
26: The fourth and final colored switch puzzle. The switch is the pillar to your left.
27: The room you will fall into if you press the incorrect switch in the colored switch rooms.
28: The upside-down T path that leads to either 29 or the old red leaf tree.
29: A room with a froggit in the corner. A door above leads to the room with the toy dagger in it.
30: The room with the toy dagger in it.
31: The save point outside Toriel’s house.
32: The main room in Toriel’s house.
33: Toriel’s living room with the fireplace and chair.
34: The hallway that has the doors to both your room and Toriel’s room.
35: Toriel’s room.
36: Your room.
37: Toriel’s kitchen.
38: Basement hallway 1.
39: Basement hallway 2..
40: Basement hallway 3…
41: The basement Ruins door.
42: The super long purple hallway that leads to 43.
43: Second Flowey encounter. Don’t talk to Flowey if he appears, otherwise you’ll get an error.
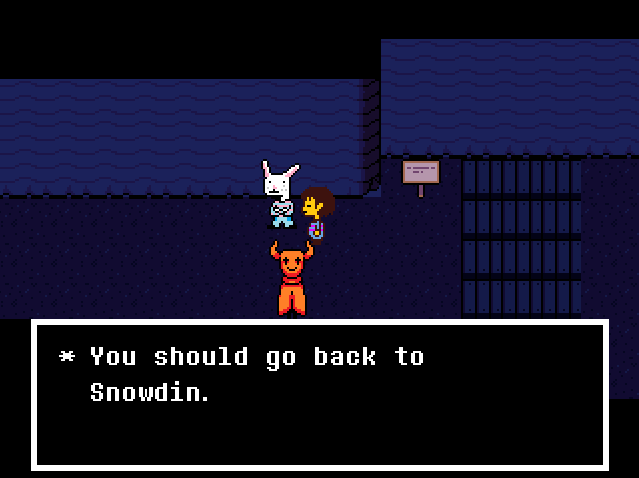
44: The area right after you’ve exited the Ruins. The ice zone’s music is playing because it doesn’t recognize the zone or scripted encounter for Sans. (Since you didn’t get there normally, y’know?)
45: Beside the bridge that Papyrus built. You can walk through and Sans will not appear.
46: Beside the first save point in the ice zone.
47: In front of the fishing pole that has a monster’s number on it in the ice zone. Going down brings you back to room 46.
48: Where you would normally encounter Sans and Papyrus for a second time. If your Fun is at 66 you’ll get a call from Sans asking if your fridge is running.

49: Beside Doggo’s post.
50: The area where you can read a sign that tells you what is in any direction: Ice.
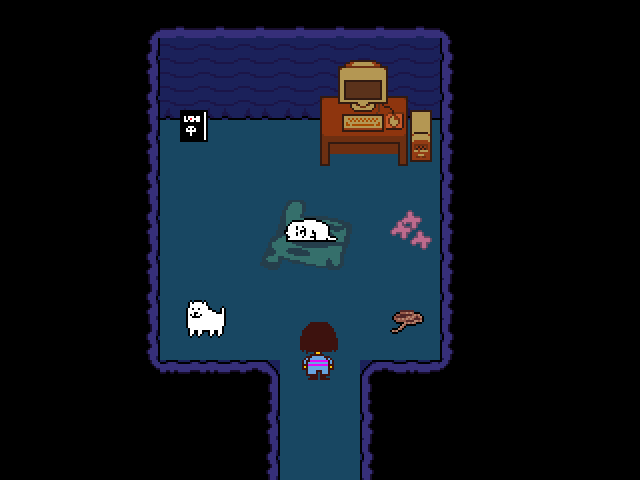
51: The area where you can get the snowman pieces.
52: Where you would normally do the invisible electricity puzzle.
53: “Ball.”
54: The Dogi outposts.
55: The crossword puzzle puzzle. Puzzle puzzle puzzle.
56: The spaghetti save point.
57: The snow covered map puzzle.
58: First X to O puzzle.
59: The second X to O puzzle with the switch on the tree.
60: The random floor tile puzzle.
61: In front of the inspired snowdog save point.
62: The snow papyrus and the rock with Sans’ name on it. This is the area you fall into if you slide off of the edge of room 63.
63: The sliding puzzle the activates the bridge to room .
64: The area below room 63 where you can encounter Gyftrot.
65: Outside the door to the secret room.
66: Snow poff area.
67: The gauntlet of deadly terror bridge.
68: In front of the save point in Snowdin.
69: In the area beside Ice Wolf and the door that some random guy won’t open.
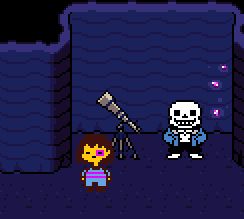
70: The riverperson transport in Snowdin.
71: The Snowdin Inn. For some reason the NPC will talk to you as if you’ve just slept there. (and then your game crashes. So, like, don’t use this one.)
72: You sleeping in the Snowdin inn. Once you wake up and the NPC talks to you, your game will crash.
73: Grillby’s.
74: The Snowdin Library. Or Librarby. Whatever you want to call it.
75: Sans and Papyrus’ garage. This is where you get put if you are “captured” by Papyrus. Just walk out.
76: Sans and Papyrus’ house.
77: Papyrus’ room.
78: Sans’ room. There is a key in the drawer. You can use that to unlock another little Gaster secret behind the house.
79: I honestly don’t know what this room is or what purpose it serves. All I know is that the sound of wind will get progressively louder as you walk forward, there will be the sound of a switch, and then you’ll be back in Sans’ room, stuck. Use debug mode to get unstuck.
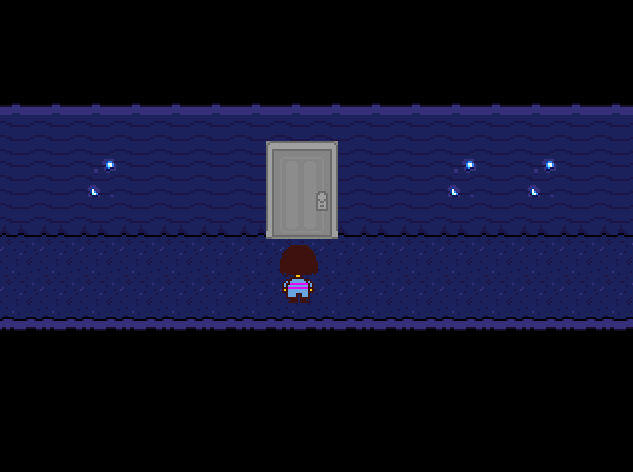
80: The secret room behind Sans and Papyrus’ house.
81: The icy fog area where you fight Papyrus.
82: The first area in Waterfall.
83: In front of the save point beside Sans’ outpost in Waterfall.
84: The room with the rocks falling down a waterfall. There is a box and a sign next to you.
85: The secret room in the waterfall with the falling rocks. There are two glowing mushrooms inside.
86: In front of the save point after the first Undyne encounter.
87: The first use of bridge flowers in Waterfall.
88: Second bridge flower room.
89: The secret room from 88 that you can get to with bridge flowers. There is an echo flower and interacting with the bench will give you an abandoned quiche.
90: The echo flower room with a telescope. It tells you to activate the hidden door on the wall ahead. There is a scripted Woshua encounter here, but for some reason it turns into Aaron.
91: The long bridge with the signs. Leads to the raft that takes you to the first Undyne spear dodge. The raft may or may not be there, so you will need to warp to the next room with INS. When you finish dodging her spears, go back to where you exited the raft. spr_mkid_goner should be there.

92: Undyne’s first spear dodge room. Going to the left will bring up spr_mkid_goner.
93: The bushes after Undyne has thrown her spears at you. Normally where she comes and grabs the monster kid instead of you, then walks off.
94: The crystallized cheese save point room.
95: Beside Sans and his “premium telescope.” You’ll get a red dot on your eye. You’ve been pranked.
96: Inside the room with the Nice Cream man in Waterfall.
97: The first glowing area when you head down the bridge and onto the glowing grass. Papyrus will call and say he lied.
Normal Codes Pt. 2
98: The bush where you find the ballet shoes in Waterfall.
99: The platform opposite the duck in Waterfall.
100: The room where you meet Onion-san.
101: The room where there is a scripted encounter for Shyren. If you’re in debug mode, press 3 if you’d like.
102: The room with the piano to open the secret door. The melody is . ^ > . v v >
103: You’re carrying too many dogs.
104: The stone statue room.
105: The room where you can pick up an umbrella. Pick one up and go back to the spr_mkid_goner for different dialogue, if you’d like.
106: The hallway with reflective puddles. Look at one and press space while in debug mode for Chara.
107: Longer pathway with an echo flower off to your right. Normally monster kid will look at it and talk about his school and Asgore. Using debug mode to get to it and interacting will cause the flower to say, “Error!”
108: The view of the castle. Monster kid is with you.
109: The area where you can put up your umbrella and where monster kid hoists you up. If you’re in debug mode there will be two random numbers by your head that indicate monster kid’s state. Ignore them.
110: The save point before the second spear dodge from Undyne.
111: The spear dodge bridge.
112: The end of the spear dodging section. You’ll be stuck so use debug mode to get unstuck.
113: The garbage dump flower bed.
114: The garbage dump save point.
115: The junk room that leads to mad dummy.
116: Napstablook looks at you and says, “oh hey… you… followed me..” etc. This is the quiet place save point.
117: Outside Undyne’s house. Mad dummy will be sitting to the left by default. It’s a living.
118: Undyne’s “date.” Don’t debug your way out of the chair and interact with other things unless you want to get softlocked.
119: Beside Napstablook’s and Metatton’s house.
120: Napstablook’s house.
121: Metatton’s house.
122: Napstablook’s snail farm and race.
123: A strange room with four NPC’s in it. They all seem to be girls trying to catch bugs. You can’t see their sprites, and they may not even have any, since they’re hidden in the bushes. Walking to the left crashes your game. Walking to the right gets you softlocked on a black screen. Each one says something, but the one in the lower left has something a little unsettling to say, possibly about Chara. This could be a dogchecked room but it’s well below the index for the ones that are.


124: The intersection just below the old man turtle’s shop.
125: The spot where you would meet the riverperson in Waterfall.
126: The walkway with two waterfalls and signs. Leads to the glowing mushroom pathway puzzle.
127: Glowing mushroom pathway puzzle.
128: hOI!! welcom to. . . TEM VILLAGE! ! (sorry)
129: Glowing lantern pathway puzzle.
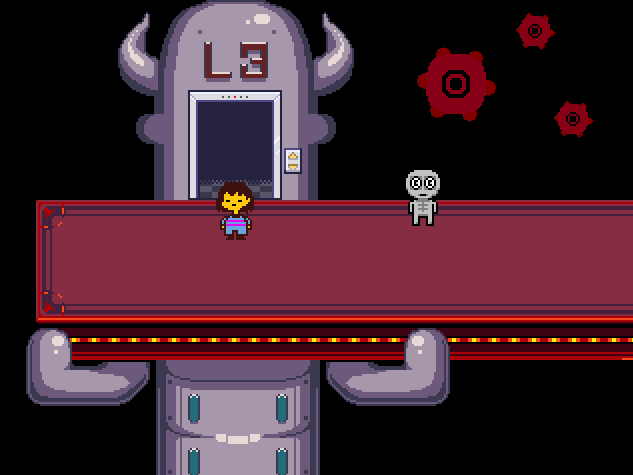
130: The walk leading to Undyne’s echo flower that says, “Behind you.”
131: The echo flower hallway that leads to the bridge where monster kid will fall.
132: The bridge where monster kid comes and talks to you, and then falls off the bridge.
133: The dialogue of what will happen if you leave monster kid to fall.

134: The mountain where Undyne talks to you.
135: The hallway after you run from Undyne. Yes, she will chase you, and the fight will act as if it just started if she catches you.
136: The Hotland sign. You spawn right next to Undyne and are stuck, and will have to start the fight.
137: In front of Sans sleeping on the job. Undyne still chases you.
138: In front of the water dispenser in Hotland. Walking a little to the left will trigger the parched Undyne cutscene.
139: The first Hotland save point. It’s an intersection.
140: Where you would meet the riverperson in Hotland.
141: The first time you enter Alphys’ lab.
142: The top part of Alphys’ lab.
143: Right outside Alphys’ lab in Hotland.
144: The first two conveyor belts in Hotland, with the scripted Vulkin encounter.
145: The second save point in Hotland. It’s the area where you first encounter steam hoppers, and the scripted Tsunderplane encounter.
146: The room where you can get the burnt pan.
147: The room where Alphys first explains Hotland’s lasers to you. Take note that, even though Alphys can call you, you do not have a cellphone in your menu.
148: The room after passing the orange lasers.
149: The first slider puzzle to the west of the first puzzle door. The blue laser is not deactivated since you did not trigger Alphys’ event to deactivate it. The NPC’s don’t know that, though.
150: The slider puzzle room to the west.
151: The area outside the slider puzzle to the east.
152: The slider puzzle to the east.
153: The room after you complete both puzzle and enter the unlocked door. Note that if you exit, you can’t go back in without debug, because you didn’t complete the puzzles in the first place.
154: Metatton’s cooking show.
155: The save point in front of the core’s view.
156: In front of the right floor 1 elevator. If you have your Fun level at 66, a Gaster follower should be here.
157: In front of the right floor 2 elevator. Heats Flamesman is here.
158: Sans’ hotdog stand.
159: The long walk where Alphys and Papyrus spam status messages at each other. Leads to two (three if you can find the secret) other pathways.
160: The secret “Art Club” room with three cacti around a sign. Go there on October 10th at 8PM. I guess.
161: The room where you find the stained apron.
162: The moving conveyor belt switch puzzle.
163: The steam hopper button puzzle.
164: The save point with the computerize safe and mouse hole.
165: The pathway where Guard 01 and 02 stop you.
166: Metatton’s News show.
167: The second view of the Core.
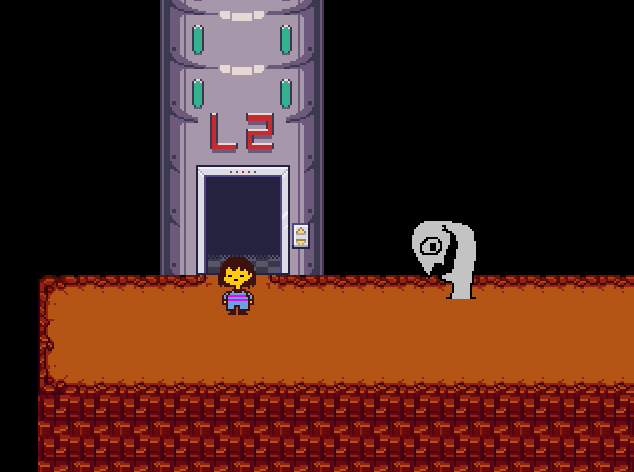
168: The left floor 2 elevator. If your Fun is at 66, another Gaster follower will be here.
169: The left floor 3 elevator. The third and final Gaster follower is here.
170: The spider bake sale. Ludicrous prices and all.
171: The second steam hopper and slider puzzles main room.
172: The conveyor belt wih blue lasers leading to a slider puzzle.
173: The second slider puzzle to the south.
174: The entrance to the second slider puzzle to the north.
175: The second slider puzzle to the North.
176: The save point outside of Muffet’s room.
177: Muffet’s room.
178: The short hallway before heading into Metatton’s play.
179: Metatton’s play.
180: You falling into the “Dungeon” with the randm floor tile puzzle.
181: The intersection with the Nice Cream man and Guard 01 and 02.
182: Outside MTT Resort.
183: Beside the save point inside MTT Resort.
184: Inside the dining hall in MTT Resort.
185: Outside the 4 guest rooms in MTT Resort.
186: Under the covers in a room in MTT Resort. Move around for a funky tune.
187: Outside right elevator 3, by Heats Flamesman.
188: The path to the Core after leaving MTT Resort.
189: Inside the Core. You will get a call from Alphys that is a black box just keep pressing enter until it goes away.
190: The room to the right of first entering the core. Flame particles.
191: The first mercenary encounter. Battle music will not play.
192: The bridge with the moving lasers that you need to go past to start the confusing mess of hallways.
193: T-road leading to different rooms.
194-204: Pointless hallways. Do I really need to describe these?
205: Slider puzzle to unlock the pathway to the bridge to a switch to a- ok I’ll stop.
Normal Codes Pt. 3
209: The bridge to Metatton’s fight room entrance.
210: By the save point outside Metatton’s fight room.
211: Metatton’s fight room.
212: The hallway to the final elevator to Asgore’s path.
213: Inside the right elevator 1.
214: Outside left elevator 1. Going down will put you behind Guards 01 and 02, preventing you from going down more. You can only go to the right elevators from this one.
215: The final elevator. Exiting will trigger Alphys talking to you and you will freeze up. Just wait for Alphys to talk then head back into the elevator.
216: Beside the save point for Castle Elevator.
217: The long castle path. If in debug mode just press and hold backspace to walk faster.
218: The long path upward, but you spawn near the top of it.
219: In front of the save point for Asgore’s house.
220: The main room of Asgore’s house.
221: Asgore’s living room.
222: The hallway in Asgore’s house. Above is “your” room with the rusty dagger and heart locket. The other door is Asgore’s room.
223: Asgore’s room.
224: “Your” room.
225: Asgore’s kitchen.
226: First basement hall.
227: Second basement hall..
228: Third basement hall…
229: FOURTH basement hall….
230: Jesus christ how many ar- Oh, a long pathway where the monsters talk to you.
231: Save point in the judgement hall.
232: The save point outside the throne room.
233: The stairway leading back up to the throne room save point, or the coffin room below.
234: The coffin room.
235: The save point in the throne room. Asgore will be in front of you but you can walk through him. Walk to the entrance of the room to trigger the cutscene.
236: The save point outside of the barrier room.
237: You’re behind Asgore in the barrier.
238: The exit to the surface if you kill Asgore.
242: The lab elevator that will go to the True Lab.
243: The open True Lab elevator.
244: In front of the True Lab elevator.
245: Beginning hallway in True Lab.
246: In front of the save point after entering True Lab.
247: The hallway to the left after entering True Lab.
248: Sink and examination table room in True Lab.
249: Red keyhole in True Lab.
250: The hallway just inside the red door in True Lab.
251: In front of the save point in the bed area in True Lab.
252: Mirror room in True Lab.
253: Blue keyhole in True Lab.
254: T-path in True Lab.
255: Wavy tentacle bit where you get the green key in True Lab.
256: Next to Lemon Bread in True Lab. (She’s the fake save point blocking your path.)
257: The VHS and yellow keyhole room in True Lab.
258: The fridge room in True Lab, but the fog is still on the screen. You will need to go to the ventilation room to remove it.
259: The green keyhole in True Lab.
260: The ventilation room in True Lab.
261: The True Lab elevator. Not powered. Go to the left to do so.
262: The door leading to the True Lab power source.
263: The power button in the True Lab.
The dogchecked rooms, and what they do.
The “dogchecked” rooms that you can’t normally access.
1: It’s the intro. Spam enter if you want; you’re not getting out of the loop.
2: The Undertale logo, then the menu screen. Spam enter, too.
3: The menu screen forever. Enter spam.
Now here’s a few useful ones. (That will eventually softlock your game you dirty cheater.)
239: The creator’s credits.
240: The true pacifist exit to the surface. You’ll get to the credits, but upon the ending static, your game will softlock and run out of memory.
241: First a black screen, and then the true pacifist ending where everyone is looking at the sunset.
Now, for everything after that is probably a test room or just plain weird.
While room 264 is accessible without removing dogcheck, it’s still noteworthy as you cannot encounter it through normal means. Here’s a video of what happens upon booting this room. Pretty bonechilling:
ENTRY NUMBER SEVENTEEN
DARK DARKER YET DARKER
THE DARKNESS KEEPS GROWING
THE SHADOWS CUTTING DEEPER
PHOTON READINGS NEGATIVE
THIS NEXT EXPERIMENT
SEEMS
VERY
VERY
INTERESTING
. . .
WHAT DO YOU TWO THINK?
It plays with the background sound of mus_smile.ogg, which is an awful sound on its own. After the message is complete, it will close your game.
266: Dog room! Exiting brings you outside the ice hallway door in Snowdin. So now you don’t have to dodge the end credits, you lazy dog.
267: Unbelievably loud sound of an enemy dying and then your game crashes.
268: Fake hallway. Has a .1 chance of spawning the grey door to 269.
269: The better known room that you enter when entering the “Grey Door”. The sprite here is presumably Gaster, and interacting with him will make him disappear. When you exit you will be teleported to “fakehallway”. Left takes you to the crystallized cheese, right brings you to Sans and his “premium” telescope. You cannot reenter the hallway after leaving.
270: The sound test. Playing Gaster’s theme will cause the thanks for your feedback message, and you will be sent to the fishing pole in Snowdin.

271: Test monster dialogue. A bloody mess of sprites. You can sit through three little blurbs of dialogue but then you’re softlocked.
272: Gaster secret. Piano music playing. A strange looking sprite disappears and appears as you get closer. Interacting with him will speak in the Gaster voice in wingdings. It says *[REDACTED]. Walking into the room below brings up the sound test. Playing Gaster’s theme will cause the “Thanks for your feedback.” and will crash your game.

273: An area that looks like it’s from waterfall. There are four bridge flowers hidden in the shrubs. Leads to a room that plays the game over theme on loop forever. Leads to 274. Walking down will crash the game.

274: Walking… lava drips? Game over music plays forever. Interacting with them crashes your game.

275: Walk in any direction forever with unsettling ambience. You can’t leave.
276: A froggit fight while Frisk’s acid trip starts. I have no clue. It will crash after a few seconds.
277: Empty black room you can walk around in. Can’t leave.
278: Beginning to the true ending credits.
279: Papyrus and Sans on the road in the credits. Surprisingly doesn’t crash like all of the other endanims. Softlocks on static before end credits. So, no, you can’t cheat the true ending. Eventually the game will run out of memory and crash.
280: Beach scene in credits crash.
281: Crashes loading the credit’s mettaton concert.
282: Crashes loading the credit’s school animation.
283: Crashes trying to load the sprite for Mt. Ebbot fading from green to brown.
284: Literally freezes your game. I don’t know.
285: The ending cutscene for true pacifist if you stayed with Toriel. Then Chara looks at the screen and goes to 286.
286: The genocide-tainted true pacifist “THE END” screen. Unsettling music and all.
287: Every single sprite in the game! And Undyne’s face! And a 0. I honestly don’t know why this room would exist. After every sprite gives you a seizure, the 0 starts counting.
288: Joystick configuration.
289: Dancing Migosp bug. Below is joystick configuration.
290: The “corrupted” title screen for Flowey’s fight.
291: Same as above.
292: Flowey’s continue screen.
293: You walking to the save point before fighting Omega Flowey. You really are an idiot! Crashes if you speed through with debug mode.
294: The Omega Flowey fight room. It crashes your game.
295: ##########################################################
##################################
FATAL ERROR in
action number 1
of Create Event
for object obj_f_frasier:
global variable floss(100148, -2147483648) not set before
reading it.
at gml_Object_obj_f_frasier_Create_0
##########################################################
################################## …..
I have no idea.
296: Layout for the Hotland call trigger points. Walking forward will crash your game once you get the call. Going below will crash your game as it attempts to load Omega Flowey. There are the steam jumpers from Hotland that you can hop on. There is an exit to the right, but it will crash your game.

297: A similar look to the end of the room in 298. Going to the right crashes your game. A conveyor belt leads you to another pathway exit. This also crashes your game. Falling off the edge puts you in room 298.

298: Er. Dog food. Sadly, it’s dry. A conveyor belt leads you to a line of corner pathway tiles and a small hollow square shape. There’s an echo flower you can interact with that says “Error!” This is probably a test room to see if the switch interaction while on a conveyor belt in hotland worked.
299: Ice sliding physics test room. Can’t leave.
300: Oh look. A bowl of rock candy. Walking to the left crashes your game.

301: The test game for ball. There is no hole. You can push the snowball around forever, or until it gets stuck. It will infinitely grow. Can’t leave.

302: Behold! A crash!
303:Start here and end at 305. Going to the left will crash your game. Go right. This is one of the last “test” rooms. Or just a little nod to you cheating. The Orange smiling monster and the bunny with his arms crossed, both from Snowdin, are here. There is no music. There’s also a sign here, but it’s actually an echo flower with an incorrect sprite. You can tell by talking to either one of the NPC’s and seeing the sign repeat it. There are bridge tiles you can walk through.
304: A crystal, and an NPC from Hotland that tells you that he wants to know what’s in the room to the right, which is room 305.
305: Flicker of a fading Amalgate. Then you’re softlocked. You’ve been trolled.
Codes Pt. 2
307: The cutscene that plays when you first encounter Flowey in the ruins. Toriel will intervene and you’ll exit the cutscene. Unless you have debug mode and can turn off collisions, you’re going to be stuck.
308: Uh. Spears. Little white dot in the top left. I guess that’s interesting. Can’t leave.
309: First event of the froggits talking to you when you’re walking to Asgore. You can move around freely, but you’re stuck here. Pressing enter loops it.
310: The Game Over screen. It crashes your game.
311: Snowdin shop.
312: Waterfall Old Man Turtle shop.
313: Bratty and Catty’s Alley shop.
314: Burgerpants MTT store.
315: hOI! welcom to . . . da TEM SHOP!!! (sorry)
316: A hall with absolutely no collision. You can’t leave.


317: Papyrus hangout. Proceeds as normal.
318: Alphys date. It will proceed as normal and you’ll end up where you normally would afterwards.
319: The fight or mercy after you’ve beaten Omega Flowey. One of the pacifist endings will play after killing or sparing flowey. Giving him mercy will say he ran away, but he’ll be dead in front of you anyway.
320: True pacifist Flowey telling you about the true reset. You can true reset after this as well. Continuing just puts you back in the cutscene.
321: Completely black room. Walk around, I guess. You can’t leave.
322: Congratulations! Your game instantly closes.

323: What happens if you pick “Gaster” as your name.
324: You’ve destroyed the world. Good job.
325: “Undertale by Toby Fox” spiel, then you exit the ruins.
326: Invalid room number dog. Which is what you’ll get for any code above 264 if you don’t disable dogcheck.

327: Mettaton waves at you forever.
328= Very glitchy true pacifist scene. Sprites are colored incorrectly and the game will crash after Flowey appears and finishes talking.


329= Encouraging monsters. You’re softlocked, reset.

330= Asriel. (Flowey just after he’s absorbed all of the souls. And, yes, you can beat the game. I’m kidding. At the credits, the game will softlock on the static sprite. You dirty hacker.)
331= Asriel crying. etc. game softlocks at credits.
332= Asriel walking with Frisk cutscene. Afterwards you go back into the second stage of the Asriel Dreemurr fight. Credit softlock. You get it.
333= Asriel shakes his head infinitely, then starts bouncing around, and your heart sprite is glitched. You can’t do anything here. If you’re in debug mode, making him attack will cause the game to crash. No sound.

334= You get to stare at Asriel Dreemurr stage 2 forever. No sound. Nothing happens.
335= Dog Shrine! This is the most recent addition to Undertale.
Extra debug mode fun.
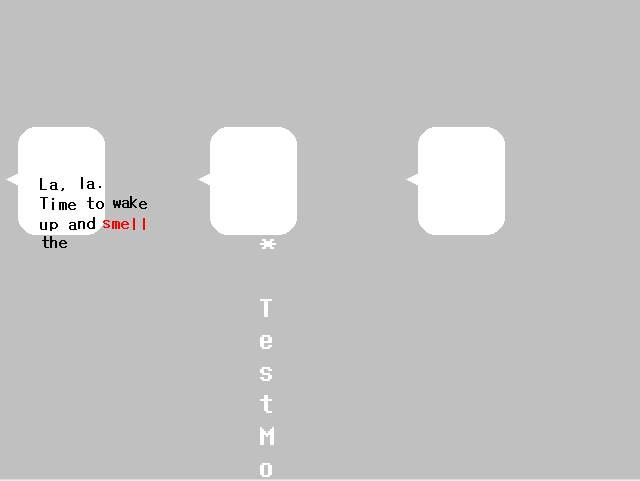
Using debug mode, and a hex editor, you can encounter pretty much any enemy in the game, including the cut ones. To do this, go into the top left bar of Hex Editor Neo, and paste in this code 0000BD7CE4.. Now that you have your little green box, you’ll want to type in any of the following codes for the given enemy. These are in hexadecimal, so they may not seem like real numbers. Always make sure you keep track of what value you are editing. Cheat responsibly, m’kay?
Note, you will need to exit and reopen the game in order to load in the new battlegroup you entered into the hex editor. To actually encounter the selected battlegroup, just press HOME on your keyboard, right between DELETE and END. Now, here are all of the possible battlegroups you can force (with or without crashing.)
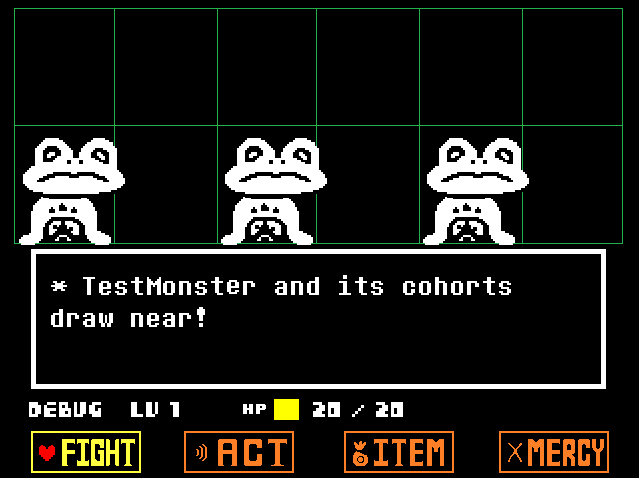
01: [TestMonster] TestMonster and his cohorts draw near! They are all froggit sprites. Checking any one will ask “What’s your favorite color?” and your game will softlock. Complementing one will cause the response as if they were threatened, and threatening will act as if you complimented them. Attacking any will crash the game, as well as letting any attack. There really is no point to booting up this battlegroup, but if you do just press O+P, then spare them to exit crash-free.
02: [Dummy] You encountered the Dummy. Talking will say Toriel is pleased. But, you know, she isn’t actually there.
03: [Froggit] Froggit attacks you! More specifically the first Froggit you encounter. Toriel will appear to glare at it. She, of course, isn’t there when you win.
04: [Froggit] Froggit hopped close! The real enemy Froggit.
05: [Whimsun] Whimsun approached meekly!
06: [Froggit and Whimsun] Froggit and Whimsun drew near!
07: [Moldsmal] Moldsmal blocked the way!
08: [Moldsmal x3] You tripped into a line of Moldsmals.
09: [Froggit x2] A pair of Froggits hop towards you.
0A: [Moldsmal x2] Moldsmal and Moldsmal block the way.
0B: [Moldsmal and Migosp] Migosp crawled up close!
0C: [Migosp and Vegetoid] Vegetoid came out of the earth!
0D: [Loox] Loox drew near!
0E: [Vegetoid and Loox] Vegetoid and Loox attacked!
0F: [Loox, Vegetoid, and Migosp] Loox and co. decided to pick on you!
10: [Vegetoid x2] A pair of Vegetoids came out of the ground!
11: [Loox x2] A pair of Loox decided to pick on you!
12: [Vegetoid] Vegetoid came out of the earth!
13: But nobody came.
14: [Napstablook] Here comes Napstablook.
15: [Loox] Loox drew near!
16: [Toriel] Toriel blocks the way!
17: [Doggo] Doggo blocks the way!
18: [Lesser Dog] Lesser Dog appears.
19: [Dogamy and Dogaressa] Dogi assault you!
1A: [Greater Dog] It’s the Greater Dog.
1B: [Papyrus] Papyrus blocks the way!
1C: [Gyftrot] Gyftrot confronts you!
1D: [Snowdrake] Snowdrake flutters forth!
1E: [Chilldrake] Chilldrake saunters up!
1E(alt): [Chilldrake x2] Chilldrakes flutter forth!
20: [Icecap] Icecap struts into view.
21: [Icecap and Snowdrake] Icecap and Snowdrake pose like bad guys.
21(alt): [Icecap and Chilldrake] Icecap and Chilldrake pose like bad guys.
22: [Jerry] Jerry clings to you!
23: [Icecap and Jerry] Icecap appears. Jerry came too.
24: [Icecap, Jerry, and Snowdrake] Icecap and Snowdrake confront you, sighing. Jerry.
(there’s a blank in the battlegroups here, not sure why. Trying to run them will crash your game, duh.)
28: [Aaron] Aaron flexes in!
29: [Temmie] Special enemy Temmie appears here to defeat you!!
2A: [Moldsmal and Moldbygg] You walk into Moldsmal.
2B: [Woshua] Woshua shuffles up.
2C: [Shyren] Shyren hides in the corner but somehow encounters you anyway.
2D: [Mad Dummy] Mad Dummy blocks the way! There will be red numbers in the top right, indicating his turns. Pressing A makes his next attack his final attack.
2E: [Aaron and Woshua] You shouldn’t read this. They appear if you play one of Napstablook’s CD’s, then wander around in the quiet place save point for a while. More of a cutscene than an actual fight.
2F: [Undyne] You’ll spawn in her foot, but the fight proceeds as normal. Fleeing will exit the fight, and she, of course, won’t be there to chase you.
30: [Mettaton] Mettaton attacks! Using the key combination of O+P to spare him will softlock your game.
31: [RG01 and RG02] Royal Guard attacks!
32: [Tsunderplane] Tsunderplane gets in the way! Not on purpose or anything.
33: [Vulkin] Vulkin strolls in.
34: [Pyrope] Pyrope bounds towards you!
35: [Moldsmal x2] You walk into Moldsmal.
36: [Woshua and Aaron] Woshua and Aaron appear.
37: [Moldbygg and Woshua] Moldbygg and Woshua appear.
38: [Muffet] Muffet traps you!
39: [Mettaton] Mettaton attacks! The first “fake” fight against Mettaton where he pretends to be defeated.
3A: [Undyne] The armorless Undyne that you fight while on a date with her. If you continue the fight and get her to stop, you will appear outside of her house, regardless of where you actually were before. Fleeing will exit the battle and you will be where you normally were.
3B: [Madjick] Madjick pops out of its hat!
3C: [Knight Knight] Knight Knight blocks the way!
3D: [Final Froggit] Final Froggit was already there, waiting for you
3E: [Astigmatism] Astigmatism drew near.
3F: [Whimsalot] Whimsalot rushed in!
40: [Whimsalot and Final Froggit] Whimsalot and Final Froggit appeared.
41: [Whimsalot and Astigmatism] Whimsalot and Astigmatism appeared.
42: [Final Froggit and Astigmatism] Final Froggit and Astigmatism appeared.
43: [Final Froggit, Astigmatism, and Whimsalot] What a nightmare!
44: [Knight Knight and Madjick] Mercenaries emerge from the shadows.
45: [Bomb bomb] Defuse the bomb!
46: [Dog bomb] Defuse the dog!
47: [Extremely Agile Glass of Water bomb] Defuse the extremely agile glass of water!
48: [Script bomb] Defuse the script!
49: [Basketbomb] Defuse the basketball!
4A: [Gift bomb] Defuse the present!
4B: [Game bomb] Defuse the game!
4C: [RG 03 and RG04] Royal Guard attacks! These are cut enemies from the game, but they are still fully scripted.
4D: [Tsunderplane and Vulkin] Tsunderplane attacks! Not because it’s jealous Vulkin is paying attention to you!
4E: [Pyrope x2] The rare and threatening Double Davis.
4F: [Vulkin x2] A strange parade blocks the path.
50: [Mettaton] Mettaton attacks! Mettaton you attention ♥♥♥♥♥ why do you have so many battlegroups?
51: [Mettaton Ex] Mettaton EX makes his premiere!
52: [Lemon Bread] Smells like sweet lemons.
53: [Reaperbird] ,
54: [Amalgamate (Snowdrake’s mom)] It’s so cold.
55: [Memoryhead x3] drew near!
56: [Endogeny] It’s the Amalgamate.
These are lost souls. Saving them will port you to the beginning of the Asriel Dreemurr fight stage 2. Beating the game this way will softlock and the credits until it runs out of memory.
57: [Undyne’s lost soul] The Lost Soul appeared.
58: [Papyrus and Sans’ lost souls] The Lost Souls appeared.
59: [Alphys’ lost soul] The Lost Soul appeared.
5A: [Toriel and Asgore’s lost souls] The Lost Souls appeared.
5B: [Monster Kid] In my way. Hitting him will bring Undyne up. If you never want to run the genocide run, don’t run this battlegroup. (You’d probably die, anyway.)
5C: [Undyne the Undying] The heroine appears.
5D: [Glad Dummy] Glad Dummy lets you go. Another genocide route enemy.
5E: [Mettaton NEO] Mettaton NEO blocks the way!
5F: [Sans] You feel like you’re going to have a bad time.
(Another blank bit)
64: [Asgore] Pre-Asgore’s chat.
65: [Asgore] ASGORE attacks!
78: [Final Froggit and Astigmatism] That doesn’t seem correct. Hard mode enemies.
79: [Final Froggit and Migospel] Final Froggit stopped chasing Migospel around.
7A: [Parsnik] Parsnik slithered out of the earth!
Debug mode fun pt. 2
7B: [Moldessa x2] You tripped over some Moldessas.
7C: [Moldessa x3] A line of Moldessas block the path.
7D: [Final Froggit and Whimsalot] Can you believe it?
7E: [Final Froggit] Final Froggit hopped in…?
7F: [Whimsalot and Parsnik] Whimsalot and Parsnik appeared.
80: [Moldessa and Migospel] Migospel flutters in, carrying Moldessa.
81: [Migospel and Parsnik] Migospel flutters in, carrying Parsnik.
82: [Parsnik x2] Parsniks hissed out of the earth!
83: [Parsnik and Astigmatism] Not only potatoes have eyes.
84: [Astigmatism x2] Eyes appeared from the shadows.
85: [Astigmatism, Migospel, and Moldessa] Looks like a real party.
86: [Whimsalot, Parsnik, and Moldessa] Party from Hell.
87: [Glyde] Glyde swooped in! A mini boss you can fight if you walk around outside the secret door in Snowdin for 3 minutes or more.
8C: [So Sorry] You’re blocked in politely! The enemy you can encounter if you go into the secret art club meeting room on the correct date and time.
FF: [Asriel Dreemurr] It’s the end. You can flee from him, funnily enough.
I could not find the encounter for ASRIEL, as his value is above the possible number in undertale, and the closest I could get to forcing an encounter was this mess. Sorry, but no ASRIEL for you.

How to turn off debug mode.
If you ever want to turn off debug mode, just reopen Hex Editor Neo, and paste in the top left 0x725D8C. Simply change that value back to 00. If you enter the game, press U, and nothing happens, you’re out of debug mode! There isn’t much of a point to re-enabling dogcheck, as you won’t encounter a dog checked room inside the normal game. On a last note, please cheat responsibly and keep assets you find to yourself. Do not post sprites online, or Toby will stop making secrets[puu.sh].
hello ha-ha-ha-have some respect and don’t spoil the game
it’s impossible to have mysteries nowadays
because of no-sy people like you
please keep all of this between us
if you post it online, i won’t make anymore secrets
no one will be impressed
it will be your faaaaauuuult
heheheheheheheheheheh
The actual words.[puu.sh]