Overview
If you want custom textures in Half-Life, then this is the guide for you!
Beginning
First, make sure you have Half-Life 1. (duh) If you do, then you’re good to go!
Installing the right programs.
You’ll need to install the right programs. (duh x2)
You’ll need Jed’s Model Viewer *https://www.wunderboy.org/jeds-half-life-model-viewer/*
And you’ll need any photo editing tool like paint, gimp, photoshop, whatever.
Loading models.
Unless you understand how to use Jed’s Model Viewer already, you don’t need to follow this section.
1: Click on the “File” button.
2: Click “Load model”.
3: Find your game folder.
4: Let’s say, you’re looking for the scientist model in HL1. First, you go to the “Valve” folder. 
(It will most likely be called something different if you’re using a mod or a different game.)
5: Go to the “models” folder inside of the “Valve” folder.
6: Scroll down until you find the model you want.
Then, click on it!
Finding and exporting textures.
This is the MOST IMPORTANT part of the tutorial.
1: Click on “Textures”.
2: Search for the texture you want. For me, I want SCI3X_Face1.bmp.
3: Click on it, then click “Export Texture”.
4: Create a folder for your textures. (unless you’re an unorganized idiot lmaooooo)
5: Once you have exported the texture and put it in your folder, open it in any photo editing software you use.
6: Edit the texture until you have what you wanted, and then save it.
(do not ask why i made this)
Importing textures.
If you’ve gotten this far, great! This is the last part about textures, so pay attention.
1: Go to the texture that you used in Jed’s Model Viewer.
(reused image alert!!!)
2: Click the “Import Texture” button.
3: Select your edited texture.
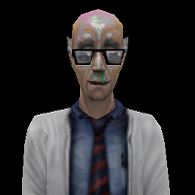
4: Boom! You’re done with the textures! View your beautiful (or not) texture on the model! (sorry i forgot the model has glasses so i will show you one of the old versions)
Exporting the model.
1: Click the “Save Model As…” button.
2: Make a folder for the models (you already know how you dont have to see)
3: Save the model name as the original.
4: Change the “T” into a “t”.
The end!
Congratulations! You did it! Just copy your models into the original models folder and you’re done (remember to have a backup models folder or you will be sad)
[link]


