Overview
The purpose of this guide is to teach new and struggling Night Hunters on how to improve when fighting against Survivors. This guide also goes into incredible depth on almost everything.
Starting Off
It is highly recommened that you first play the tutorial with Hunter as it will give you a basic idea of what you need to do, and your current moveset. I will still go over the Night Hunter’s basic moves here.
Claws – Your basic attack. It will deal 20% of damage for each hit dealt.
Howl – You will howl loudly, and it will highlight Survivors location any where on the map. It has unlimited range. It will also show their Health Bar, and UV Bar above their head.
Pounce – This attack will instantly kill a Survivor. This attack be easily interrupted by a Survivor’s UV Light, and cannot be used unless you have a full bar of energy.
Ground Pound – a move which deals 20% of damage to any one caught in its radius, and pushes away Survivors. This move is primararily used as a last resort when your energy is completely gone as you can escape easily after a successful hit. If you miss a Ground Pound you will have to suffer a long recovery animation.
There is another important thing the tutorial does not teach you, and that is you can cancel your Ground Pound animation. All you have to do is press “Z” to cancel it.
I’m pretty sure all new players who do Ground Pounds feel stuck seeing as when you the ready up animation for the Ground Pound you have to commit when you don’t have to. Just press “Z” and you can move around freely, and not be taking unnecessary damage.
Its also a good idea to look at your skill tree before hand so you know which skills you desire most. There is even a preview of the ability to show you what it does, but its still good to go over them. This will be important whenever you decide to gain a new Mutation.
Night Hunter Skills
Horde Summoner Spit: This is the very first skill you unlock no matter what. This skill will allow you to fire a projectile, gooey explosive that summons a horde of bombers that can instant kill or deal massive damage to Survivors. The projectile can also be stuck on to the Survivors leaving them no choice, but to take it.
UV Suppressor Spit: Same type of projectile as Horde Spit, but this one is designed to block the Survivors UV Light for a specific amount of time.
Sense Suppressor Spit: disables the ability of Survivors using their Survivor sense to find you on their mini map. This last for quite a while. (Acquired at Mutation Level 1).
Toxic Spit: this spit explodes once it hits contact with any surface, and creates a toxic cloud in its radius. Survivors coming into contact in this cloud will take damage over time. (Acquired at Mutation Level 2).
Spit Charging: This allows you to charge your spits in order to launch them further and faster.
Horde and UV Spits x2: Allows you to have up to two spits maximum for both Horde and UV. Both abilities are separate.
Horde and UV Duration: Increases the duration for both Horde and UV spits. Again abilities are separate.
– A thing to note is that Horde and Toxic spits share with each other. Meaning that if you have 2 spits and you shoot a toxic one , it counts for both. Same goes with UV and Sense Suppressor spits.
Spit Smash: This ability requires two of whatever spit. It allows to you create a Ground Pound, but with your spits. This ability is good for striking multiple Survivors with one go. Do be careful as it functions just like a normal Ground Pound. If you miss both your spits are gone, and have to suffer a long recovery.
UV Block: Protects the Hunter for a short amount of time against UV lights and Flares.
UV Block x2: allows for a maximum of two shields.
UV Block Duration: Increases the duration of the shield.
UV Heal: Allows you to recover both your health and energy to full. It allows to basically get a quick heal and return to battle in exchange for a UV shield. You will be unable to move while performing this skill so make sure you are far away if you attempt this. (Acquired at Mutation Level 3)
Ground Pound Movement: Allows you to move on the ground while holding Ground Pound.
Aerial Ground Pound: basically you can start the ground pound animation in the air. When you let go it will immediately put all that force directly below you.
Ground Pound Knock-back: increases the distance Survivors are pushed back when hit with a ground pound. This is only useful to gain more distance to push survivors into spikes.
Tackle: this will allow you to deal a lot of damage and knock-back a survivor should it land. Just sprint and press “E” to execute it. You have to be facing at the Survivor in order for it to work. This move can be dodged.
Tackle Knock-back: Just increases the distance of tackle’s knock-back even more.
Leapfrog: allows the Hunter to continuously pounce from one Survivor to another. (Can be interrupted by UV Light)
Pounce Slam: creates a shockwave when landing a successful Pounce attack putting any
survivor nearby in a downed position making them unable to do anything.
Speed: Increases Hunter’s sprinting speed and jump height.
Tendril Locomotion: allows a Hunter’s Tendril speed and range to be increased. (Very helpful when doing Tendril Sprint)
Getting right into it
Night Hunter has the capabilities to instantly/quickly kill Survivors, and is able to put them in unfavorable situations leading to panic and disorder. However, Night Hunter has the highest skill ceiling that requires excellent use of movement and precision, and is also glass cannon.
Night Hunters can dish out a lot of damage, but dies very easily by the Survivors. This might be because of Night Hunter’s instant kill potential, but we don’t know.
Either way I’m pretty sure to all the players out there who played Night Hunter already feel that Humans are over-powered. You can’t land a Pounce, you always die quick, your spits and tackles are easily dodged, etc.
The first thing you must realize is that you just started. You can’t expect to win everything, and think you’re this ultimate badass who is unstoppable because of a skill that instantly kills people. It takes time to know and practice everything in order to become better no matter what multiplayer game.
What not to do
So what is it that you’re doing wrong all time?
First, is thinking you’re undetectable and stealthy as a Night Hunter, and think you can Pounce attack all the time. This is completely false. Survivors will always know where you are at all times because of their Survivor Sense which allows them to see you with a special Icon that appears on their mini-map. This Icon shows Survivors where you are, and how high and low you are with tiny arrows indicating which on the their map.

(This is what a Survivor sees on his mini map when he uses his Survivor Sense. He’ll see where you are on the map and the tiny arrow you see pointing up shows that you are above him)
Eventually you’ll gain access to Sense Suppressor which will block off their Survivor Sense for a long time, but even then it will not provide with that much of a stealth aspect. Sometimes Players will play without a HUD, and either way they will always be aware, and will take measures to make sure they will not die. Your breathing, Roar, and Tendrilling will also make it easy to spot you. So again, Stealth isn’t an option overall.
Second is that you don’t do anything. I’ve seen many Hunter players who start off not doing a damn thing to Survivors. I’ve even seen many new Hunter players sometimes even land right in front of the Survivors and not do anything to them, and become free kills for them. By you not doing anything you are basically giving them a free win. Even if you can’t directly do anything to them, or nothing seems to be working its never a good idea to just give up. It will not give you a chance to learn and see what you are doing wrong, and more importantly your presence will delay the Survivors attack on your Nests.
Third, stop wasting moves and opportunities. What I mean by this is that new players think just because they did a tackle, Ground Pound, or spit on Survivors just once they would sit there and apparently not realize he’s not dead. By sitting there and not continuing the assault you are missing a huge opportunity to finish Survivors off. You need to act and continue the assault. He is not dead and simply running away and giving the Survivor a chance to heal and get his bearings will be your fault.
Spits are also something you shouldn’t needlessly waste. Many new Hunters believe that Spits are these massive explosives that have a huge explosion radius and are miracle workers. They are not. Spits are a very valuable tool in your arsenal as you only carry 2 of each, and they put Survivors in unfavorable situations. If you even see a Survivor struck by Horde or UV spit, ACT NOW. During this time he will by trying to run to rooftops or high places if struck by Horde Spit, and will desperately try and toss flares when hit by UV Spit (Time ground pounds carefully as missing the Survivor will most likely result in death even if the flare is disabled).
Lastly, don’t be predictable. This is really important because you are either doing/preparing to do something that can be seen from a mile away; or constantly relying on the same move, or tactic over and over again. An example of this would running only straight towards Survivors for tackle. This is incredibly predictable because it gives Survivors loads of time to see it coming. Walking towards someone with a Ground Pound at the ready is an example of how predictable it is as Survivors know what you want, and can react with plenty of time.
Survivor Weapons and Equipment
Before we get into what you should be doing I want to talk about how Survivors damage you, and how battling them works. There seems to be misconceptions that new players think other players are cheating because dying quickly or instantly. That is completely false, and you have to remember Night Hunter is a Glass Cannon. In terms of damage the following below tells you exactly how much damage it takes to kill you. (Unfortunately I could not find the percentage numbers exactly as all damage is based on percentage when it comes to Survivors vs Hunter)
Legend rank has NO BEARING on melee damage. Damage is always the same on Hunter and Nests. Legend rank only affects their health regeneration and Medkit regeneration speed.
Weapons
One-Handed Melee weapon – Machetes, Katanas, Crowbars, Picks, Hatchets, Swords, Batons, Baseball Bats; basically anything held by one hand. Damage varies on how many Survivors you are fighting, but you will see these as the main weapon for Survivors. They deal decent damage, and have good attack speed.
- Knives are also One-Handed that swing much faster than other Melee weapons, but deal weak damage and have poor range.
Two-Handed Melee weapon– Sledgehammers, Axes, rebars; anything held by Survivors with two hands. Damage varies on how many Survivors you are fighting, but these massive hammers and axes deal alot of damage. Be aware if a Survivor is holding.
(All Melee weapons also have different attack ranges. Ex: A knife is much shorter than a Sledgehammer which is long)
Bows and Crossbows – projectile weapons that fire arrows, and bolts that also come with special arrows, and bolts which may cause additional damage along with the initial hit. Damage dealt by these projectiles vary depending on how many Survivors you are fighting. Crossbows however deal less damage than the Bow.
Guns– Hit scan weapons that deal damage depending on the weapon, and range.
- Pistols/Revolvers – basic firearms that deal small amounts of damage. Mostly used as finishers
- Assault Rifles – firearms with large clips, and ammo capacity. Deal little damage, and are mostly used as finishers. However, a person with good aim can potentially kill you should he land his shots.
- Shotguns – Mid-to-close range weapons that deal certain amounts of damage depending on the range.
- SMGs – the highest amount of bullet clip size, and capacity. Deals the weakest amount of damage out of all firearms.
- Last Wish – a special revolver that if a Survivor has one bullet left in the chamber it will deal a good chunk of damage.
Tackle: Survivors will ram themselves into you which deals a small amount of damage. Its weak, but it is a great combo starter. If a Survivor hits you with tackle he can immediately hit you with his melee weapon, or anything else.
Grapple Hook: while a means of fast transportation can also damage you for the same amount as Tackle, but what makes it special is the fact it cancels all animations, so its a quick item.
Dropkick: Should this connect it will do a third of damage no matter wht situation, and will be put in a locked animation which will knock you back. This can be combo’d to your death, as once dropkicked if you’re fighting teams, one player dropkicks and the other can either dropkick themselves, or just kill you quick with melee weapons.
Camouflage: Survivors can use dead zombies as a means to camouflage themselves from you. When this happens a question will appear as to where they got the Camo, and as mention, cannot be detected by your Howl. Should they get be hit by Horde Spit and Camo’d after being hit, they are completely undectable by them. However, they are not invincible, or completely invisible. While Survivors are Camo’d they are colored orange on their bodies. It only takes one attack from anything to remove their Camo. Claws are a good way to remove it as its the saftest way to so.
Equipment
UV Light: By far the most important, and dangerous as it diminishes your energy and removes your Pounce attack by the smallest flicker of light when aimed at you. Try to avoid this whenever you can as going in with some of your energy already gone can be dangerous. Try, and go for weird angles to try and Pounce Survivors.
Flares: There are regular Flares and Zaid’s Flares the latter lasting much longer and is very common. Flares give Survivors a small Area-of-Effect of UV Light where the flare is tossed. This either used as a backup option if their UV Light is disabled, running low; or to block off a Pounce attack that involves the use of UV Shield, or from obscure angles. These can be removed by UV Spit, Ground Pounds, and explosions.
Grapple Hook: Survivors use this to scale large buildings, travel faster, and dodge attacks. The big flaw this item has is that when Survivors grapple they will always be traveling straight. This means you can basically get free Tackles during their grappling. There is currently a glitch where if you try to Tackle them when they are of a builing; they can grapple, and cancel the Grapple mid-air which allows Survivors to dodge your tackle.
Night Hunter Potion: The only thing this provides against Night Hunters for Survivors are a speed boost, and a defense boost against Claws for a period of time. Once this effect is over Survivors have to wait a long time to drink another potion.
Cloak Potion: Its Camouflage in bottle. Survivors drink this, and will be instantly camouflaged for a short period of time. This will block them from Horde Spit if hit, and from your Howl dectection. A simple Claw can remove the Camouflage. The duration of this is shorter than regular Camo.
Land Mines: These are normally clumped together, and are very dangerous. Damage varies depending on how many Survivors they are. While they are dangerous they are also easy to see, and predict. Warning signs appear on your screen whenever an explosive is around you. Mines also beep a red light every second. Even if you die by them once you know now he is using them and are more aware. Plus they only cover a very small space. However, Survivors are smart and may place them in spots you may not expect.
Survivor Combos and Instant Death Attacks
Combos
Survivors can do combos (wih teammates) in order to rack up damage, or quickly kill you. These combos are very fast and can be executed fast.
- Tackle-Slice/Tackle Two-Handed: Tackle-Slice is when Survivors manage to landed a successful Tackle which immediately leads to a Slice from a One-Handed melee weapon. This deal significant as the next time you get hit it leads to a death blow. Players assume that this is a two hit kill when its actually a 3-hit kill.
- Tackle can also combo into other deadly combos such as a Two Handed weapon which will also lead to a quick death, or even quick switching with Crossbow to Melee weapon.
- Other combos are also done by teams. When fighting in teams expect more than one person joining in on dealing damage to you. The most common team combo is chaining Dropkicks till death.
Instant Kills
These are the only ways Survivors can kill you with just one move.
- Death-from-Above: by far the most common way to die as of now. All Survivors have to do in order to land this is jump from a high place on top of you. It must be a high place in order to execute this move. As long as he is in the DFA (short for Death-from-Above) range it will land.
- Tossed Two-Handed Melee Weapon: This is only when fighting in a 1v1. Players can toss their melee weapon in order to do massive damage. A Tossed Two-Handed however, will always result in an instant kill. This goes through UV Heal. Such a tactic is unreliable at most as it costs them their most reliable way of damaging you. This tactic is often used as a last resort, or if you miss a Ground Pound.
- Interrupted Pounce, Dodged Tackle, and Dropkicked: If Survivors are behind spikes and you try to either Pounce, or Tackle them this will result in an instant kill so watch your surroundings. Survivors can also Dropkick you into Spikes to lead to an instant kill.
Environmental Hazards
Survivors can use the environment to their advantage in order to kill you quickly.
Red Barrels, Canisters, and Propane Tanks:
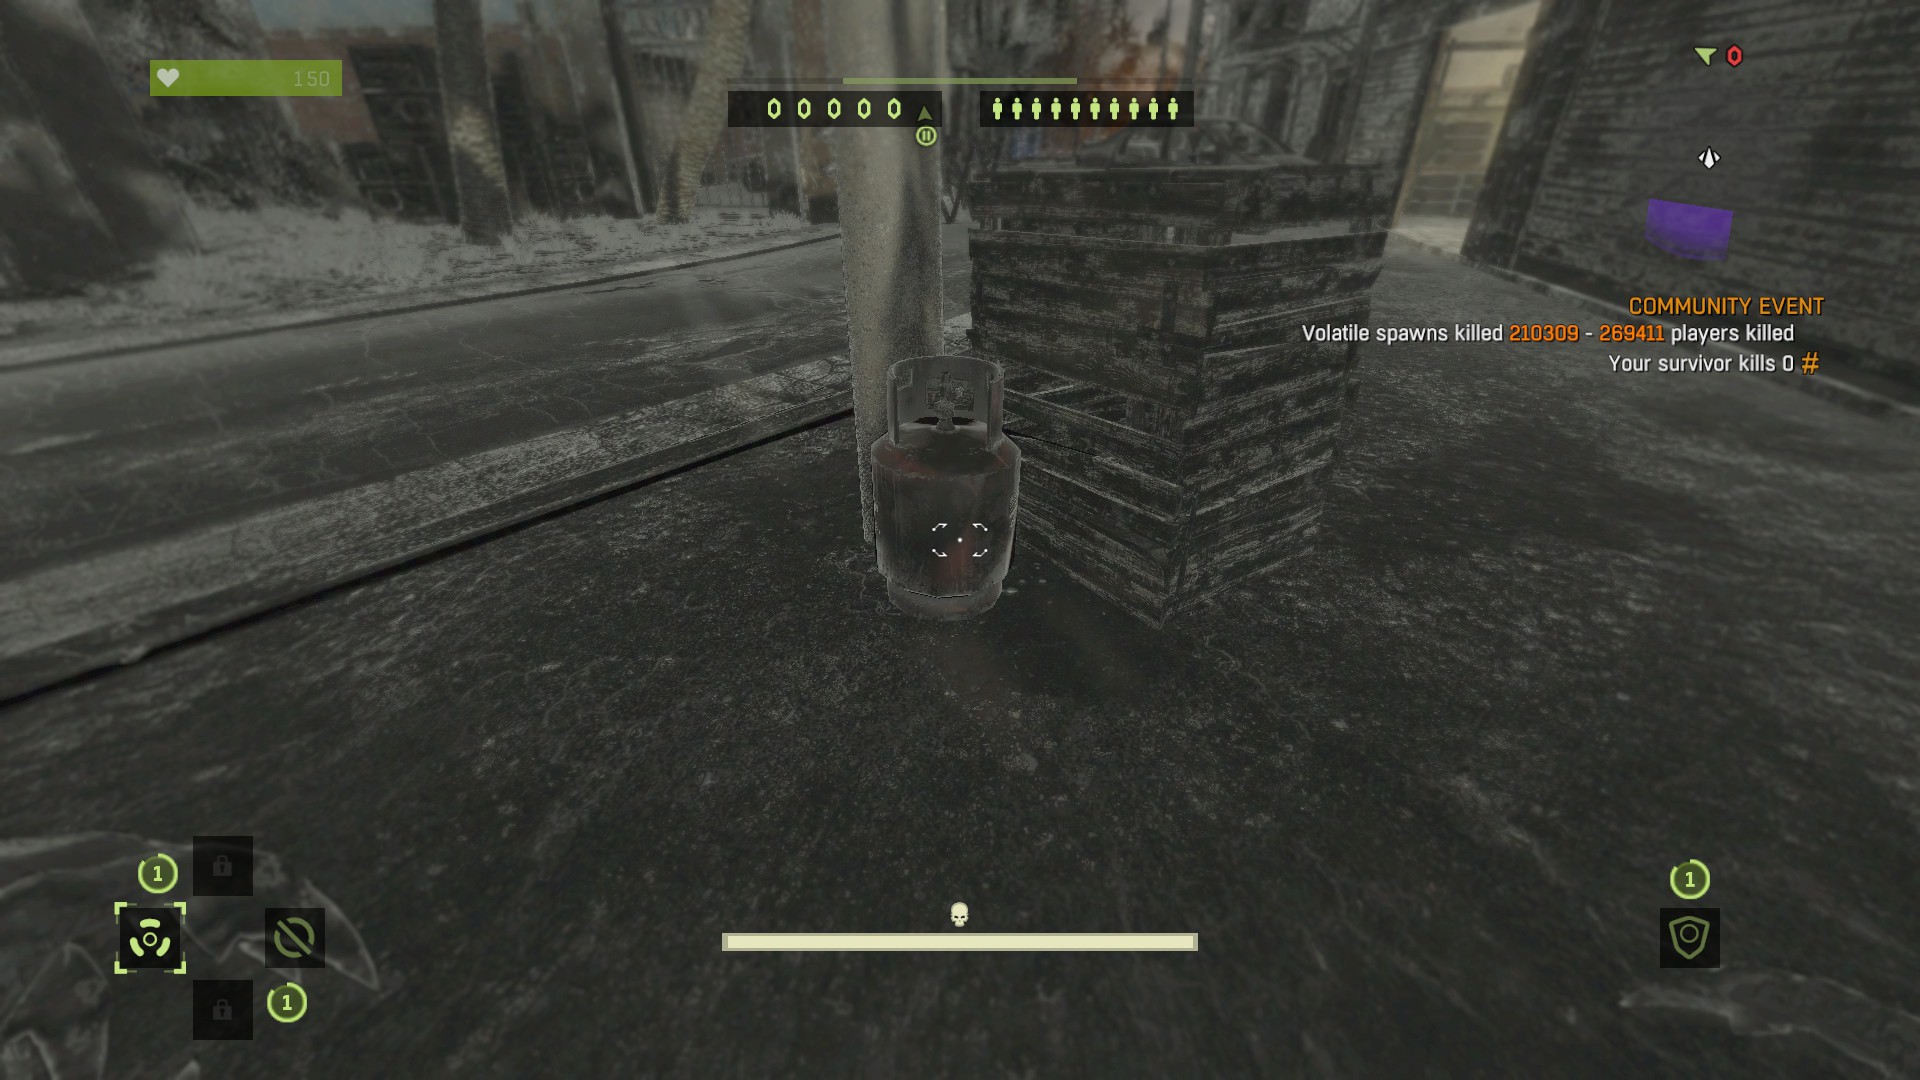

These explosives are scattered throughout all maps in various areas and spots. Humans can shoot them to either kill, severely wound you, or as a means to finish you off. Always be on the lookout and avoid them at all cost as it can end your life early.
Spikes:
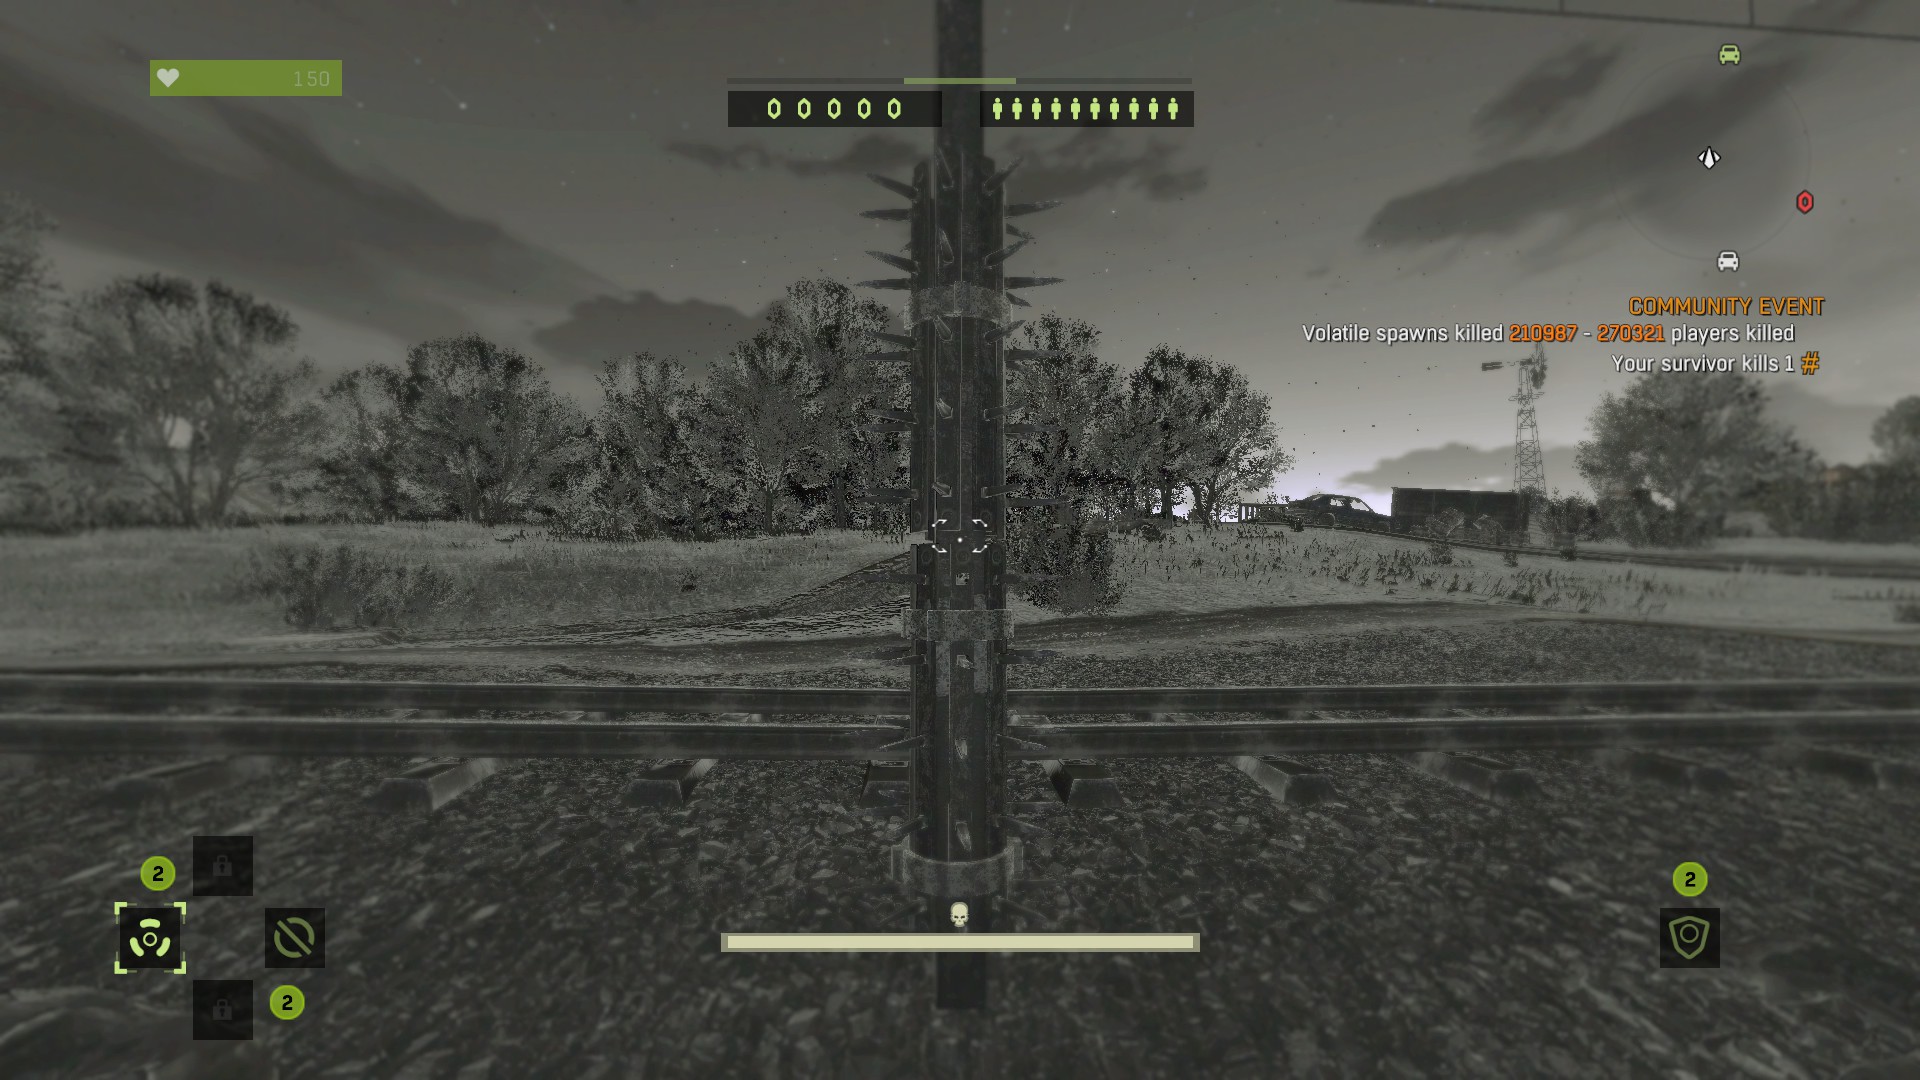
Same as the explosives, spikes are littered throughout all maps and are not only dangerous to you, but to humans as well. Spikes purposes are to instantly kill both humans and hunters under certain actions. They act like weird magnets and only activate should certain actions are done.
Human Initiated
- If a Human is behind spikes, and a Hunter Pounces him, if its interrupted by UV Lights the hunter will die.
- If a Hunter tries to tackle a Human, that is behind spikes, and the Human dodges the tackle the Hunter will die.
- If a Human dropkicks a Hunter in the direction of spikes, the Hunter will die.
Hunter Initiated
- If a Hunter Ground Pounds aligns a Ground Pound correctly the Human will die being knocked into the spikes. (This can be further enhanced should the player put a skill point into
- If a Hunter lands a successful Tackle on a Human in the direction of where the spikes are, the Human will die.
So both sides have ways to kill each other with the use of spikes, but spikes are only in specific spots on each of the three maps. Do not rely on spikes in order to get a quick kill. Most experienced Humans are always aware where the spikes are and how to avoid getting killed by them. However, should an opportunity present itself and a Human is not aware by all means go for it. Overall spikes are just a bonus should you manage to get a kill with it as it doesn’t waste your Spits and Shields.
What to actually do
So we’ve gone over what not to do, and how humans can damage you so; what do we do?
First, you have to realize you are in it to win it. Your job is to kill Survivors by any means necessary. So that means using every possible solution to put them in bad situations, and quickly eliminate them. So for example, if you hit Survivors with Horde Spit and they are trying to run away by grappling, or something you have to tackle them or make sure they stay grounded. You must do everything in your power to secure kills no matter what as Survivors can easily dodge all your attacks which makes it just as important to finish them off quickly and efficiently.
Second is that you have to be unpredictable at all costs. If you do same tactic over and over again, players will notice and will be able to react accordingly. I’ve seen many Hunter players always perform the same tricks or strategies numerous times to where they don’t even notice that something is not working and to try something else. Tendril Sprint helps with the unpredictability because of the insane speed it offers making it hard for players to even track you. Also try some crazy strategies, you never know what you can actually get away with until you try it.
Tackle can also be used in weird angles. As I’ve said above as long as you are facing them the animation will activate.
Third is to constantly move, and know when to engage. Never stand still during combat as it will be your downfall, and always move unpredictability so that Survivors have difficulty tracking you with their UV Lights and Bows. Knowing when to fight is also important as always jumping into a fight could lead to a plan failing. Is your stamina full or at least decent to engage in a fight? Do you have Spits? Is this a favorable area to fight in? Even more questions you must ask yourself, and will get better with experience.
Lastly is always keep calm, and pay attention. This is something commonly said, but it’s very important. Sometimes we all have those bad moments, but if you let emotion take over it will screw you over. Paying attention is very important as well as people don’t seem to care for their health, or surroundings. Maybe you might encounter a really weird moment and say “wtf,” but just maybe think it over as to why that moment happened. Did he do something you didn’t
expect? Did a plan not go well? Did luck happen? Always keep a level head when fighting.
Speaking of health it regenerates when you are not taking damage for a short period of time, and are not shined by the UV Light. So if you are trying to recover make sure you are at a good distance.
*One small tip is that Claws are good damage wise, but not good as a main attack. Claws should be used when Survivors are panicking and expect you to do a Ground Pound, or Tackle. Like I said, be unpredictable.
In terms on what should start with when it comes to fighting you start with 1v1. That way you get familiar with fighting a Survivor and don’t have to deal with other people. Then you should start working your way up to fighting against more Survivor players. Also note that in 3v1 and 4v1 that all damage, except from animation attacks, dealt to you from survivors is cut in half, but don’t get cocky.
Try to also fight players around your level. You will get a warning before you fight very experienced players saying how dangerous and unmatched it is. Unless you are willing to learn and are ready for a serious owning I highly suggest you listen to the warning and always fight players of your level until you are ready. Nothing brings players down than fighting and unfair fight.
You also should also be focusing on trying to get all the Night Hunter skills when starting off. You are heavily at a disadvantage if you do not have most of these skills. Also be careful when you decide to mutate.
When Mutating you lose all skills. This is by far the most idiotic developer decision about there, but its in the game. Thus you have to regain all your skills again, but the small upside is that you gain access to a new skill each mutation. Level 1 is Sense Suppressor; Level 2 is Toxic Spit; and Level 3 is UV Heal.
Advanced Techniques
A couple of these Techniques are honestly broken due to how good they are, but are mostly necessary in order to win most matches.
Tendril Sprint: Doing this will allow Hunters to gain an increased running speed for a short amount of time. All you have to do is tendril to the ground and hold the Run Button. It won’t activate by tendrilling directly below you. You also keep this momentum when you are jumping as well. This Technique is only active for a short time so make the most of it, or extend it by doing another Tendril Sprint.
This increased speed is very viable as it allows you close in, and confuse your opponents. It can lead to a potential Pounce, Ground Pound, and Tackle with such speed. However, try not to be predictable with it as simply running towards them, or left and right for tackle is very obvious.
The best thing about this move is that you can do it as soon as you start playing Hunter, it’s always there.
Instant Ground Pound
You can actually Ground Pound instantly and skip the Claw-to- Ground Pound. All you have to do is Roar and it will skip you having to Claw first in order to initiate a Ground Pound. This can be very effectively with the next Technique below as it comes fast where players might not expect it. It has a huge timing factor so practice it whenever you can.
Ground Pound+Spit Combo: One out of the two most broken Techniques a Hunter can do to Humans, especially in a 1v1. As the combo implies all you have to do is Ground Pound a Human and immediately Spit. It has been nerfed in a recent update, but still can be sometimes executed. Even with the nerf, the spit is close to them so a Tackle or Pounce will lock them in place to guarantee the spit.
This combo and lead to quick kills onto humans. An example would be if you were to activate UV shield before going in, land a Ground Pound, use UV Spit and it strikes him, there absolutely nothing he can do except die.
Instant Tackle:
This is the second broken Technique which is called Instant Tackle. This technique works in two ways. If you land a successful tackle, and if you fail a tackle.
The first way its done is if you land a successful tackle and your opponent hits a wall near you, you can then continuously tackle him again. What needs to be done is you have to hold E when you successfully hit him and the action will continue. However, he must be near you for this to work which is why I said if he hits cause that’s when it will mostly succeed.
The second way is if you fail a tackle. So let’s say you fail landing a successful tackle which leaves you with only two options: Either recover quickly and escape to regain stamina and plan your next attack; die in the process, or possibly take massive damage forcing you to retreat.
However, the Fail-Safe Tackle provides a third option. This move can literally go on forever even if you’re out of stamina. This makes it literally one of the most broken moves for Hunter as it can go on forever and allows you to strike multiple Survivors. However, don’t go believing you can do it forever as some players can just not move towards you and damage you with a Crossbow to gain some damage if you rely on this often. However, if you miss a tackle and are near a wall then there is nothing they can do as you recover faster when missing animation attacks and hit a wall.
So in order to execute this tactic what you have to do is after you missed a tackle you hold “E” or whatever button you binded it to, and then turn around with your mouse into his direction. It is very important that you DON’T move at all except with your mouse. If you so much as walk or run you will fail to execute it. You must be completely still and move with your mouse only.
Another important factor is that he must be within tackle’s range. Which is why I said to not rely on this often as a human can just take a shot at you while he is in midair. This makes matters even more concerning if more than one human is involved. Just use your own Judgment when using this. This has been patched as of 07/26/2017.
Maps
They are three maps in Dying Light in which you fight in. All of them are big and have Nests in certain themes to them.
Slums
The very first map in the game, and a very common place where you will fight. You should know some of the basic surroundings (Unless you immediately jumped into Hunter). This map has a lot of hazards when it comes with spikes and red barrels so be careful. Easy kills are not common here especially with how high most rooftops are. However, Survivors will have a hard time trying to avoid Horde Spit with the lack of Water. There also tight spaces for potential spits so try and abuse that.
Old Town
This place has a lot of high rooftops. It makes easier to land Ground Pounds and land some easy kills with Tackles, but also favors humans with these for a chance at a Death-from-Above. Hazards also not as common so barrels and spikes will be rare as they appear in a few Nest areas. However, there a lot of water in this map for Humans to use as a safe-zone against the Horde and UV spit.
The Countryside
This area is an entire different beast from the Slums, Old Town. What makes this place different from the other maps is the huge wide open space, and the Survivor’s new vehicle The Buggy. The open space of the The Countryside has means that you are not able to get many tackles off of high or low areas due to the massive open space. Some nest locations are even thrown in open spaces where Survivors can run them over with their Buggies. The only way you’ll be able to use the environment your advantage is when Survivors are struck with Horde spit, or using Tendril Sprint. Despite the massive open that is against you it is also against them as when struck by horde spit they really have no where to run. However, they will most likely be using Cloak potion or their Buggies to defend against the horde. Difficulty can also vary depending on how many Buggies/Survivors you are up against.
The Buggy is very unique for PVP as it becomes a big obstacle when fighting Survivors. The biggest threats from the Buggy are the UV Headlights, Car Alarm, and Electric Cage.

UV Headlights create a massive AoE around the car that’s bigger than flares. The Headlights (lights in front of the car) also emit a very, long UV range.
The Car Alarm is not a danger for Hunters, but makes your Horde Spit useless as it creates loud music which attracts all zombies within the sound’s range.
The Electric Cage does very little damage, but is dangerous if you grab onto the car. It will stun you for a short period of time, but in the right situation can give Survivors time to knock you out of the car, or into spikes.
The less dangerous tools of the Buggy are the Mine Dispenser and Flamethrower. The Flamethrower always shoots straight, and is easy to to avoid. The Mine Dispenser drops one mine at a time right behind the car, and even if it hits you already know how to avoid it making it completely useless.
Now many new Hunters fear the Buggy as if its the ultimate threat which its really not. All it takes to disable anything from the Buggy is one Ground Pound, and you will not suffer the long animation at all when landing successful Ground Pounds on the Buggy. So if you see the UV Headlights, or the Car Alarm do take the time to disable it. It will help you immensely.
Unfortunately even with Tendril Sprint you cannot catch the Buggy when it is at 60+mph, and using Nitro. However, you can try to cut corners in order to Ground Pound, or Tackle it. If the Survivor crashes his Buggy into a solid object as well that’s a huge opportunity to do whatever to him and make sure his car can’t be driven. There are also some terrains where the Buggy will slow down such as tall grass, and water. This will give you an edge to catch up to it, and even Nitro can’t help in tall grass, or water.
Ground Pounds may flip the car over forcing the Survivor(s) to leave rendering it unable to be driven. Tackle may flip and spin the Buggy out of control which briefly makes the Buggy unable to move. Use this opportunity to get spits, or damage him should he refuse to get out.
You can also grab onto the Buggy, and attempt to do massive damage to him. However, I would highly advise against this as anytime you grab onto the Buggy Survivors will find anything to crash into in order to knock you off and cause good damage to you. Even worse that they can even crash you into spikes resulting in death. However, you can fake out he Survivor, and make him crash his Buggy by jumping on and off. Such a tactic is used for intimidation, but may not work if the Survivor catches on. Just be aware of the environment, and use good judgement when deciding to grab onto the Buggy.
When attempting to try, and disable the car with Tackles or Ground Pounds do not aim at the front. You will will mostly get hit and getting run over by the car will deal half to your health. Getting run over will also knock you back, and leave you temporarily stunned and you will probably die as it gives Survivors enough time to ram you again thus killing you. If there are spikes in the area you can also be rammed, and knocked into them.
Spits can also get stuck on to the car and vary depending on which is used. Horde does what it does, but remember he also in the car driving, and if he hasn’t crashed, oris being harrassed he can skillfully avoid the Horde completely in his Buggy. UV Spit disable the Survivor’s UV Light and his UV Headlights IF he has them activated. Even if his UV Light is disabled he can activate the UV Headlights whenever so be cautious. Toxic Spit messes up the tires of the Buggy for a while making it difficult to even drive, and causes damage. The tires will show off a green smoke off them should they hit, and makes it the perfect opportunity to force him out of his Buggy. Lastly Sense Spit is…….well it doesn’t do anything special at all. Just disables Survivor sense that’s it.
Some last tips, while Spits can also be stuck to the car do not get cocky as Survivors can get out of the Buggy really fast if they see the spit stuck on their car in order to avoid it. The can also continue driving around you, or your spit. Lastly, if a UV Spit lands on the Survivor, and he’s in the car he cannot get pounced. This is usually a time where you would go in, and try to grab, and attack thinking that he is helpless. He’s not. He’ll try to ram you into spikes, or just knock you off. He also has an opportunity to drop a flare, go to an area he knows is safe that he can kill you, or go to the nearest safezone should one be near his location.
CHEATERS
Unfortunately like any other multiplayer game this one also has cheaters. Cheating can range from things that really don’t even matter, to the point of where its almost impossible to beat them.
The ones that don’t matter are Survivors that hold melee weapons that have effects that don’t exist, and infinite guns. This might be hard to see, but always use your eyes and ears. As you know Survivors can modify their melee weapons to do additional damage such as fire, electricity, and ice. These modifications also increase the damage.
However, some cheaters have manage to make melee weapons have insanely high damage numbers and godly modifications that don’t exist. These modifications allow the element types of their weapons to have 100% of their effects. So poison, fire, ice, etc will always happen. The insane damage numbers will also allow cheaters to instantly kill zombies in PVP.
Infinite Guns also exist, but do very poor, damage and cannot even kill nests efficiently. If you see cheaters with these its an easy kill. Even in teams they’re a joke.
What you should watch out for:
- Invincibility – cheaters are unkillable by normal means of damage. (Animation kills like Pouncing, and Spike kills will always get rid of them.)
- Unlimited Battery – Most cheat softwares allow players to have their normal UV Light to have an infinite battery life.
- Super Speed – cheaters run really, really fast. (Don’t mistake this with Night Hunter Booster and Speed Booster).
- High Jumps – cheaters can jump really high which makes it easy for DFAs. (Cheaters may have scripts to modify jumping to try and make it look like they are not cheating. Can also turn this ability to literally fly.)
- One-shot kills – cheat programs have a command that allows cheaters to make everything except you die in one hit. So that means Nests, and zombies are one shot killable.
- Teleportation – cheaters can teleport to one location to another no matter the distance. LAG CAN BE AN ISSUE. DO NOT BLINDLY ACCUSE.
- Gold Zaid’s Flares: These are scripted Flares that have a longer burn time than the normal Zaid’s Flares, and also instantly kill nests. You’ll notice if it lasts longer if it burns for more than 15 seconds, or nests dies unexpectedly quick.
Rare ones:
- Infinite Crossbows – cheaters made crossbows that allow them to fire infinitely, has no reloading, and fire very quickly. This provides a safe way for them to kill you from a distance and eliminate nests quickly as well. This is a major threat and whoever has these should be focused down hard. (Non-Cheaters may have two normal crossbows in their loadouts as they can fire one Crossbow then quickly switch to fire another Crossbow. Watch Carefully as he would then need to reload both of them)
- Infinite UV Lights – unlike the Unlimited Battery listed above, these exists as an actual item, and are also a major threat. These don’t have the purple shine regular UV Lights have. They have a red-ish hue do it, and will not shine like the normal UV Light. Good news is that they can be stopped with UV Spit.
- Lastly, very few cheaters have managed to actually make their own scripts and cheats. They can press commands which allow them to wipe entire nests instantly without moving at all. They can also crash your game, kill you instantly at any time point no matter what, and do much more that not even I know. Again these are rare, but watch out.
This is all sounds very intimidating, but it is possible to beat them. A majority of cheaters will always rely on their cheats and are not as smart as skilled survivors. You just have to very patient, and use every strategy possible. Animation kills are your best bet against them if they have invincibility cheats, and if they don’t have invincibility, just plan accordingly. UV spits are also good because no matter the cheat their UV Lights can still be shut off by the spits. Just because they cheat doesn’t meant they are not immune to some of the rules of PVP. However as I have said above some have personal scripts and these people are to be avoided at all costs. You can also just Alt-F4 and abort to not give them the satisfaction of winning, or if you really don’t want to fight them. Make a list as well so you do not encounter them again.
Lastly, don’t not blindly assume cheats without proof, and good analysis. Don’t go out there fighting Survivors, and call out cheats just because you’re losing, or see something new you probably did not expect. It just makes you look very bad. Look very carefully and think it through before saying, assuming, or doing anything. People also have VAC bans in this game, but even then some of those people are not cheaters.
Some Last Words
Being a Night Hunter is incredibly difficult. It requires a lot out of players and takes a lot of practice. However, do not give up and do not be upset. Many other Hunter players before you were in your position as well and now they are the very best and most feared players out there.
Do not give up. You really don’t learn anything by giving up. Take breaks if you have to if it becomes to frustrating. Never push yourself as well.
Also in terms of morality, do not abort if you are losing. You, yourself, decided to quit during a match and choosing aborting literally reaps the rewards from Survivor players who actually stood their ground and fighting you. Just normally drop out if a fight becomes too much.
Here are some Youtube links to some of the best Hunters out there. Use these as a reference as too what went wrong, what went right, and how they did it.
Vallon: https://www.youtube.com/user/PhOeNiXCrEw93/videos
Spinoza:https://www.youtube.com/channel/UCP3Iead3cuL8qIBRqRWkIJw
Visceral: https://www.youtube.com/user/DxVisceral
tvdaXD: https://www.youtube.com/user/tvdaXD
LucasK: https://www.youtube.com/channel/UCdsJui-w-nJDC4i5t0SSeCA
Here is also a guide on being good at Survivor that a friend of mine made. Use this as a reference as to what Survivors will do and as a helpful guide for yourself if you prefer to play Survivor more.
[link]There also many other high level players out there that I unfortunately do not remember much, but try my best to find more and update it. Some of these players also allow others to watch them by Steam stream.
This is also my first time making a guide so I’ll take any form of constructive criticism. I went into incredible detail so that new players and players looking for help know what they are up against and how to improve. So comment on what you all think, and say if I might have missed something, or there was an error.