Overview
In this guide, I’ll show you how to change the sky of a map using hammer world editor. I wrote This for people who don’t know how to use hammer, so don’t worry, even if you’ve never heard of it before, you’ll be able to follow this tutorial. But if you’ve already made maps with it, I don’t think this guide will help you.It’s my first guide, so if something is not clear or if you get errors, just add me or leave a comment, and I’ll try to fix the problem!Sometimes, the map won’t compile, or some textures may be missing. Fixing these problems may require some skills. You can ask in the comments or try to find the solution in forums.If you only want to change the skybox (the env light will stay the same), go in the sfm console and type sv_skyname “Your sky”. (Many thanks to Zappy for this useful tip!)What we’re going to do: decompile a TF2 map in order to change its skybox and light_environment in hammer.What we’re going to use: SFM, BspSource and Hammer editor (we won’t get far in it’s utilisation).
BspSource

“BSPSource is a map decompiler for Source engine maps, written in Java.
It decompiles .bsp map files back to .vmf files that can be loaded in Hammer, Valve’s official level editor.”
(http://ata4.info/bspsrc/about.html)
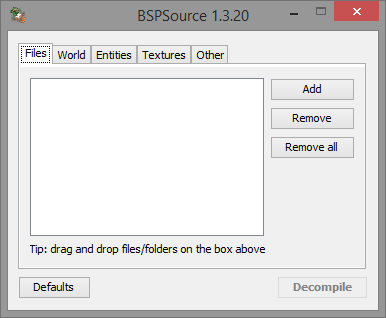
Extract all the files in a folder of your computer and click on “bspsrc.bat” to launch BspSource.
Hammer
“The Valve Hammer Editor (more informally known as Hammer) was the official mapping tool for the Goldsource engine – the engine that ran Half-Life and Counter-Strike and other pre-Source Valve games. Apart from the construction of level architecture, Valve Hammer Editor 4.x is also heavily involved with creating level events and scripting.” (https://developer.valvesoftware.com/wiki/Valve_Hammer_Editor)
For TF2, hammer should be in the bin folder (E.g: [steam directory]/steamapps/common/Team Fortress 2/bin), locate hammer.exe (blue icon with a green hammer) and launch it.
If you don’t have Team Fortress 2, you can try installing the Source SDK, but as you don’t have the game, I don’t think you’ll be able to set up hammer for TF2.
For HL2, the hammer.exe is in the bin folder of hl2 (E.g: [steam directory]/steamapps/common/half-life 2/bin)
For CS:GO and Portal 2, you might need to install either counter strike global offensive SDK or portal 2 authoring tools, in the tools section of the library.
For SFM workshop maps, launch the TF2 hammer.
For other games, it might be something similar, I don’t know.
I really recommend to create a desktop shortcut of hammer.
In this guide I’ll use TF2 maps, but it’s basically the same thing for other games.
Decompiling the map
Locate the map you want to edit in the map folder (E.g: [steam directory]/steamapps/common/Team Fortress 2/tf/maps). For this guide, I’ll edit the map cp_dustbowl.
If you want to edit a SFM workshop map, look in [steam directory]/steamapps/SourceFilmmaker/game/workshop/maps.
For CS:GO maps, download SFM compatible version here[thekinsie.com] or here[sfmlab.com].
Copy the map into a new folder, launch BspSource and open the map.
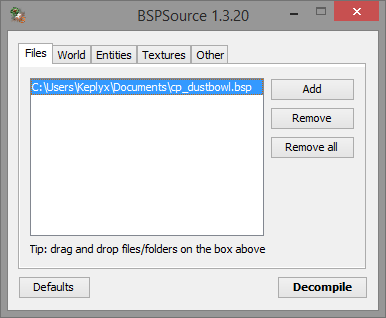
Then go to the “other” tab, select the Team Fortress 2 BSP format (if it’s a TF2 map) and leave everything else to the default. Then press decompile and rename your map.

When the decompile process is over, you should have something like that:

If it works fine, close BspSource, if not, try to find what has gone wrong or post a comment.
Editing the map
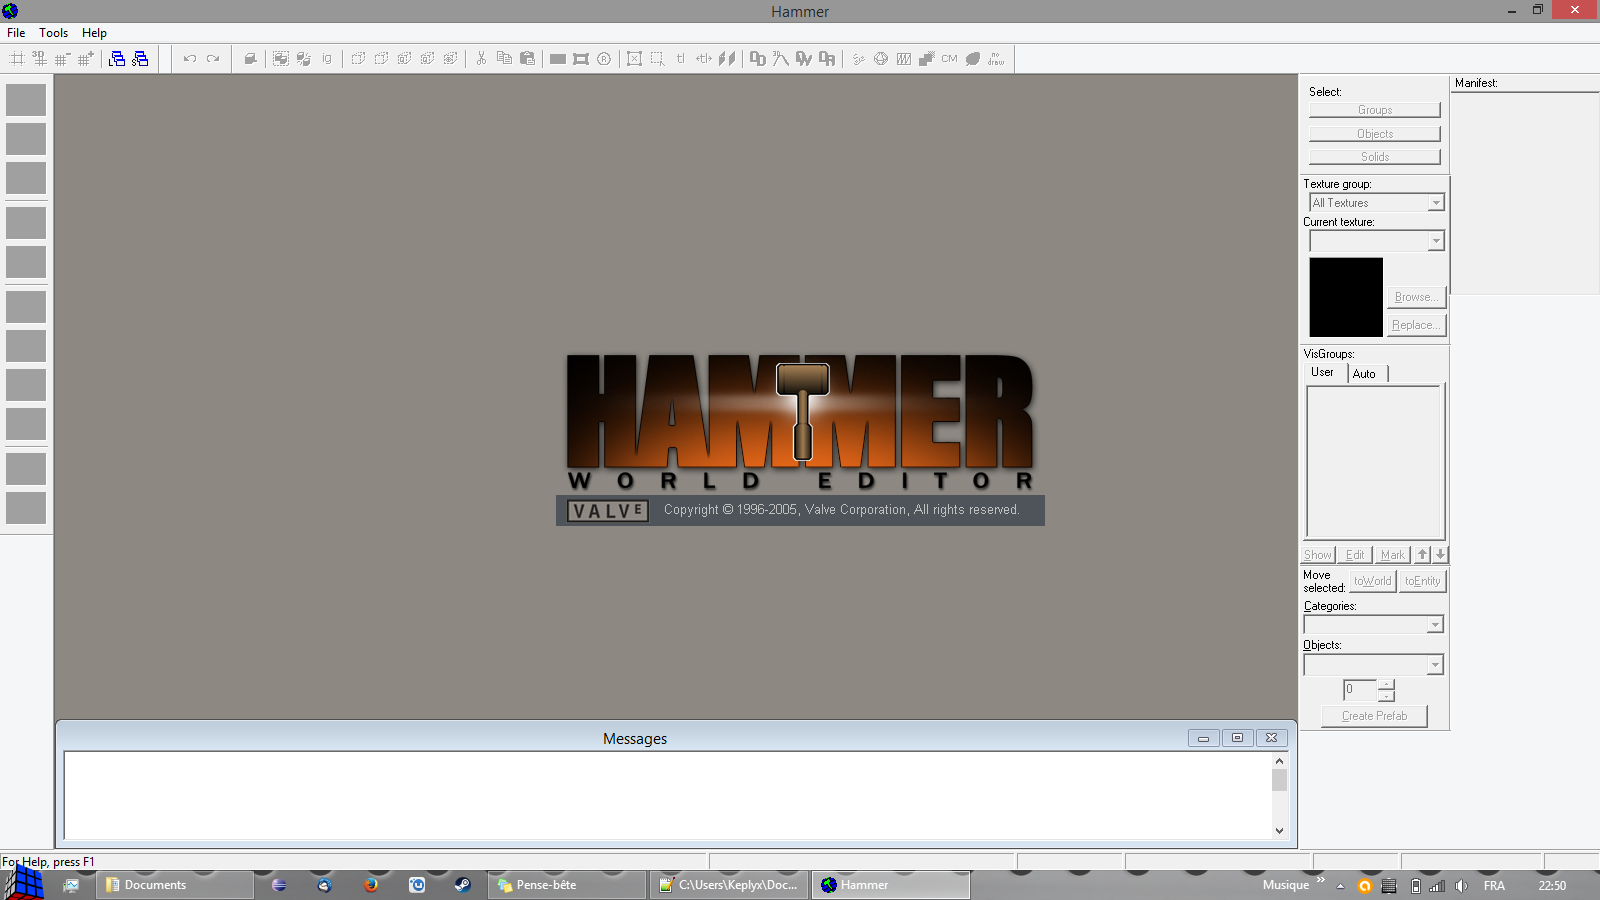
You have decompiled your map in a .vmf, but you now have to edit it through hammer. So launch it and open your map (File -> open).
You may have an error like this one :
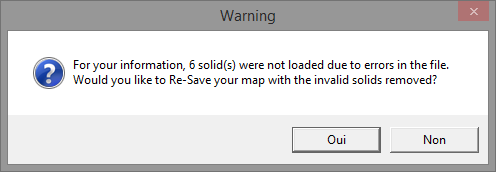
Say yes, BspSource made errors while decompiling the map and some objects may have been removed, but you can’t do anything about that (if the number is too high (more than 10), try redecompiling the map).
The loading might take some time, depending on your computer. If it says “not responding”, just wait.
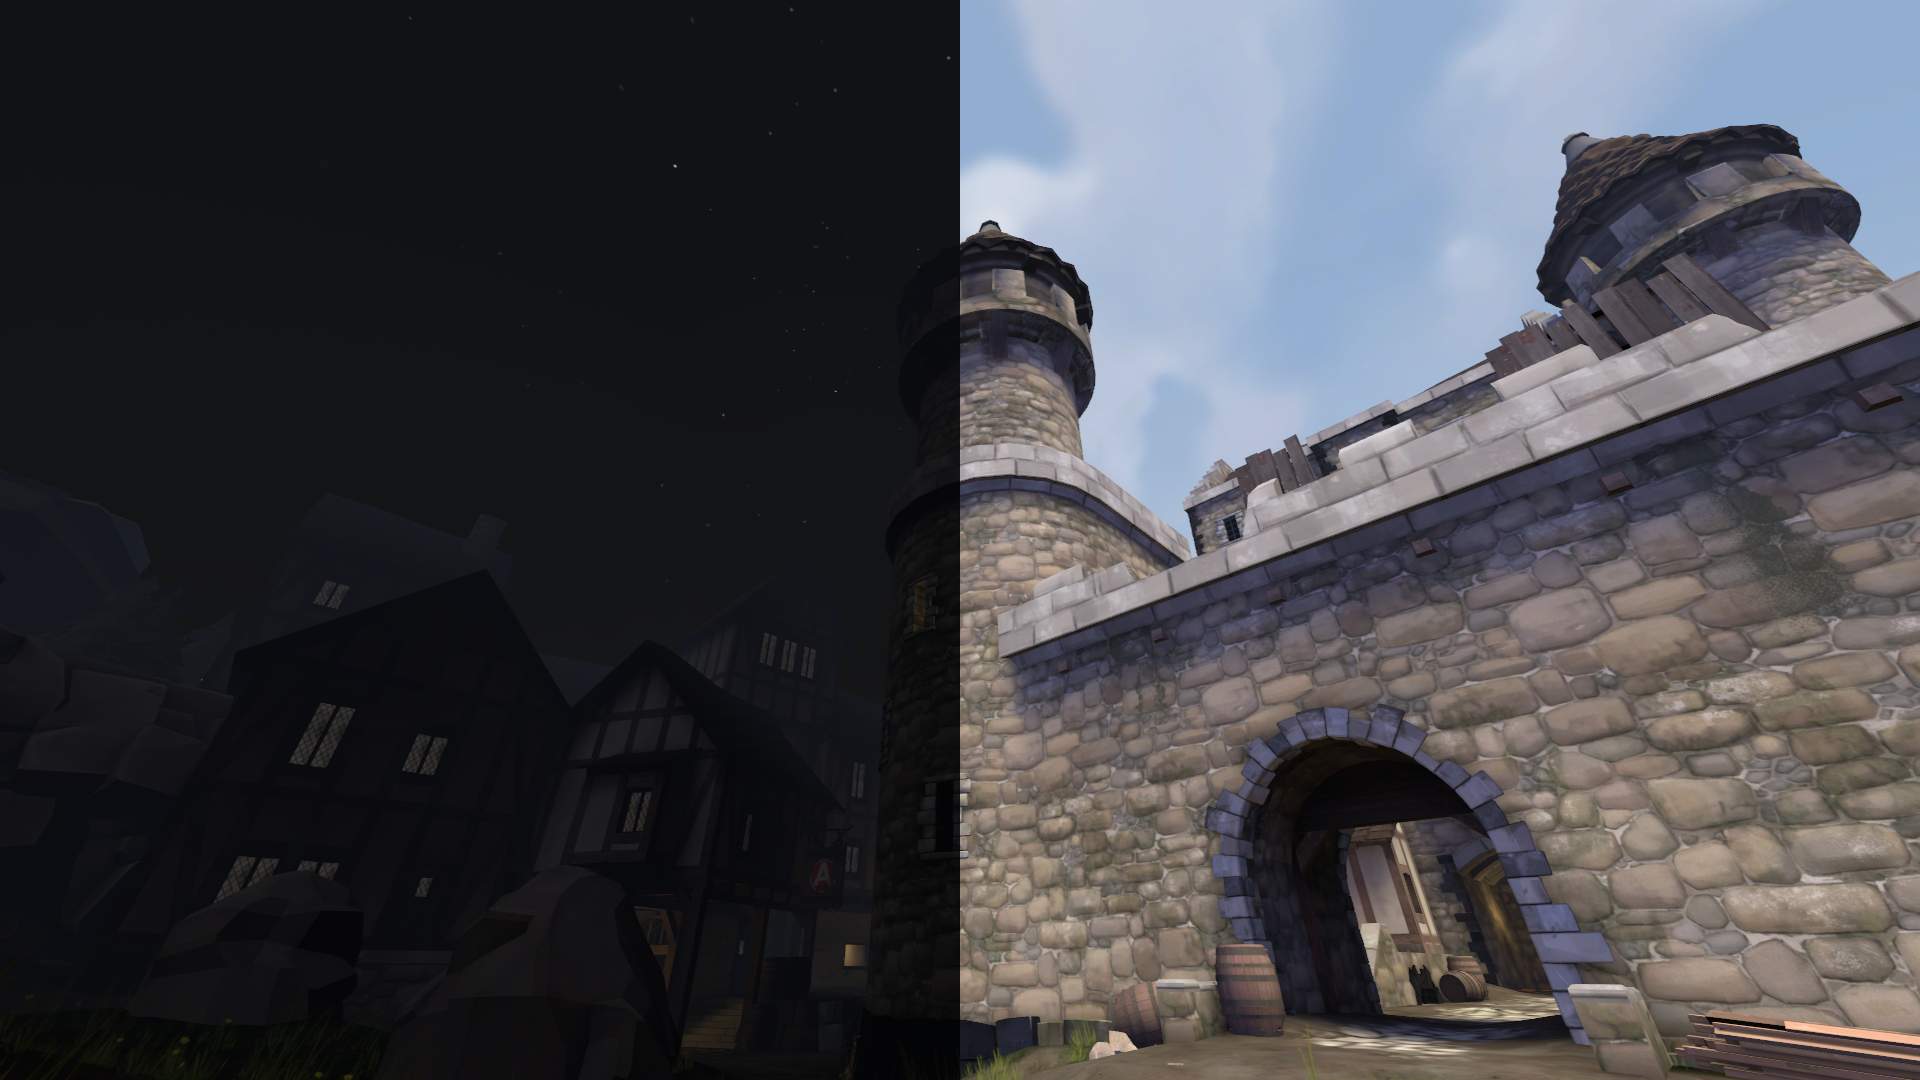
If it loads correctly, you should have something like that:
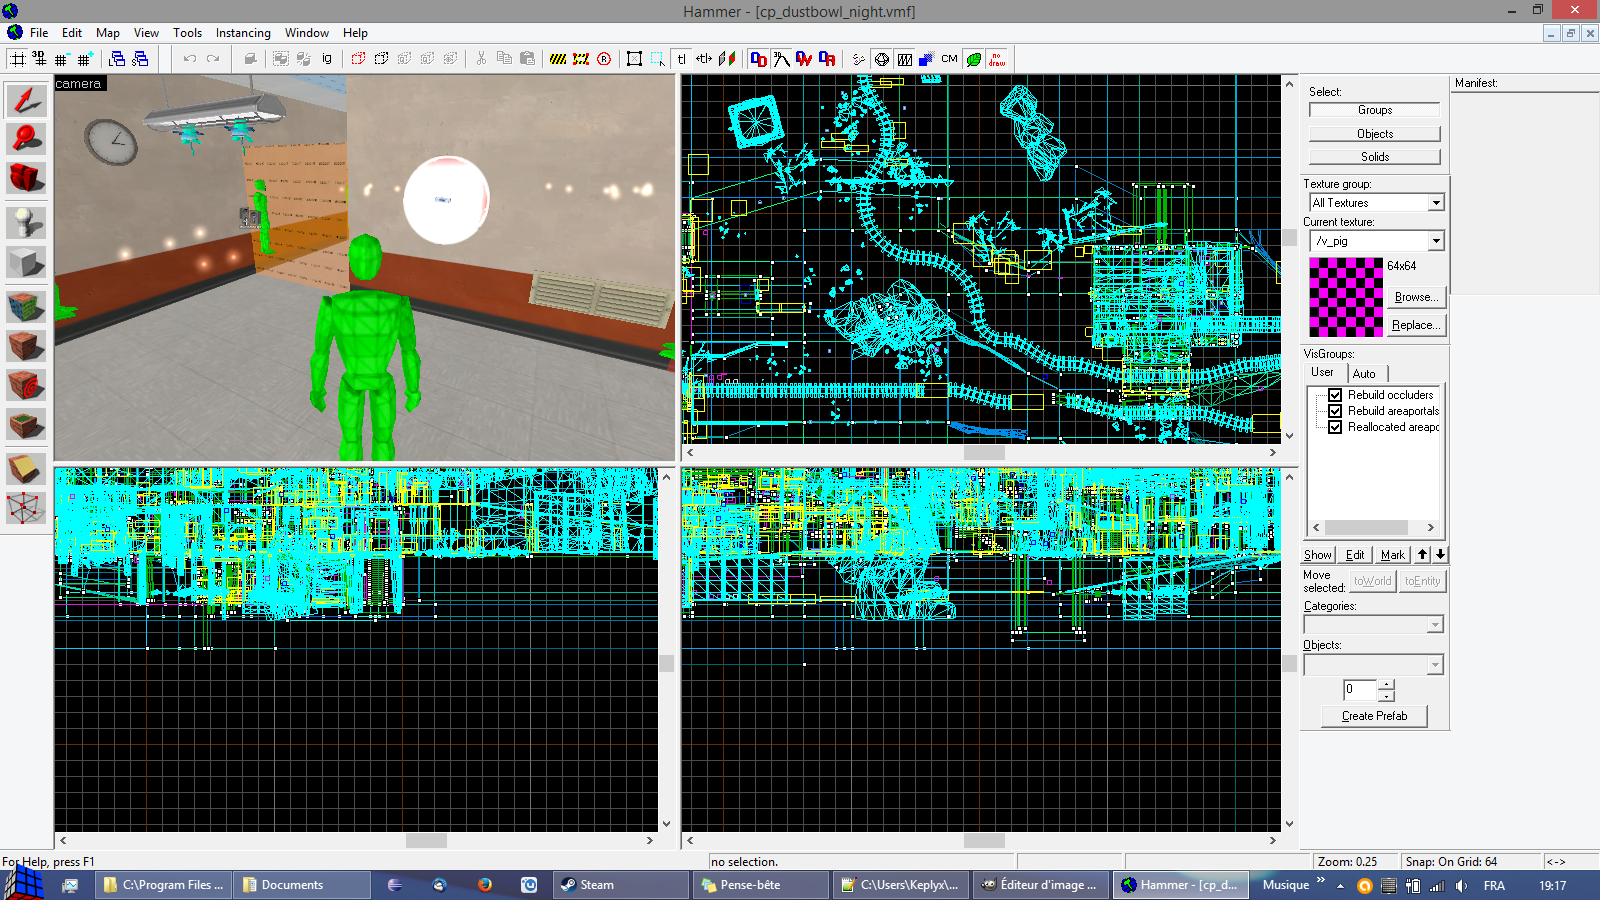
The interface seems very complicated but don’t worry! We’re just going to change some properties of the map.
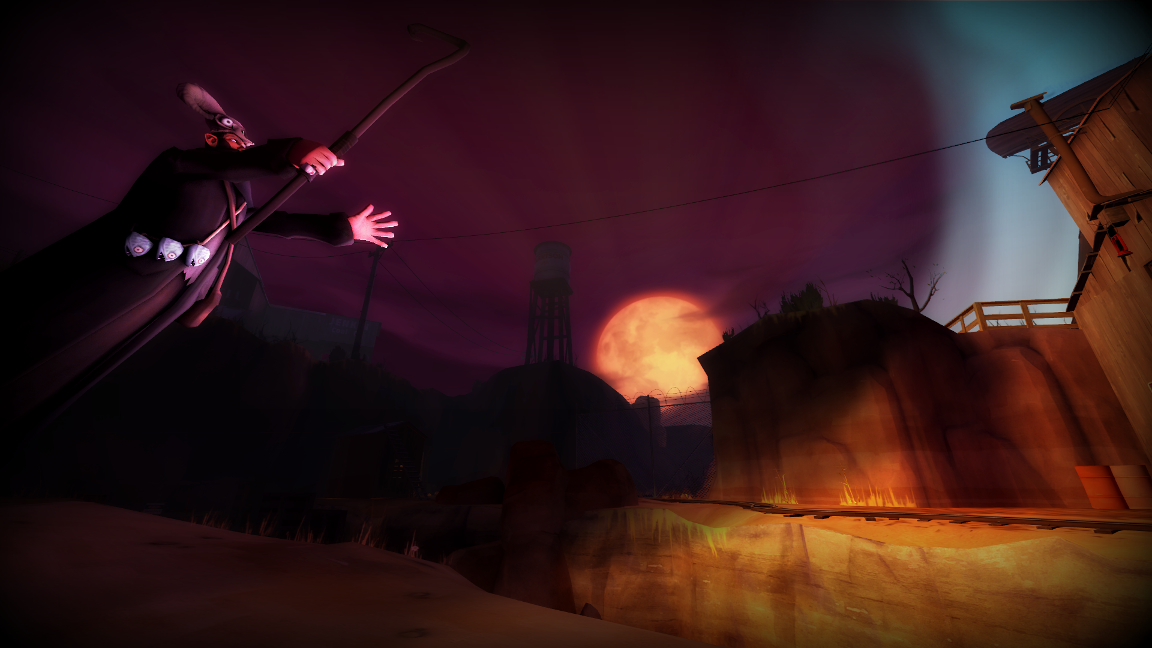
First of all, we are going to choose a skybox. Click here to choose your sky! Choose skies from your game (I don’t think CS:GO skies will work in TF2).
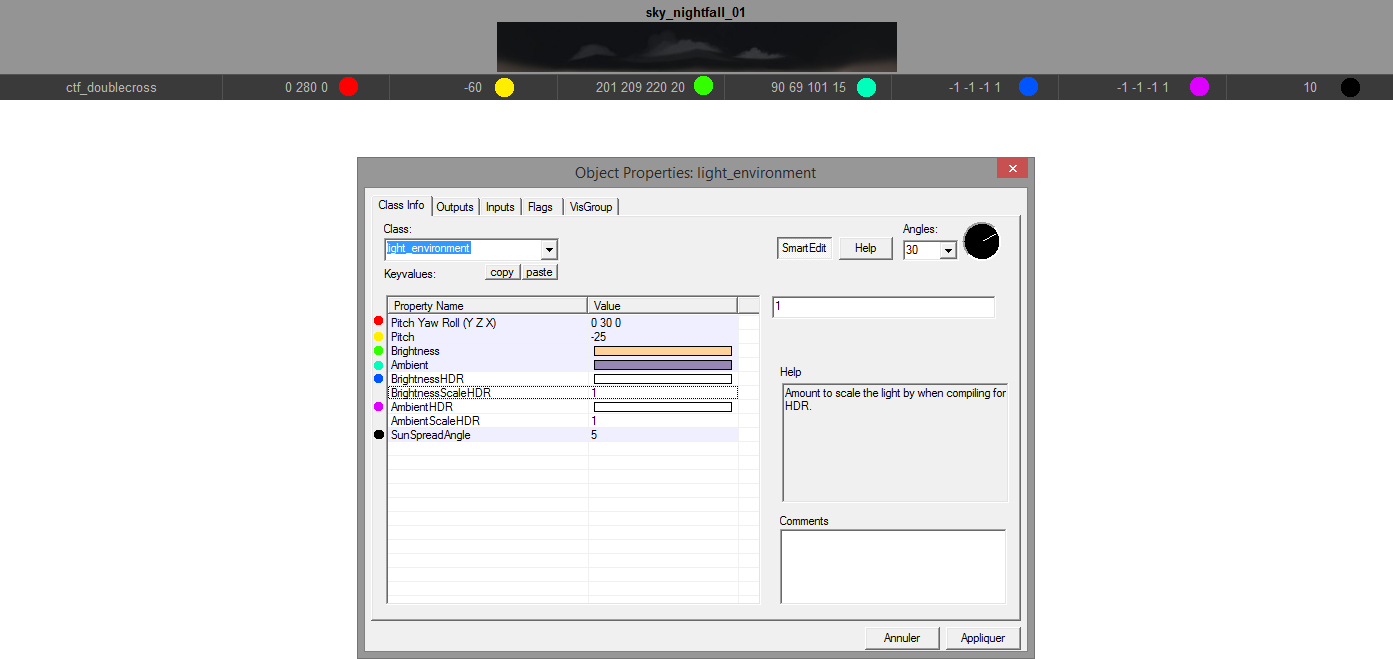
To make a good looking night in TF2, I chose sky_nightfall_01.

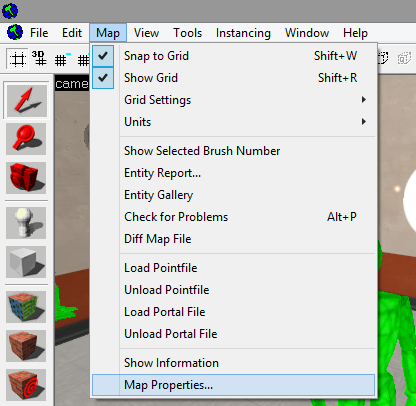
Once you’ve chosen your sky, go back in hammer, and go to map -> map properties…
There’s a lot of properties but the only one we’re going to modify is the “SkyBox Texture Name”. Replace it with the sky you’ve selected (E.g: sky_nightfall_01). Don’t forget to hit apply!

If everything has turned yellow,don’t worry! When you entered the map properties, hammer selected everything in the map, and when you select something, it turns yellow or a yellow frame appears around it.
You now have to find the light_environment.
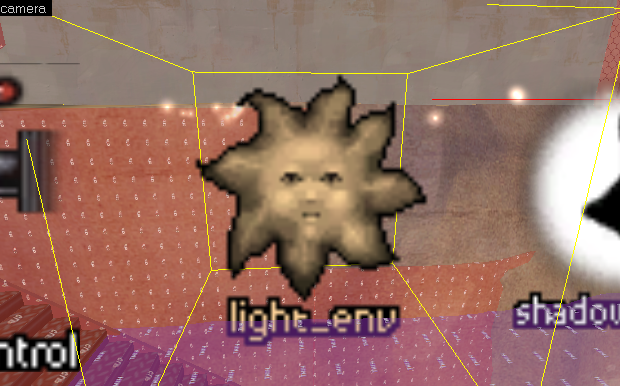
What’s that? It’s simply an entity that sets the ambient light in the map, it’s like the sun or the moon light. If you just change the skybox texture but not this, you will have a map with, for example, a night sky with stars and the moon, but day light.
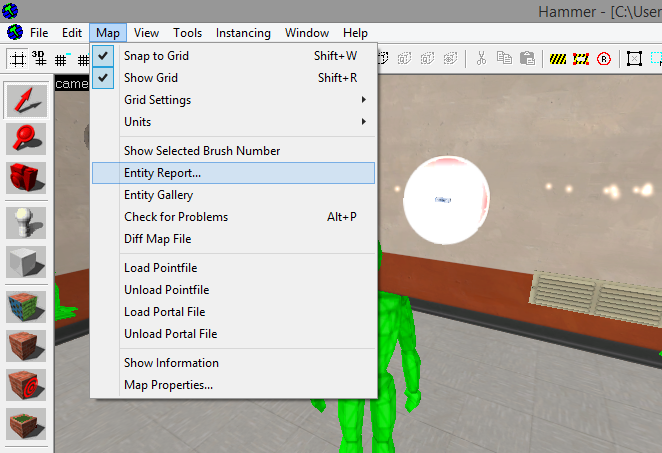
To find it, just go to map -> Entity Report…
Check “Point Entities”, click on the name of one of the entities, press “L” and scroll down to find the light_environment. Select it and hit “go to”.

Once you have found it, double click it, or press alt+enter to display its properties (or you can just select the light and click on properties in the entity report).
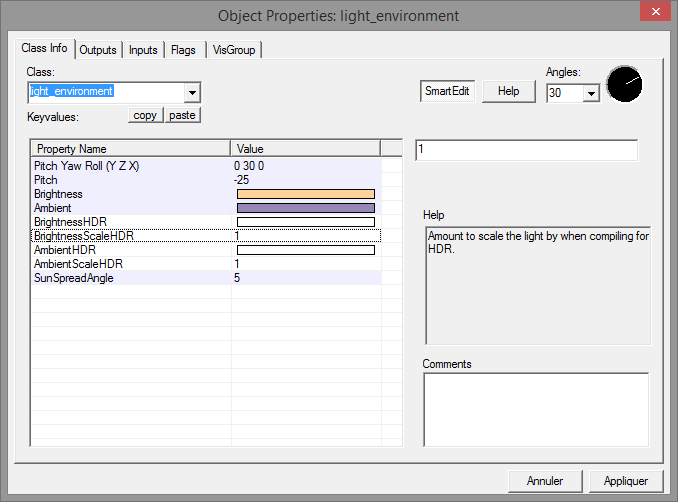
You now have to replace the properties of the light_environment with the ones of the sky you have chosen, and if your map has several light_environment’s, be sure to change all of them. The only things you don’t have to modify are BrightnessScaleHDR and AmbientScaleHDR.
You can, of course, create your own light.
Once you’ve copied the properties, hit apply and close the window. We will now compile the map by pressing “F9” or by going to File -> Run Map…
It will open a new window, leave everything as it is, but be sure to check “don’t run the game after compiling” and “HDR”. Without HDR, you won’t have lights in your map when you load it in SFM (you will be in “Fullbright”).
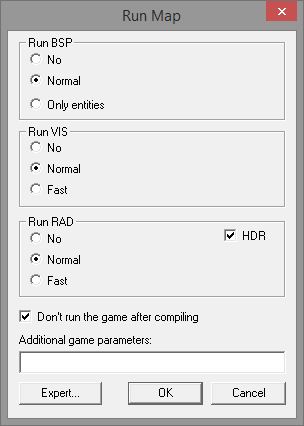
It may take time depending on your computer, so just wait until the compiling process is complete. If you have errors or if the compiler gets stuck for a long time (more than 4 minutes at the same line), go to the error section of this guide to see if there’s a fix.
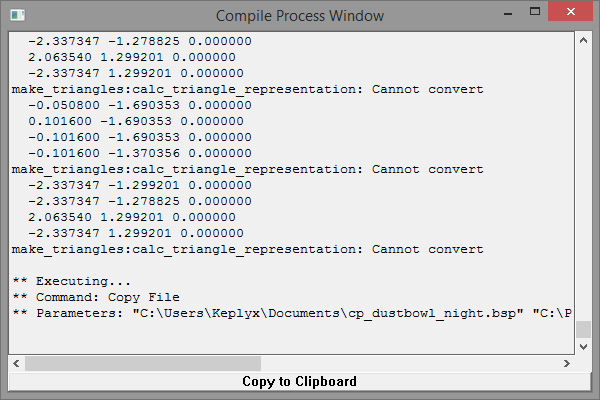
You should have a window like that when compiling is done without errors (the important line is Command: Copy file. It means that your file has been compiled and copied to the destination folder):
When your map is successfully compiled, move the .bsp created into SFM
(E.g: [steam directory]/steamapps/SourceFilmmaker/game/usermod/maps)
Now just launch SFM, load your map and go make some awesome stuff!
Errors
If you get an error, before doing anything else, try redecompile the map and recompile it through hammer without touching anything, if it don’t work, then try to find a fix in this section of the guide, ask in the comments or search in forums.
- If during the compiling process, hammer freezes for a very long time, just open you task manager (ctrl+alt+del), kill the hammer.exe and the “vvis.exe”(Don’t forget to kill the vvis.exe process or it will use 100% of your processor!). Re-open hammer, reload your map, recompile but this time, under the VIS section, check “Fast”.
- If it’s the vrad.exe and not vvis.exe, just do the same thing as above, but with vrad.exe and then the RAD section.
- If hammer tells you something has “leaked”, that means there’s a hole in the map. Your map must be sealed, if there’s and access to the “void” or “black”, the map will not compile. If you’ve imported an official map, it means that you’ve broken something. So re-decompile the original file and re-edit it. (or if ou want to know more: see the “leak” page of the wiki)
- Some parts of the map you’ve chosen may stay with their default day light texture. I don’t know how to fix that apart deleting the object.
- If you tried to edit the map afd_warehouse, nearly all the textures might be white. The problem is that hammer don’t recognize the textures (or something like that). I don’t know how to fix this, so you can either give up, or you can try changing the broken textures by others, but it’s long and annoying. If somebody knows why this is happening and how to fix it, share your secret in the comments!
- If SFM tells you that your map is missing HDR (High dynamic range), be sure you checked HDR in the “Run Map” window. If it appens again and you’re sure you checked HDR, search in the compile log any errors. If don’t know how to fix the error or you just can’t find it, send me the log so I can try to help you!
Report me any errors you get so I can try to help you and find a fix!
For more information about how to use hammer, you can follow the officials tutorials on the wiki.
Conclusion
I hope this guide helped you and that you can now change the sky of any map for your SFM posters or videos!
As it’s my first guide, it may contain some errors, or some unclear explications, so tell me in the comments so I can improve it!
Thanks to Darmo for helping me with my bad English!
Feel free to add me if you have any questions and don’t forget to rate! (feedback is also much
appreciated ;D)