
Overview
Today in this Guide, i will show you how to make Custom heads, the example will be a Happy Mudkip from Pokémon 🙂
1. Requirements
What you need is:
GIMP
Paint.net
2. The Guide
One thing before we start, this is the very easy version on how to make yourself a head! There are other methods which look better but this one is the easiest to do and to understand!
STEP BY STEP:
1. Get a Picture of whatever you want to make your head! i recommend getting a Picture where you can see the head from the Side (So it looks he/She/it looks to the right or left)
1a. When it looks to the left flip the Picture Horizontal so it looks to the right!
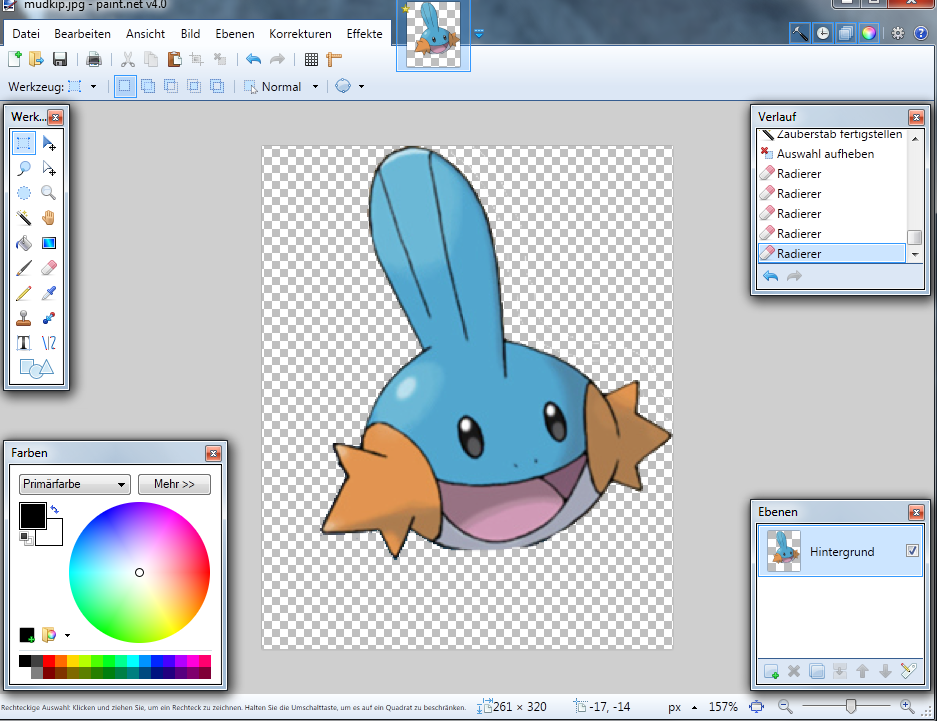
2. Save the Image and Open it up in Paint.net [PICTURE 1]
PICTURE 1

3. Erase a rough line around the Head [PICTURE 2]
PICTURE 2

4. Erase everything outside the erased Line! [PICTURE 3] ( I also removed some white inside use Magic wand tool for this)
PICTURE 3
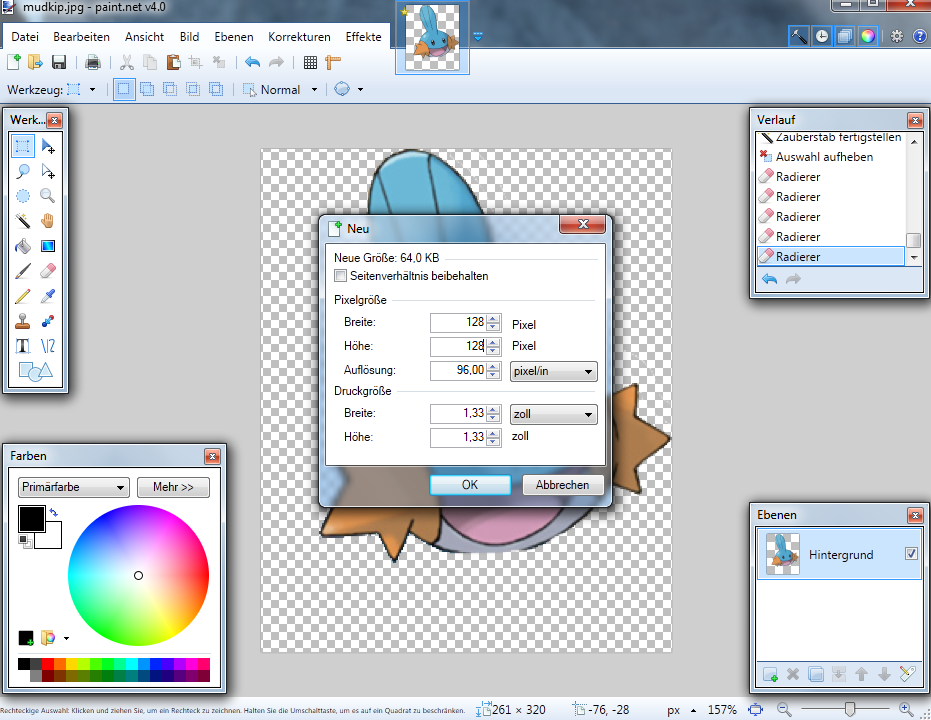
5. Create a new Image with the Size of 128×128(Pixel) [PICTURE 4]
PICTURE 4
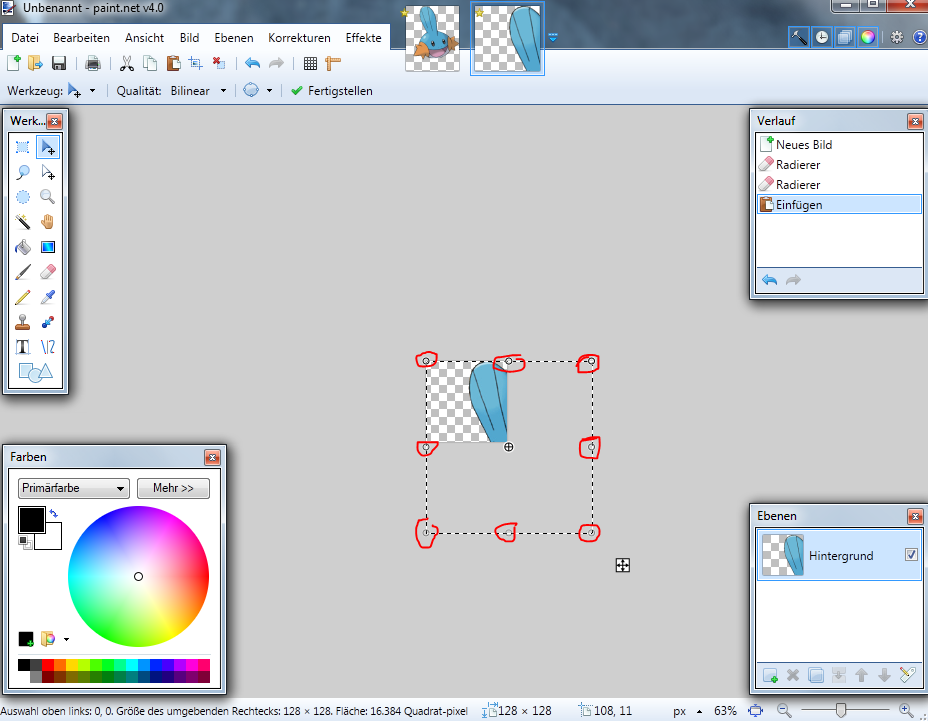
6. Copy the Head with the Rectangle Tool (Select by click and drag and then press CTRL+C)[PICTURE 5]
PICTURE 5

7. Go to the New Image (128×128) you just created and Erase every white thing so it will be Transparent, then PASTE the Image into the new image with CTRL+V[PICTURE 6]
PICTURE 6

8.As you can see on Picture 6, the head doesn’t fit right? WRONG! On Picture 7 you will see the JOints where you can adjust the size [PICTURE 7]
PICTURE 7
9. Drag them around until it fits! on picture 8 you will see when you go to the left with your mose (Outside the Copy box) you can Rotate the head this can be Important sometimes![PICTURE 8]
PICTURE 8
10. On the Next picture you’ll see i rotated the picture a little bit so it would look straight, now choose the “Line” tool and set the size of the brush to 2 and change the colour to Black as shown in [PICTURE 9]

PICTURE 9

11. Now connect the line tool with two ends of a line (As the thing on Mudkips head) you might say this looks Dumb but hold on ! on the next picture you can see that there are joints you can drag around! [PICTURE 10]
PICTURE 10

12. Now drag them around a little bit until they fit exactly into the shape, its not that hard! [PICTURE 11]
PICTURE 11

13. See? fits very good! now do that on all outlines on the Head! [PICTURE 12]
PICTURE 12

14. Looks good! now a big jump, save the Head somewhere and close Paint.net, open the image with Gimp, go to the TAB “COLOURS” its “FARBE” in my language and continue what i do on the Picture [PICTURE 13]
PICTURE 13

15. Than use the same config as i do [PICTURE 14]
PICTURE 14

16. You might think “Cool thats it?” NO ITS NOT DONE YET, Yet it only looks grey-ish and wouldnt fit into the game at all, trust me ,what we do know, get the Paint Bucket and colour the different colours in different Grey tones and make the main colour White as seen on [PICTURE 15]
PICTURE 15

17. We realized that Paint bucket doesnt colour everything, now its time to use the brush to make the colours look good again!(AND USE A SIZE 3 BRUSH TO REDRAW THE LINES)(TO SAVE IN GIMP USE (EXPORT AS as shown in Picture 16 “Save as” Would save it as an Project) [PICTURE 16]
PICTURE 16

18. That looks ok! now lets go back to Paint.net and do final Adjustments in Positioning! ( Make sure you are always above the red lines i am drawing and dont make the head too tall![PICTURE 17]
PICTURE 17

19. GREAT! WE ARE DONE! Now save the image and follow my Guide “How to use Custom Heads”
[link]20. NOW, THIS IS HOW IT LOOKS INGAME:

Enjoy this guide and feel free to show me your creations 🙂
The Mudkip head will be available on my Head thread which you can find in this link -> [link]