![How to create a good Duck Game level [Results are spectacular] for Duck Game](https://steamsolo.com/wp-content/uploads/2021/07/how-to-create-a-good-duck-game-level-results-are-spectacular-duck-game.jpg)
Overview
If you don’t know how to make a good level, or you want to make them better, this is the guide you’re searching for…Let’s start this guide:
Presentation
Hello, I’m Antikore, a map maker that have created actually 80 maps aproximately and I hope this guide can clean the Duck Game workshop of the “Laggy/Unplayable/Hell” levels, and make the “Internet Maps” more useful.
Let’s begin this battle
Run the Level Editor
If you actually don’t know how or where to start creating your Duck Game levels, it’s even easier than expected:
Run Duck Game and in the main menu you should go to the beam that is in the down-right part of the screen, then press start or the button you use to start.

After doing this you can see your blank canvas, that in a few minutes (I last about 5 minutes on making the level I show on the tutorial) will be transformed on the level of your dreams:
*Guaranteed*
The level editor at the start is something like this:

Style
The level needs a fixed style, space theme, snow theme.
If you create a level, you cannot place space floor with a desert background, or at least space tiles can’t be the main floor in the level.
Of course sometimes be original is good, If the tiles seems good with the background, is enough to start a good level.
– Select a background
When you have your style decided, right click anywhere on the screen and open the editor menu UI:
Then click on “Backgrounds > Parallax”.
You have the option to add custom BGs but I don’t know how to do that.
Select one of the backgrounds and leftclick on anywhere on the screen
When playing the level, you should see a fullscreen background, and the item you place will not be visible while playing, so, don’t worry.
You can obtain something like this:

– Create the layout
Start making some floor where your ducks will move during the battle.
Rightclick “Blocks”
Select the floor of your style, you can put more than one type of floor.
Drag into the map and start creating the basic layout.
This is an example of a finished layout:

– Structural Features
Obviusly, the last image you have seen isn’t the finished game layout.
Something important to have in account, is doors, windows, etc.
Place them onto the map wisely, remember, you have to place them with mind, not with ass:
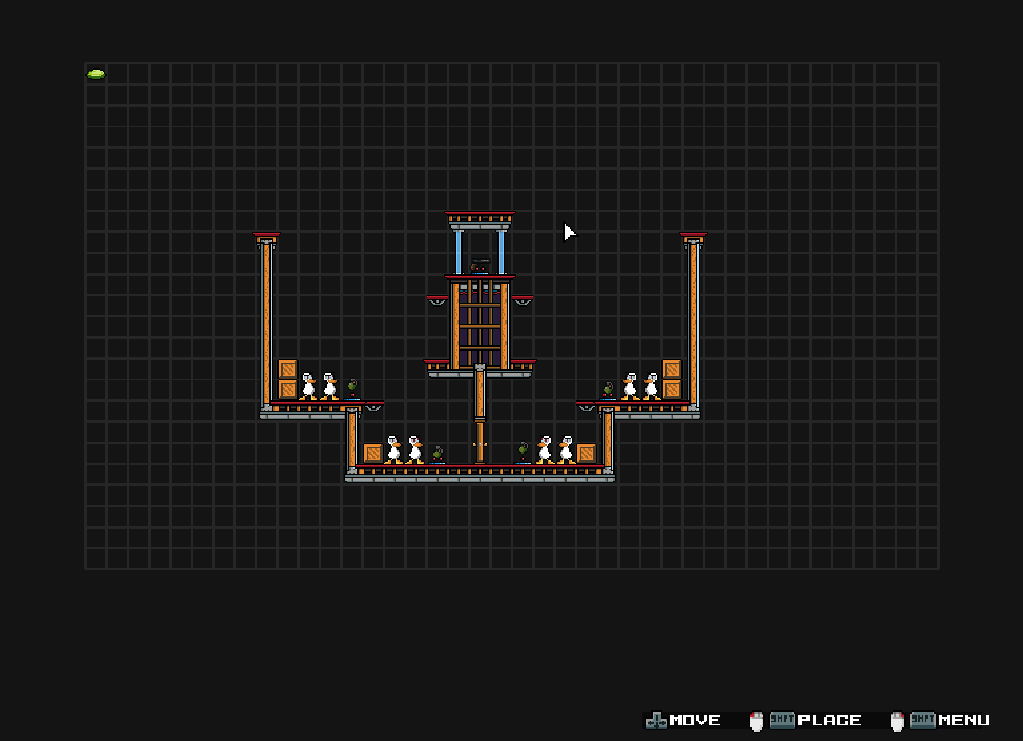
In the level I’m making, following this step, I make something like this:

Spawns & Weapons
Finally we get on the place you are awaiting for, the weapons, but before we need to place the player spawns and then, you can start playing your level:
For making player spawns and item spawners (or weapons xD), you need to remember this acronym:
P.N.E.Q
That means
Players Needs Equality and Quality.
Of course, the players like the level not only if it’s good decorated, designed or anything, players can feel bad if they spawn on places with bad weapons, and others appeared with incredible weapon.
All players need balanced spawn positions, that will make players have the same possibilites to win with the rest.
– Player Spawns
Once decided where to place our player spawns, you can see this in the in-game level editor:

– Weapons & Item Spawners
As our acronym said, the player want the same winning possibilites than the rest of players (Or at least not lower possibilites)
As our example level is symethric, I will place the weapons symethrical.
Pro Tip: Place the best weapon on the top of the level, our the lowest part of the level in case of the players spawns at top. Of course, you can place it anywhere, middle, top, bottom as well it respects the “PNEQ rule” 😉
After placing our items, equipment, spawners etc. you can get something like this:

Into details
Now the level is finished and playable, but also some ugly.
In this step, you will see how to transform your crap, into anything as long is not a crap. (Or at least a golden crap xD)
– Props & Things
You have to admit that props are now important things in the Duck Game gameplay mechanics. Add some crates (According into styles, remember “PNEQ”) and also if you want, some barrels, presents or batteries, or anything you need etc.
Anything that makes you feel good with your level :3
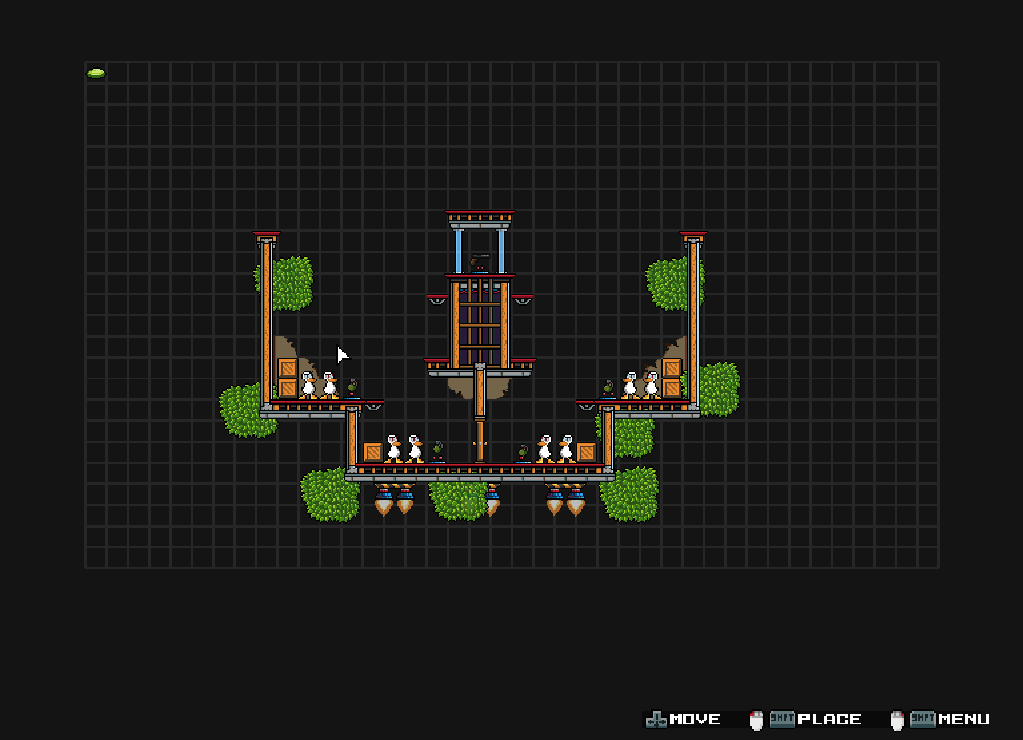
In my case I did something like this:
– Background Tiles
You still remember that when we started placing the background, you have entered “Background > Parallax” to place it, this is because now, you will place items (Accordingly placed) from the section “Background”
Inside this section, apart from the subsection “Parallax”, you can find some tiles that players can’t interact with. Try to place some of them according to the style, and don’t place randomly.
Also there is a hotkey to go to the bg-tile menu of the style/theme you’re using, and select more.
I did some borders:

– Details
In the “Detail section” there some items you can place to decorate more your level, I did something like this to make it better:
– Chances
In Duck Game, most of the items have a parameter that can make your level be even a few more playable.
When rightclicking on an item, in the first section, you enter and the chance option, adjust the percentage to appear that thing at any start of that level, each time, the level will change the items with chances.
Use it with precaution.
I didn’t use in my level chances, but you can use them if you want.
Final touches
Finally, you have your level finished, but before anything goes wrong with friends, Duck Game gives you the try to play your level directly from the editor and play it before publish or save it.
If you see an error, fix it.
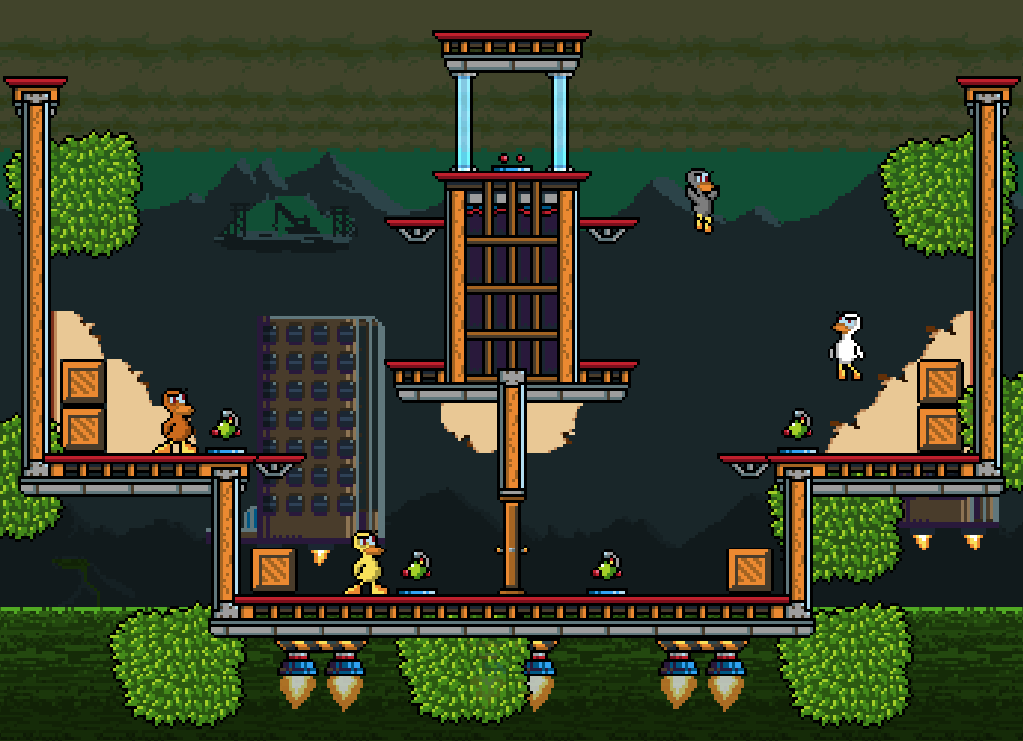
Now the final level I get is this:
– Save your level
Now, to save changes and finally allowing you to play the level through the normal game, rightclick anywhere and click the floppy disk icon, click save and then name it as you want.

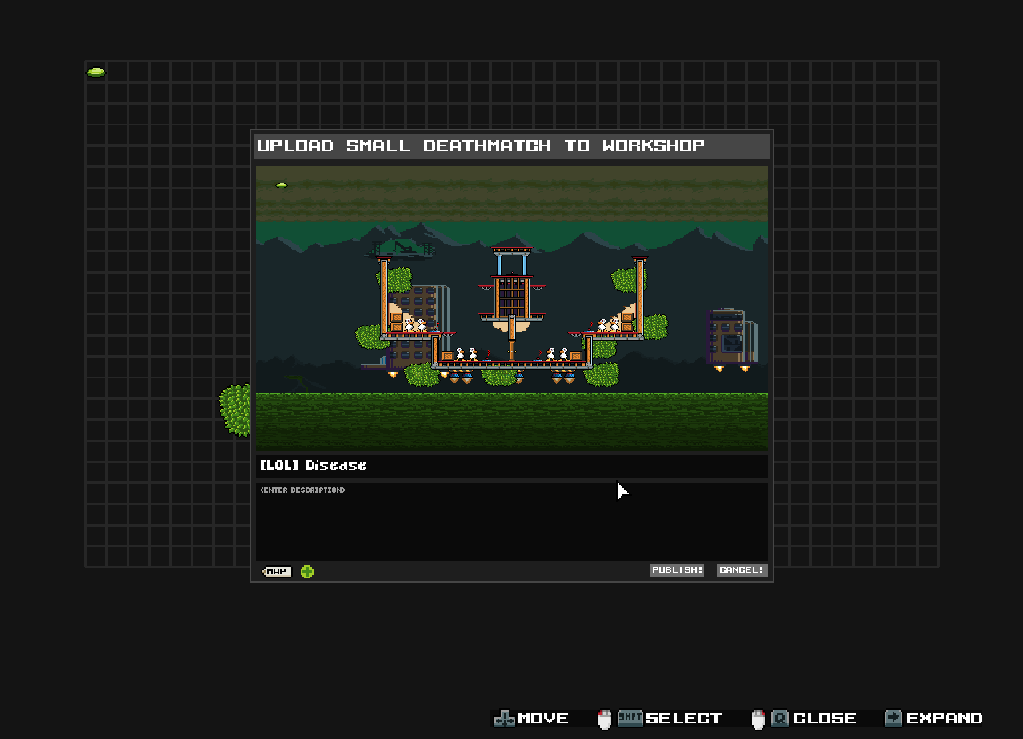
– Publish it through steam
Rightclick anywhere on the screen, click the steam icon and you should follow the steps there, and you finally publish your epic level.
Extra Pro Tips
- When the level is finished, but you feel somethings missing, don’t stop, try it harder
- Use the some punch of weapons all around the level: Ex “Grenades, Pistols, Magnums, Virtual Shotgun and Jetpack”
- You can inspirate on other’s levels, that can give you points (Inspirate, no copy)
- When creating your level, save it each some seconds to don’t lose progress in case of shutdown of lights or run out of battery.
- Add delay to items according to the items inside.
- Try to make your level playable for anyone, from noobs to pros. Don’t create zones where necessarily you need gun-jumping, crate bugs, etc.
My final level:

Thank you
I hope this guide can help you on your future levels, I want to see them when playing Internet maps ;D
You can add things I forgot or more tip etc in comments, and also rate and give me your opinion to make it better and harder next time.
Good luck and happy map making!
– Antikore