How to create Custom Maps for Teardown
The Official Guide
The Official Map Editor
This guide is outdated, you can still use it for some tips but I highly recommend checking out the offical tutorials.
Installing MagicaVoxel
In order to create content for Teardown, you will have to download MagicaVoxel[ephtracy.github.io].
Extract the folder contents and launch the program. (I recommend starting it as an administrator, since MagicaVoxel does not start sometimes otherwise, for me, atleast)
Getting used to MagicaVoxel
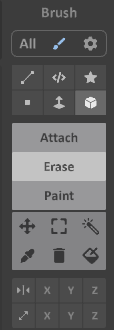
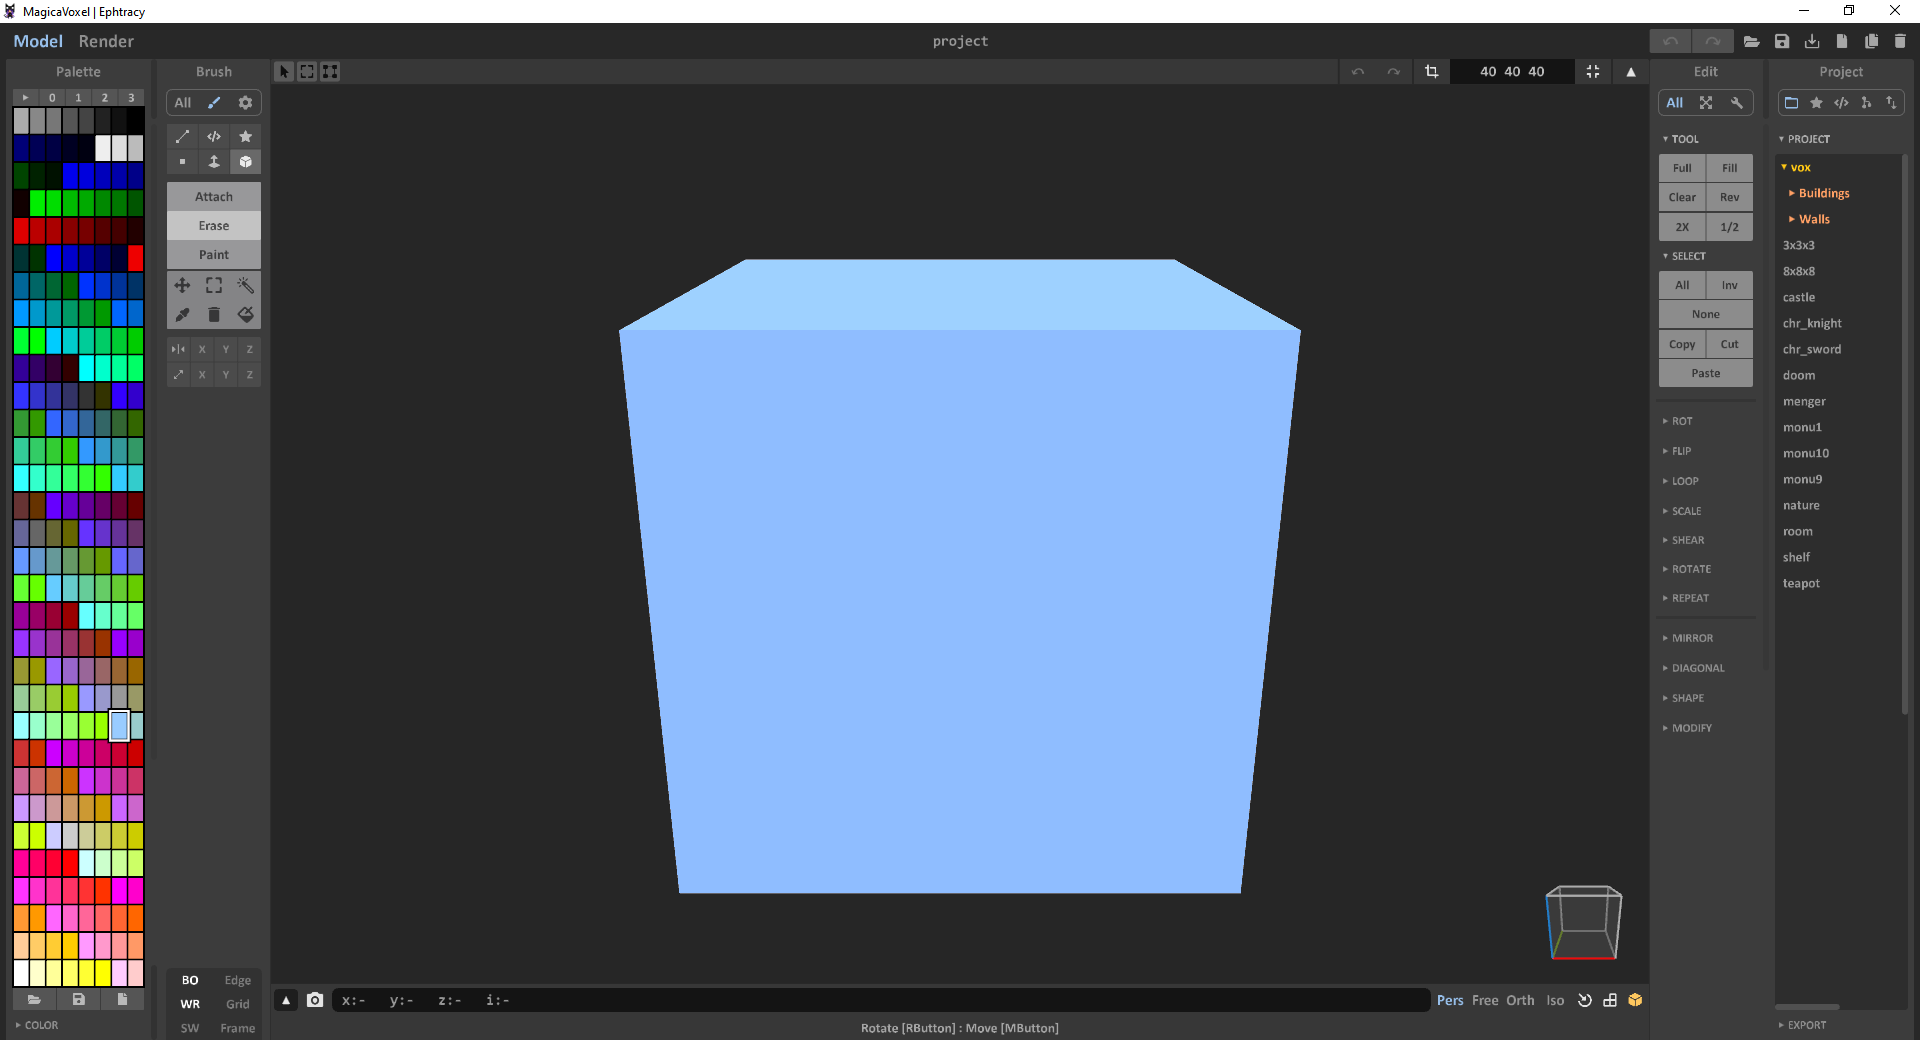
The most common tool to use is the Box tool, that is selected by default.
You can switch between attach and erase mode below it.
 )
)
Let's delete the default cube by selecting the face tool on erase mode and dragging down on the top of the cube.
 Let's draw a shape using the Box tool.
 And let's paint it.
Thats pretty much the basics.
The color palette
Download this .vox file[teardowngame.com] and open it in MagicaVoxel. The materials are listed on the left, next to the palette and cannot be changed. Though the colors can.
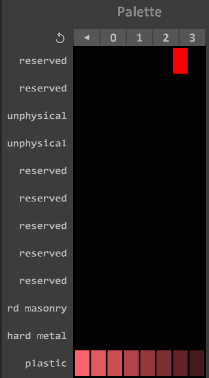
(from teardowngame.com/create)
Objects and how to build them properly
This is a wall, yes but that wouldn't be fun to break would it.
A real wall will have some support of some kind, or insulation. Something to make this more interesting to break. Bad wall vs "good" wall:
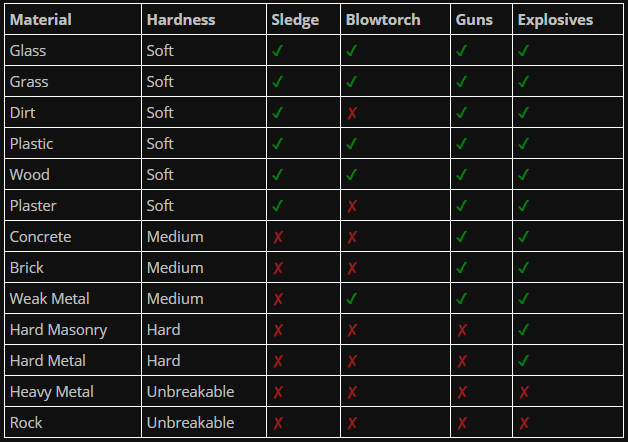
See the material list and combine them properly to get satisfying results.
Windows, Lights, and similar
In order to get windows, just select the window material (Palette Index 1-9)
Select your color and chose the material on the right.
Metal makes your material look like metal. The roughness slider makes the metal look like it has been brushed with a steel brush.
If you want lights, use the "Emit" shader. Same for every other material.
See the create website[teardowngame.com] for more details.
(Though they don't actually emit light in-game, yet)
Building complex scenes
In order to build complex scenes, you will need to know about the object mode and edit mode.
By pressing tab you can switch between the two.
In edit mode, you can edit your currently selected object, in object mode, you can move your objects around and arrange them.
 While in object mode, you can press SHIFT while dragging one of the arrows to duplicate the selected objects.
You can add empty objects to edit them by pressing the plus icon in the top right.
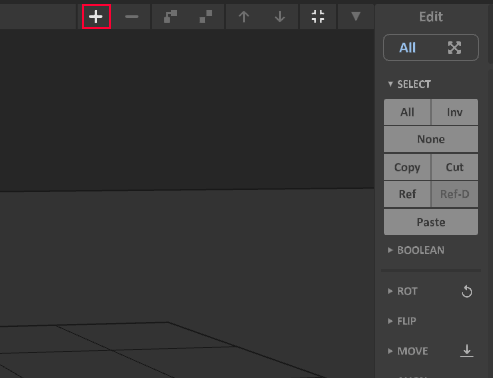
That makes building a lot simpler, and is also recommended by the developers.
Props, such as Chairs, Crates, and similar.
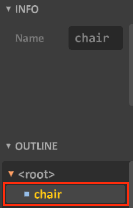
To add props, I recommend creating a new .vox file with all of the props inside. For example a char.
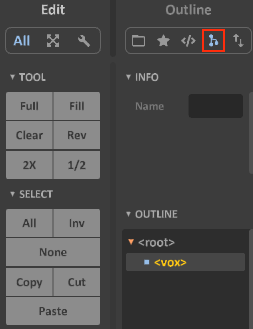
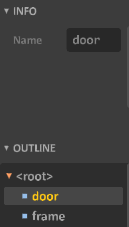
Now rename the chair inside of MagicaVoxel by selecting the Scene Outline on the right hand side.
Select your Object (probably called <vox>) and rename it.
Now place your props.vox file inside of the custom folder (C:\Program Files (x86)\Steam\steamapps\common\Teardown\create\custom).
 Inside of your custom.xml (in C:\Program Files (x86)\Steam\steamapps\common\Teardown\create)you will need to add this:
Body:
- pos, the position of the object. X, Y (Height), Z
- rot, the roation of the object.
- pos: the position of the object. X, Y (Height), Z relative to the position of the body element.
- rot: the roation of the object relative to the rotation of the body element.´
- name: The name the game references to this object. Can be any.
- prop: is this object a prop or not?
- file: the location of your .vox file (Note: LEVEL shouldn't be changed. Only the contents after it.)
- object: the name of your object inside of MagicaVoxel
Doors
Doors are pretty complicated at the moment, but I will try my best to explain it.
First off, you will have to create a door frame inside of MagicaVoxel.
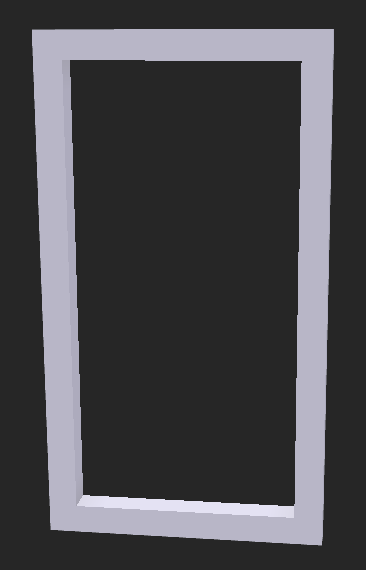
Then you need to create a new object and create the actual door.
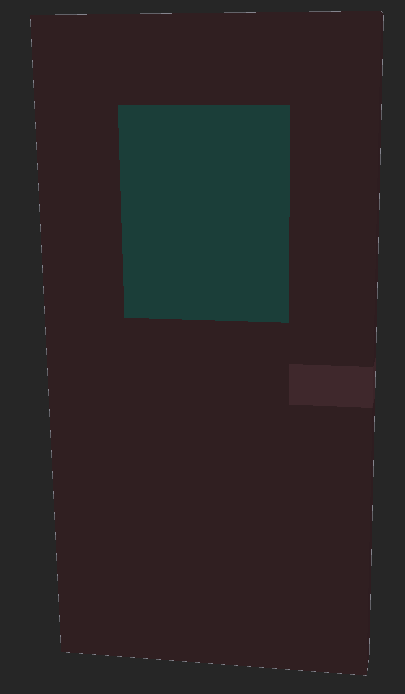
Make sure to give these two seperate object names inside of the scene outline.
You should have something like this:
Save your file and place the .vox inside of your C:\Program Files (x86)\Steam\steamapps\common\Teardown\create\custom folder. I called mine door_tut.vox.
Next go to your C:\Program Files (x86)\Steam\steamapps\common\Teardown\create folder and open the custom.xml with a text editor. (I recommend Notepad++)
You will have to add code now. inbetween of theAdjust the positions until everythin fits together, remember, 10 Voxels are 1 Meter.
I really recommend you joining the official Teardown Discord[discord.gg]. One of the Devs, ResidentEmil posts tutorials like these there.
Adding your .vox file to Teardown
In order to actually destroy your masterpiece, you will need to implement it into Teardown.
Save your file, and navigate to your folder where you saved it. Now, copy the .vox file and move it into the C:\Program Files (x86)\Steam\steamapps\common\Teardown\create\custom folder.
Rename the existing file to something like custom_old.vox and rename the file you just moved to custom.vox Now you just have start Teardown and start playing your map :)
Closing Thoughts
This is by far not everything you can do, but these are the basics for creating custom content.
I highly recommend visiting the create website by the devs www.teardowngame.com/create.
They explain everything pretty well.
I really recommend you joining the official Teardown Discord[discord.gg]. One of the Devs, ResidentEmil, posts tutorials like these there.
Remember, 10 Voxels = 1 Meter.
Have fun!
- hidden expensive items★ 5 (413)26k views966 ♥3 minUpdated 5 Feb, 2024
- Teardown 100% Achievements★ 5 (477)24k views1.2k ♥3 minUpdated 18 May, 2024
- Teardown ALL valuables guide★ 5 (635)24k views1.3k ♥21 minUpdated 17 Jan, 2025
- How to make your framerate become a negative integer★ 5 (307)18k views200 ♥1 min
- TEARDOWN: Hollowrock Vault★ 4 (97)12k views97 ♥2 minUpdated 3 Nov, 2020
- Все достижения в Teardown★ 5 (256)11k views601 ♥3 minRussian


- Upgrading to PremiumTeam Fortress 2★ 5 (20k)1441k views11k ♥6 minUpdated May 11, 2022
- No More Room in Hell Official ManualNo More Room in Hell★ 5 (2.8k)569k views2.1k ♥29 minUpdated Apr 22, 2019
- NMRiH Community Hosting GuidesNo More Room in Hell★ 5 (526)351k views653 ♥1 minUpdated Aug 10, 2022
- How to 'Git Gud' Soon™MORDHAU★ 5 (2k)318k views3k ♥68 minUpdated Nov 16, 2024
- Лучшие кооперативные игры SteamPAYDAY 2★ 5 (1.5k)315k views2.1k ♥56 minRussianUpdated Apr 27, 2025
- Desert Eagle Heat Treated | Blue GemCounter-Strike 2★ 5 (1.6k)293k views1.5k ♥2 minUpdated Jan 16


This guide was created by its original author on the Steam Community. Are you the author and want it removed? Request removal.