
Overview
This guide will help you figure out how to use the left analog stick as a real analog stick, instead of an emulated d-pad. You can also use the right analog stick as gas and brake with this as well.
Prerequisites
Before you get down to fixing the analog input on this port of Buggy, there’s a few things you’ll need first:
- A Playstation 1 emulator so we can configure our input plugin (in our case, the latest build of epsxe)
- A Playstation 1 emulator controller plugin (in our case, LilyPad 0.10.0)
- A Gamepad you plan on using with the game
- A freshly installed copy of Buggy from Steam
- A program that can extract .zip and .rar files (recommended one being 7zip)
A good link to LilyPad is here [forums.pcsx2.net]
A good link to ePSXe is here [www.epsxe.com]
If you don’t have it yet, a good link to 7zip is here [www.7-zip.org]
First, make sure 7zip is installed, and once it is, you’re ready for the next step.
Configuring the Lilypad Plugin
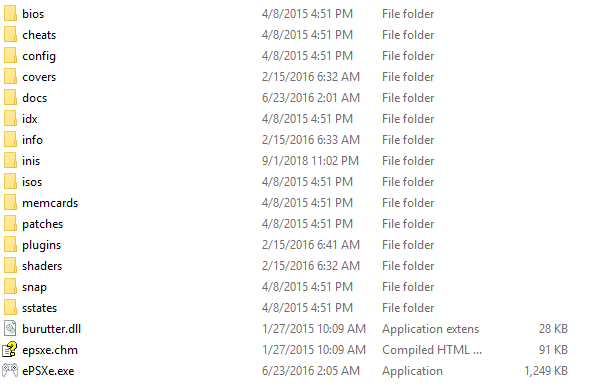
The first thing you’re going to want to do is extract the contents of ePSXe205.zip to it’s own seperate folder. Once it has been extracted, go to that folder, and windows explorer should show you something like this:
Once you’ve unpacked ePSXe correctly, make your way to the plugins folder, and unpack the LilyPad 0.10.0 (r1826).rar file into it. The plugins folder should look something like this afterwards:
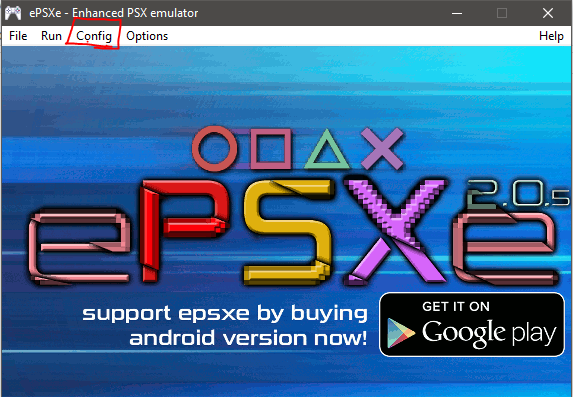
Once you have LilyPad.dll inside ePSXe’s plugins folder, go back to the main folder for ePSXe, and double click ePSXe’s main .exe file. It may ask you for a bios file, and which plugins you want to use, don’t worry about finding a bios file, just use the simulated one, and eventually you’ll get to the main ePSXe window, which looks like this:
From here, click on Config -> Plugins -> Input Port 1, and you will get another window come up that looks like this:
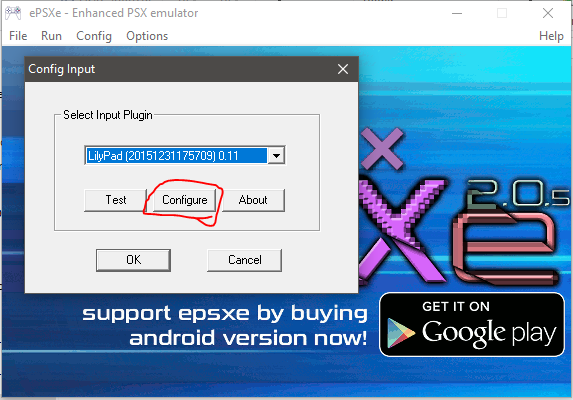
From here, in the drop down menu, select Lilypad, and then click configure, and you will be greeted with this screen:
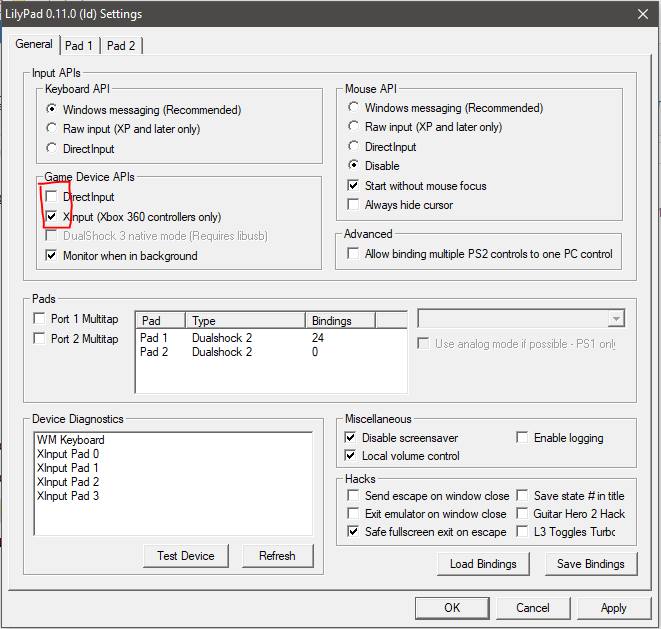
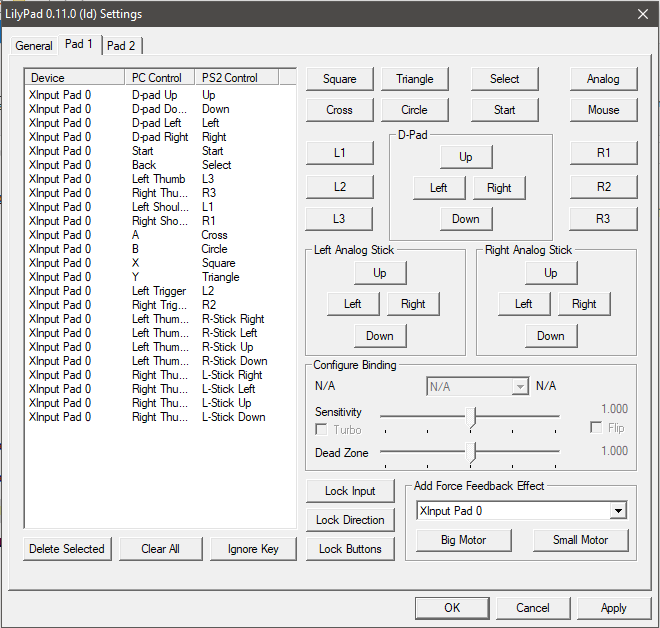
Depending on what controller you have, you should be fine leaving it on just xInput only, for 360 and xbone controllers, but if you’re using a gamepad that isn’t xInput, you may need directinput on too. From there, click on the Pad1 tab on the top, and click every button on the right and press which button on your gamepad you want mapped to that input. Also from testing, Buggy expects forward and reverse to be the Left analog stick, and steering to be the Right analog stick, so my configuration has the sticks flipped so steering is left analog, and gas/brake is right. When you get done, it should look something like this :
From there, when you have your controller mapped how you want it, click apply, then OK. You can now close ePSXe, as we are done using it for this setup.

Copying Lilypad from ePSXe to the Buggy Engine
Once you have Lilypad configured with ePSXe, in the folder with ePSXe’s .exe, go back and view the “inis” folder. In this folder is the configuration for LilyPad you just got done creating:
In the folder, there should just be Lilypad.ini, right click this file, and copy it.
From here, navigate to where Steam saved the data for Buggy, in steamapps/common/Buggy. Once you are there, create a folder in the main directory called “inis”, and paste your Lilypad.ini inside this folder. At the same time, make a copy of Lilypad.dll from ePSXe’s plugins folder, and copy it into this same folder. It should look like this when you’re done:
After the Lilypad.ini file is in */Buggy/inis, go ahead and rename ControllerDriver.dll to something else, like “ControllerDriver_OLD.dll”. The name you give to the old ControllerDriver isn’t important, but the next step is. Rename LilyPad.dll to ControllerDriver.dll. Once that is done, the folder Buggy is saved in should look like this:
If it looks like that, then you should be good to go from there.


Conclusion
From here, If you want to edit your controller configuration, go into ePSXe, follow the instructions for making the initial controller configuration, and edit it to your likeing, then copy the .ini from inis from ePSXe to Buggy. If you’re 100% sure that you aren’t going to mess with the configuration any more, you can delete ePSXe off your system.
If you followed the steps correctly, you should have working analog sticks inside Buggy now. If you run into any problems with this guide, feel free to comment, and I’ll try to help you out best I can, and otherwise, have a good time!