This guide will not use any add-on in the making.We’ll just use the Material Properties and the UV Editing options.
Unwrap Your UV Map Model First
Before we start making the ID map, make sure you already unwrap all of the part you need.
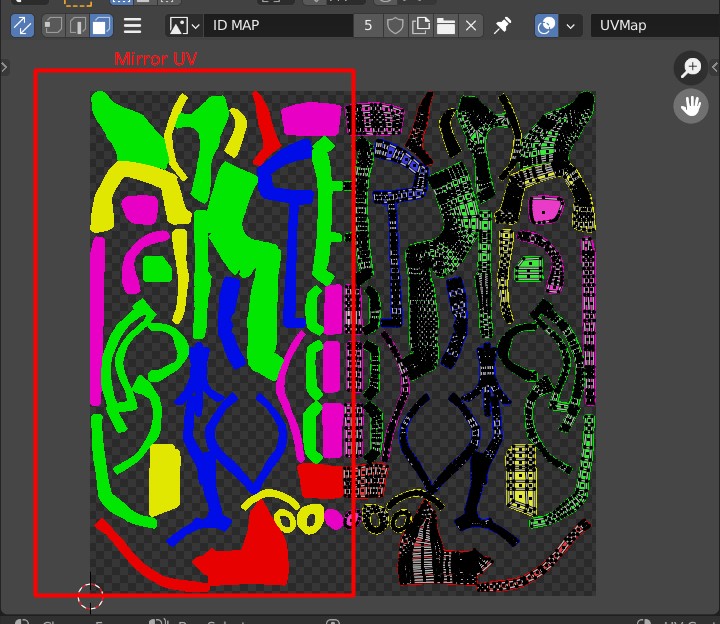
If you mirror the mesh, it will affect the other side of the map so don’t worry.
Also create a new map for the image texture. I made mine in 2048×2048 px.
Making the ID/RGB Shading
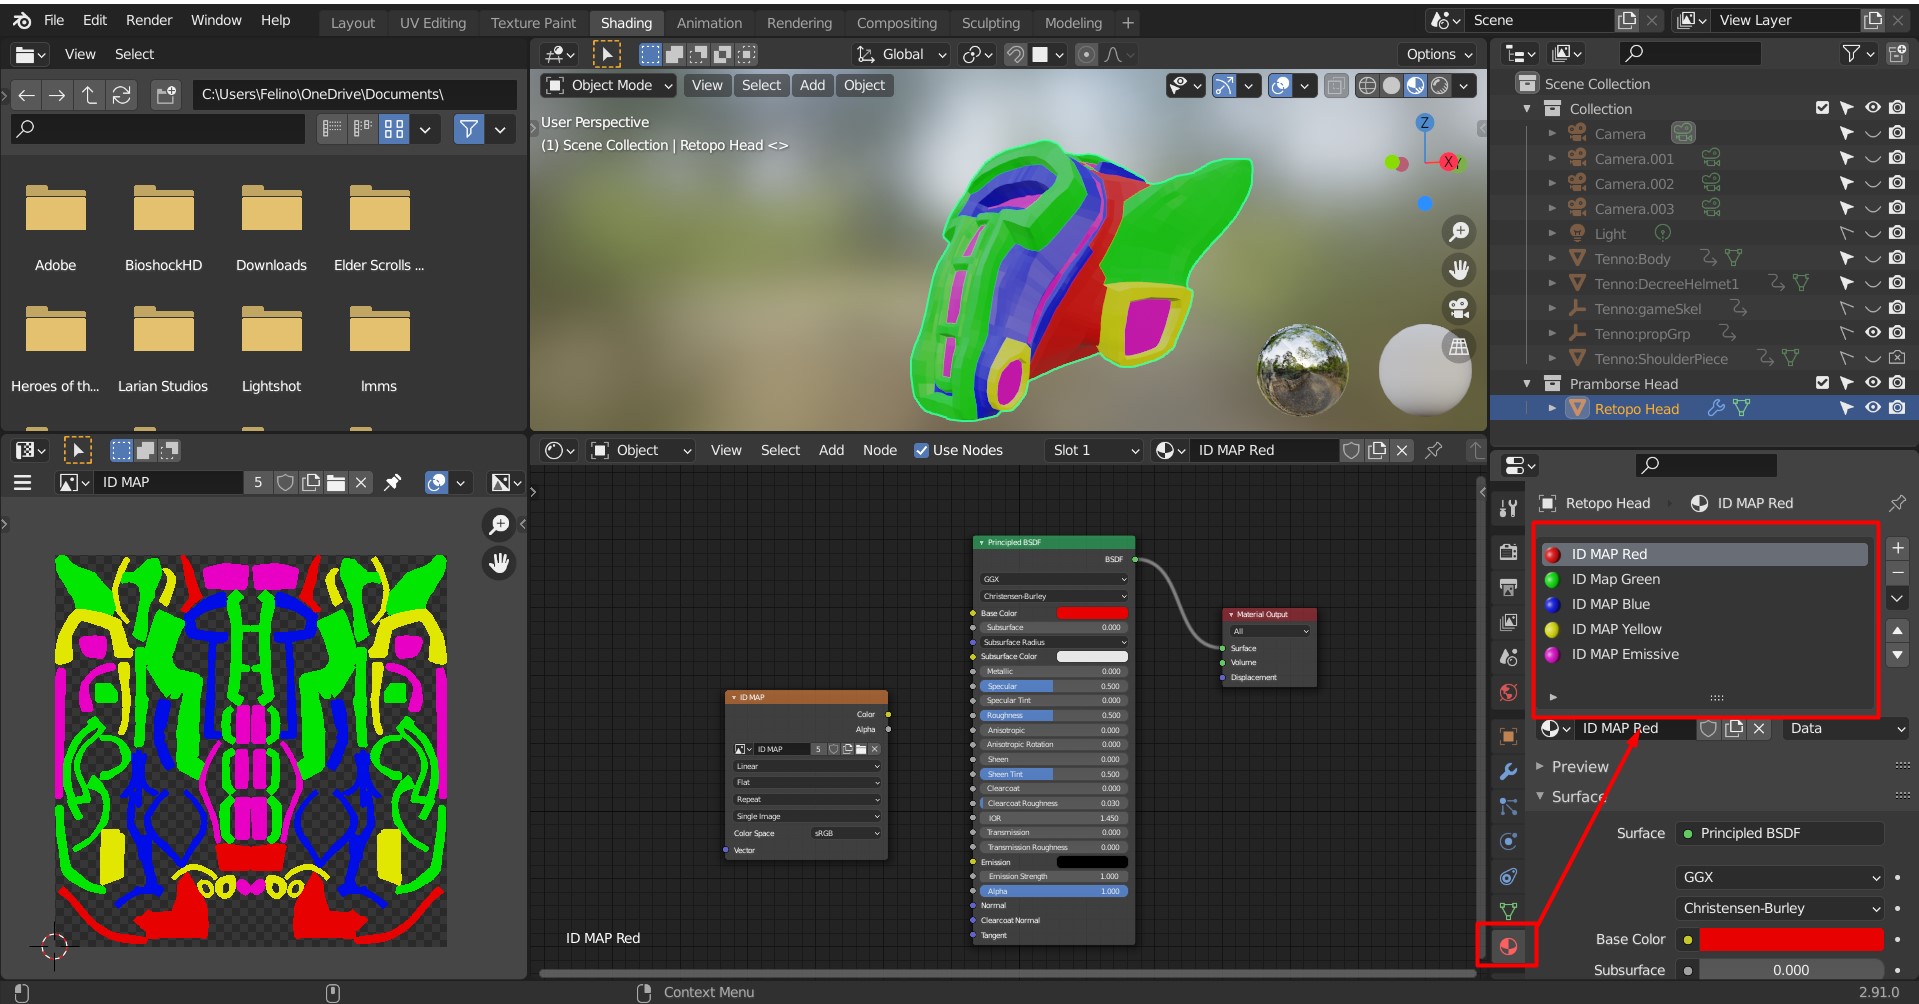
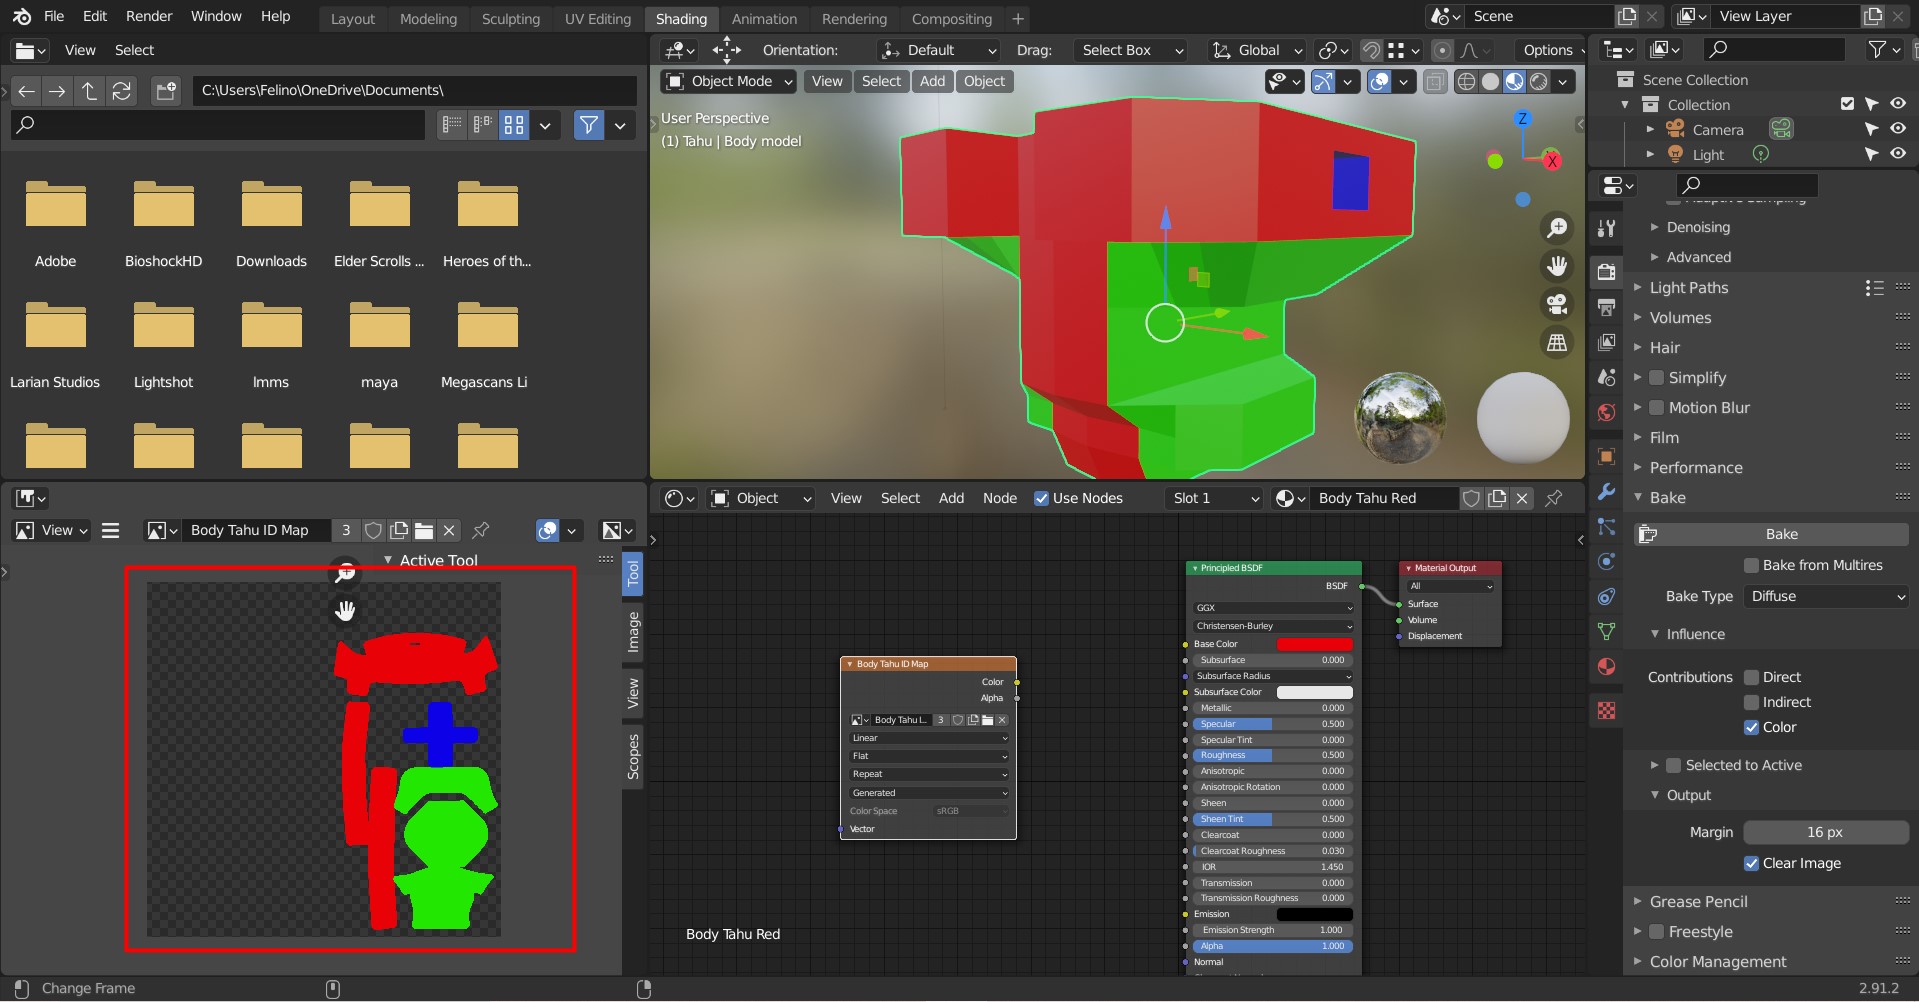
Go to the “SHADING” tab of the tray > Press “New Material” on the shading view port > After that, look at your bottom right and press the “shading” and go to “Material Properties”
There will be a plus(+) that will add the material and minus(-) to delete the material on the top right of the properties.
The MAIN material are:
-ID MAP Red
-ID MAP Blue
-ID MAP Green
EXTRA material:
-ID MAP Yellow
-ID MAP Emissive
Assigning which should be ID/RGB Map
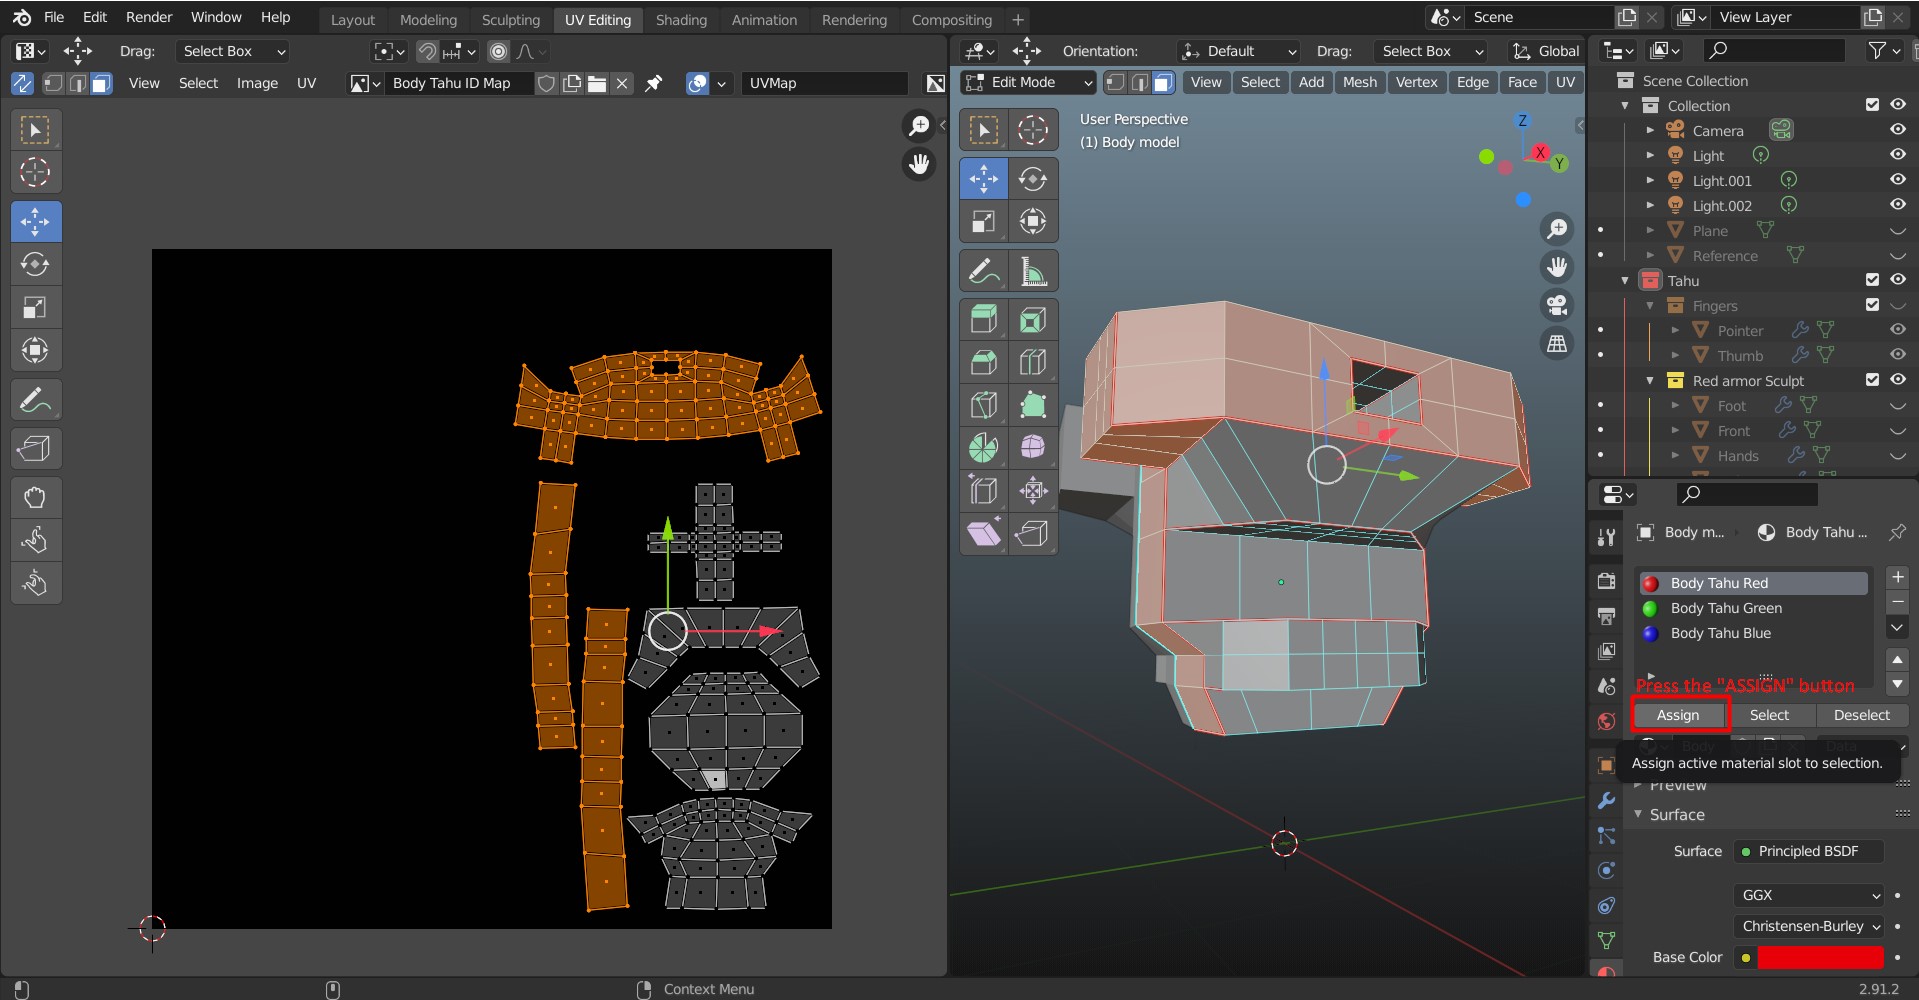
Make sure you align the UV position of your map.
Create the material and the sub-material.
Select which UV map parts you want to assign as your selected material.
Once you selected the UV map, press the “ASSIGN” button.
Do the same for Green.
Also Blue.
RESULT: You can see the result on the material preview.
Baking the RGB/ID Map
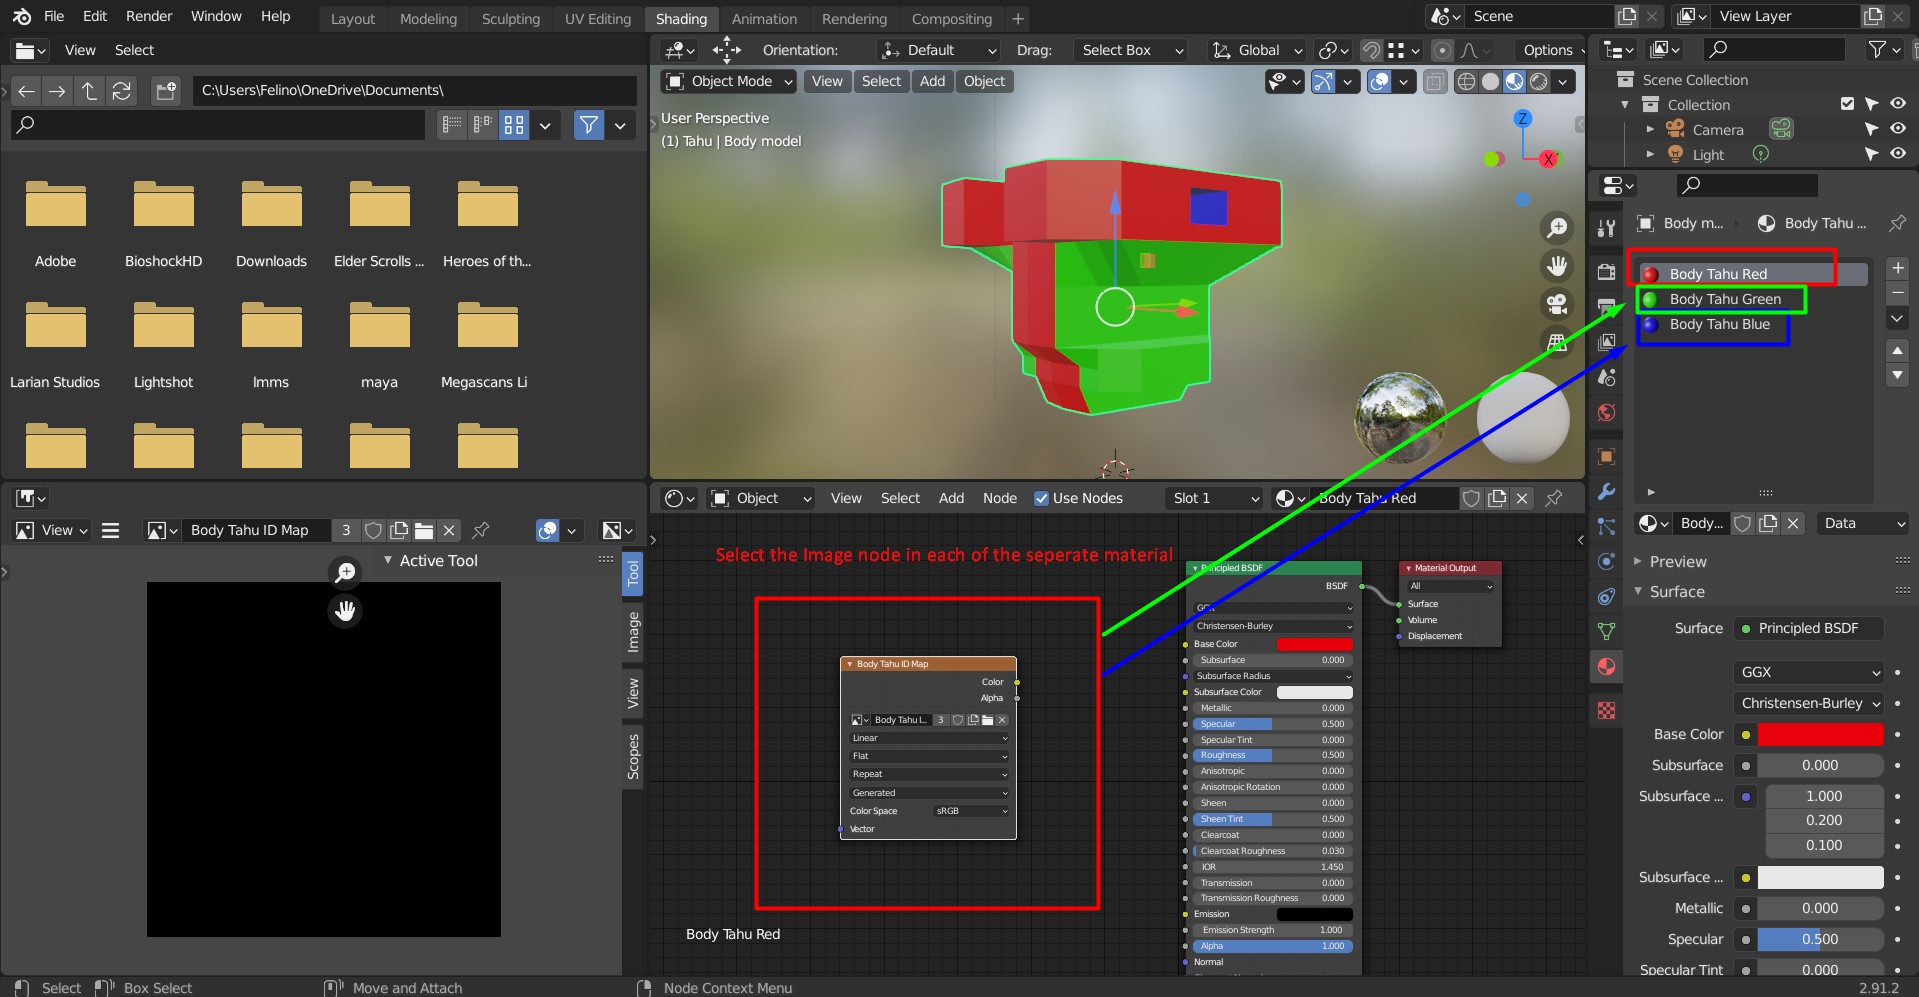
Add an Image node on each of the material you created. Just press the material section and add another Image node but don’t connect them to the Base Color.
Select the file map.
Select each of the Image node on each of the material you made.
Go to “RENDER PROPERTIES” and change EEVEE to CYCLES –> Go to the “BAKE” section, changed the “BAKE TYPE” to Diffuse and make sure the Contributions only check mark the “COLOR”.
Press the “BAKE” button to finalize the image.
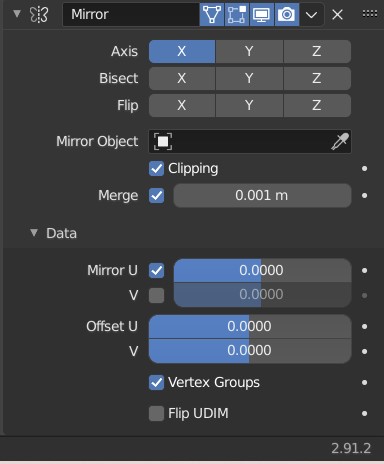
Once it’s done baking, you can see the result. You can see only half is bake. We can change that on the Mirror modifier.
NOTE: You don’t need to connect the Image node to the Base color to bake.
MIRROR MODIFIER Just mark the U on the MIRROR section of DATA to see the mirror of the UV map by baking it again.
There you go!
Finally, go back to “UV Editing” tab and press “Save As” the image file.
VIDEO VERSION
Purpose of an RGB/ID Map
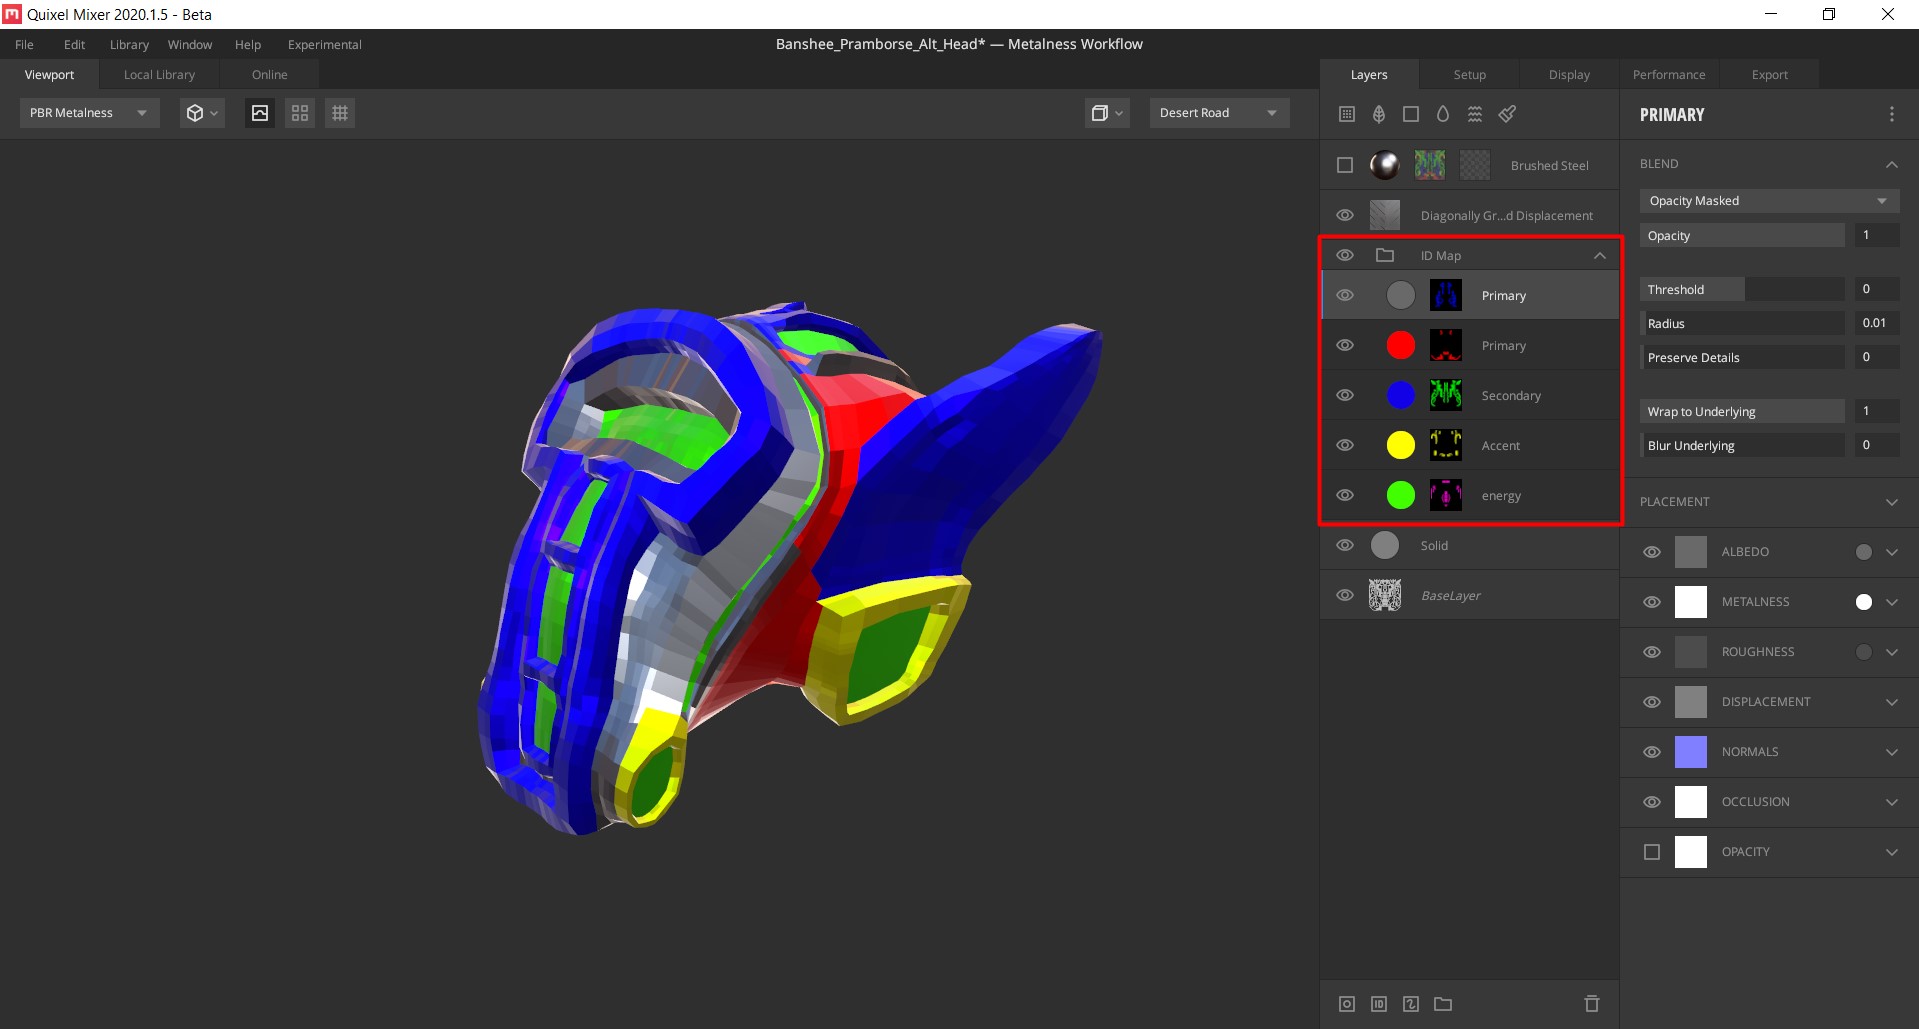
When exporting a model file to a texture application software like Substance Painter or Quixel Mixer, you’ll have a difficult time painting the material that you want to paint at a specific area. Which is why RGB/ID map comes in to identify which area that you want to paint.
Texture Paint Software that is FREE
There are texture paint software that are alternate to Substance Painter. Quixel Mixer:
Link: [link]
Note: If you want the full experienced of the software, I recommend signing in Quixel with your Epic account because everything is FREE to Epic account users, except Megascans. The free stuff includes a free library of textures, assets and model in Quixel Bridge. You can also import and export texture from Bridge to Mixer.