
Overview
A guide to make Fallout 3 GOTY work on Windows 10 in 2019. Plus, an introduction to modding.
Introduction
Hello everyone, since I see A LOT of people in the discussions forums complaining that the game didn’t work and trying to find a way to make it work, I decided to make a guide that accomplishes this. At least it did for me, I first installed Fallout 3 GOTY on 14/06/2019 using Windows 10 OS and this procedure worked for me.
If this guide was useful to you, please rate it ^^
Step 1: Install Fallout 3 GOTY
I know, I know, this one is pretty obvious. But I decided to start at the very beginning so there’s no margin for error. If you already tried a lot of things and messed up with many files, I would recommend fully uninstalling and installing again so we can have a fresh start.
Step 2: Being able to launch the game
So, this is where a lot of people already have problems. Most people can open the launcher, but when they click “Play”, nothing happens. So if you are having problems launching the game, follow this step. If you can launch the game by clicking “Play”, jump to the next step.
If you are having trouble launching the game, you are going to want to download the following file:
- SDK Debug LIVE DLL – [link]
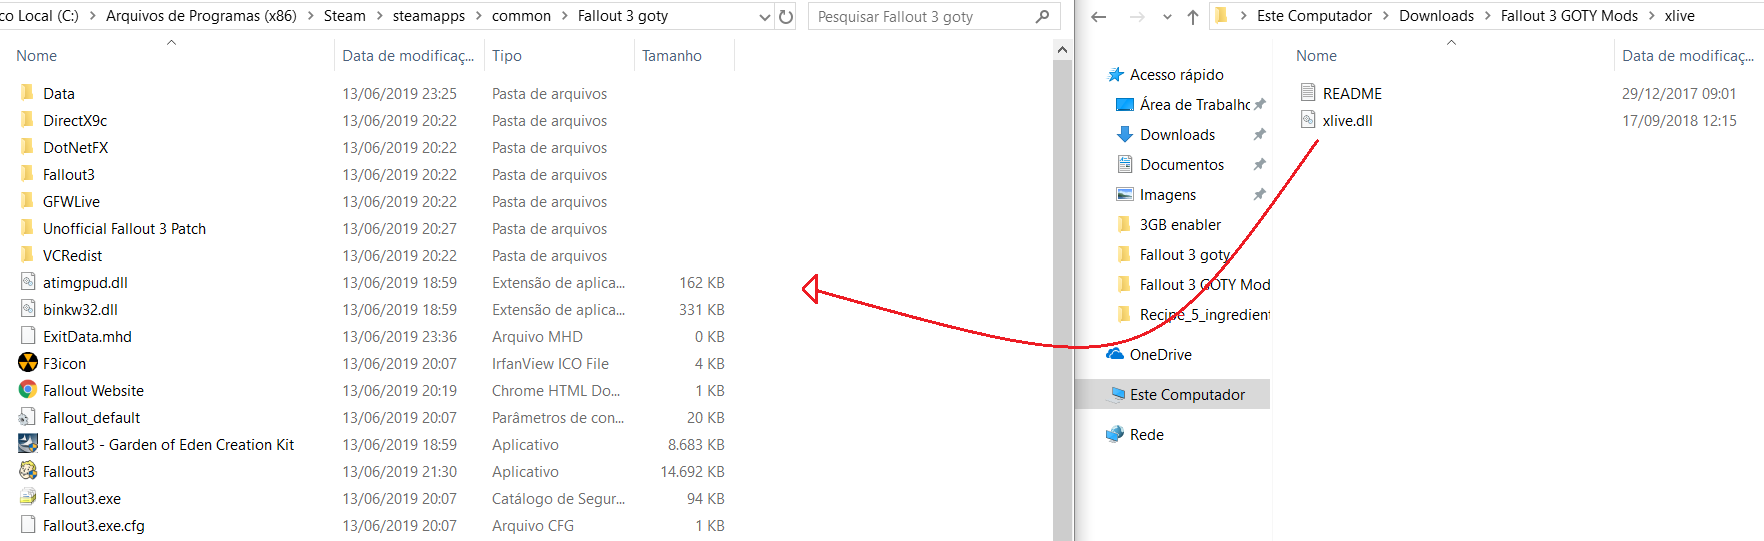
You will download the zip file, all you got to do is extract or move (if you extracted it elsewhere) the “xlive.dll” file to your Fallout 3 GOTY folder, which is usually located at:

After doing this, test if you can click the “Play” button in the Fallout 3 GOTY launcher. If you can, this worked! For some, the game now works reasonably well, for others not so much. If that is the case, I suggest that you follow the next steps too.
If it still doesn’t work, you can try this fix that user Town posted:
Originally posted by town:I’ve got a windows 10 and a GTX 760 graphics card. For me, I took these steps in order to get it to work.
1. download and place xlive.dll in the Fallout 3 goty folder like it says on this guide.
2. set Fallout3.exe to run as admin and in compatibility mode as windows vista SP2.
3. ran it. Launcher works but if I press “play” it crashes.
4. go to the Fallout 3 goty folder. there should be a file named “Fallout_default.ini”. copy it. go to the Fallout3 folder in “My Games”, ie C:UsersusernameDocumentsMy GamesFallout3. In this folder, there should be a file named Fallout.ini. make a backup of this file somewhere. Then delete Fallout.ini from the Fallout3 folder. paste “Fallout_default.ini”. rename it “Fallout.ini”. This did it for me.
For me once xlive.dll is placed in the goty folder, if it doesnt work, its because the fallout.ini file in the fallout3 folder is corrupted. so replacing it with the default .ini is all i really needed to do.
Step 3: Enabling Fallout 3 GOTY to use more memory
Initially, Fallout 3 GOTY uses only up to 2 gb of physical memory, causing a lot of sudden crashes. So we are going to download something that allows it to use some more memory:
- Large Address Aware Enabler for FO3 – [link]
Then do these sub-steps:
- Download the zip file;
- Unzip the zipfile (NOT inside the Fallout 3 GOTY folder);
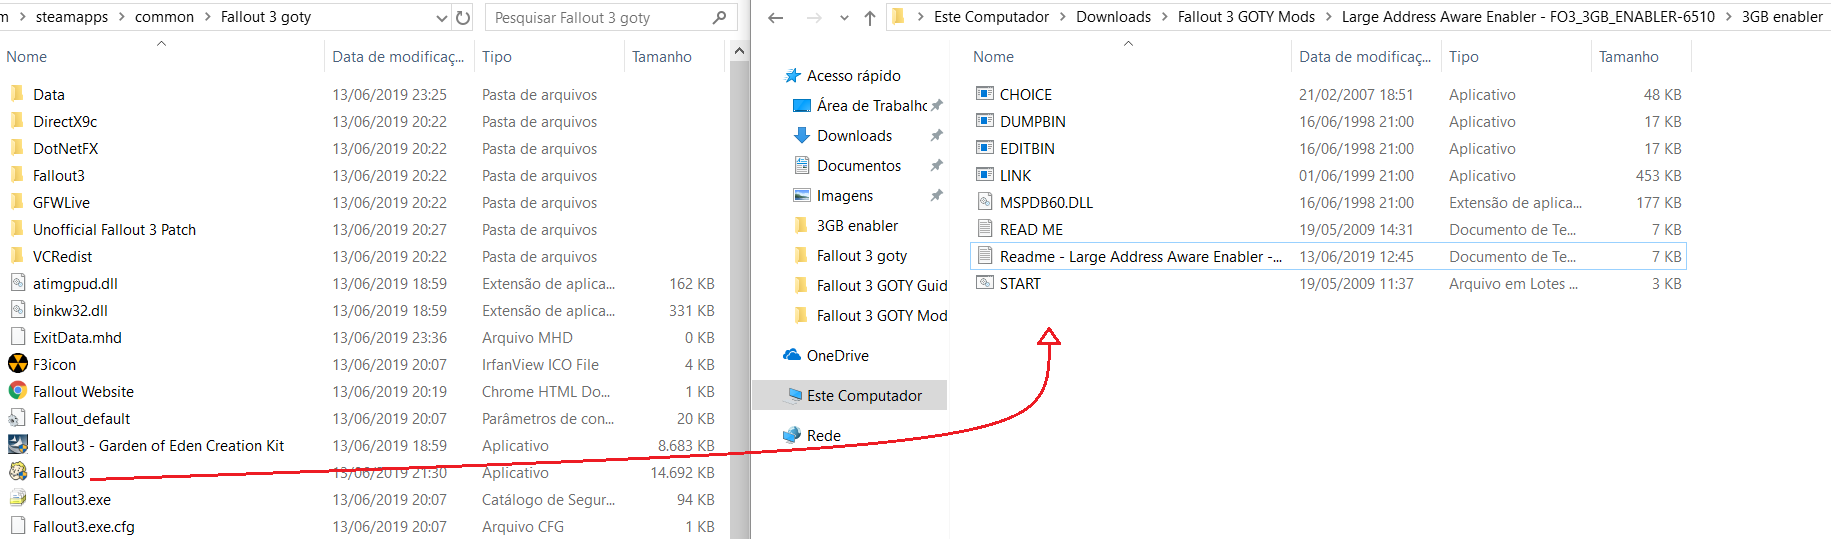
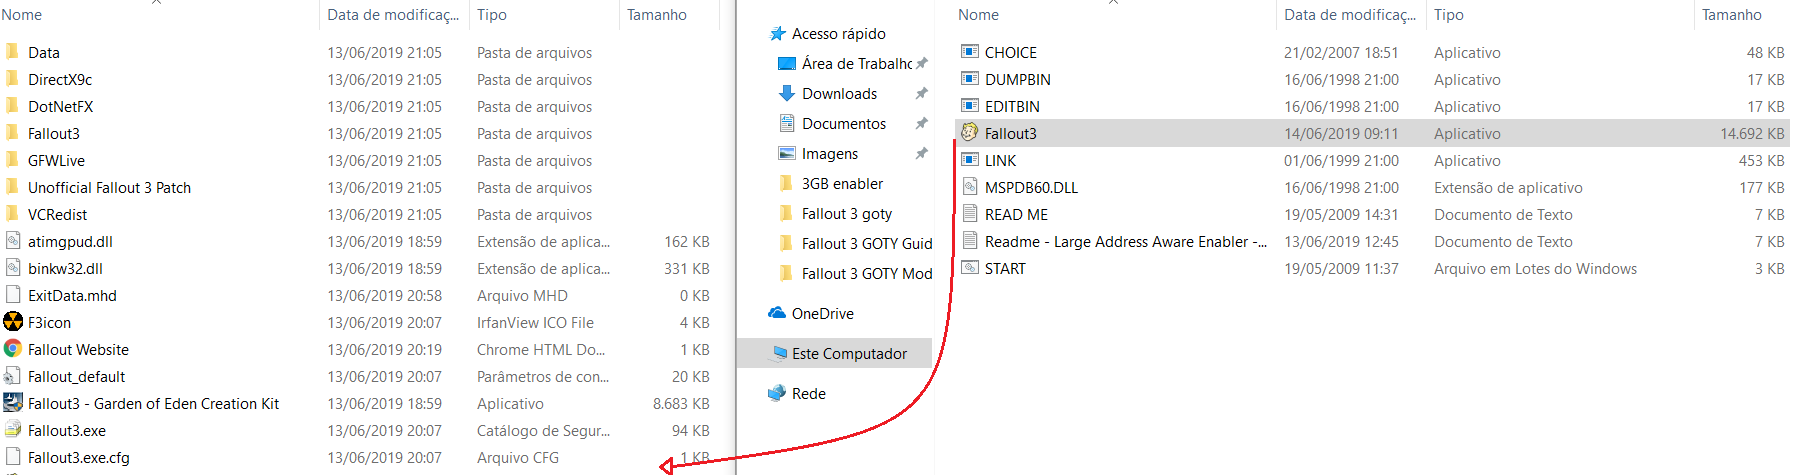
- Open BOTH the Fallout 3 GOTY folder and the newly unzipped folder (FO3_3GB_ENABLER-65103G Enabler);
- Make a backup of the “Fallout 3” file (the one with the fallout boy face as an icon, NOT the security catalog type file), just in case;
- Now move the ORIGINAL “Fallout 3” file (the one with the fallout boy face as an icon, NOT the security catalog type file) to the 3G Enabler file:
- Open the “START” file in the 3GB Enabler folder (the “Fallout 3” must be on the same folder!);
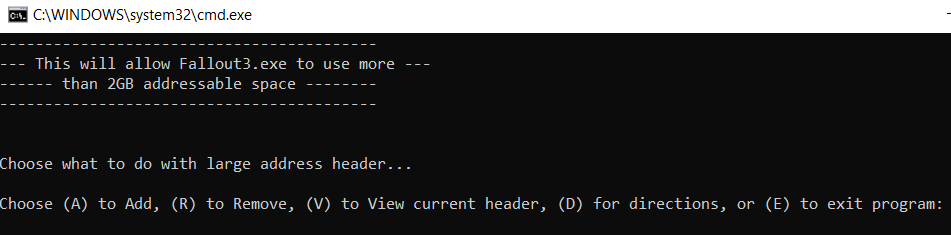
- A command window will open, it will look like this:
- Press any key to continue, like the command windows says. Then it will give you options:
- Press “A”, because you want to ADD memory. It will say that the Large Address Aware has been enabled;
- Press any key to continue, you can either double-check by pressing “V” to view your current header or “E” to exit the program;
- If you decide to double-check by pressing “V”, there will be a lot of text, scroll all the way back up and it must be like this:
- Close the program and move the “Fallout3” file back to its original folder:


Step 4: Install the Unofficial Fallout 3 Patch
The goal here is to install the Unofficial Fallout 3 Patch, that fixes A LOT of bugs. You can download it here:
- Unofficial Fallout 3 Patch – [link]
You can install it using the newbie friendly version (it will be like any game installation) or you can use the Nexus Mod Manager, I personally used the 2nd because I wanted to mod my game to enhance the graphics. If you choose the newbie version, just keep clicking “next” until the patch is installed. If you want the Nexus Mod Manager version, do NOT download anything just yet.
If you want to venture yourself into the modding world, download the Nexus Mod Manager:
- Nexus Mod Manager – [link]
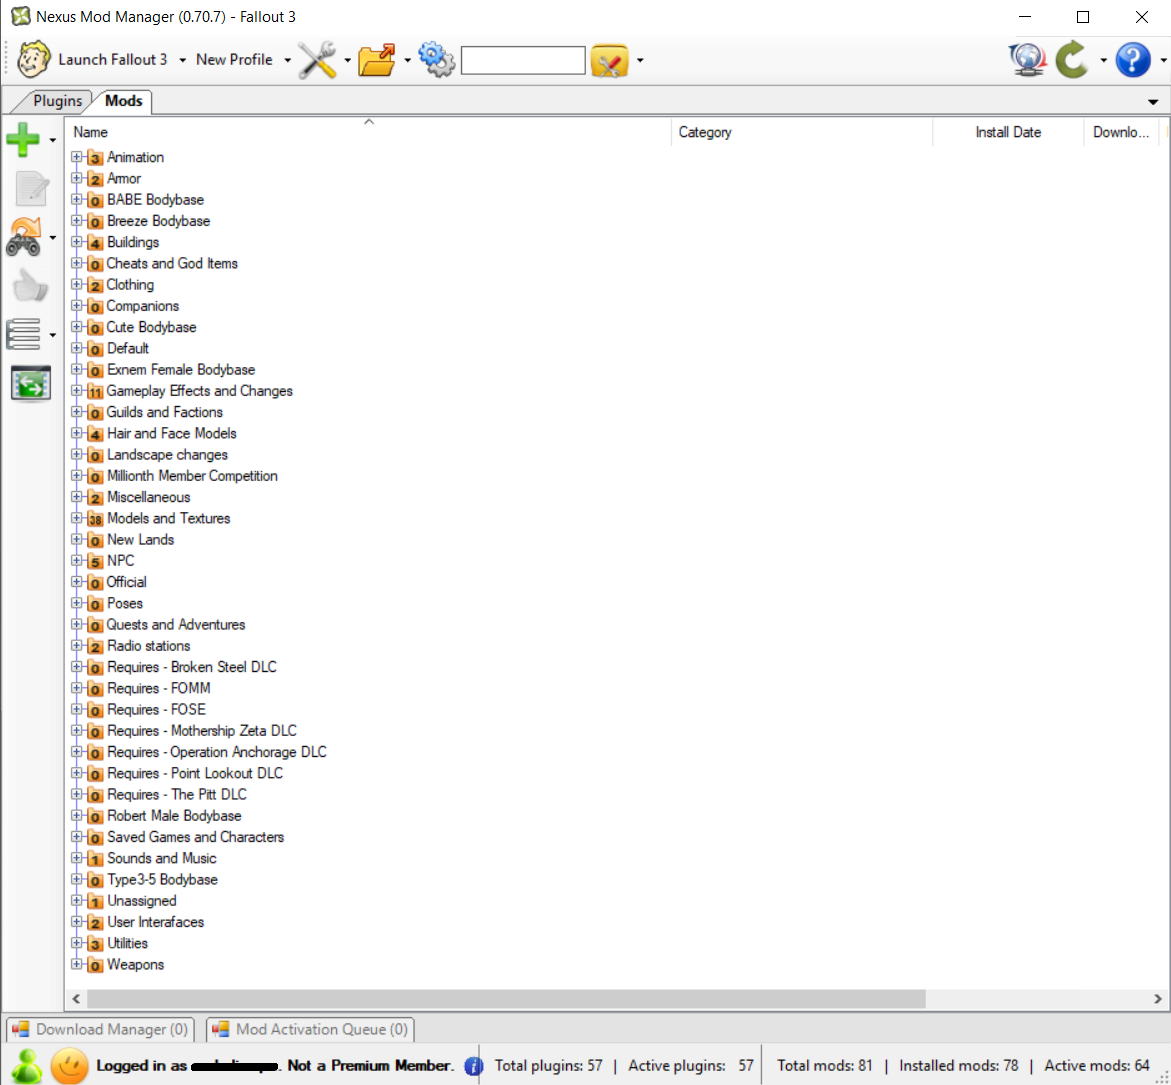
The installation is standard procedure as well, just keep clicking “next” until it is installed. Then open the NMM (Nexus Mod Manager), it will start locating which games you have, once you saw that it located Fallout 3, confirm that the folder shown by NMM is the correct one. Then, you can click on “stop searching” on the bottom right screen of the NMM so it stops looking for other games. Just do everything the NMM tells you.
I can’t produce the images again because my NMM is already configured and I don’t want to do all that again. But if you have any problems, tell me and I will try to guide you. After the installation/configuration process, you should be looking at something like this (except the numbers, because these are the mods, yours will be “0”):
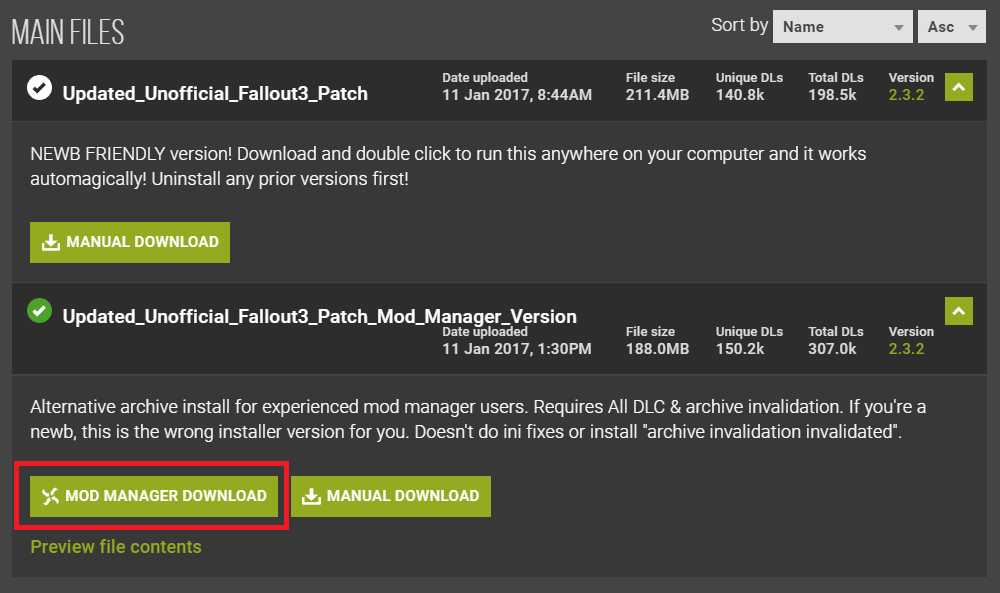
Then you go back to the Unofficial Fallout 3 Patch and click the “Mod Manager Download”:
- Unofficial Fallout 3 Patch – [link]
It will start downloading directly at NMM, you can check the bottom side of the NMM window and it will be like this:
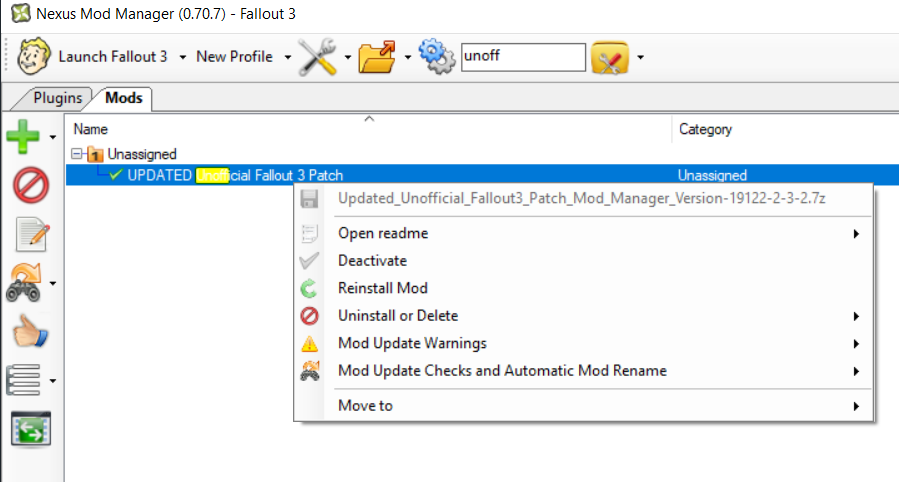
After the download is completed, search for unofficial in the top side of the NMM window, right-click the “Updated unofficial fallout 3 patch” and click “Install and activate”. My image doesn’t show that because my patch is already activated, but you should have that option.

After this installation, you are very close to being able to play the game! This is where people have different results, so you are going to need to try both these options:
- Go to the Fallout 3 GOTY folder;
- Right-click “Fallout 3.exe”;
- Go to “Compatibility” tab;
- UNCHECK the “Execute this program in compatilibity mode” AND “Execute this program as administrator” options;
- Close and check if the game works;
- IF the game doesn’t work, CHECK the “Execute this program in compatilibity mode” option, select “Windows XP Service Pack 3” AND CHECK the “Execute this program as administrator” option;
- Close and check if the game works.
My game worked, so if this didn’t work, let met know and I will try to help you as best as I can!
In the next section of the guide, I have compiled a lot of suggestions made by users in the comment section. If you are still having trouble with this game, maybe it’s worth it to take a look at their fixes.
Last Hope
If the game still doesn’t work, you can try these suggestions that users commented here in my guide that worked for them:
If you are having trouble starting a new game, user Sparky says this worked for him:
Originally posted by Sparky:I found a fix to the game crashing after starting a new game and before the video plays. Intel graphics cards are the cause of the issue.
[link]I followed steps 7-9 after following this guide and I have no issues now.
If you are still having trouble launching the game, you can try this suggestion by user town:
Originally posted by town:I’ve got a windows 10 and a GTX 760 graphics card. For me, I took these steps in order to get it to work.
1. download and place xlive.dll in the Fallout 3 goty folder like it says on this guide.
2. set Fallout3.exe to run as admin and in compatibility mode as windows vista SP2.
3. ran it. Launcher works but if I press “play” it crashes.
4. go to the Fallout 3 goty folder. there should be a file named “Fallout_default.ini”. copy it. go to the Fallout3 folder in “My Games”, ie C:UsersusernameDocumentsMy GamesFallout3. In this folder, there should be a file named Fallout.ini. make a backup of this file somewhere. Then delete Fallout.ini from the Fallout3 folder. paste “Fallout_default.ini”. rename it “Fallout.ini”. This did it for me.
For me once xlive.dll is placed in the goty folder, if it doesnt work, its because the fallout.ini file in the fallout3 folder is corrupted. so replacing it with the default .ini is all i really needed to do.
If it doesn’t work, you can try this suggestion by user takesonetodisco:
Originally posted by takesonetodisco:I ended up getting it to work. I had to delete the entire contents of the fo3 folder In the “this computer/documents/my games” booted right up no problem.
Below are many other suggestions made by other users:
Originally posted by lucalucaria:i tried this more complex guide and a simple guide but it still didn’t work. Then, i noticed seemingly corrupted (they contained only a few lines of text) duplicates had installed of the Fallout.ini BASE file and Fallout configuration settings file in the “My Games > Fallout3” folder. deleting these corrupted versions made it work. maybe this will help someone
Originally posted by Saujana:tips for stability and optimization: turn off Anti-Aliasing and Anisotropic Filtering if using High-dynamic-range settings, because those combination settings will cause random freezing and crashes.
Originally posted by THE_Groselia:i used the d3d9 dll to fix the new game crash
put the dll into your game folder
download link https://www.nexusmods.com/fallout3/mods/20371/?tab=2&navtag=http%3A%2F%2Fwww.nexusmods.com%2Ffallout3%2Fajax%2Fmodfiles%2F%3Fid%3D20371&pUp=1
Originally posted by roger_harrington:I have one more thing to contribute which worked for me. In your preliminary troubleshooting, the game may have partially run to the point of creating an incomplete fallout.ini file in your “my games” directory. Go to c:userslogin-namedocumentsmy gamesfallout3 and see if you have a fallout.ini file. If so, check its contents, if it has only a few lines, then it is incomplete and the game will “crash” (for me it would go to black and then fail). To remedy, copy the fallout_default.ini file in the steam fallout3 main game directory, rename to fallout.ini, and then try. If it still fails and you have a multicore system, then add or edit these two lines in the [General] section:
bUseThreadedAI=1
iNumHWThreads=2Golden-Spirits’ steps 1-4 plus the ini fixes above worked on my system. I didn’t need to set compatibility mode, didn’t need to re-install MS Live Games, and didn’t need to use an alternate d3d9.dll file.
Thanks for the help and I’ll look into the mods next.
Originally posted by NoPlaceToHide:I fixed it, i think… I do these things after i finish the 4th step from this guide..
1. I reinstall Game for Windows live.
2. I downloaded a D3D9.dll (i think this is a fix just for Intel processors)
3. I delete all the archives except the saves from the My Documents/My Games/Fallout3 folder… All of them except the /Saves and /Savesbackup one…Then i can play the game properly… Well, more or less, but at least now it opens and let me play :cozybethesda:
“it just works”
Originally posted by Saujana:tips for stability and optimization: turn off Anti-Aliasing and Anisotropic Filtering if using High-dynamic-range settings, because those combination settings will cause random freezing and crashes.
*** IMPORTANT ***
After the installation of the Unofficial Fallout 3 Patch (Step 4 above), either by manually installing the newbie friendly version or by using the NMM version, your game should be good to go now. But I would recommend using mods to fix possible ingame bugs or even to bring the game closer to 2019 standards.
Step 5: Installing FOSE
This step and the next ones should ONLY be followed if you are interesting in modding the game!
In this step you will install the Fallout Script Extender (FOSE), which is a modder’s resource that expands the scripting capabilities of Fallout 3. Download the zip file in:
- Fallout Script Extender – [link]
Now follow the substeps:
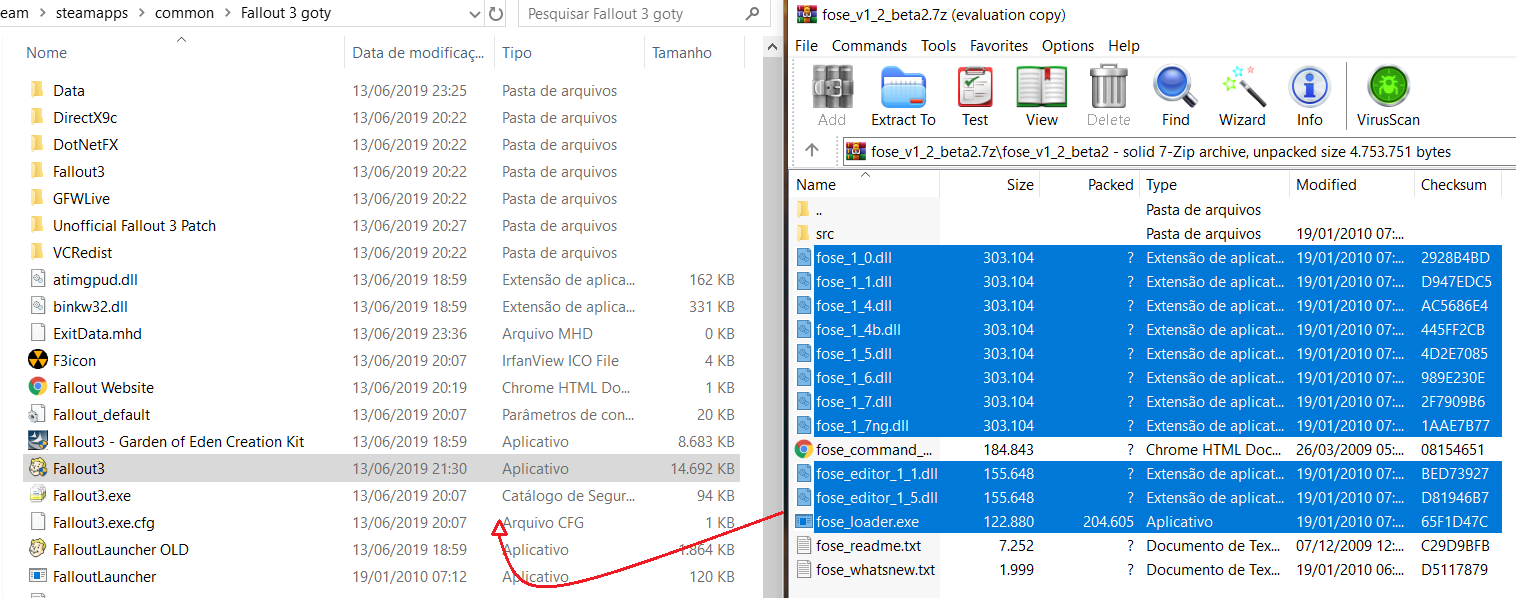
- Download the first link (the one right below “Current stable version v1.2 b2”);
- Extract or move (if you extracted elsewhere) ONLY ALL of the “.dll” files and the “fose_loader.exe” file to your Fallout 3 GOTY directory;
- You now launch your game through FOSE launcher, so if you want to keep Steam Overlay while playing, rename your ORIGINAL “FalloutLauncher” to something else (like “FalloutLauncher OLD”) and rename the “fose_loader.exe” to “FalloutLauncher”;
- Right-click on “Fallout3.exe”, go to “Compatibility” tab and UNCHECK the “Run this program in compatibility mode” and “Run this program as administrator” options;
- YOU NOW LAUNCH YOUR GAME DIRECTLY THROUGH YOUR STEAM LIBRARY;
ALTERNATIVELY
- You can launch through a desktop shortcut but it won’t have Steam Overlay (it won’t count hours, for example). Just create a shortcut of your “FalloutLauncher” (the former FOSE loader one, NOT the “FalloutLauncher OLD” one).
Step 6: Installing LOOT
Now because mods mess with a lot of files, multiple mods may mess with the same files and create a huge mess. So basically you want to install this program that optimizes the loading order of the mods:
- Load Order Optimisation Tool – [link]
Click “Download LOOT”, then click the “LOOT.Installer.exe” file. After the download is completed, install it normally.
Now, everytime you install and activate mods through the NMM (not every after single one, after you install the bunch of mods that you want), you will want to run LOOT so it optimizes your mods order.
This is how you do it:
- Open Nexus Mod Manager (NMM);
- Download, install and activate the desired mods (you do this by going to the nexusmods website, find the mod you want and click “Mod Manager Download”, as was demonstrated in Step 4 and will be demonstrated in Step 7);
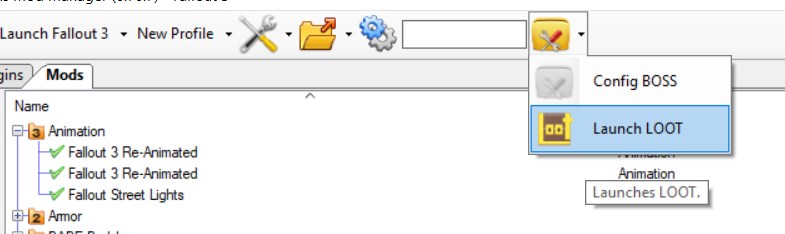
- Then, on the top side of the NMM window, you click here:
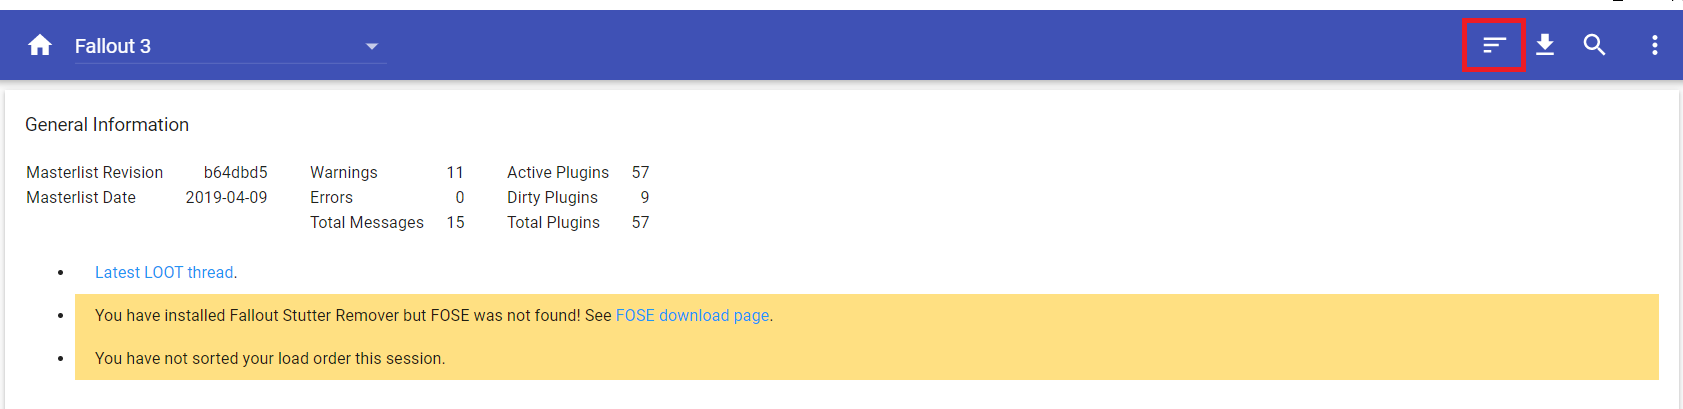
- This will launch LOOT, click this in the top side of the LOOT window:
- This will sort the optimal order for your mods (keep in mind that there are mods that are incompatible);
- Any errors or warnings will be shown on the top of the screen. I myself have some warnings but since I am not an expert in modding, I just leave it there. Although, if there are errors, you should consider deactivating the mods causing them or the ones causing incompatibility;
- Click “Apply” in the top side of the LOOT window and close LOOT;
- When you close LOOT, Nexus Mod Manager (NMM) will start sorting your mods to the optimal order, according to LOOT;
- Once it finishes, you can close NMM as well.
Your modded game is good to go now. Just launch Fallout 3 THROUGH Steam OR THROUGH the FalloutLauncher (former FOSE one) desktop shortcut you created, depending on what you chose in the end of Step 5.
Step 7: Example 1 – Adding a mod
Now I will show you how to download, install and activate a mod, step by step.
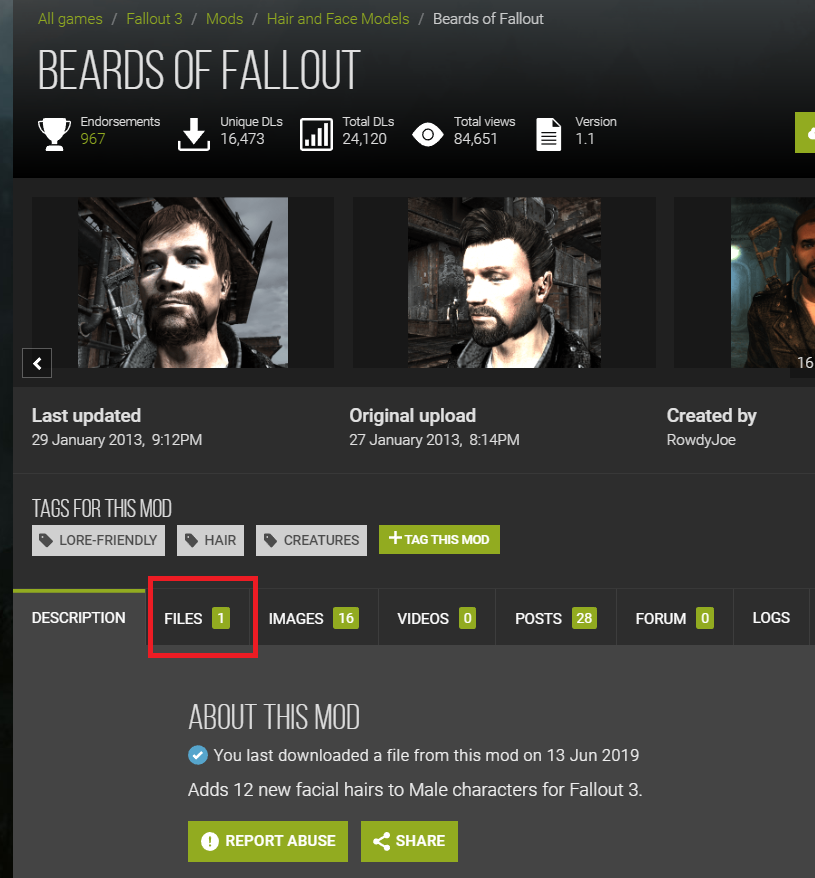
Let’s pick a mod that is light and easily recognized in the beginning of the game! Such as:
- Beards of Fallout – [link]
Do the following
- Close all Fallout 3 related applications and open Nexus Mod Manager (NMM);
- Enter the mod link above (duuh);
- Click the “Files” tab:
- Click the “Mod Manager Download” option (NOT the “Manual Download” option):
- This will cause the download to immediatly start in the NMM;
- Wait until it’s finished (you can check in by looking at the “Download Manager” tab in the bottom of NMM window);
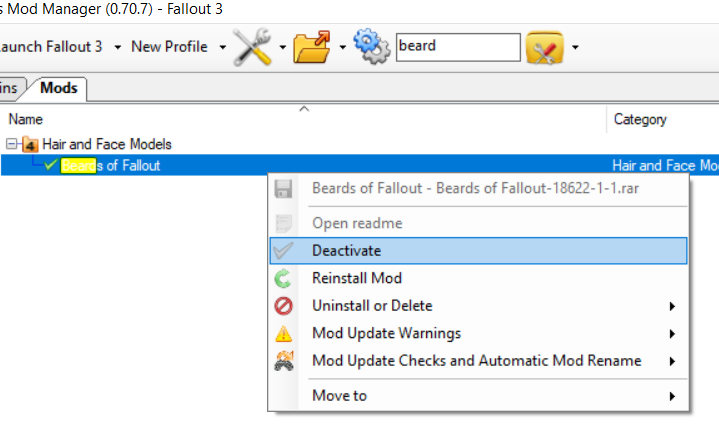
- After it’s finished, use the “Search” command in the top of NMM window and search for “Beard”:
- Right-click it and select “Activate” (If it’s the first time using that mod, the option will be “Install and Activate” instead, if I recall correctly);
- If you have any more mods, repeat the LOOT thing shown in Step 6 (Launch LOOT through NMM, Sort plugins, Apply then close). But you shouldn’t have, since this is an example for people unfamiliar with modding with the goal of just teaching how to mod);
- Close LOOT, NMM will start applying the LOOT optimal order. After it is done, close NMM as well;
- Launch Fallout 3 through steam or through desktop shortcut, depending on what you chose on the end of Step 5;
- Create a new game, wait until you have to choose your face (2~3 minutes into the game) and check if the beards (Face > Facial hair) have weird stuff like “Pirate” or “Pirate 2”:
- If it has, CONGRATULATIONS, you just successfully installed a mod!


Don’t worry, you can easily deactivate any mods like nothing ever happened to your original Fallout files, thanks to the Nexus Mod Manager!
- Open NMM window again;
- Find the “Beards of Fallout” mod again;
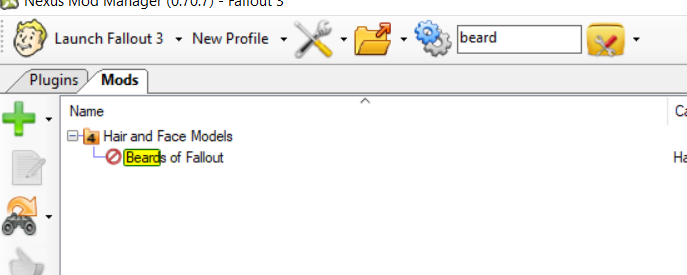
- Right-click it and click “Deactivate”:
- The icon will show a forbidden sign instead of a check sign and this will mean it is deactivated!
*** IMPORTANT ***
Some mods modify the same files and may cause incompatibility, so choose carefuly your mods! Just don’t go downloading hundreds and hundreds of mods!
Some big mods have compatibility mods that make them compatible, such as the famous:
- Fallout Wanderer’s Edition (FWE) – [link]
- Energy Visuals Enhanced (EVE) – [link]
- Marts Mutant Mod (MMM) – [link]
- Fallout 3 Redesigned (Project Beauty) – [link]
For example, all of these specifics mods can be made compatible to each other by adding the following mod:
- Blackened – [link]
You can see it in the Blackened “Files” tab that there are many versions, depending on which of these mods you want to add. If you just want EVE and Project Beauty, you choose one file. If you want FWE and EVE, you choose another. If you want them all, you choose the most complete file. The name of the file represents which mods are made compatible in said version:

Recommended mods
I can’t really recommend any mod because I HAVEN’T PLAYED THE GAME LONG ENOUGH (!!!!). I stopped playing to make this guide because I got really stressed doing all of this to make the game work, and I see a lot of people struggling to make the game work. So I decided to help!
And because of that, I am mostly using graphics enhancing mods (because I want to experience the closest to the real game). I mainly chose the graphics and some mechanics mods shown in this guide:
[link]*** IMPORTANT ***
His installation procedure did NOT work for me! It may for you, but consider yourself warned. I got the game working by doing the steps shown in this (my own) guide! Although, I learned a lot in his guide and chose my mods there, so thanks Amstroid!
*** IMPORTANT ***
Anyways, there are a lot of places that recommend Fallout 3 mods. Just google it, or search in reddit or youtube for recommended/best fallout 3 mods.
Conclusion
I hope this guide helped making your Fallout 3 work and/or helped you understanding the basics of modding, hopefully even helped you making mods work!
If you have any suggestions, corrections or just want to say something, feel free to do so!
I will update this guide if needed.