Overview
This tutorial will teach you how to properly make tank tracks. In written and video format.
About the Creator
The internet calls me Petard, I’m a Croatian youtuber and a very active Besiege community person! I have several other Besiege guides that you can view below:
I’m a big fan of Besiege and I have a section on my website dedicated to the game. There is a submission form for machines and a database table with downloads of all machines that were submitted so far.
All of my info is available below if you happen to be interested.
Besiege Videos:
Website (Besiege Section): [link]
Facebook: [link]
Twitter: Tweets by Petard9000
Google+ (lol): https://plus.google.com/u/0/b/112749971493539547377/+IamPetard/videos
Strategy Videos: http://www.youtube.com/user/soundslikedisturbed?feature=mhee
Video Tutorial
For those asking how I made extra rotations in the video, here’s how – [link]
Understanding the manipulation of game blocks
To make your tracks you need to understand 2 basic concepts.
Block space manipulation using wheels:
Hinge placement manipulation:
As you can see, wheels occupy half the space of a single block which means you can adjust your hinges to fit perfectly into each other during corners, which is impossible if you simply attach a hinge perpendicularly to the hinges you already have.
Once you understand this, making tank tracks will be a piece of cake!


Preparing your vehicle base
We will use a simple vehicle base since the process of creating the tracks is always the same.

We will be manipulating the red and green vectors to get the hinges to be as close to the wheels as possible and to make them attach in a perfect loop.

Add 3 blocks to the front of your base and then go right 3 blocks. You should be in line with the wheels on your right side.

Now turn to the side of your vehicle. You’ll notice how your block goes in the middle of the wheels.

If you add a block on top of your extra blocks… poop happens.

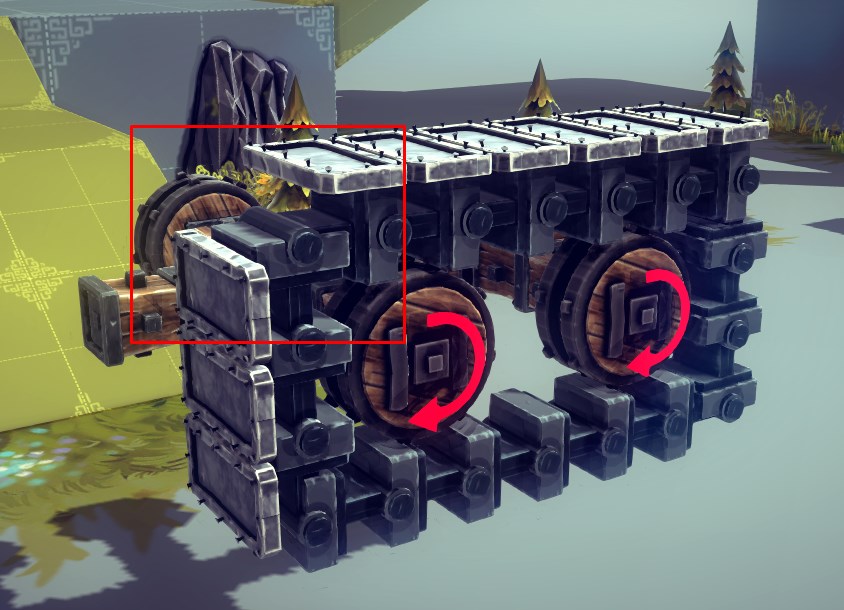
This is why you need to use a wheel to go half a block above, so your future to be hinges are as close to the wheels as possible.

Creating the tracks
When you add hinges, you have to pay attention to their orientation. Add the upper line like this

Now we gotta create the left side, remember we are creating a perfect loop of hinges and that is impossible by just connecting them one after another perpendicularly
Add a block going down(you have to go down because of the hinge orientation) and then attach a wheel, we need to go half a block to the right so we are right next to the wheel and so the upper hinge connects properly to the hinges you are creating.

After adding another block, you’ll see that you’re in a perfect position

Add hinges up, you will encounter a problem with the already created hinges, just delete the extra one

When you connect the final hinge, your loop will be complete. It has to look exactly like this, otherwise it won’t be it.

Now in order to create the lower and right side, you have to go to the other side of your vehicle. Since we can’t rotate hinges upside down, only to the side, you are forced to go around and connect the rest of them from the other side.
If you decide to question your glorious lord, this will happen

So once you are on the other side, the method is pretty much the same as with the left side, add blocks until you are in line with the wheels on the blue axis

Now add a wheel under it so your hinges go in line with the vehicle wheels.

Simply start adding hinges to the left until you reach the already created hinges. They should connect in a perfect loop.

To create the hinges of the right side, you need to go above the vehicle because of the orientation of the already created hinges.
As you add blocks up, before you go left, add a wheel so you come closer to the vehicle wheels and so you can close the perfect loop of hinges

Add hinges down

You will encounter overlapping hinges, just delete them until you are able to connect both sides like this

Note about adding armor plates
When you add armor on your hinges, make sure you leave this corner empty. If you think a bit you will notice how those two hinges will actually be next to each other once you start moving your tank. So don’t mess that up!
Finished tank + possible problems
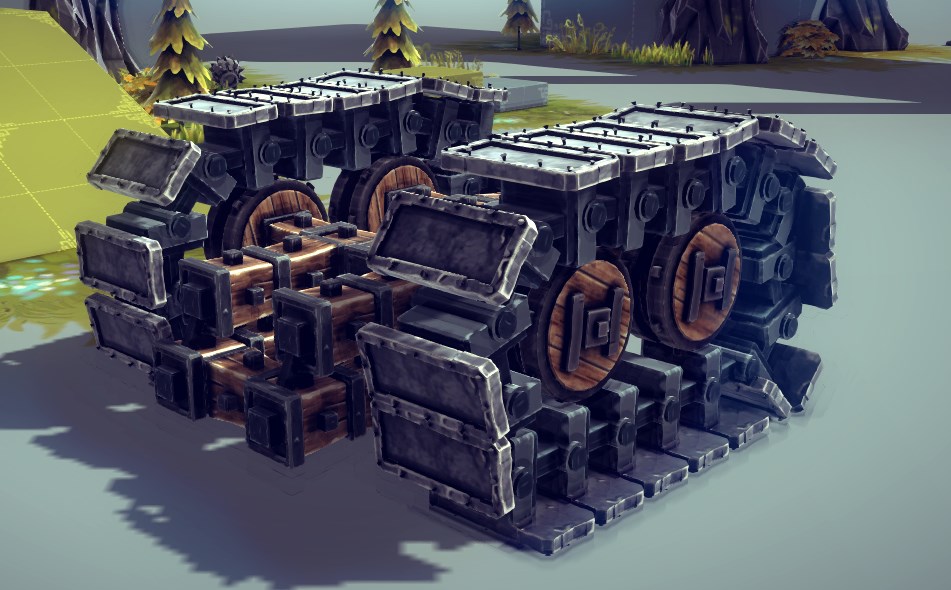
We didn’t talk about adding braces and springs to secure the hinges onto your tank. This will be a problem if you want to make some crazy moves with your tank so make sure to secure your tracks properly.
Since this is a tutorial for tank tracks and not how to make a super uber stable tank, I am legally not allowed to give you all of the secrets and I’m sure knowing everything will take away from all the fun you can have in the game learning all of that!
Thanks for reading/watching and I hope you will leave a comment and rating!
PS. I have no clue how to secure the tracks