Overview
An incomplete guide to modifying your copy of Muck. (It’s good to have some experience with C# and the Unity Libraries before following this guide) There are better ways of modding the game, with this method your game will be reset with every patch. If you just want to screw around once or twice this is alright, but with how constantly the game updates I strongly recommend you search for a different method.
Step 1: Install dnSpy
dnSpy is a tool that will allow you to decompile and edit the game’s code.
You can get it from its GitHub[github.com] page: [link]
After installing we can move onto the next step.

Step 2: Locate Muck’s ‘Assembly-CSharp.dll’ File
The Assembly-CSharp.dll file contains the game’s code that we want to modify. In order to modify it we will need to open it in dnSpy. Click ‘File’ -> ‘Open’ and then navigate to where your copy of Muck is stored. (Default location should be: Program Files (x86) > steam > steamapps > common > Muck)
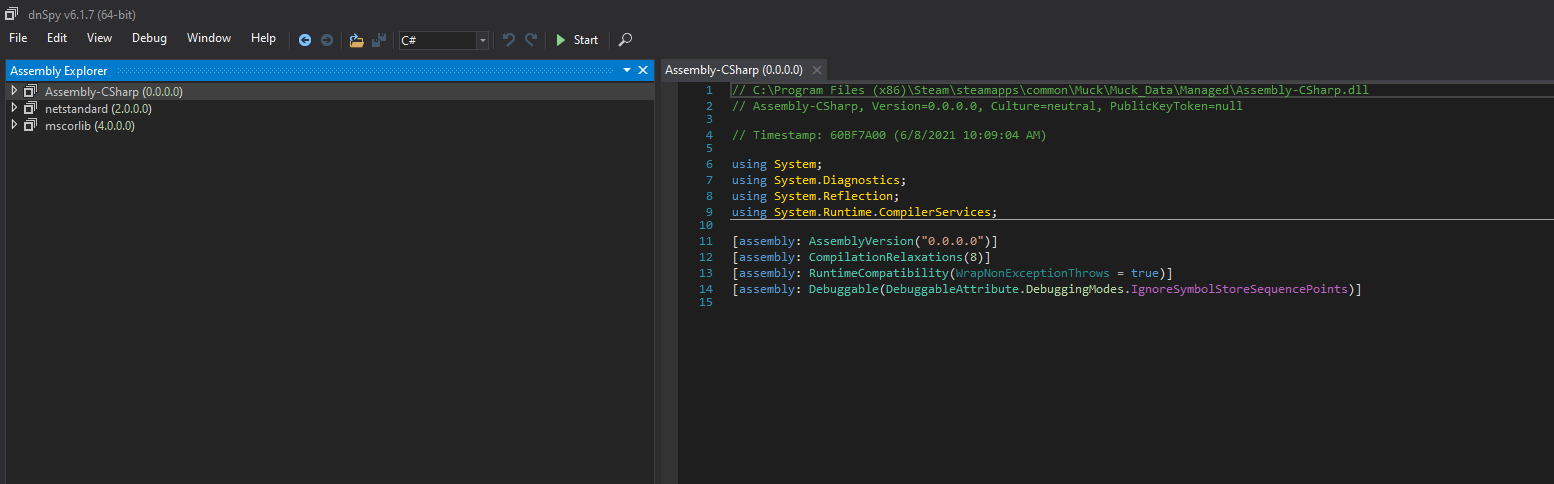
Inside of your Muck folder, you want to then navigate to: Muck_Data > Managed > Assembly-CSharp.dll. After opening the file, dnSpy should look something like this:
Step 3: Understanding dnSpy
dnSpy displays the file’s you can edit on the left. On the right it displays the decompiled code from the currently selected file.
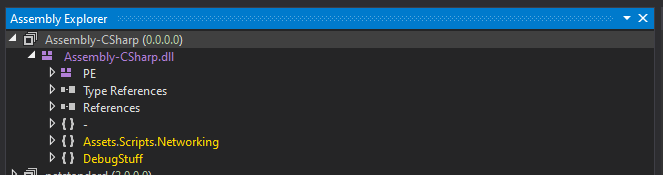
We want to edit the Assembly-CSharp file, so click on the drop down to display what’s inside.
All of the scripts written by the creator (Dani) are inside of ‘{ – }’, so we need to open that up.
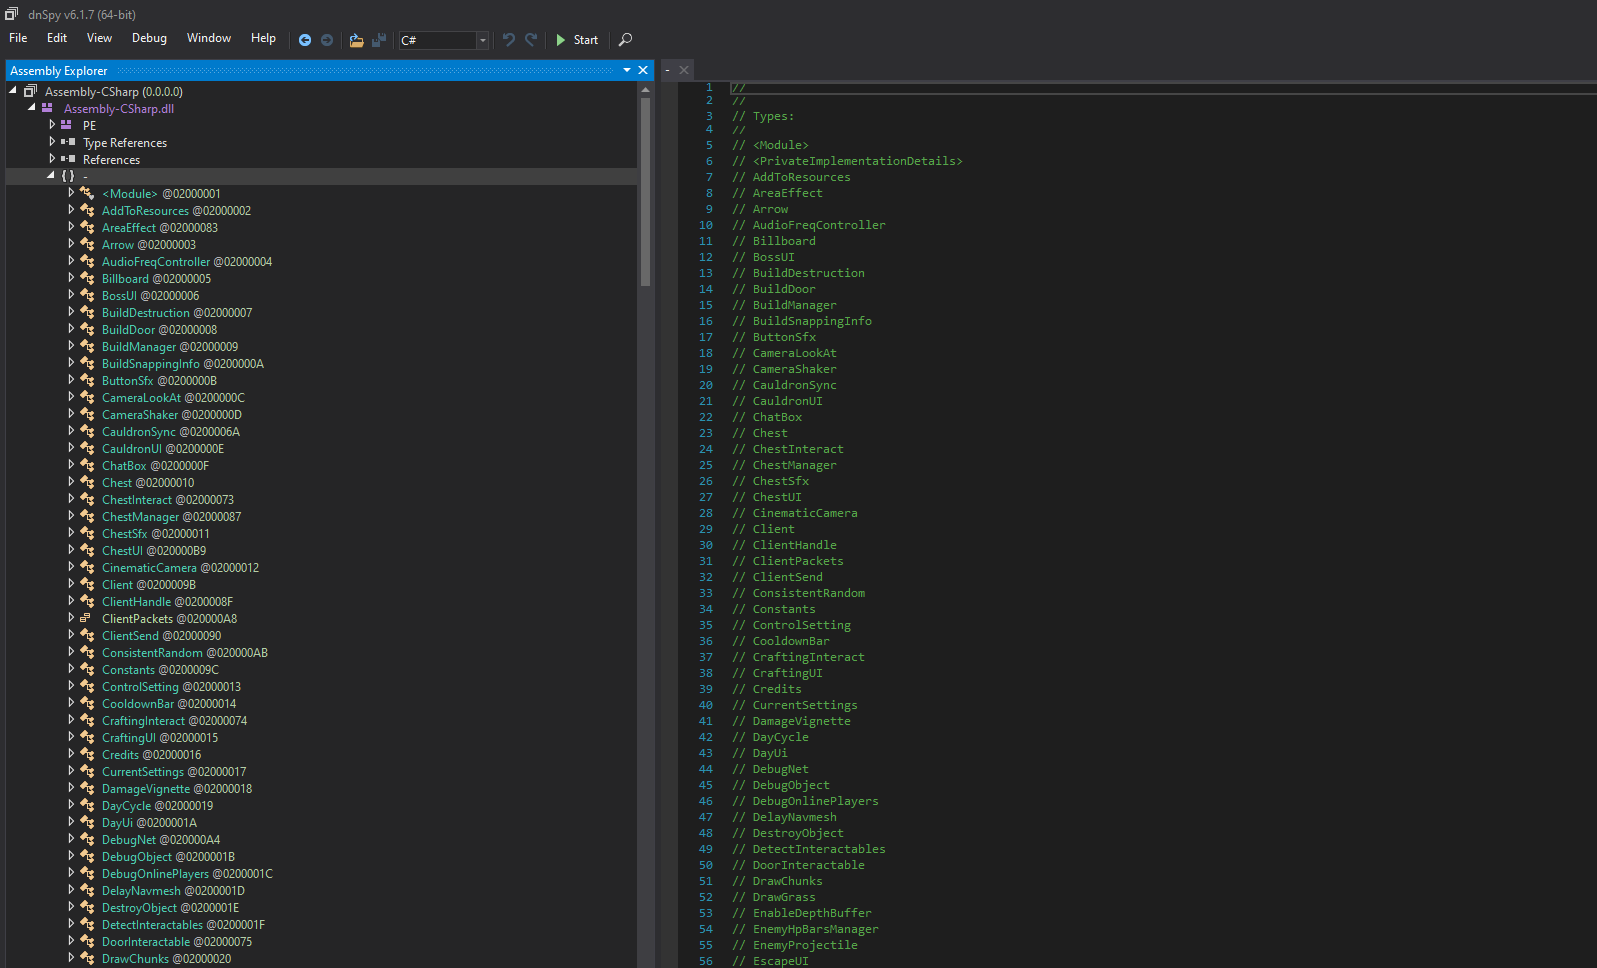
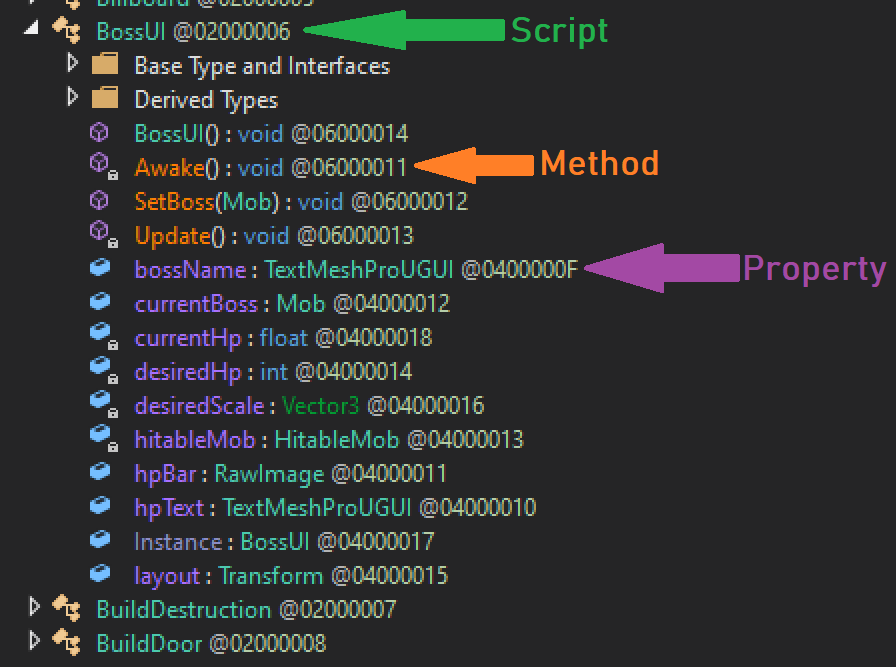
All of the scripts in the game are now displayed on the left.
dnSpy color codes everything, so we know what means what. Scripts are green, Methods / Functions are orange, and Properties / Variables are purple.
Step 4: Modding The Game
Phew! We’re finally ready to start modding.
For the sake of this being a tutorial, I will be showing you how to do something simple, giving the player the ability to fly! (Well not really, we’re just going to make them jump SUPER high)
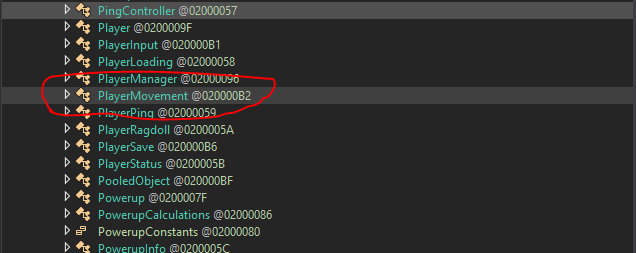
Scroll down through all the scripts until you find one called, “PlayerMovement”. As the name suggests, this will let us modify the player movement.
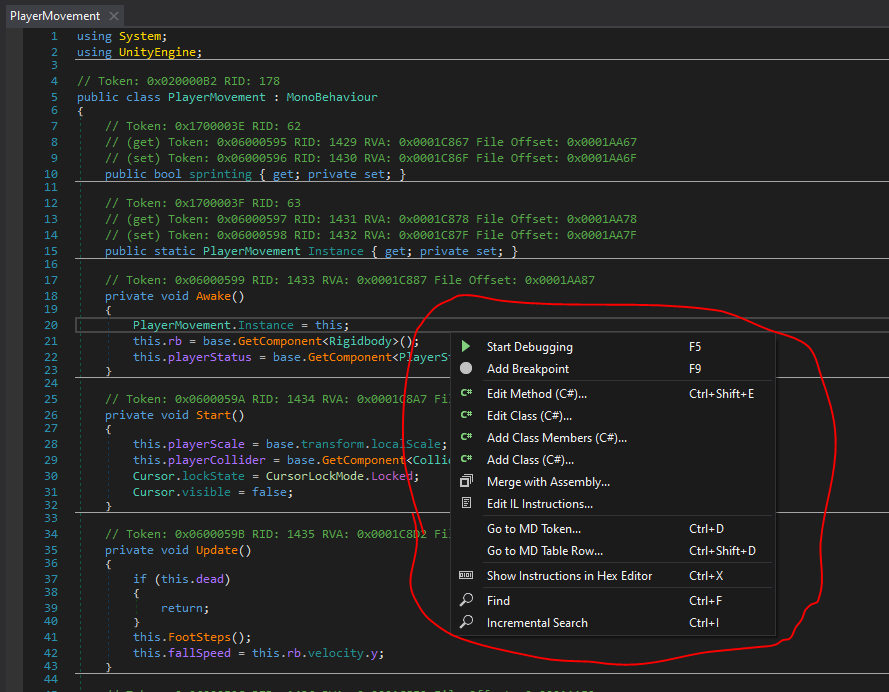
Open it up, and you’ll see all of the code for the script. But how can you modify it? It doesn’t seem like you can type in there, but that’s okay. Right click in the code view, and you will see a few options.
The main two that we will be working with are “Edit Class” and “Edit Method”.
“Edit Class” Will allow you to edit the entire class, (Not the whole script), while “Edit Method” will allow you to edit individual methods in the script.
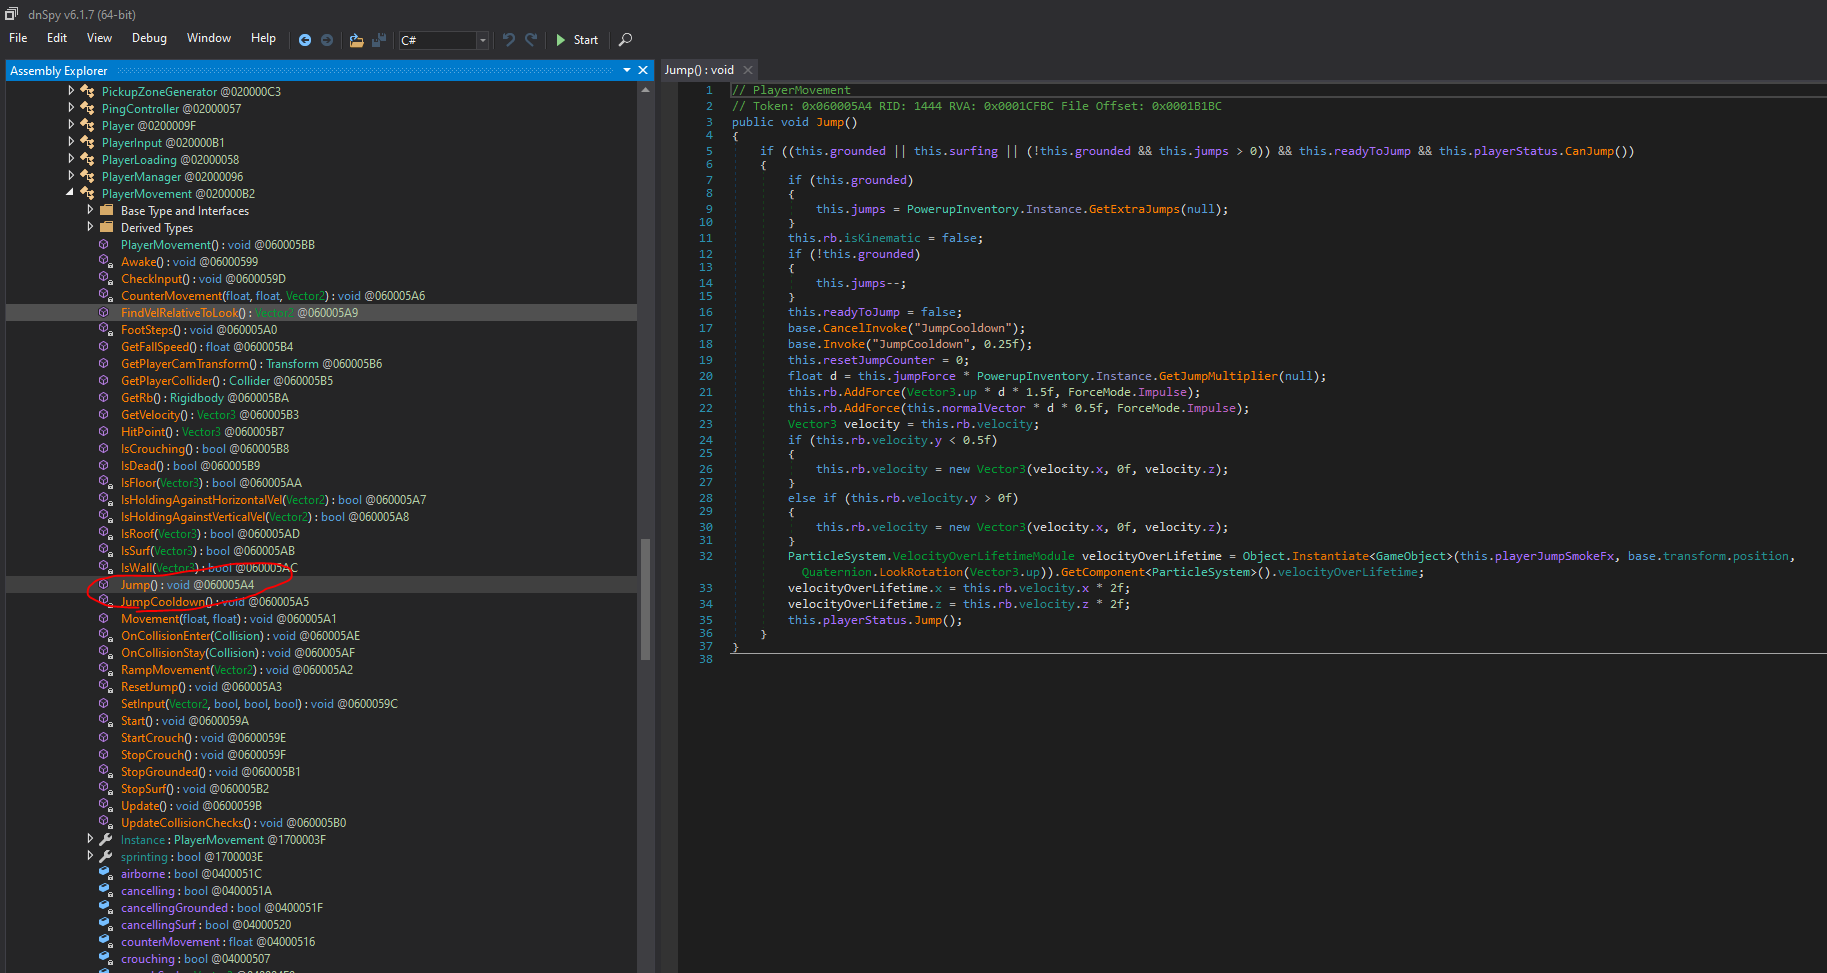
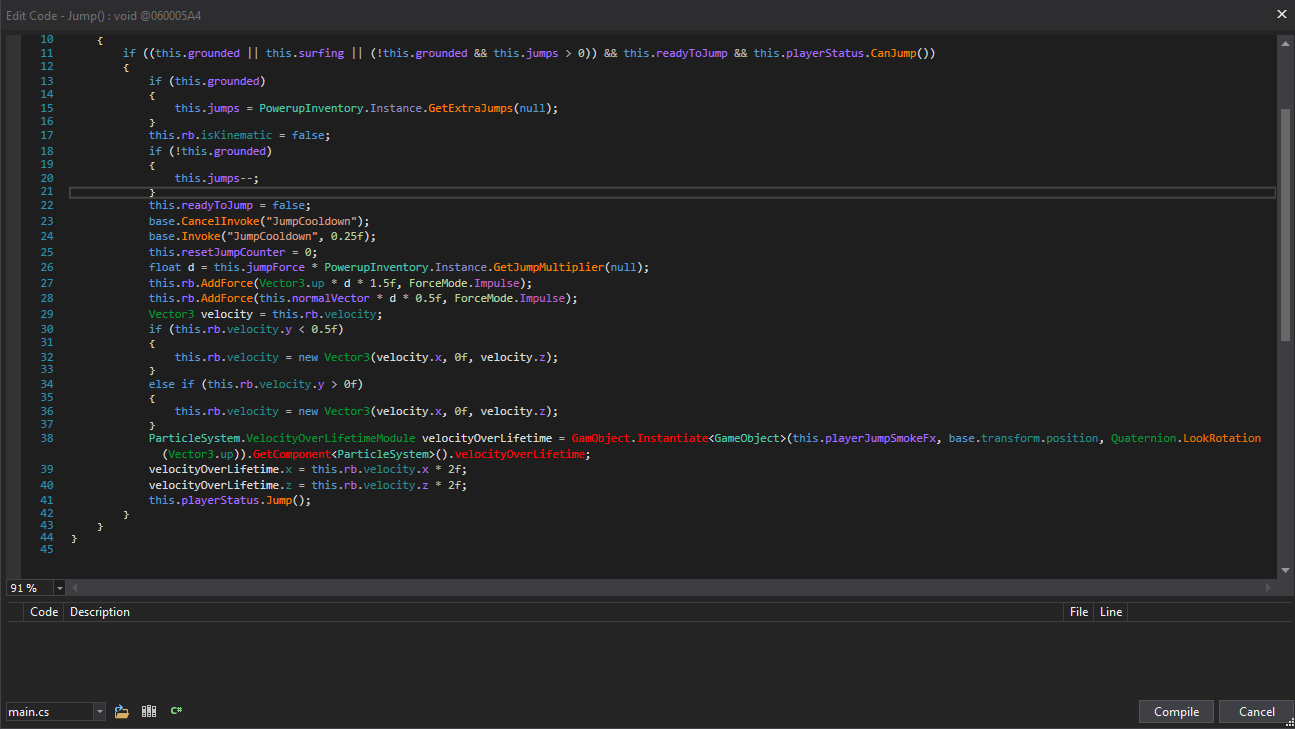
Inside of the “Player Movement” script, look for the Jump() method and open it.
Right click in the code view and click “Edit Method”. A code window will pop up and allow you to modify the code. Now there seems to be an error here, even though we haven’t edited anything.
(The red colored text signifies an error)
In order to fix this issue, we need to change “Object.Instantiate” to “GameObject.Instantiate”. This is a small hiccup caused by dnSpy that you may run into in the future.
Now how can we make the player jump super high? Well let’s take a look at the code. The part that makes the player jump seems to be on this line here: “this.rb.AddForce(Vector3.up * d * 1.5f, ForceMode.Impulse);”. Let’s change the 1.5 to a larger number like maybe, 50. “this.rb.AddForce(Vector3.up * d * 50f, ForceMode.Impulse);”

Step 5: Overwrite Assembly-CSharp.dll
In order to save your code, you need to hit “Compile” in the code window. If you don’t have any errors, the window should close. This won’t save your changes though, in order to save them you need to “File -> Save All -> Okay” Congratulations! You have created your first mod for Muck. Boot up the game and try to jump. (You go VERY high lol)
But yeah that’s almost it. Most of the fun in Muck comes from the online multiplayer, but these mods are all client side. If you create a mod that modifies terrain generation for example, you will need to send your friend(s) your Assembly-CSharp.dll file so they can replace theirs and actually see / use your mod.
Thank you for reading!