How to Not Die: Lessons Learned from Hardcore Mode
RULE ZERO
RULE 0: Caution above all.
This will apply in some way to just about everything else, because situations can quickly go from “I’m fine!” to “Wait, why am I on the title screen?”. If ever you are in a situation where you think “this could get me killed”, you are probably right.
This will apply in some way to just about everything else, because situations can quickly go from “I’m fine!” to “Wait, why am I on the title screen?”. If ever you are in a situation where you think “this could get me killed”, you are probably right.
Tip 1: Be ready to bail
Always be ready to evacuate a bad situation. Pressing the Esc key opens the menu, pauses the game, and lets you save & quit to the title screen, where you can click back in when ready. The teleport button is another way, but has its own problems: you must be above the “underground” layer of a planet, you must have an open wall behind you (background layer), and you will have to click through an additional pop-up “are you sure?” when in a mission (like the Erchius facility).
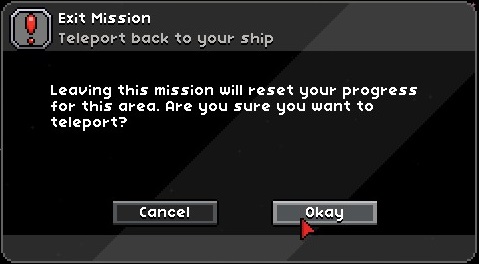
Both of these methods will abort mission progress, pull you out of challenge rooms, and erase the door to enter that challenge room, but lets you keep all items you currently have on you. You may lose some progress, but it’s better than having to start a new character.
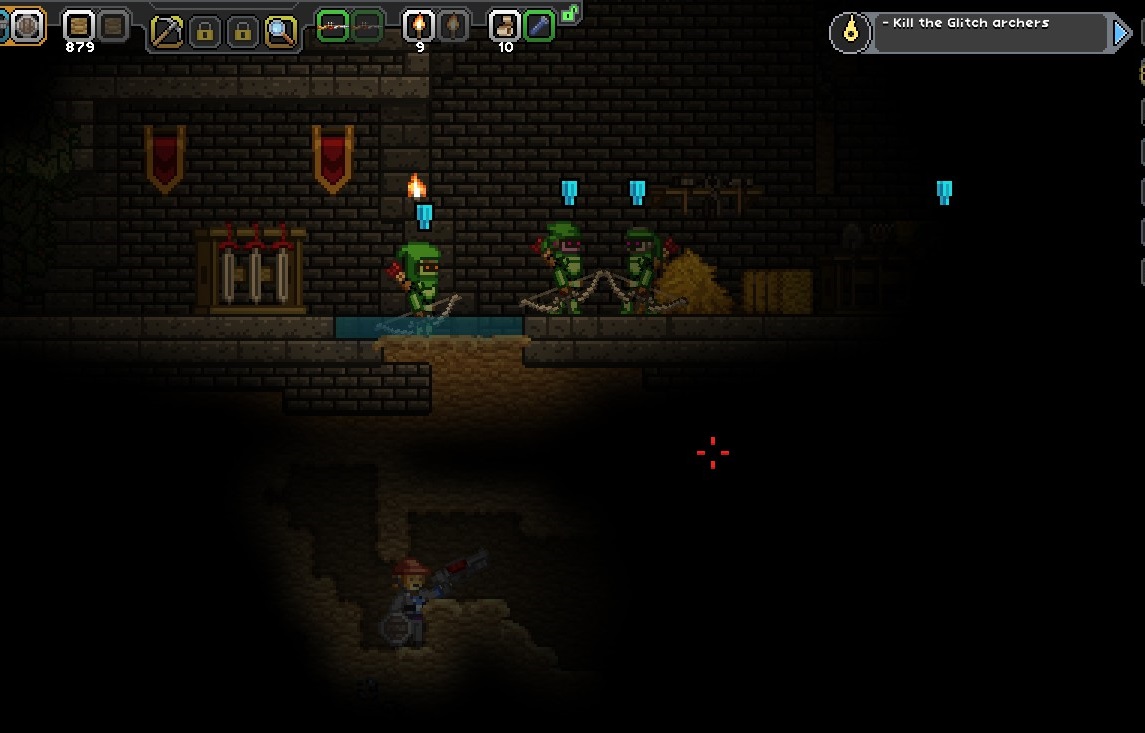
Why pull out? Because some enemy types are randomly generated as you explore a planet, and rejoining/beaming in resets random enemy spawns. You also can’t die from damage-over-time effects such as poison, fire, or lava while on board your ship. If you’re getting overwhelmed, or don’t want to deal with some wildlife that’s popped up, beam out & then back in to reset the spawns. This doesn’t work with pre-determined spawns however, such as bandits/cultists around a lamp, or bounty hunter targets; they will need a different approach.
Both of these methods will abort mission progress, pull you out of challenge rooms, and erase the door to enter that challenge room, but lets you keep all items you currently have on you. You may lose some progress, but it’s better than having to start a new character.
Why pull out? Because some enemy types are randomly generated as you explore a planet, and rejoining/beaming in resets random enemy spawns. You also can’t die from damage-over-time effects such as poison, fire, or lava while on board your ship. If you’re getting overwhelmed, or don’t want to deal with some wildlife that’s popped up, beam out & then back in to reset the spawns. This doesn’t work with pre-determined spawns however, such as bandits/cultists around a lamp, or bounty hunter targets; they will need a different approach.
Tip 2: Look before you leap
When you start the game, you will have a flashlight in your ship locker. Hotkey it immediately. If you are ever in a situation where you can’t see the ground below you, (cresting a tall hill, or mining in a cave and you come to a cliff), TREAD CAREFULLY. Use your flashlight, and move the screen with your cursor and “ctrl” key to try and find out how far down it is.
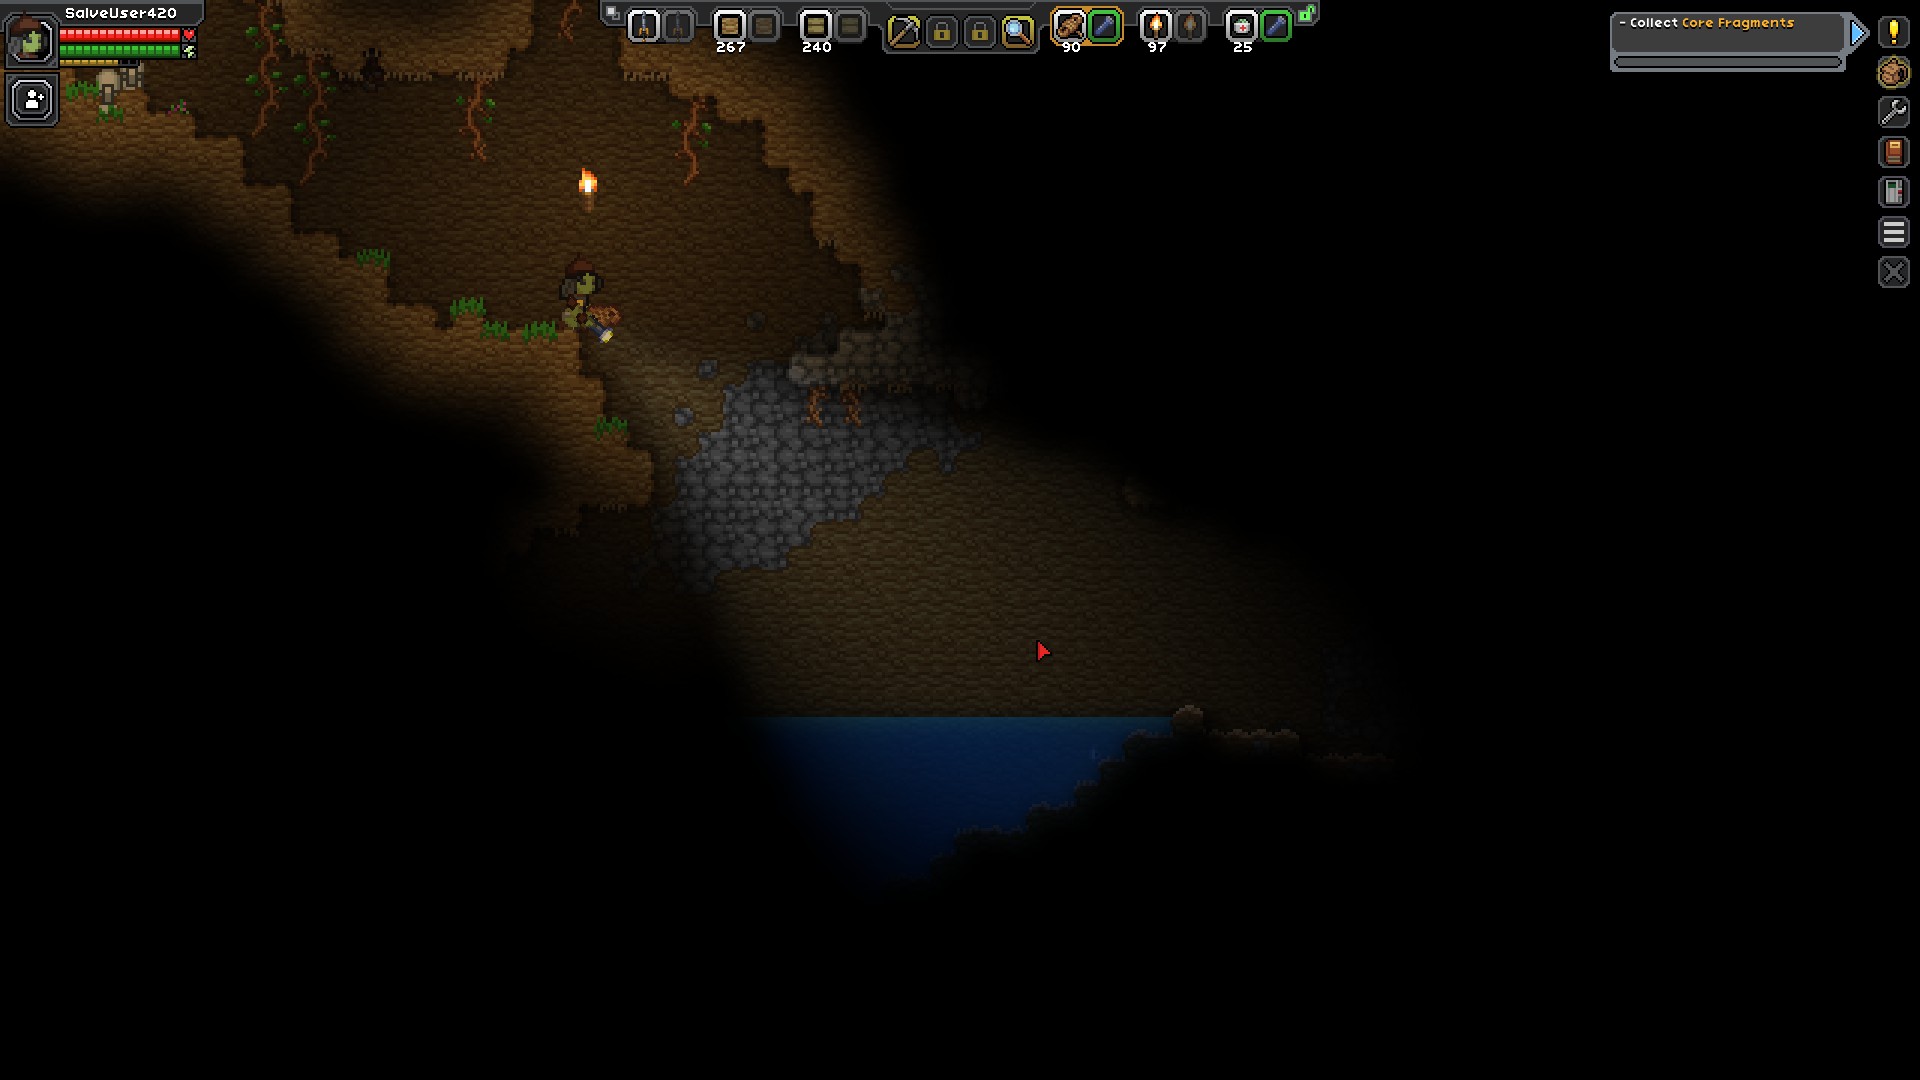
Combine this with some rope to carefully repel down. Sometimes it isn’t the fall that kills you, it’s the monster right next to you when you land who is happy that dinner just hopped into its lap.
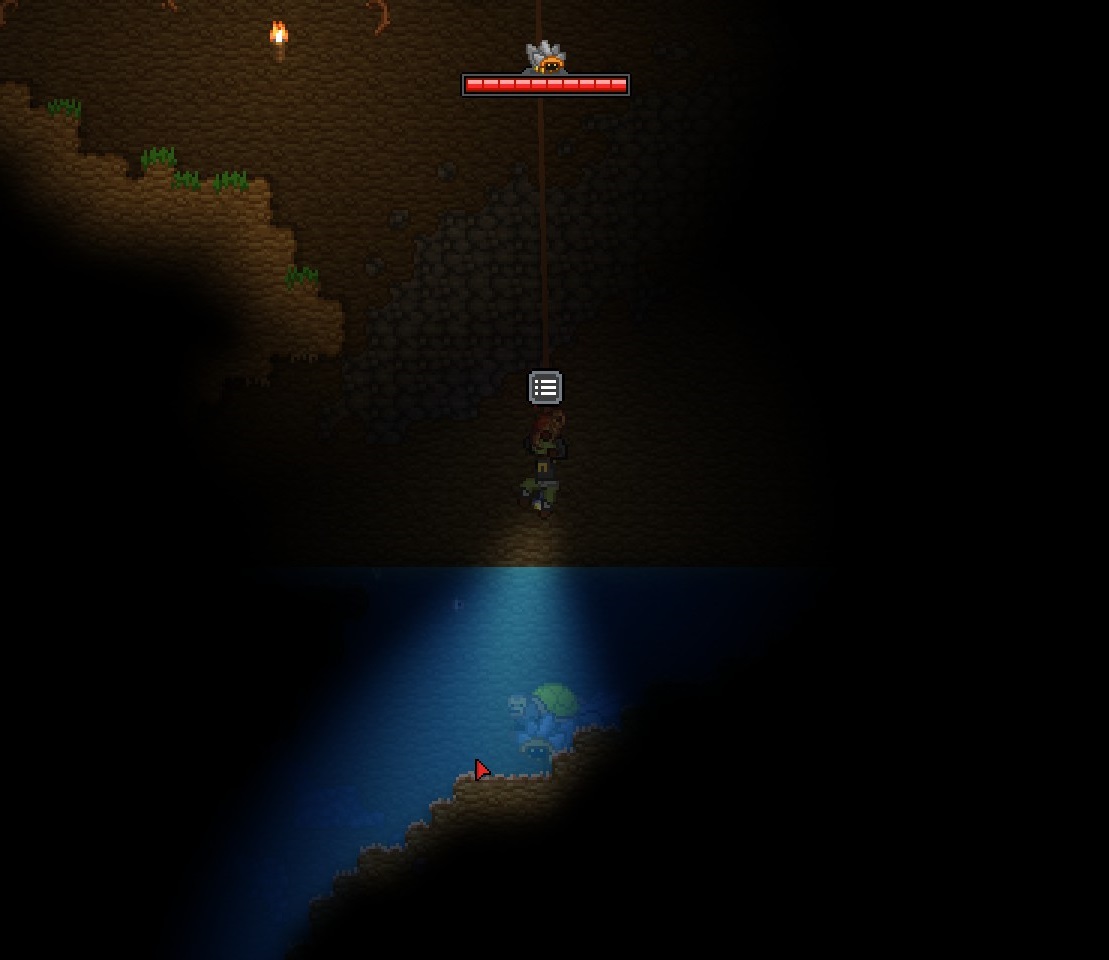
Combine this with some rope to carefully repel down. Sometimes it isn’t the fall that kills you, it’s the monster right next to you when you land who is happy that dinner just hopped into its lap.
Tip 3: Use more rope
I already touched on this, but I’m gonna footstomp this issue: get familiar with rope, it will be your literal lifeline when treading over cliffs. Even into the late-game, fall damage is nasty, and the cliffs only get steeper as you head into more difficult planets.
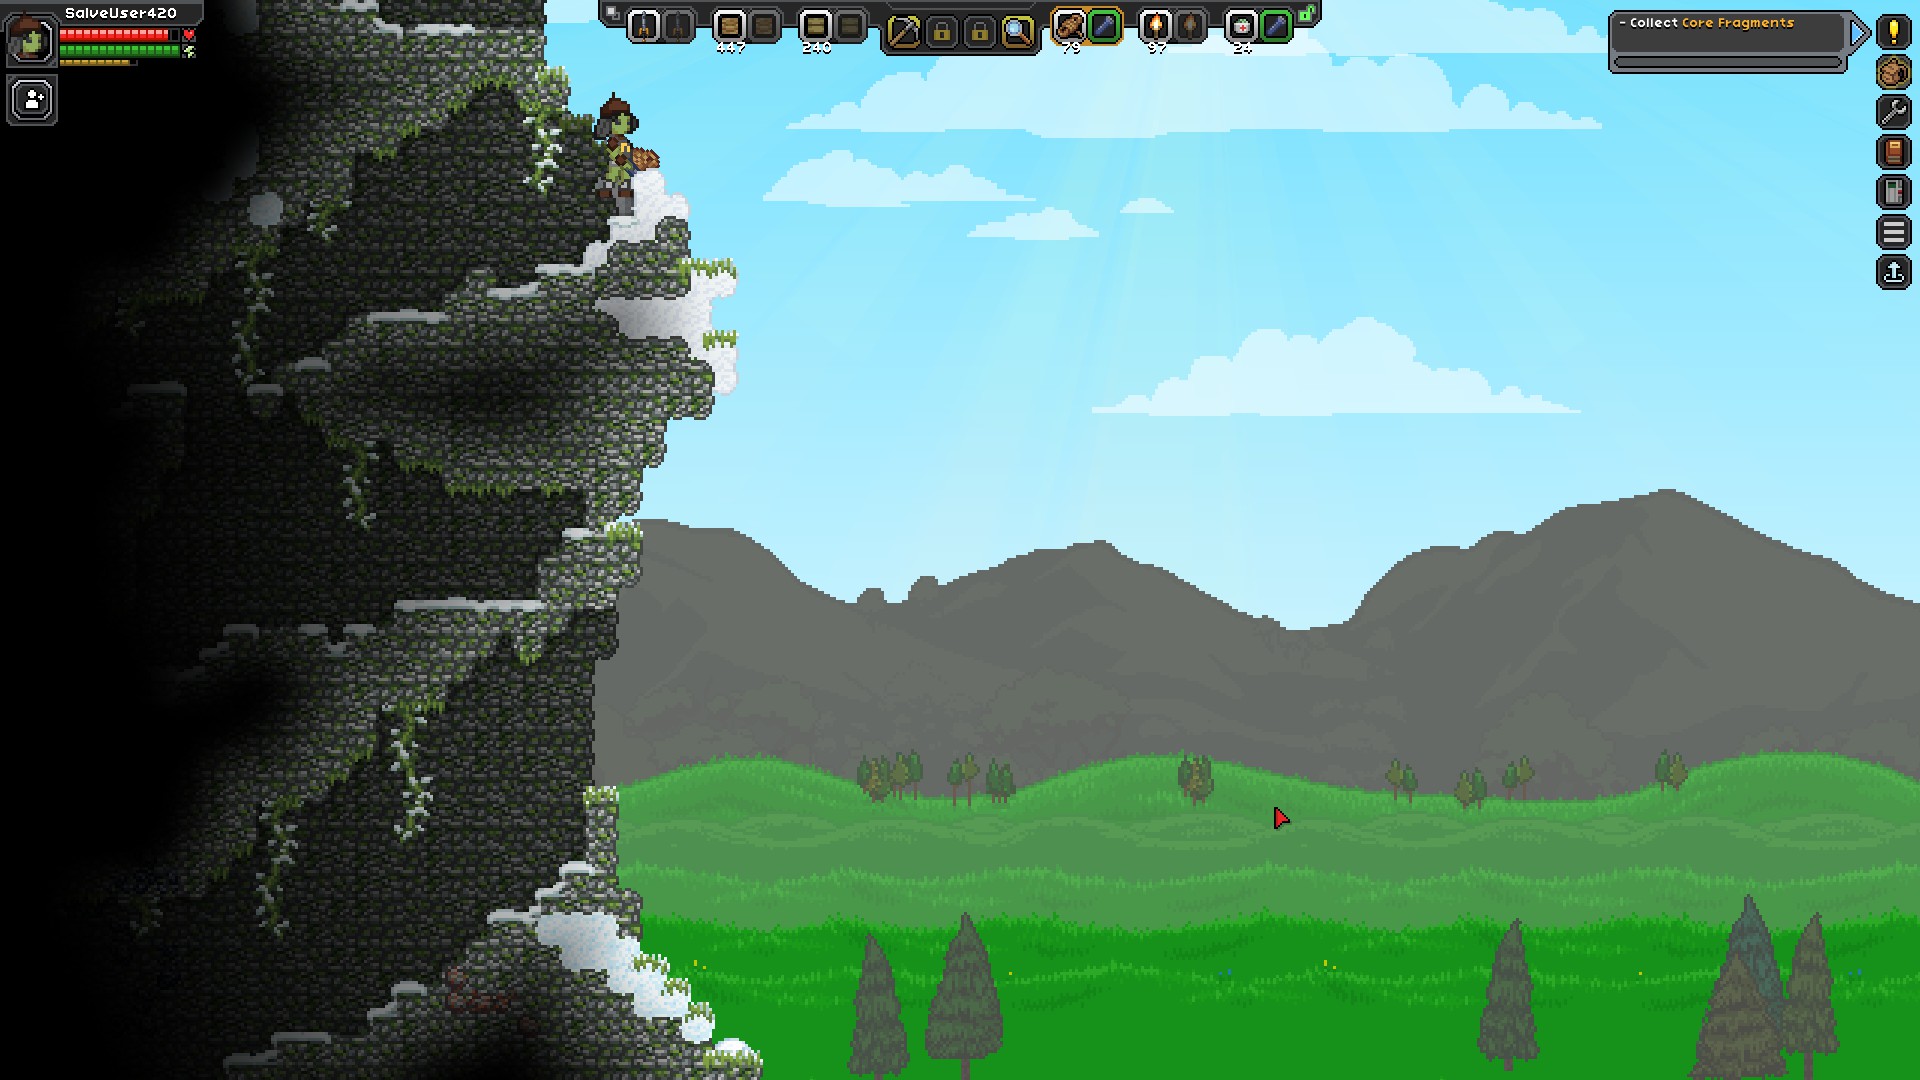
Rope can also be used in missions where block placement is restricted. Ropes are finicky when trying to grapple straight into ceilings, so try to hit walls or floors with it and pull yourself up. Also, try to secure your rope BEFORE your feet leave the ground. Save your mid-air epic trick shots for when you’re running a casual character, not a hardcore one.
Rope can also be used in missions where block placement is restricted. Ropes are finicky when trying to grapple straight into ceilings, so try to hit walls or floors with it and pull yourself up. Also, try to secure your rope BEFORE your feet leave the ground. Save your mid-air epic trick shots for when you’re running a casual character, not a hardcore one.
Tip 4: Proceed by torchlight
Ropes & flashlights are good for getting a look at where you plan to explore down into, but you will need more stable footing for fighting any enemies that come up. If any flying enemy comes at you when you’re hanging on a rope over the abyss, switching to a weapon immediately deletes the rope you’re hanging onto.
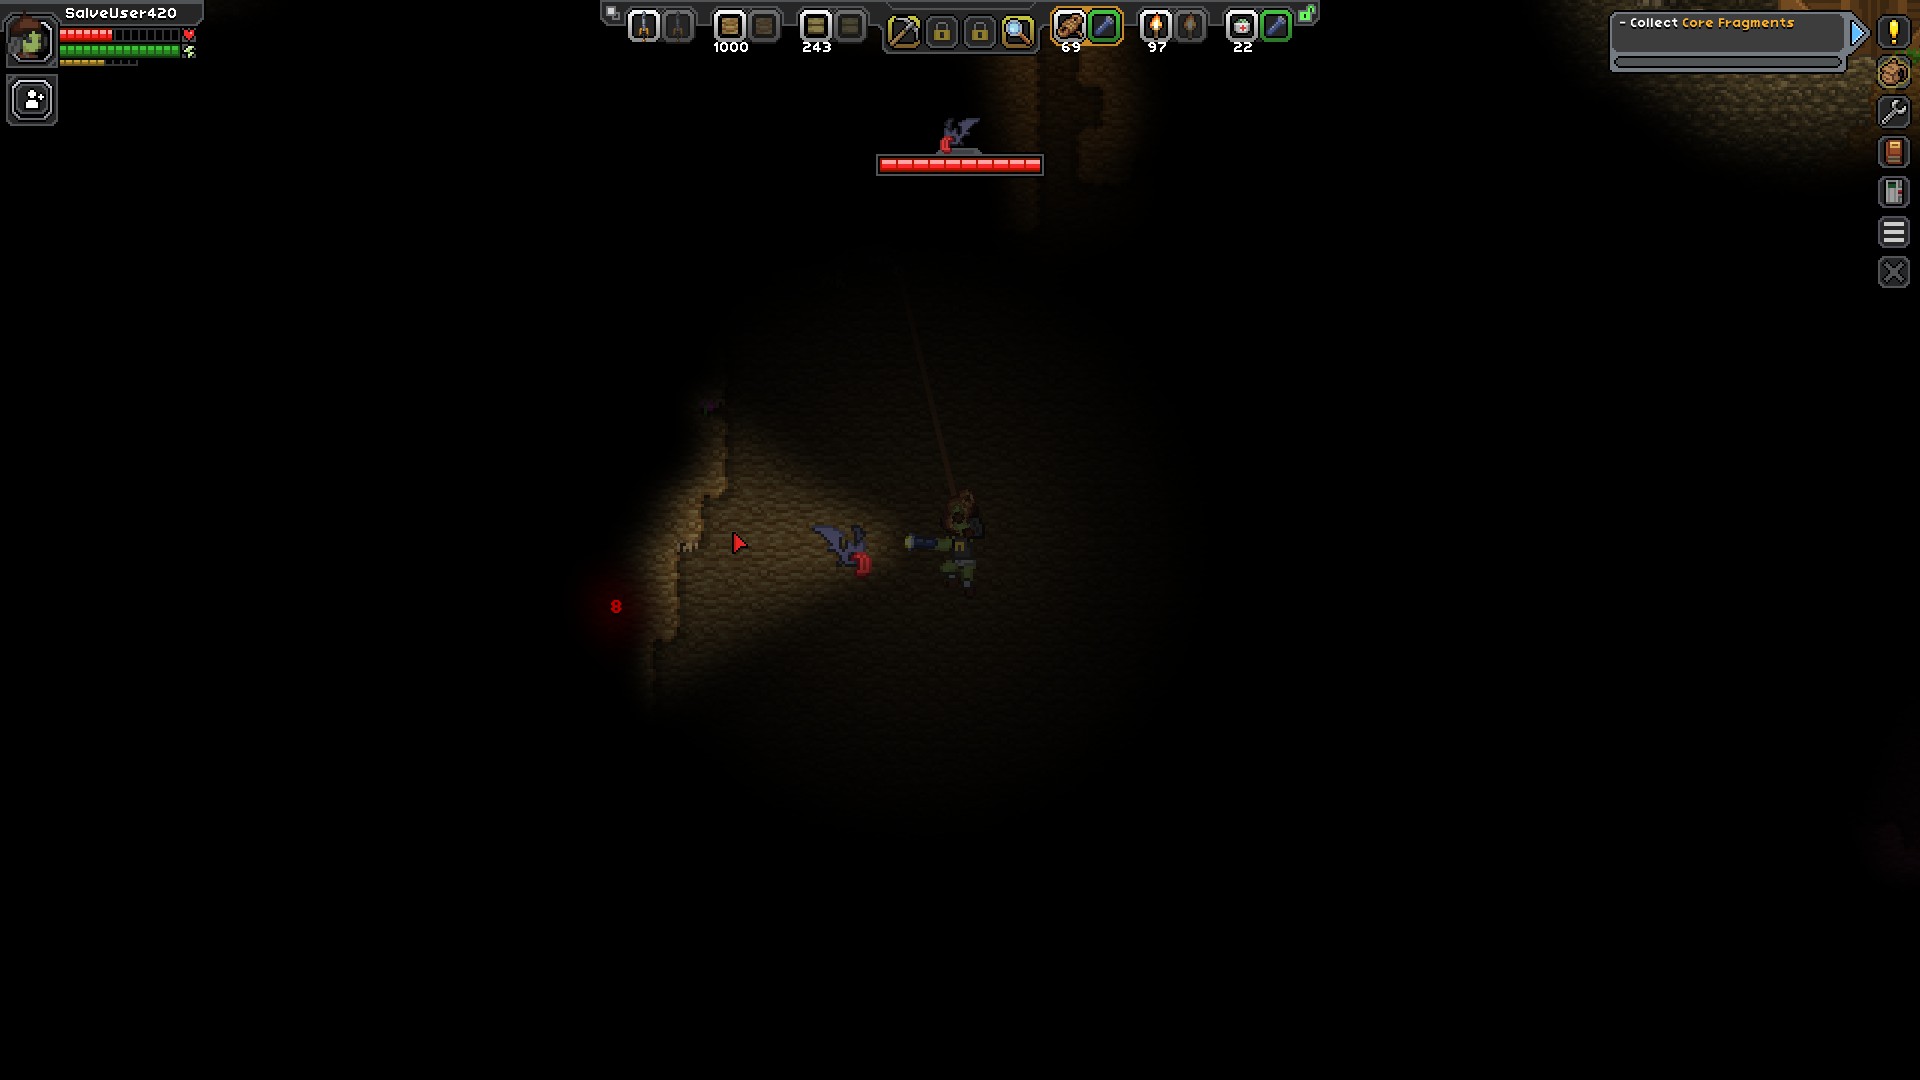
Whenever possible, mine downward and use platforms to make it easier, more gradual way to descend cliffs.
Whenever possible, mine downward and use platforms to make it easier, more gradual way to descend cliffs.
Tip 5: Stop using salve
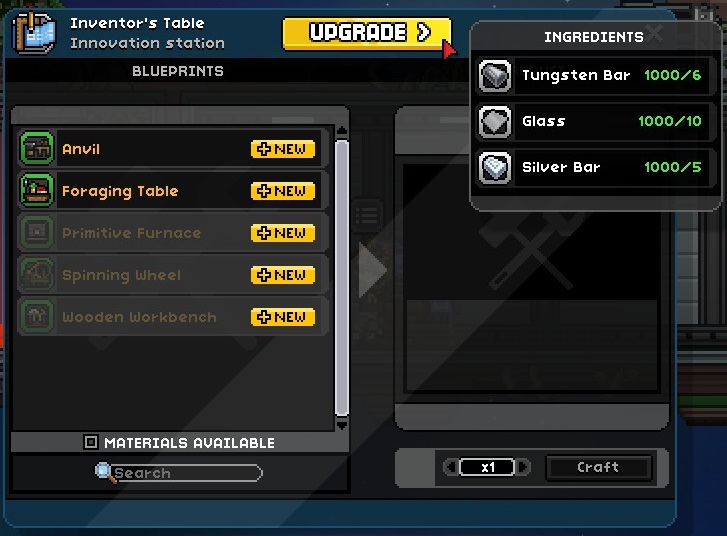
Upgrade to bandages as soon as possible. Bandages can be crafted at the apothecary station, but this requires upgrading the inventor’s workbench with tungsten and glass. This means that you’ll have to be extra careful about healing until you clear the Erchius facility and get access to other planets.
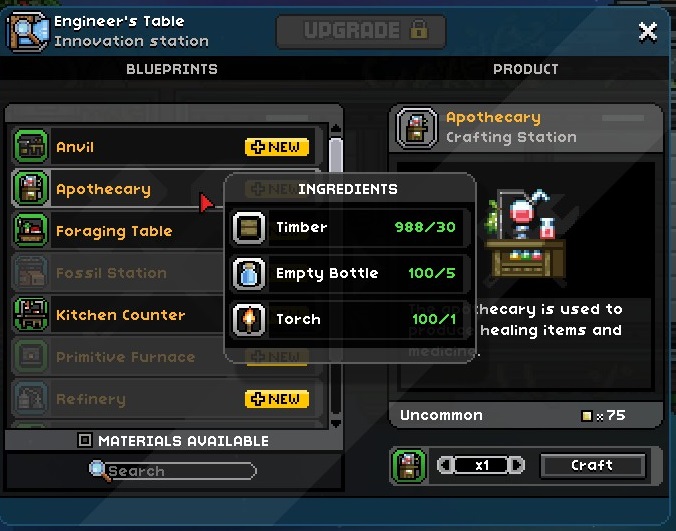
Once you have a ready supply of bandages, sell/throw away all salve and medical kits you come across to remove the temptation of using them. Yes, medkits too, and for the same reason: Using a healing item (salve, bandage, medkit, & nano-bandage) locks you out of using any more healing items until the duration is over. Bandages & Nano-Bandages have a duration of 1 second, whereas the salve and medkits last 10 seconds. While 10 seconds might not seem that long, it’s an eternity in the middle of a scrap, and could easily cost you a run.
Once you have a ready supply of bandages, sell/throw away all salve and medical kits you come across to remove the temptation of using them. Yes, medkits too, and for the same reason: Using a healing item (salve, bandage, medkit, & nano-bandage) locks you out of using any more healing items until the duration is over. Bandages & Nano-Bandages have a duration of 1 second, whereas the salve and medkits last 10 seconds. While 10 seconds might not seem that long, it’s an eternity in the middle of a scrap, and could easily cost you a run.
Tip 6: Don’t walk around with an open window.
It’s a bit limiting only have 6 (effective) inventory slots, but walking around with your inventory window open (so that you always have access to more items) is a bad habit which can get you killed. This is for two reasons: lack of visibility, and sticky fingers. The more screens you have open, the less likely you are to see some bird swooping out of the sky to get all up in your hit-box. Secondly, if you click on an item in your inventory, that item is in your hands. This means that trying to switch to a weapon and swat your enemy will do nothing but keep waving around that piece of furniture you’re holding onto while the enemy kicks your teeth in.
Tip 7: Speed rules melee
The developers clearly thought that balancing speed vs damage & knockback was an interesting design choice. They were not quite right when it comes to the melee weapons. Dual-daggers rule melee, followed by swords, and then leaving spears, axes, and warhammers at the bottom of the barrel. In fact, these slower weapons act more like handicaps than anything else. Here’s why:
• Slower weapons require better timing and aim to make use of their power. If anything slips or you miss, you’ve decreased your DPS, and given your enemy a chance to hit you for free. Faster weapons can just keep attacking with little loss in DPS.
• Slower weapons may knock your enemy back a ways, but if they have a broadsword or hammer, they’ll be able to close the gap and hit you before you can charge up the next strike. Or, they’ll just decide to pull out a gun and start shooting you.
• If enemies stagger themselves out, you’ll waste your one big hit on an enemy, send him flying back, then the next one comes up and hits you immediately after. Dealing with enemies that aren’t in clusters is a bad idea for slower weapons.
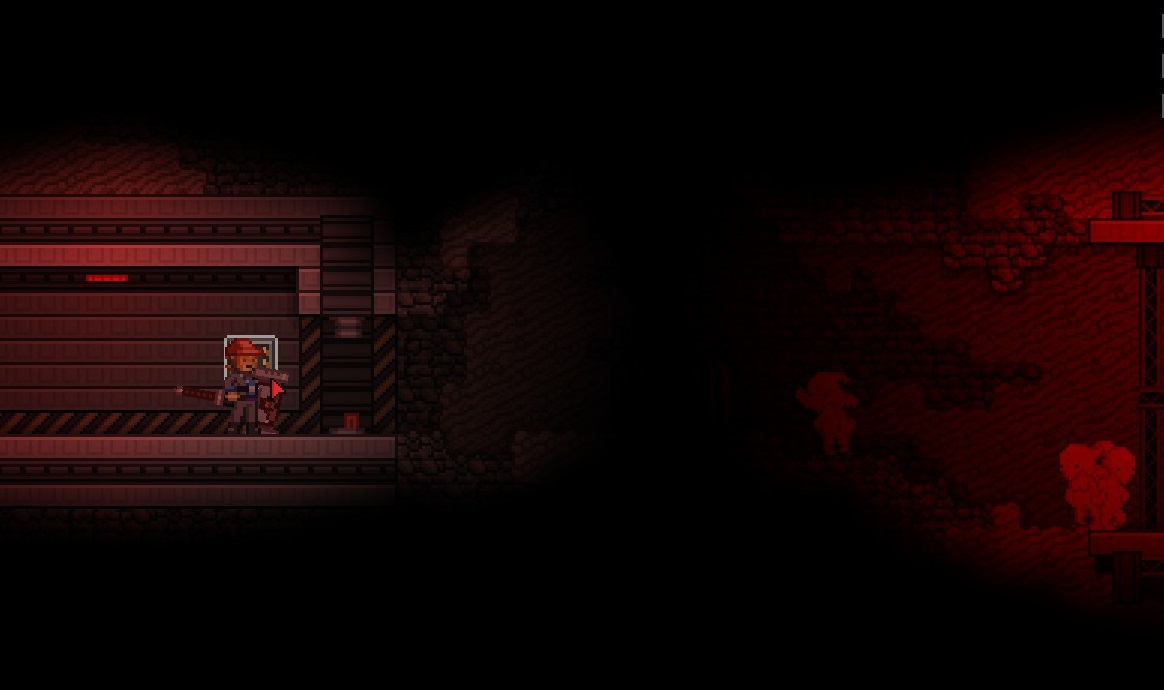 • Dual-daggers have much less knockback, but can strike so fast that they effectively juggle the enemy. An enemy that is “in the air” cannot normally land their attack until they are touching the ground (fliers are exempt, though). You can run into a whole group of enemies in a line, scoop them up, then hold them hostage against a wall while killing them, and there’s little they can do about it unless you let up.
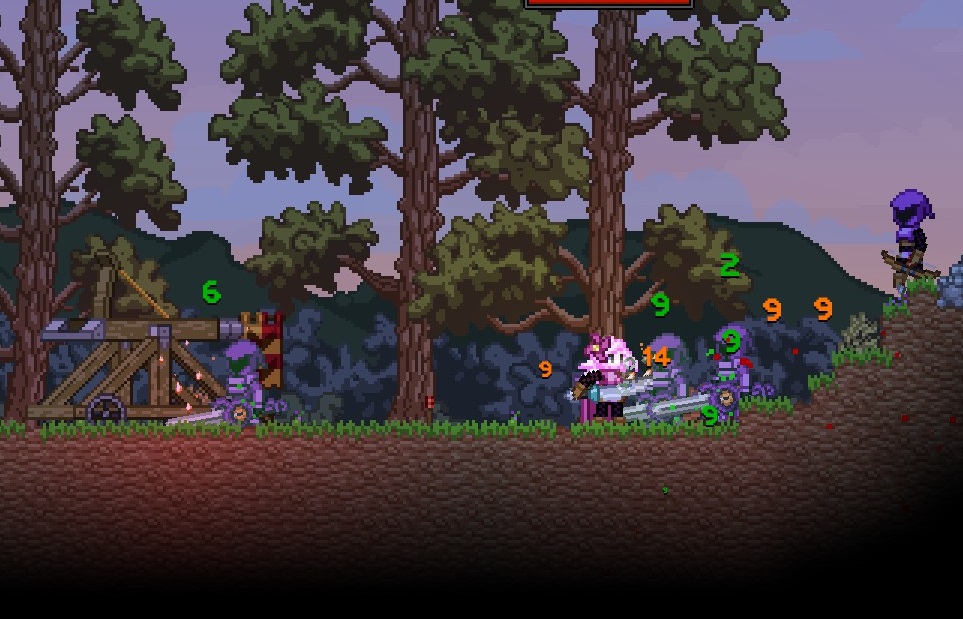 • Spears can also juggle enemies when left pointed out, but the damage is pitiful, and other enemies will likely wander in before you’ve killed your shish-kebab victim, forcing you to divert attention.
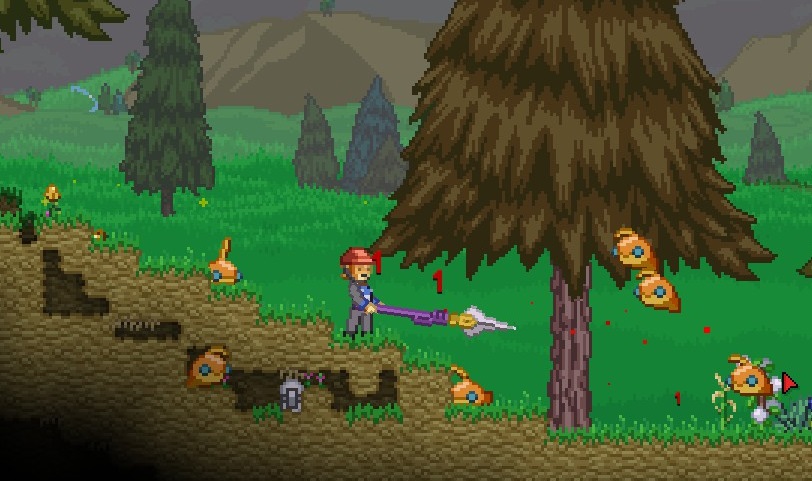 • Broadswords are fairly middle-of-the-road, have an effective arc for hitting ariel enemies, and can just about keep enemies juggled during the combo if your attack speed is fast enough. If your broadsword doesn’t have a speed of 1.4, you’ll have to learn how to dance in & out of enemy range. Just be mindful or where your cursor is, because it determines which direction you’re attacking. (it’s astonishing how easy it is to lose track of it in a skirmish)
• Slower weapons require better timing and aim to make use of their power. If anything slips or you miss, you’ve decreased your DPS, and given your enemy a chance to hit you for free. Faster weapons can just keep attacking with little loss in DPS.
• Slower weapons may knock your enemy back a ways, but if they have a broadsword or hammer, they’ll be able to close the gap and hit you before you can charge up the next strike. Or, they’ll just decide to pull out a gun and start shooting you.
• If enemies stagger themselves out, you’ll waste your one big hit on an enemy, send him flying back, then the next one comes up and hits you immediately after. Dealing with enemies that aren’t in clusters is a bad idea for slower weapons.
• Dual-daggers have much less knockback, but can strike so fast that they effectively juggle the enemy. An enemy that is “in the air” cannot normally land their attack until they are touching the ground (fliers are exempt, though). You can run into a whole group of enemies in a line, scoop them up, then hold them hostage against a wall while killing them, and there’s little they can do about it unless you let up.• Spears can also juggle enemies when left pointed out, but the damage is pitiful, and other enemies will likely wander in before you’ve killed your shish-kebab victim, forcing you to divert attention. • Broadswords are fairly middle-of-the-road, have an effective arc for hitting ariel enemies, and can just about keep enemies juggled during the combo if your attack speed is fast enough. If your broadsword doesn’t have a speed of 1.4, you’ll have to learn how to dance in & out of enemy range. Just be mindful or where your cursor is, because it determines which direction you’re attacking. (it’s astonishing how easy it is to lose track of it in a skirmish)Tip 8: Update your armor
Tip 8: Update your armor.
Always deck yourself out with the strongest armor you can. Do not enter the Erchius Facility or a planet with tungsten until you have iron armor. Do not enter the Hunting Caverns or a planet with titanium until you have tungsten armor. Etc...
Armor not only gives you more defense, but also more health, energy, and damage. It’s always a good idea to get the best gear you can. Speaking of the latest upgrades…
Always deck yourself out with the strongest armor you can. Do not enter the Erchius Facility or a planet with tungsten until you have iron armor. Do not enter the Hunting Caverns or a planet with titanium until you have tungsten armor. Etc...
Armor not only gives you more defense, but also more health, energy, and damage. It’s always a good idea to get the best gear you can. Speaking of the latest upgrades…
Tip 9: Update your mech
My honest advice, don’t bother with the mech. The only use I ever found for it is mining for Erchius on the first moon, because its drill arm is still better than your Matter Manipulator at that point. Everywhere else, the mech has worse combat & mobility options than what you have while on foot.
However, if you plan on laying siege to space pirates, or investigating strange space signals, don’t go outside your weight class. Always make sure your mech is upgraded with the latest armor pieces, and has as much health and damage as possible. Stepping into a fight with space enemies even two tiers above your own can decimate your mech in a few hits, and it takes you down with it if it blows. Your whole run can end in about 2 seconds if you pick a space-battle with something stronger than you. I know because I counted. (T_T)
It can be a real grind to find enough upgrade-parts before heading into a stronger area, but it is vital if you plan on using your mech. Also, remember to keep your hand on the teleport button in case things get hairy. Take your time and whittle the enemy down.
However, if you plan on laying siege to space pirates, or investigating strange space signals, don’t go outside your weight class. Always make sure your mech is upgraded with the latest armor pieces, and has as much health and damage as possible. Stepping into a fight with space enemies even two tiers above your own can decimate your mech in a few hits, and it takes you down with it if it blows. Your whole run can end in about 2 seconds if you pick a space-battle with something stronger than you. I know because I counted. (T_T)
It can be a real grind to find enough upgrade-parts before heading into a stronger area, but it is vital if you plan on using your mech. Also, remember to keep your hand on the teleport button in case things get hairy. Take your time and whittle the enemy down.
Tip 10: Only you can manipulate terrain.
This is one of the reasons why missions don’t let you use your matter manipulator, it would completely break the game balance in your favor during boss fights. However, that doesn’t apply to the rest of gameplay. With the exception of the ghost monsters (Spookit & Skimbus) and some short-ranged electric projectiles (eg., Scandroid’s), nothing can go through solid blocks. This means that you, the player, are the one that can decide & shape the battlefield. Throwing down a few blocks of dirt can block enemy fire, and you can even encase most enemies in blocks, trapping them there until they despawn. Why do I bring this up?
Tip 11: Let the lava do the work
You’ve accepted a quest to go kill some bandits, or apex scientists, or some Ronin on the edge of town. Problem is, their attacks hurt. A lot. Also, that bandit just threw out a pokeball with ONE THICC BOI, then he pulled out a rocket launcher which will probably one-shot you. THEN, after you whittle him down, he’ll try and pull a fake surrender on you, which you can’t afford to risk. What to do?
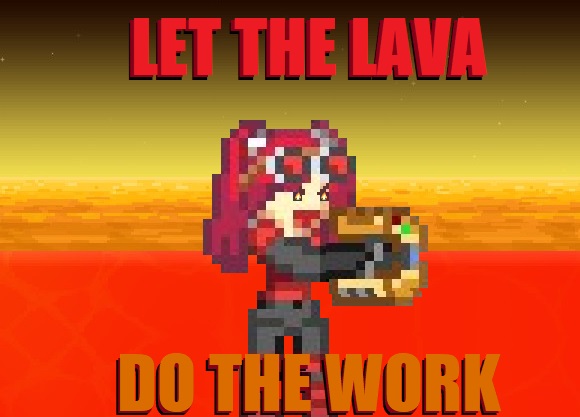 Lava is one of the most dangerous things in this game, and you do NOT want to mess with it. The longer you stay in it, the more its damage starts getting exponential. The first tick is 30 damage, the next, 70. Then over 200. Then over 3,000. In a few more ticks, it’s into the millions. So put that kind of damage to work for you.
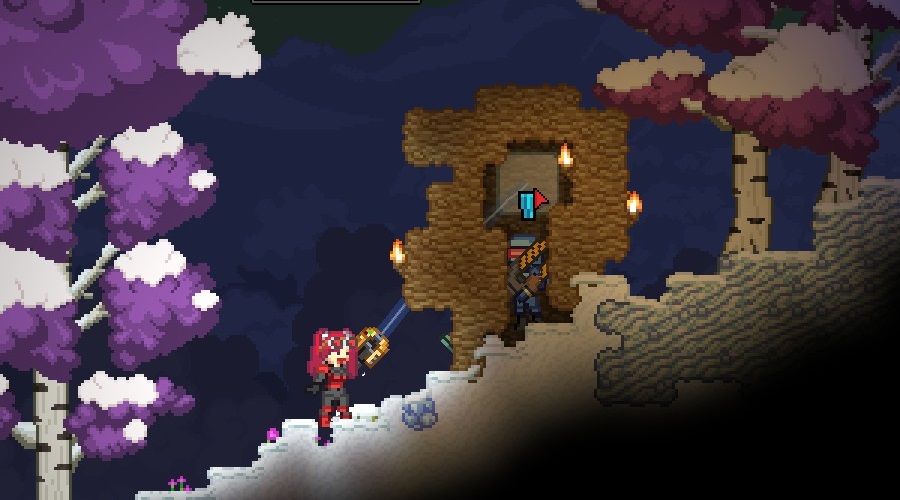 Dig a tunnel under your enemies if you have to, but get over to them and use your matter manipulator to encase them in dirt blocks. Then right click to place dirt walls in the background. Once that’s done, add a little lava into their enclosure, and watch the orange numbers fly. If the Ronin wants to join your team, they’ll put on a uniform and become immune to the lava.
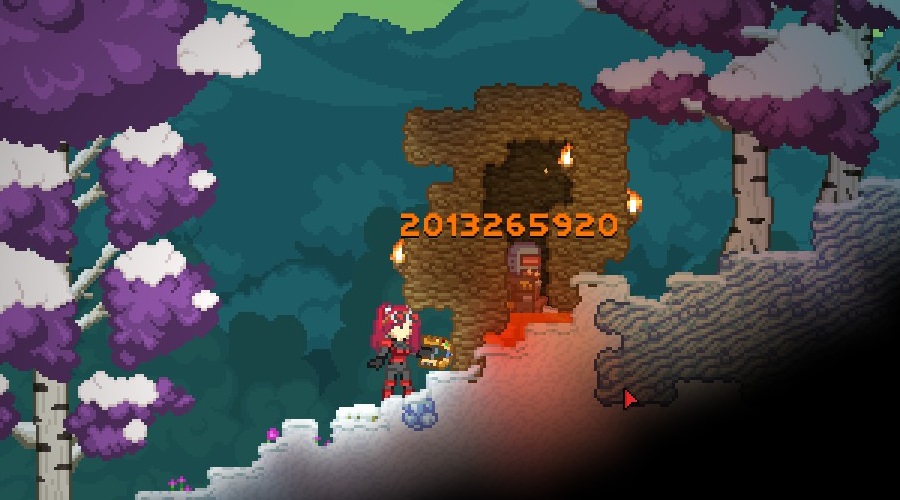 .
.
If they are faking, however...
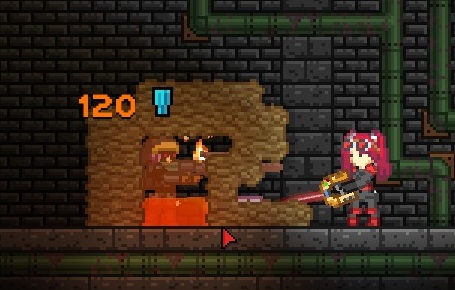
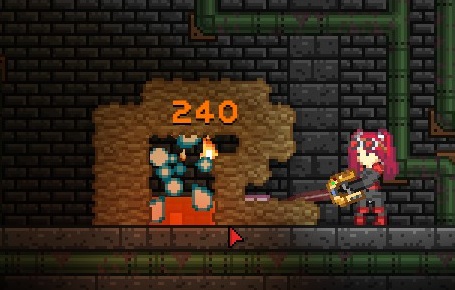 THEY'LL BURN.
...Just, uh...
Just be careful of using lava near escort NPCs, they are not resistant to lava. :(
Lava is one of the most dangerous things in this game, and you do NOT want to mess with it. The longer you stay in it, the more its damage starts getting exponential. The first tick is 30 damage, the next, 70. Then over 200. Then over 3,000. In a few more ticks, it’s into the millions. So put that kind of damage to work for you. Dig a tunnel under your enemies if you have to, but get over to them and use your matter manipulator to encase them in dirt blocks. Then right click to place dirt walls in the background. Once that’s done, add a little lava into their enclosure, and watch the orange numbers fly. If the Ronin wants to join your team, they’ll put on a uniform and become immune to the lava. .If they are faking, however...
THEY'LL BURN....Just, uh...
Just be careful of using lava near escort NPCs, they are not resistant to lava. :(
Tip 12: Mind the hitbox
As a general rule, enemies do not always deal contact damage automatically. Monster enemies (Birds, beasts, etc.) do not deal contact damage until they notice you. They will do a little hop, and you’ll hear a short “bwip!” sound effect to indicate the monster has now activated their contact damage.
Humanoid NPCs like bandits, cultists, etc., do not deal contact damage, only weapon damage. Also, humanoids will switch to melee at close range, and guns if you run from them (if the AI doesn’t just derp out). A good thing to note about both you, and humanoid NPCs, is that ranged attacks miss their target if they are too close. Basically, the bullet comes from the muzzle of the gun, and you can avoid the shots by being “inside” from where the enemy is shooting (also works for most throwing weapons)
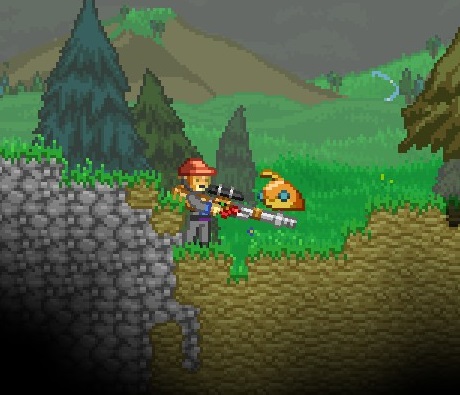 Unfortunately, this also works for enemies getting inside your hitbox. For this reason, it’s always a good idea to have a melee weapon in one of your hotkeys.
Humanoid NPCs like bandits, cultists, etc., do not deal contact damage, only weapon damage. Also, humanoids will switch to melee at close range, and guns if you run from them (if the AI doesn’t just derp out). A good thing to note about both you, and humanoid NPCs, is that ranged attacks miss their target if they are too close. Basically, the bullet comes from the muzzle of the gun, and you can avoid the shots by being “inside” from where the enemy is shooting (also works for most throwing weapons)
Unfortunately, this also works for enemies getting inside your hitbox. For this reason, it’s always a good idea to have a melee weapon in one of your hotkeys.
Tip 13: Spiked-morphball is best morphball.
Let’s face it, the other options are moving faster across the surface of oceans (which you’ll never need), and another that consumes your energy bar & rockets you uncontrollably off to the side (and into trouble). The ability to cling to walls and climb all over is by far the best ability, and can let you explore mission areas, scale up or down cliffsides safely, and help trivialize some boss-fights or challenge rooms. Just be careful you don’t take sharp corners too fast, or it will fling you off. In fact, speed-boosting modifiers make this problem much worse, to the point where this becomes nearly unusable.
Tip 14: Elemental trapezoid
You probably noticed that weapons have one of four elements (five if you count non-elemental). Some elemental damage does more against certain monsters. I have figured out the following:
- Fire monster: weak to ice, resistant to fire, immune to lava.
- Ice monster: weak to fire, resistant to ice.
- Poison monster: weak to ice, resistant to poison, immune to poison pools.
- Fish monsters: weak to electricity, resistant to ice.
- Robot monsters: weak to electricity.
- Humanoid NPCs: no noticeable weaknesses or resistances.
Tip 15: Fire, bad. Spray, good
As soon as you upgrade your apothecary to medical station, start getting the Burn Resistance Sprays. Buy an Ice fluffalo from the Terramart shop as soon as you can, in order to start stocking up. They do not make you immune to heat damage, but they do completely prevent the damage-over-time effect, which makes an amazing difference. This also allows you to walk over flaming cinders without taking damage, while simultaneously extinguishing them. (these fall from the sky on volcano planets, and litter the ground during the Bone Dragon bossfight).
Tip 16: Find a good stim dealer.
The red stimpack gives you health regen without locking out your healing, making it great for tough encounters and bossfights. Occasionally you’ll come across a merchant out in the wild who sells red stims. Bookmark that merchant’s location and do everything you can to keep them alive. Buying stims from merchants is vastly preferred to making your own red stims, because the ingredient “Living vine” is used in recipes for both nano-bandages and red stims. Use your limited supply of living vines to make nano-bandages, and just buy the stims.
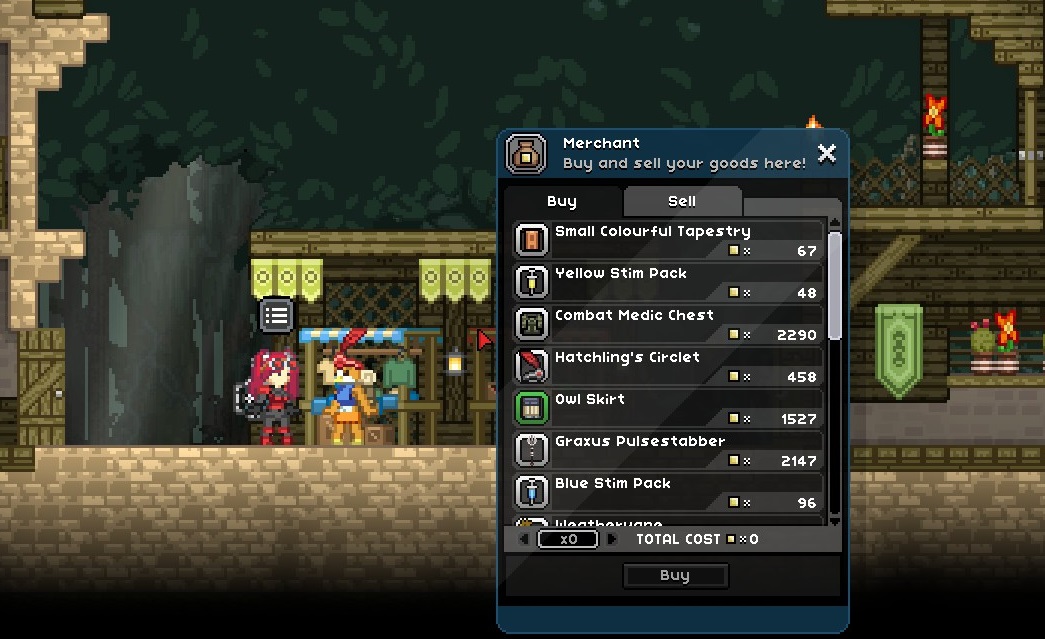
Tip 17: Take advantage of the shared universe.
The game never tells you this, but every character you make shares the same universe with each other. If you build a base, and store some items in a container there, then go to your ship and copy the coordinates for that planet, you can switch to another character, navigate/warp to those coordinates, and visit the same base, just as you left it. This means that you can share resources between all of your characters who can navigate the stars (ie., have completed the Erchius mining facility).
Another benefit is that any villager who has asked to join your crew is also shared. Meaning, that if you make nice and do a lot of favors with a town, getting several people asking join your crew (but not accepting yet), then another character can go to that same village and recruit them for their ship without having to re-do the hassle and sidequests!
It’s up to you whether or not you feel this breaks the spirit of a hardcore playthrough, but it certainly helps cut down on some of the mining, side-questing, collecting upgrade modules, or finding artifacts to scan. Other characters and their on-call crewmates who you left on a planet will not be there for another character to interact with though, they only exist when you’re controlling them.
Note: Food items that you left in a (non-fridge) container or on the ground will keep the spoil timer running when you are playing another character, so keep your perishable food items in your fridge, or in your inventory to keep them from spoiling while another character is being played.
Another benefit is that any villager who has asked to join your crew is also shared. Meaning, that if you make nice and do a lot of favors with a town, getting several people asking join your crew (but not accepting yet), then another character can go to that same village and recruit them for their ship without having to re-do the hassle and sidequests!
It’s up to you whether or not you feel this breaks the spirit of a hardcore playthrough, but it certainly helps cut down on some of the mining, side-questing, collecting upgrade modules, or finding artifacts to scan. Other characters and their on-call crewmates who you left on a planet will not be there for another character to interact with though, they only exist when you’re controlling them.
Note: Food items that you left in a (non-fridge) container or on the ground will keep the spoil timer running when you are playing another character, so keep your perishable food items in your fridge, or in your inventory to keep them from spoiling while another character is being played.
Tip 18: Use doors to cluster enemies
If a door is wired to a switch, it can’t be opened by NPCs walking up to it. You can use this to cluster enemies together. Lure them towards you, shut the door, then wait until they turn around to open the door and unleash. Repeat until victory.
Tip 19: Parry the Beam
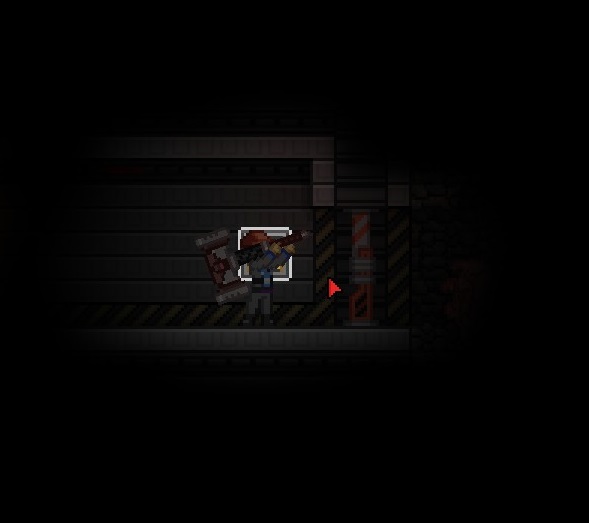
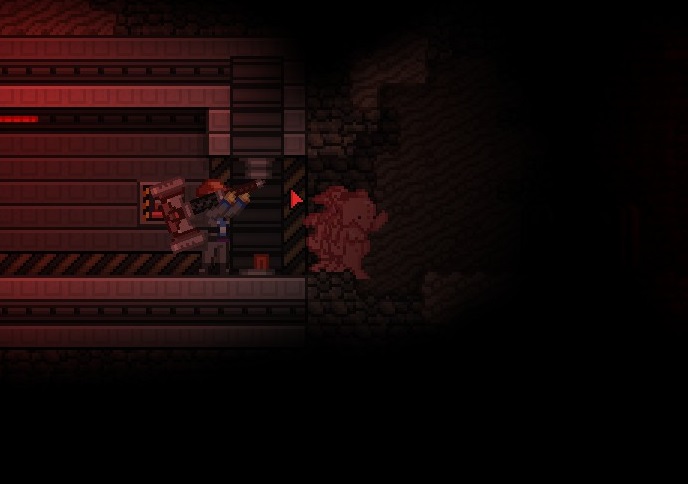
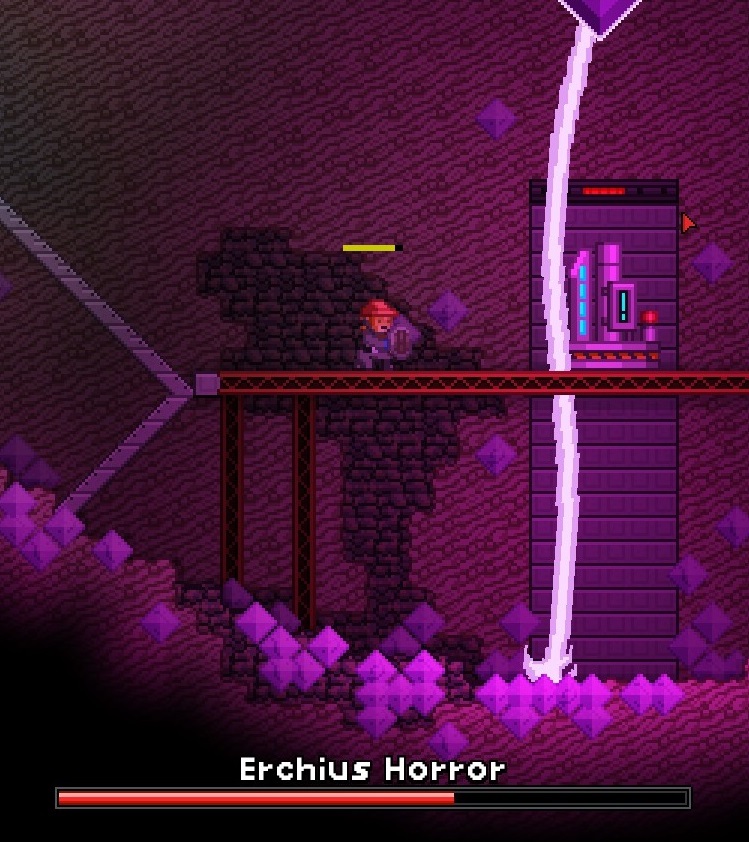
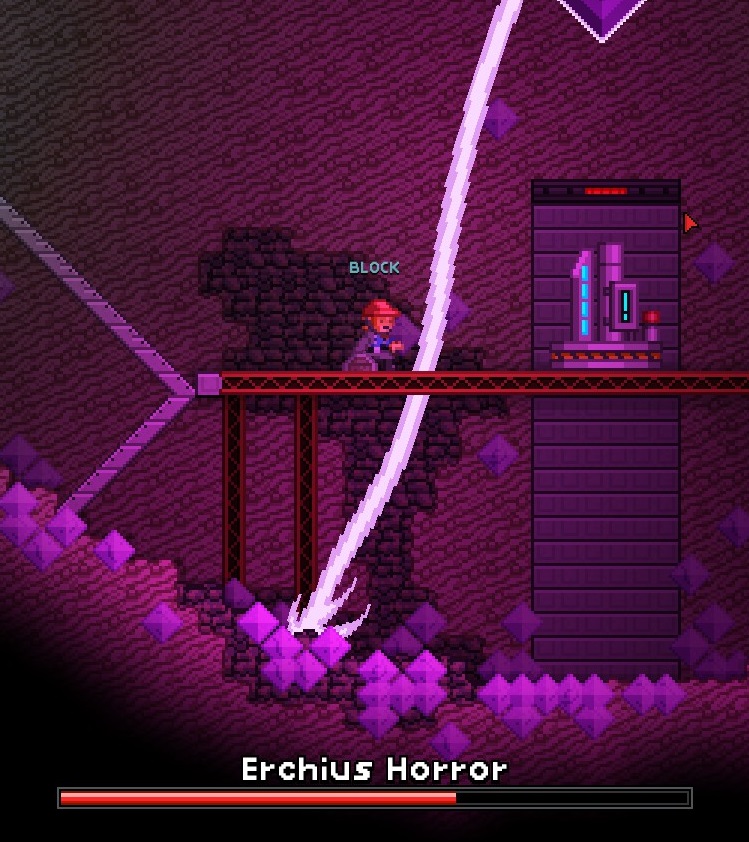
In the battle against the Erchius Horror, if you hold out a shield (or sword with the “parry” ability) while ducking, you can block the beams. This breaks the guard instantly, but it gives you a small window of invulnerability to get around and hit the switches. This also works while holding down to fall through the platforms, but just beware of fall damage.
Tip 20: To dodge the ball, BECOME the ball.
Most of Asra Nox’s attack patterns are pretty trivial to dodge by clinging to the wall just above her, but her most difficult attack to dodge is her impression of Sonic the Hedgehog. Best way I’ve found of dodging this is to morphball yourself, then move slowly across the arena in one direction away from her.
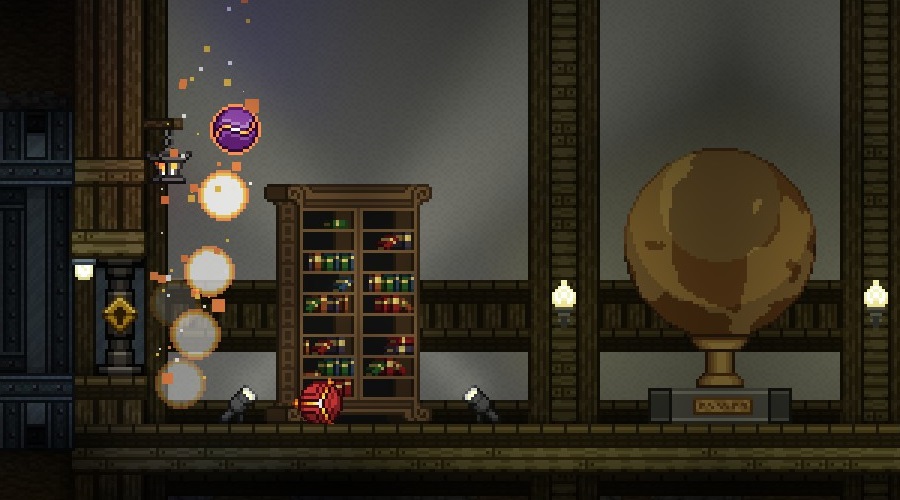
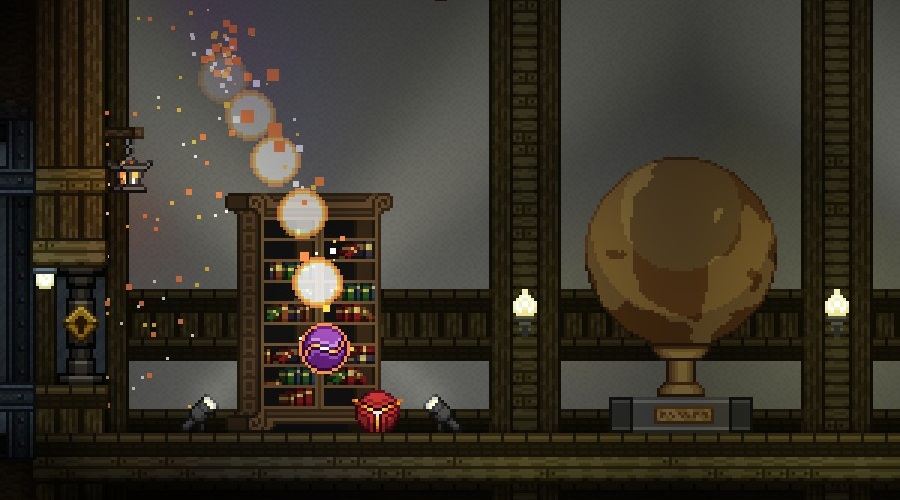
Nox’s attacks seem to be mostly aiming for where your head should be when she’s close to you, but she can do a wicked curve down and across when either you get to the edges of the arena, or if she’s too far away from you when she begins each homing attack.
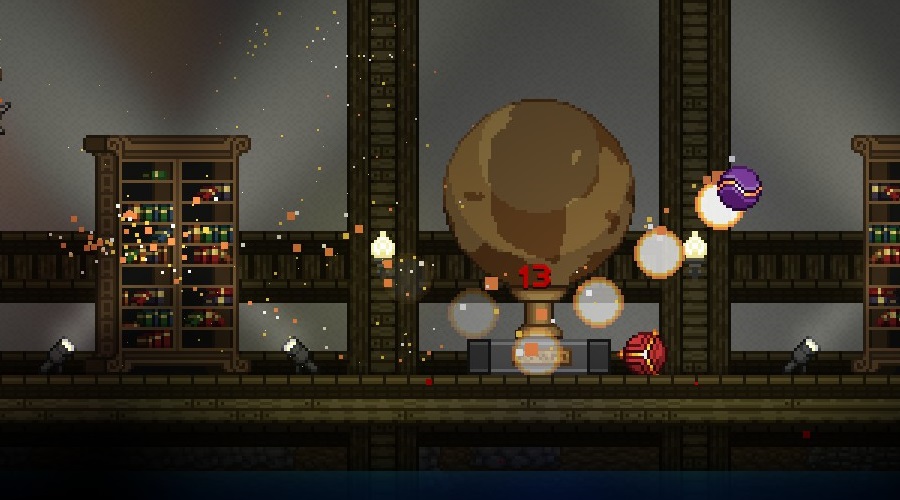
Or you can just hold up some shields and spam bandages.
Nox’s attacks seem to be mostly aiming for where your head should be when she’s close to you, but she can do a wicked curve down and across when either you get to the edges of the arena, or if she’s too far away from you when she begins each homing attack.
Or you can just hold up some shields and spam bandages.
Tip 21: Choose the Fire Path
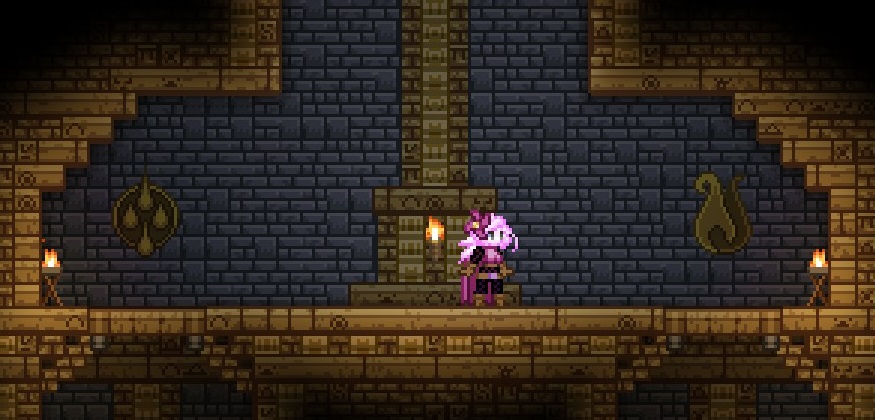 In the Kluex grand temple, you come to the crossroads of the fire path, or water path. While the water path’s spikes are easy enough to swim around, the two giant fish that are trapped with you can be a run-killer if you don’t have a good gun with lightning damage. A safer path is ironically the one that shoots flames and laser beams, as they are more predictable and thus avoidable.
 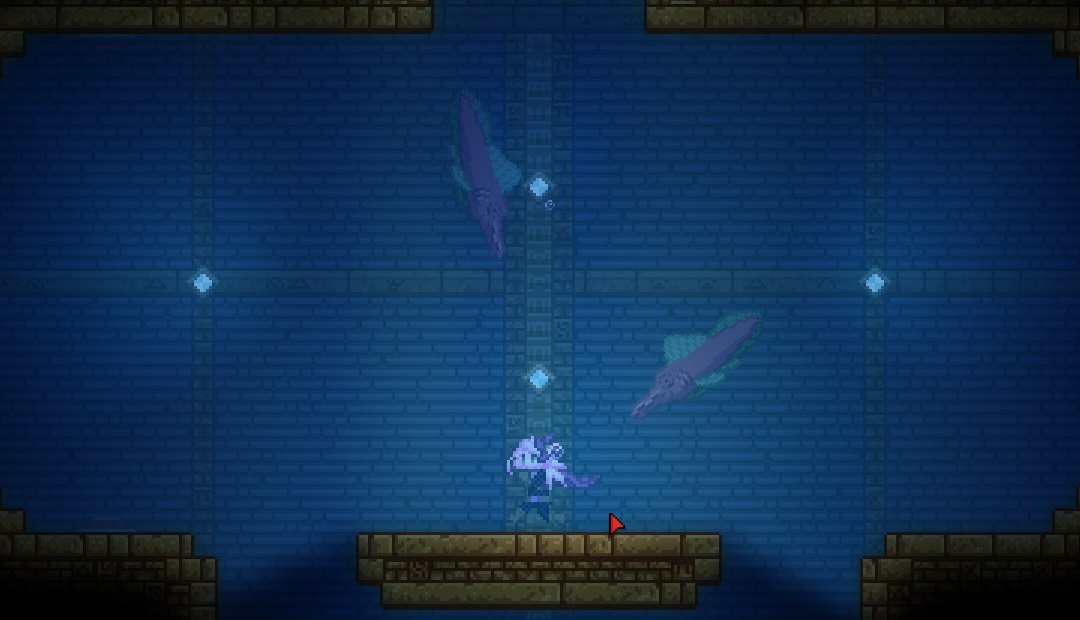 Also, avoid using Reefcola at all costs: the “extra swim speed” only applies in the upwards direction, and it is uncontrollably fast. It will ram you into spikes and make the trip much harder.
Tip 22: Cars can't fly
If you ever got to the large chasm at the end of the final level “The Ruin”, and thought to yourself “I can negate the fall damage in my hovercar!”, let me tell you right now: that doesn’t work. (T_T)
Using platforms to carefully (and slowly) build a stairway down is one option, but another option is to gather as much of the green jelly blob blocks (or other block with falling physics) as possible, spam it off the edge, then ride the slime-wave all the way down. (might vary depending on computer processing power, lag, etc.) ...And it's also the only certain option, unless you want to chance that the spot you're dropping isn't the spot right next to the door.
Fun fact, all blocks despawn close to the brain, and that will include your falling platform. Making a staircase down, with one block to hook a rope to is the most secure way down.
Using platforms to carefully (and slowly) build a stairway down is one option, but another option is to gather as much of the green jelly blob blocks (or other block with falling physics) as possible, spam it off the edge, then ride the slime-wave all the way down. (might vary depending on computer processing power, lag, etc.) ...And it's also the only certain option, unless you want to chance that the spot you're dropping isn't the spot right next to the door.
Fun fact, all blocks despawn close to the brain, and that will include your falling platform. Making a staircase down, with one block to hook a rope to is the most secure way down.
Tip 23: Meteor planets are No-Go planets
When viewing a planet in orbit, click on it to see the weather conditions. If the planet has the condition "Small meteorites", avoid it if at all possible. If the planet has the condition "Large meteors", avoid it at all costs.
Meteors fall from the sky very fast, and completely at random (usually in ways that screw you over). The small ones can deal major damage to you, and you usually won't even be able to see them coming in time to react. The large meteors can outright one-shot you, even with end-game armor. You can try to avoid this by tunneling under the ground, but you'll be tunneling your way around the entire planet. Also, if your ceiling is ever too thin, you might get hit by the impact explosion. (Yes, meteors explode. VIOLENTLY.)
If you didn't check the weather before beaming down, or you're running a mod that obscures some weather effects, and you suddenly start hearing random explosion sound effects with no clear source, bail immediately.
Meteors fall from the sky very fast, and completely at random (usually in ways that screw you over). The small ones can deal major damage to you, and you usually won't even be able to see them coming in time to react. The large meteors can outright one-shot you, even with end-game armor. You can try to avoid this by tunneling under the ground, but you'll be tunneling your way around the entire planet. Also, if your ceiling is ever too thin, you might get hit by the impact explosion. (Yes, meteors explode. VIOLENTLY.)
If you didn't check the weather before beaming down, or you're running a mod that obscures some weather effects, and you suddenly start hearing random explosion sound effects with no clear source, bail immediately.
Comments, final thoughts
Please take into consideration that all of these tips are granted from just my own perspective and experience. Most of them I've found out the hard way, and some were even run-ending. I didn't cover anything about crops or food, because I felt that "grow crops, hunt creatures, cook food" is too fundamental, and I hate guides that are like "Guide to jumping: press the spacebar. End of guide, now give me accolades."
I didn't post anything about which guns were best, because I think that's far more subjective than melee. However, I find myself most often using grenade launchers with throwing weapons in off-hand, and sniper rifles. The gun-type I use the least is rocket-launcher, because the energy cost-to-damage ratio always feel less effective than any other gun. I was going to talk about & rank weapon abilities, but I think I'll save that for another guide.
If you have your own tips you feel might benefit someone doing a hardcore playthrough, leave a comment and I might add it to the list. If you have any questions about anything I posted, feel free to ask and I'll try to elaborate or change the wording in the guide.
I didn't post anything about which guns were best, because I think that's far more subjective than melee. However, I find myself most often using grenade launchers with throwing weapons in off-hand, and sniper rifles. The gun-type I use the least is rocket-launcher, because the energy cost-to-damage ratio always feel less effective than any other gun. I was going to talk about & rank weapon abilities, but I think I'll save that for another guide.
If you have your own tips you feel might benefit someone doing a hardcore playthrough, leave a comment and I might add it to the list. If you have any questions about anything I posted, feel free to ask and I'll try to elaborate or change the wording in the guide.
More Starbound guides
- Starbound 100% Achievement Guide★ 5 (3k)60k views5k ♥14 minUpdated Jan 21, 2024
- How to construct a liquid erchius fuel generator★ 5 (726)40k views1.9k ♥2 minUpdated Jan 19, 2019
- Starbound: Гайд для начинающих! [Первые боссы, Первый Артефакт - Флоран!]★ 5 (1.1k)39k views1.8k ♥35 minRussianUpdated Jun 14, 2017
- Русификатор для Starbound 1.4.4★ 5 (770)38k views997 ♥1 minRussianUpdated Feb 16, 2021
- Starbound + Frackin’ Universe Guide to Automation [Part 1]★ 5 (451)33k views1.5k ♥23 minUpdated Oct 19, 2024
- Русскоязычное руководство по моду Frackin' Universe (частично актуально)★ 5 (975)30k views2.2k ♥52 minRussianUpdated Nov 26, 2024





This guide was created by its original author on the Steam Community. Are you the author and want it removed? Request removal.