Overview
Today, I will be teaching you how to revisit what was patched all that time ago in order to offer another means to have fun among friends.
Introduction, Requirements, & Notes
INTRODUCTION:
On October 29th, 2020, Phasmophobia received a major game update which patched the beloved method used to host 8-player (or more) lobbies. Today, I will be teaching you how to revisit what was patched all that time ago in order to offer another means to have fun among friends.
REQUIREMENTS:
- A stable internet connection
- At least 40 GB of free storage space if using one drive to complete this tutorial (the game will end up being around only 12 GB when finished)
- A Steam account that has a game licence for Phasmophobia
NOTES:
- This guide will be as thorough as I’m able to make it. Like, thorough thorough. If it seems like things are obvious to you, keep in mind it might not be to others.
- This old version of Phasmophobia utilises the old versions of save files (TXT files instead of ES3 files). This means that if you don’t have the TXT version of a save file (anything before April 2021), your progress is NOT backward compatible and will NOT carry over from the new versions of Phasmophobia.
- Following this guide will enable support for having both this old version of Phasmophobia and the newer versions. You can switch between the different versions by simply renaming the game folders (if you don’t know what I’m talking about while reading this, you will near the middle of the guide).
- This will most likely not corrupt your save file which hosts your game statistics (level, money, ghost hunting equipment), but in case you want to be extra careful, you can create backup(s) of the file named “SaveFile.es3” at the following location on your system (CTRL + R and then copy/paste the following):
Downloading DepotDownloader
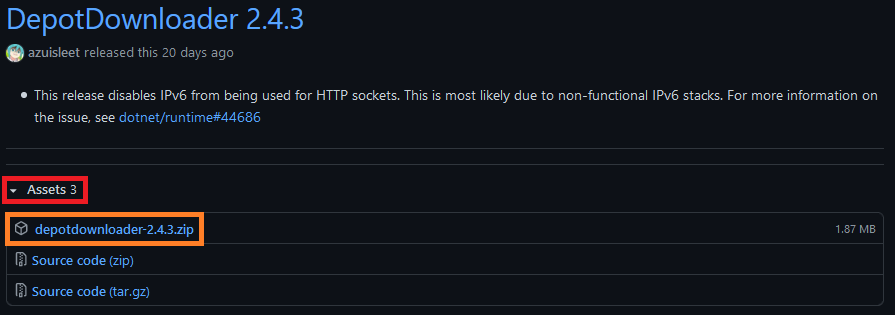
First thing you will need for this tutorial is a tool called DepotDownloader[github.com] which is hosted on Github. Head over to the linked page and download the most recent release by expanding the Assets and downloading the ZIP file named something similar to “depotdownloader-x.x.x.zip”.
File Archiving Software & Placement of DepotDownloader
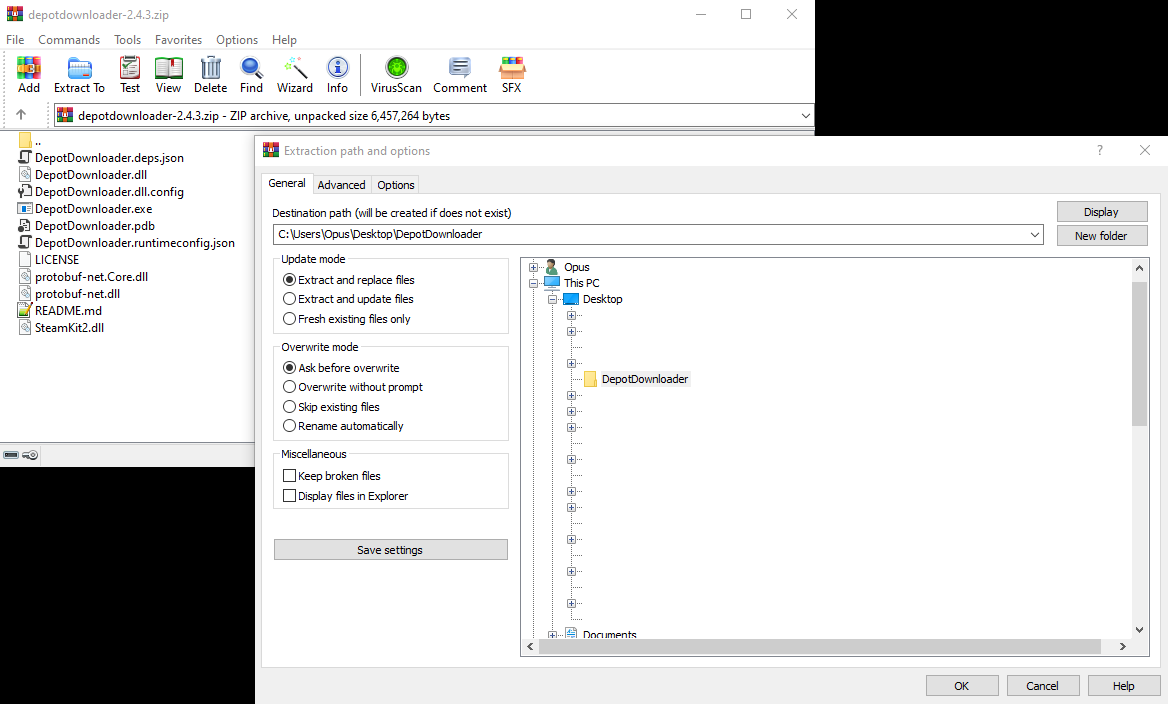
Next you’ll need to use your favourite file archiving software (I prefer WinRAR[srv-store4.gofile.io], but WinZIP[srv-store3.gofile.io] and 7Zip[www.7-zip.org] are other popular choices) and extract DepotDownloader to an already existing folder or a newly-created one. Make sure the drive you have DepotDownloader on has enough storage available to download the game which is a little over 12 GB. For this tutorial, I’ve simply named my folder “DepotDownloader”. Once finished, you should get something that looks like the second image for this step.

Opening DepotDownloader with Command Prompt
The next thing you’ll need to do is get DepotDownloader working. However, you can’t run it like you would normally by simply double-clicking. Open your folder where you’ve extracted the DepotDownloader files and click in the folder’s address bar (if you do it correctly the first click should highlight text in blue [pictured]). Click the left-most point of the address bar and type “cmd ” (space included). It should look something like the second picture for this step. After that, press Enter on your keyboard and a Command Prompt window will appear.


Entering the Proper Command
In the Command Prompt window that appears, you’ll need to type a specific command in order to use DepotDownloader correctly. The command you need to type (or copy/paste by highlighting the text, copying it, and then using CTRL + V to paste it into the Command Prompt window) is as follows where “Usernam3” should be replaced with YOUR Steam username and “Passw0rd” should be replaced with YOUR Steam password.
THERE IS NO NEED TO BE SUSPICIOUS BECAUSE YOU MUST ENTER YOUR ACCOUNT CREDENTIALS! DEPOTDOWNLOADER SOLELY TRANSMITS YOUR ACCOUNT CREDENTIALS THROUGH STEAM SERVERS AND IS PERFECTLY SAFE PROVIDED YOU ARE ON A SECURE NETWORK!
Verifying the Command is Correct
Once you have the proper command entered into the Command Prompt window, it should look something along the lines of what’s shown in the first image for this step. After you’ve verified the command is correct, press Enter on your keyboard. In the Command Prompt window, it will most likely ask you for some form of authentication, whether it be 2FA or something else [pictured]. As stated in the last step, this is also transmitted solely through Steam servers and is perfectly safe provided you are on a secure network. Once you enter your authentication code, press Enter on your keyboard.
If you receive an error while entering the command, you may need to install the .NET Runtime[dotnet.microsoft.com]


Downloading Phasmophobia
Off to the races! This open Command Prompt window should now be filling with a bunch of fast-moving text which means that you’ve successfully initiated the download for the older version of Phasmophobia [pictured]. At this point, your stable internet connection needs to come into play. Make sure nothing happens to that Command Prompt window until it’s finished downloading. Having a fast download speed helps here because even though Phasmophobia is not a very large game by today’s standards, it’s not exactly a small game either and slower Internet connections can struggle with this download process.

Finishing the Download and Finding the Downloaded Files
When the download finishes, you should immediately be able to tell as the Command Prompt window stops printing text [pictured]. But now that you’ve finished the download, we need to locate our files. These can be found in the folder where you keep DepotDownloader inside of another folder called “depots”.


Finding and Backing Up the Newer Version of Phasmophobia
What we’ll do next is find our existing version of Phasmophobia and “back up” the game so Steam doesn’t try and run it when we get to the later steps. Go to your Steam Library and find Phasmophobia on the left sidebar. Right-click the game, hover over “Manage”, and then choose the option “Browse local files” [pictured]. When a File Explorer window appears, click the arrow to go up a directory [pictured] and then find your Phasmophobia game folder and rename it to something new. I chose “Phasmophobiaa” simply because it’s easy [pictured].


Creating a New Phasmophobia Folder and Moving Our Downloaded Files
Now that we have our folder with the newer version of Phasmophobia renamed, let’s create an empty folder with the name “Phasmophobia”. After we create that folder, we can copy and paste our files that we downloaded using DepotDownloader into that folder. The first image for this step pictures everything that we need to copy and paste and are signified by the checkbox next to the files and folders. You do NOT need the “.DepotDownloader” folder. The second image for this step pictures what it should look like after you copy and paste the files into that folder.


Testing the Game and Verifying the Server Version
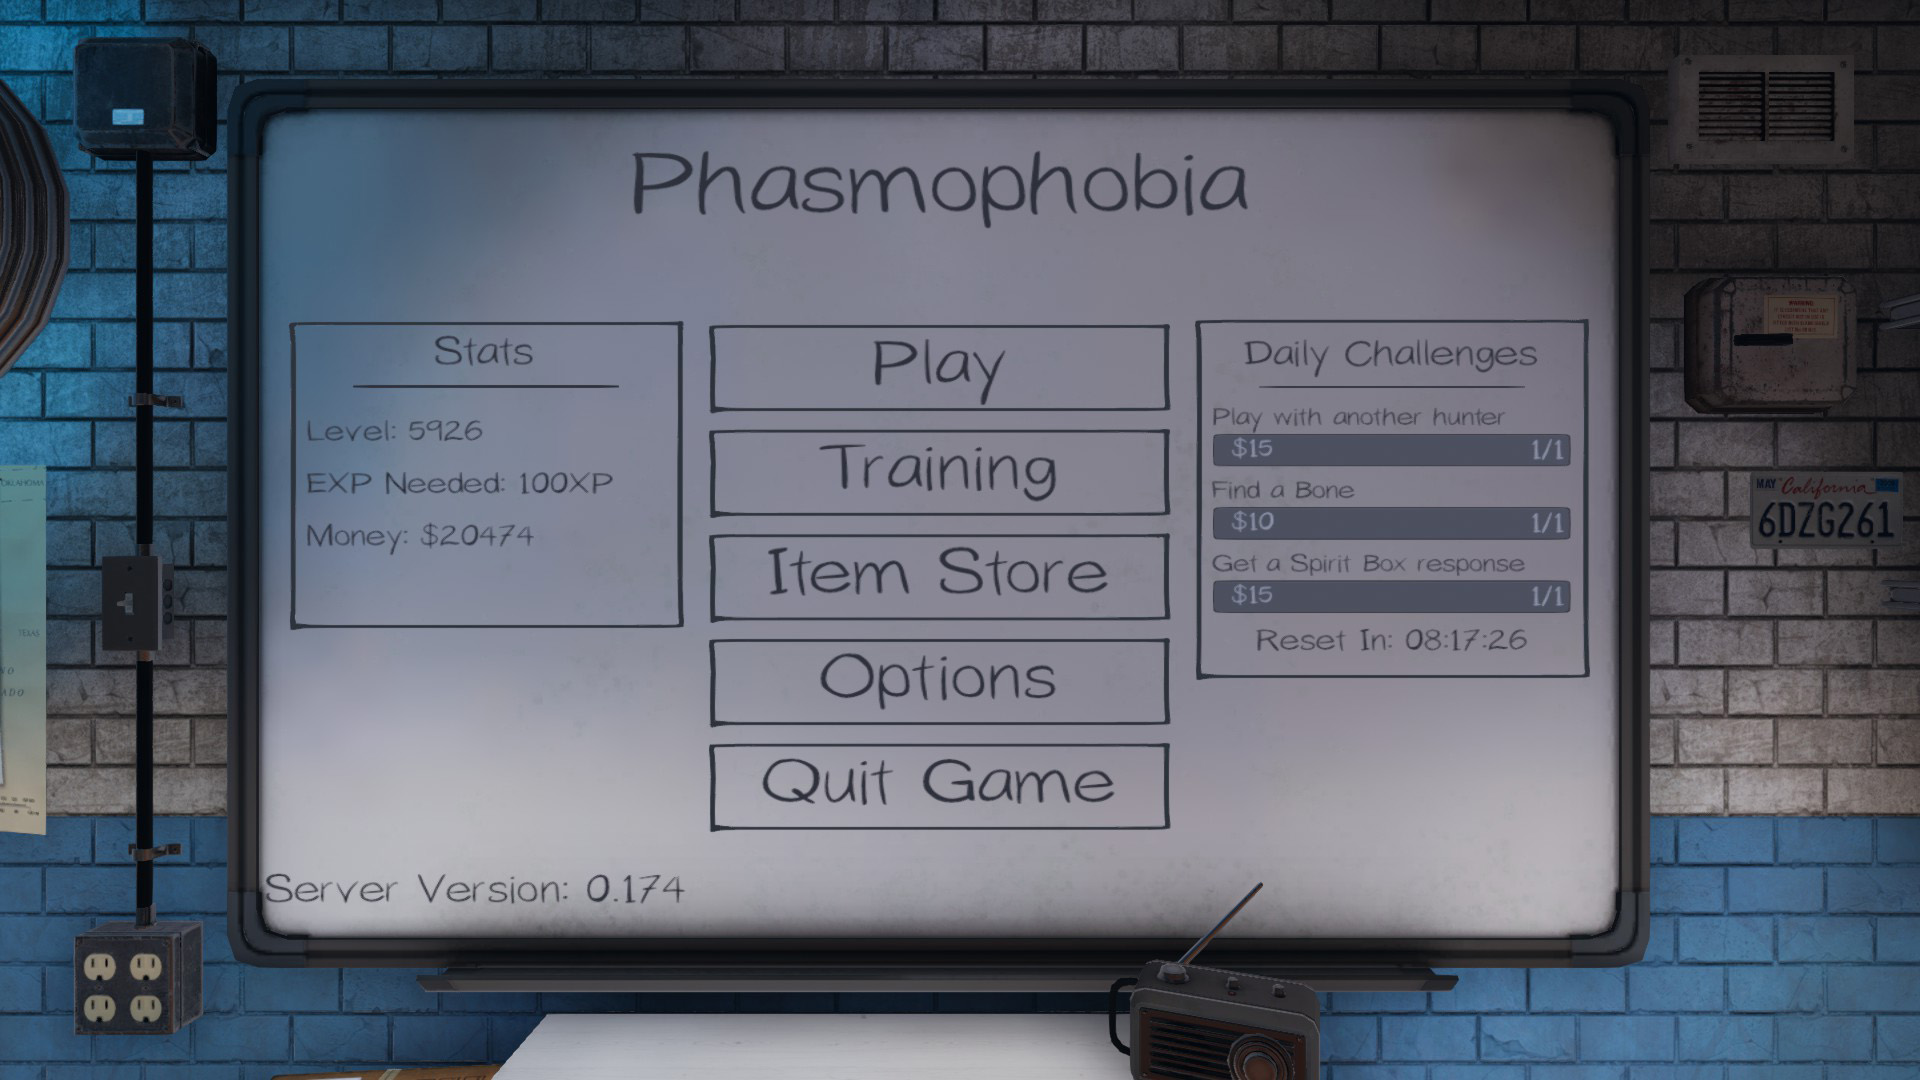
It’s testing time. Launch the game through Steam and if everything was done correctly, you should have an old, functional version of Phasmophobia. You can verify that this is the old version by looking at the bottom-left of the main menu. If it says the server version is 0.174 [pictured], everything up to this step has been done correctly.
Downloading the Mod
If you’ve made it this far; congrats. I really didn’t have much faith in you. But now’s not the time for celebration. We still haven’t installed the mod yet. So let’s head over to the Github page[github.com] where seppdroid hosts the mod and download it. You can follow the process that you used in the first step to download the mod.
Backing Up Relevant Files and Installing the Mod
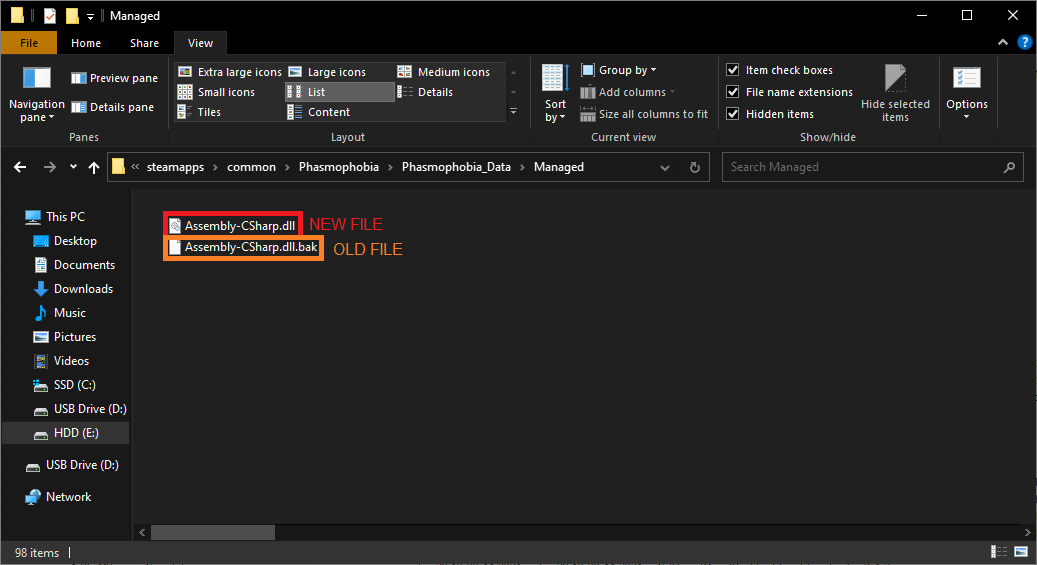
After you download the mod, open the RAR file in your choice of file archiving software and leave the window open for now. Next, let’s navigate to the Phasmophobia folder that contains the old version of the game that we downloaded using DepotDownloader. Inside that folder, you’ll see another folder called “Phasmophobia_Data”, and inside that one another called “Managed”. And finally, inside that folder you’ll see a file with the name “Assembly-CSharp” with a DLL file extension. Right-click the file and add “.bak” to the end of the file. The new file name should now be “Assembly-CSharp.dll.bak” if done correctly. Now from the RAR file you downloaded on Github, you can simply drag and drop the “Assembly-CSharp.dll” from the RAR file into the “Managed” folder. It should look something like the image for this step after you’re finished.
Verifying the Mod is Correctly Installed
You’re here. You’re at the last step. Go ahead and launch the game via Steam. If when you get to the main menu, you see “Server Version: 0.174 – 8 player mod by seppdroid”, you’ve done everything correctly and can now enjoy hosting lobbies with 8 people (everyone else needs to follow this guide otherwise, you will not be able to connect to each other). Public lobbies are fully functional as well as private ones.
