Overview
I’ve tried a lot of other guides on how to map a HOTAS to this game but this is the only method that has worked for me. I have a t1600m and an FCS throttle. Credit to Reddit user u/AntaressSQ01 for the first part of the guide. This uses the UCR program and a virtual driver to map your HOTAS to the virtual gamepad that is recognized as a separate 360 controller.
Initial Setup
The 2 programs that you will need are:
UCR: [link]
ViGEm driver: [link]
Download the driver from the github page and follow the on screen instructions.
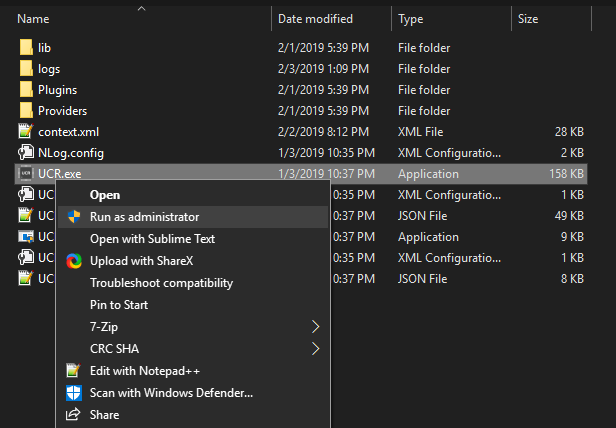
Download the most recent UCR version and extract to your chosen directory. Launch the UCR.exe file to start the process.
If you have the same setup as me, with the T1600M and TWCS throttle, here’s the config file if you don’t want to set it up on your own: [link]
NOTE: The contents of this guide is slightly outdated, newer versions of UCR and ViGEm have been released and might be more or less stable. I have not experimented with them so I’m not going to be of any help if you need assistance.
Mapping the HOTAS
This is by far the most time-consuming process and is quite tedious, so get a cup of coffee and some good music because this will take a while. And a word of caution, the UCR program crashed quite a bit for me, but it does allow saving so save often. It also didn’t launch from the start menu so always open the program in administrator mode and from the directory that you installed it from.
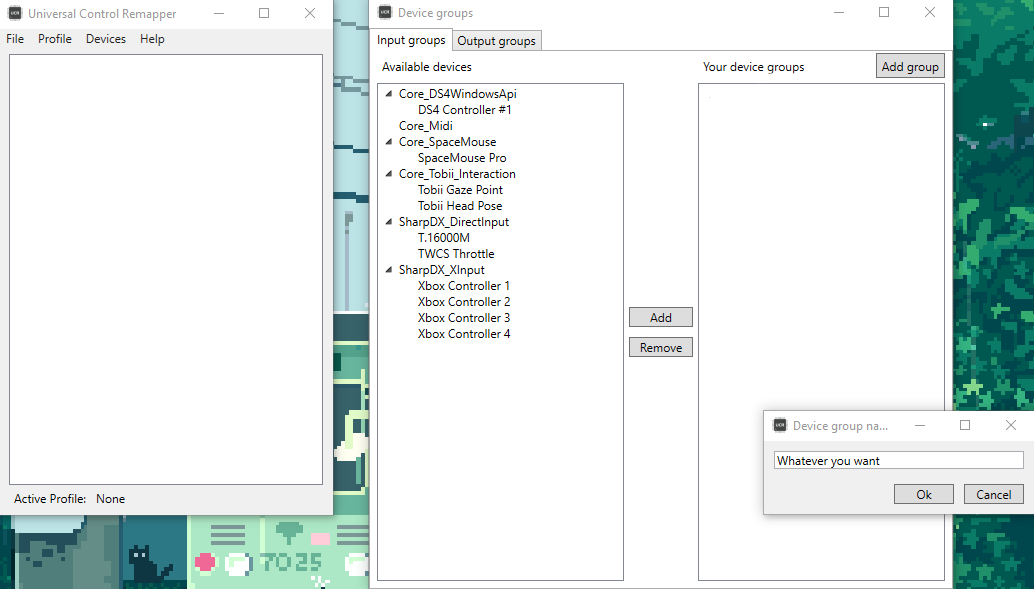
- Once you have UCR open, click on the Devices tab and then click on Manage Device
Groups.
- Then on the Input Groups tab, click on the Add Group button and name it whatever you want.
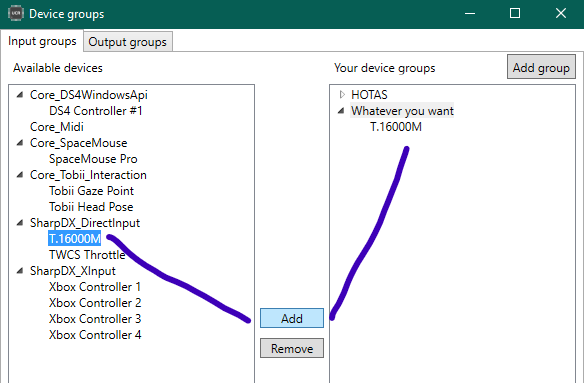
- Then under the device list on the left, click on the Devices that you want to map, and then click on the add button.
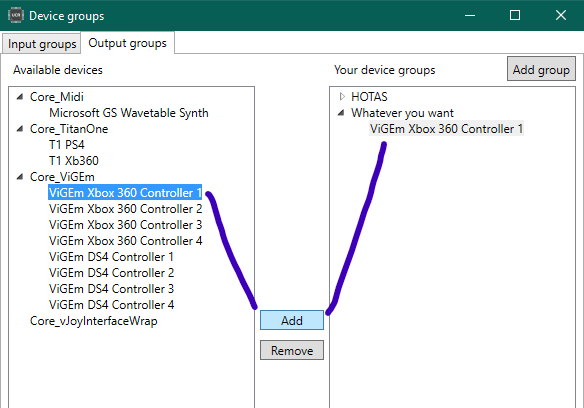
- Then go to the Output Groups tab and create another group and name it whatever you want (Preferably the same as the input group to make it easier to remember in the future).
- Add the ViGEm Xbox 360 Controller 1 to the new output device group that you created in the previous step.
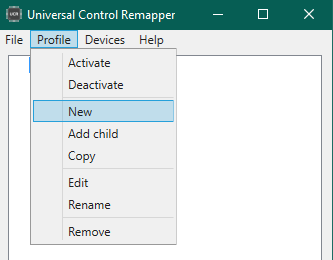
- Go back to the main window and click on the Profile tab. Then click on the New button. In the box that opens, name the profile whatever you want and then in the Input Group and the Output Group categories, choose the ones that were created in the previous steps.
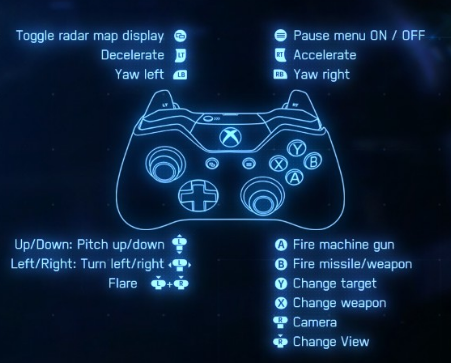
- Now you need to add the actual inputs to your HOTAS. I’d recommend getting a picture of the controls in game and then planning out each button on your HOTAS that you want to map it to.
For every button, you will need to press the Add button and add the corresponding bind to that, only add the buttons that you want to use in the game.
- Next is the actual mapping, I’m going to go over the basic types that I used for my mapping.
Axes to Axes: This is a type of keybind that allows you to bind 2 axis inputs to 2 axis outputs, this means that if the controller has a variable input like a joystick that moves from side to side in the X direction (left-right) or in the Y direction (up-down), it can be bound to the left or right stick x and y directions. (I’d recommend using the Axis to Axis as I had problems using this method for certain keybinds)
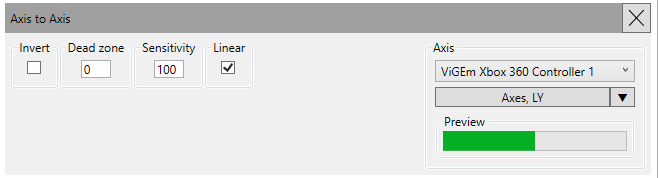
Axis to Axis: Type of keybind that allows you to bind one direction of an Axis input to an Axis output. You can map a one-directional movement of a joystick to the up and down motion of the left or right stick.
Axis to Button: Allows you to map an axis input on your controller to 2 buttons on the gamepad. For this, I mapped my twist grip to the LB and RB buttons for the yaw and adjusted the dead zone to feel comfortable to me.
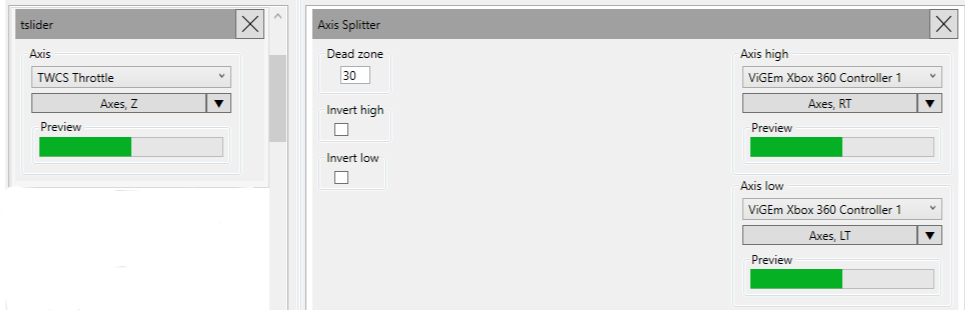
Axis Splitter: You want to use this for splitting one axis on your HOTAS into 2 on the controller. This is useful for the Throttle as you have a single throttle stick whereas on the Xbox controller the Acceleration is RT and Deceleration is LT (both are axes).
Button to Axis: The opposite of Button to Axis.
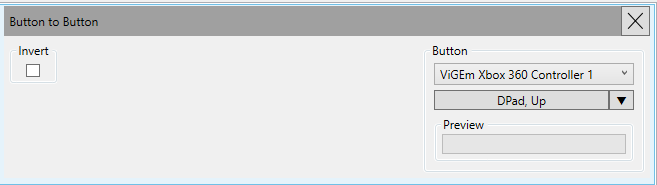
Button to Button: Allows you to map buttons on your HOTAS to buttons on the gamepad like A B X Y.
- Now for each input that you’ve mapped for the HOTAS, you need a plugin for each output to be mapped to the virtual controller. This is the longest part of the entire process.
For the DPAD, I used a button to button setup so that on my pov switch I could map that to up, down, left, and right. If you’re like me and have too many POV’s and hat switches to know what to do with, I double bound them so that I could use one on the throttle and one on my stick as well. You can overlap controls no problem.
(Just repeat the button setup for every dpad input with the corresponding output)
For the stick itself, Instead of doing an Axes to Axes, I did an Axis to Axis on 2 different controls because that allowed me more control over dead zones and was a little wonky in game when I used Axes to Axes.
For RT and LT, I used the Axis Splitter so that my throttle slider would work as intended. If you have something similar to that, I’d recommend using a dead zone of 30 since that’s what felt right to me.
For the Right Stick, I had a stick on the back of my throttle that worked as an axis, if you don’t have something like that, I’d recommend using the Button to Axis to map a POV or 8 way Rocker so that you can look around during combat.
- The final step is to save your controls that you’ve now bound and mapped to the virtual gamepad and go to the main window. In the main window, select the Profile that you have mapped, then click on the profile tab and click Activate Profile. You’re done with the hardest part now.
If any of this doesn’t feel right, you can always change the controls during the game. Just deactivate the profile, edit the settings and reactivate it.


Making it work with AC7
If you’ve tried launching the game with the profile activated, you might have noticed that it didn’t work. This is because AC7 only recognizes certain specific gamepad/HOTAS setups. This means you’re going to have to make the game recognize the virtual controller as an Xbox controller. Luckily you can do this through steam natively with Big Picture mode.
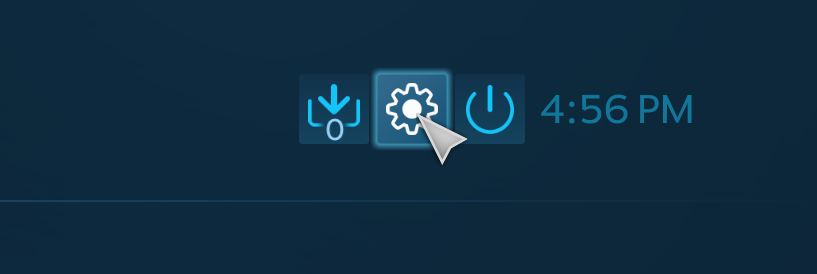
- First, navigate to steam and press the View tab in the upper left. Go down to the Big Picture Mode button and click it. This will open steam in its full-screen mode.
- Then once you’re in the Big Picture Mode, navigate to the upper right and click on the gear icon.
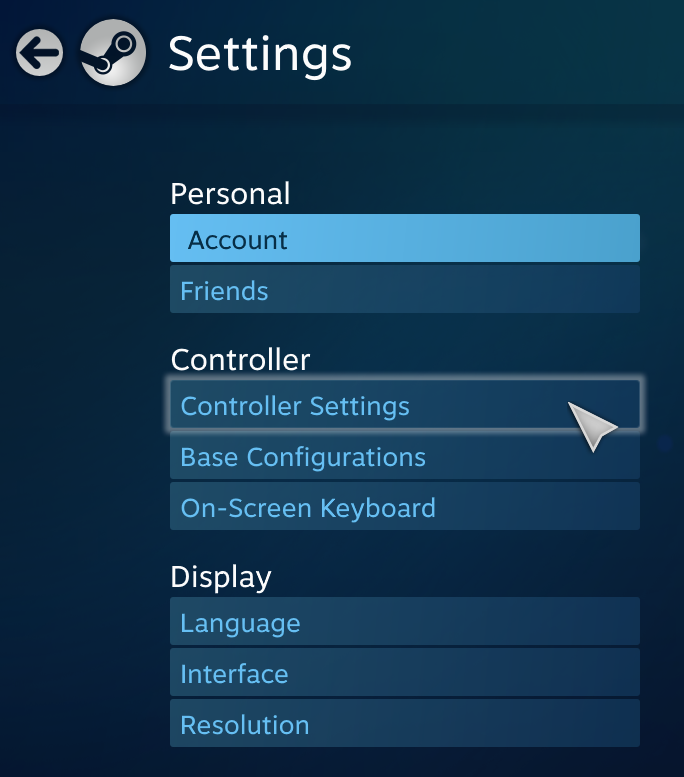
- Then Navigate to the controller section and press the Controller Settings button.
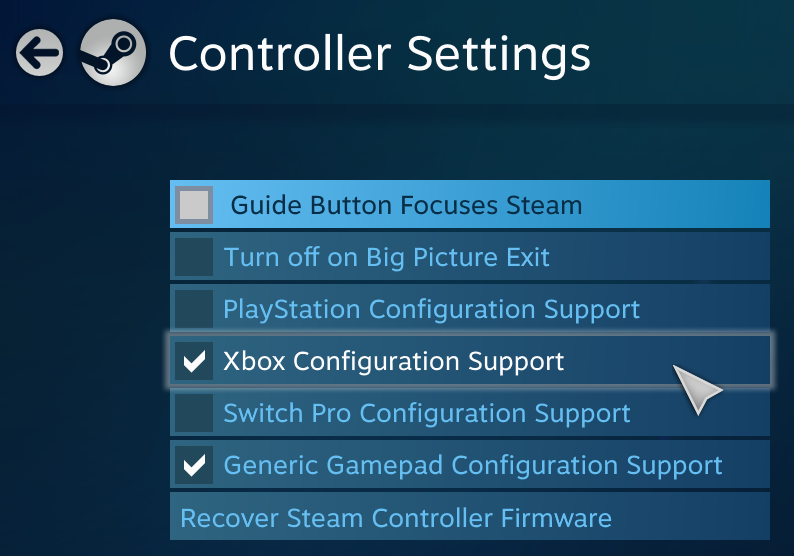
- Once you’re in this menu, check the Xbox Configuration Support and the Generic Gamepad Configuration Support tick boxes.
- Launch the game through steam big picture mode.
And that’s it, you can now play Ace Combat 7 with any HOTAS you would like. Make sure to always have the UCR program with the activated profile open when playing with the HOTAS virtual controller as it will not work without it. Have fun guys, I hope you enjoyed or used this guide and it worked for you 🙂