Overview
Contraptions built specifically for racking up stats for certain achievements, and guides to build your own if you so choose!
Overview
This guide is made to help you with the more time-consuming achievements. Most of the achievements are self-explanatory and can be gotten simply through normal gameplay, so this guide is here as a help for the ones that require doing certain actions a certain (usually very large) number of times. Using contraptions, you can speed up this process considerably! This guide will provide you with already made contraptions (supplied via the Steam Workshop), as well as step-by-step instructions on how to build them on your own.
For each guide to an achievement, you will be provided:
- The achievement’s goal
- A link to a completed version of the contraption
- Walkthrough of how to build the contraption
This guide assumes you have some knowledge already of how the game works (and if you don’t, play the tutorial stages in the game to get acquainted). However, below I will provide a few tips to speed up the building process in the editor.
- You can quickly copy an object by right-clicking on it. Right-clicking outside of objects will bring up the “Paste” option.
- To copy/move a group of objects, drag the mouse across them to create a selection box around them. To copy them, click the orange icon in the bottom right-hand corner.
- To edit a programmable object (such as the Part Creator), left click on the object and click on the yellow wrench icon on the right.
Most of the contraptions provided by the workshop are created by me, however if any of the links go dead, in the case any of them were for some reason taken down or otherwise corrupted/removed, please let me know and I will replace it.
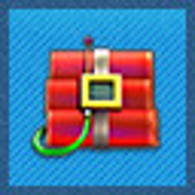
Megaton

Workshop Item: Explosions Galore!
Walkthrough

This one is very simple to set up, and doesn’t take long to rack up enough explosions to get the achievement.
- Step 1: Add a Part Creator, and plug it in.
- Step 2: Set it to create Nitroglycerin.
- Step 3: Add a play block underneath; make sure it is not too close as the Nitroglycerin will not detonate.
- Step 4: Make copies of this until you have the amount you desire; this one doesn’t need too many to be completed quickly so you don’t need to go too overboard.
- Step 5: Hit play! The Nitroglycerin will quickly drop and explode over and over.
You Monster

Workshop Item: Knocking Out Tim
Walkthrough
This is the most complicated of all of them, it may be helpful to use the screenshot as a reference as you put this one together.

- Step 1: Create a row of four Part Disposals, and plug them in (make sure there are no spaces between them and the tops of them all line up).
- Step 2: Add two (red) Conveyor Belts at angles leading down to the Part Disposals. The incline should not be too steep, and you may want them to be rather long, so you can maximize the amount of knock outs you get at once. Make sure that the conveyors end just above the disposals to make sure things will fall into them.
- Step 3: Attach Electric Motors to each Conveyor Belt, and make sure that the conveyors run inward toward the Disposals (the motor on the left should face to the left, and the motor on the right should face to the right). Plug in the Electric Motors.
- Step 4: Add walls (either from play blocks or bricks) on the outer sides of the conveyors (to prevent objects from falling off those ends).
- Step 5: This part is optional, but will speed up the process towards the achievement a bit (some lag may be caused when moving large amounts of Toolman Tim objects, so you can skip this step if you want to avoid any slow down). Create a line of Toolman Tim above the conveyors (and in between the two walls at the end), and above them, a line of Bowling Balls. This can be done quickly by copying and pasting groups of them.
- Step 6: Your last step in building, add and plug in Part Creators that make Toolman Tim above the conveyors and in between the walls at the ends. Leave spaces between them (this also can be done quickly by making one part creator, and copying and pasting it). Above these (above the spaces), add and plug in Part Creators that make Bowling Balls. If you have enough room, you can make more Bowling Ball Part Creators above those, as long as the Bowling Balls have room to fall all the way down.
- Step 7: Hit Play! The Bowling Balls and Toolman Tims will continuously fall down and get bonked on the head, eventually earning enough for the achievement!
Zombie Hunter

Workshop Item: Killing Zombies
Walkthrough
Use the walkthrough for You Monster to build this one, but with the following changes:

- You will only need one Part Disposal in the center, rather than four;
- replace Toolman Tim with Zombie Toolman Tim;
- replace Toolman Tim Part Creators with Zombie Toolman Tim Part Creators (make sure they are high up from the conveyors);
- and you won’t need any Bowling Balls, so replace your line of Bowling Balls with Zombie Toolman Tims and your Bowling Ball Part Creators with Zombie Toolman Tim Part Creators.
The falling zombies will be killed when they hit the conveyor belts! The disposal is there in case any make it to the center and to prevent lag caused by too many objects being on the screen at once.
15,000 seems like a lot, but if you have enough Part Creators it goes quite quickly (the lines of zombies at the beginning help speed things up, too)!
Fun Ruiner

Workshop Item: Popping Balloons
Walkthrough
This is another simple one to put together, and doesn’t take too long to reach the goal.

- Step 1: Add a Part Creator, plug it in, and set it to create Balloons.
- Step 2: Add three pins underneath the Part Creator (make sure there is signifcant distance between the Pins and the Part Creator), and rotate them so they face upward.
- Step 3: Add an Anti-Gravity Pad undeneath the Part Creator and the Pins, and make sure its area of influence (marked in green) extends all the way to where the Balloons will be created.
- Step 4: That’s it as far as any real building goes, from here all you need to do is make as many copies as you’d like. The more copies, the faster it will go! Just watch out for creating lag by adding too many.
- Step 5: Hit Play! The Balloons will be created and dragged downwards into the Pins, popping them.
Bounce It

Workshop Item: Super Fast Dribbling
Walkthrough
This is the very easiest of these to get! 10,000 seems like quite a bit, but the Basketballs bounce very, very fast, so it adds up very quickly (especially if you turn up the speed)!

- Step 1: Add a Mechanical Trampoline.
- Step 2: Add a Basketball.
- Step 3: Make a few copies of this.
- Step 4: Add a Play Block and extend it across all your trampoline/basketballs. Make sure you have all of your trampolines/basketballs at about the same level, and keep them all close together (check the screenshot for reference).
- Step 5: Hit Play! The Basketballs will bounce over and over very, very quickly, so you don’t need many to quickly hit 10,000 bounces!
I Would Walk 500 Miles/But I Would Walk 500 More


Workshop Item: Hamster Workout
Walkthrough
This one is very simple to set up, but may still take quite a bit of time to reach the goal(s). In fact, this one takes the longest out of all of these! Be prapared to have some patience.

- Step 1: Add a Hamster Cage.
- Step 2: Add a Mechanical Trampoline underneath.
- Step 3: Add a Tennis Ball above the trampoline but under the Hamster.
- Step 4: Make copies of this. You’re going to want a lot, because this one will take awhile.
- Step 5: Hit Play! The Tennis Balls will bounce repeatedly, causing the Hamsters to run indefinitely.