Overview
In this guide, I will explain you how to spawn any NPC using the console, but with the skin you want (enough of that gasmask grunt !). Then we’ll also see how to create squads.
Create the NPC you want.
We will spawn for example, a grunt with the balaclava.
Don’t forget to activate “Notarget” and “Noclip” cheats before, otherwise the bad guy will shoot you as soon as you create him 🙂
First thing you have to do is spawn a grunt, using the console command you probably already know :
give monster_human_grunt
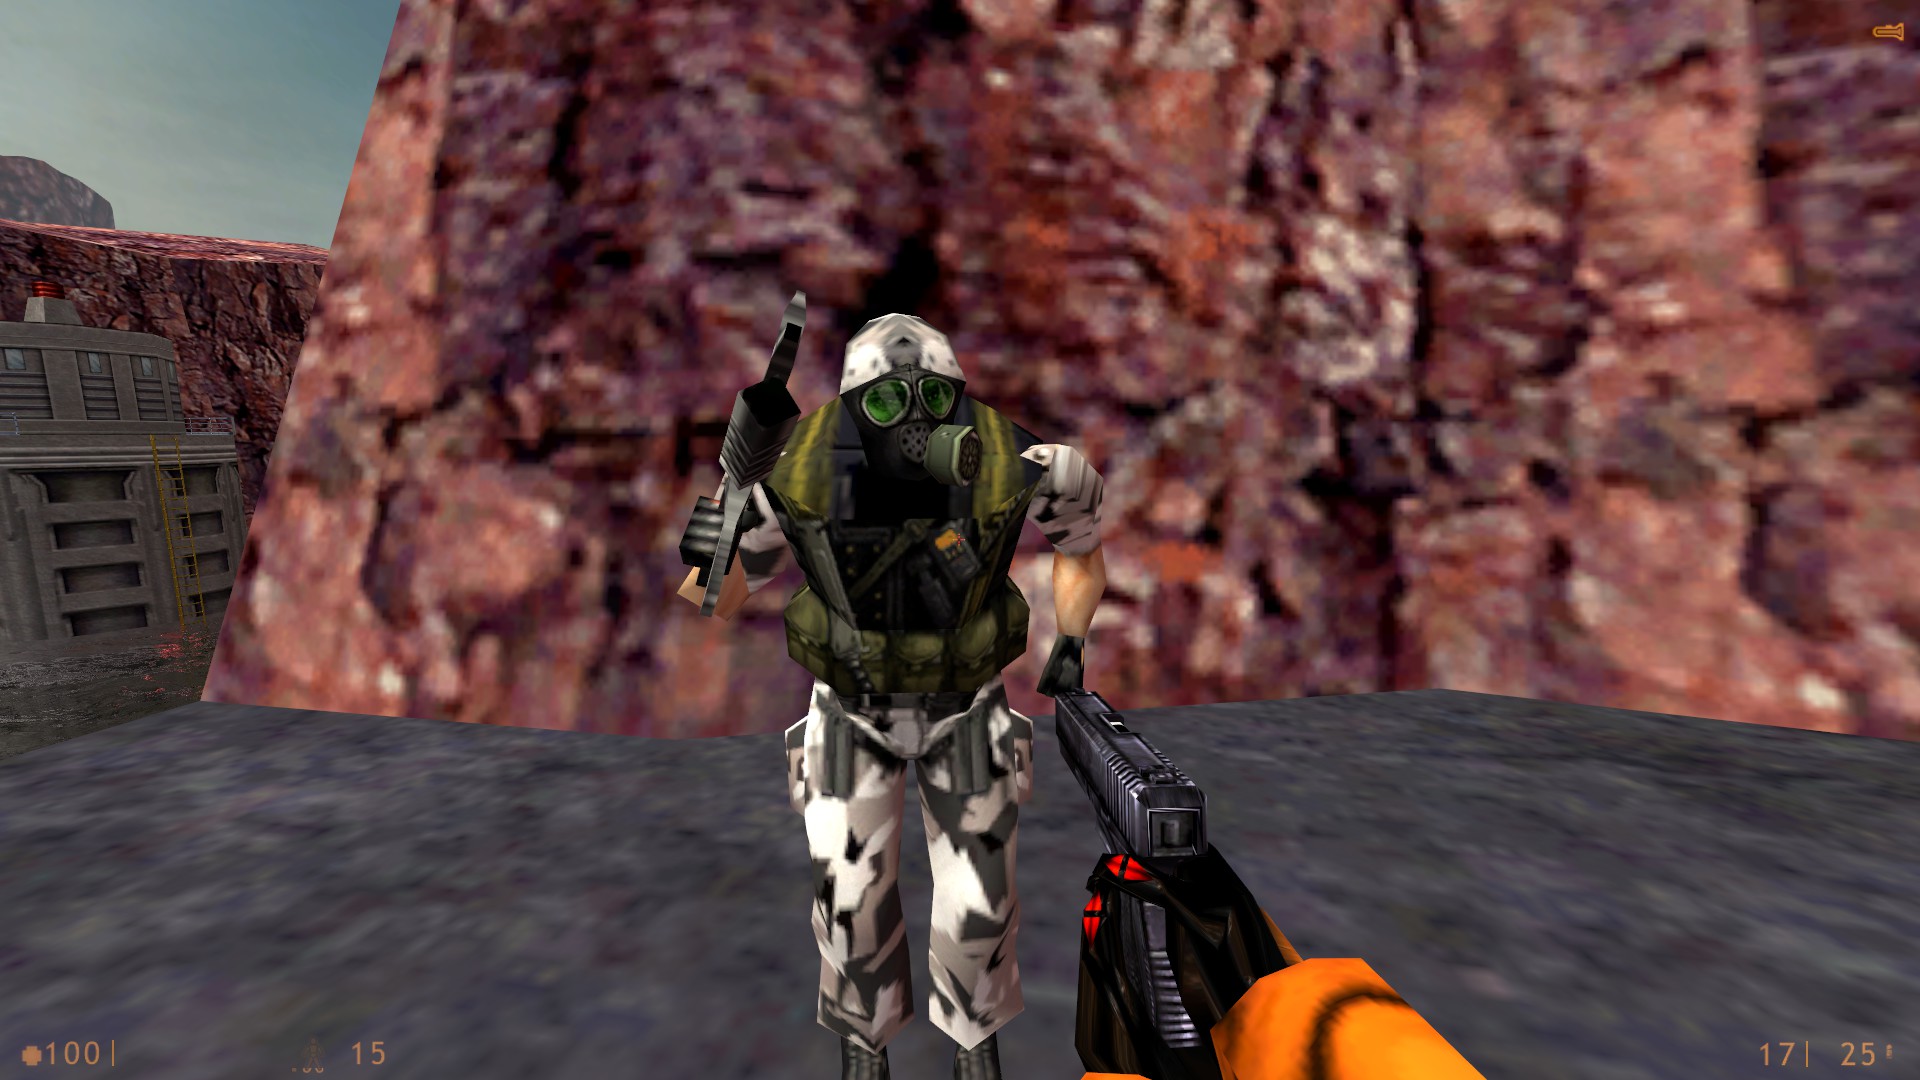
This done, the grunt will spawn under where you are standing. (that’s why you must use noclip)
Obviously, he’s not the guy we want, he still has that annoying gasmask face !
So, to change his face, we will have to give him a name (to make him “unique” from the other grunts we spawn) using the following command while aiming the grunt:
ent_setname X
Here, “X” is the name of the grunt. In our case, we will simply name him “grunt1”. That gives us:
ent_setname grunt1
Now our grunt has a name, he surely feels unique … Let’s change his face with the following command:
ent_fire X setbodygroup Y
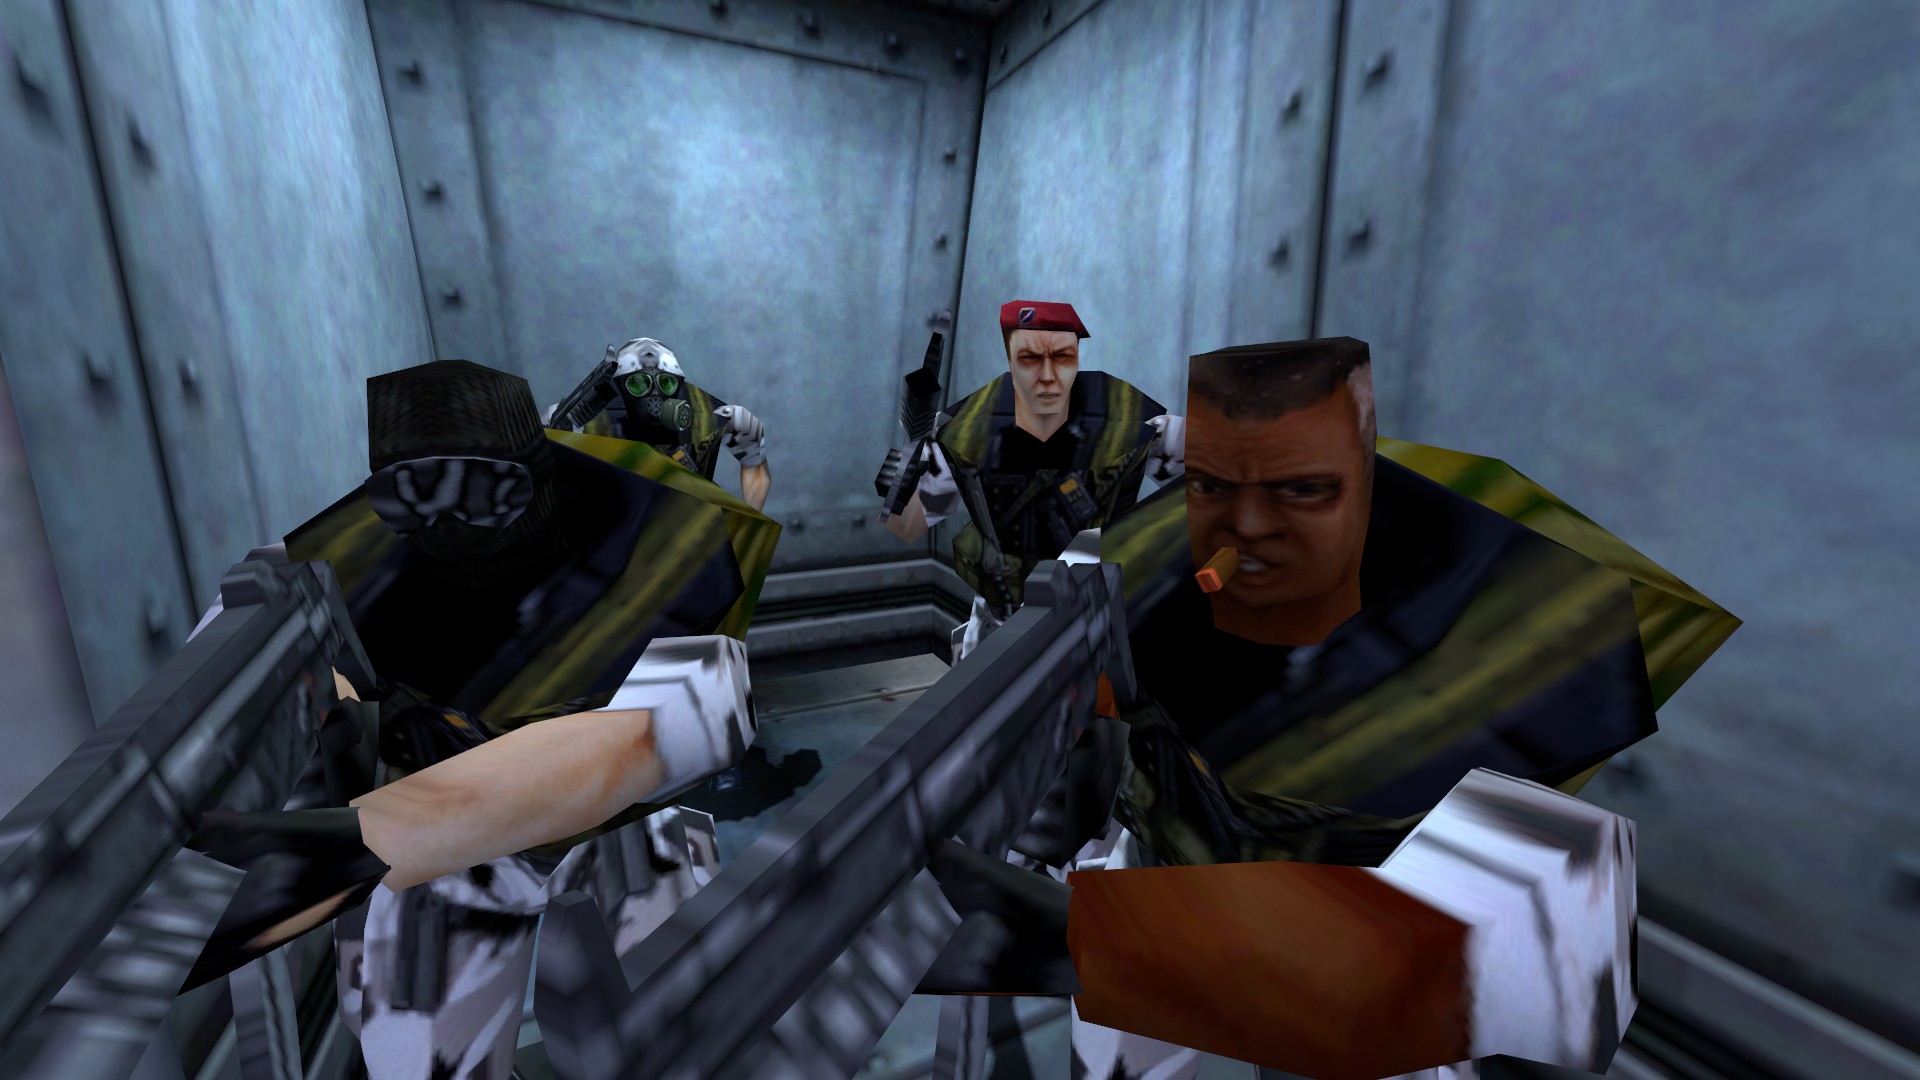
In this command, “X” stands for the name of the NPC (“grunt1”, remember ?) and “Y” is the number that corresponds to the skin. For instance 0 is the grunt with gasmask, 1 is the red beret, 2 the balaclava, 3 the guy with the cigar. Now speaking of balaclava, here’s the command for our example:
ent_fire grunt1 setbodygroup 2
And here he is ! Our grunt with balaclava is ready to kill some xen aliens !

Notes:
- the “setbodygroup” console command sets the grunt appearance, and the weapon. For instance, 0 is the gasmask guy with a machinegun, and 5 is the same gasmask guy, but with a shotgun. The problem is that he only has a shotgun skin, but he will fire machinegun rounds. I didn’t find how to make the grunt use a shotgun.
- You can also change scientists appearance. Obviously, it doesn’t change anything for barney, as he only has one face.
- It won’t work for the original Half-Life game. Yet I guess it works for any Half-Life: Source mods. I tried it with a total conversion for HL:S called “Heart Of Evil: Source” and it also works.
- Do not forget, in order to give a name to your NPC, YOU MUST write the console command “ent_setname X” while aiming at him ! Otherwise it will not work.
- When you change your NPC’s face with the second command “ent_fire X setbodygroup Y”, you don’t need to aim at him anymore.
Create a squad.
Now that we know how to create different kinds of grunts, we will see how to group them into squads.
We will continue our example, with our friend : “grunt1”.
First thing, we will create him a squad mate. So let’s create another grunt using the command we saw before:
give monster_human_grunt
Now we have two grunts.
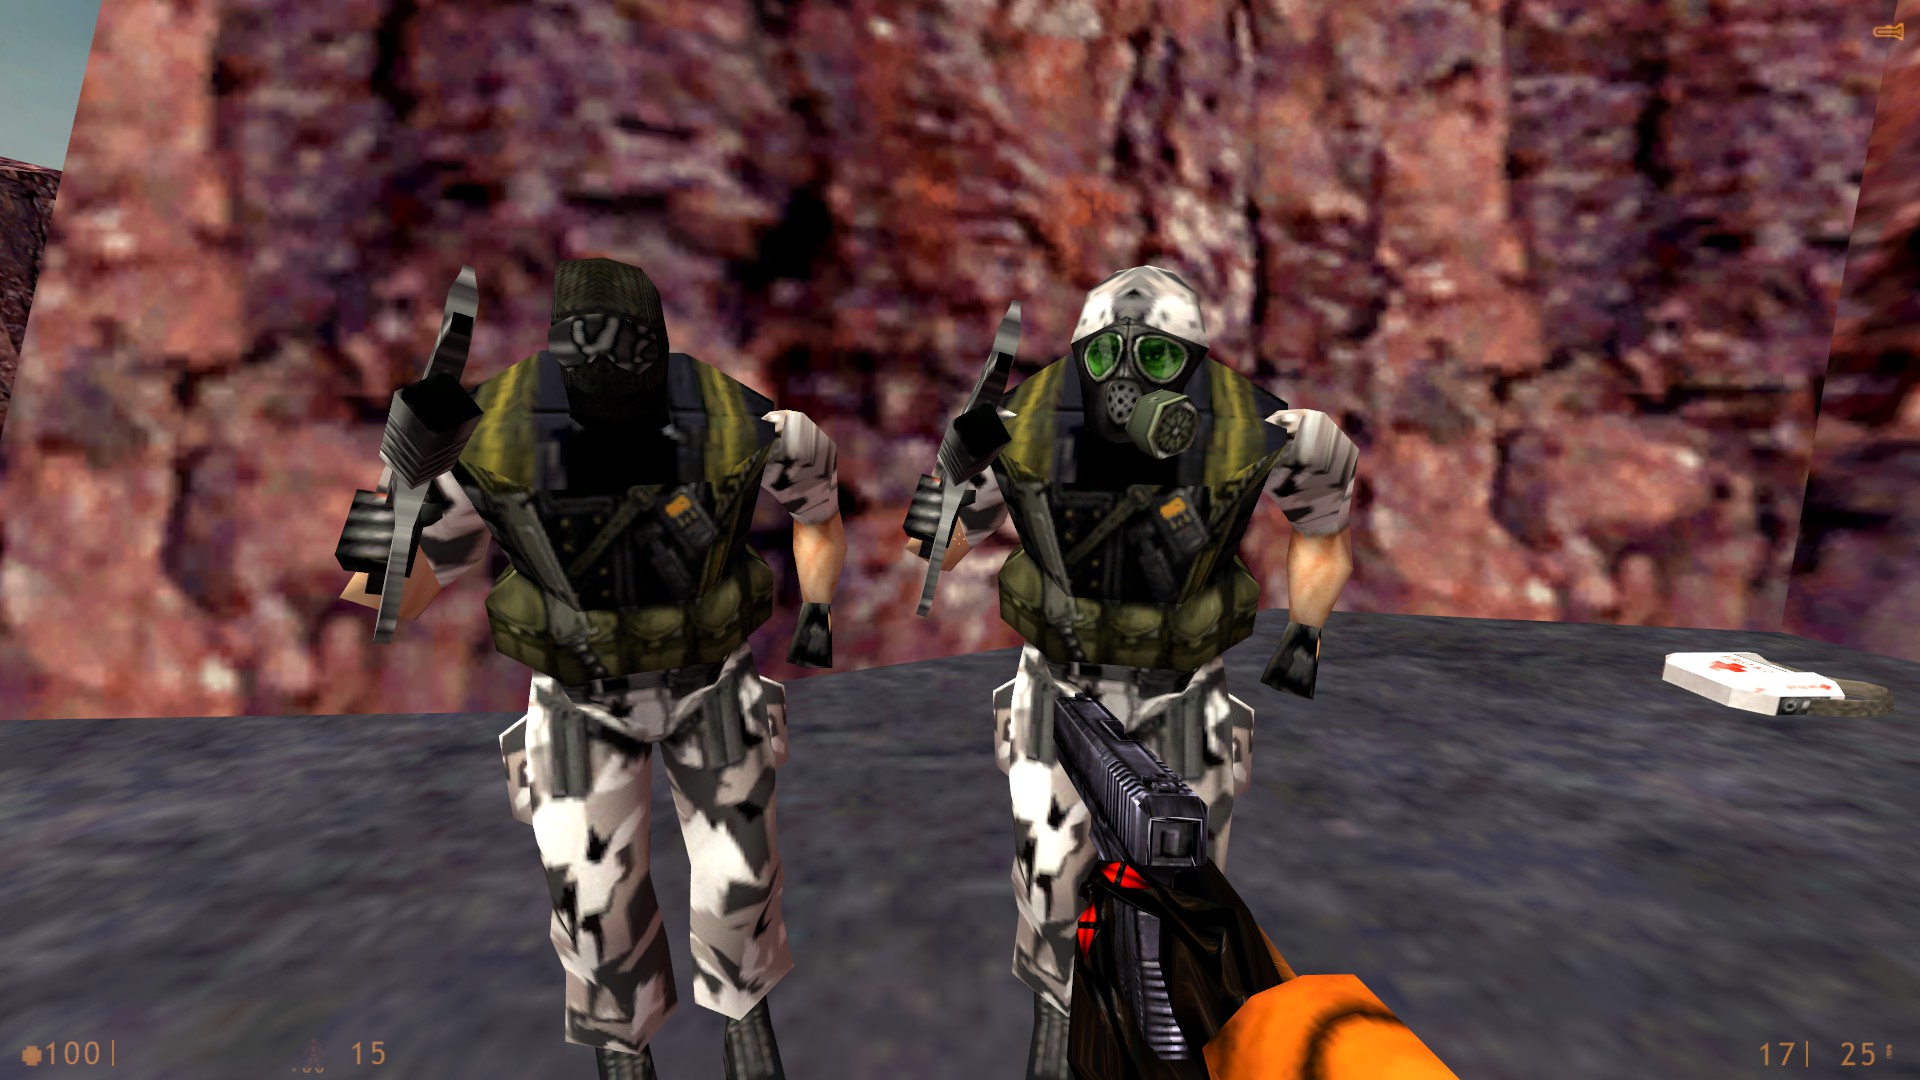
As we saw before, we will have to give the second grunt a name too. I’ll name him “grunt2” in our example. This gives us the command :
ent_setname grunt2
Now we have two grunts, each one with their own name: “grunt1” and “grunt2”.
You can also change “grunt2” appearance if you want, but for our example, we’ll keep a gasmask guy.
Let’s make a squad with those two guys using the following command:
ent_fire X setsquad Y
Just like in the “setbodygroup” command we saw before, here “X” stands for the name, and “Y” stands for the number of the squad. Here is the command for our example:
ent_fire grunt1 setsquad 1
Now “grunt1” belongs to the squad number one. Let’s add the second grunt :
ent_fire grunt2 setsquad 1
Done ! “grunt1” and “grunt2” both belong to the squad “one”, meaning if one is attacked, the other squad members will help him. They also communicate if they see an enemy.
Notes:
- You can add as much members you want in a squad.
- As the other commands in this guide, it will only work for Half-Life: Source and source mods.
- Unlike the original Half-Life, in HL:S there are no squad leader, any squad member will give orders and communicate with others.