
Overview
Ever since I got Banished, I’ve looked over the Community Hub a lot. I’ve read threads, looked at other peoples screenshots, reading a few guides. That sort of thing. However, the most common thing I’ve seen over my months of gameplay are things like ‘My town keeps dying in the first 5 years!!’ or ‘My people keep starving!’ ‘Please help! This game is so hard! I can’t survive!’. I have a world that is pretty successful. Year 100, population over 1,000, a bunch of recources, etc. I will admit I had two or three worlds that failed before I got this success. But unfortunately it seems a lot of people haven’t been as fortunate as I have. I have decided to create this guide to help new comers, frustrated players, and unsuccessful users survive in Banished.
Creating your world
To start off I will tell you what I prefer my world to be. I would like to point out that this section is NOT a necessity. It is simply my prefered world conditions.
First off, I prefer to have a Large world simply because if I am successful I don’t want to be stopped by map bounds. I learned this the hard way. For climate I choose Fair weather. Why? Because I want to make a few bumps in the road simply because if I didn’t the gameplay would be less enjoyable for me. But on the other hand I also don’t want to make it too hard for me. I also like Mountains enabled because it just gives more places to put mines in and also variation in the layout. Disasters I keep on. Again, I like the bumps in the road. Keeping it exciting instead of boringly easy. Last but not least, starting conditions. My personal preference is Medium. Medium starting conditions give a few families, two seeds, no houses, and a good amount of resources. I don’t choose Easy as Easy mode gives you four or six houses, animals, seeds, a larger amount of people, and a large amount of resources. I don’t choose Hard mode because Hard gives me a small number of people, no seeds, very small amount of resources, etc. So Medium starting conditions it is.
Note: This guide will be based off of the starting conditions listed here. For complete understanding I suggest to follow use these conditions. However, I do believe it is possible to reference this guide despite the fact that you didn’t follow this section of the guide by the letter.
Starting Your World and Resource Gathering Facility
Now that you’ve set all your conditions, named your world, and put in a seed, it’s time to start playing. I’d suggest getting a minimap, an event log, a resources list, and work list (unofficial titles). I prefer to play on speed 10x. But If you’re new or still getting into Banished I’d suggest speed 2x or 5x.
Using the pause mechanic (or pressing space on your keyboard) is a big help. While you’re trying to figure out how your town layout is going to be, don’t waste precious time. Pausing is good for also laying down multiple construction sites. I highly recommend pausing especially if you’re playing on 5x or 10x. It greatly helps you and your town to coordinate.
When you first start your world you’ll want to get resources. First off clear out an open plain of space no more than 20×20. When your villagers clear that out you’ll have a place to work. Make around 4 – 6 houses in order to fully shelter your entire starting population.
After that, create something I like to call a ‘Resource Gathering Facility’. What is a Gathering Facility? It’s a small bunch of buildings consisting of a Gatherers Hut, a Hunting Cabin, a Herbalist, and a Forester Cabins. In order to do this properly you’ll have to find an area not too far away from your original town. Preferably somewhere where you won’t be planning on expanding. The ideal area is a place where there is a lot of trees.
Examples:
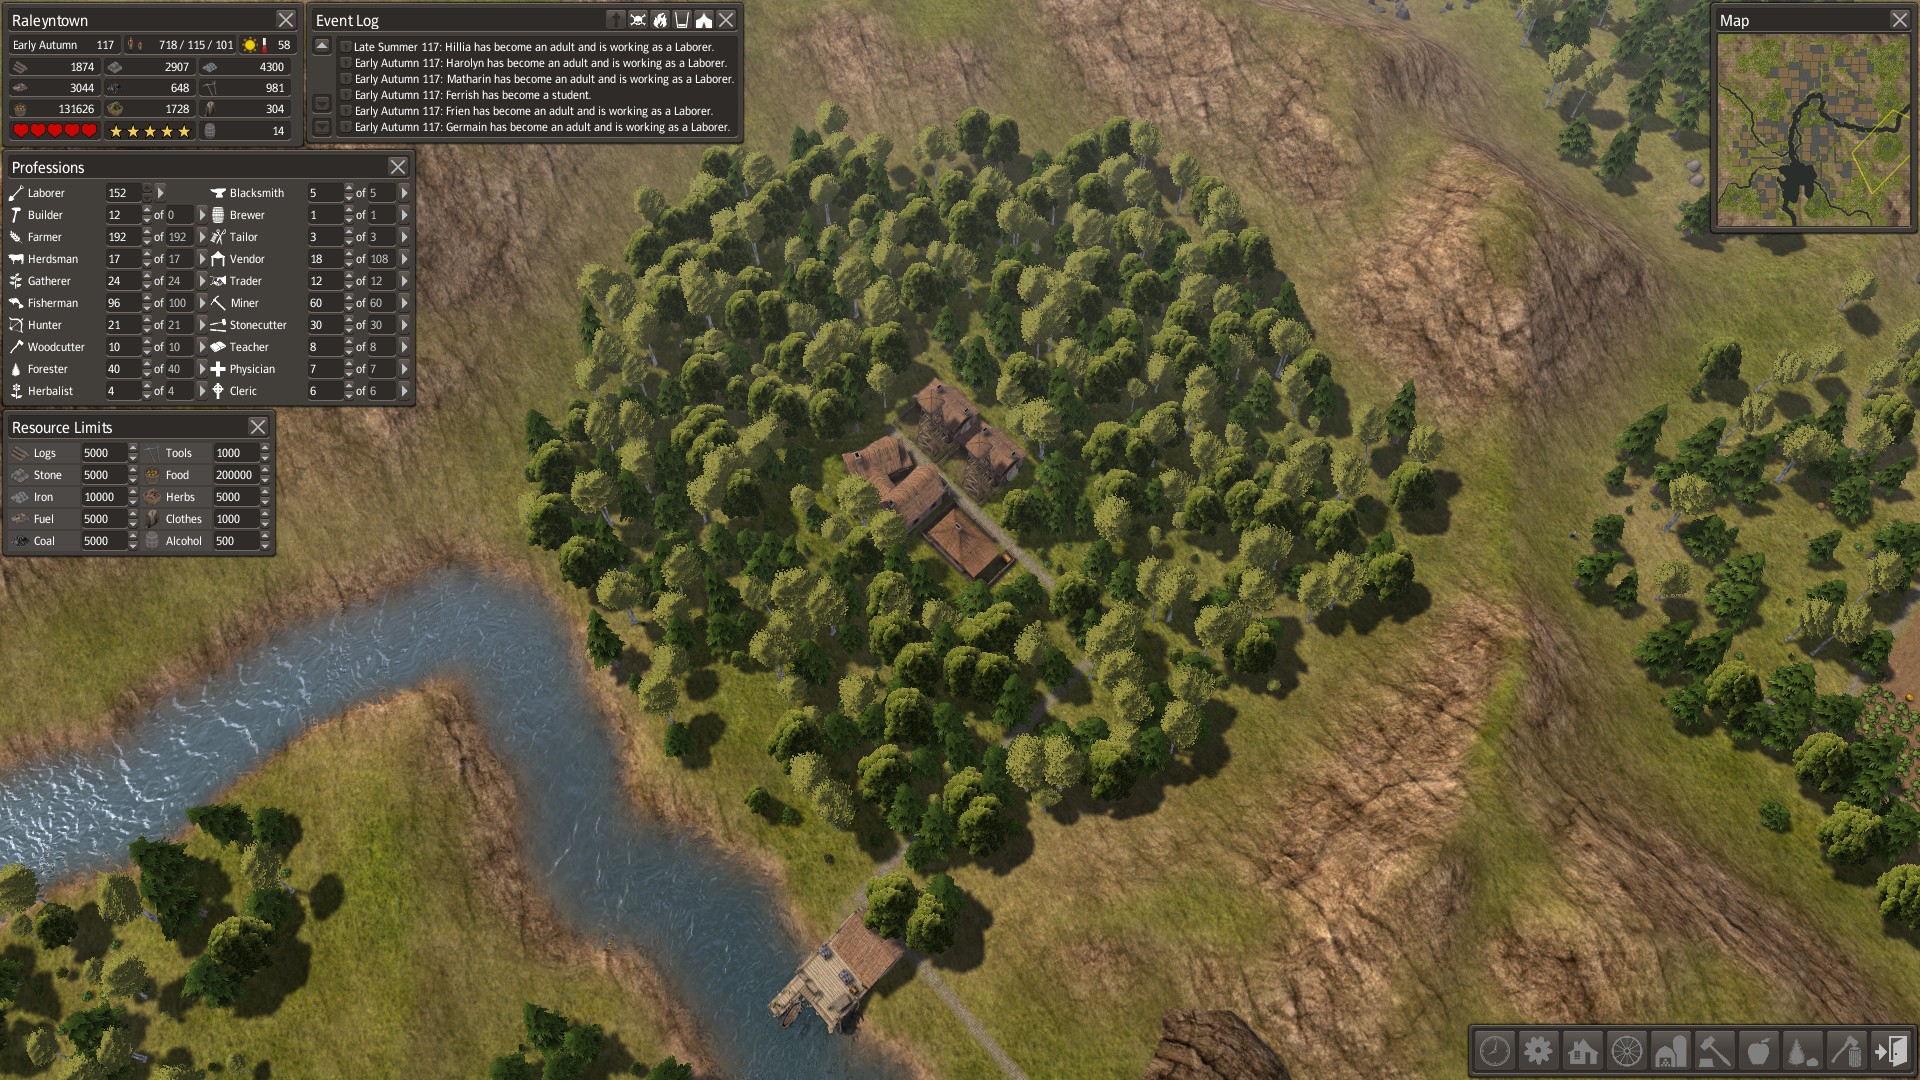
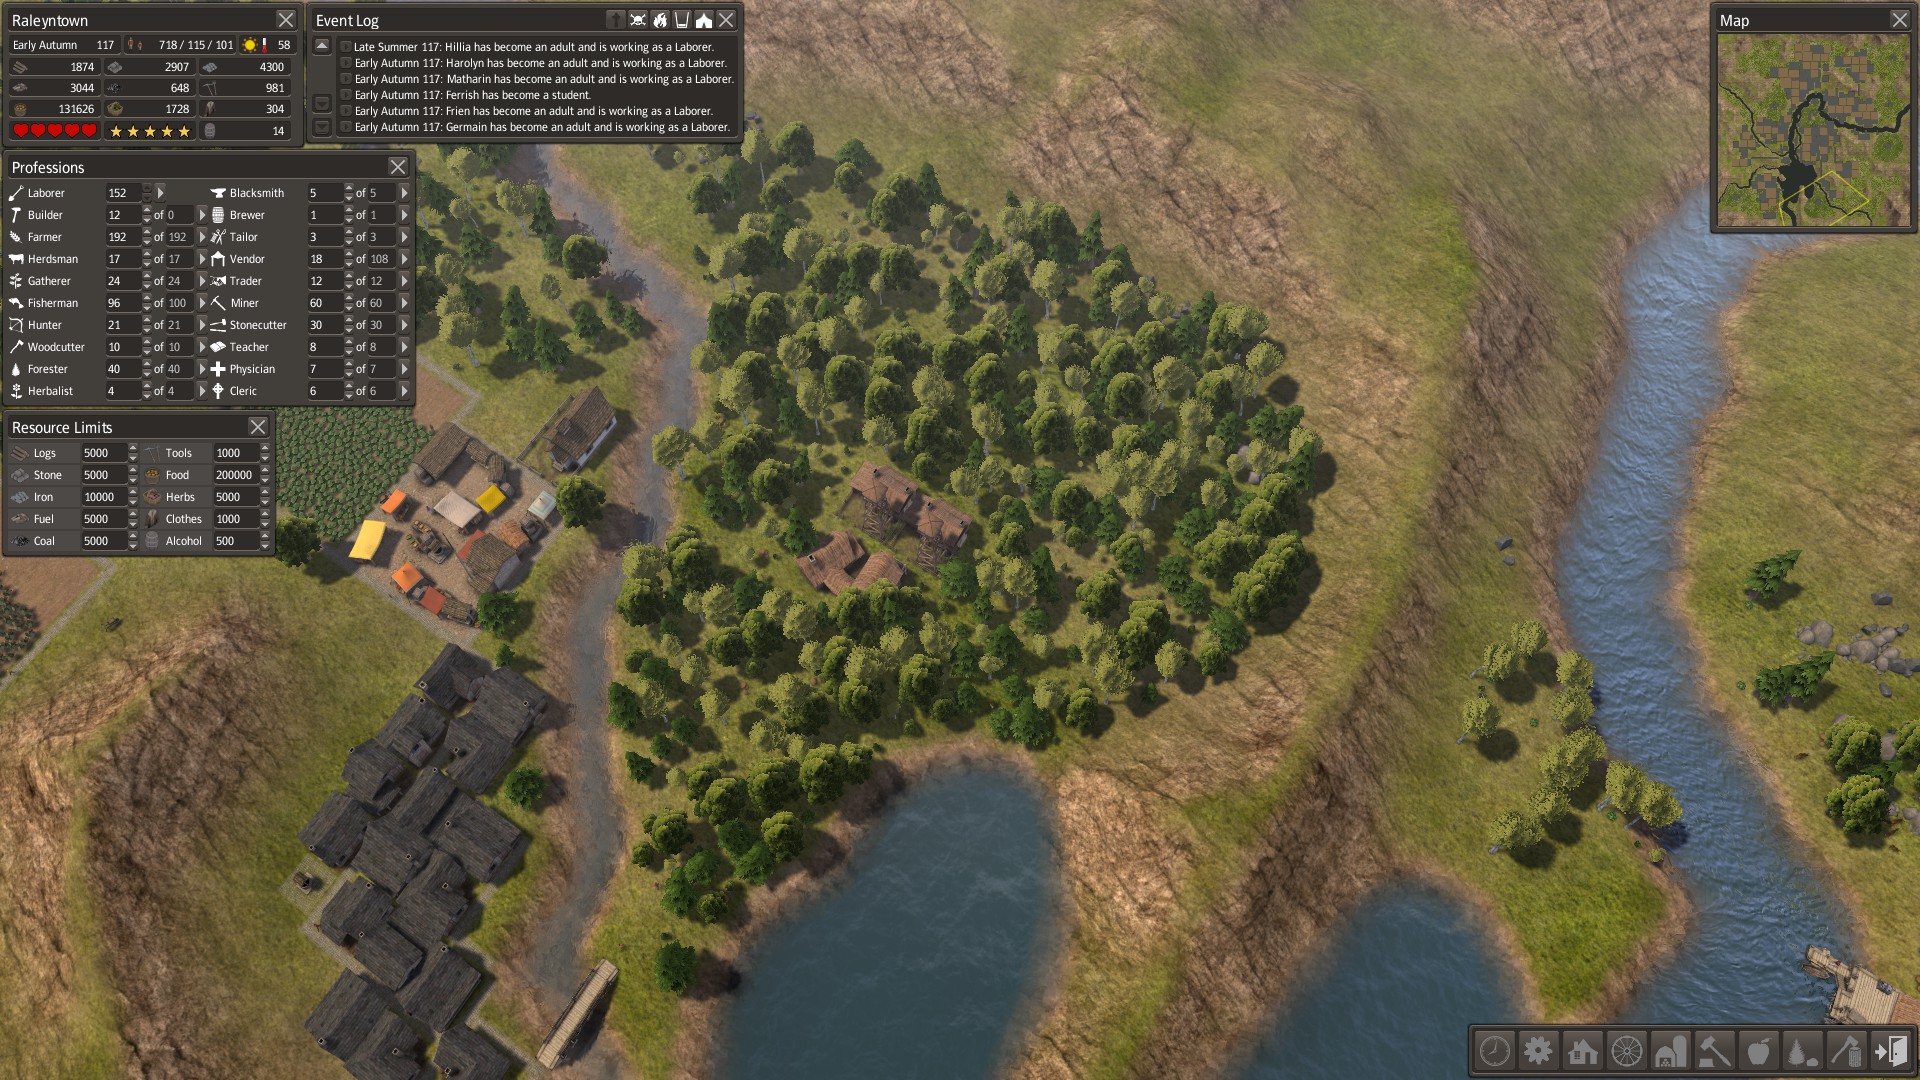
When you have the enough materials the ideal Gathering Facility will have two Forester Cabins. One for cutting and one for planting. This will increase your productivity. After you’ve finished building all the necessary buildings that involve this Resource Gathering Facility and place workers in them you’ll have a steady supply of Herbs, Wood, Food, and Leather from the Hunting Cabin. This facility will eventually be your main supply of Wood and Herbs.
In the near future you will eventually have to create multiple Resource Gathering Facilities in order to have adapt to your increasingly larger village.
Somewhere near the end of the Resource Gathering Facility’s development you should start creating a Wood Cutter. Why? Because if you start it too late you won’t have any Firewood to keep your houses warm. A single Wood Cutter should suffice for the next couple years.
Preventing Starvation
Once you have the Resource Gathering Facility you’ll be set on wood for quite a while. As much as this facility can offer it will still not be enough to feed your entire village on its own. Getting one Fishing Dock and 1 15×15 crop field should suffice for at least the first year. When the first winter approaches you’ll want to start working on a second crop field, that way it’ll be operational by the time planting season (Early Spring) comes about. A second Fishing Dock should be considered in year 2 – 5.
An example of a Year 5 food condition (Not showing a Resource Gathering Facility):

As you can see in the screenshot there are two crop fields and two Fishing Docks. Since you have just started and you have a limited amount of adults I’d suggest 4/8 farmers in all and 4/8 fishermen as well. But once you get more people I strongly suggest to get add as many people as you can to Fishing and Farming. To prevent losing any crops before winter comes and to increase production in fishing.
Remember, don’t forget to keep making new houses. The more houses you have the more new couples enter the new houses. Giving them more privacy to have children. But don’t over do it. Keep in mind the more people you have the more mouths to feed. I’d suggest about ever 15×15 crop field you make you build two, maybe three, houses. This may vary depending on if you’re in a population drop or a food shortage.
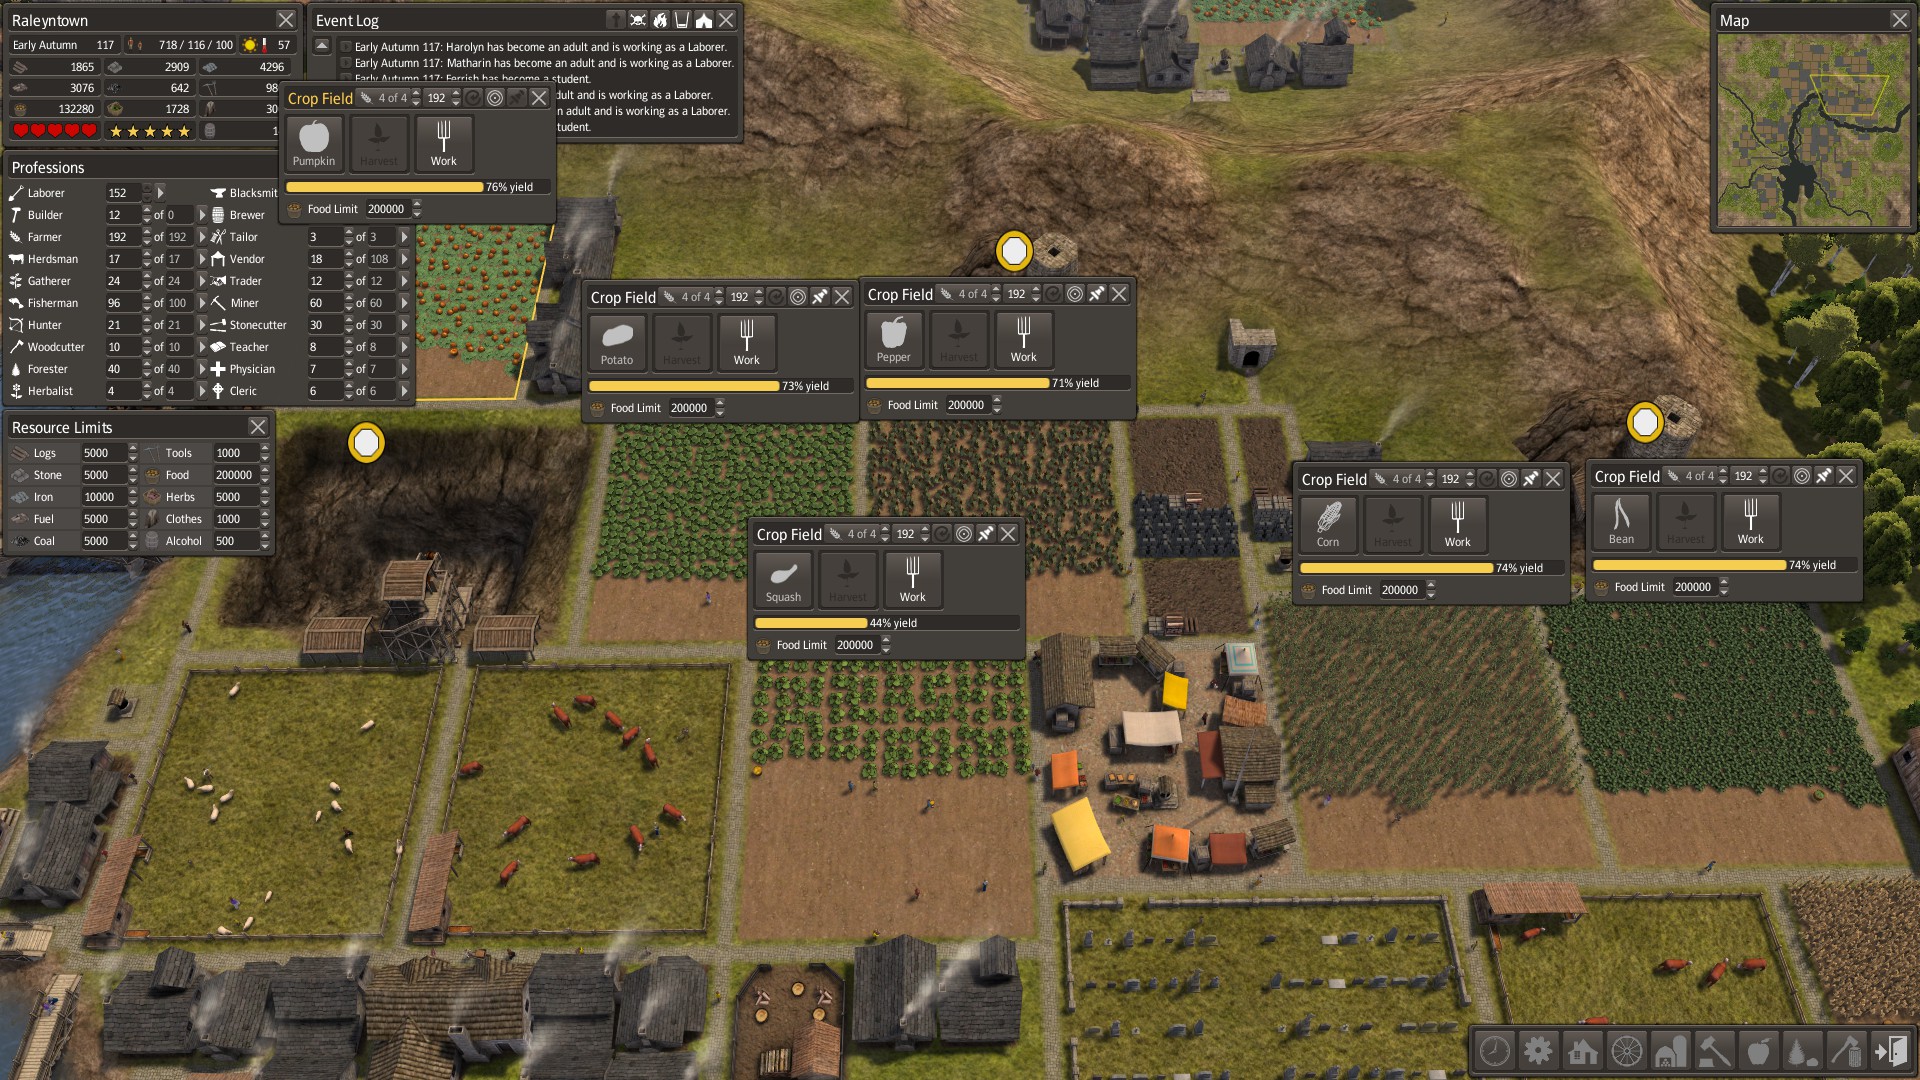
For crop fields in general, keep building them 15×15, they may take up more space and take more farmers but they sure do make a lot of food every year. If you’re planning on make 3 or 4 cropfields back to back to eachother, make a pattern in your different seed types. Such as Wheat, Peppers, Wheat, Peppers. As you trade for more seeds you should increase the pattern. Now why would you want to do that? Because if you ever get your crops infected, which is more than likely to happen a couple times, you don’t want two of the same crops right next to eachother or else they’ll spread to them as well. And when you do get infected crops, when the crop is gone, switch the original seed to a different one. This decreases the chance of it getting infected again.
Example of Cropfield Variation:
Also, make sure you have some sort of storage area such as a barn or a market relatively/very close to food sources, mainly near crop fields. Why use so many storage areas especially over a relatively enclosed area when you have plenty of storage space left and/or don’t have too too much to spare? Because when crop fields start being harvested, the amount of time needed to transport the harvested goods to a storage area means less time gathering the unharvested goods. Meaning having perfectly good food wasted by the time it starts snowing (Winter) because you didn’t have enough time left. This is a very important thing to remember because if you do have a lot of crops and are only getting about half or 3/4 of your original crop you are actually losing a LOT of food. Say you have 20 fields. And you lose about half of each. That means you’re only getting 10 fields worth of food a year. Yeah, pretty bad. (And yes, I have lost more than half a crop on multiple occasions). So remember, keep enough storage areas convenient around crop fields! It greatly decreases your chance of starvation and greatly increases your food supply!
Years 2 – 10
Eventually, your people will start to run out of Tools and Coats. I suggest starting construction on a Blacksmith Shop at year two. Keeping your people tooled up helps them do their jobs faster. If they don’t have any they’ll do their jobs much slower, decreasing production in everything and risking your entire town. For the first couple years keep your tools to Iron as Steel tools are much more expensive. However I suggest to upgrade to Steel tools once you get a couple mines up and running.
Around the end of year two and the beginning of year three you should start running out of Coats. Start construction on a Tailor Shop around Autumn of year two. You shouldn’t have a problem with making coats as your Hunting Cabin should be giving a steady supply of Leather. Keep your coats to Leather until you trade for some Wool. When you start getting wool or bought sheep you should go straight to Warm Coats instead of Wool Coats as you already have Leather to create Warm Coats. If you don’t have any coats it will greatly increase the chance of freezing to death despite having a stock of Firewood and/or Coal.
You should build wells around your town as soon as possible. Wells help prevent Fires. So the more wells you have around your town, the more your townspeople will be able to reach them faster in case a building does catch fire.
Around year 3 – 5 you should consider building Market Places. Market Places are like a larger barn. They hold much more but take Vendors to run them. I’d suggest using them instead of barns. However barns are still useful incase you need a place to put things that can’t fit Market Places. Stock Piles are also good to have around your town. They don’t cost anything and don’t require anyone to look over them. They are simply a place to put Wood, Firewood, Stone, Iron, and Coal. I suggest placing Stock Piles around areas that generate resources, such as Mines and Quarries.
Towards the end of year 5 and the beginning of year 8 or so you should start considering Trading Posts, Mines, Quarries, Hospitals, and Schools. I know it’s a lot to do all at once but it will be worth it. But why would you need Trading Posts, Mines, Quarries, Hospitals, and Schools? Because Trading Posts gives you a whole new world of new items and the chance to get some extra things such as Wood, Stone, Iron, etc. And you can use some of your already owned stuff to use as trading items in exchange for other things. Mines give you the opportunity to mine for Iron and Coal. Coal is used to heat homes and also used to create Steel Tools, and you should know what Iron is used for. Quarries are used to get stone. Hospitals are capable of preventing an outbreak of a disease if the infected individual gets to the Hospital in time. So make sure to make more Hospitals as you expand your town. Schools are used to educate your children. Once children come of age they will then turn into ‘Students’. Why do you need to educate your children? They already are doing a swell job at their jobs. Well, educated workers do their jobs faster, increasing productivity. Also I am not certain of this but I think happiness gets an increase if people are educated. But don’t quote me on that.
Trading Posts should be stocked with items in order to be certain you have enough for whatever a merchant has to offer. Don’t put in too much though, make sure you have enough of something in order to put it in the trading post first. You wouldn’t want to try to get 1,000 wood in a Trading Post if you only have 1,200.
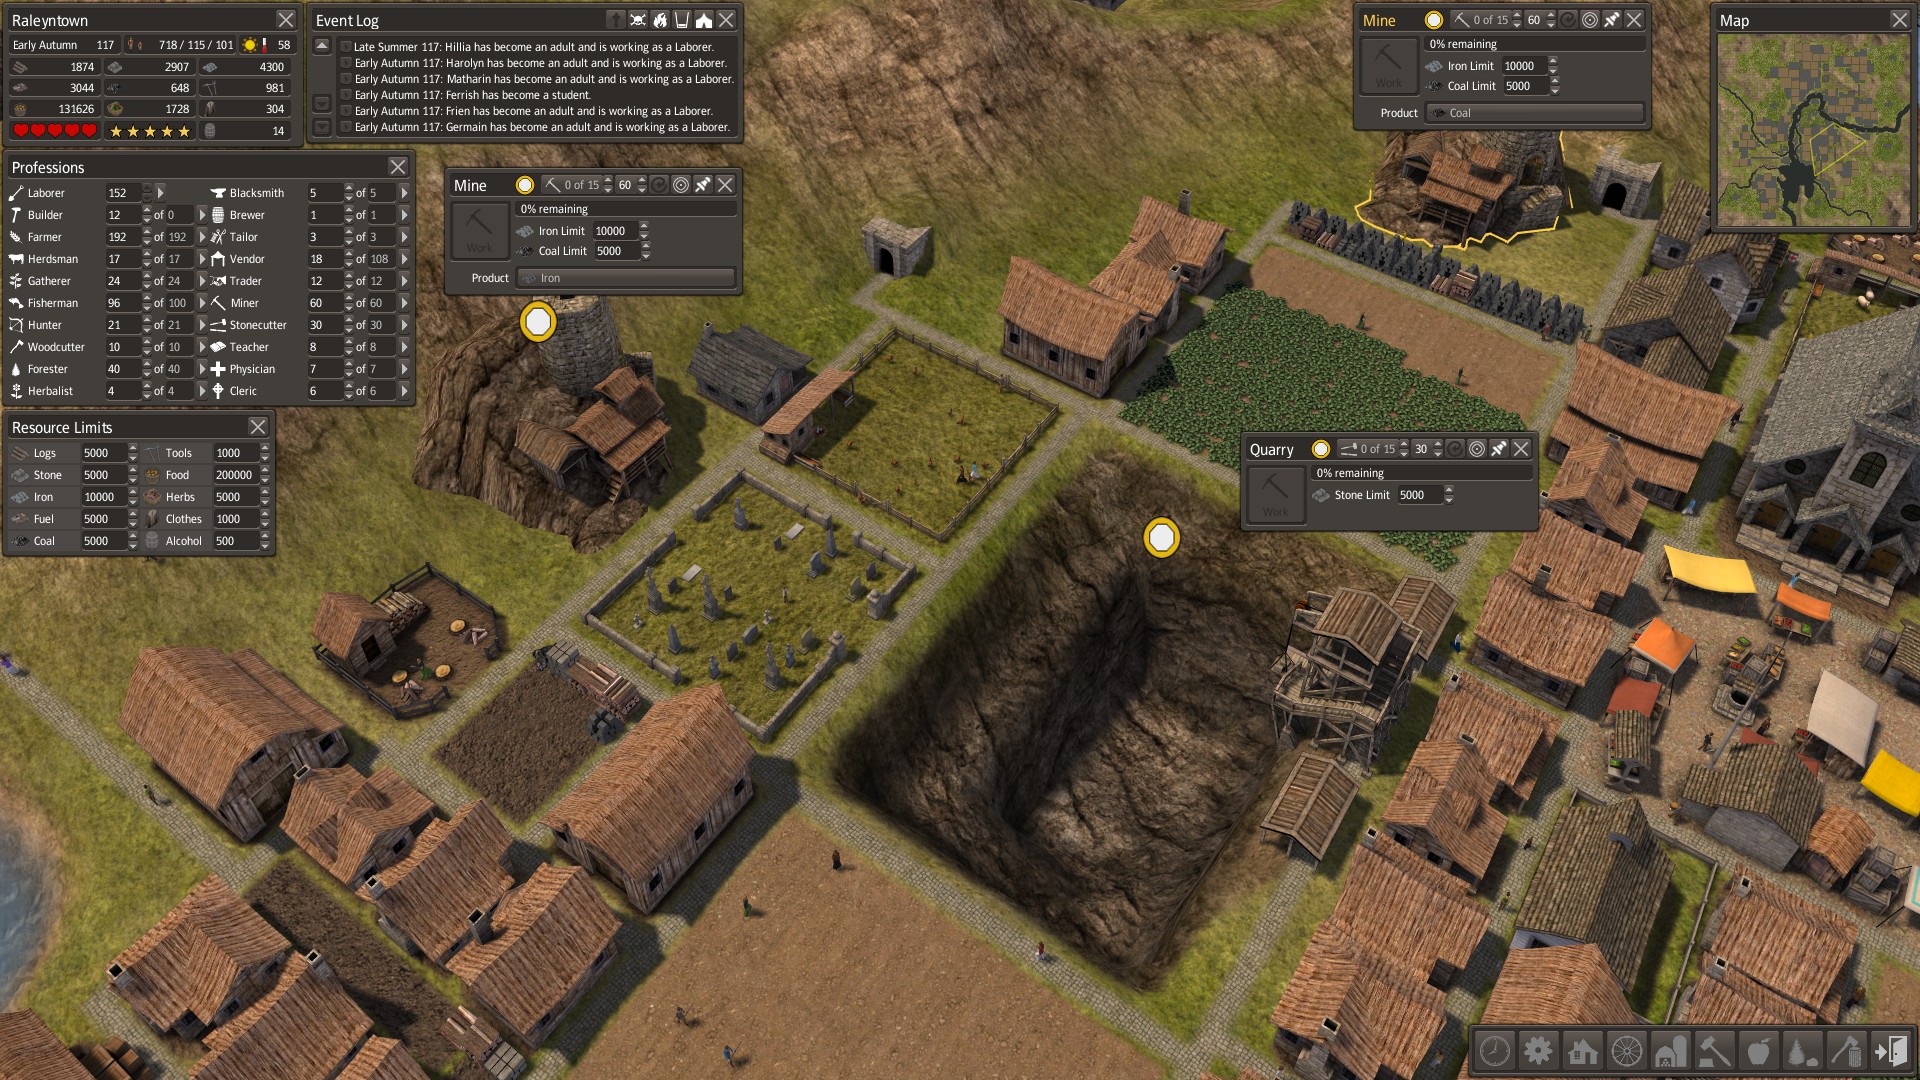
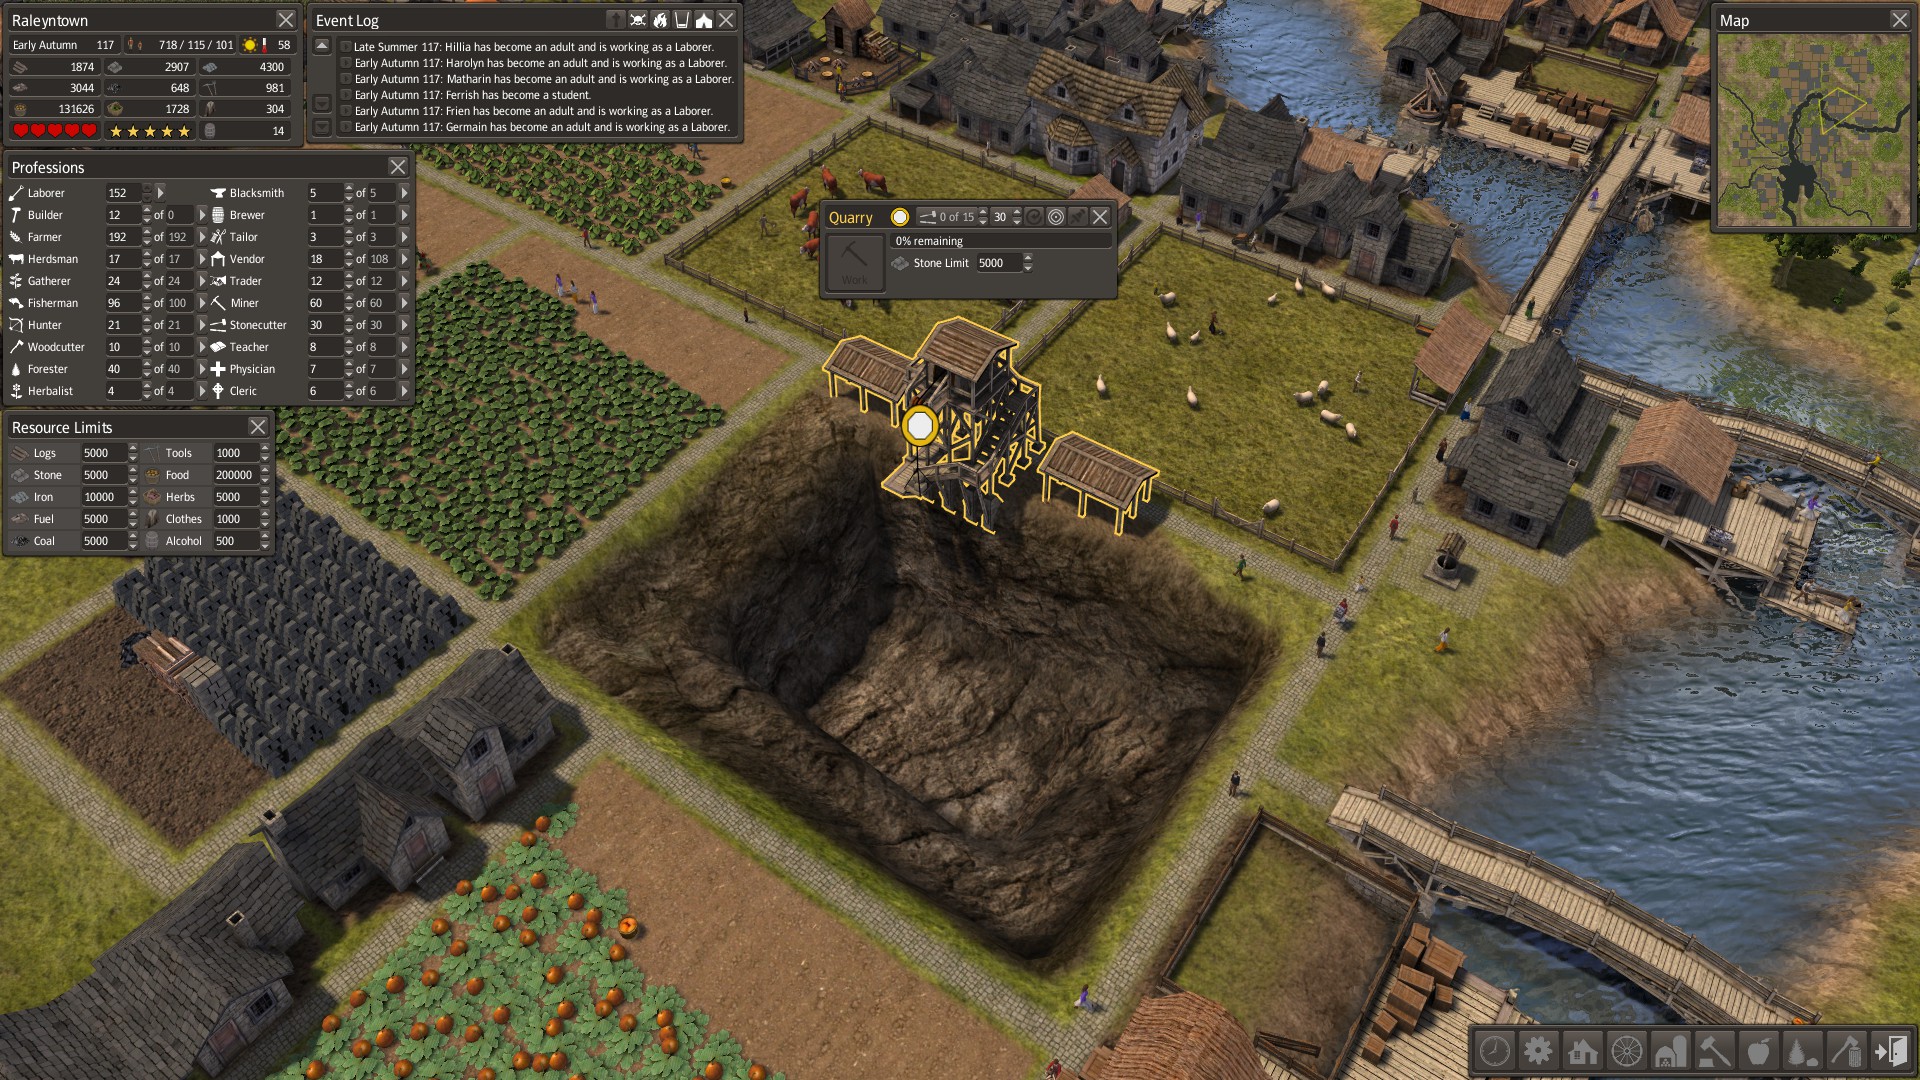
Quarries and Mines take a lot of people. But I suggest for now only putting in about 5 per Quarry/Mine. Unless you find you have a surplus of Laborers. Quarries and Mines are different from other buildings, as they are permanent and they do not have an infinite amount of resources. Eventually your Quarry will be all dug out or your Mine will be all mined out. So the amount of people in a Quarry/Mine only affects the speed of how long it takes dig/mine them out. So choose wisely where you place your Quarries and Mines.
Examples of Quarries and Mines and how they cannot be moved after they’re placed:
Schools don’t really take any special care. They simple require a teacher and a place to stand. However there is a limit to how many students can be in one school. So make sure you have enough schools to educate your entire population.
Hopefully if all goes well around year 10 you’ll get your first animal! With an animal such as Cattle, Chickens, and Sheep, you can create Pastures. Pastures aren’t exactly a necessity but it’s another way to get food and Sheep and Cattle produce Wool and Leather, providing you with a steady supply to create Warm Coats.
Other Buildings and a Town Hall
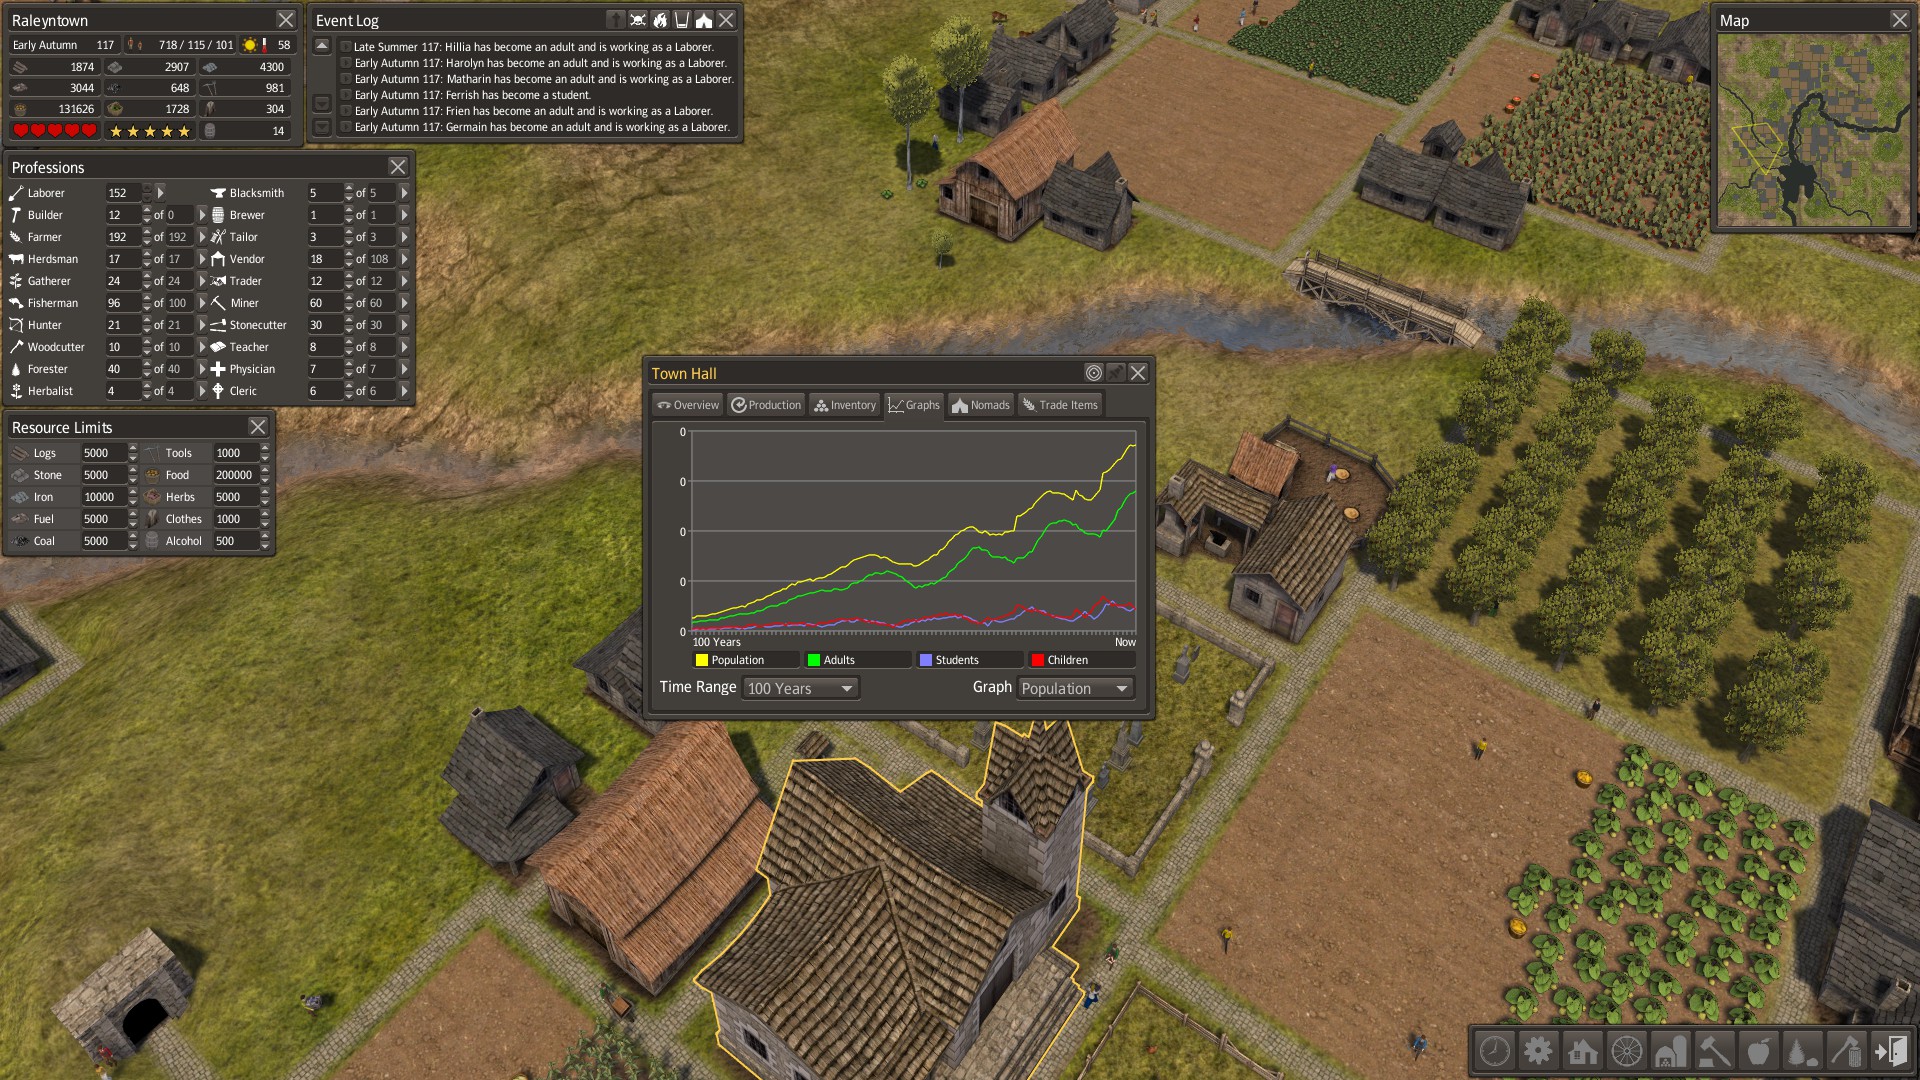
Sometime around year 10 or possibly sooner you should start thinking about a Town Hall. A Town Hall records the amount of people you have, graphs throughout the years, your stock of items, and also allows Nomads to ask to join your town. The Town Hall can do much more but I don’t want to get into that much detail. Your town can only have one Town Hall and I do not know if it can be destroyed or not as I have never tried to. So just to be on the safe side choose wisely where you place your Town Hall.
Nomads are very helpful, but sometimes they can be terribly devastating. Nomads appear randomly and their numbers are generated randomly as well. You could get 30 nomads looking for homes one day, and the next day there are 400 nomads requesting citizenship. Nomads are useful as they can boost your population if you’re in a population shortage. However keep in mind if you do accept they’ll give you a lot more mouths to feed in a very short amount of time. Also they can sometimes carry diseases, so it’s probably wise to create Hospitals before you accept any Nomads into your town.
Examples of what a Town Hall does:

If you are planning on accepting nomads it’d be best if you get Boarding Houses. Boarding houses are large buildings capable of holding homeless people until you can construct homes for them. Nomads can settle inside boarding homes before you get homes for them to prevent them from freezing or starving.
Taverns and Churches increase happiness. Churches, like schools, have a limited number of people it can have in its community. So make more Churches as you expand your town. Taverns merely take Ale. Ale can be acquired via the Trading Post or you can create your own if you have Orchards.
In order to get Orchards you must first get a tree seed from a merchant. After you get one or two seeds you can then create Orchards in which you can grow trees and harvest them. Much like cropfields you can use Orchards as food.
Cemetaries are places you can put down in order for your townspeople to feel better about passing friends and relatives. It is another way to increase happiness.
Using tunnels are a big help. They are not a requirement but they do help with expansions especially if you are playing on a Mountains enabled world.
Years 25+ and more on Nomads
So far we’ve run through all the basics on how to get your Banished world started off well. There will be random chance happenings that may halt your progress by a lot. Most of the screenshots that you’ve already seen are from a world that has used this guide’s content almost by letter. There were a few times where it seemed it wouldn’t work out, but don’t delete your world just because you lose 100 or so people. My own world had a couple population drops but I kept pushing and it eventually turned out in my favor.
How do you fight off disasters such as Tornados, Fires, and Disease? I’ve already listed ways to fight off fires and also to prevent disease. However, you really can’t fight off tornados. They’re just a random thing that can sometimes drive right through your town or simply brush the corner of the map.
After reading those last paragraphs you may think this is the end of the guide. But wait, there’s more! There are still dozens, possibly hundreds of years to review. The first 25 years are really the hardest years, that’s why I put so much detail into them.
Since by now you’ve hopefully built at least one of every building there is, all there is now is to steadily expand everything evenly. This can be very tricky as building too many houses or building too many work areas can be disaster waiting to happen. I’ve already talked about how to evenly build houses and cropfields, every 15×15 cropfield you should build one, two, or three houses. However, there is a point at which this cannot apply. I have had many situations where I thought it best not to expand either simply because my town was having a lot of babies, and my food supply was pretty much steady.
And when I mean expand, I mean expand everything. Building more mines to keep up with demand, getting more schools for the growing population of children, multiple Resource Gathering Facilities as they are most likely going to be your main source of wood and herbs. If you were curious my 100+ year world has about 6 Gathering Facilities. Giving me a steady 3,000 – 5,000 wood and firewood yearround. And hundreds of herbs to keep my entire population at 5 hearts since day 1.
Much about Banished is all about careful decisions and strategy. Some decisions are easier than others. Such as adding houses over there or over here. Pretty easy decision, right? Right. However, many decisions in Banished are tricky. For example, inviting Nomads. Like I already explained in slight detail Nomads can be good, and yet sometimes they can be bad. Just to explain nomads in some more detail let me give you a few examples of how Nomads can be bad for you and how they can be good.
Example 1: Your people are dying out. You only have 200 left, but your food supply is quite high. 44 nomads request citizenship.
In a situation like that I believe it would be best to accept these nomads.
Example 2: Same situation, people dying, food high. All of a sudden 400 Nomads request citizenship!
In this particular situation perhaps it wouldn’t be best to accept them. Despite having a large supply of food, 400 new people in about 2 seconds is a LOT of people to feed. The workers may look very tempting but you need to keep in mind the amount of food you have. Also, the more Nomads requesting citizenship there are the higher the chance of them having at least 1 disease is.
I hope that gives you a better picture on Nomads. Also, something I may have not maken clearly is disease. Nomads are not the only way for your people to contract disease. You can get diseases in your town simply by random chance or having someone freeze for a while or feeding them possibly infected crops.
Summing Things Up
Now that I’ve got mostly everything layed out for you, let’s just sum everything up here for those of you who want a shorter version (Not Recommended) of the guide, or those of you who wants to not be scrolling up and down to try to remember everything after they’ve finished reading.
Resource Gathering Facilities: They consist of 1 Herbalist, 1 Hunters Cabin, 1 Gatherers Hut, and 1 or 2 (Ideally 2) Forester Lodges. One for cutting and one for planting. Place these little areas somewhere away from your own village with a lot of trees. Try to stay out of the little circled area when it comes to expanding as much as possible.
Food: 2 15×15 cropfields, 2 fishing docks, and a single Gathering Facility should suffice for the first couple years. Every 15×15 cropfield build 1, 2, or 3 more houses to help steady the rate of population growth and food count. Adding fishing docks and Gathering Facilities along the way also help increase food count and help keep it steady throughout the winter.
Buildings: Mines and Quarries cannot be moved after placed. They are ideal for gathering stone, iron, and coal. Tailors and Blacksmiths should be built around the first 5 years to prevent a lack of coats and tools. Schools and should be built around year 10 to help educate the next generation and, providing your townspeople with more knowledge of their jobs and increases they’re productivity. Churches, Taverns, and Cemetaries help increase happiness. The more happiness you have the better your people will do their jobs. With little happiness you risk murders and suicides (Very Rare). Trading Posts should also be considered around year 10 as they provide you with an opportunity to get more seeds and replenish low supplies of materials and foods. Hospitals and Boarding Houses should be considered before making a Town Hall, so if you accept Nomads there is a smaller risk of diseases sprouting and giving them a place to stay until you can construct enough houses for the Nomads. Invite Nomads with caution. Wells should be built throughout your expanding town to lower the chance of Fires from spreading from more than one or two buildings. Bridges and Tunnels are considered necessities to fully expand your town to the limits.
Expanding: Expand your town steadily. Not too fast and not too slow. If you have a point in which there are little to none babies being born I suggest you build 5 – 10 houses ASAP to prevent your town from dying out from old age.
I do believe that is all for this guide. As I said before, my successful world has followed these guidelines almost to the letter. There are times where it is advisable to bend these rules a little. Don’t get the idea that this is the only way to successfully play out Banished. It is not. I simply believe this is a better way to do so. There are many people who have successfully played Banished without using these guidelines at all. However that doesn’t mean you should just dismiss this guide. If you have any more questions or give feedback about this guide or anything related to it or Banished either comment below, comment on my profile, or friend me so we can talk about in more detail. If you do friend me, be sure to comment on my profile before you send the request so I know not to defriend you for random invites.