Overview
(Patch 0.13.0: Transcension Changes!) This guide will explain most parts of the gameplay for Cid. I made it because I have struggled to find good guides elsewhere. It is not finished, and I will expand on it as I progress through the game and learn more.
Introduction
Welcome to this guide, I’ll warn you now, there is a lot in this game to talk about. I don’t know everything about every mechanic, so I will update this guide as I learn more. Also, this is my first time every trying to make a guide, so feedback will be appreciated.
This guide is split into a few sections:
- The Basics – For people still on World 1. It goes over how to get started.
- Intermediate Stuff – For people that have beaten World 1
- Extras – Random stuff that doesn’t really affect gameplay (discord, console, etc.)
— The Basics: —
The following sections are for the very beginning of the game. This includes how equipment works, and introduction into the skill and automator tree, as well as a few basic automator setups. These sections are focused for players that are still on World 1-1.
The sections that are a part of the basics are:
- Equipment and Stat Bonuses
- Upgrading Equipment
- Level Types
- Skill Tree Basics
- Automator Basics
- Earning Xp
Equipment and Stat Bonuses
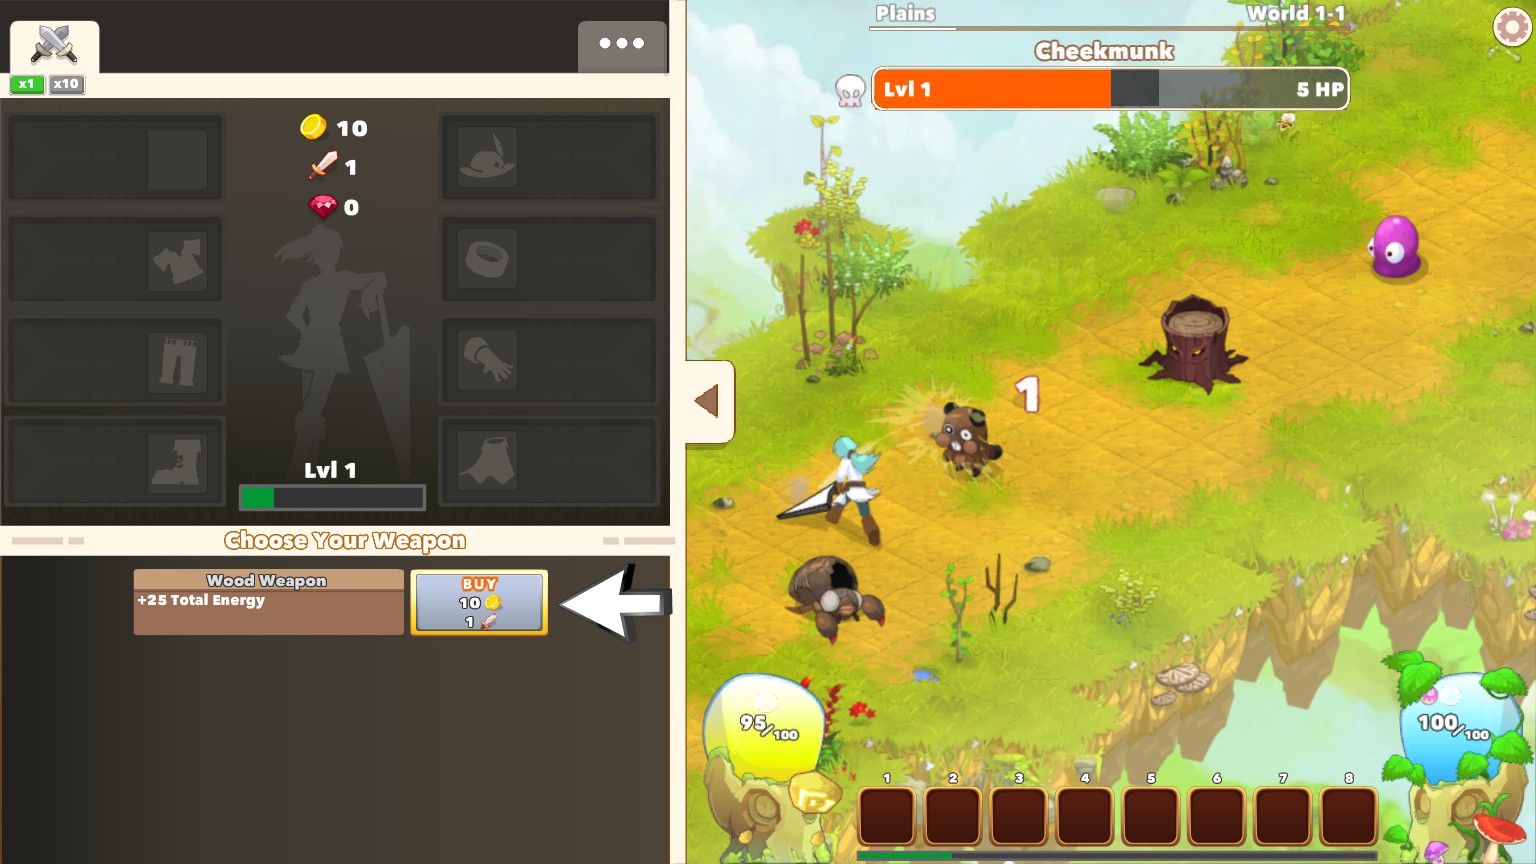
To start off, you need to understand how to get stronger, otherwise, you’ll be stuck on the same monsters forever. Like other clicker games, money and attack power reaches absurd scales, and you’ll be dealing with numbers like 4.529e78. Each monster you kill drops gold, this is the main method of gaining gold. You can use this gold to buy your first weapon.
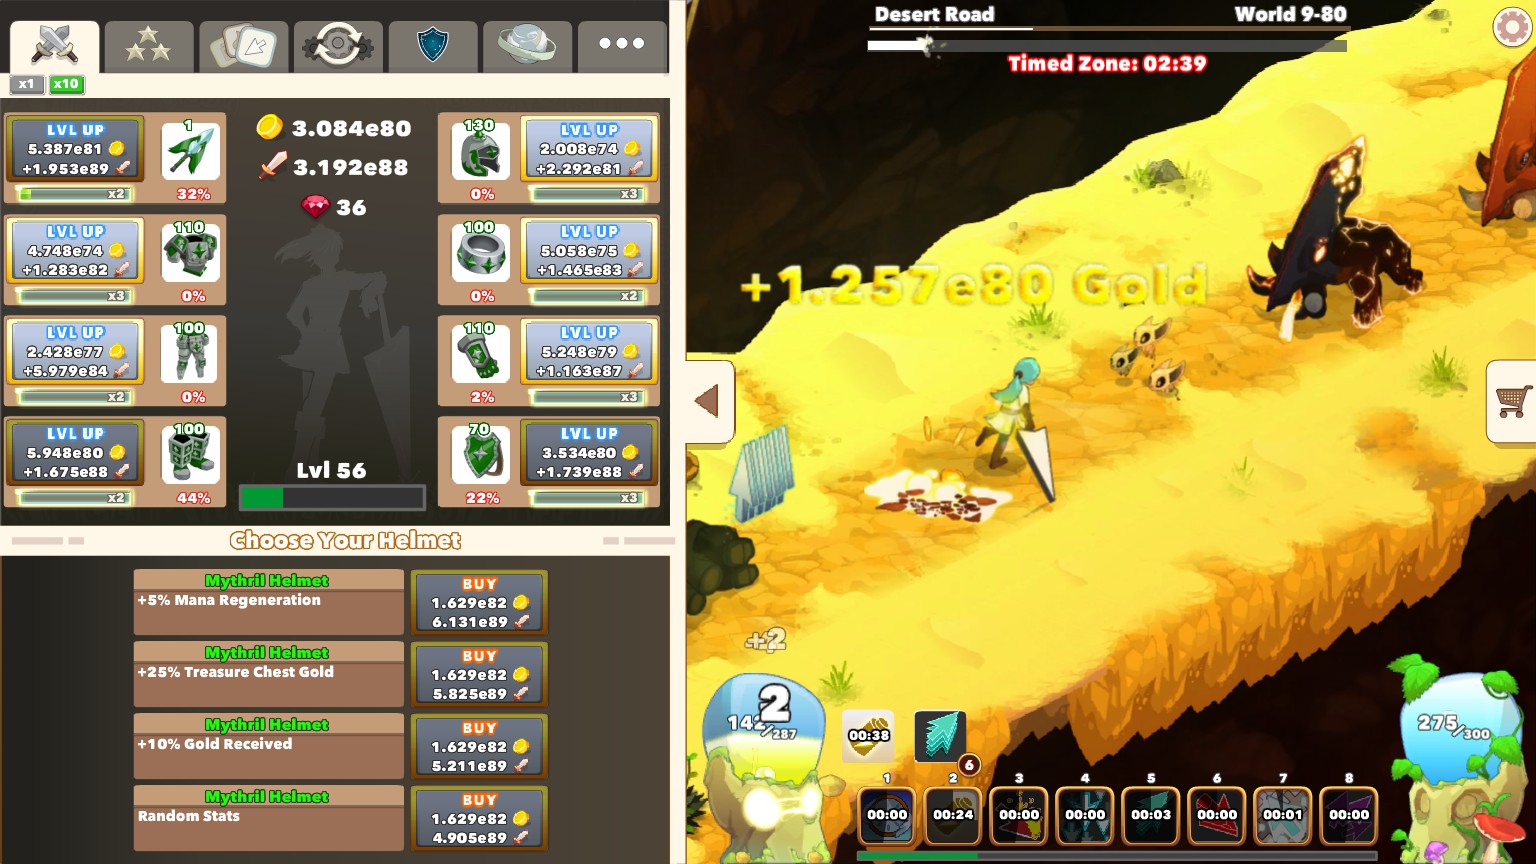
As you can see there are three values shown when buying equipment. Inside the button is the price and cost. To the left of the button is a stat bonus. These are random, but give useful boosts to your character. As you buy more items, you will eventually have four options. When you buy new tier equipment, you can add another bonus onto it or “reroll” all the previous bonuses you received. The cost is always the same between options, but from time to time, they will have different attack powers based on their bonuses.
Here is an example of four options, the top three have unique bonuses and the fourth is a random. Some of them have different attack powers.
After filling all eight equipment slots you get to upgrade the tier of your equipment. The tiers are as follows:
- Wood
- Stone
- Leather
- Iron
- Steel
- Mythril
- Crystal
- Obsidian
- Astral
- Orangescale (this one just repeats from here on)
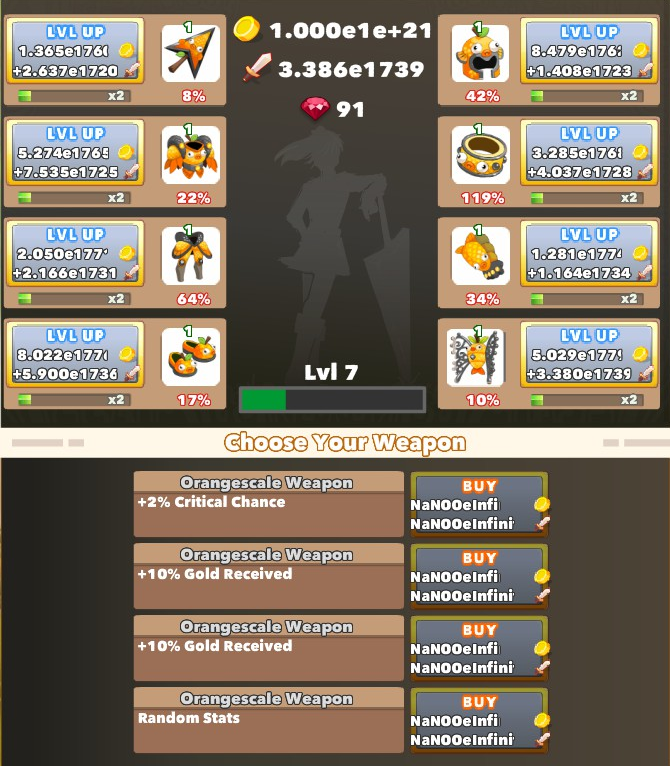
Generally, the best bonus to go for is haste because it speeds up just about everything. The global cooldown speed, skill cooldown speed, and autoattack speed are all dependent on haste. Which bonuses work best for you depends on your style. Personally, I aim for haste, mana regen, total mana, and total energy to get the most out of my clickstorm and energize. Click and auto attack damage are also useful as well as gold received. What bonuses you want will be something you figure out better as you build up your skill tree and automator.
Here are all the possible equipment bonuses (comment if I missed one or have the wrong %).
- +5% Haste
- +5% Mana Regen
- +25 Total Mana
- +25 Total Energy
- +10% Auto Attack Damage
- +10% Click Damage
- +2% Critical Chance
- +20% Critical Damage
- +1% Treasure Chest Chance
- +25% Treasure Chest Gold
- +1% Bonus Gold Chance
- +10% Gold Recieved
- +12% Monster Gold
- +25% Clickable Gold
- +10% Gold Piles
As you upgrade the equipment, you get a few bonuses for hitting landmark numbers:
- Every odd multiple of ten (10, 30, 50, etc) gives a 2x damage boost
- Every even multiple of 10 (20, 40, 60, etc) gives a 3x damage boost
- Level 50 gives a 10x damage boost
- Level 100 gives a 15x damage boost.
Upgrading Equipment
This is an area that people have a lot of differing opinions on, I’m not saying they are wrong, but here is another way to look at it.
From what I’ve seen, people find that upgrading your equipment to level 10 is as far as you should go. I looked into it a little, and it is true that going beyond ten is less cost efficient, except for when you hit 50 or 100. In fact, you get the most damage for your money at level 50. Here is a chart that I put together in Excel (all of the numbers are for the wood weapon):
Note: the cost is the cost to buy 10x to get from the previous level to the current.
Others say to upgrade so that your newest piece of equipment is level 10, the second is level 20, third is level 30, and so on, creating a 80-70-60-50-40-30-20-10 pattern. However, newer equipment quickly overpowers the older stuff, to the point where it is entirely useless to upgrade your older items.
So, I guess, in conclusion, it is best to get each piece of equipment to level 50, because that is when you get the most damage for the cost.
Zone and Monster Types
Each world has 100 zones, and each zone is a bit different depending on what number it is. Here is a little list:
- Every fifth zone is a timed zone. If you do not kill every monster within the time limit you restart at the beginning of the zone. Zone 99 is also a timed zone. Each one of these zones end with a mini boss.
- Zones 25, 50, 75, and 100 are boss zones. There is only one monster you fight, but it has much more health. These fights are also timed, and as far as I know, there are never clickable bonuses on these stages (such as gold piles or energy capsules).
- Every other zone is a normal zone. There are 50 enemies, like the timed zone, but without a timer. Each one of these zones also ends with a mini boss.
There are three types of monster you face
- Normal monsters – Different monsters have different health, but give the same xp
- Mini Bosses – They have more health, but do not give any extra xp.
- Bosses – They have a lot more health and give more xp.
Skill Tree Basics
By now you probably have leveled up at least once while figuring out the armor. A new tab labelled the “level graph” should have popped up. When you open you are introduced to a massive skill tree. It can seem daunting, but I’ll try to give tips on how it works, what you should get, and some builds you can make out of it.
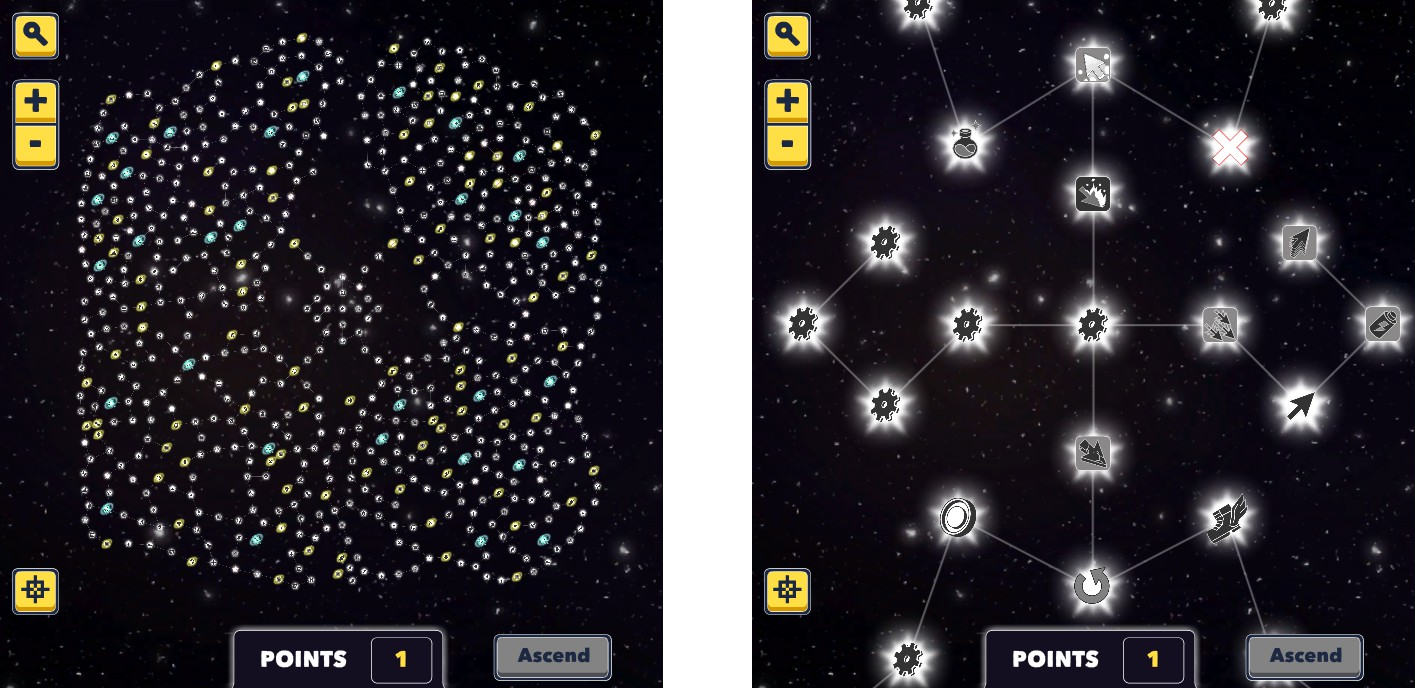
From there, there are four different directions you can go to, each corner. The four sections do not connect anywhere except for the center, so keep that in mind when trying to decide where to branch out. I usually head straight down and to the right to grab as many haste nodes as I can, after that I go for small clicks, expandable small clicks, and flurry. I’ll explain the skill upgrades later in this guide.
When looking for where a specific node is, you can use the search button. This lets you type in text and it will highlight any nodes that have that text in the title or description. This is helpful because you can look up “total energy” and all nodes that have anything to do with it will appear, not just ones named that. Below the search button, there is a zoom in and out button as well as a recenter button at the bottom. There is also a button that says “Ascend” in the bottom right, but that will be explained later on.
There are a lot of different types of nodes, so I probably won’t go over every one, but I will go over the coloring:
- Gray nodes are regular nodes.
- Golden nodes are ones that have several levels worth of effect. For example Juggernaut’s Pittance is equivalent to four levels of total energy.
- Blue nodes are upgrades to skills. Be careful when buying these because some of them replace a skill. For example, Managize replaces Energize so you can no longer spend mana to get energy.
Again, I am not going to explain each node, but I suggest you look through some of them to see what bonuses they provide, especially the blue ones.
Automator Basics
This section will be about the basic layout of the automator tree, how the automator works, and how to set up a good automator.

You can get nodes from the skill tree that give you two automator points. These can then be spent on the automator tree to get stones and gems. Stones are the conditions that need to be met in order for a gem to activate. The gems are various actions that can be performed. Like with the skill tree, I will not go over each one because of how many and how similar they are, but I suggest you check them out.

Even these are enough to set up a basic automator like the one to the right. In order make one, you drag the stones and gems into the corresponding slot. In this example, the automator will activate big clicks every four seconds (plus the delay the automator has). Every 10 seconds, mulitclick will activate, consuming the big clicks. Now you have your first automator setup!
The power button in the top left lets you enable or disable the automator. There is also a search button, like in the skill and automator trees, that lets you filter through your gems and stones. If you click on the green box that says “Set 1”, you can rename it. Eventually, you can unlock more sets and there will be a “1”, “2”, “3”, etc tab for you to choose from. Only one of these sets can be active at a time, the one you are currently looking at. However, you can use the next set and previous set gems to automatically switch between them. As you buy more stones and gems, you will be able to automate clickstorm, energize, and more, to create a better offline machine.
Earning Xp
I’m finally getting around to updating this section. I still don’t have a great understanding of how xp is given, but here are a few numbers to give you an idea.
- You cannot earn less than 10 xp per monster when you are level 50 or less
- After monster level 4, every 5 monster levels seems to increase your xp gain by 1 (while you are less than level 51). So, monster levels 5-9 give 11, 10-14 give 12, 15-19 give 13, etc
- At level 51, level 1 monsters give around 1.5 xp per monster. This value goes down as your level increases
This is not from my own findings, but seems to be going around: after completing a world, the xp you get from rerunning that world is multiplied by an number that is less than 1, so you get less xp each run. The Clicker Heroes 2 patch notes for update 0.07 says that “The first 7 runs of each world provide most of the XP available in the world.” I haven’t tested this, but you should watch out in case you are running the same world dozens of times to try and get xp.
Unfortunately, this is about as much as I know. It is generally a good idea to stick to monsters near your level to get a good amount of xp.
The Ruby Shop
At some point, you will start collecting a second currency called rubies. You will also unlock a little shopping cart icon to the right of the screen. When you click on it, the Ruby Shop pops up.

The Ruby Shop restocks every 25 minutes, presenting you with three items you can purchase. The top two can only be bought once, until the shop restocks again. The bottom one can be purchased several times, but they are usually not very useful. The top slot is where any “rare” items go. This includes automator points, ethereal items, Ancient Shards, and Empyrean Motes. Empyrean Motes are a part of transcension, and only appear once every 15 days, so don’t worry about them for now. If you do happen to come across one though, make sure you buy it if you have enough rubies.
The middle slot is for “uncommon” items. These include metal detectors, speed runes, and power runes (I might have missed some). If no rare item is picked to be in stock, two uncommon items are picked instead, so you can get an uncommon item in the top and middle slot.
The bottom slot is always for “common” items. This is either a bag of gold or magical brew. They only cost one or two rubies to buy and can be bought several times, seemingly without running out of stock.
Here is a list of every item in the ruby shop, how much they cost, and their “rarity” that I gave them:
- Empyrean Mote – 1 Ruby – Rare
- Ethereal Item – 200 Rubies – Rare
- Automator Point – 100 Rubies – Rare
- Ancient Shard – 50 Rubies – Rare
- Power Rune – 100 Rubies – Uncommon
- Speed Rune –
- Metal Detector – 15 Rubies – Uncommon
- Magical Brew – 2 Rubies – Common
- Bag of Gold – 1 Ruby – Common
When it comes to what items you actually want to buy, its kind of hard to tell. I only ever go for the rare items, because they are (sort of) permanent. The metal detector has two different variations, one that lasts for 5 zones, and one that lasts for 20 minutes. These and the runes do not stay, so I never found them that useful unless you are really struggling in a world. The bag of gold can also be a little helpful if you are short on gold, but I never really buy them or the magical brew.
Ancient shards increase your damage for an entire star system, but they are a bit more permanent because if you go back to an old star system, you get the ones you bought in that system. All of the other items are really useful because they give points for the automator tree, stat bonuses, and let you transcend.
— Late(ish) Game: —
The following sections are for the middle parts of the game. These sections are intended for players who have beaten their first world and stretches all the way to after beating an entire Star System and ascending.
The sections that are considered intermediate are (currently):
- Worlds and Star Systems
- Etheral Items
- Ascension
- Generic Automator Setup
- Managize Automator Setup
Worlds and Star Systems
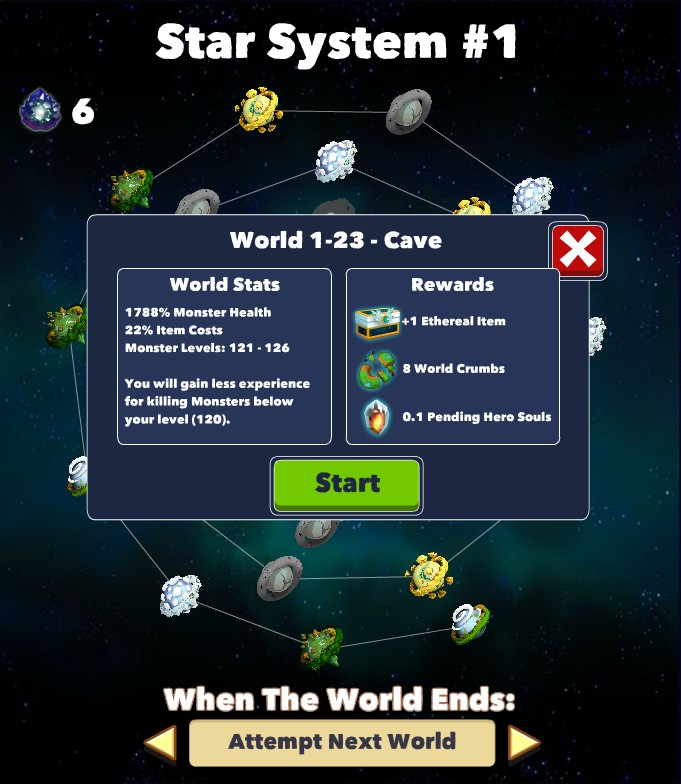
I did a little bit of research into how the monster health and item cost values are determined, and I found something interesting. The values are not at all random, they actually get increasingly difficult when combined. Time for another table!
Two things first: don’t forget, these numbers are based on my save, they will be different, but should follow a similar world difficulty pattern. Also, the world difficulty is just the monster health multiplied by the item cost, then dividing by 10000 to keep the numbers small.
As you can see (hopefully), the world difficulty only increases. This is even true between the worlds I put in the table. After the first Star System, the world difficulty starts to really ramp up. World 1-30 is around difficulty 6, but World 1-35 is nearly 20. This sudden jump is probably because of the boost that ascension would provide, since you unlock it after beating the first Star System.
The monster levels of a world follows a set pattern. The first world has levels 1-15. Every world after that is the next 5 levels (16-21, 21-26, 26-31, etc). The monster level affects the amount of xp you gain, so it is good to keep the monster level near your player level the best you can.
The popup when you click on a world also shows the rewards for completing that world. You get 1 Etheral item, some world crumbs (this number changes), and 0.1 pending hero souls. World crumbs are used during ascension, and pending hero souls are involved in transcension. Towards the top left, you can see an icon with a number next to it. In the picture, it is 6. This is your ancient shard count. Ancient shards are something you can buy in the ruby shop. These shards only affect one star system, meaning if you were to move on the the next system, the number would be 0. However, the number of shards is saved, so if you were to return to Star System #1, you would still have the ones you bought in the first system.
Each world also has a random style, which can be one of the following:
- Grass
- Jungle
- Frozen
- Desert
- Cave
- Astral (only the last world of each Star System is an Astral World)
World automation is unlocked after completing World 3, which lets you automatically start a new world based on what option you set it to:
- Do Nothing
- Rerun Current World
- Attempt Next World
- Attempt Highest World
Ethereal Items
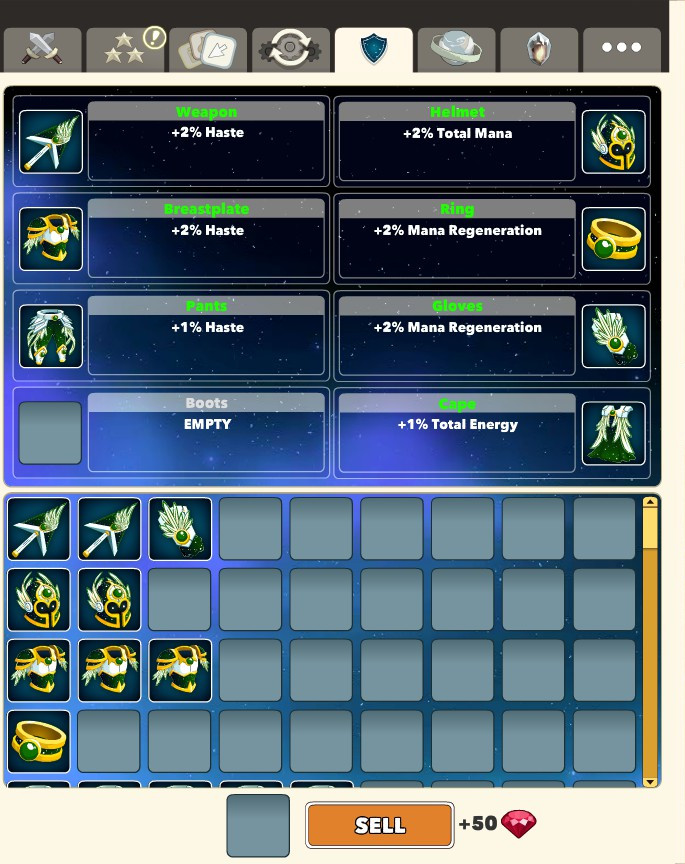
Each ethereal item has a stat boost, similar to the other set of equipment. Unlike the other set though, each item gives a % bonus based on what Star System you are on (at Star System 4, you get +4% bonuses). The list of possible effects is the same as the one for the other equipment:
- Haste
- Mana Regen
- Total Mana
- Total Energy
- Auto Attack Damage
- Click Damage
- Critical Chance
- Critical Damage
- Treasure Chest Chance
- Treasure Chest Gold
- Bonus Gold Chance
- Gold Recieved
- Monster Gold
- Clickable Gold
- Gold Piles
Since the values of ethereal items has changed from the previous versions, Any ethereal items from older versions give the bonus of +0% Gold Received. I don’t know if they will fix this and give them new bonuses, but I just sold mine to get some extra rubies.
Ascension
After completing an entire Star System, you are rewarded with 1 Starfire. Starfire is used to ascend. In the skill and automator tree tabs, there is a button that says “Ascend.” When you click it, you get a warning that says:
“Ascending will consume a Starfire and all of your World Crumbs to give you a damage bonus based on the number of World Crumbs consumed. Your skill tree will be reset, and you will lose the functionality of all flammable nodes.”
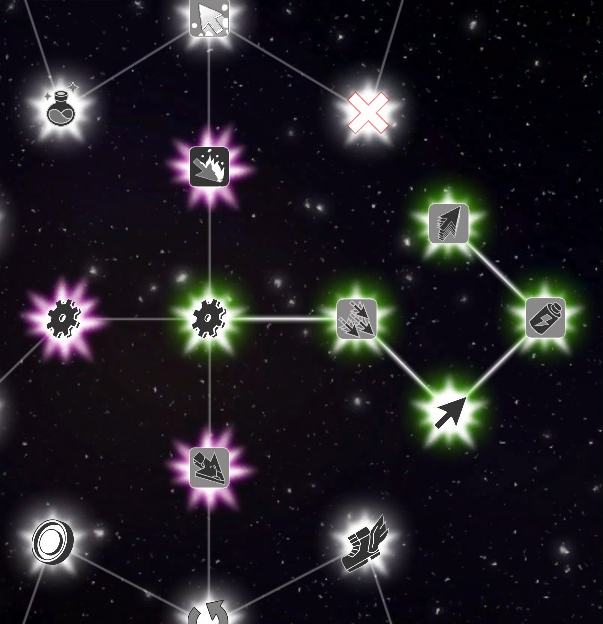
Ascension seems to be pretty buggy right now, because some of my saves have the ability to ascend without a Starfire, causing my Starfire count to go negative. Also, they keep any unspent skill points, even though there is a second warning that says “Unspent skill points will be lost on Ascension. Are you sure you want to ascend?” It is understandable that it is still buggy since ascension was just introduced, but keep these bugs in mind when ascending.
The way flammable or nonflammable nodes works is that the effect of any nonflammable nodes are kept. For example, I grabbed every haste node before ascending, so my haste stat was at 3.65 levels. After ascending, I keep this and can add even more haste when I re-buy the nodes. Flammable nodes work the opposite way, if you ascend, the effects of any flammable nodes are lost. This can be annoying, because you have to repurchase nodes like synchrony and small clicks.
I don’t really know how long you should wait before ascending. I’ve only ascended once in a legit save, and I waited a while before doing so. I was at world 2-15, and the progress was getting so slow I decided to ascend. In the previous section (Worlds and Star Systems), I talked about how the “World Difficulty” increases. In the first Star System, it increases slowly, but it really starts to speed up in the second one. Because of this, it is good to ascend sooner than later so that the difficulty doesn’t get too hard without the damage boost. It is probably best for you to test different timings to ascend and see what works best for you.
Generic Automator Setup
Here, I will talk about a pretty simple, but effective automator. It doesn’t use some of the more unique skills like the clickstorm upgrades or discharge. Without ascending, I managed to get all the way to World 2-15 before this setup got too slow (It worked amazingly after ascending though). At that point, it was only earning a level every six hours or so, but in up to World 2-10 it worked amazingly, getting around two levels an hour.
I won’t go over how to get it much, this is more for people who know the automator well and have a lot of stones and gems already. There are two sets that you have to use: one for low mana and one for high mana. The skill tree needs a be a bit late game, but it’ll pay off. The important nodes to get are Limitless Big Clicks, Hecaton’s Echo, Flurry, Small Clicks, and Expandable Small Clicks (these seem to be broken in the new update though, so I don’t know if you actually need them). Other nodes that are helpful are Synchrony, and Killing Frenzy. I also recommend getting as many haste nodes as possible (I’ve been working towards getting every one).

Also, here are each quadrant of the skill tree, to make it a little bigger:


The low mana set goes as following:
- Mana Greater Than 90% – Next Set
- 90s Cooldown – Buy Random Catalog Item
- Always – Upgrade Newest Item
- Next Monster < 90 cm Away – Upgrade The Second Newest Item
- Next Monster > 90 cm Away – Perform a click
- Energy Greater Than 90% – Clickstorm
- 4s Cooldown (Always if you happen to have two of them) – Reload
- Big Clicks <= Multiclicks – Big Clicks
- Huge Click = 0 – Huge Click
- 10s Cooldown – MultiClick
The high mana set goes as following:
- Mana Less Than 40% – Previous Set
- 90s Cooldown – Buy Random Catalog Item
- Always – Upgrade Newest Item
- Next Monster < 90 cm Away – Upgrade The Second Newest Item
- Next Monster > 90 cm Away – Perform a click
- Energy Greater Than 90% – Clickstorm
- 4s Cooldown (Always if you happen to have two of them) – Reload
- Clickstorm > 0 – Energize
- Clickstorm > 0 (If you have another, otherwise, don’t add this) – Powersurge
- Big Clicks <= Multiclicks – Big Clicks
- Huge Click = 0 – Huge Click
- 10s Cooldown – MultiClick
Managize Automator Setup
For the longest time, I could not figure out why anyone would want to get the managize skill, since it replaces energize. I was looking through different threads about world crumbs and ascension, and found someone with a managize setup. I started messing with the basic idea and came up with this automator that works pretty well. A bonus is that it you don’t have to go for mana regen bonuses as much, because managize will take care of that. I don’t really have a skill tree to show because I haven’t actually used it in a legit world. The three main nodes you have to go for is Synchrony, Managize, and AutoattackStorm. They are pretty close to each other, in the top left corner, so they are not hard to get.
There are three different sets you need to use for this automator, I named them “Good Damage”, “Stall”, and “Upgrade.” This doesn’t really matter, but it will help you follow along with the setup. Each one is relatively short, but my original version requires three 10s stones. You can swap these out for others if need be.
Good Damage:
- Next Monster < 90 cm Away – Next Set
- Next Monster > 90 cm Away – Perform a Click
- Mana Less Than 40% – Managize
- Autoattackstorm = 0 – Autoattackstorm
Stall:
- Next Monster > 90 cm Away – Previous Set
- 40s Cooldown – Next Set
- Mana Less Than 40% – Managize
- Autoattackstorm = 0 – Autoattackstorm
Upgrade:
- 40s Cooldown – Previous Set
- 10s Cooldown – Buy Random Catalog Item
- 10s Cooldown – Upgrade Newest Item
- 10s Cooldowm – Upgrade The Second Newest Item
This setup works pretty well. I added big clicks, huge click, and multiclicks with a few other stones and it worked just as good (maybe better) the the other setup I shared in this guide.
Transcension
This section is for players that are much later into their save. Transcendence is not unlocked for a while, so you will have to wait until the new tab appears. Transcension is pretty cool, but it really hurts. All progress you have made up to this point will be reset. This includes rubies, world completion, leveling up your character, the automator, ethereal items, all stat and trait bonuses, and any ascension damage boost. Your character is set back to World 1-1, at level 1, with absolutely nothing.

You get more Hero Souls when you have more Empyrean Motes. There is a cap of how many Empyrean Motes you can get based on how many times you have transcended. The cap is:
10 + Transcension Level, and your transcension level is how many times you have transcended. Your first transcension has a cap of 10, the second: 11, the third: 12, and so on.
Each world in a Star System gives the same number of Pending Hero Souls (except for World 30, possibly), here is a little chart of the first few Star Systems.
These new values are about 1/10 of the old ones, so to get the same amount, you would want 10 Empyrean Motes. I am pretty sure that completing a Star System gives you hero souls too, because I was testing more exactly how many hero souls each World gives, and Star System 1 totaled to be 0.33 per World, much more than the 0.01 the game says you get. Also, the tooltip that pops up when you hover over the transcend button says “Pending Hero Souls are gained each time you beat a new World or Star System.”
After transcending, all of your Pending Hero Souls are given to you as Hero Souls that you can spend on upgrades. These upgrades survive through other transcensions, so there is no reason not to upgrade. There is a huge list of possible upgrades, but most of them just improve the effects of nodes in the skill tree. There are a few special ones that are much more expensive, here is a list of them and what they do:
- Hand of Libertas – This upgrade gives you the “Hand of Libertas” skill and an automator gem for it. This skill will pop one of the bubble collectables for you. This is nice because it can give you the gold in the bubbles while you are not actually online.
- Downpour – Causes Clicktorrent to continuously cast Big Clicks and Huge Clicks. This skill helps to get a major damage boost while not costing extra energy.
- Kinetic Energy – Autoattacks are given a damage boost when Curse of the Juggernaut is active. It doesn’t seem to give extra damage when there are more curse stacks.
- Clickable Value – “Makes clickables scale with your treasure chest stats.” I don’t know what this one does exactly yet.
- Glorious Bounty – According to Reddit user SqLISTHESH*T, “While golden clicks is active, Treasure chests are affected by monster gold and clikeable gold multipliers. Golden clicks clicks and spend energy at 1/5th speed.” This skill is more difficult to test, but Smitedeath’s testing didn’t seem to confirm most of this, so this might not be entirely true.
- Automatic Automation – At the start of each transcension, you are given one full set of the automator. This helps give you a head start on that and you don’t have to worry about getting automator points as much in the beginning.
- Improved Ascension – This one isn’t much more expensive at the start, but gets expensive fast. For every level of this upgrade, you are given one skill point when you ascend (and the first five it normally gives). If you managed to level this up enough, you could get a full skill tree immediately. That’d be a ton of Hero Souls though.
(Thanks to Smitedeath for testing most of these!)
Before I tell you what I did with my first Hero Souls, my first transcension was in a different version, where it worked pretty differently. I probably got a lot less Hero Souls to spend, so you may be able to get much more.
I don’t know what the best method for buying upgrades is, but this is what I did: I got two levels of improved ascension and then put the rest of the points into nodes that I either get a lot of (like haste) or go for, but there aren’t that many of (like decreased item cost). This is nice because it boosts the nodes I get a lot of and the ones that are really useful, but uncommon. My first transcension was after beating Star System 3 and managed to get a total of 8 upgrades.
— Extras: —
The following sections do not have much to do with gameplay. These sections will include stuff like the Clicker Heroes Discord, how to use the console, and some of the random stuff I’ve figured out about the game.
Clicker Heroes Discord
Before going to the discord, I do not have any role in it, and I cannot say anything about how people are going to act. Please don’t get mad at me if something happens to you on discord. Here is a link to join:
[link]This is the discord for both Clicker Heroes and Clicker Heroes 2, so there are a lot of text channels you won’t really use if you only play the second one.
Naming, Copying, and Deleting Saves

I use windows, and I don’t know other computer types very well, so I cannot explain this for other computer types. Please comment if its the same or what steps you have to take.
First, you want to go to the windows search bar. You can easily do this by pressing the windows key on your keyboard or by clicking the search area to the left of the taskbar. In here you are going to type %appdata%. This will open up the file explorer and bring you to appdata>roaming. In here you should find a folder named ClickerHeroes2. Open this and go to Local Store>saves. This is where all of the saves are stored.

That’s pretty much it. You can open up the save file, which will bring you to a bunch of gibberish. I don’t recommend changing anything inside the save though, because it could mess things up.
The Console
I’m a bit hesitant to add this one, because using the console can really destroy the fun of the game. I do not recommend using it in any save that you want to be a normal save. I only use it to test things in new worlds. Some commands do affect all saves though, so use the console at your own risk.
You can open the console by pressing the tilda (~) key. I’m not entirely sure if you need to do this to unlock the console because I didn’t try using it before hand, but you might have to type in: unlockConsole playsaurus4321. After doing so, you should have access to the console.
Here is a little key for the commands that are coming up:
(Do not put () around any of these in the actual command!)
- (number) – a number should go here.
- (item) – an item name should go here. These are usually not plural, like ruby or soul.
- (stat) – one of the various stats should go here. You can view all of the stat names in the “Miscellaneous” tab
- (trait) – one of the various traits should go here. You can view all of the trait names in the “Miscellaneous” tab.
Pressing Tab brings up a huge list of commands that don’t even all fit on the screen at once. I’ll go over a few of the more useful ones. This list will expand as time goes on.
add (item) (number)- typing add with something after it (gold, mana, ruby, or even soul) and then a number will give you that many of that item. This is useful to quickly get enough gold to upgrade an item, or add some hero souls to mess around with the transcendence upgrades. To add large amounts, you can do the following: (number)e+(number). For example 2e+3. This equals 2000 because the first number is two, and the second number three, meaning that there it is 2 with three zeros after it. If you add 1e+1000 it says “added Infinity…” and it actually seems to never run out, so that’s a great way to get lots of something.
addHaste (number) – This one is fun if you don’t want to do haste through the skill tree. It adds a haste boost equivalent to one node for however much you entered.
addLevel (number) – This command adds however many levels you choose to your character. You also get that many skill points.
addStatLevels (stat) (number) – This works similarly to the addHaste. You type in the stat and then how many levels you want to add.
addTrait (trait) (number) – This works similarly to the addHaste. You type in the trait name and then how many levels you want to add.
drainXP – This one is a bit less useful unless you’re testing how much xp monsters give. If you set your level to 3, get over 500 xp, and set your level back to 1, the bar will be glitched out because you have more xp than the level requires. Using drainXP at this point will drain and level up your character. Unfortunately, the command doesn’t work if your xp isn’t more than full.
finishWorld – This one is really useful. The world you are currently in will immediately finish and give you all of the rewards you would normally get for beating it. This is similar to unlockWorldForCurrentCharacter, but that command does not give any of the rewards, this one does.
setAllNodesToAvailable – I don’t recommend using this one, because the one time I tried it, it set all nodes available for every save. This was a bit of a mess on my normal save, but it undid itself after ascending. This command just lets you buy nodes that aren’t connected to nodes that you already have. It’s pretty useful to try and get a lot of a node type fast.
setLevelForCurrentCharacter (number) – this one is pretty self explanatory. The character will be set to whatever level you chose. You can even set your character level to negative. For every kill you get you will level up once when negative, so its a great way to get skill points.
unlockWorldForCurrentCharacter (number) – this does what it says, it unlocks worlds. If you unlock World 2, it is considered beaten, so you cannot get any rewards, and World 3 is visible but not beaten. One downside to using this is you don’t get the rewards for the worlds you unlock, its just gone. You can also lock worlds that were unlocked by unlocking a world lower than your top world. For example, if you are at World 11, unlocking world 2 will backtrack you to start on World 3, although your character will say on World 9 unless you switch worlds.
Credits
These are all the people that improve my guide by helping me with information I couldn’t find.
Gibe Moni Plox – Helped just about everywhere
Bobkatron – Lots of questions and suggestions
Athalia – CH2 Discord
Kb Harlem – Transcendence
Ehksdee – Using ruby shop runes
Smitedeath – Transcendence upgrades

