Overview
Solo achievement guide featuring animated GIFs, coloured artwork, and detailed explanations. Safe viewing for young children.
1. Introduction
This guide has been colour-coded as follows:

White: Guide Information

Green: Easy Achievements

Gold: Medium Achievements

Red: Hard Achievements

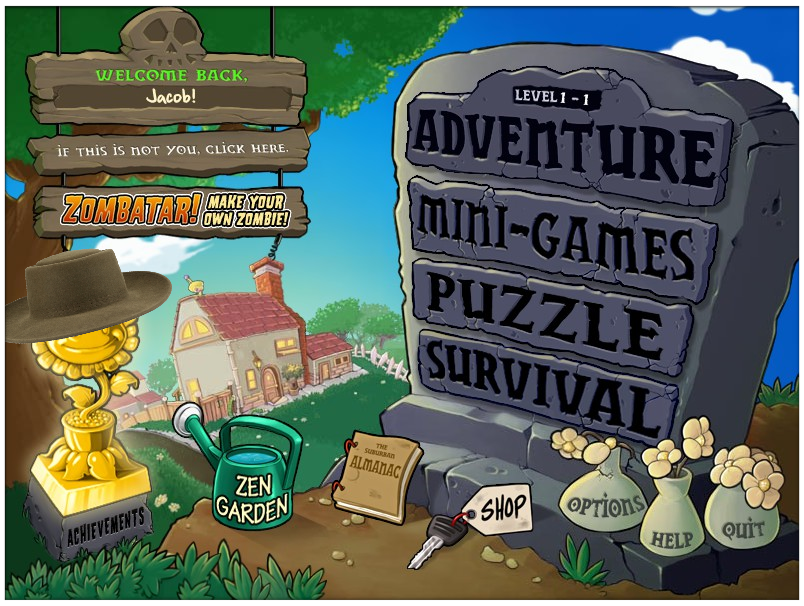
A) Change accounts.
B) Create Zombatars.
C) Check your achievements.
D) Go to your Gardens.
E) Frequent Crazy Dave’s shop.
F) Access the Suburban Almanac.
G) Choose game modes, Help, and Options.
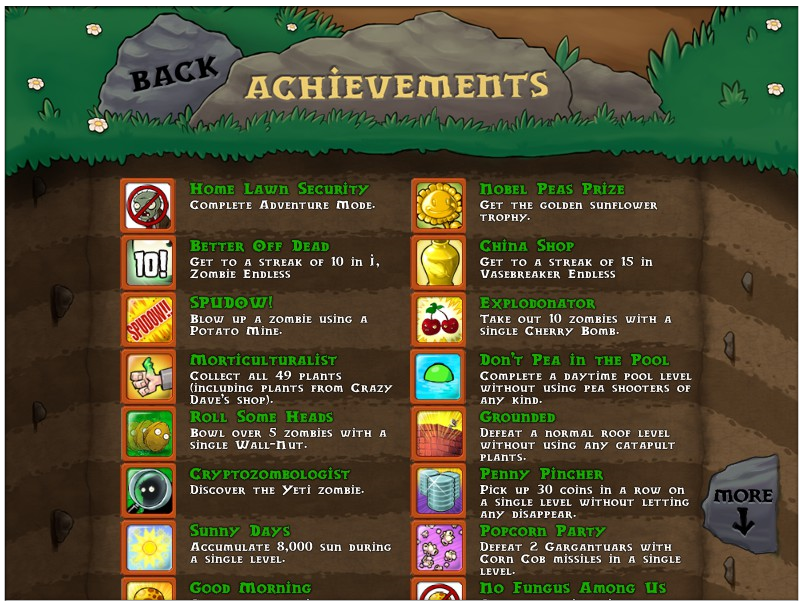
When you click ACHIEVEMENTS below the Sunflower Trophy, you will be brought down to an achievement list. Take a look at your progress!

Crazy Dave’s Twiddydinkies shop is where you buy plants and supplies for your garden and gameplay. Some plants will be acquired through natural game progression; the rest will need to be bought from Crazy Dave. In case you didn’t realize it, he eats off the floor.
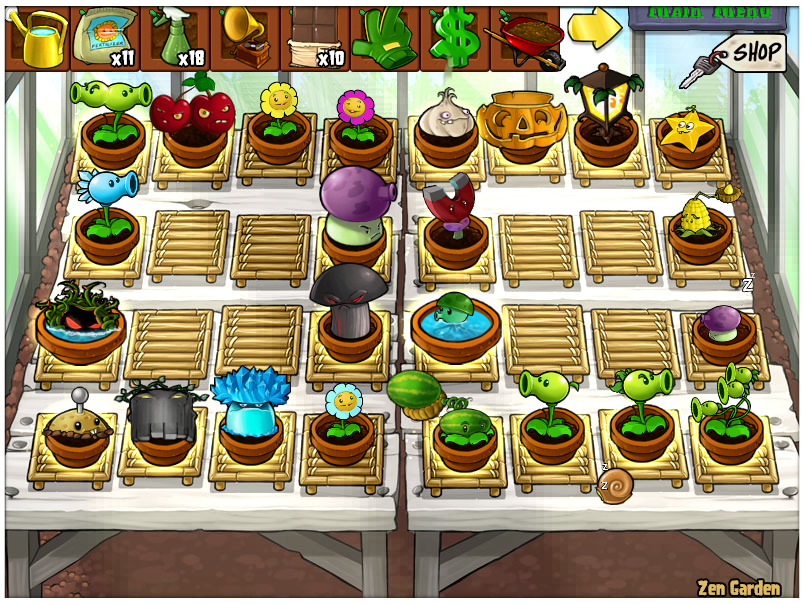
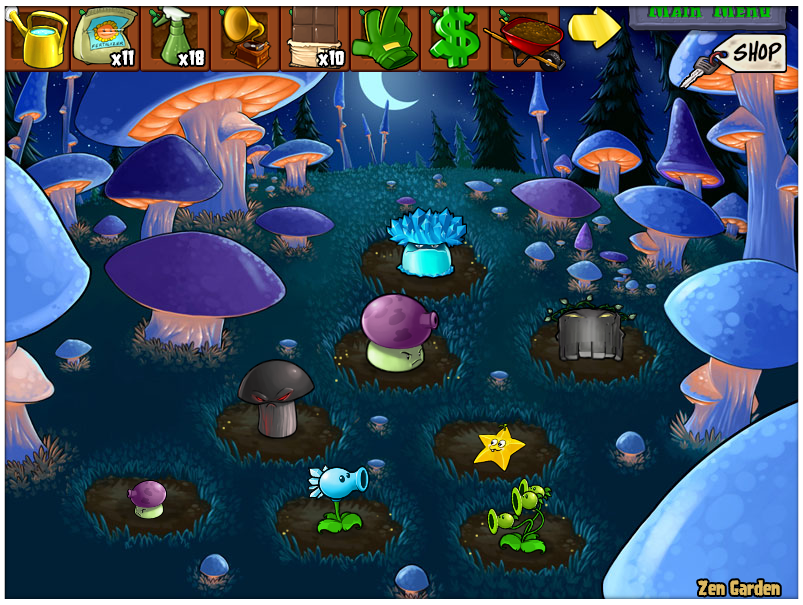
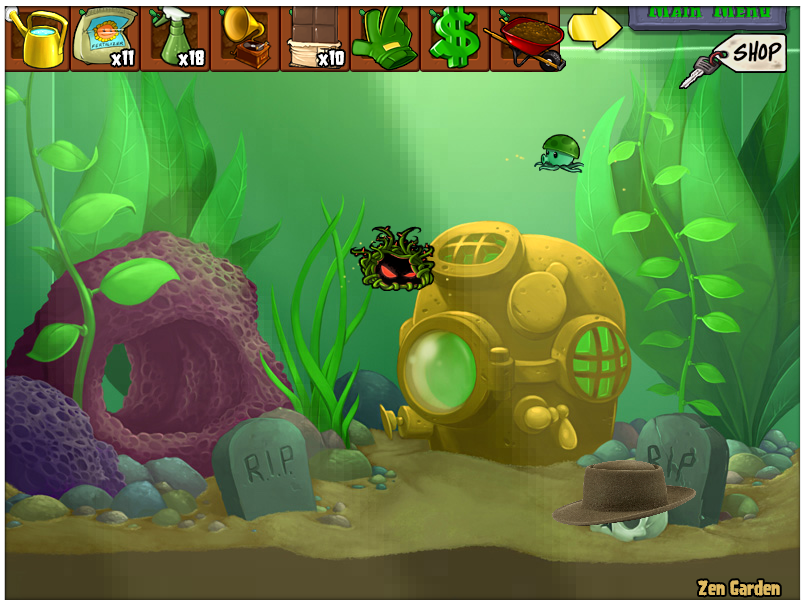

There are three Gardens in this game, two of which can be bought from Crazy Dave. The Zen (day) and Mushroom (night) Gardens will support aquatic plants in water-filled pots, but they won’t be able to grow. Daytime plants will not sleep in the Mushroom Garden, but unmatured nighttime plants (except the Grave Buster and Plantern) will sleep in the Zen Garden. In those cases, plants again will not be able to grow. Finally, there is the Aquarium Garden which only supports aquatic plants.
Every plant you have will go through up to three stages of growth, needing plenty of water and soil. As you give them what they need, you will be rewarded with larger and larger sums of money until growth ends. Then, plants will occasionally give signs of what they need to stay healthy, such as bug spray, music, and watering.
Stinky the Snail can be seen sleeping in your daytime Zen Garden. Clicking on him will wake him up for a time, during which he will move around collecting any coins and diamonds for you that are given by plants. Feeding him Chocolate will make him much faster for a short period.

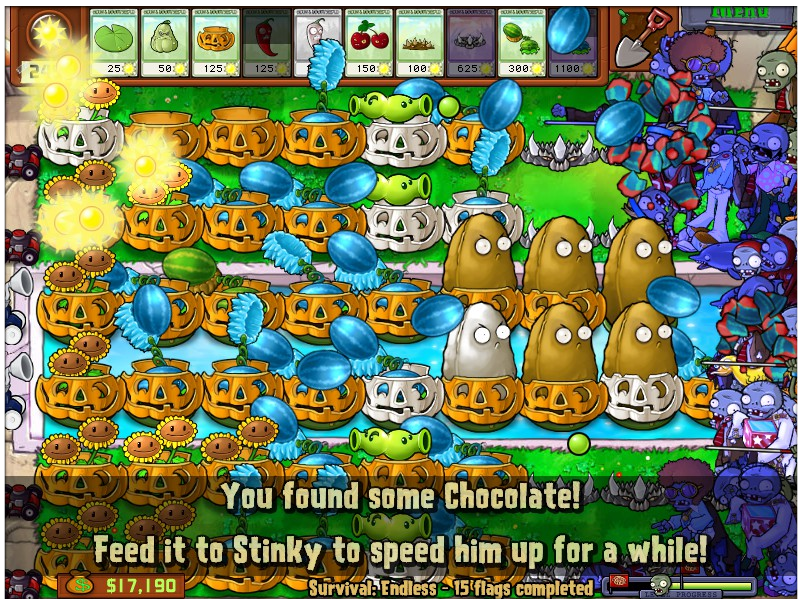
Chocolate can not be bought from Crazy Dave, but instead can only be acquired randomly during gameplay. From time to time, it will show up large on your screen for you to click on, then disappearing after a short time on its own. The same things happens with coins, diamonds, and the odd gift-wrapped plant.

Zen (Day) Garden
A) $3,000 for sproutling plants.
B) $5,000 for plants in mid-growth.
C) $8,000 for full-grown plants (fully matured Marigolds will get $3,000).
Mushroom (Night) & Aquarium (Water) Gardens
A) $5,000 for sproutling plants.
B) $8,000 for plants in mid-growth.
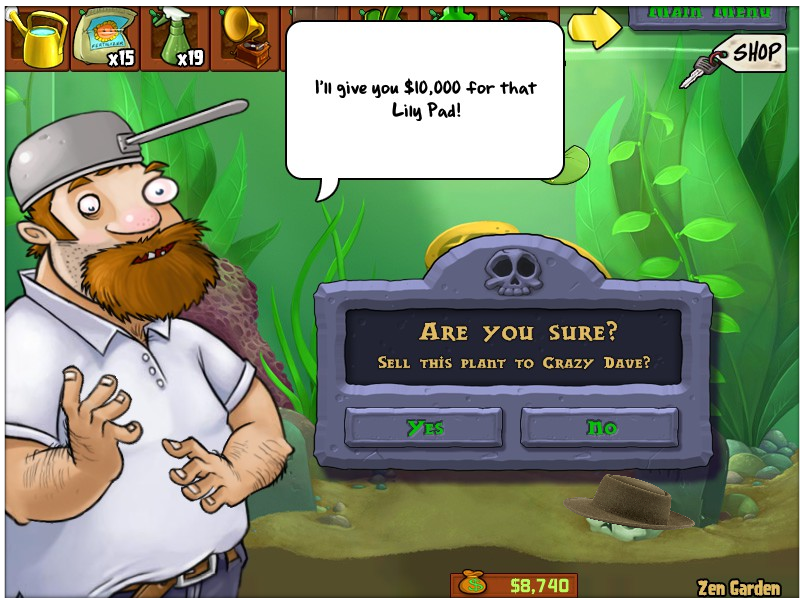
C) $10,000 for full-grown plants.
The Tree of Wisdom starts as a baby sapling, giving you wisdom the more you help it grow. Bags of earth for the tree can be bought from Crazy Dave for $2,500 a piece. #17: Towering Wisdom requires you to help the tree grow to 100 feet tall, costing $10,000 for the tree itself (including the first foot of tree height) and $235,000 in soil.

When you first buy the tree, Crazy Dave will give you five bags of soil for it free of charge, worth another five feet of growth.
Growing the tree will not only give you tips on game characters and strategy, but also unlock certain game features. Milestone tips:
“Tree food, please!” (before being first fed)
“Thank you for feeding me! Keep giving me food and I’ll give you valuable information!”
“Pssst! Try typing future while playing to experience zombies… from the FUTURE!”
Typing mustache when playing with zombies will bring a terrible transformation to the undead!”
“If you type trickedout, don’t be surprised if you see something wacky happen to your Lawn Mowers!”
“Hey, I’m 100 feet tall! Celebrate with me by typing daisies to get the zombies to leave tiny daisies behind when they die.”
“Whoa! I’m 500 feet tall! This calls for some dancing! Type dance to get the zombies to boogie on down!”
“WOW! I’m 1000 feet tall! Celebrate with me by typing pinata to make zombies spit out candy when destroyed!”
Game Over

If you fail to stop the zombies from reaching the back door of your home or the edge of your roof, you will see this lovely message. You even get a scream and sad violin music! >.>

2. Suburban Almanac

Index, Peashooter


Sunflower, Cherry Bomb


Wall-Nut, Potato Mine


Snow Pea, Chomper


Repeater, Puff-Shroom


Sun-Shroom, Fume-Shroom


Grave Buster, Hypno-Shroom


Scaredy-Shroom, Ice-Shroom


Doom-Shroom, Lily Pad


Squash, Threepeater


Tangle Kelp, Jalapeno


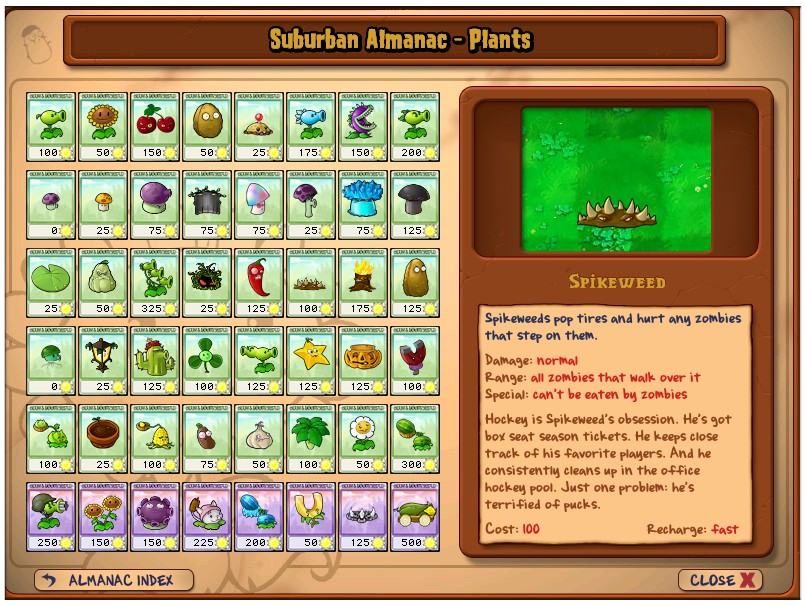
Spikeweed, Torchwood

Tall-Nut, Sea-Shroom


Plantern, Cactus


Blover, Starfruit


Pumpkin, Magnet-Shroom


Cabbage-Pult, Flower Pot


Kernel-Pult, Coffee Bean


Garlic, Umbrella Leaf


Melon-Pult, Bruton

Gatling Pea, Twin Sunflower


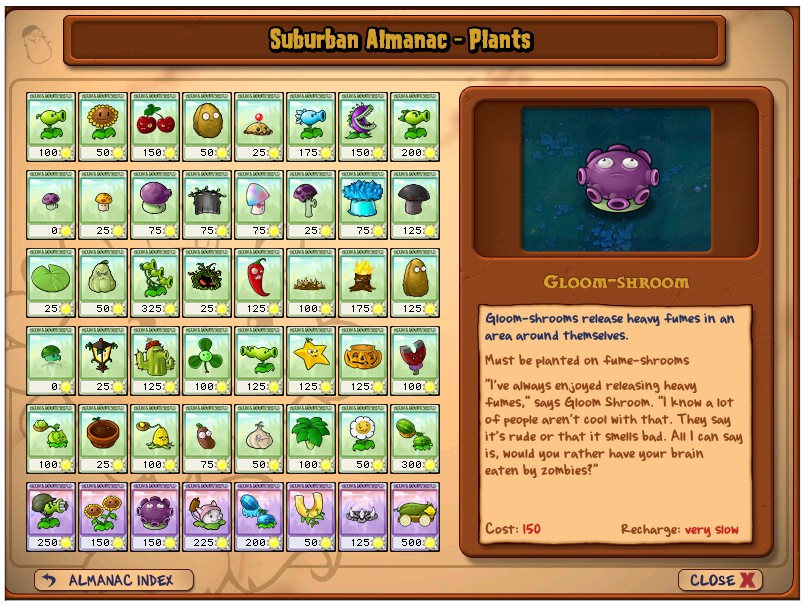
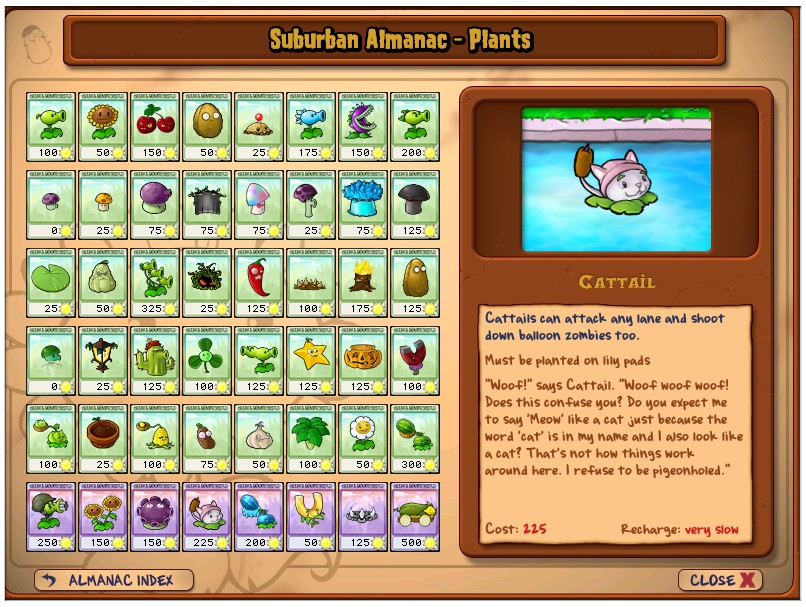
Gloom-Shroom, Cattail
Winter Melon, Gold Magnet


Spikerock, Cob Cannon


Imitater


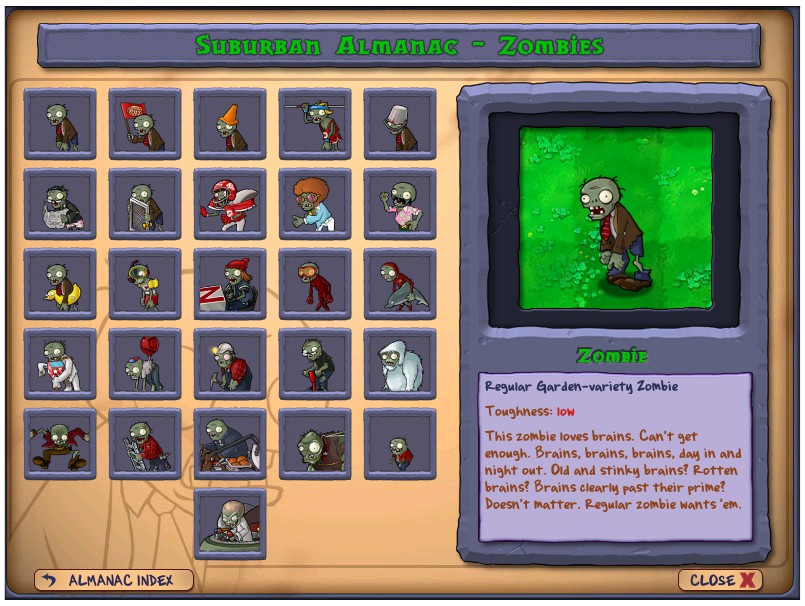
Zombie, Conehead Zombie

Pole Vaulting Zombie, Buckethead Zombie


Newspaper Zombie, Screen Door Zombie


Football Zombie, Dancing Zombie


Backup Dancer, Jack-In-The-Box Zombie


Balloon Zombie, Digger Zombie


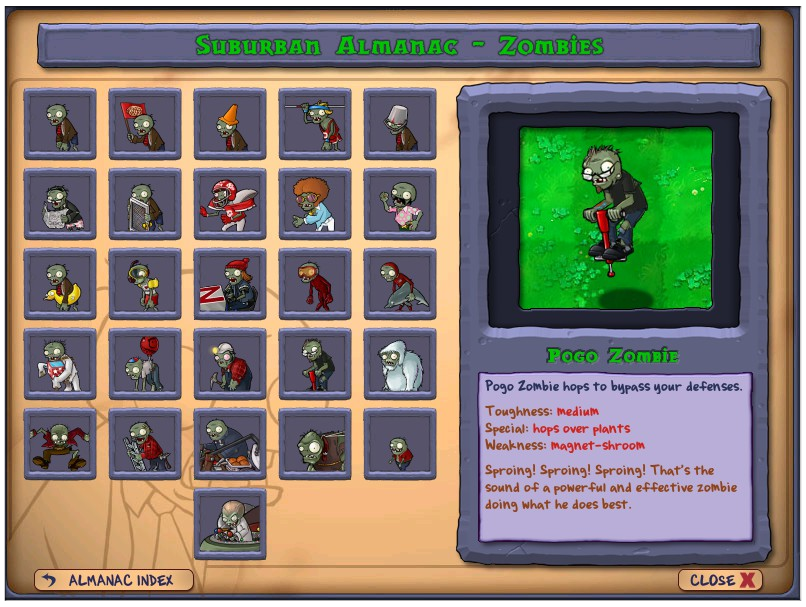
Pogo Zombie, Zombie Yeti

Bungee Zombie, Ladder Zombie


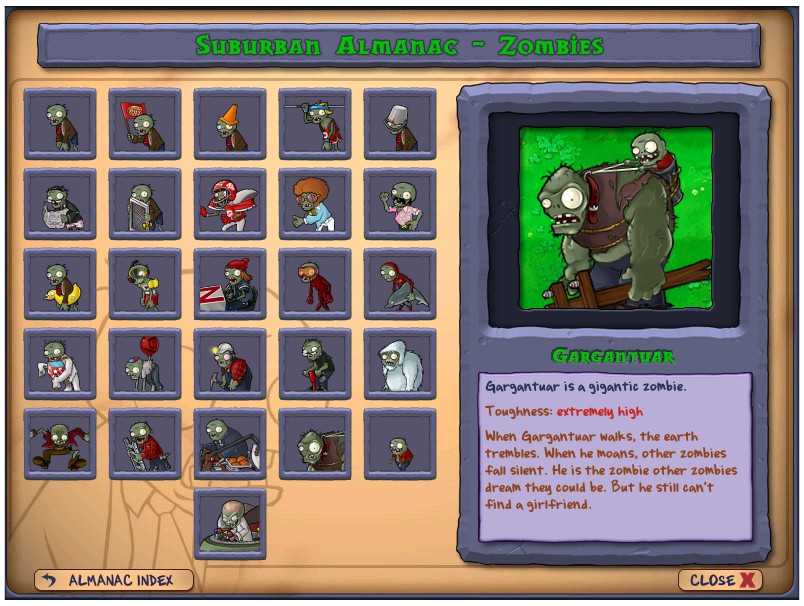
Catapult Zombie, Gargantuar

Imp, Dr. Zomboss


Flag Zombie

[:] Achievements #1 – #5


#1. Ask Me About Mustache Mode

Enable Mustache Mode. Simply type mustache with your keyboard and witness the hair tonic that actually works.

For more fun, try typing words like future and trickedout once your Tree of Wisdom is tall enough. If it isn’t you will see this message pop up. To undo any of these commands, type them in a second time.

#2. Disco is Undead

Hypnotize the lead Dancer Zombie. Plant a Hypno-Shroom in front of them either just after they spawn Support Dancers or before they stop dancing backward. In Adventure Mode, Dancing Zombies first appear in level 2-8.

#3. Don’t Pea in the Pool

Conehead Zombies need at least two Kernel-Pults if not three attacking them at once. Get a full column of Spikeweed down as soon as reasonably possible. They don’t have to be made into Spikerocks, but it helps. Kernel butter and spike plants make an important combination.

#4. Explodonator


Blow up 10 zombies with a single Cherry Bomb. Easily accomplished in the Big Trouble, Little Zombie mini-game. You will be given many Cherry Bombs throughout the level and have several chances to take out thick clusters of little ones.
You may also achieve this playing Survival Endless, where large numbers of zombies will attack at once in later rounds.

#5. Roll Some Heads
Bowl over 5 zombies with a single Wall-Nut. This can only be done in one of the two Wall-nut Bowling mini-games. A single Wall-Nut from you must hit one zombie and bounce off of four more.

Money will drop in higher and higher amounts with each ricochet, and sound cues will let you hear your progression. A gold coin drop will mark your fifth and final bowl-over. Don’t use red nuts, they explode on impact.
[:] Achievements #6 – #10

#6. Spudow!

Blow up a zombie using a Potato Mine. Plant mines at least three spaces ahead of normal tie-wearing zombies. By the time they reach your potato, it will arm and explode on impact. Other zombies will move faster, requiring you to plant further ahead of them.

#7. Sunny Days


Get 8,000 Sun during a single level. Observe the layout and early level in these pictures. Some Twin Sunflowers are used, but not too many so as to maximize return on short-term Sun investment. Sun count will max out at 9990; you can still collect Sun, but your counter will not reach a higher number.
Another option is to eventually cover your entire lawn with Sunflowers except for one row, where you will make a line of Wall-Nuts and/or Tall-Nuts. One or two zombies should remain at the end of the level, munching away while you collect Sun. Wall-nut First Aid from Crazy Dave’s shop is useful here, but not essential.


#8. Cryptozombologist


Discover the top secret zombie. He will appear for the first time on level 4-10, during your second playthrough of Adventure Mode. Kill him quickly, as he will only move forward for so long before turning around and walking back off-screen. If you miss him, it may be some time before you see him again.
After downing the Yeti for the first time, he can appear again anywhere. His initial defeat will drop five diamonds amounting to $5,000. Every subsequent encounter and defeat will drop $4,000.

#9. Good Morning

Complete a daytime level by planting only Mushrooms and Coffee Beans. This can be accomplished on any day or daytime pool level. This method requires Imitater. Start by planting a Sun-Shroom and wake it as soon as you can. In the meantime, place Puff-Shrooms one after another down each row starting at the fifth column, replacing those that get eaten.
Place a Coffee Bean on the Puff-Shroom in the fifth column, at whichever row zombies approach first. Once the entire column worth of plants are awake, begin to wake up the whole sixth column from the left while continually padding each row with sleeping Puff-Shrooms. Once the entire sixth column is awake, continue padding while saving up enough Sun for Scaredy-Shrooms. Place those first down the third column from the left. Once they are all awake, go on planting and waking them along the fourth column from left right next to it.
As a footnote, attempting to plant and wake more than one Sun-Shroom may prove counterproductive and ruin your chances at success.

#10. Grounded


Defeat a normal roof level without using any catapult plants. This is easiest during early roof levels. Notice the slope on these levels reaching four spaces; any shooting plant in that region will not be able to reach past the slope itself. Depending on how many Seed Slots you have available and what flora Crazy Dave may choose, you will have to prioritize what plants are most important. Spending $200 on a Garden Rake would be helpful, as it will kill the first zombie that approaches you.
Squash, Potato Mine, Repeater, Gatling Pea, Twin Sunflower, and Torchwood are recommended. Pumpkin and Umbrella Leaf to protect your other vegetation are also valuable. Another option is to use nocturnal plants with Coffee Bean. Puff-Shroom, Fume-Shroom, Gloom-Shroom, and Magnet-Shroom are recommended. Depending on your play style, you might make very good use of Doom-Shroom and Imitater. If playing very early levels, a largely explosive arsenal can work in your favour.

[:] Achievements #11 – #15

#11. Home Lawn Security
Complete Adventure Mode. There are fifty levels in this mode across five layouts, culminating in a final confrontation against Doctor Zomboss, leader of all zombies.

A) Day levels. Always on a sunny day with a green lawn. No pools, no fog, no roof tiles. Nocturnal plants placed here will be asleep unless awoken by a Coffee Bean. Covers levels 1-1 to 1-10. Level 1-6 introduces the Pole Vaulting Zombie.

C) Night levels. Day plants will function normally at night, except Sunflowers, Twin Sunflowers, and Sun-Shrooms will produce less Sun. Nocturnal plants will not be asleep anymore, and Coffee Beans are not needed at all. Grave Busters will be needed to eat graves that will pop up from the ground in random spots. Level 2-8 introduces the Dancing Zombie, giving you your first crack at #2. Disco is Undead.Covers levels 2-1 to 2-10.
B) Pool levels. Similar to day levels, except there is a pool present where aquatic plants may be used and where another layer of protection can be bought from Crazy Dave’s shop. Lily Pads, Tangle Kelp, and Sea-Shrooms can only be used in levels with a pool. The Scuba Zombie and Dolphin Rider Zombie will appear in these levels, as will random zombies covered in seaweed that pop up in different sections of your pool. Covers levels 3-1 to 3-10.


Grave Busters are not important here as in night levels, because no graves will rise from the ground. Level 4-3 introduces the Balloon Zombie, which can be beaten with Blovers, Cacti, Cattails, and Cob Cannons. Chili Peppers and Cherry Bombs also work. Covers levels 4-1 to 4-10.
E) Roof levels. On the roof of your home, it will always be sunny except for the final fight against Doctor Zomboss, which takes place throughout level 5-10. Every plant will need a Flower Pot, with Spikeweed and Spikerocks by extension not being useable. Bungee Zombies are a particular menace, and should be thwarted with Umbrella Leaves, explosive or freezing plants, and Chompers. Covers levels 4-1 to 4-9.


F) Doctor Edgar George Zomboss. Leader of all zombies, and final opponent of Adventure Mode. The level in which you face him is the only level that takes place of your roof at night. His ice balls must be countered with Chili Peppers and his fireballs with Ice-Shrooms. He will leave a polite note explaining his actions before he fights you, and a note from his subordinates will be left for you after his defeat, denoting their capitulation.
Notice the plant configuration in the pictures. Melon-Pults are best in the leftmost column, where they tend to be more safe. Cabbage-Pults are best in the second column, and Kernel-Pults along the third for butter launching to slow zombies down. Try to keep one column of Flower Pots empty for Chili Peppers and Ice-Shrooms, and do your best to keep at least one or two of each available.
Finally, beware of Doctor Zomboss slamming buses down on your plants and dangling multiple Bungee Zombies from his mechanized hand to steal what you’ve planted. Chili Peppers and Ice-Shrooms will work on them as well. The final battle takes place throughout level 5-10.

#12. Morticulturalist
Collect all 49 plants. This includes Imitater, but not Bruton. See the Suburban Almanac section for more information.

#13. No Fungus Among Us

Complete a nighttime level without planting any Mushrooms. This can be done during any night or fog level. The later you try it level-wise, the harder it will be. It doesn’t matter if Crazy Dave chooses Mushroom plants for you, just don’t use them.

#14. Nobel Peas Prize


Get the golden Sunflower Trophy. You will need to first beat Adventure Mode and unlock the silver Sunflower Trophy. Then, complete all Mini-Games, Puzzles, and Survival levels (this excludes Endless challenges). At the end of the final outstanding match, you will be awarded five diamonds and the golden Sunflower Trophy. Back at the Main Menu, you will notice that your golden Trophy has replaced the silver one.

#15. Penny Pincher


Pick up 30 coins in a row on a single level without letting any disappear. Having two Gold Magnet plants can help. Placing two or more will collect all coins dropped, no matter where they are. Although they must be planted on Magnet-Shrooms, Coffee Beans are not needed.
Another option is to play the Whack-A-Zombie mini-game and collect as many coins as quickly as possible. Use Grave Busters to remove graves one whole row at a time. Your goal in that is to keep remaining graves grouped together for easier assault management.
[:] Achievements #16 – #17

#16. Popcorn Party

See #21. Immortal for tips on a setup to get both achievements in one game on Survival Endless.

#17. Towering Wisdom


Grow the Tree of Wisdom to 100 feet. As mentioned in the Introduction section of this guide, the overall cost for this achievement is $245,000. Look into the Moneymaker strategy just below #21. Immortal.
[:] Achievement #18


#18. Better Off Dead


Get to a streak of 10 in I, Zombie Endless. Hardest achievement in the game. Sequence of events and timing are key. Some rows will require more than one zombie; knowing when to release them, when to sacrifice them, and when to choose one class of them over another is crucial.
Always study a board before starting, don’t be impatient. When getting tired, it is best to leave your current progress as-is and return at a later time. You have to be patient enough to analyze each board, know the abilities of each zombie and plant, and strategize an entire board before you even make the first move.
The idea is to do all this using as little Sun as possible, saving it for whatever may come in later rounds. Beyond that, you can expect having to try at least two to three times to get this achievement. Acknowledge beforehand that, even if you do everything right, you can still lose. It will depend not only on your choices, but what board configurations pop up and how much Sun you are afforded through plants each round.
A few zombies of note:

They eat fast and have a toughness between that of a Conehead Zombie and Buckethead Zombie. The Buckethead Zombie certainly can take more hits, but moves much more slowly than a Ladder Zombie before they climb.


Take this beginning level for instance. You start with 150 Sun, and getting more is paramount. The Threepeater is covering the the row it occupies as well as the two on either side of it. This makes the lawn’s bottom row the only one that can be used to start. You have one choice; a Conehead Zombie or Pole Vaulting Zombie, the latter being the safer option due to their speed and vaulting over the first plant, a freezing Snow Pea.

It is now time to deal either with the Threepeater-toting middle row or the top Magnet-Shroom-harbouring one. The top is most favourable, because the Magnet-Shroom will interfere with any metal-wearing zombies within the lawn’s top half. More, the Threepeater will not cover that area. Once the Magnet-Shroom is gone, any zombies with metal can be used anywhere on the lawn.
Clearing this row will take more than one zombie because of the firepower present. A Conehead Zombie will be used, as it is the most resilient without metal. If he gets through the Magnet-Shroom and Kernel-Pult, a Buckethead Zombie will be used to follow up. If not, a Football Zombie will be employed. The Repeater to the far left makes this investment of Sun necessary. Because of the Split Pea present, a Digger cannot be used.

The gamble here is the Kernel-Pult – how many times will your zombie be hit with butter instead of kernels? You can’t know in advance. The Threepeater shoots a single pea at once per lane, so it is decidedly worth the risk in order to save Sun.
Now there are only two rows left. On the topmost one, there are two Snow Peas; your first thought then is to use a Digger. Be sure that there are no Magnet-Shrooms, Split Peas, Starfruit, or Threepeaters that can interfere. Also mind any row containing more than one Spikeweed, because their placement and damage may stop your zombie short of their goal. Here, because there are no plants to interfere except one Spikeweed, a Digger will survive.


In the final row, a Conehead Zombie may prevail. A Buckethead Zombie would definitely get through it without a problem, but we want to save Sun.

Study the Magnet-Shroom here. You would think to use a Bungee Zombie on it, except that it would be blocked by the nearby Umbrella Leaf, wasting 125 Sun with no return on your investment.
You would then scan for Threepeaters and Starfruit. The former, placed as it is here, would require a zombie using metal to remove, but the Magnet-Shroom prevents it. Using a Bungee Zombie would be pointless, as it is not in this case cost-effective.
The priority then must be the Magnet-Shroom. Once that row is cleared and brain eaten, the row containing the Threepeater will be dealt with. That can’t be done with a Digger, though, because of the Split Pea.
A Football Zombie will be required for that center row, and even that may not be enough. If he can’t endure, you will have to use a Buckethead Zombie to finish. Here lies another point of strategy, the shield. If you know you will need more than one zombie to finish a row, then why not send one behind the other? The first can take as many hits as possible, sparing your second. The only issue then left is timing. Sending a second zombie too early will just get them killed, wasting Sun.
You get the idea.

[:] Achievements #19 – #20

#19. Beyond the Grave

Beat all 20 Mini-Games. Below are strategies for a few of the more challenging and fun games:


Bobsled Bonanza.
Start by placing all Sunflowers. Your next plant should be a Cattail, except for using Squash on Zombonies and maybe Chili Peppers for Bobsleds. Your objective is to collect enough Sun to plant Spikeweed and then Spikerocks along the farthest right column. This will prevent Zombonies from crossing your lawn and leaving ice trails behind them for Bobsleds to travel.
Planting two Cattails and then Snow Peas along an entire column will help tremendously. Beyond that, saving up Sun is important for when Spikeweed and Spikerocks need to be replaced. Adding a second layer of Spikeweed just behind the first would also be prudent.


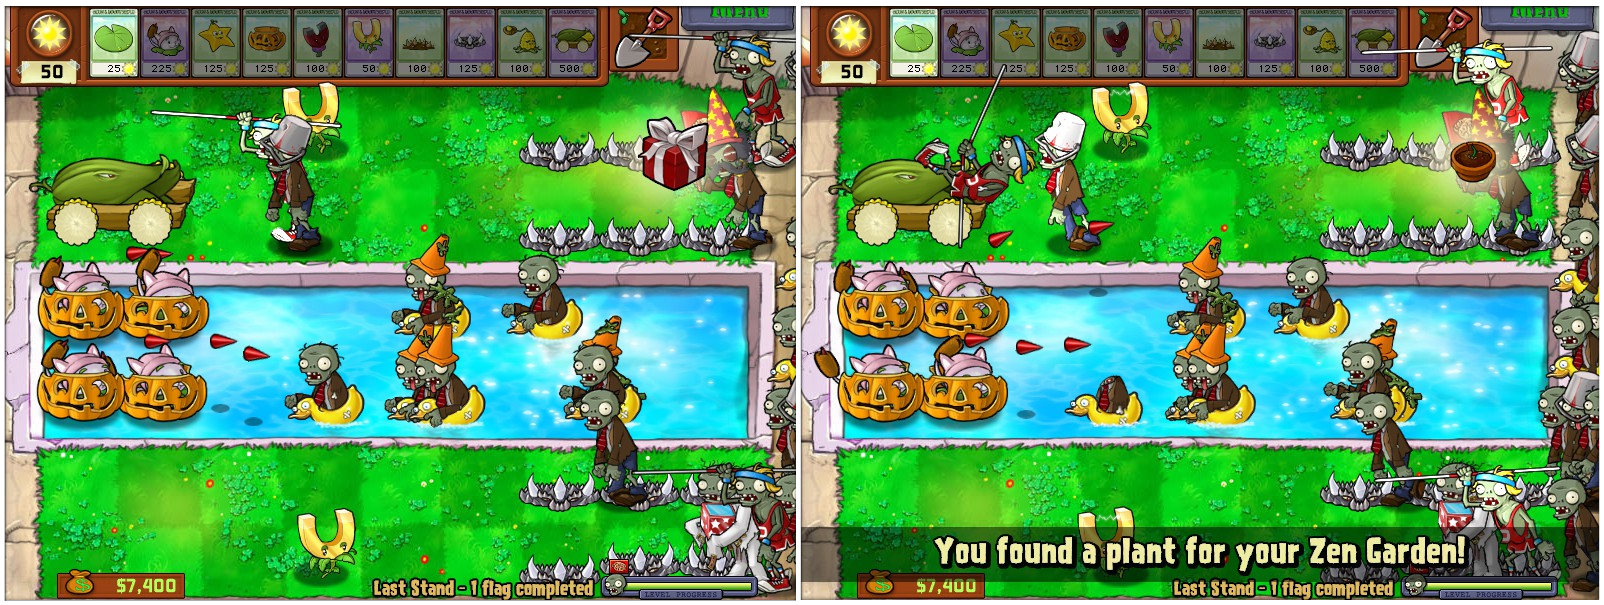
Last Stand. The leftmost picture is your initial setup. The picture on the right is your eventual setup in preparation for your fifth and final flag. Between flags you will add three Repeaters followed by two Gatling Peas. The idea is to keep the pool cleared as much as possible so that your Cattails can focus their fire elsewhere. The only downside is that one row will be more vulnerable than the rest.


Pogo Party. First, buy a Garden Rake. Imitater for cloning Squash and Starfruit is recommended, but not essential. Start with Flower Pots and Sunflowers, planting along two full columns. As zombies appear (beyond the first Sideshow Bob-style Rake recipient) place Flower Pots with Squash as needed along the fifth column. Make sure you do it soon enough to intercept Pogo Zombies; if not, Chili Peppers will be required to catch them.
When possible, fill in the fifth column from the left with Tall-Nuts and the third with Melon-Pults. The latter plant is costly, and so an alternative is to place Flower Pots two spaces ahead of your Tall-Nuts and plant Starfruit on them until you have saved enough Sun to install your melon line. Using these two plants in conjunction, placed as explained, would be ideal.
It is good practice to leave the fourth column from the left empty, using Squash, Cherry Bombs, and Chili Peppers along that section as needed. When focusing on Starfruit, be sure to cover the sixth and seventh columns with them. Using Pumpkins to protect them is recommended, as zombies will approach in groups and quickly devour your nearest unprotected plants.

20. China Shop

Get to a streak of 15 in Vasebreaker Endless. Above all, this requires patience and pattern awareness. If you’re in a rush, you won’t make it.
Never panic. Avoid Cherry Bombs or Squash on a Gargantuan until he’s reached at least halfway across the lawn; if you don’t, he will throw his Imp. You’ll always start with one Gargantuan per round until you reach level 11. In levels 11-20, there are two per round. Levels 21-30 have three per round.
A good trick against them is to plant a Snow Pea and then Squash just in front of it. This also works well when clearing whole rows. When doing so, try to eliminate entire rows starting from the far right. Once a zombie treads in front of a vase, break it. Following that process, all zombies in a row will be walking together and can be taken down all at once with a single Squash.

Now study this example, and read through the setup description below.
Left side:
Every level Vasebreaker Endless contains the exact same number and types of plants to be used. You will always have two Threepeaters; the first should be placed to the far left, second row from the top, and the second in the same column, second from the bottom. This will have them covering the entire lawn.
You will have two Snow Peas. One should be placed in the top left corner, the other in the bottom left. Your single Wall-Nut should be placed in the center row just left of the leftmost vase. Behind that Nut you will place your only Peashooter.
A number of Squash plants will be received. Two, if possible, should be placed in front of each Snow Pea. If more are discovered in time, try placing one in front of each Threepeater. It does takes two Squash to kill a Gargantuan, but multiple pea hits will also get the job done (so don’t panic). If you discover a Squash and don’t know what to do with it, let it sit until it starts to blink. At that point, left click your mouse on it and hold that click down. Keep holding it until the appropriate time presents itself and plant away.
Next is the Potato Mine. There is only one per round, and it would normally be placed in front of a Threepeater. If not, it can be used anywhere to nail stragglers, stop Gargantuans and Imps, or as an alternate tool from the Squash to blow up zombie groupings.
All plants explained up until now cover your setup along the lawn’s entire left side.
Right side:
You will be blessed with six left-shooting Repeaters per level. Plant them on the far right side of the lawn, trying to clear the first two rightmost vase columns first if possible. This will help to prevent their destruction via surprise Jack-In-The-Box Zombies.
This is the ideal setup. You may not always be able to follow that model, but it is a good point of reference. Cherry Bombs, for their part, should be used sparingly. Always collect any Sun that comes at random intervals from vases, and consider it precious.
[:] Achievement #21

#21. Immortal (includes Moneymaker strategy just below)


Get to 20 flags in Survival Endless. You must reach –flag 21– for this achievement to unlock. Take care to fill and balance your lawn; losing track can get you overrun. Another two Cob Cannons more than you see here can be very helpful, but only if you have the reflexes to take advantage of them. The vacant Pumpkin you will notice in the uppermost row is reserved for Ice-Shrooms on a diet of Coffee Beans.
This achievement and #16. Popcorn Party may be among the last you earn. They are often achieved during the same game, because Gargantuans and red-eyed Giga-Gargantuans will appear regularly. By the time you reach flag 20, you will have to be using your Cob Cannons constantly between recharges. Use two for the top half of your lawn and the other two for the bottom half.


Study the above four screenshots for a general idea of plant progression. The setup can vary somewhat both because of differences in progressive Sun count and zombie spawning.
Moneymaker strategy:


Study these images and notice the progressive plant setup. These pictures were taken playing Survival (Hard), which consists of ten flags worth of gameplay. Depending on money drops and how fast you develop your lawn, you can expect to make between $17,000 and $25,000 on average. If playing Survival Endless, you can make more but will have to be flexible with your plants at higher rounds. This method requires Imitater. Not using that plant will cause too much delay in your setup, dwindling your profit margin.
3. Conclusion
