Jellyfish Cove 5 FoS Solo EASY 6/5/2015
Character Loadout/Youtube Walkthrough
Follow this guide and you will have almost no problem beating Jellfish Cove with 5 FoS on. Here is the setup used:
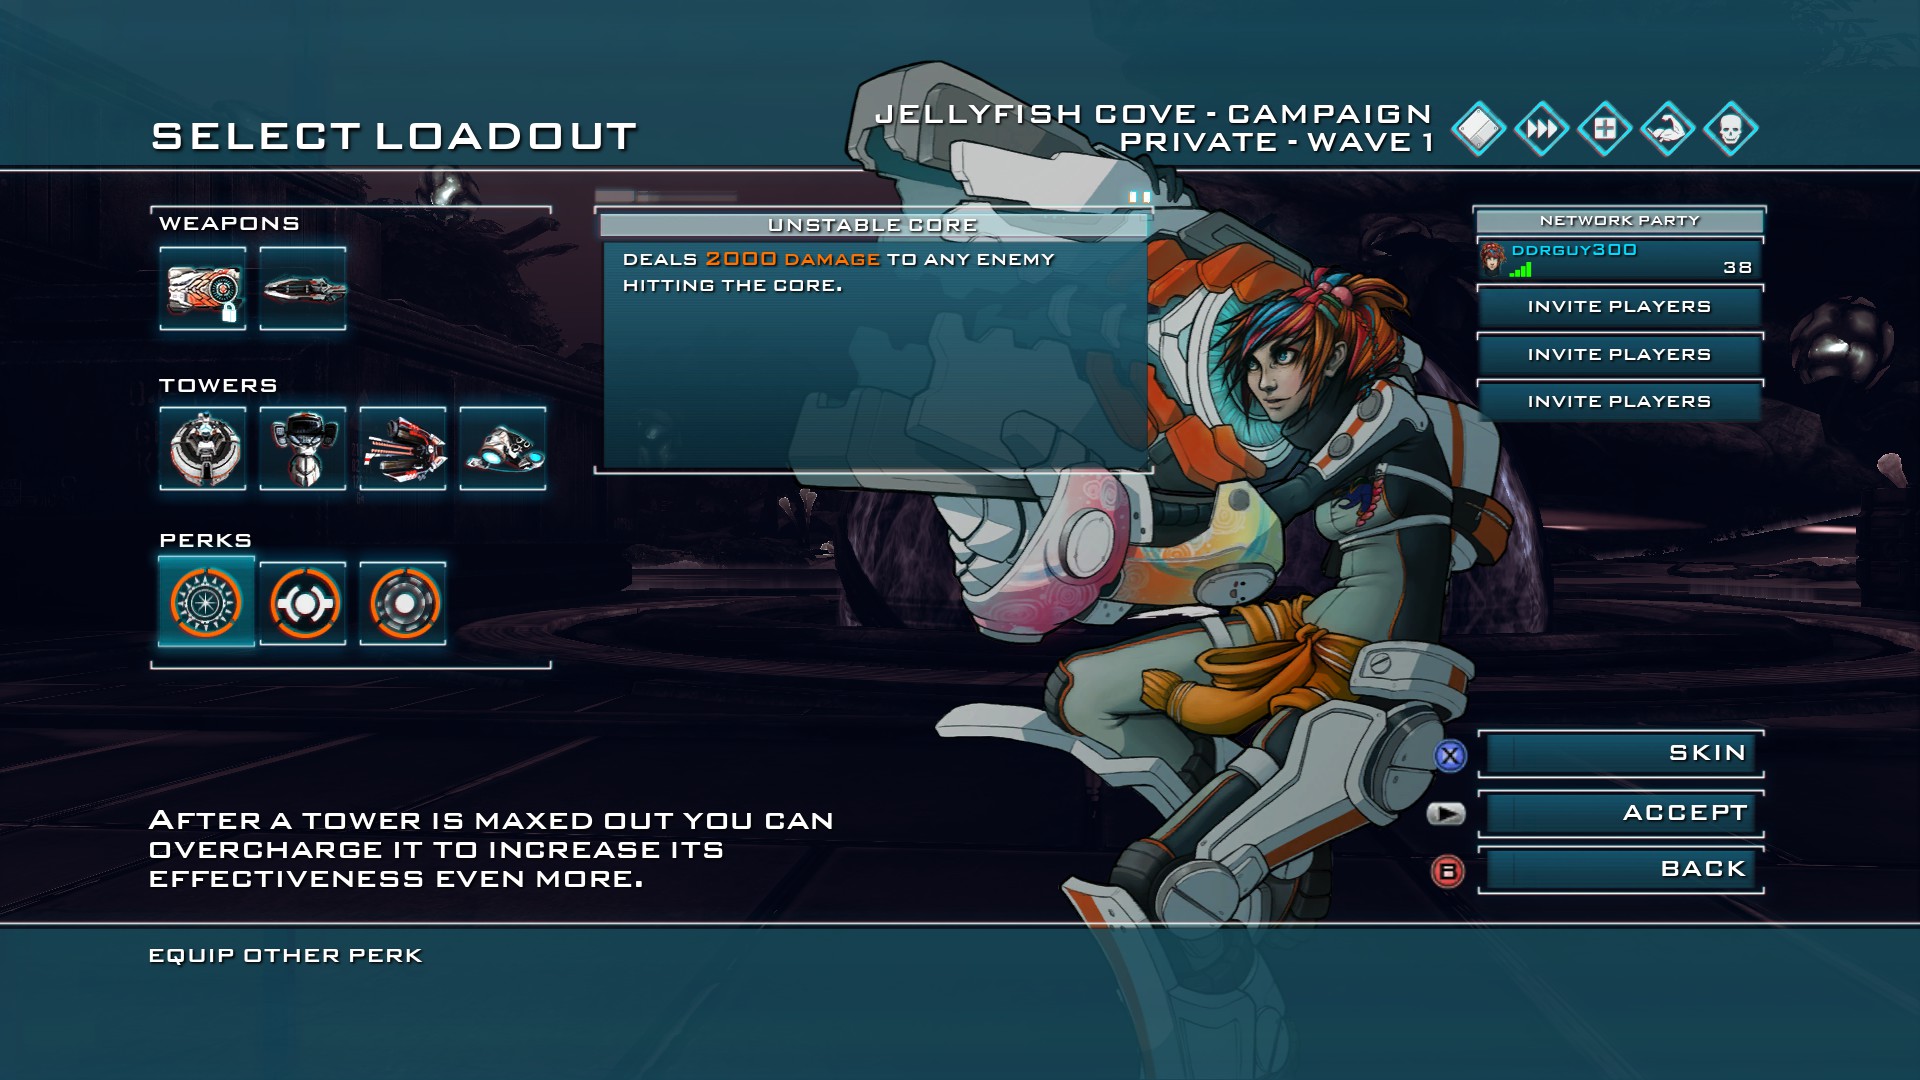
And the link to my youtube playthrough if you're more of a visual learner:
And the link to my youtube playthrough if you're more of a visual learner:
Wave 1
Setup:
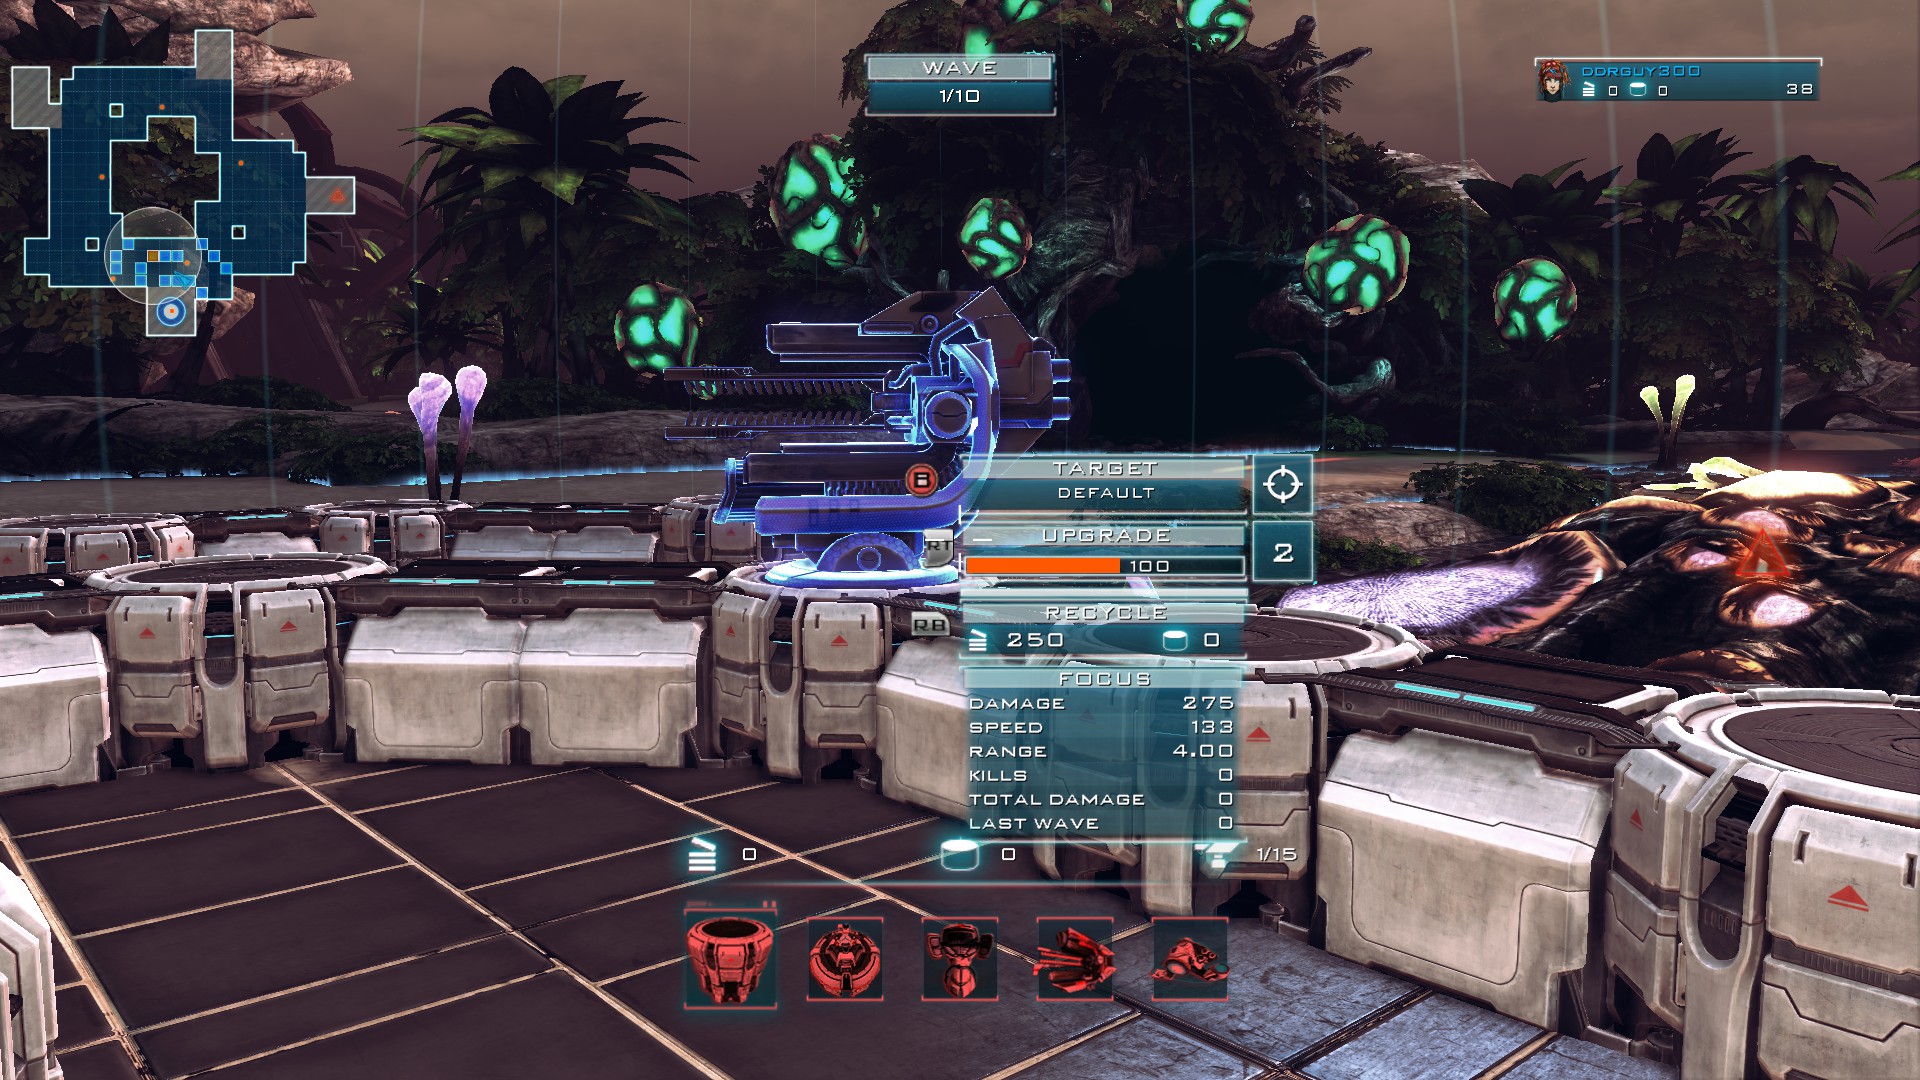
Make sure your towers are set up like this. This is going to allow the enemies to funnel to a single point while still giving you some time to take care of them before they reach the core. Dump all of your resources into a focus tower. You mines will not be needed until wave 5.
Strategy:
Start off locking onto the first soaker and let the snorkers come at you like so:
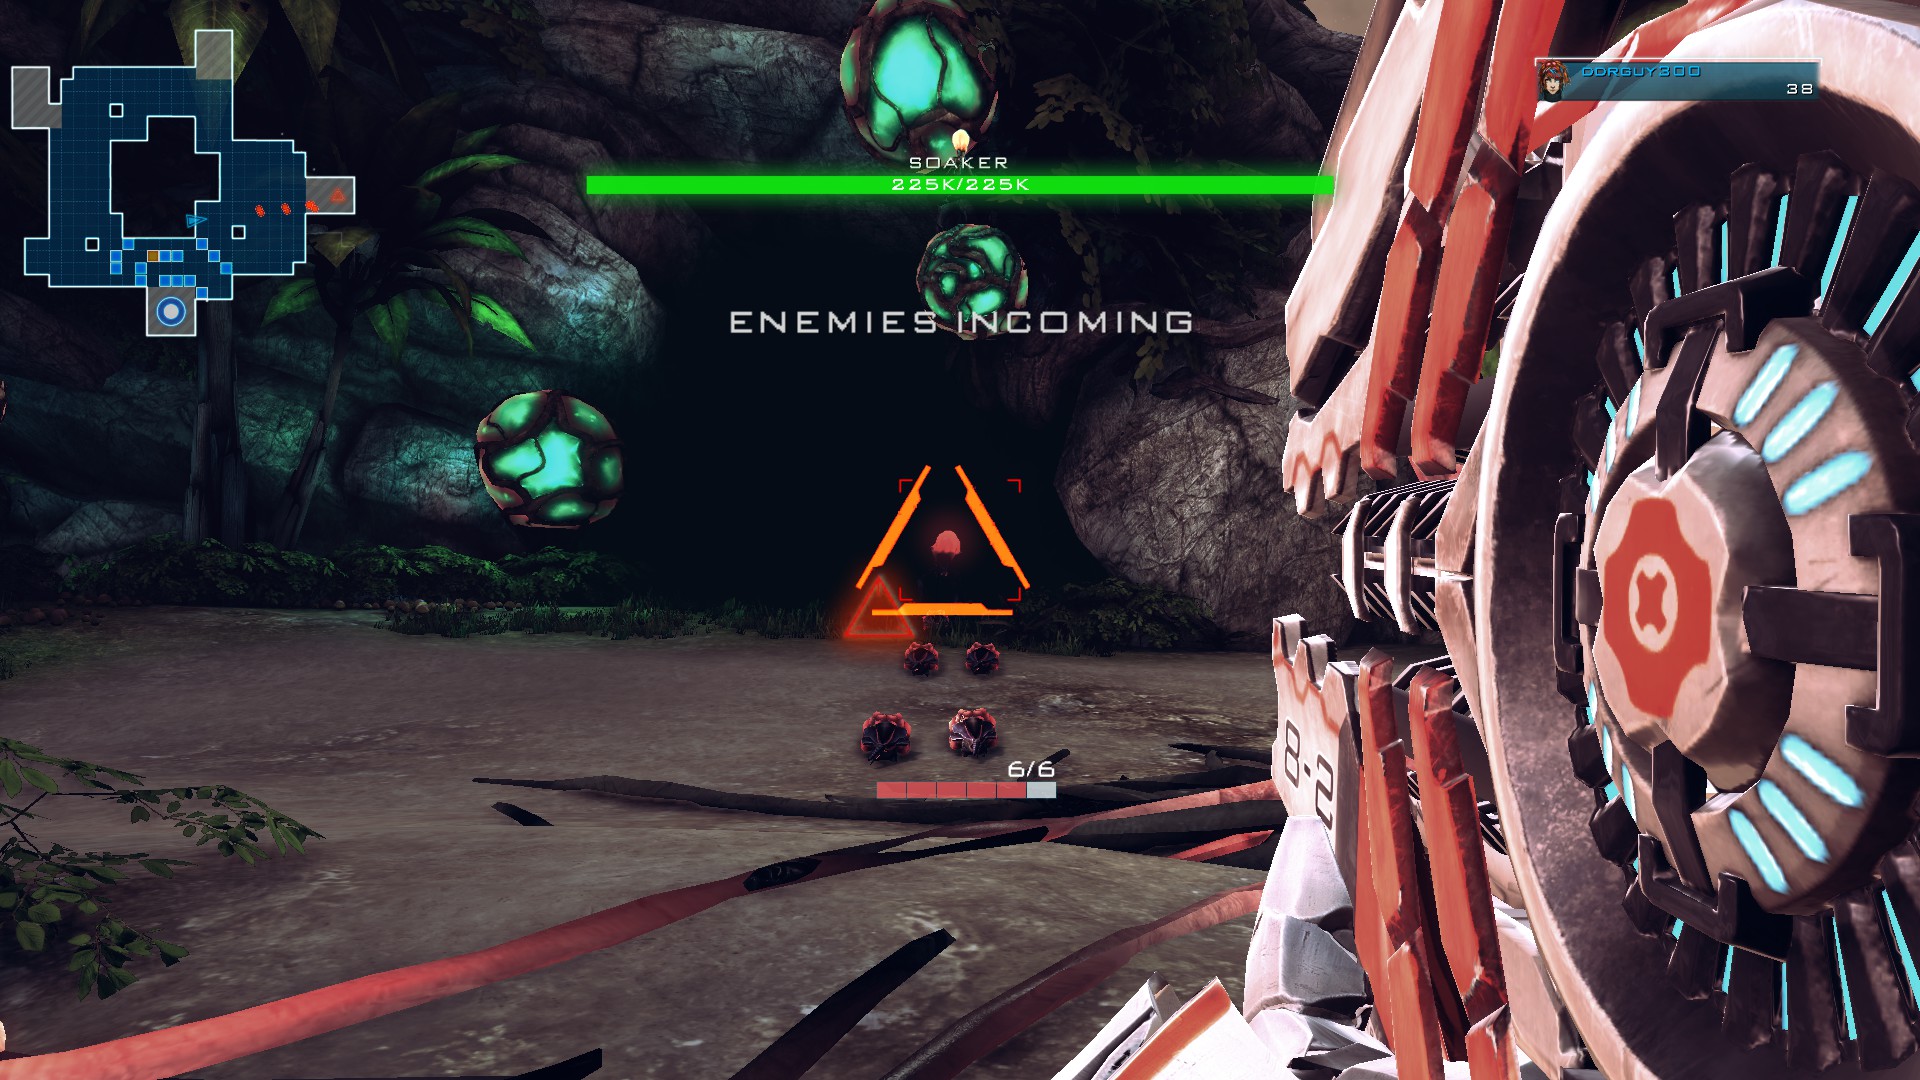
The strategy here is to let the snorkers come at you, letting some explode and damage you while you are busy damaging the rest. When you take one or two snokers blows, cross the threshold back behind the safety of your towers. This will make the snorkers then follow the path to the core in the opposite direction. Fire at them while getting your health back up and then after that, cross back over and let them come at you again. Repeat this process until the snorkers have all spawned and are out of close range.
At this point, lock onto the second soaker and fire a set of rockets at it so that it will be softened up a little. At this point the snorkers that you didn't take care of in the beginning of the wave should be at that funnel point. With the help of your focus, take them out while also paying attention to the position of the first soaker.
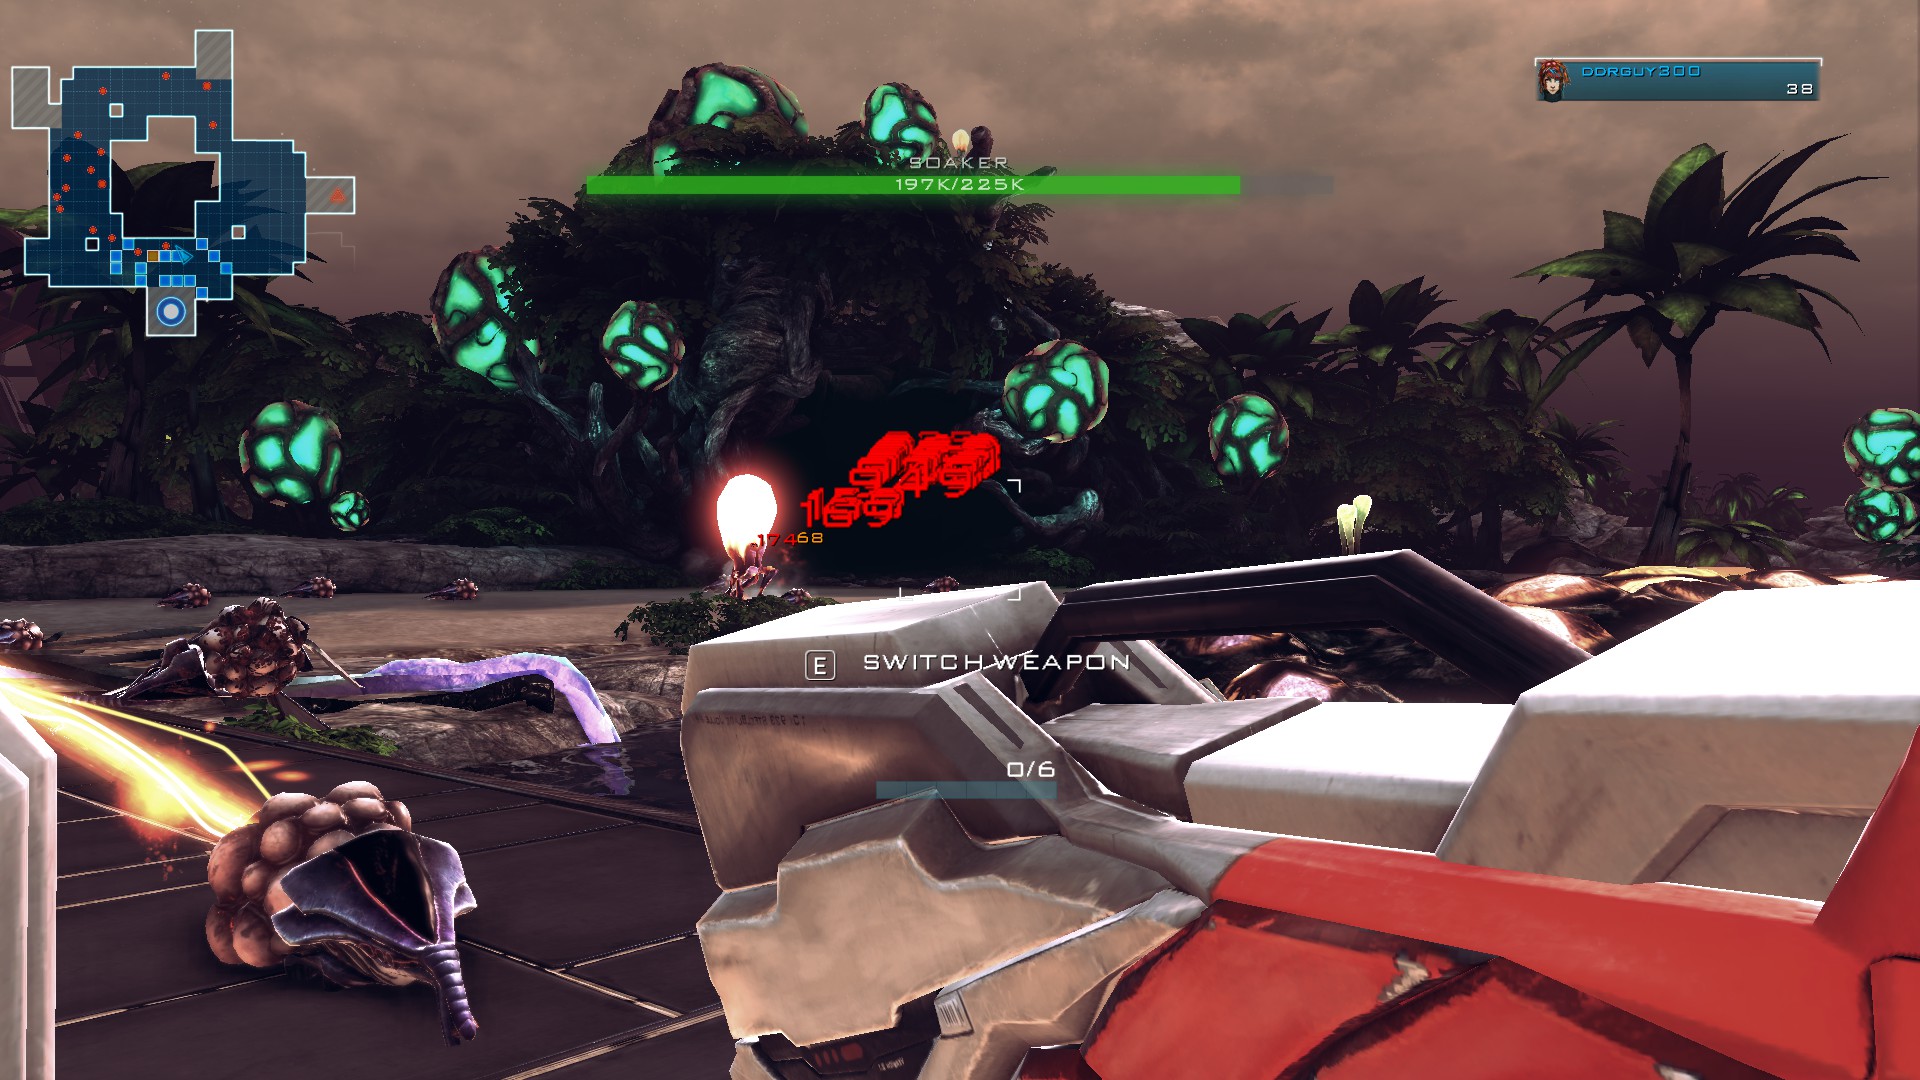
By the time you've dealt with them all, all that should be left is the last soaker.
Your core should take no damage.
Make sure your towers are set up like this. This is going to allow the enemies to funnel to a single point while still giving you some time to take care of them before they reach the core. Dump all of your resources into a focus tower. You mines will not be needed until wave 5.
Strategy:
Start off locking onto the first soaker and let the snorkers come at you like so:
The strategy here is to let the snorkers come at you, letting some explode and damage you while you are busy damaging the rest. When you take one or two snokers blows, cross the threshold back behind the safety of your towers. This will make the snorkers then follow the path to the core in the opposite direction. Fire at them while getting your health back up and then after that, cross back over and let them come at you again. Repeat this process until the snorkers have all spawned and are out of close range.
At this point, lock onto the second soaker and fire a set of rockets at it so that it will be softened up a little. At this point the snorkers that you didn't take care of in the beginning of the wave should be at that funnel point. With the help of your focus, take them out while also paying attention to the position of the first soaker.
By the time you've dealt with them all, all that should be left is the last soaker.
Your core should take no damage.
Wave 2
Setup:
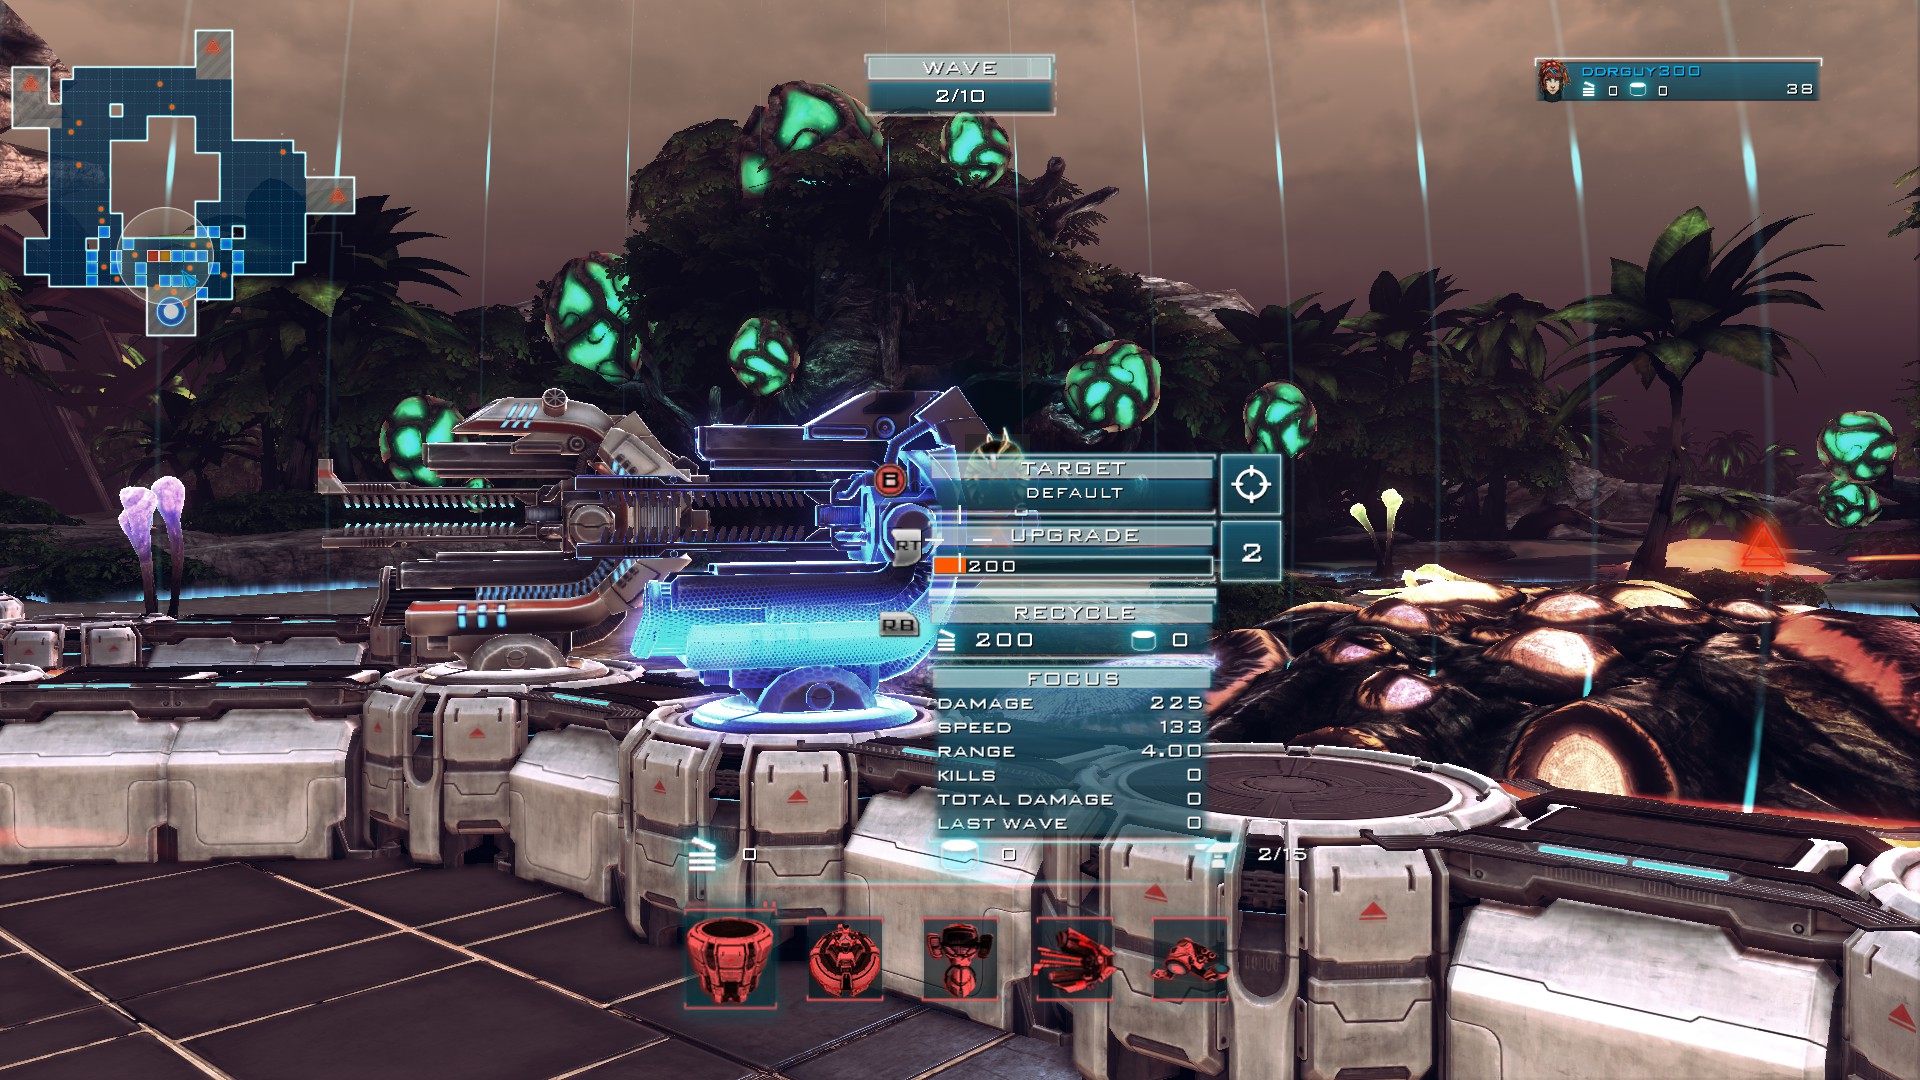
Dump all of your resources into making your first focus maxed and set out another one.
Strategy:
Simple wave. Just take out the screamers and walkers with the help of your focus towers as you're pushed back. Once you've dealt with them, you'll want to start damaging the heavys as both focus towers aren't enough to take them both out without some help.
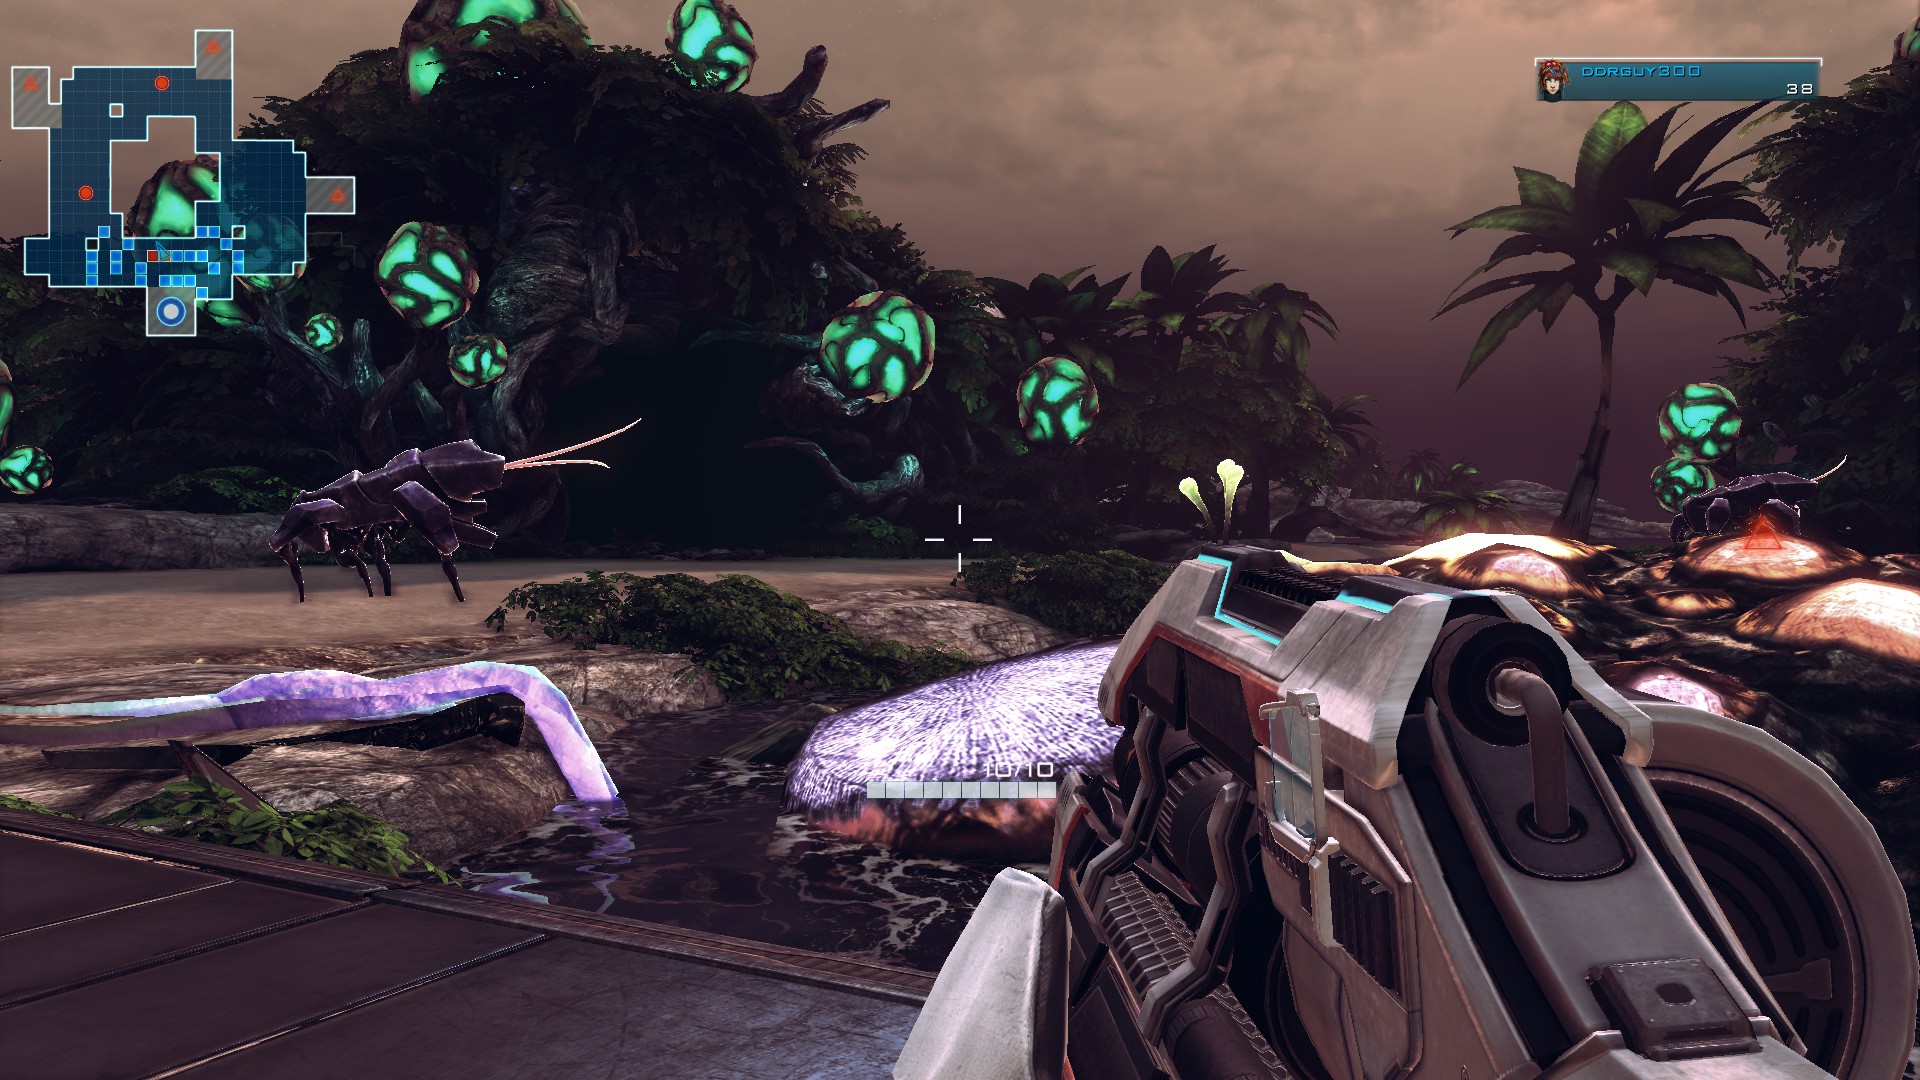
Again, core should be untouched.
Dump all of your resources into making your first focus maxed and set out another one.
Strategy:
Simple wave. Just take out the screamers and walkers with the help of your focus towers as you're pushed back. Once you've dealt with them, you'll want to start damaging the heavys as both focus towers aren't enough to take them both out without some help.
Again, core should be untouched.
Wave 3
Setup:
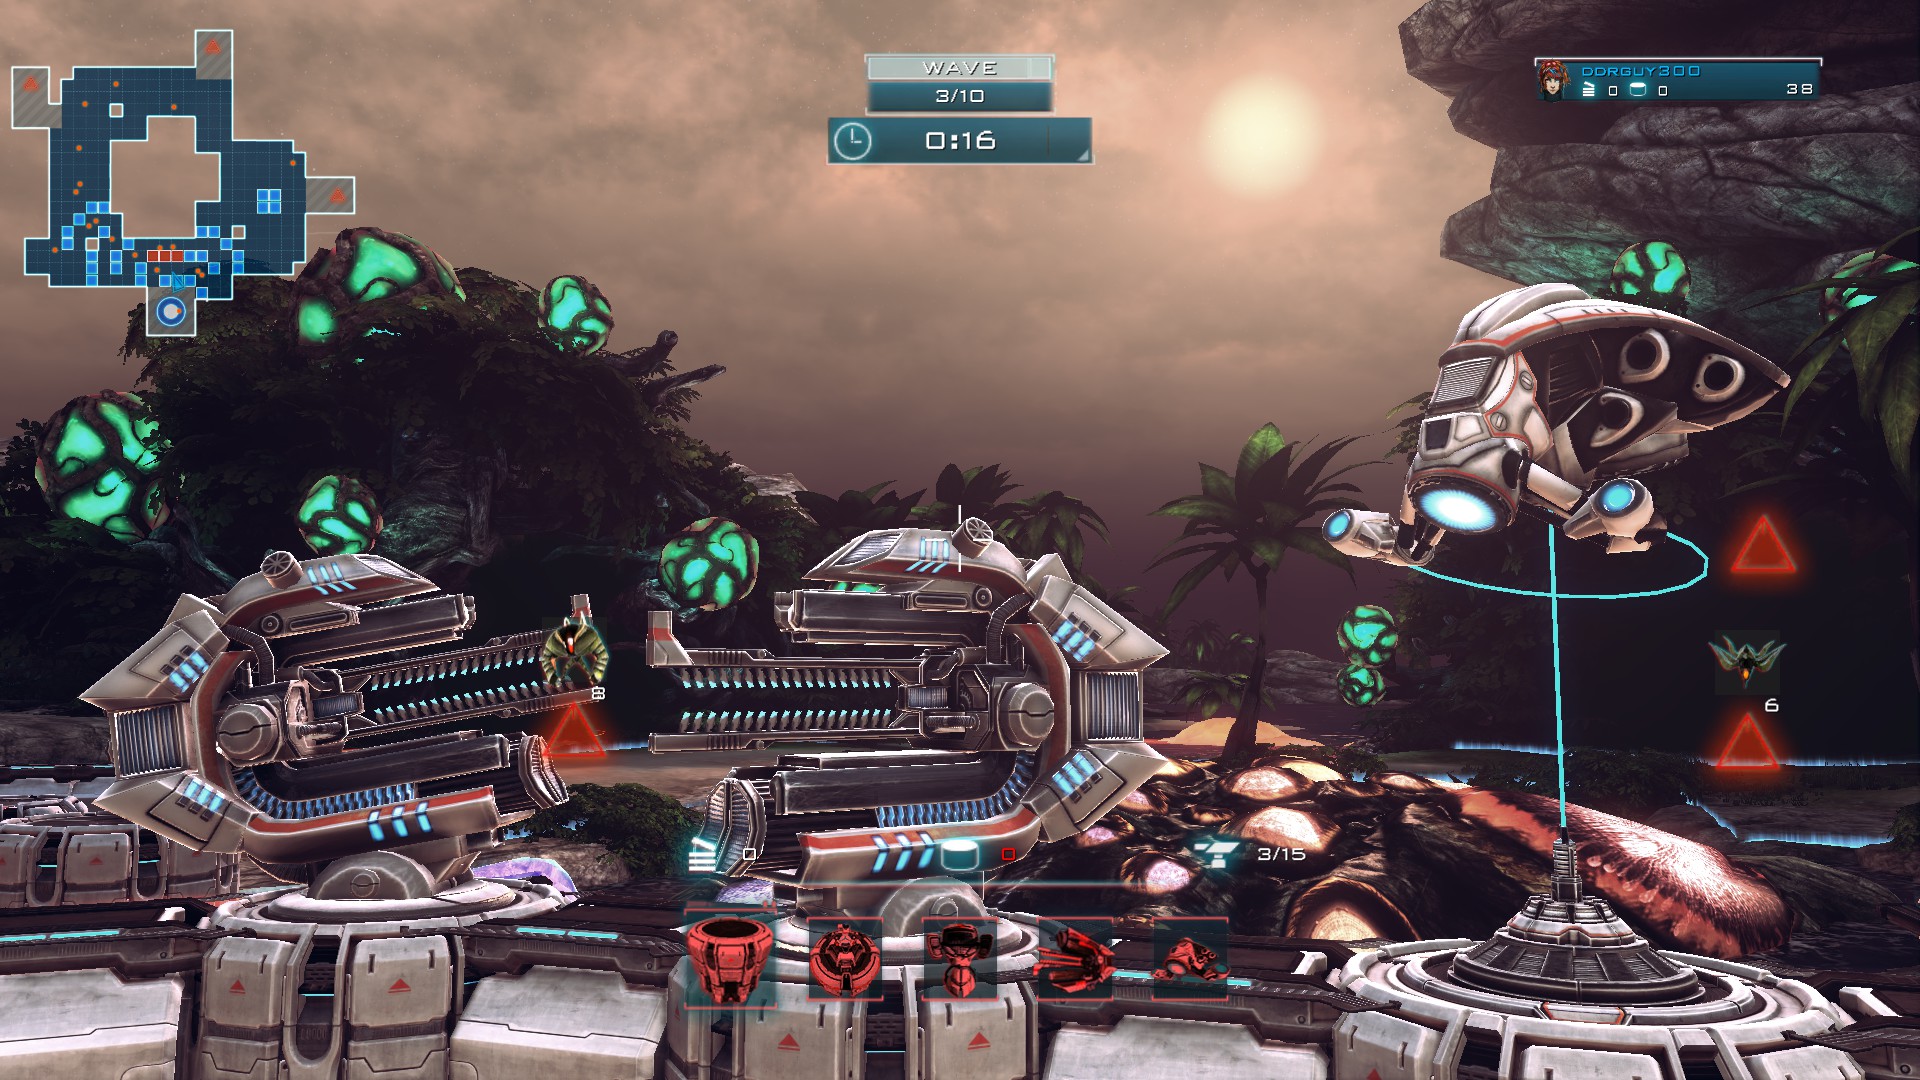
This is a timed wave, so you have to be quick. Finish off the second focus and put up a rank 3 anti-air next to it.
Strategy:
The reason for the lone 4 tower set up by the east spawn point is to give you a safe vantage point to take out some of the mutators without getting harassed by the walkers. And don't worry about the spitfly spawns as the anti-air is well within range. See my youtube video for a better set up that gives you more time to deal with them.
You only want to take out 2 of the 4 mutators. This will help lessen the buffed factor of the enemies once they reach you to a point that is tollerable. After 2 mutators are finished, 1) they get more out of range and 2) lumes start to get closer to your core and the focus towers alone can't handle them. At this point you can take care of the remaining lumes like you would any other wave. Just remember that you will have a few buffed ones.
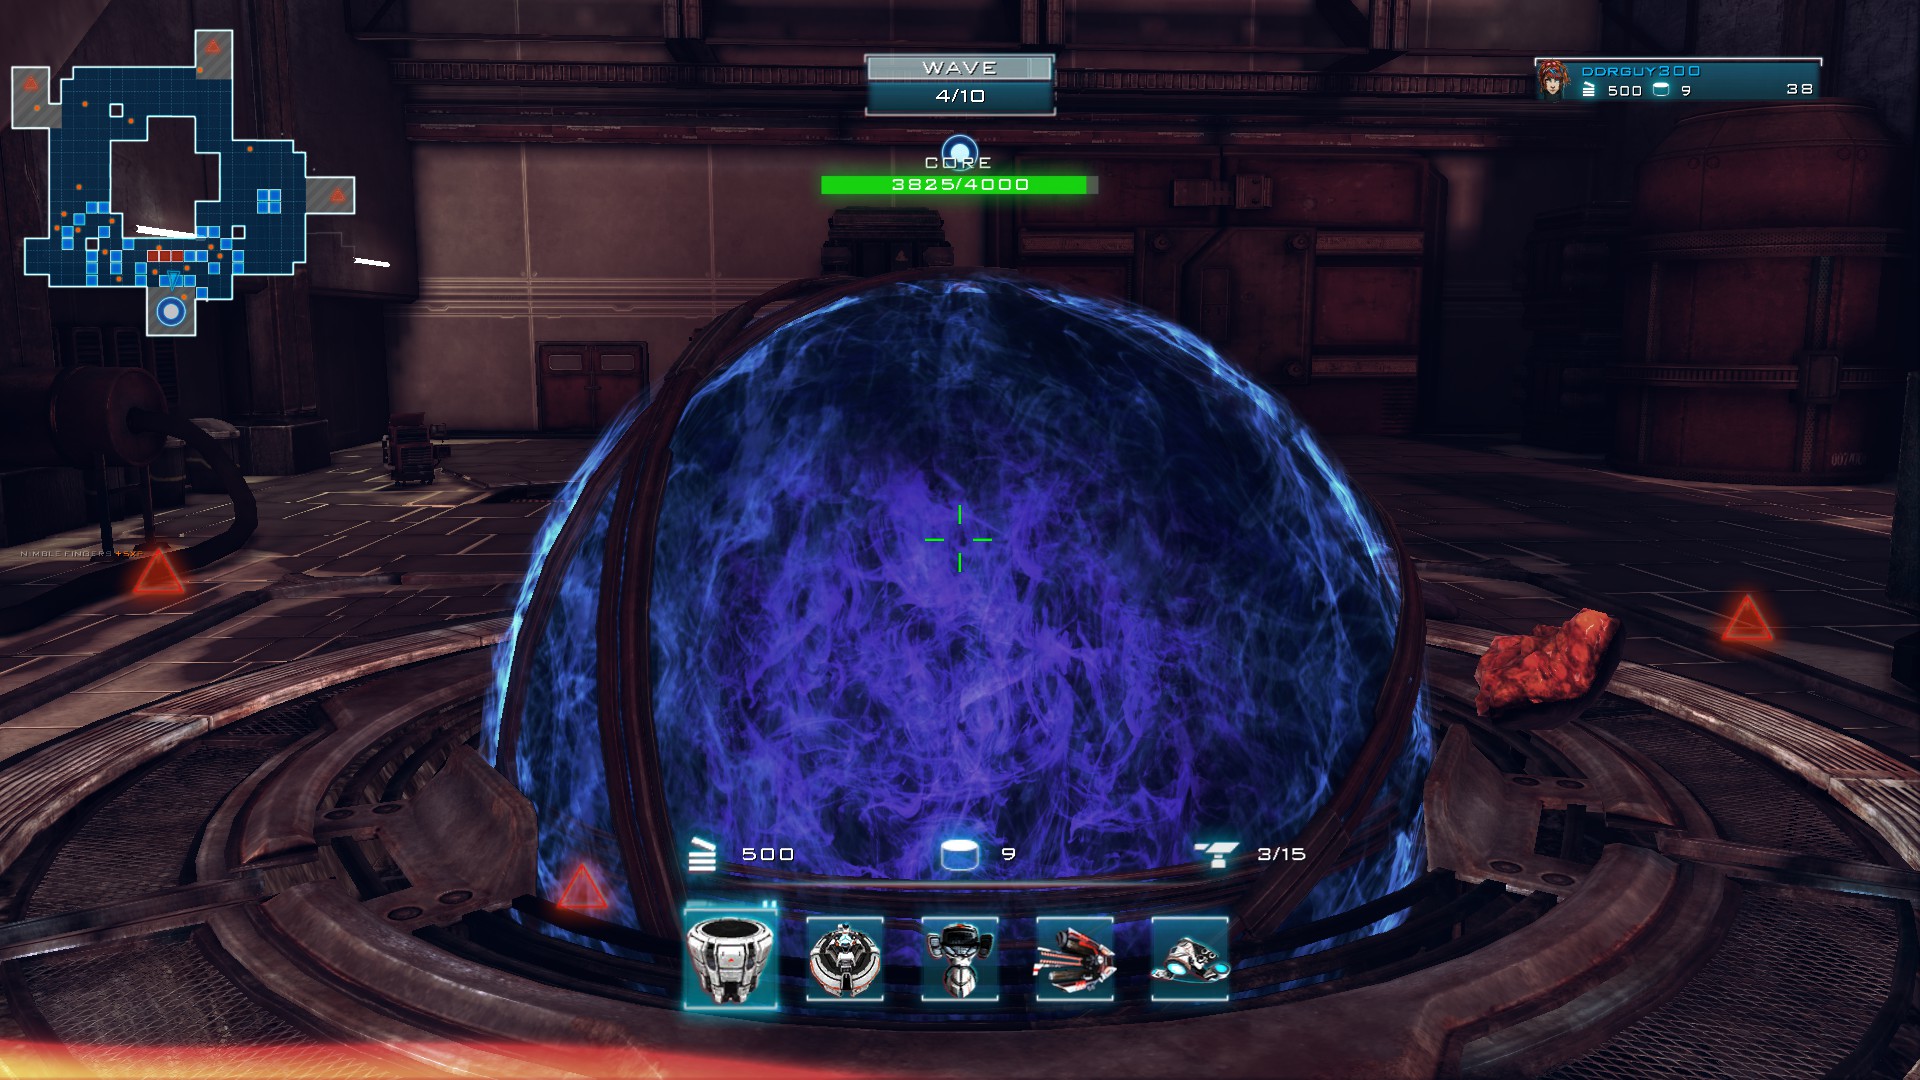
If your core doesn't stay untouched, it should only have taken minimal damage:
This is a timed wave, so you have to be quick. Finish off the second focus and put up a rank 3 anti-air next to it.
Strategy:
The reason for the lone 4 tower set up by the east spawn point is to give you a safe vantage point to take out some of the mutators without getting harassed by the walkers. And don't worry about the spitfly spawns as the anti-air is well within range. See my youtube video for a better set up that gives you more time to deal with them.
You only want to take out 2 of the 4 mutators. This will help lessen the buffed factor of the enemies once they reach you to a point that is tollerable. After 2 mutators are finished, 1) they get more out of range and 2) lumes start to get closer to your core and the focus towers alone can't handle them. At this point you can take care of the remaining lumes like you would any other wave. Just remember that you will have a few buffed ones.
If your core doesn't stay untouched, it should only have taken minimal damage:
Wave 4
Setup:
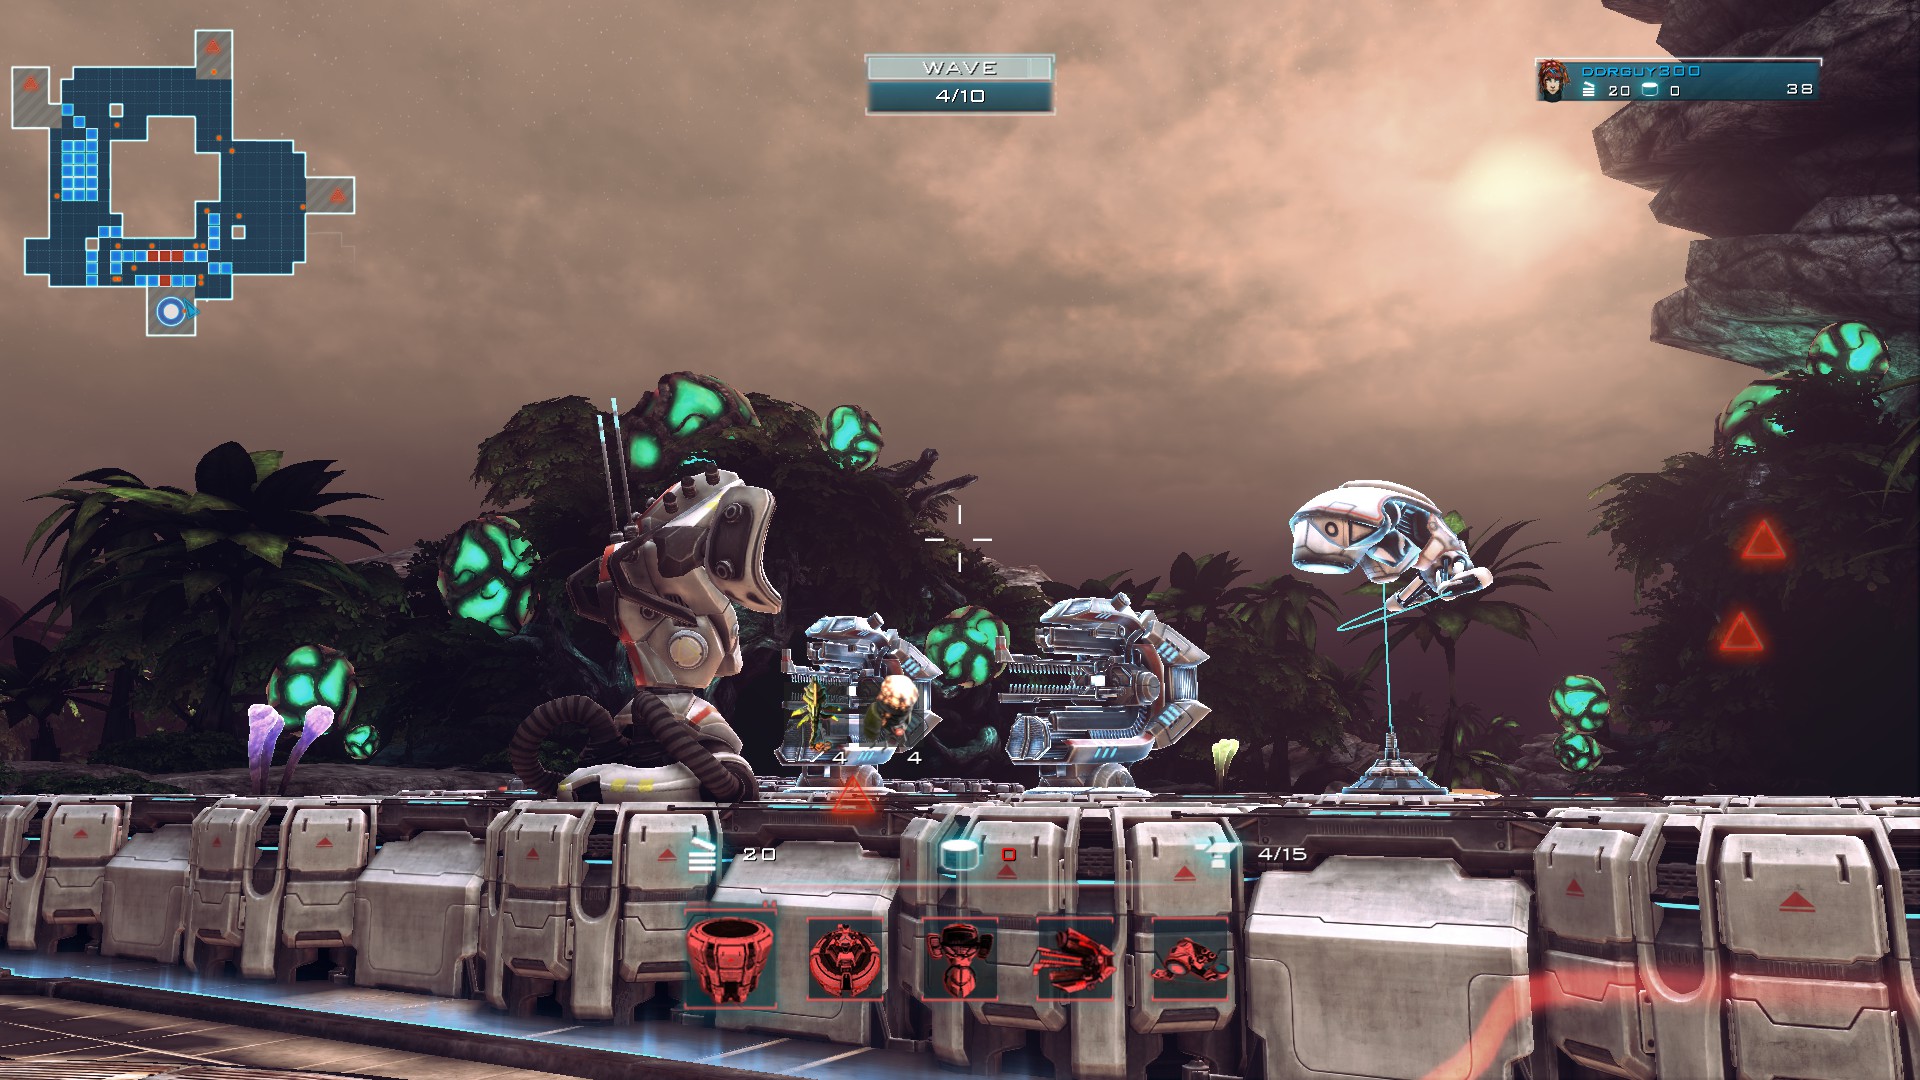
This is where things get fun and strategy begins to play a cool role. What you're going to do is divert the flow of enemies in the opposite direction the exact way it shows in the picture. Once you have that set up, put a rank 3 rang spire where it shows. This is crucial to taking out healers from a distance as well as allowing the focus towers to reach around the extended path as well as to the core.
As for the west spawn point, this is the same strategy we used in the previous wave: A safe place to take out the mutators from. Only this time, you want to take out all 4. Don't move too far toward the edges though as the hoverers will attack you and toss you and your plans out of wack.
Once you've dealth with the mutators, immediately tend to the enemies near the core. There shouldn't be many left as the focus towers have taken care of most of them with minimal damage to your core. After that, all that's left are the slow moving hoverers:
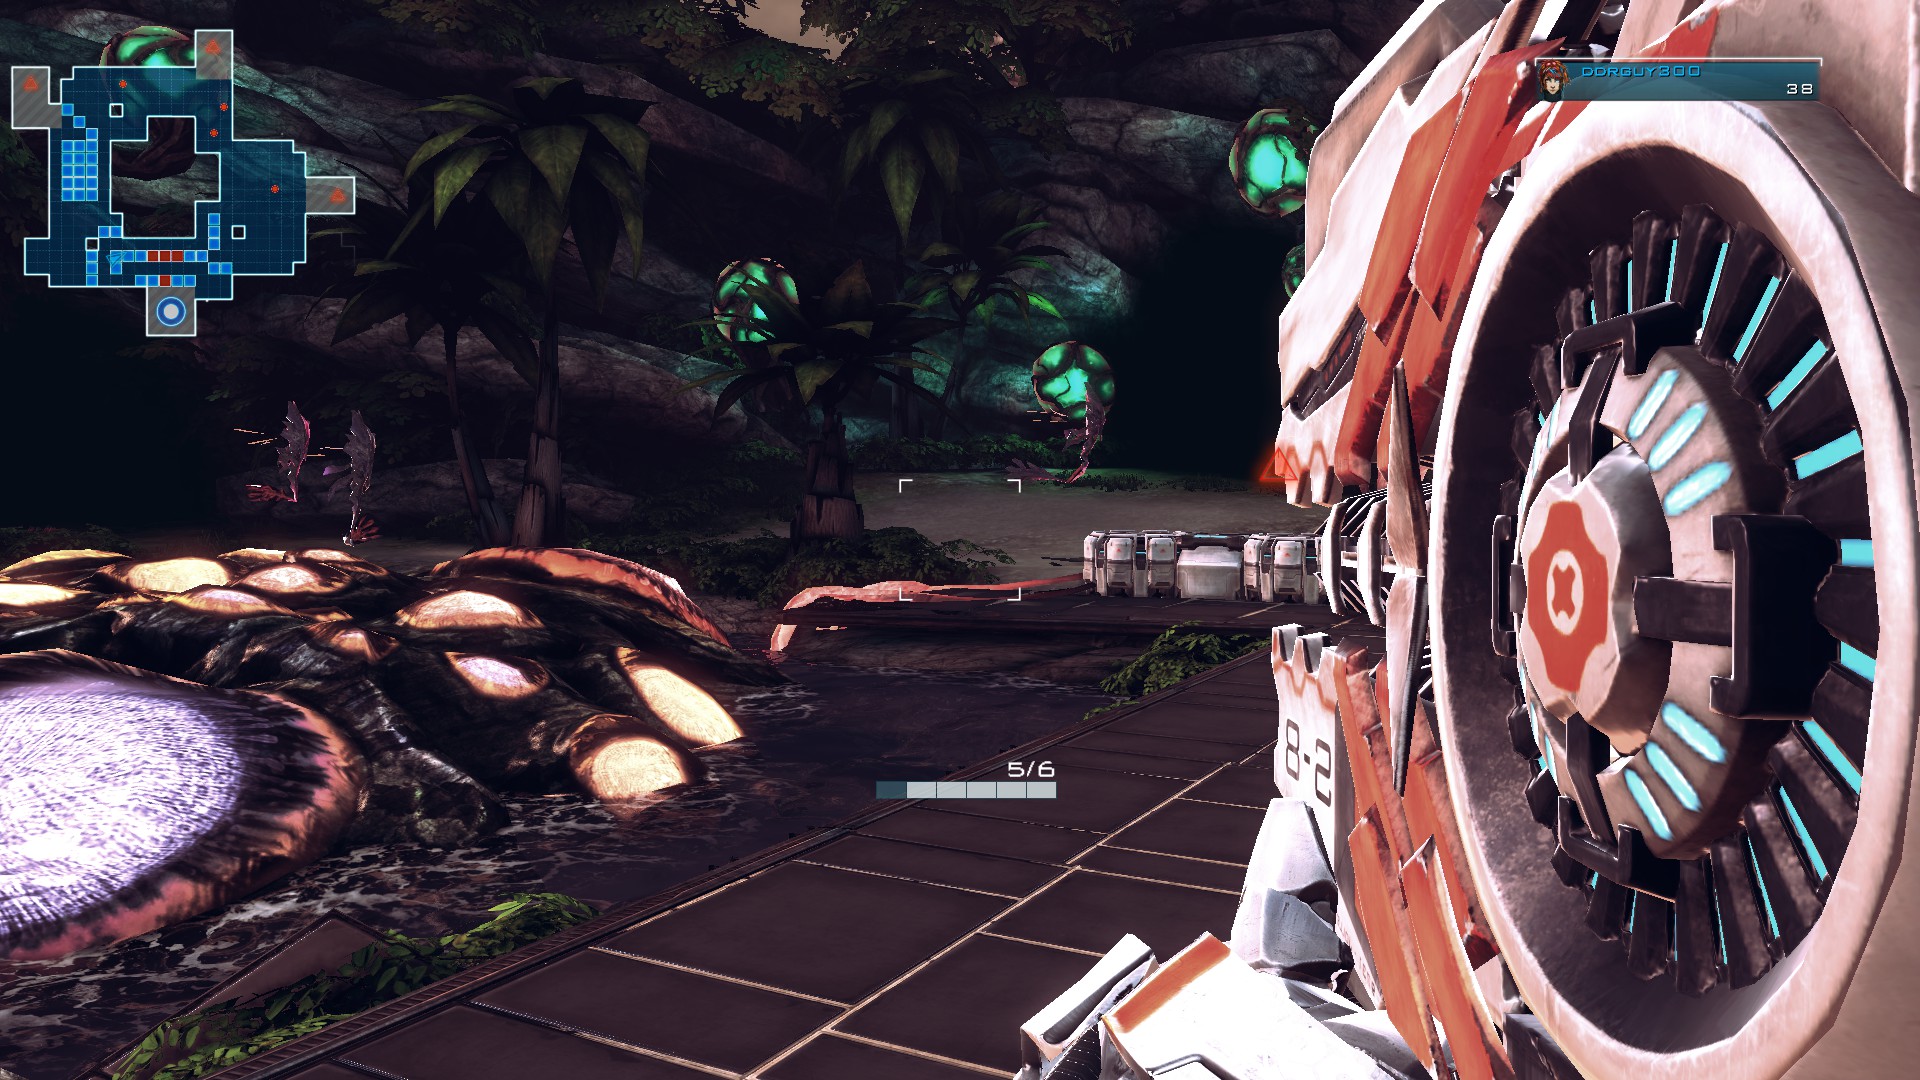
Make sure to still attack them with your weapons as the focus towers will need a little help taking them out and you don't want them getting to the core.
I learned that the hard way, so your core should look a little better than mine:
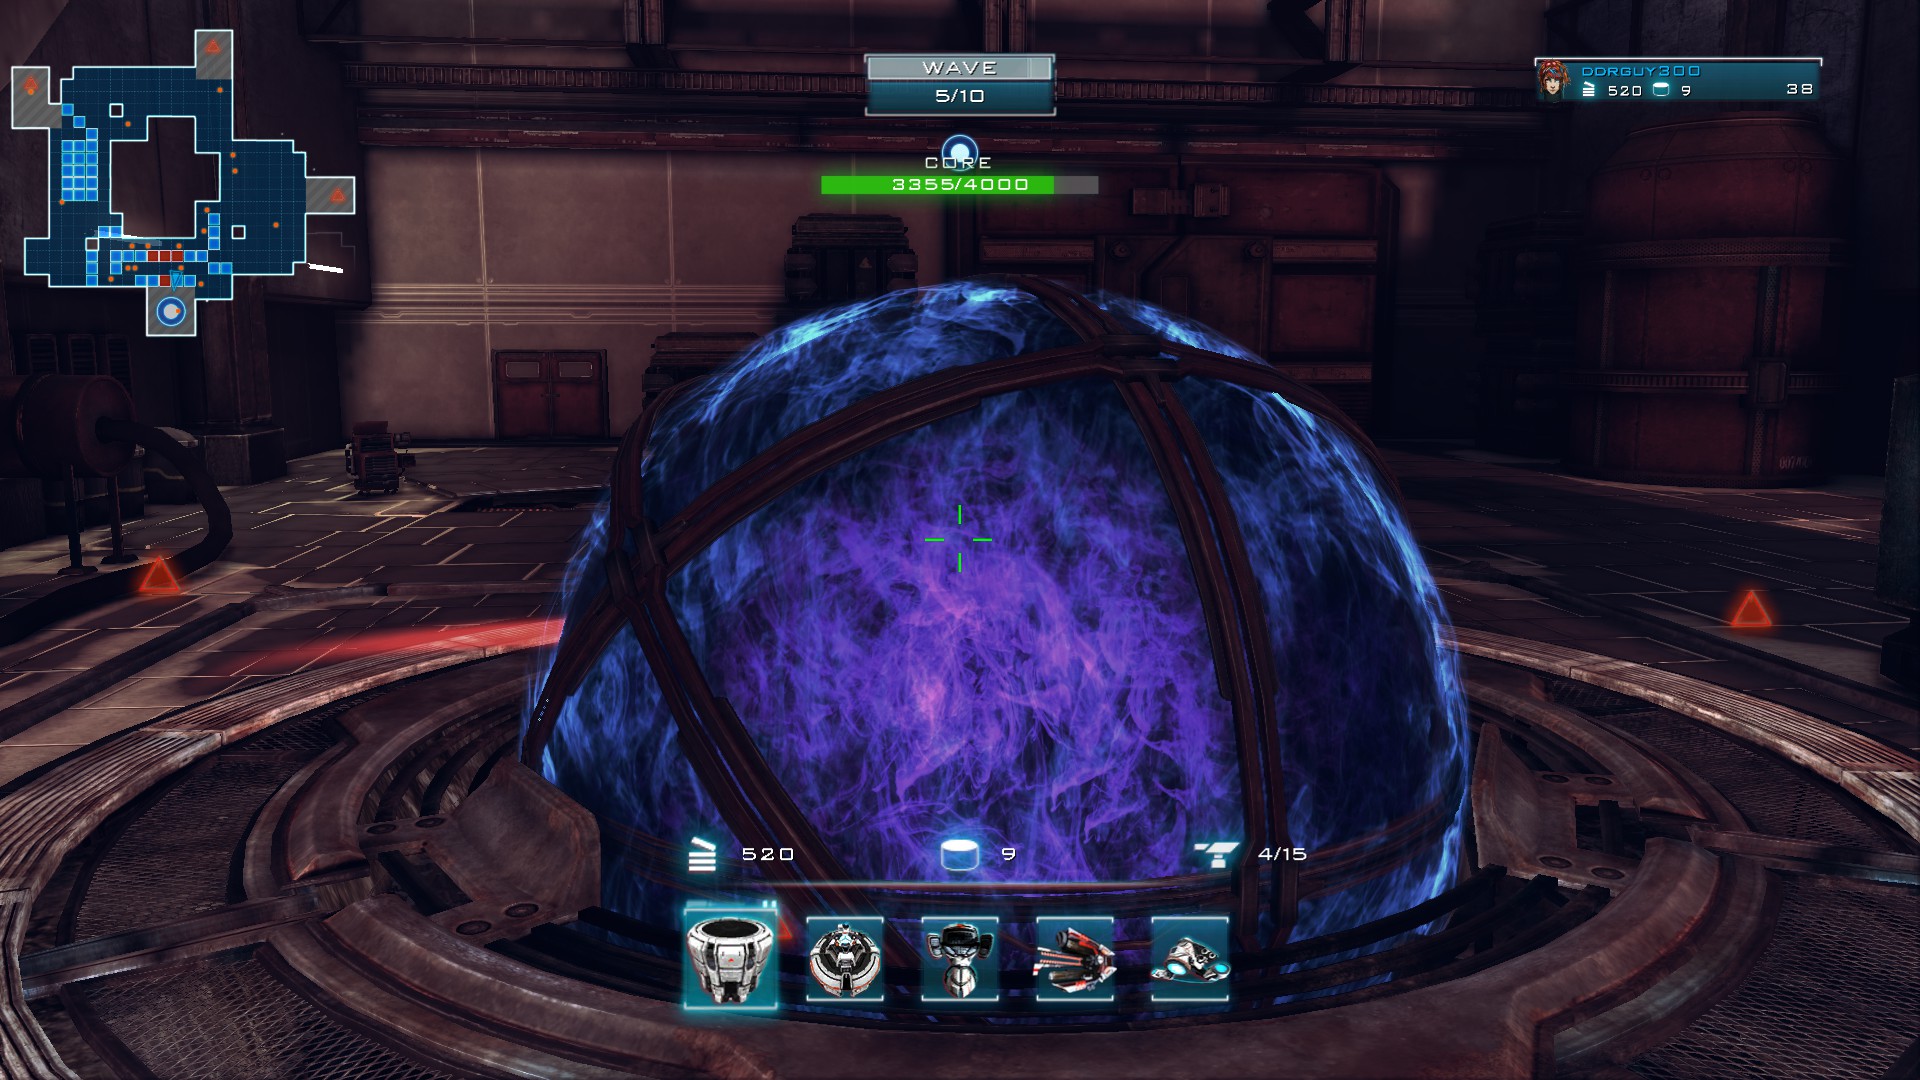
This is where things get fun and strategy begins to play a cool role. What you're going to do is divert the flow of enemies in the opposite direction the exact way it shows in the picture. Once you have that set up, put a rank 3 rang spire where it shows. This is crucial to taking out healers from a distance as well as allowing the focus towers to reach around the extended path as well as to the core.
As for the west spawn point, this is the same strategy we used in the previous wave: A safe place to take out the mutators from. Only this time, you want to take out all 4. Don't move too far toward the edges though as the hoverers will attack you and toss you and your plans out of wack.
Once you've dealth with the mutators, immediately tend to the enemies near the core. There shouldn't be many left as the focus towers have taken care of most of them with minimal damage to your core. After that, all that's left are the slow moving hoverers:
Make sure to still attack them with your weapons as the focus towers will need a little help taking them out and you don't want them getting to the core.
I learned that the hard way, so your core should look a little better than mine:
Wave 5
Setup:
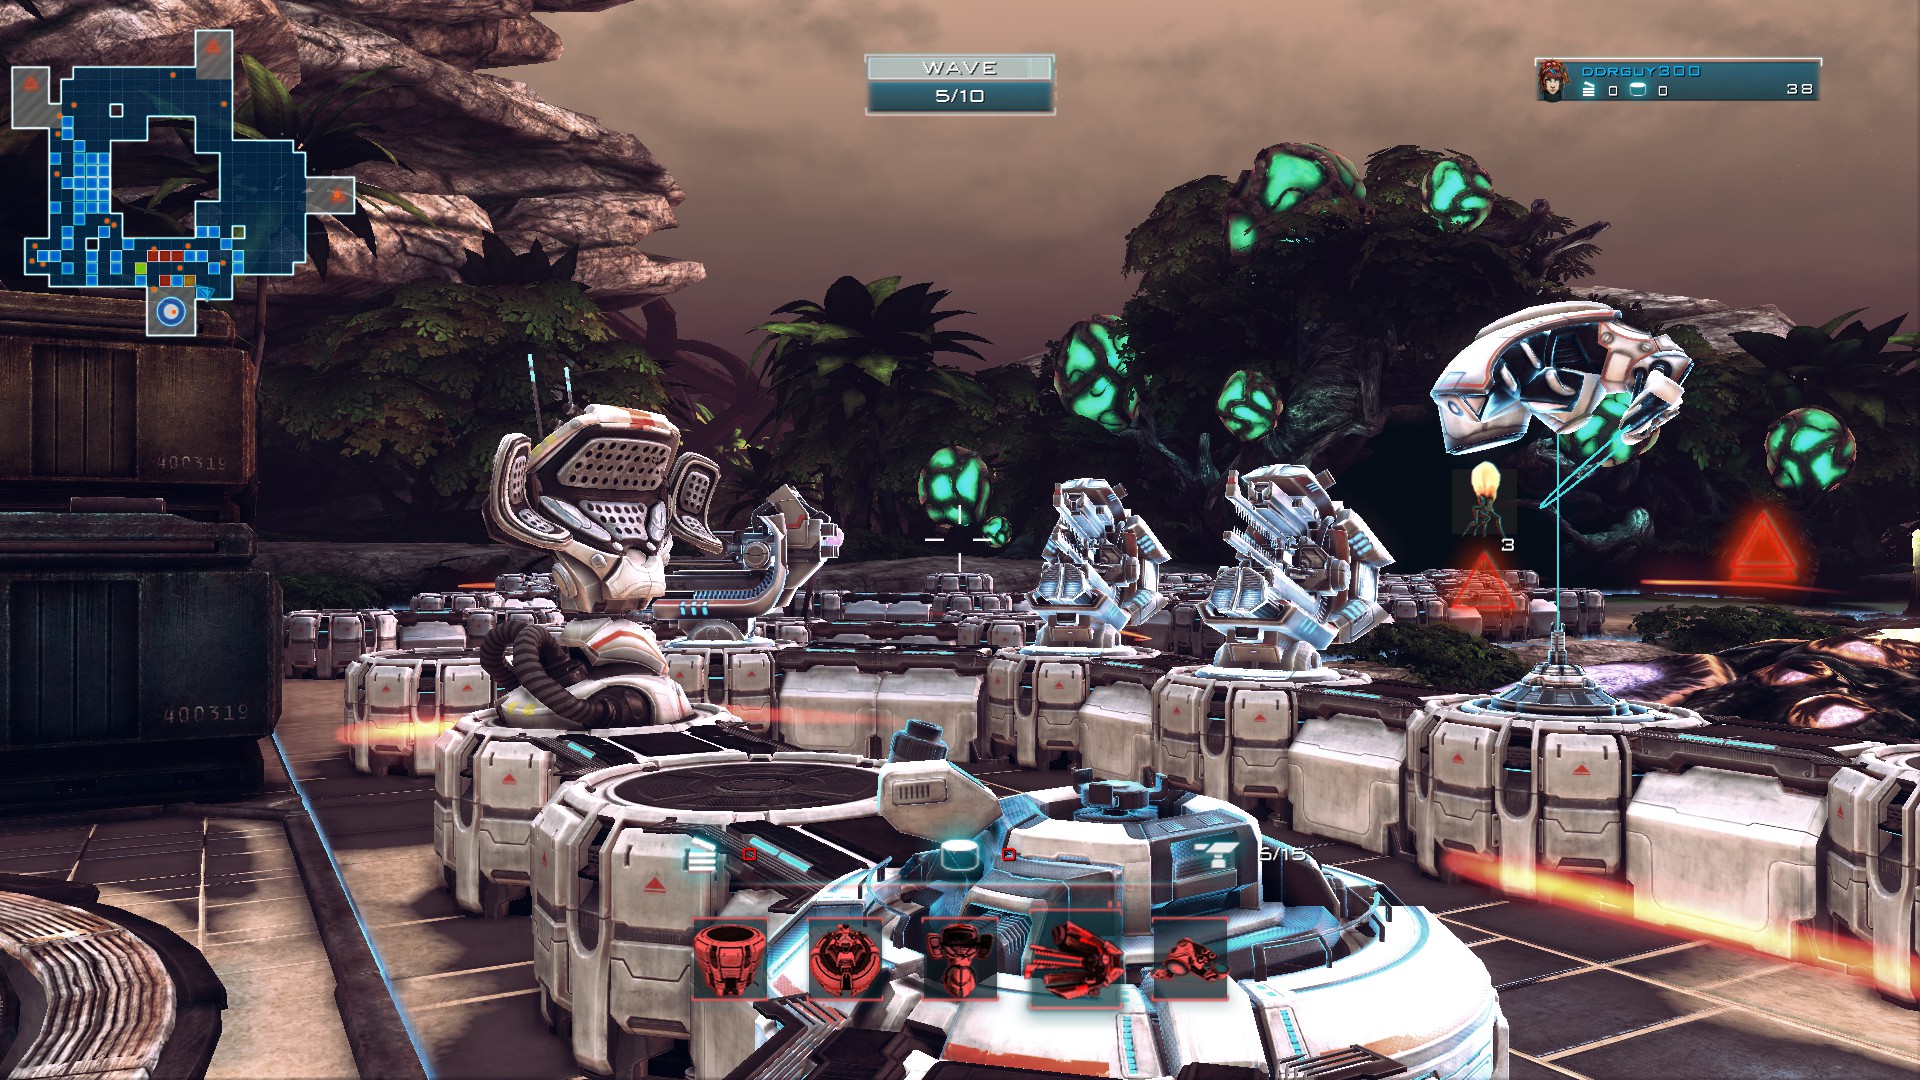
It's finally time to set out your mines. Put them out where indicated, get them to rank 2, and of course take and set them aside out of the line of fire. With your remaining resources, build another focus as far as possible where indicated. Then redirect the flow back in the direction it was before and make sure to follow the picture's layout.
Strategy:
Yep, another big safety platform. All you're going to do this wave is basically stand right here:
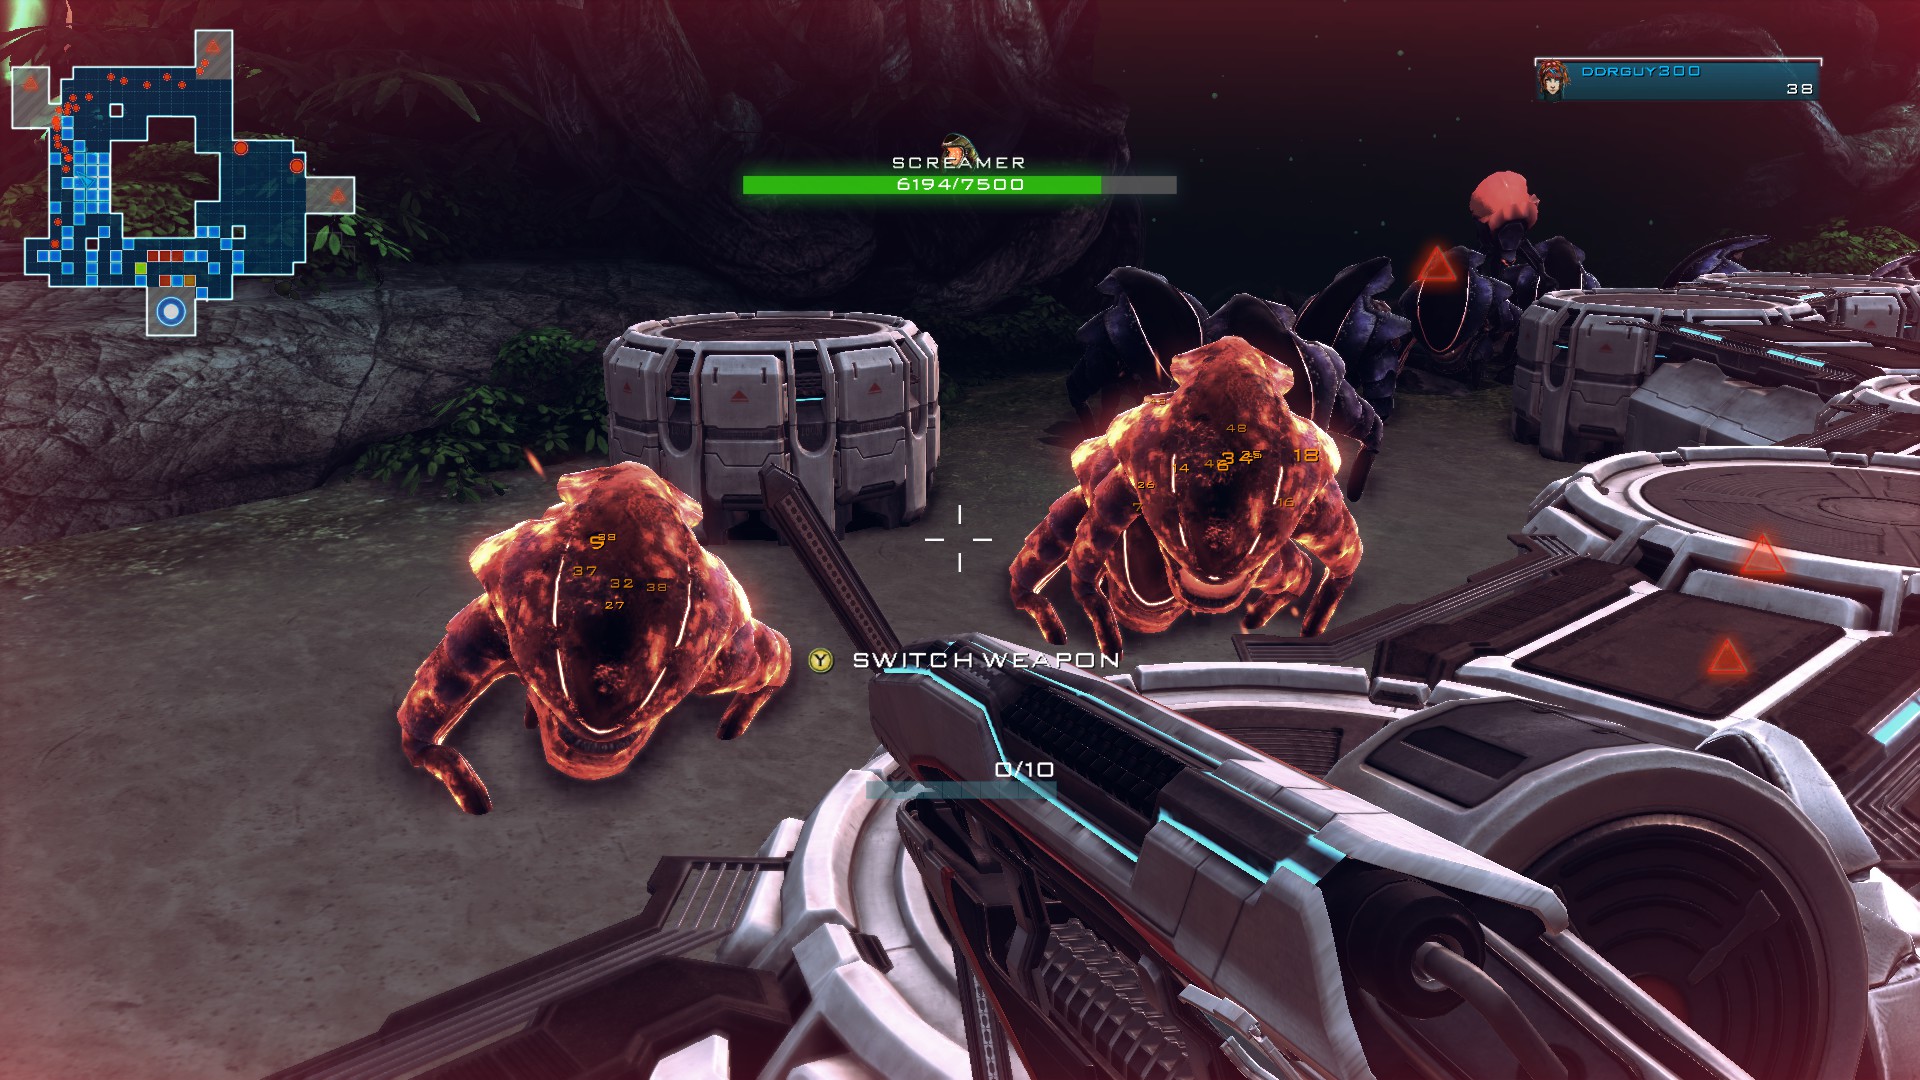
After starting the wave and giving the first soaker a dose of your 6 homing rockets, your job is going to be to stand here and grab the attention of as many screamers as you can and (hopefully) just slaughter groups of them as they stop to attack you. MAKE SURE TO KEEP MOVING. You want to be avoiding their attacks like the plague so you don't DIE. You would still complete the wave maybe (depending on when you die), but your core will be far more damaged than it needs to be. If some screamers get away from you, let them go. Only ever worry about keeping the attention of the next ones incoming.
After you've dealt with (either killed or let go by) the very last screamer, then switch over to helping the towers take care of lumes. If your core takes any damage, it will be minimal. I forgot to grab a screen shot because of the time limit of the next wave, but it stayed untouched. You can see the health is the same in the wave 4 and 6 pictures.
It's finally time to set out your mines. Put them out where indicated, get them to rank 2, and of course take and set them aside out of the line of fire. With your remaining resources, build another focus as far as possible where indicated. Then redirect the flow back in the direction it was before and make sure to follow the picture's layout.
Strategy:
Yep, another big safety platform. All you're going to do this wave is basically stand right here:
After starting the wave and giving the first soaker a dose of your 6 homing rockets, your job is going to be to stand here and grab the attention of as many screamers as you can and (hopefully) just slaughter groups of them as they stop to attack you. MAKE SURE TO KEEP MOVING. You want to be avoiding their attacks like the plague so you don't DIE. You would still complete the wave maybe (depending on when you die), but your core will be far more damaged than it needs to be. If some screamers get away from you, let them go. Only ever worry about keeping the attention of the next ones incoming.
After you've dealt with (either killed or let go by) the very last screamer, then switch over to helping the towers take care of lumes. If your core takes any damage, it will be minimal. I forgot to grab a screen shot because of the time limit of the next wave, but it stayed untouched. You can see the health is the same in the wave 4 and 6 pictures.
Wave 6
Setup:
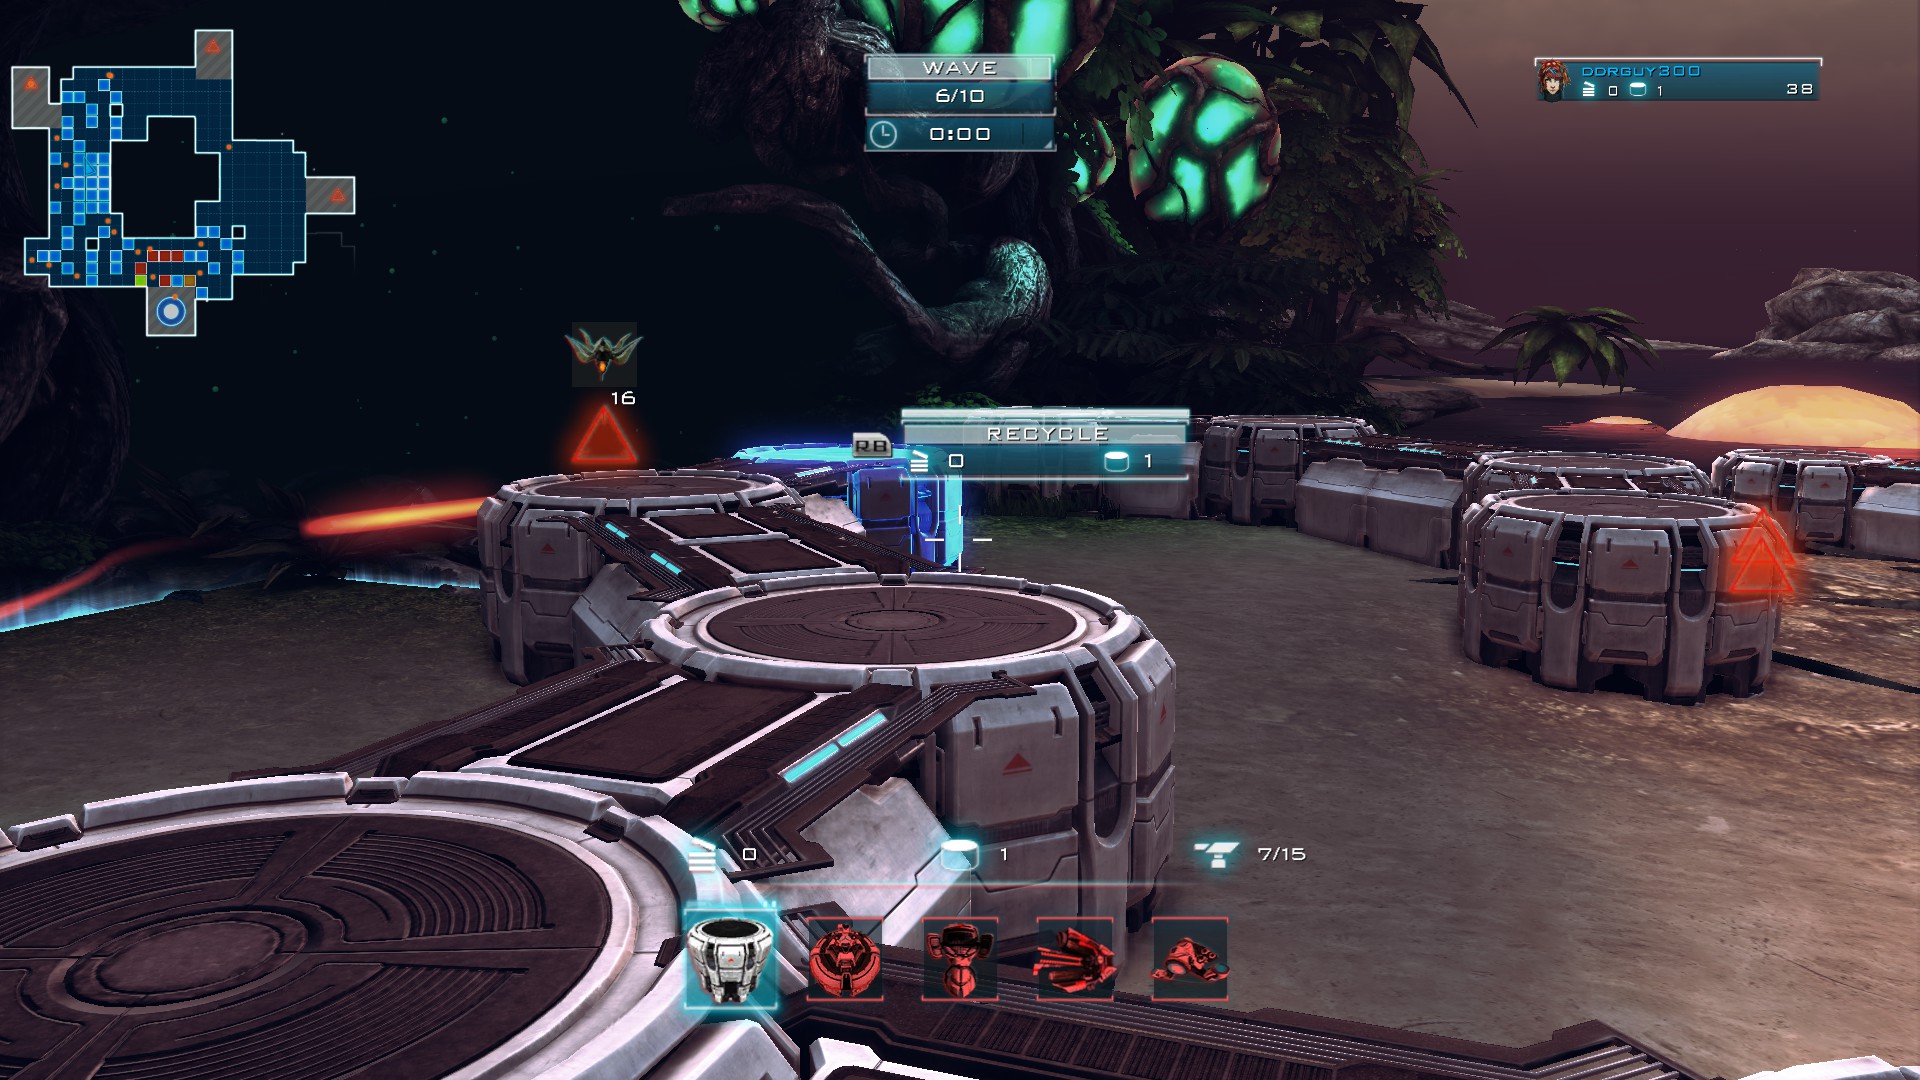
Grab your mines. Finish off the focus you built up last wave and place another next to that one with the remainder of your credits:
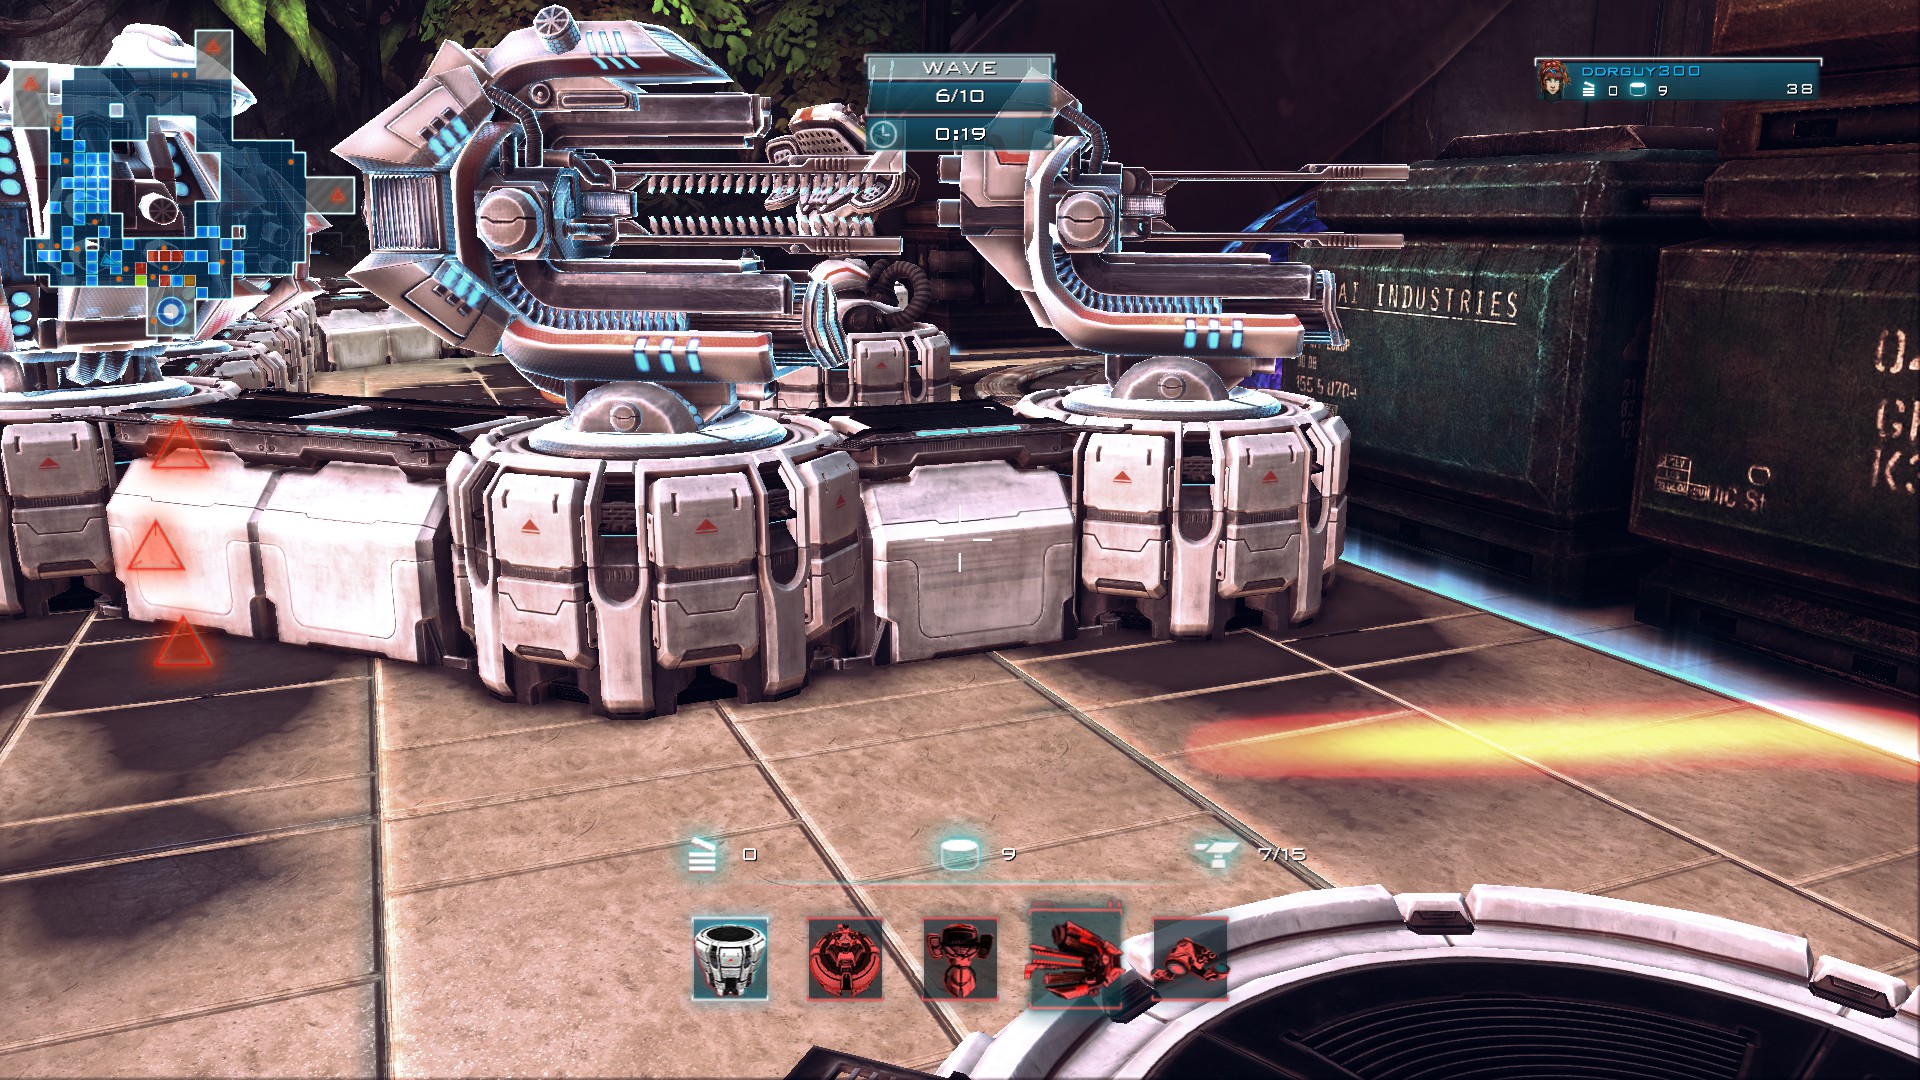
Strategy:
Kick back and relax, for the most part. You can kill one of the mutators if you like, but it's not needed. Let the anti-air deal with the spitfly spawns. Set yourself up about where the focus towers on the edge will reach. As the runners and brood mothers come, start attacking them and keep on them as they move you back. You will need your fire power and your towers to keep them from reaching the core. This is important because the mutators will pretty much only be buffing them, and though they still aren't much, they are fast.
Your core should be untouched if you've kept on them well:
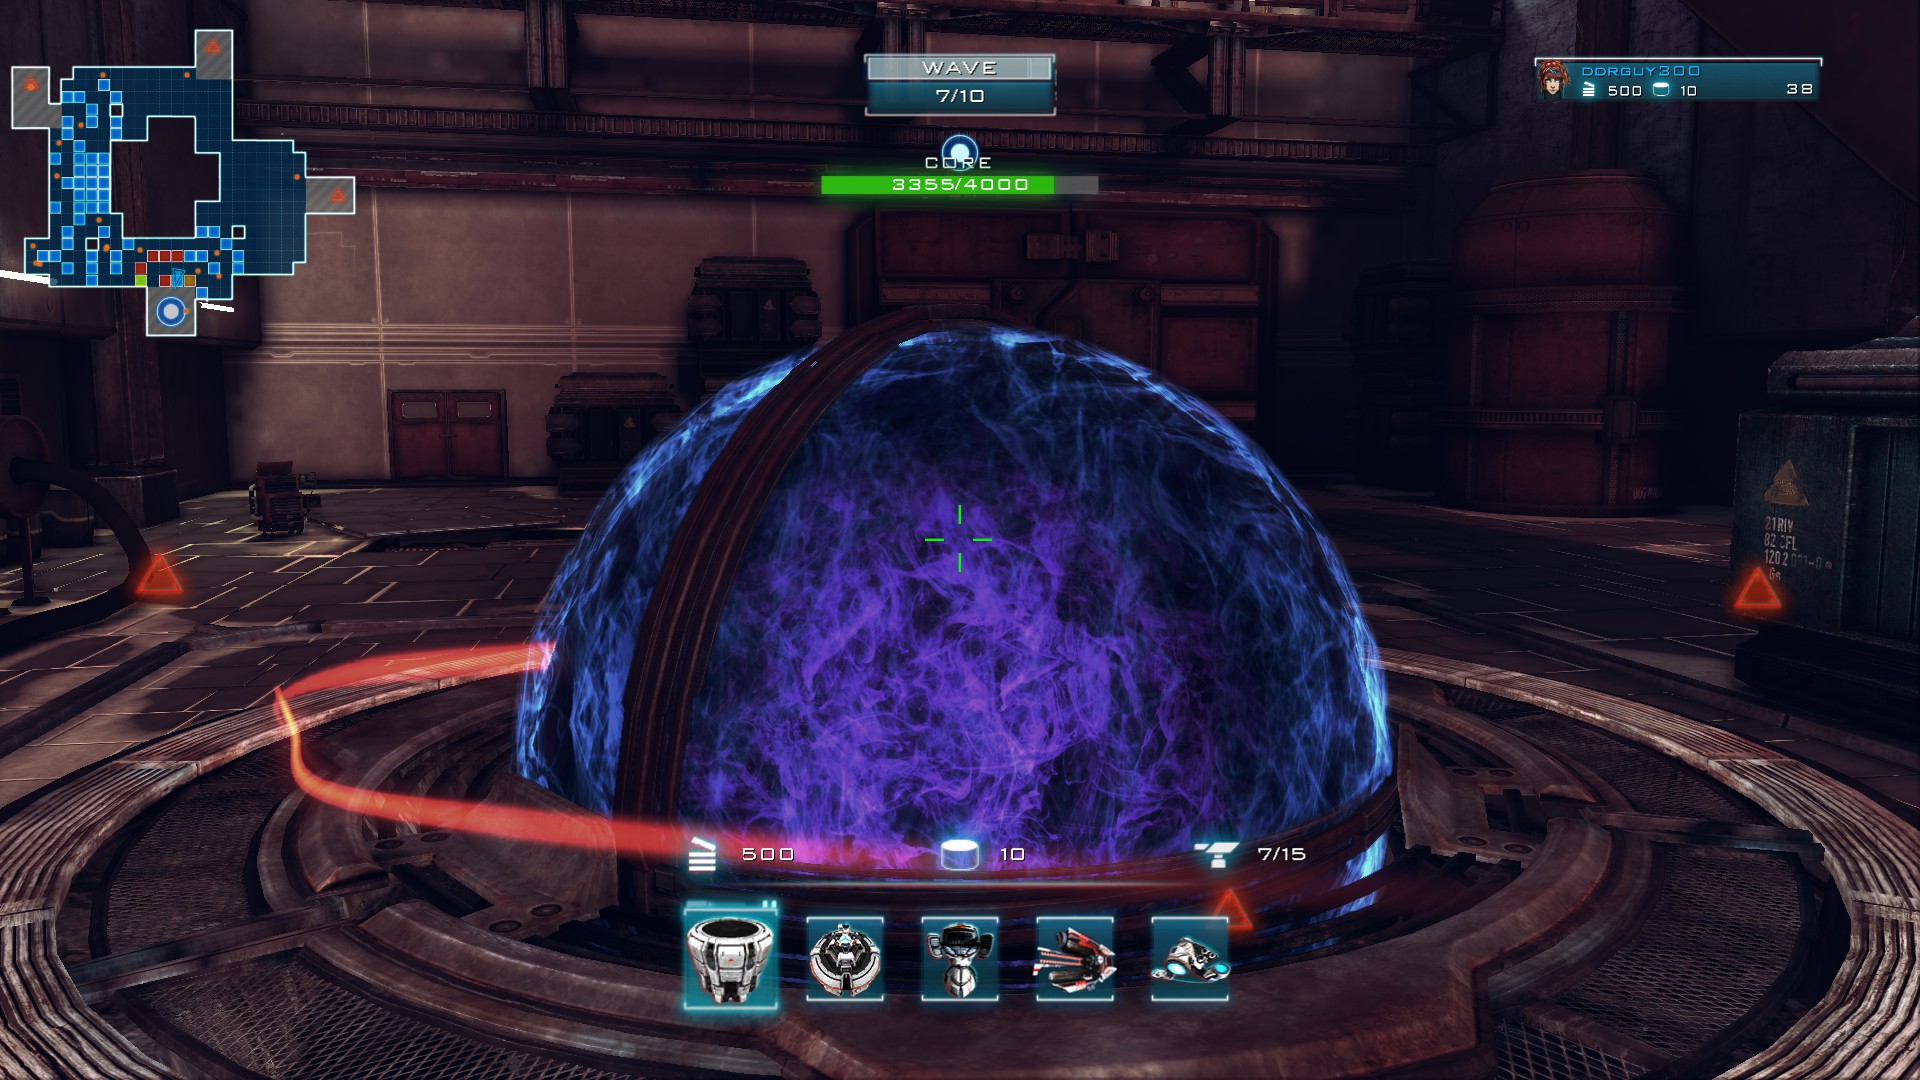
Grab your mines. Finish off the focus you built up last wave and place another next to that one with the remainder of your credits:
Strategy:
Kick back and relax, for the most part. You can kill one of the mutators if you like, but it's not needed. Let the anti-air deal with the spitfly spawns. Set yourself up about where the focus towers on the edge will reach. As the runners and brood mothers come, start attacking them and keep on them as they move you back. You will need your fire power and your towers to keep them from reaching the core. This is important because the mutators will pretty much only be buffing them, and though they still aren't much, they are fast.
Your core should be untouched if you've kept on them well:
Wave 7
Setup:
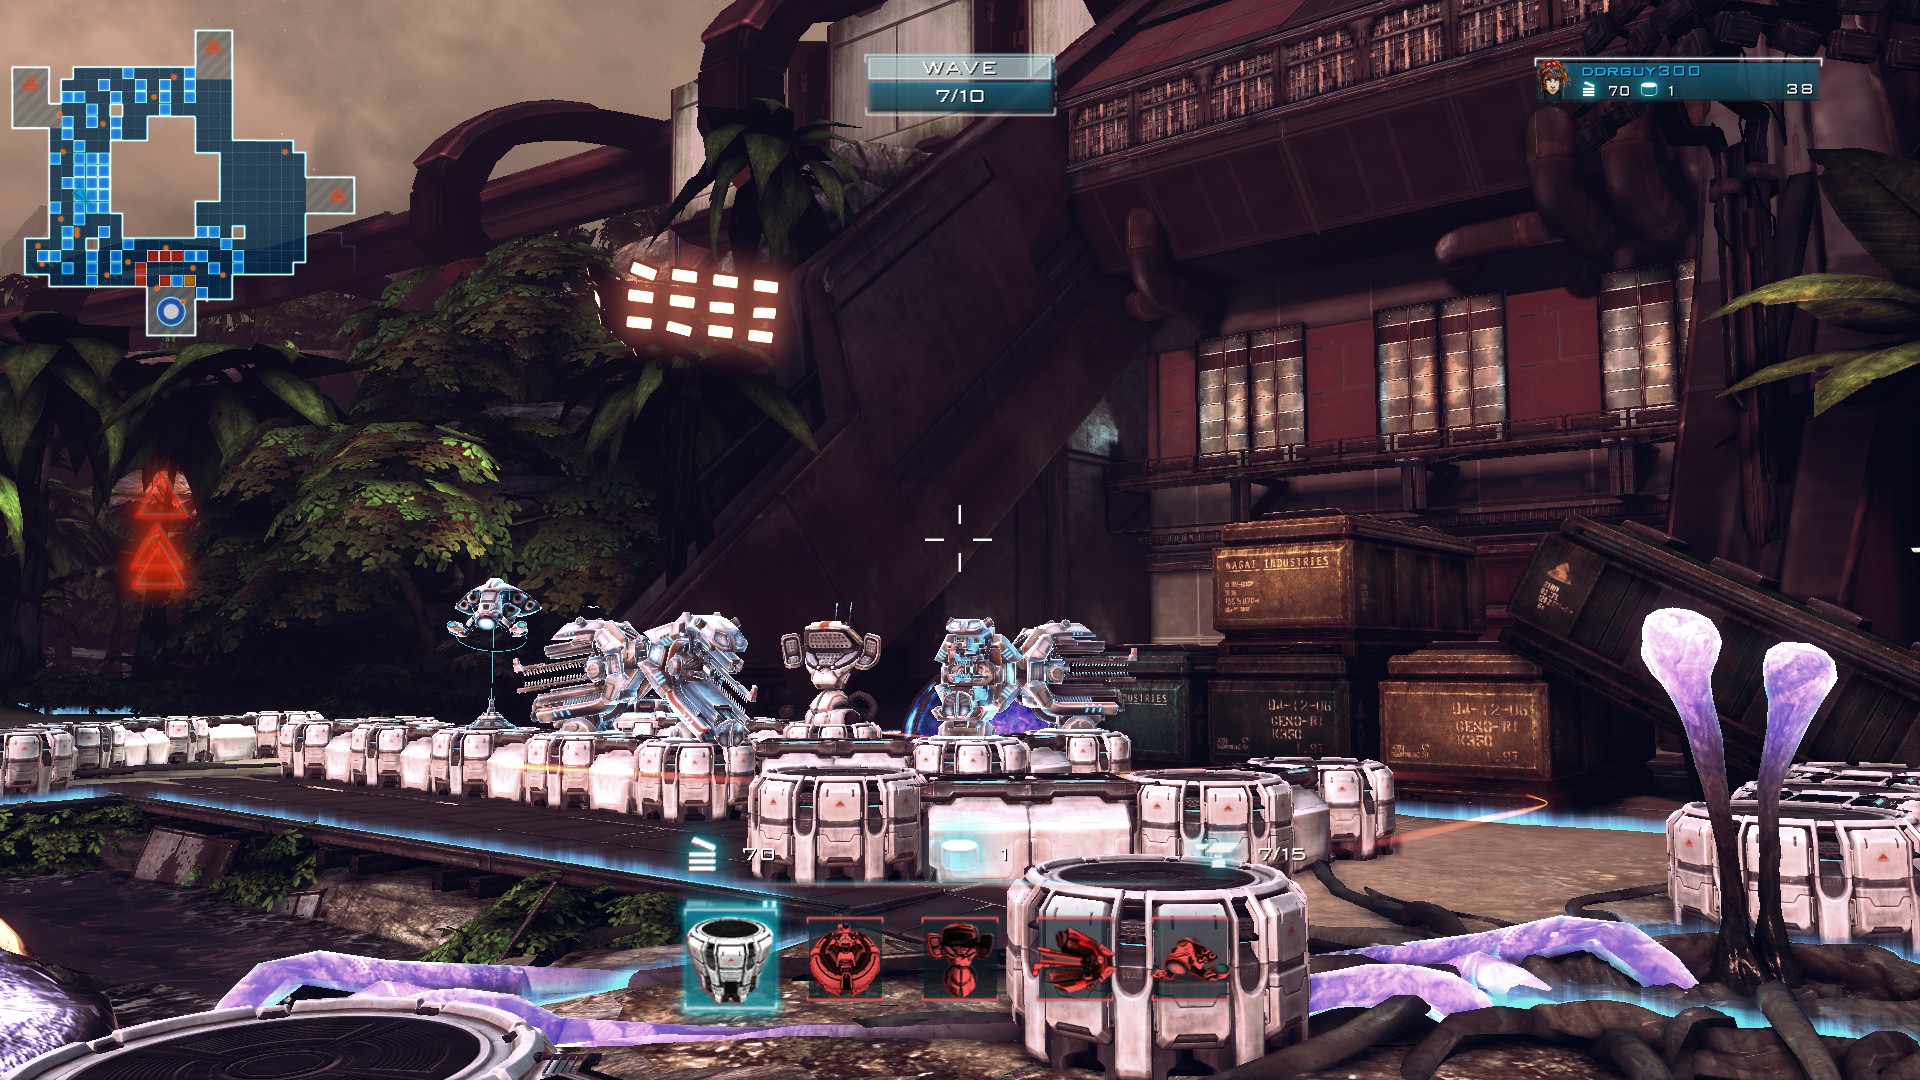
Get your mines. Finish off that last focus and save the rest of your resources.
Strategy:
This wave is actually more difficult than 9, but that's mainly because I have such an awesome way of dealing with 9. You're going to use a similar strategy to wave 5. Stand in the same general area, but your targets will ONLY be mutators. Though the west spawn point is the last to spawn a mutator, you'll want to start with taking out that one. if they get ahead of you, stay on them and make sure they die.
The general rule of thumb is to make sure that you are targetting the mutator (or group of, as they will inevitably bunch together) that is closests to the core and stay on it/them until gone and then move back to the next one. However, this takes a little bit of finesse because REALLY you want to watch for the group of mutators that are bunched up. This is especially helpful when an enemy sets off the shocking revelation as you can be attacking a group of bunched up mutators that are stunned as you unload on them. Be sure to make the best of those chances.
Also, screamers will be stopping to say hi and this could work in your favor. It CERTAINLY does in wave 9, but right now when they stop to attack you, some mutators might stay on that stationary screamer rather than move foward:
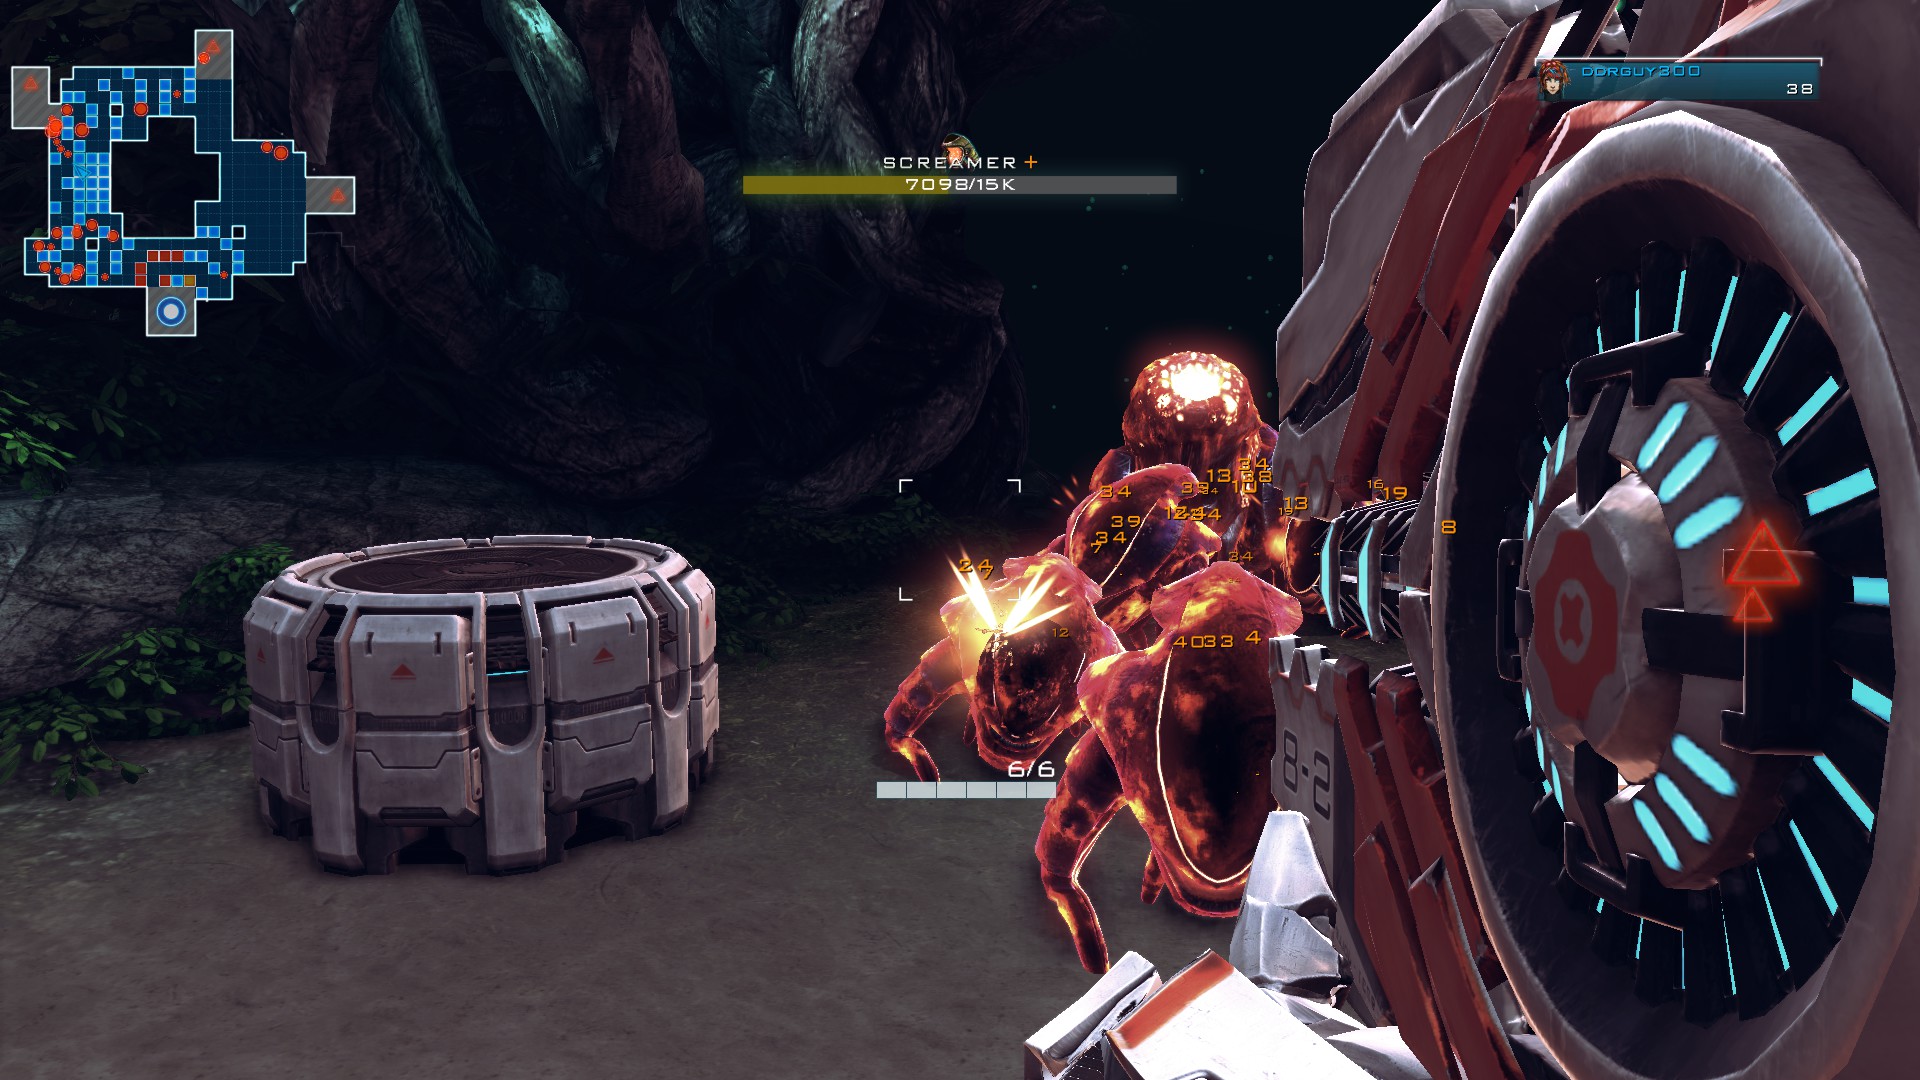
This is more of a fun fact though as you don't really have control over that. Just always remember to take care of any mutators that get past that spot where you're hanging out.
And watch out for screamers attacking you from both angles as your path makes them wind down toward you before crossing your main vantage point. If you want to combat this (like I should have done) just be sure to take 2 tower bases and fill them into the spaces that can be filled on the turn just before the path reaches the west spawn point.
Once the mutators are ALL taken care of, switch hats to actively deffending the core.
Your core will take some damage, but it won't be a whole ton. Ironically, it should be the most damage you take in a single wave here:
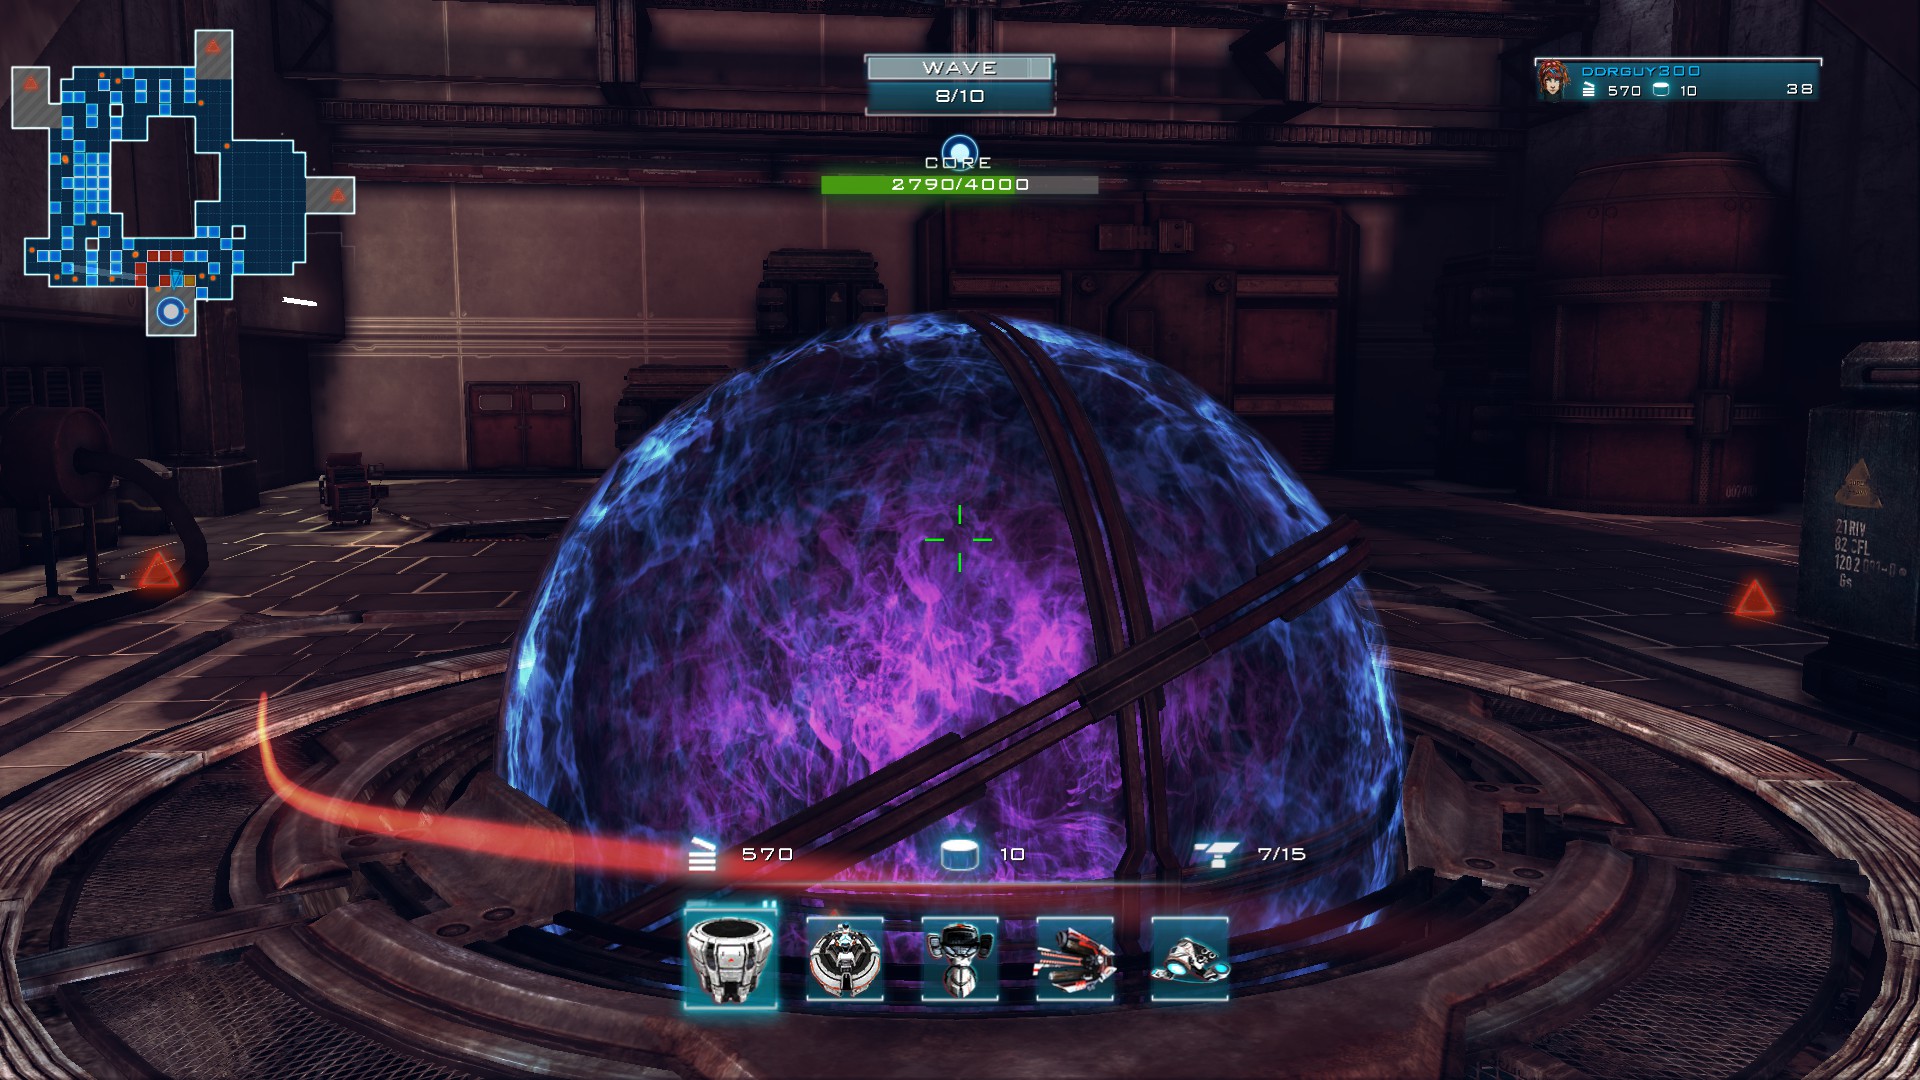
With that said though, as the wave that takes the most finesse, it's also not a big deal if you screw up here or there, so even if your core takes 1000 more damage, you'll still be able to finish the map. Just stay on the mutators and don't die, and you will be fine.
Get your mines. Finish off that last focus and save the rest of your resources.
Strategy:
This wave is actually more difficult than 9, but that's mainly because I have such an awesome way of dealing with 9. You're going to use a similar strategy to wave 5. Stand in the same general area, but your targets will ONLY be mutators. Though the west spawn point is the last to spawn a mutator, you'll want to start with taking out that one. if they get ahead of you, stay on them and make sure they die.
The general rule of thumb is to make sure that you are targetting the mutator (or group of, as they will inevitably bunch together) that is closests to the core and stay on it/them until gone and then move back to the next one. However, this takes a little bit of finesse because REALLY you want to watch for the group of mutators that are bunched up. This is especially helpful when an enemy sets off the shocking revelation as you can be attacking a group of bunched up mutators that are stunned as you unload on them. Be sure to make the best of those chances.
Also, screamers will be stopping to say hi and this could work in your favor. It CERTAINLY does in wave 9, but right now when they stop to attack you, some mutators might stay on that stationary screamer rather than move foward:
This is more of a fun fact though as you don't really have control over that. Just always remember to take care of any mutators that get past that spot where you're hanging out.
And watch out for screamers attacking you from both angles as your path makes them wind down toward you before crossing your main vantage point. If you want to combat this (like I should have done) just be sure to take 2 tower bases and fill them into the spaces that can be filled on the turn just before the path reaches the west spawn point.
Once the mutators are ALL taken care of, switch hats to actively deffending the core.
Your core will take some damage, but it won't be a whole ton. Ironically, it should be the most damage you take in a single wave here:
With that said though, as the wave that takes the most finesse, it's also not a big deal if you screw up here or there, so even if your core takes 1000 more damage, you'll still be able to finish the map. Just stay on the mutators and don't die, and you will be fine.
Wave 8
Setup:
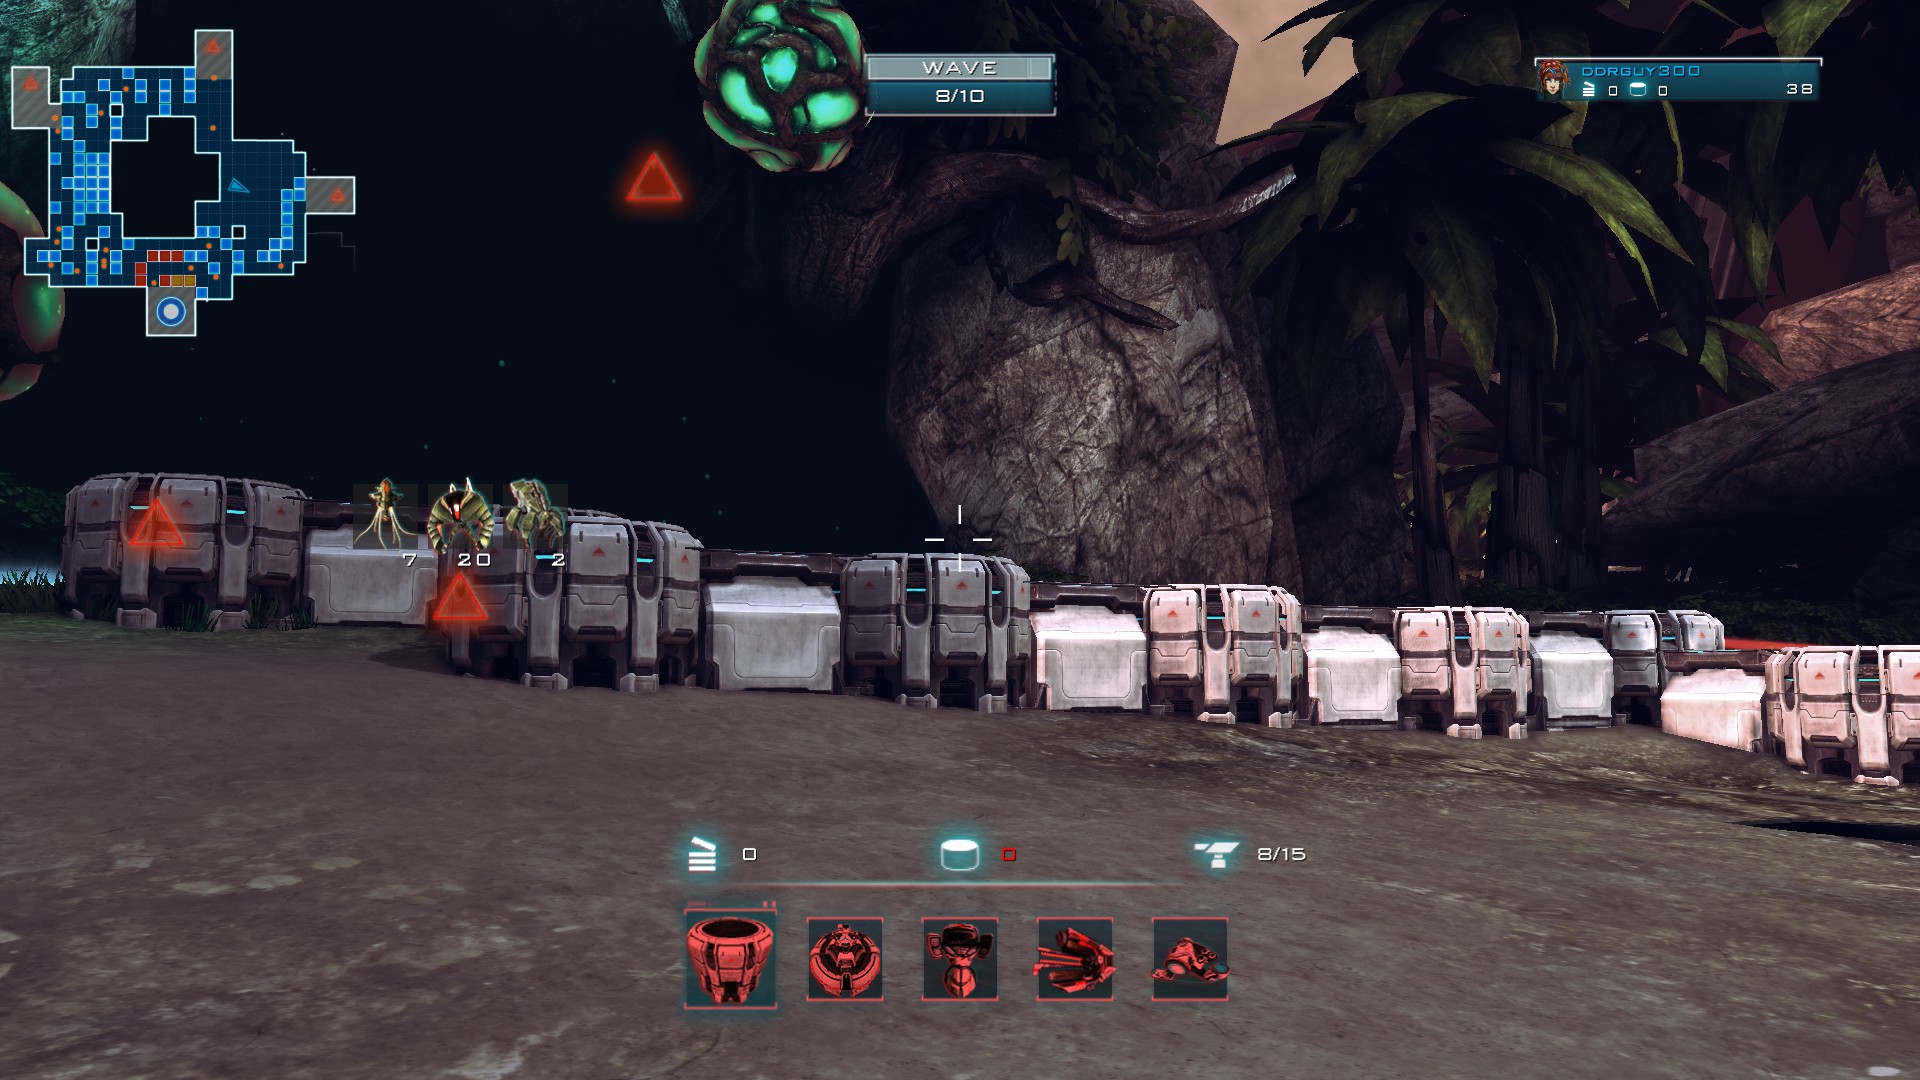
Grab your mines. Set up another focus tower between the mines and range spire and put all of your resources into it:
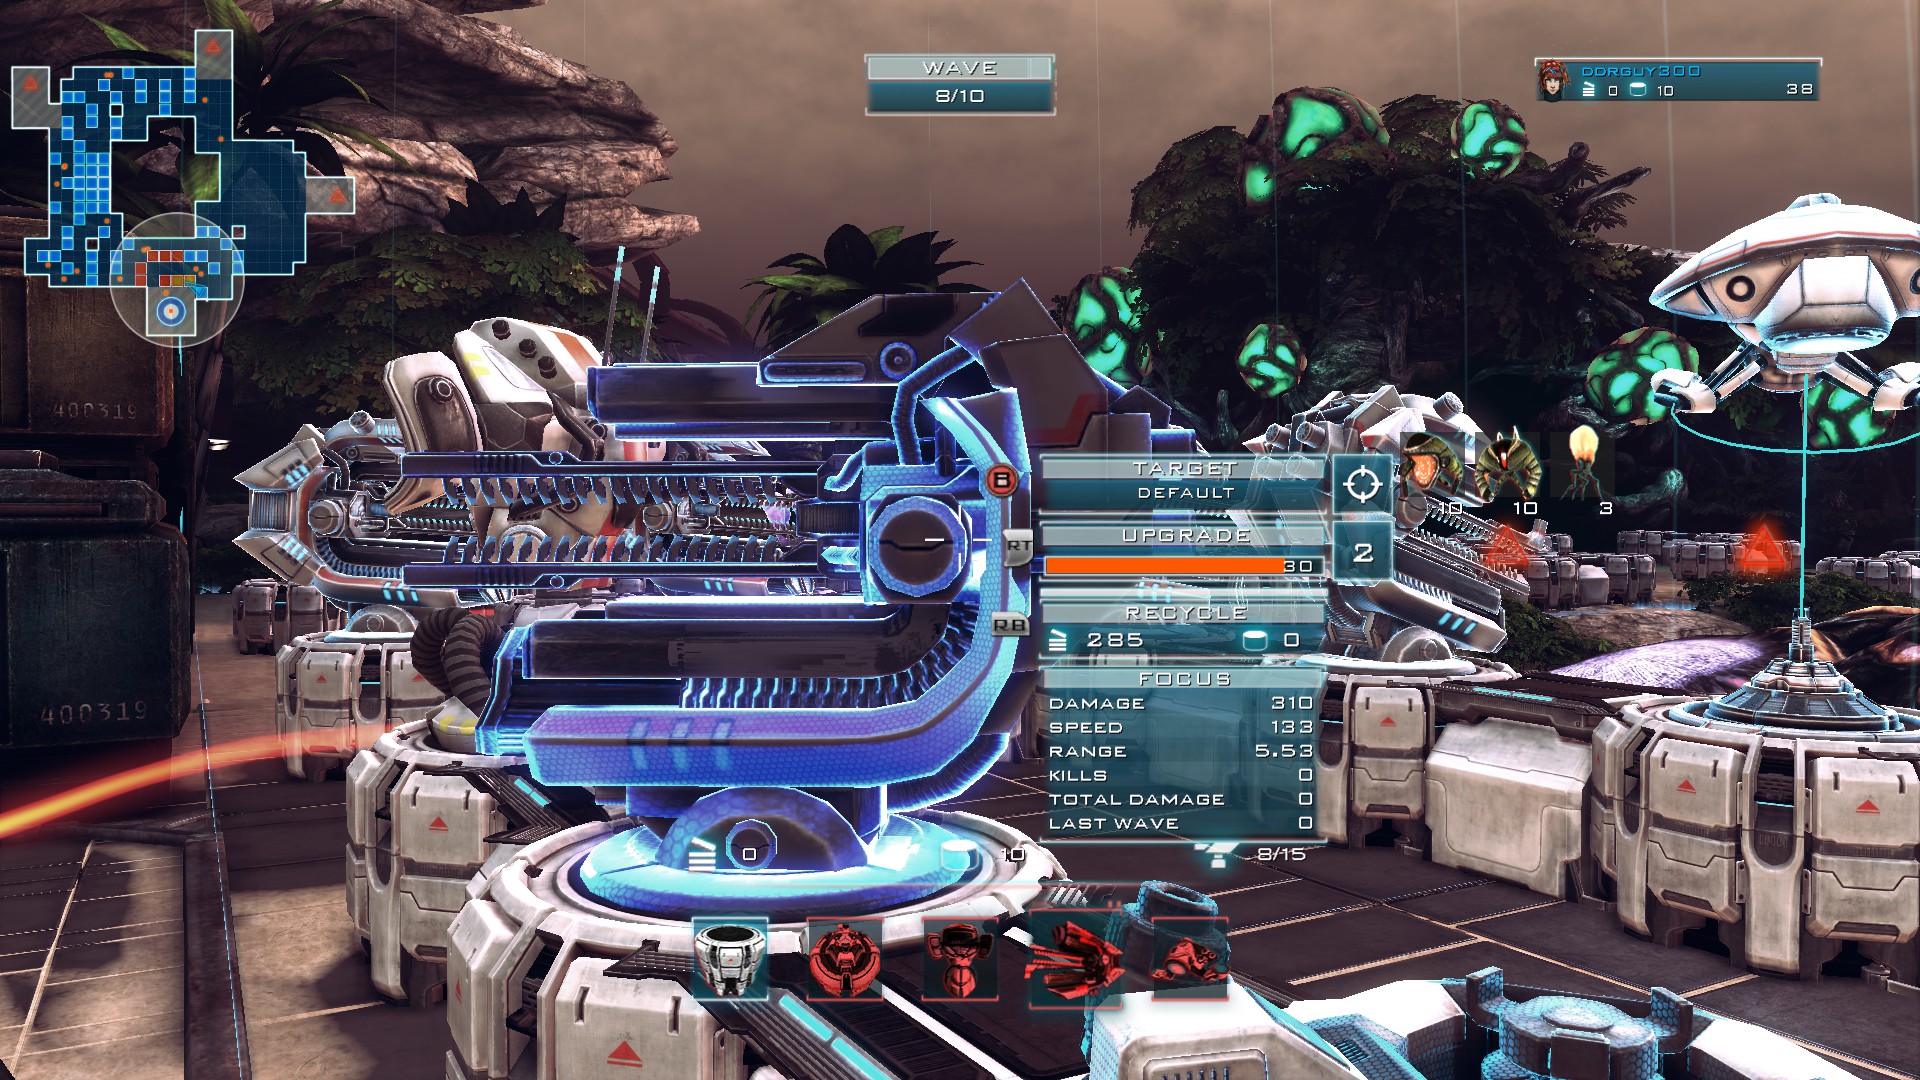
Strategy:
The east spawn point is set up the way it is to just stretch out how long it takes the enemies to reach you. It also gives the anti-air more exposure in dealing with the healers on that side. In addition, it makes part of the set up for wave 9 already done.
Hang out on your safe platform and take care of the screamers the same way you have in the past. Let the focus towers deal with everyone else.
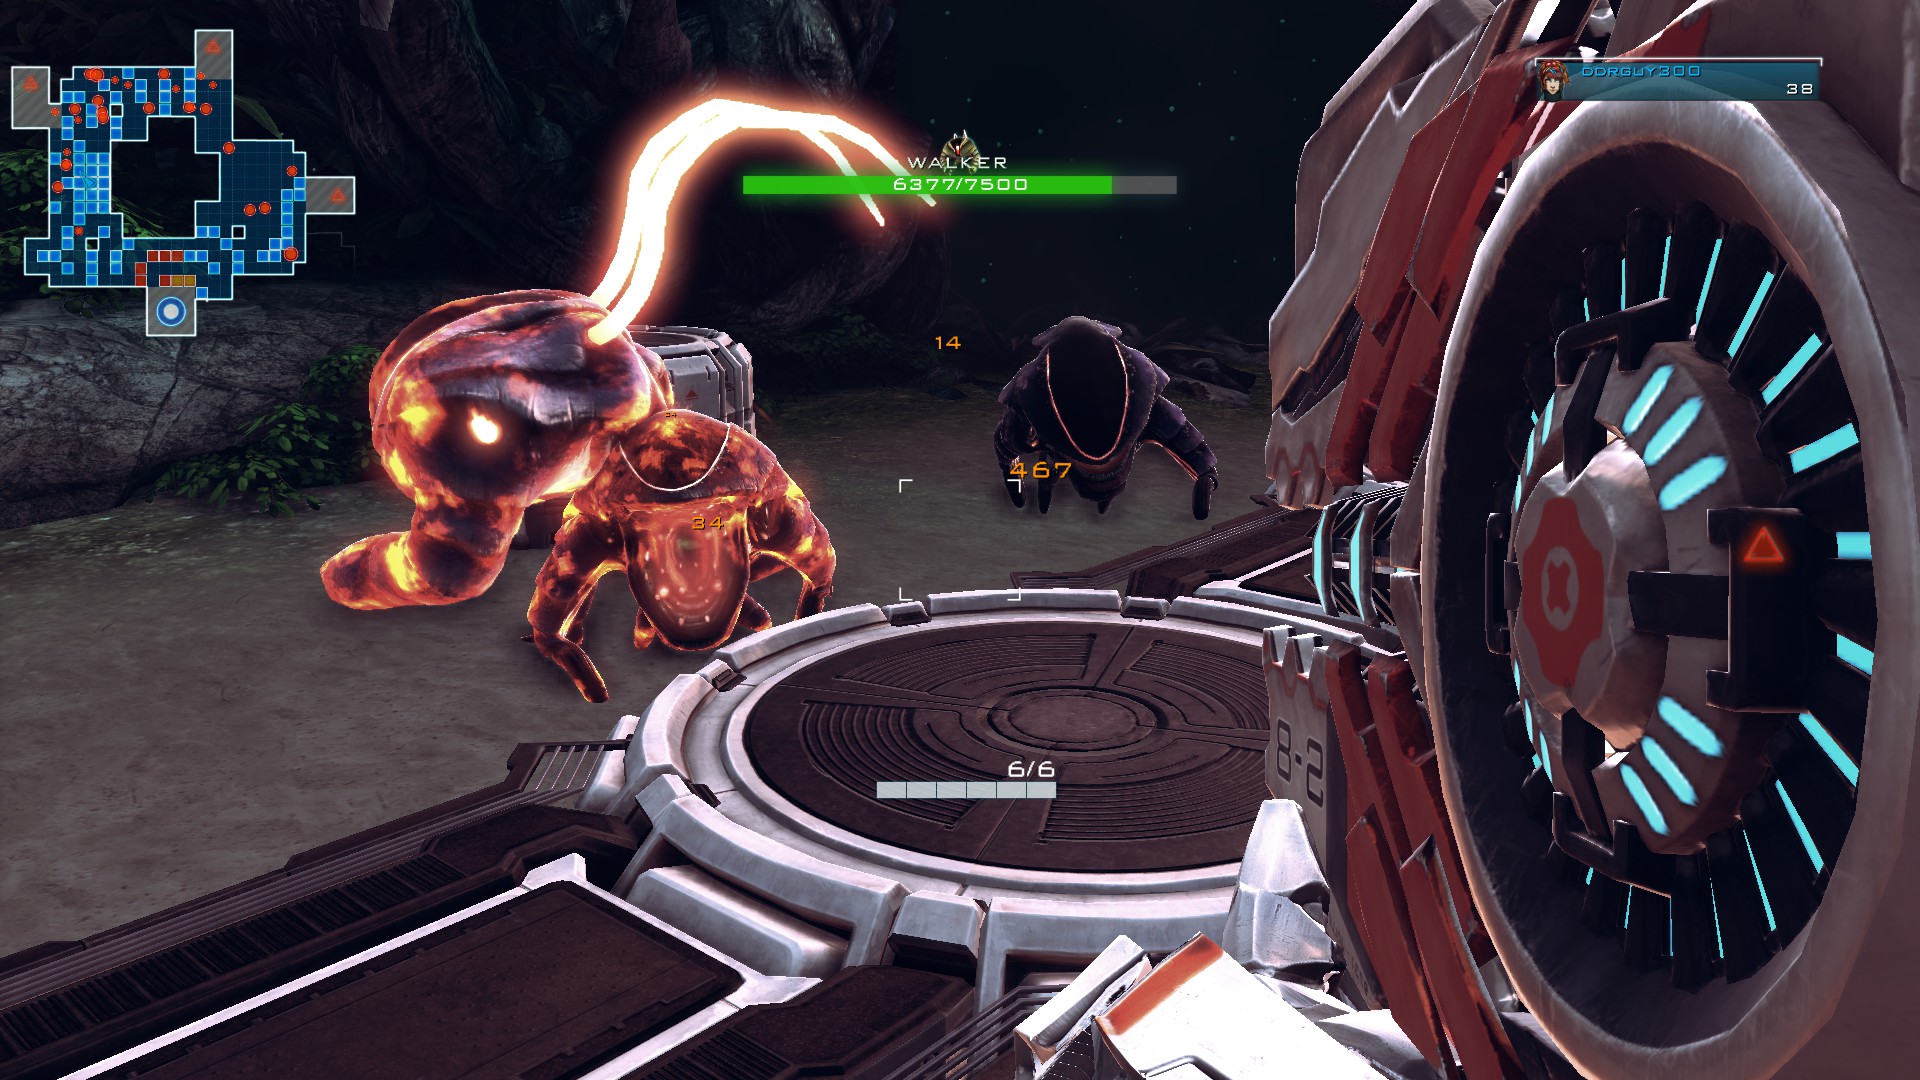
By the time the heavys get to you, double back to the core. Your core might get hit once or twice in this wave, if at all. Again, just forgot to get the screen shot.
Grab your mines. Set up another focus tower between the mines and range spire and put all of your resources into it:
Strategy:
The east spawn point is set up the way it is to just stretch out how long it takes the enemies to reach you. It also gives the anti-air more exposure in dealing with the healers on that side. In addition, it makes part of the set up for wave 9 already done.
Hang out on your safe platform and take care of the screamers the same way you have in the past. Let the focus towers deal with everyone else.
By the time the heavys get to you, double back to the core. Your core might get hit once or twice in this wave, if at all. Again, just forgot to get the screen shot.
Wave 9
Setup:
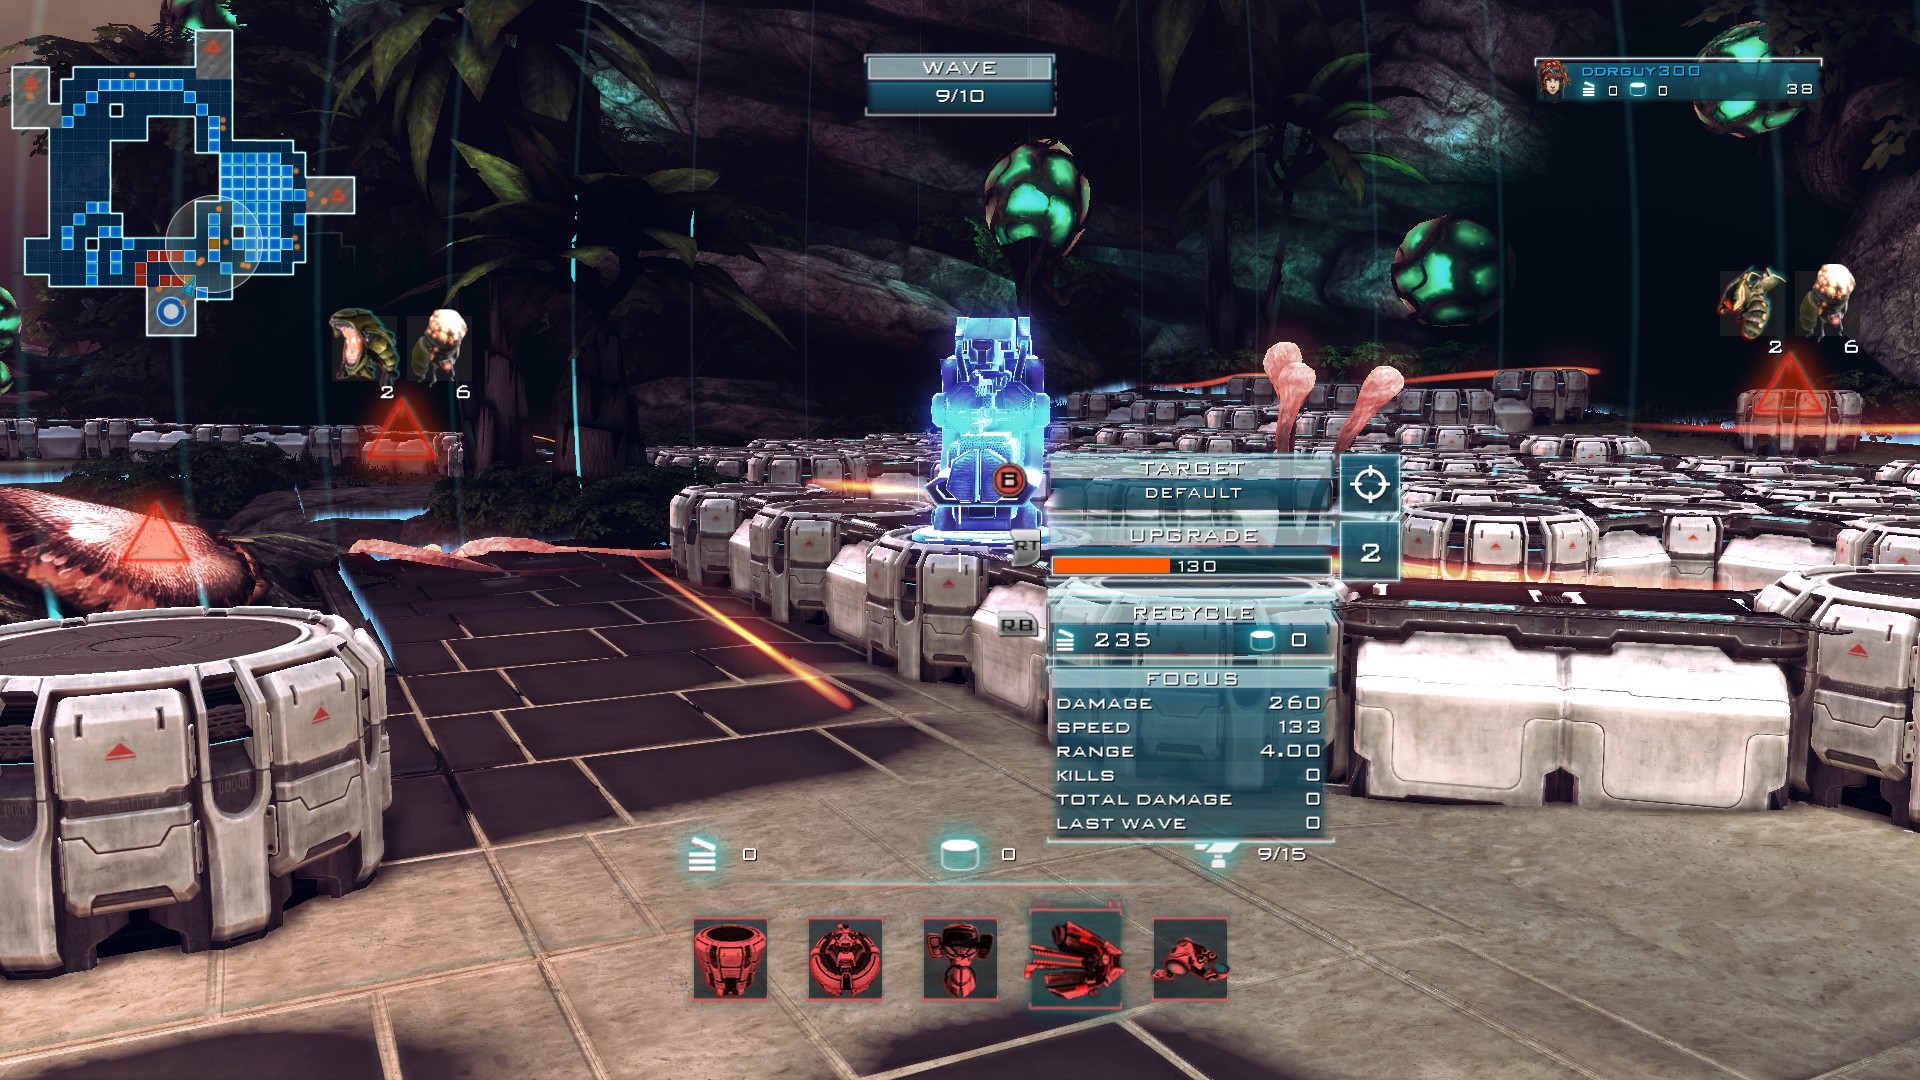
This looks tedious, but it will 100% be worth it. MAKE 100% SURE YOU SEAL OFF THE OTHER PATH.
Get your mines. Put the rest of your resources into a focus tower exactly where it shows on the map.
Strategy:
Your core is only going to get hit between 3 and 5 times this wave using this setup. Here's why it works:
You're going to be standing on that hug platform (as if that wasn't obvious) right in front of where that lone tower base extends out the path from the east spawn point. What are you going to do?
1) grab the attention of the matriarchs
2) keep their attention the whole time and DON'T DIE from their attacks.
3) systematically slaughter the groups of mutators as they stay on the distracted matriarchs:
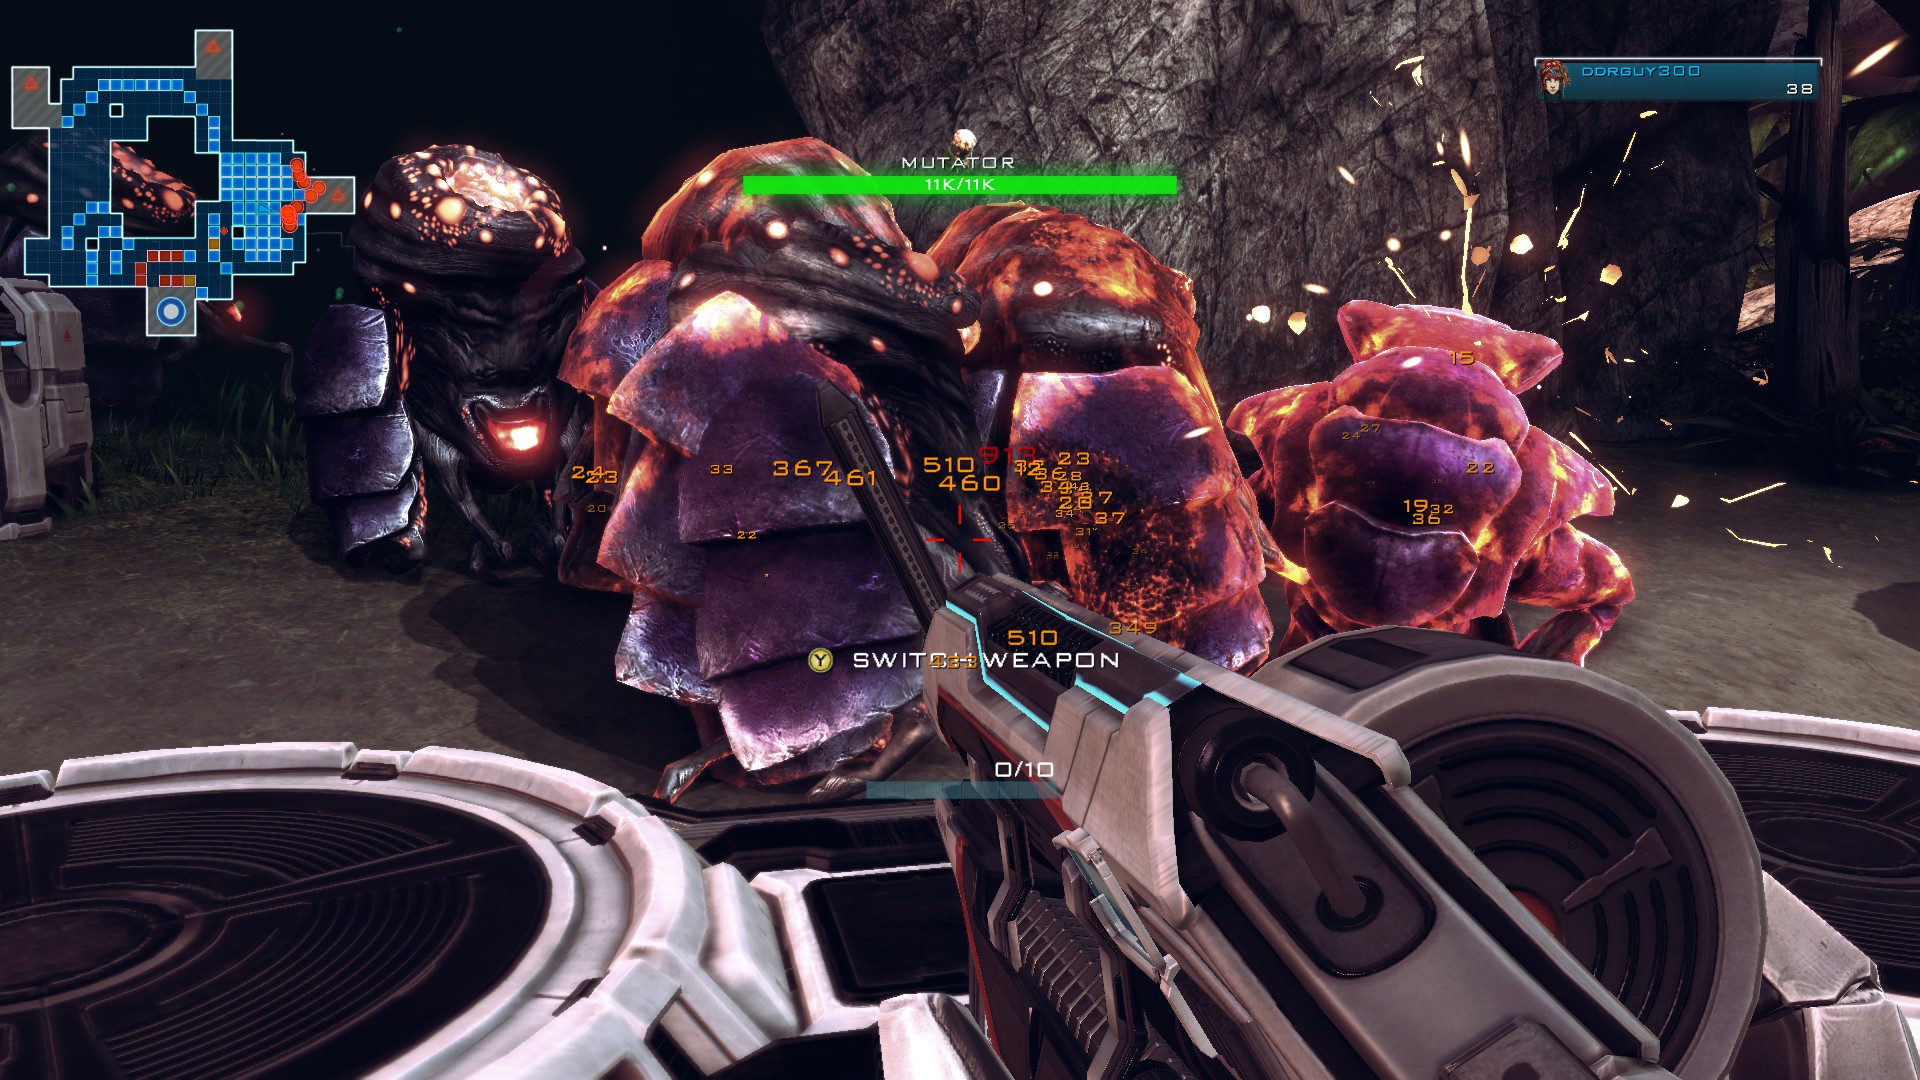
Why the direct route from the north and west spawn points to where you are? This is not only going to bring the matriarchs to you faster, but it is also going to get the hoverers to the core sooner and more reliably so they aren't aimlessly wandering around. Oh yeah, it also brings ALL of the mutators to you quicker too as a result.
This looks tedious, but it will 100% be worth it. MAKE 100% SURE YOU SEAL OFF THE OTHER PATH.
Get your mines. Put the rest of your resources into a focus tower exactly where it shows on the map.
Strategy:
Your core is only going to get hit between 3 and 5 times this wave using this setup. Here's why it works:
You're going to be standing on that hug platform (as if that wasn't obvious) right in front of where that lone tower base extends out the path from the east spawn point. What are you going to do?
1) grab the attention of the matriarchs
2) keep their attention the whole time and DON'T DIE from their attacks.
3) systematically slaughter the groups of mutators as they stay on the distracted matriarchs:
Why the direct route from the north and west spawn points to where you are? This is not only going to bring the matriarchs to you faster, but it is also going to get the hoverers to the core sooner and more reliably so they aren't aimlessly wandering around. Oh yeah, it also brings ALL of the mutators to you quicker too as a result.
Wave 9: part 2 (because not only does steam not auto save what you're writing ever, but will freak if you have too much text...)
As soon as the wave starts several mutators start following the walker warrior. However they quickly change targets to the fast moving matriarch that is right on you pretty quickly. This saves you from having to keep on the walker and his minions AS WELL AS keeping his buffs to only one or two. Same thing with the second walker warrior.
Now there is a slight chance that the first matriarch that you encounter won't be buffed at all making him able to be killed, which is what happened for me (but not in my youtube video). If so, cool, have at it. Less attacks for you to dodge. If not, it's not an issue.
Whether it's one matriarch or two that you have distracted (don't let either get to the core), your targets are only purely the mutators. And the reason for that lone tower base extending out the path from the east spawn point is to give the matriarchs a larger area to attack you so they don't run ahead. It just works a lot better this way. I had one run away from me before and this seems to fix that.
As you're going to town on the mutators, the hoverers will pass you by. THE REASON FOR THE EXTRA HUGE PLATFORM IS SO THAT THE HOVERERS HAVE AN ALMOST ZERO PERCENT CHANCE OF ATTACKING YOU. If they attack you, your strategy suffers greatly as it greatly risks the matriarchs moving on while also breaking up the mutators after you've been knocked back. So not only do you want to not give them a maze to go through because that just gives them more time to be mutated, you also want to give them as much rom as possible.
Once both hoverers are taken care of by your army of focus towers, only the matriarchs will remain. At this point, one of them should be pretty low on health. If you have the patience, finish off that one.
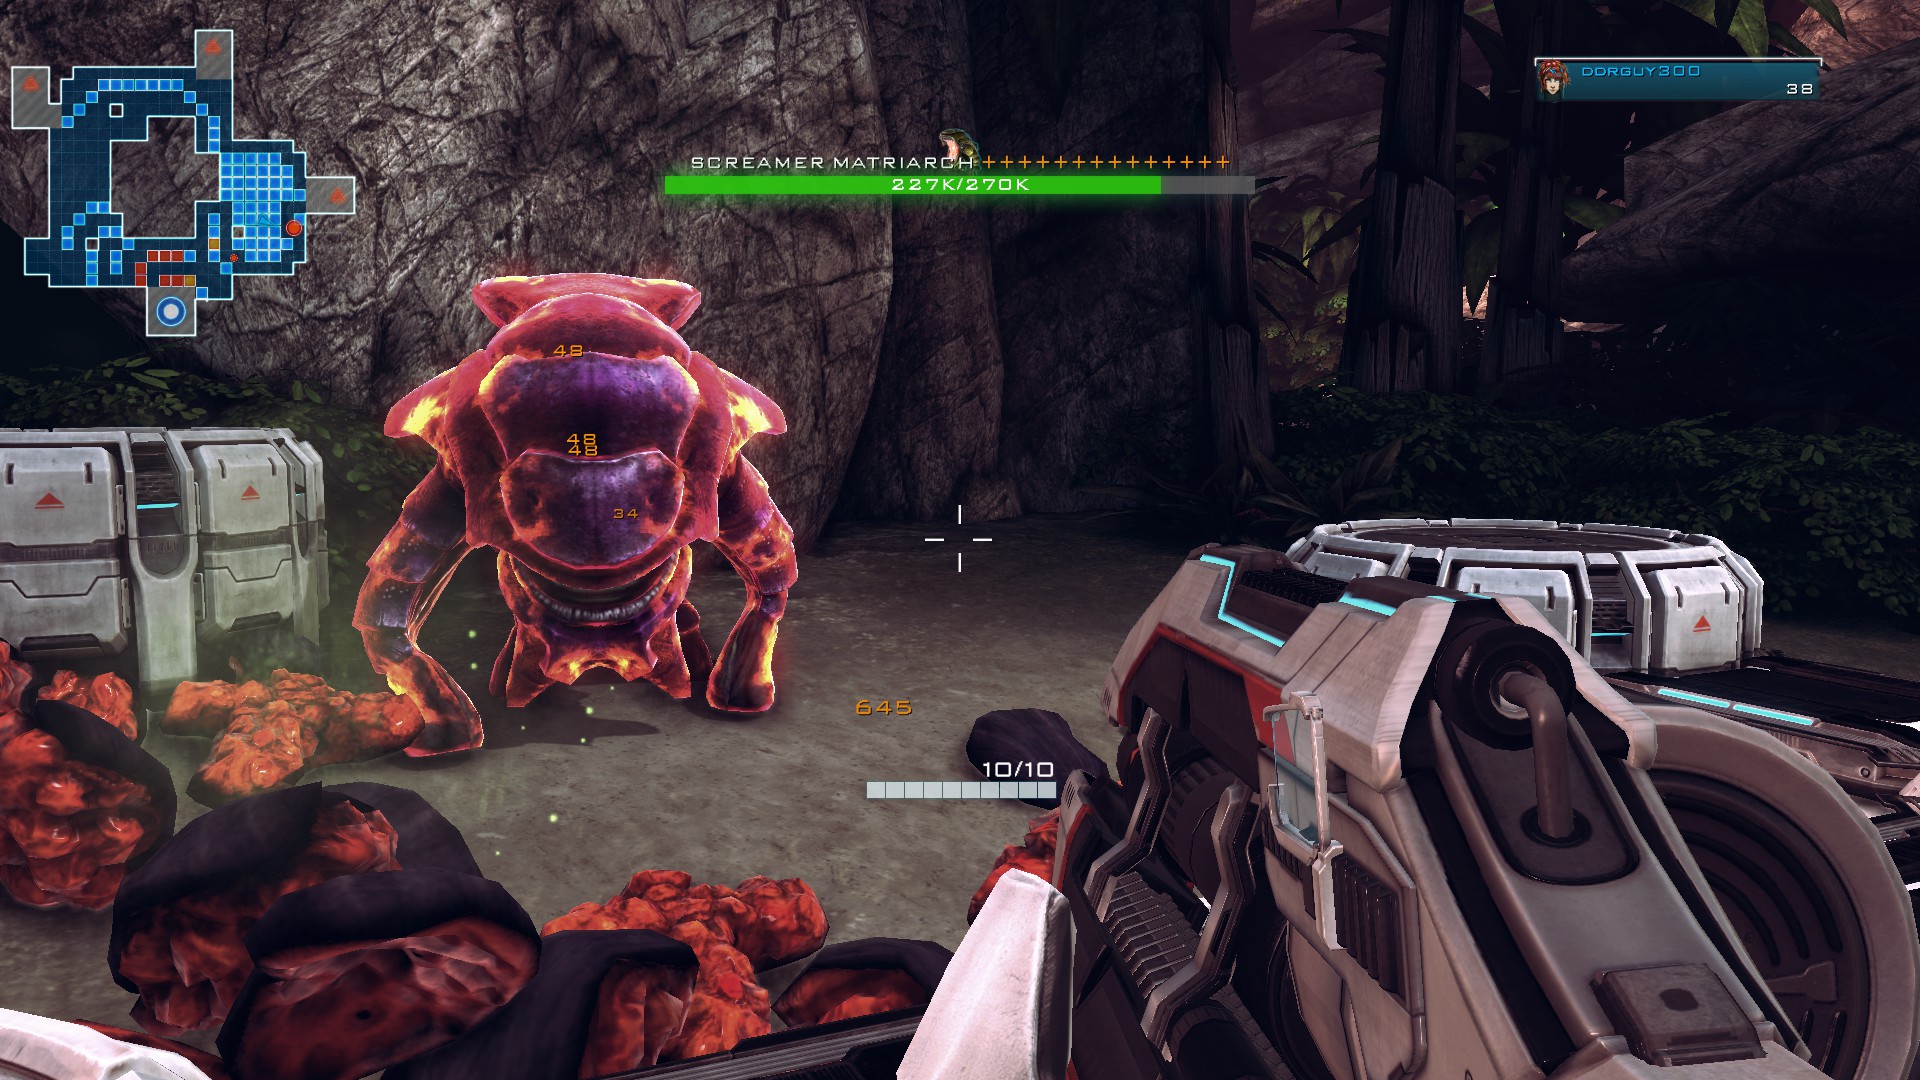
THEN run ahead to just before the core. Grab the matriarch's attention again and watch it melt.
Core was barely touched and only lost about 300 health:
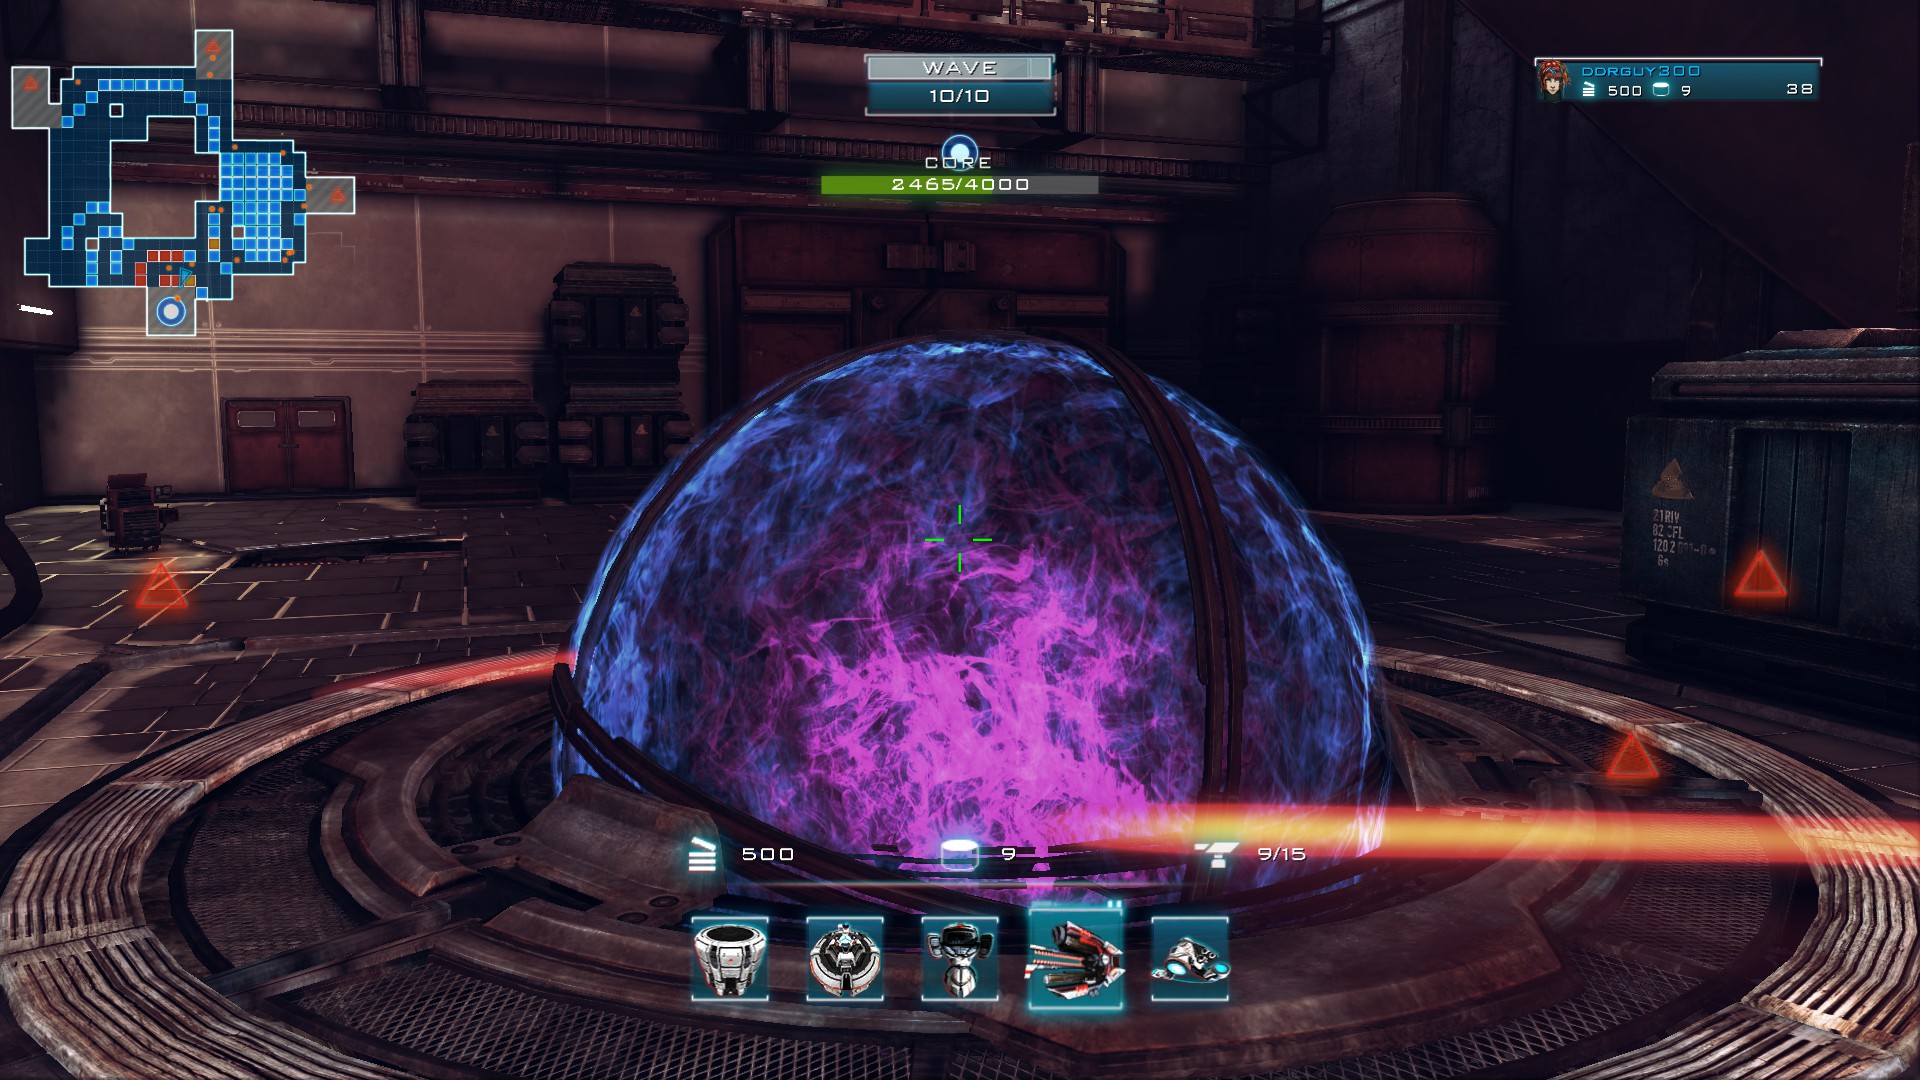
Now there is a slight chance that the first matriarch that you encounter won't be buffed at all making him able to be killed, which is what happened for me (but not in my youtube video). If so, cool, have at it. Less attacks for you to dodge. If not, it's not an issue.
Whether it's one matriarch or two that you have distracted (don't let either get to the core), your targets are only purely the mutators. And the reason for that lone tower base extending out the path from the east spawn point is to give the matriarchs a larger area to attack you so they don't run ahead. It just works a lot better this way. I had one run away from me before and this seems to fix that.
As you're going to town on the mutators, the hoverers will pass you by. THE REASON FOR THE EXTRA HUGE PLATFORM IS SO THAT THE HOVERERS HAVE AN ALMOST ZERO PERCENT CHANCE OF ATTACKING YOU. If they attack you, your strategy suffers greatly as it greatly risks the matriarchs moving on while also breaking up the mutators after you've been knocked back. So not only do you want to not give them a maze to go through because that just gives them more time to be mutated, you also want to give them as much rom as possible.
Once both hoverers are taken care of by your army of focus towers, only the matriarchs will remain. At this point, one of them should be pretty low on health. If you have the patience, finish off that one.
THEN run ahead to just before the core. Grab the matriarch's attention again and watch it melt.
Core was barely touched and only lost about 300 health:
Wave 10
Setup:
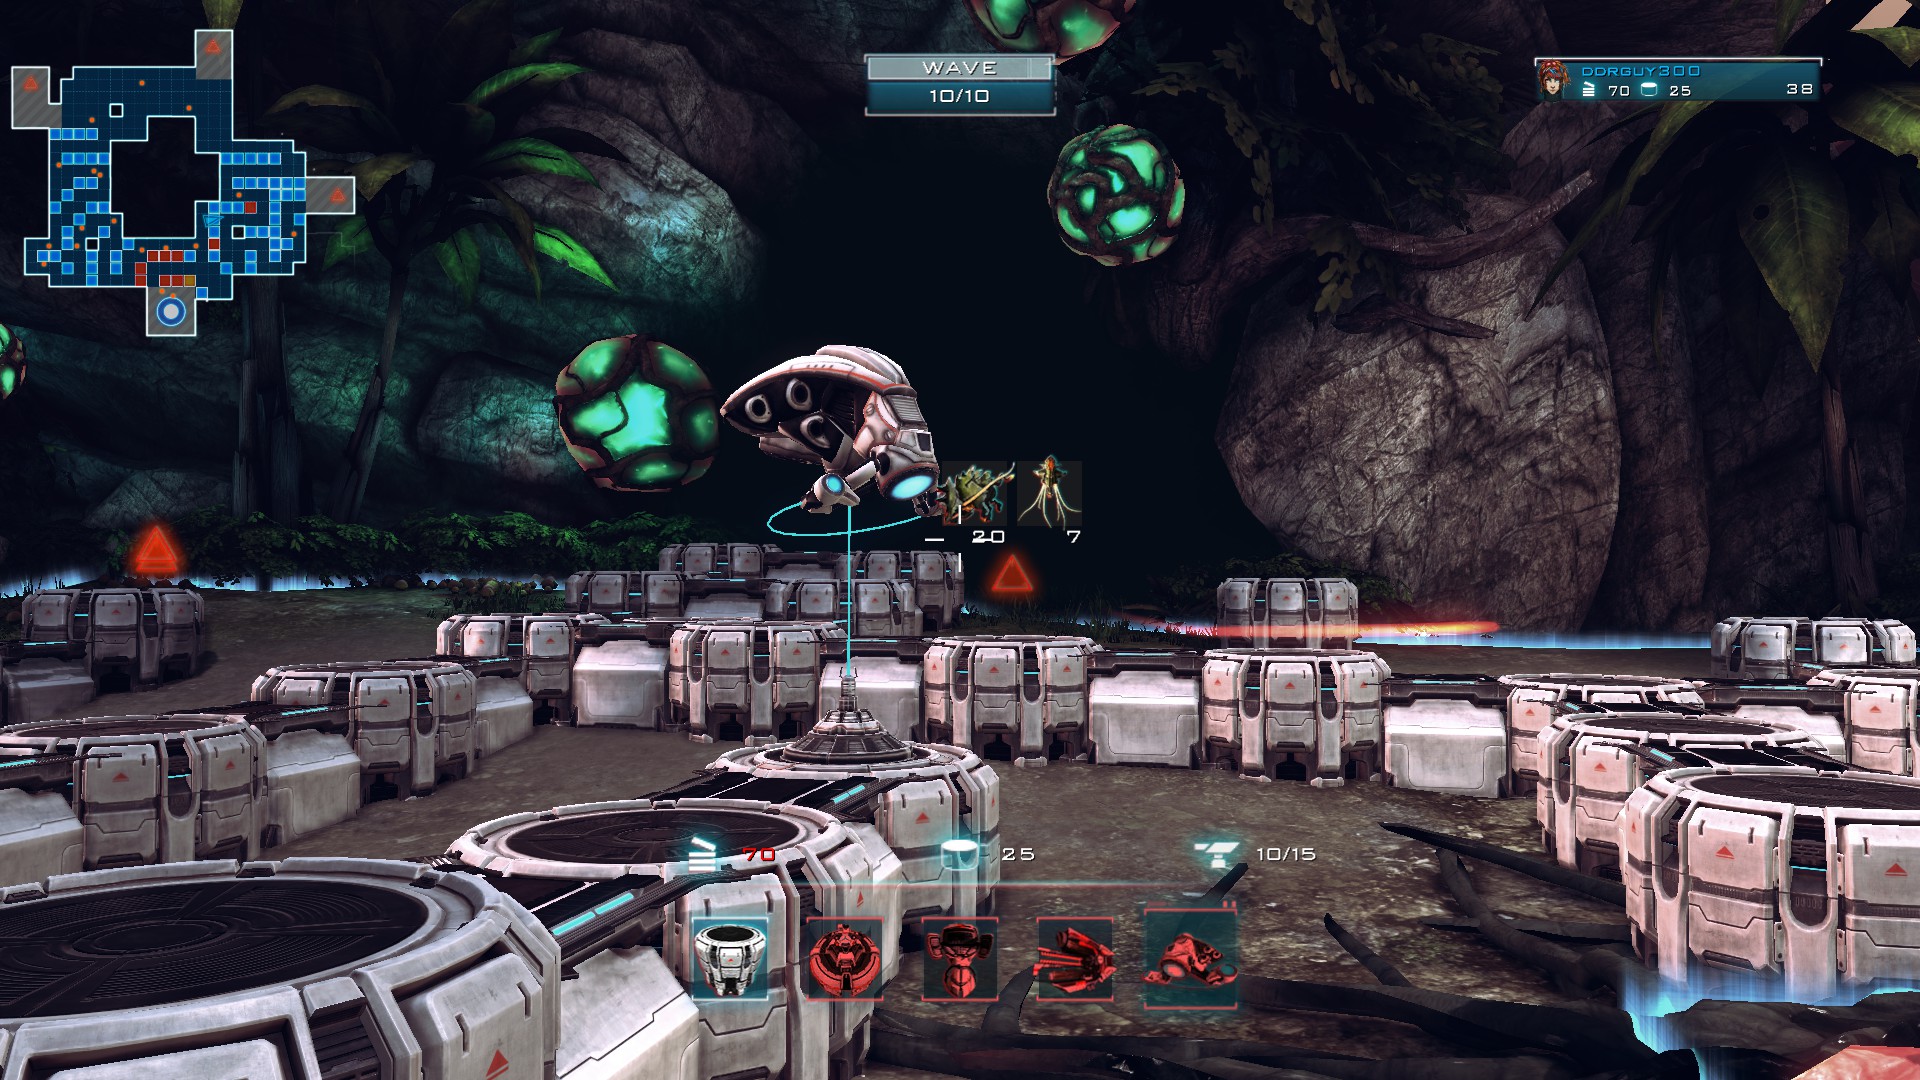
This actually I wouldn't go with this... the path is good, but when I went and did my youtube recording I only put the anti-air to rank 2 and the rest in my mines (make sure to get that last focus to rank 3 before you over charge the mines) and it worked a little better (patriarch guaranteed dead) while also giving me an extra mine. The anti-air is really extra insurance you don't truly need, but I'd rather have another than overcharge anything like range for 200.
The winding path for the east spawn point is to delay the rhinos. I got ran over once because the path was too short and I've been paranoid ever since.
Grab all of your mines and set them out like so:
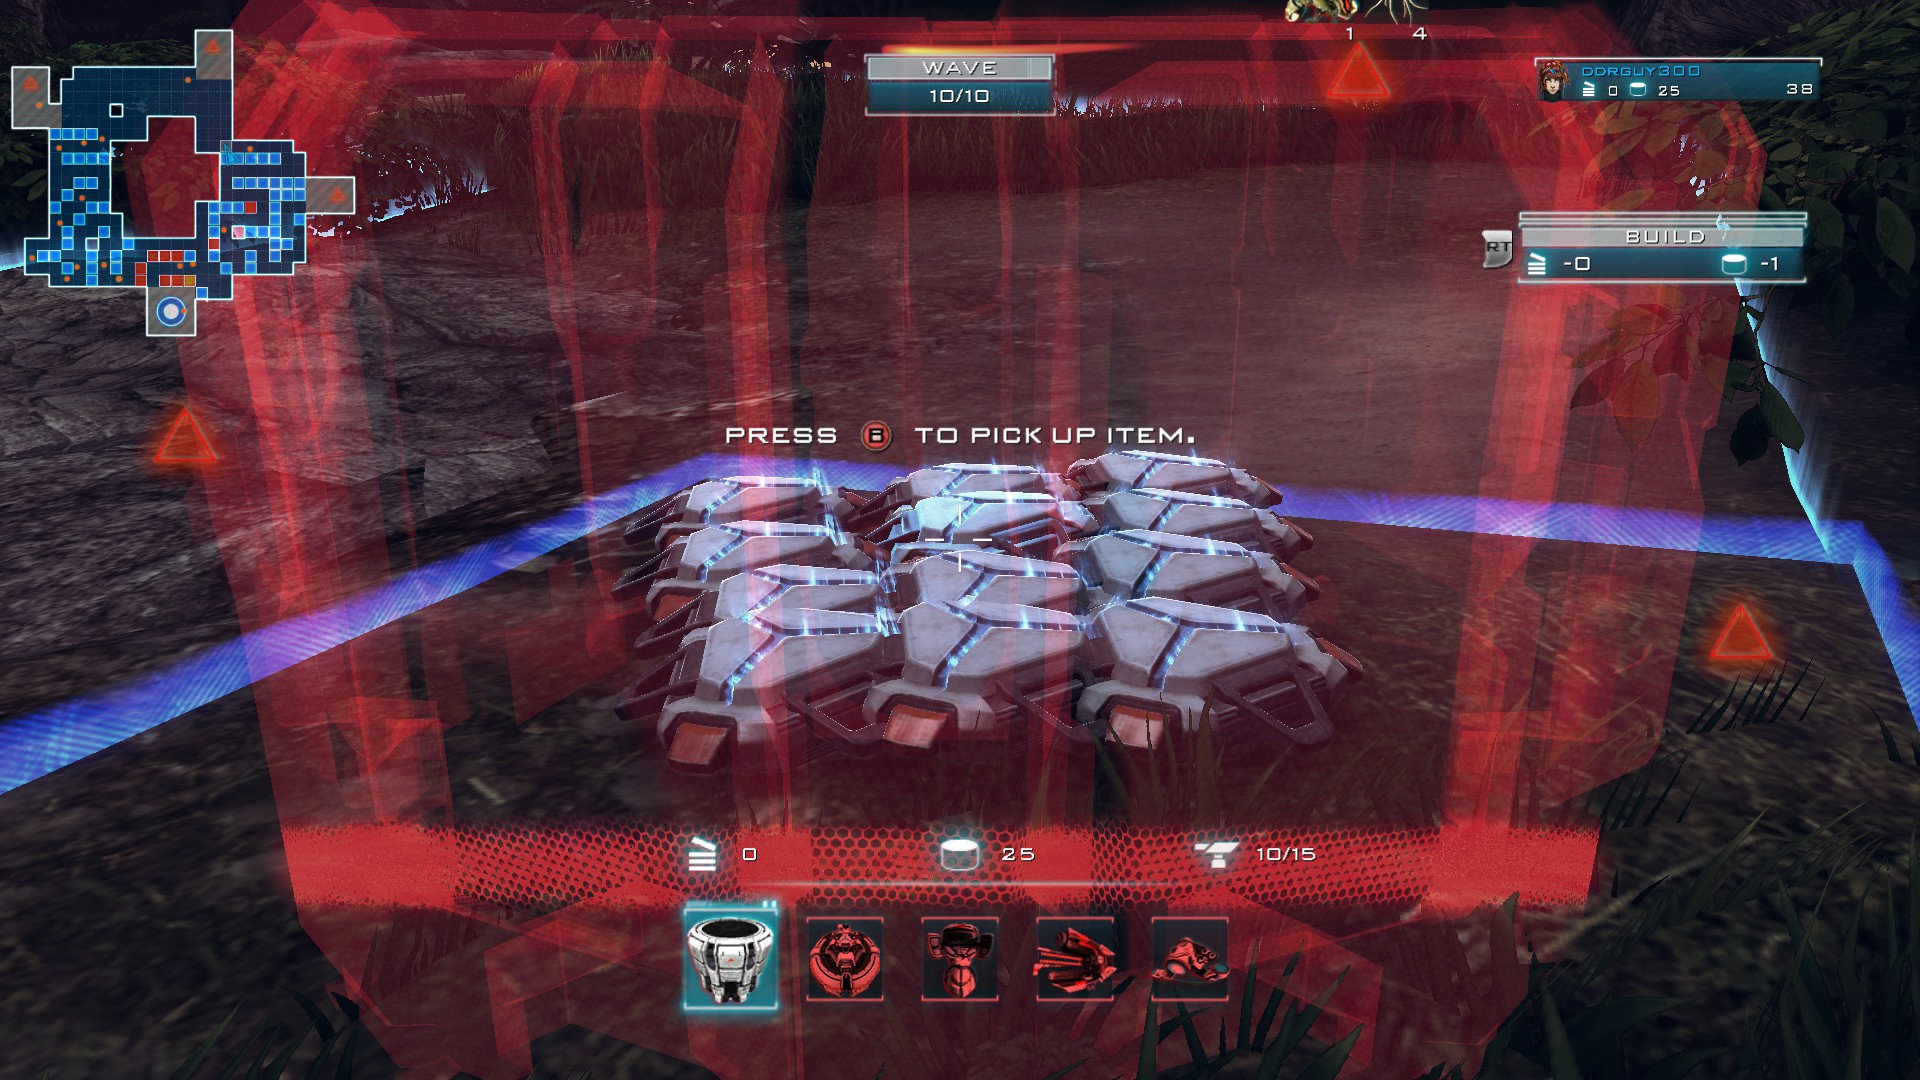
You'll have 13 instead of 12 though if you go with what I just wrote. This is the single grid that the patriarch has to walk through and you are going to use that to your advantage.
You don't want to give the patriarch reason to get held up destroying tower bases so that's why there are none out anywhere near him.
Strategy:
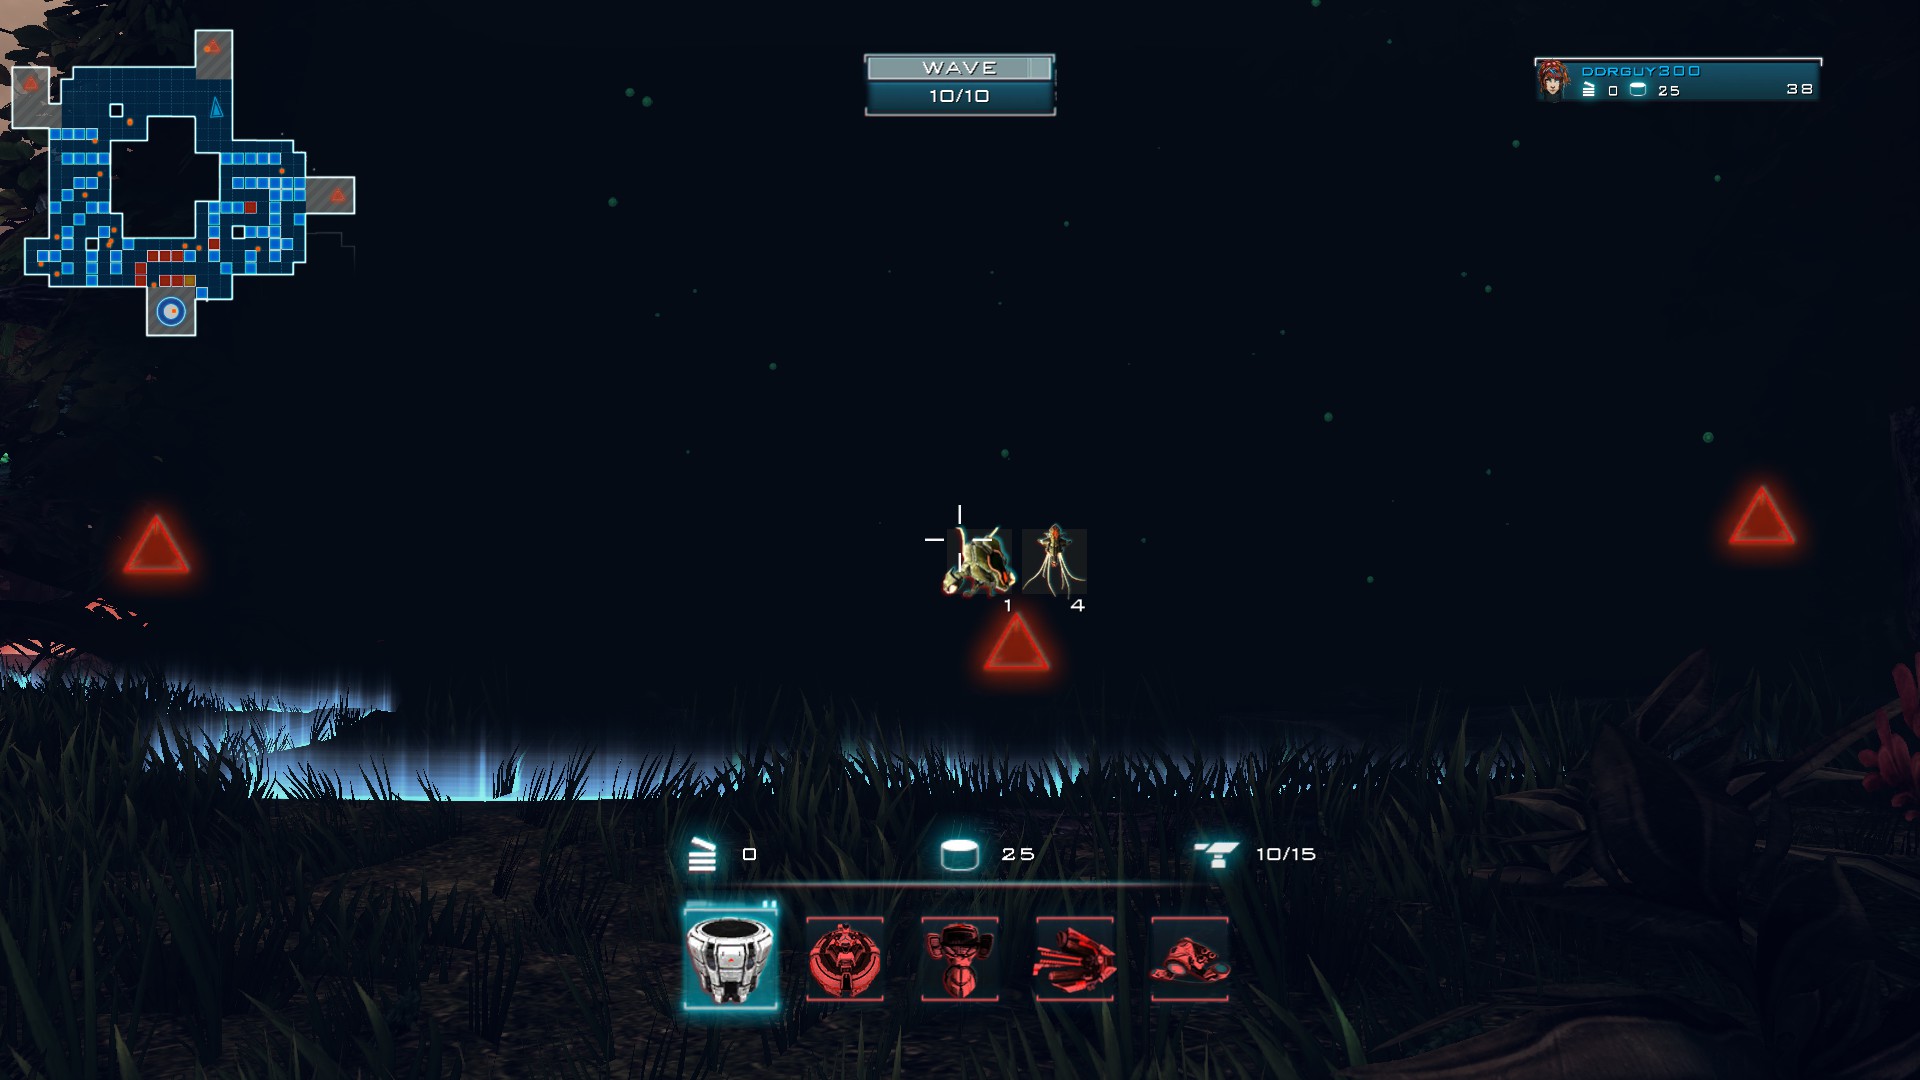
Start here:
Kite/have patriach follow you:
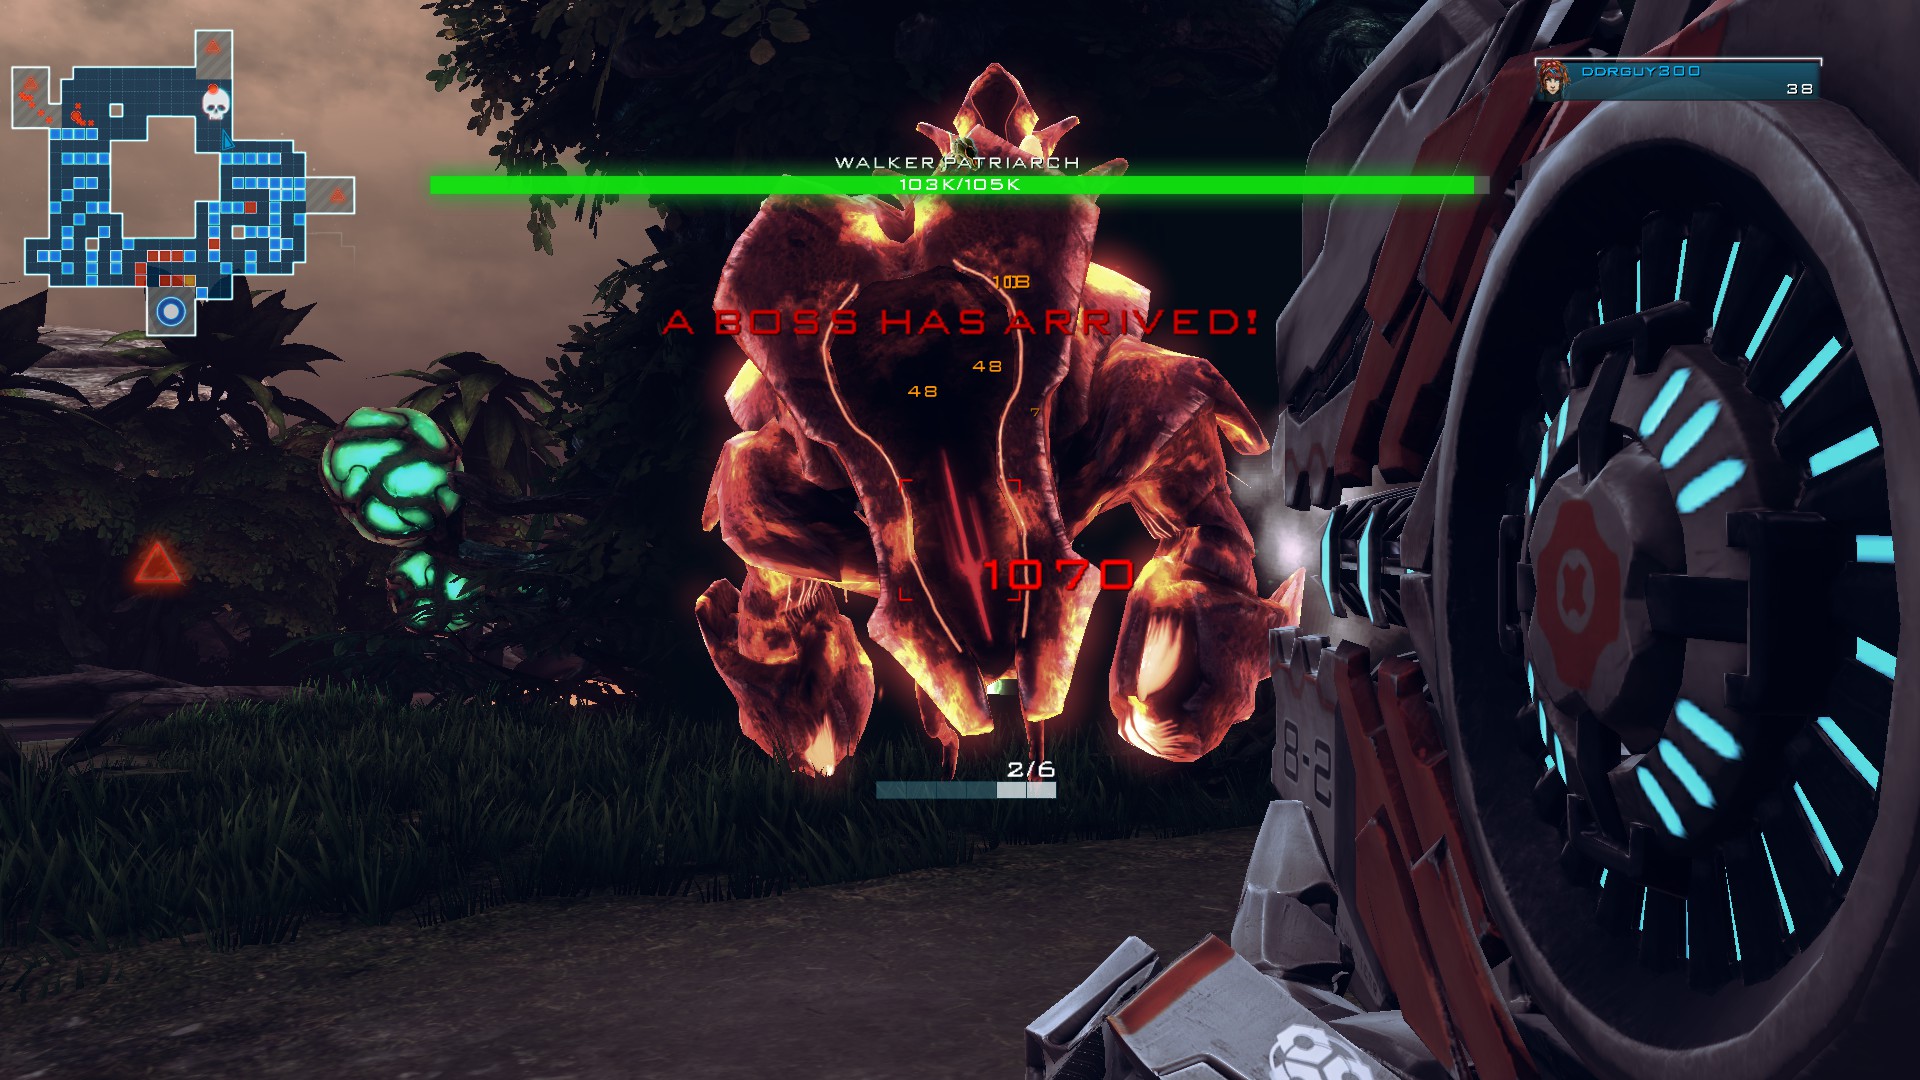
Watch him go boom.
The rest of the wave is cake. If you just make sure to help out your towers with your weapons starting at the point they can reach (so let the rhinos get within range rather than risk getting run over), your core will go completely untouched.
Here was my ending core health:
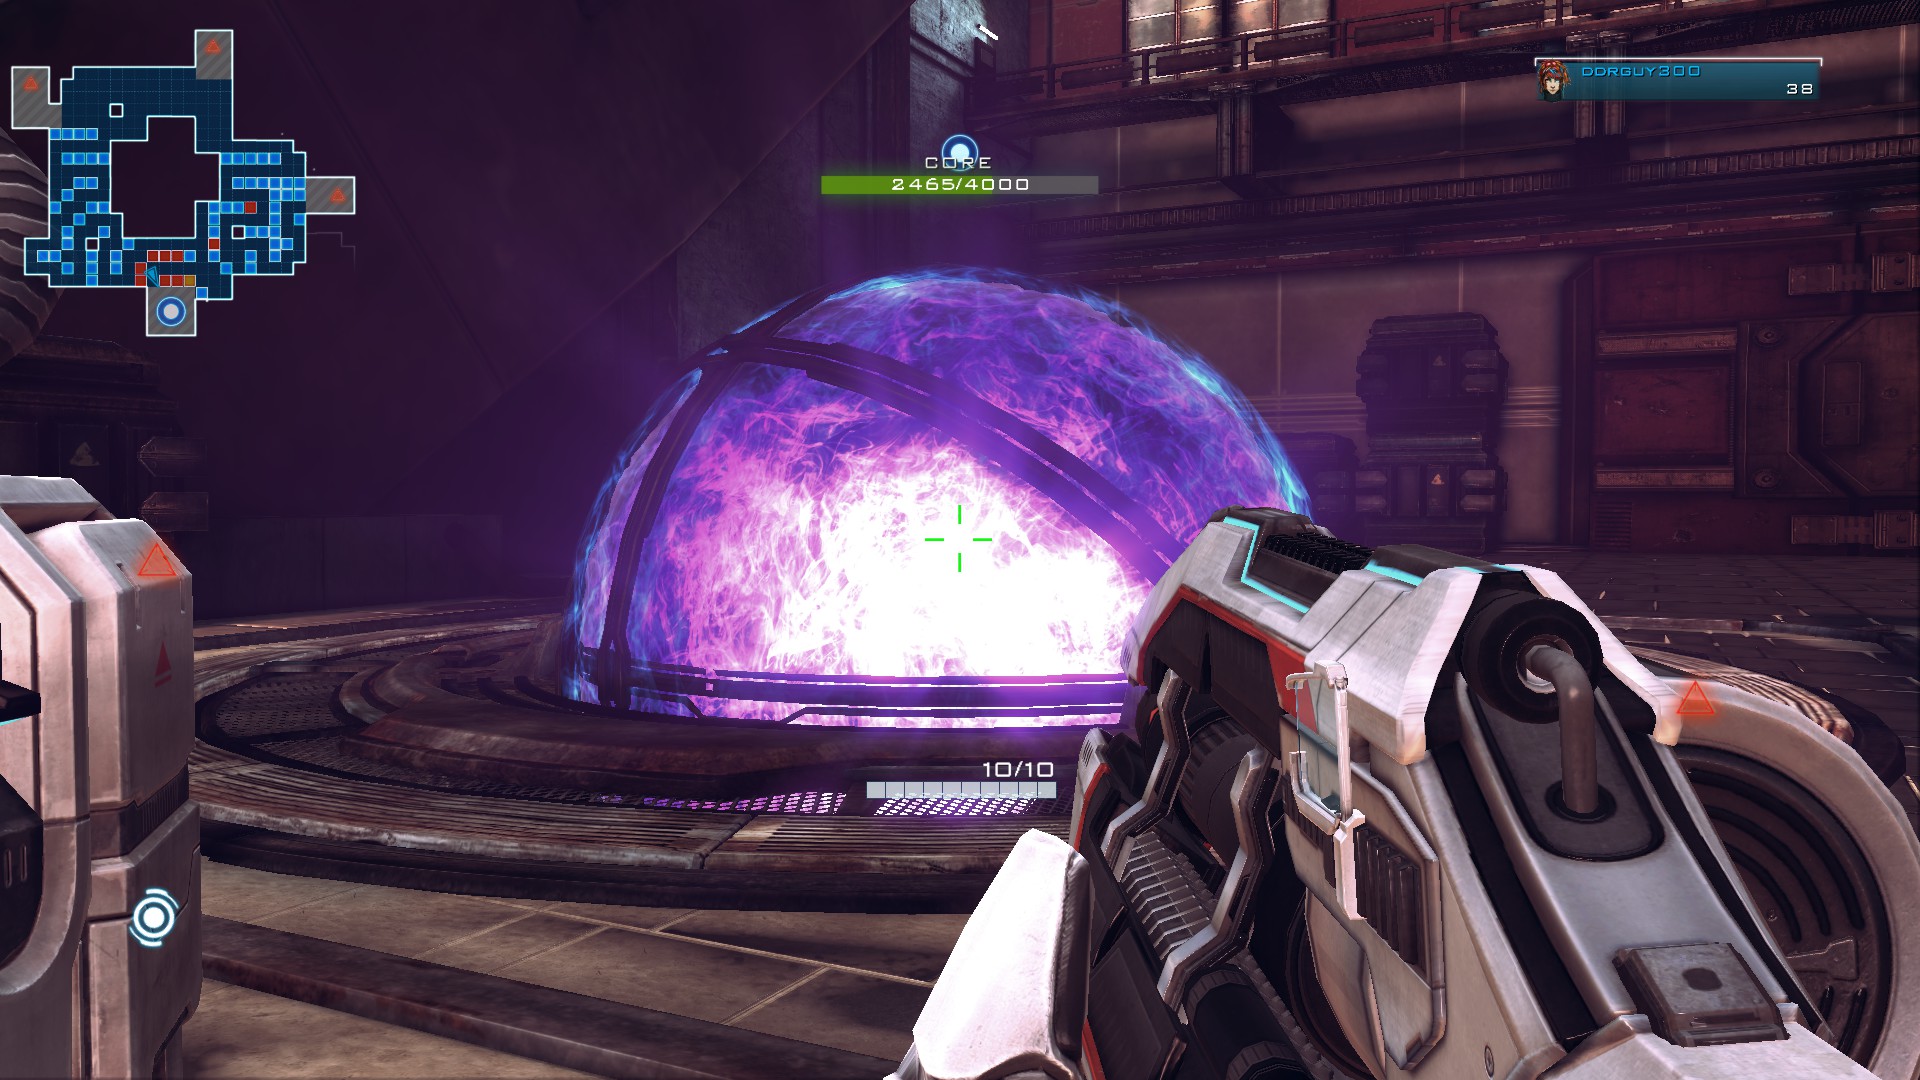
And my youtube one ended at nearly 3000.
HOPE YOU ENJOY/ENJOYED KICKING THIS OBNOXIOUS LEVEL'S @$$ :)
This actually I wouldn't go with this... the path is good, but when I went and did my youtube recording I only put the anti-air to rank 2 and the rest in my mines (make sure to get that last focus to rank 3 before you over charge the mines) and it worked a little better (patriarch guaranteed dead) while also giving me an extra mine. The anti-air is really extra insurance you don't truly need, but I'd rather have another than overcharge anything like range for 200.
The winding path for the east spawn point is to delay the rhinos. I got ran over once because the path was too short and I've been paranoid ever since.
Grab all of your mines and set them out like so:
You'll have 13 instead of 12 though if you go with what I just wrote. This is the single grid that the patriarch has to walk through and you are going to use that to your advantage.
You don't want to give the patriarch reason to get held up destroying tower bases so that's why there are none out anywhere near him.
Strategy:
Start here:
Kite/have patriach follow you:
Watch him go boom.
The rest of the wave is cake. If you just make sure to help out your towers with your weapons starting at the point they can reach (so let the rhinos get within range rather than risk getting run over), your core will go completely untouched.
Here was my ending core health:
And my youtube one ended at nearly 3000.
HOPE YOU ENJOY/ENJOYED KICKING THIS OBNOXIOUS LEVEL'S @$$ :)
More Sanctum 2 guides
- Ciara's Sanctum 2 Guide - Ultimate Edition★ 5 (1k)33k views1.2k ♥118 minUpdated Mar 18, 2022
- How To Reach Wave 2000★ 5 (305)20k views245 ♥8 min
- Sanctum 2 Tweaks★ 5 (256)15k views262 ♥6 minUpdated Sep 12, 2013
- Core Guardian's Encyclopedia (Walkthrough, Builds, Enemies, Perks, Towers, Weapons)★ 5 (737)15k views908 ♥233 minUpdated Oct 7, 2024
- Sanctum 2 Experience Farming Guide★ 5 (265)13k views420 ♥12 minUpdated Sep 8, 2014
- The Foff's Awesome Sanctum 2 Guide★ 5 (244)8.1k views323 ♥108 minUpdated Nov 21, 2014


This guide was created by its original author on the Steam Community. Are you the author and want it removed? Request removal.