Overview
This guide will lay out a the control settings to use a Logitec 3D Pro Extreme Joystick to work with a gaming mouse. This replaces the need for a keyboard for most in game controls. I believe this to be a better, more intuitive way to game than using a keyboard.
How to set up
Download software and install. Open profiler and click on “Profile” on the top left of the window.
Select “New…”
Put in name of game and browse for the exe. – this can be found in your killing floor system folder Steam – Steamapps – common – KillingFloor – system
you should then be able to select the proper Icon also.
The profiler can be set up to trigger the correct profile for the game you choose, you can manually change them or you can set any profile to be “persistant” so it is active all the time.
I tend to play one game a lot so I just set the one I am playing to persistant and if I change to a new game I just change it manually.
Control Settings input
Once the profile has been set up, click on any control listing on the right side of the window and click on “Select Keystroke > New Keystroke”
This brings up the “Edit Keystroke” window.
Simply click on record and type in key then hit stop
Repeat this to put in all these keystrokes
W
S
A
D
E
G
Space
R
C
Q
B
Tab
O
P
3
4
5
NOTE: 1 and 2 should be assigned to the gaming mouse, if no gaming mouse is used 1 and 2 can be added to this list also, but selecting them is a little more difficult.
O and P are NOT normal game functions and need to be added to the game control settings, that will be covered in another section along with changing C to crouch and not toggle crouch
Assign the controls
Starting from the lower left in the profiler window
X axis – Edit <or new Axis>
Name – X
Axis Left – select dropdown and choose “Keystroke A”
Axis Right – “Keystroke D”
Since the controls are previously entered they all appear in the dropdown for easy quick selection.
Click OK
Y axis
Name Y
Axis forward – Keystroke W
Axis backward – Keystroke S
Ignore Throttle and Twist
On Top Right
Hat control – POV
Select Assignment > New POV assignment
Name – Hat
Click on W – Keystroke 3
N – Keystroke E
E – Keystroke G
S – Keystroke 5
This allows the player with a flick of the thumb to open doors, throw grenades, select base weapons and pull up the healer/welder
the rest on the right are set in this order
Keystroke Space
Keystroke R
Keystroke 4
Keystroke C
Keystroke Q
Keystroke P
Keystroke B
Keystroke 2 – use only if gaming mouse is not used, otherwise leave default or something else
Keystroke O
Keystroke Tab
Keystroke
Keystroke 1 – use only if no gaming mouse, otherwise leave default or another use
Change In Game control settings
Once set up you need to open the game and go into settings
under controls
Change C from toggle crouch to crouch – my preferance
ADD
Last Weapon – P
quick chat “LOOK OUT” – O
for previous and next weapon on the mouse wheel Remove mouse wheel, there are buttons for each weapon and tool now so the roller only interferes with the “alt-fire” function.
That should be it for the joystick and just add 1 and 2 to buttons on a gaming mouse and you are set.
How it functions
The joystick is “right handed” but that is meaningless… it works great in the left hand while you can mouse with the right.
I am not that good a player, but I believe this setup allows me to play at a higher level than I would be able to with a keyboard.
One of the big features is using arm movement for body movement, you no longer have to think about pressing a button to move, you just move your arm in the direction you want to go, really very intuitive and natural.
With a “squeeze” on the Joystick the side button <the thumb button for right handed use, under base of index finger when used in the left hand> on the handle will reload weapons.
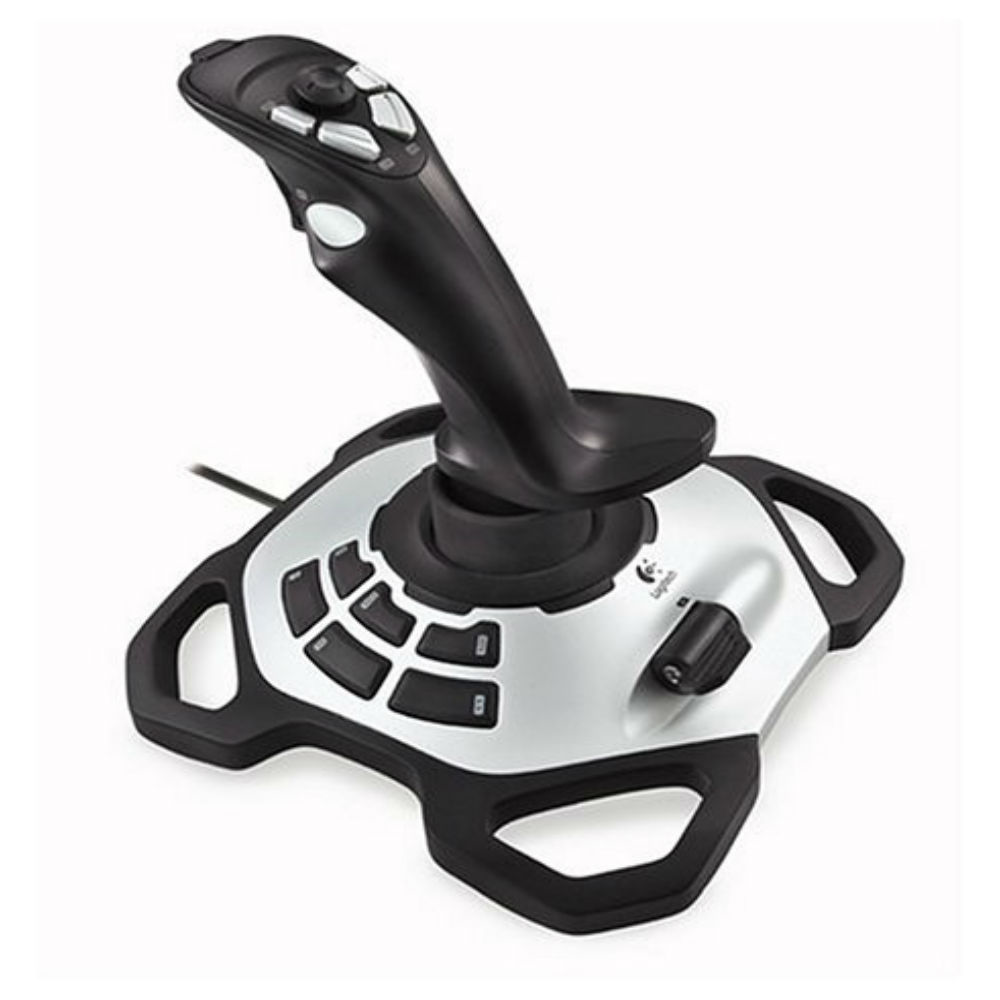
The buttons on top of the joystick
the “Hat” or POV – up is use, left for 3, right for grenade, down for heal/welder
all easily used by the thumb with a flick. Next to the “hat” are 4 buttons, the left ones are
Lower – top weapon 4
upper – quick heal
the ones on the Right are
Lower – crouch
Upper – Last weapon
I set it up this way so I could rest my thumb on crouch and rock it up to hit “last weapon” for quick weapon switching.
The Trigger on the joystick is Jump
The base buttons
there are 6 buttons on the base, the lower one in front is “toss cash” – this can be hit by the pinky finger while running to throw cash at the gas pumps while running around.
the middle top is status board – Tab
Middle bottom is – “LOOK OUT”
bottom rear is – Toss Weapon
the remaining two can be used for 1 and 2 Knife and pistol, but I prefer those on a mouse rather than the joystick. This leaves two open spots for other controls like voice activation etc.
This is meant purely as a guide and each person can find their own set ups to suit themselves, I just detailed my perfered set up. In other games with “sprint” I often change crouch to the other side and put sprint where crouch is, but again it is all up to personal preferance.