
Overview
*FALLEN KINGDOM UPDATE*Contains information on Dinosaurs, Dino stats, genetic mods, contracts, most missions and islands and MORE!I’ve run a whole lot of numbers and simulations to get some of the mathimatical results since they are not clearly noted in-game. Let me know if you found any issues with them.A work in progress to be the ultimate guide to Jurassic Park Evolution!
Introduction
Hi, I’m Tiberius and I made this guide to help out new or more veteran players in Jurassic World Evolution.
This guide will cover all the basics and give some run downs on dinosaurs, buildings, missions, contracts and gameplay features.
This is a WORK IN PROGRESS as I gather more info from testing, as well as imagery to post.
I am currently lacking information on the deluxe edition dinos.
New player?
There are 4 main things to worry about playing this game.
1. Power
2. Rangers / Asset Control Units (ACU)
3. Dinosaurs
4. Guests
5. Divisions
Power
Power you need to keep everything running from money coming in, to keeping people safe and to dinosaurs kept safe and secure! SEE POWER TAB FOR MORE INFO ON POWER
Rangers / Asset Control Units (ACU)
Ranger are your grunt worker. They care for all the dinosaur/park needs. They are be manually controlled or tasked to repair buildings/fences, resupply feeders, take photographs and medicate dinosaurs.
ACU is your security. They can be controlled manually or tasked to tranquilize dinosaurs for transport, sell or to stop rampaging. At least one is also required to be able to call in up to 3 max transport helicopters to… move and sell tranquilized dinosaurs.
Dinosaurs!
The more you have and the higher the rating the more people and the more money you make. They have a few basic requirements.
- A large enough cage (with enough grass or forest)
- Food – According to the dinosaur type
- Water
- Population – How many of it’s own kind it needs
- Social – How many dinosaurs in the same cage it needs (includes its own kind)
- Comfort – This needs to be about their own threshold at all times. So all of the above must be met! Storms will slowly degrade this no matter what, so be carful of ill-tempered dinosaurs
Guests!
They need to be babied. They dont like to do anything, and aren’t the brightest when it comes to running from dinosaurs.
- Food – Have enough food buildings around
- Drink – Have enough drink buildings around
- Shopping – Have enough shopping buildings around
- Fun – Have enough fun buildings around
- Transport – HAve well placed monorails to reduce how much they need to walk
- Dinosaur visibility – They paid to see them, so make it happen! Use Viewing Gallerys for short and wide vision and Viewing Platforms for far and precise vision.
- SAFETY – Emergency shelters for storms or dinosaur rampages. Also DON’T LET DINOSAURS GET OUT! Post-incident reduce guest count and cause lawsuits! (Human life is cheap – around 46k each, but that doesn’t mean they’re a good source of food for the T-Rex…)
What buildings to use?
I place hubs of guest buildings. The goal is to get 4 stars of Food, Drink, Shopping and Fun in that hub. Often near a monorail, hotel and emergency shelter. Storm defence station is optional and requires more strategic placement.
DO NOT FORGET TO INCREASE STAFF TO MEET DEMANDS
Early game use Fast Food, Clothes Store an a Gift Shop to mostly meet the needs. A Toy Store could also be used in the cluster.
I use a Restraunt, an Arcade and a Clothes Store to meet those needs.
Divisions!
There are 3 divisions…
Science (SCI)
Entertainment (ENT)
Security (SEC)
You will do contracts for each division, while making sure not to neglect any of them. In the control center it will have a screen for the divisions that will tell you how much favor you have with them (0%-100%), Loyalty bonus, Chance of sabotage (Low or High), and selecting the individual cards will reveal milestone unlocks.
Gaining favor with them on each island unlocks more things and missions. Completing missions will nab you larger rewards. SEE CONTRACTS OR MISSIONS TAB
Loyalty bonuses can be massive, and require you to have a lot more favor with one division than the others.
Sabotage will occur when you neglect a division for too many contract completions. This happens around 6-10 contract completions. SEE GAMEPLAY FEATURES
MONEY
Money is recorded as income per minute in the command center tab.
Money is obtained every 10 seconds so you will have a more consistent trickle of income rather than waiting around minute by minute.
Managment View
Power
- Total power output
- Total power used
- Total avalible power
- Total required power
- Power generators
- Substations
SEE POWER TAB FOR MORE INFO ON POWER
Weather
Shows storm protection range in BLUE
The Storm Defense Buildings to create/increase this range. They will reduce everything from chance of to damage actually done. (Tornadoes will still make an impact, just not as large)
Shelter:
Shows where guests need protection from emergency shelters
Shelter coverage % – RED (Bad), ORANGE, YELLOW, BLUE (Good)
Put these are decent intervals that ranges overlap a bit, as they are useful for guest safety in storms and dinosaur rampages.
Dinosaur visibility
Shows where dinosaurs can be viewed by guests
Dinosaur visibility %
Maximize this area over cages to ensure guests see what they’re paying for, and in turn increasing the Guest rating.
Attraction finances
Scale from RED (Bad), ORANGE, YELLOW, BLUE (Good)
- Income: What you’re bringing in off buildings
- Upkeep: What buildings are costing you
- Profit: What you’re actually making off buildings
Food
Shows where guests are hungry
Food rating % – RED (Bad), ORANGE, YELLOW, BLUE (Good)
Consider pricing your items at double or a couple dollars more over the item cost. The higher the price, the less people.
Drink
Shows where guests are thirsty
Drink rating % – RED (Bad), ORANGE, YELLOW, BLUE (Good)
Shopping
Shows where guests want to shop
Shopping rating % – RED (Bad), ORANGE, YELLOW, BLUE (Good)
Fun
Shows where guests want entertainment
Fun rating % – RED (Bad), ORANGE, YELLOW, BLUE (Good)
Transport
Shows where guests want shorter journeys from arrival point
Transport rating % – RED (Bad), ORANGE, YELLOW, BLUE (Good)
Just like emergency shelters these are scattered by hubs or at each end of them to reduce guest travel time, as well as close to the main gates of the park as possible.
Dinosaurs A – C
Allosaurus


Anyklosaurus


Apatosaurus


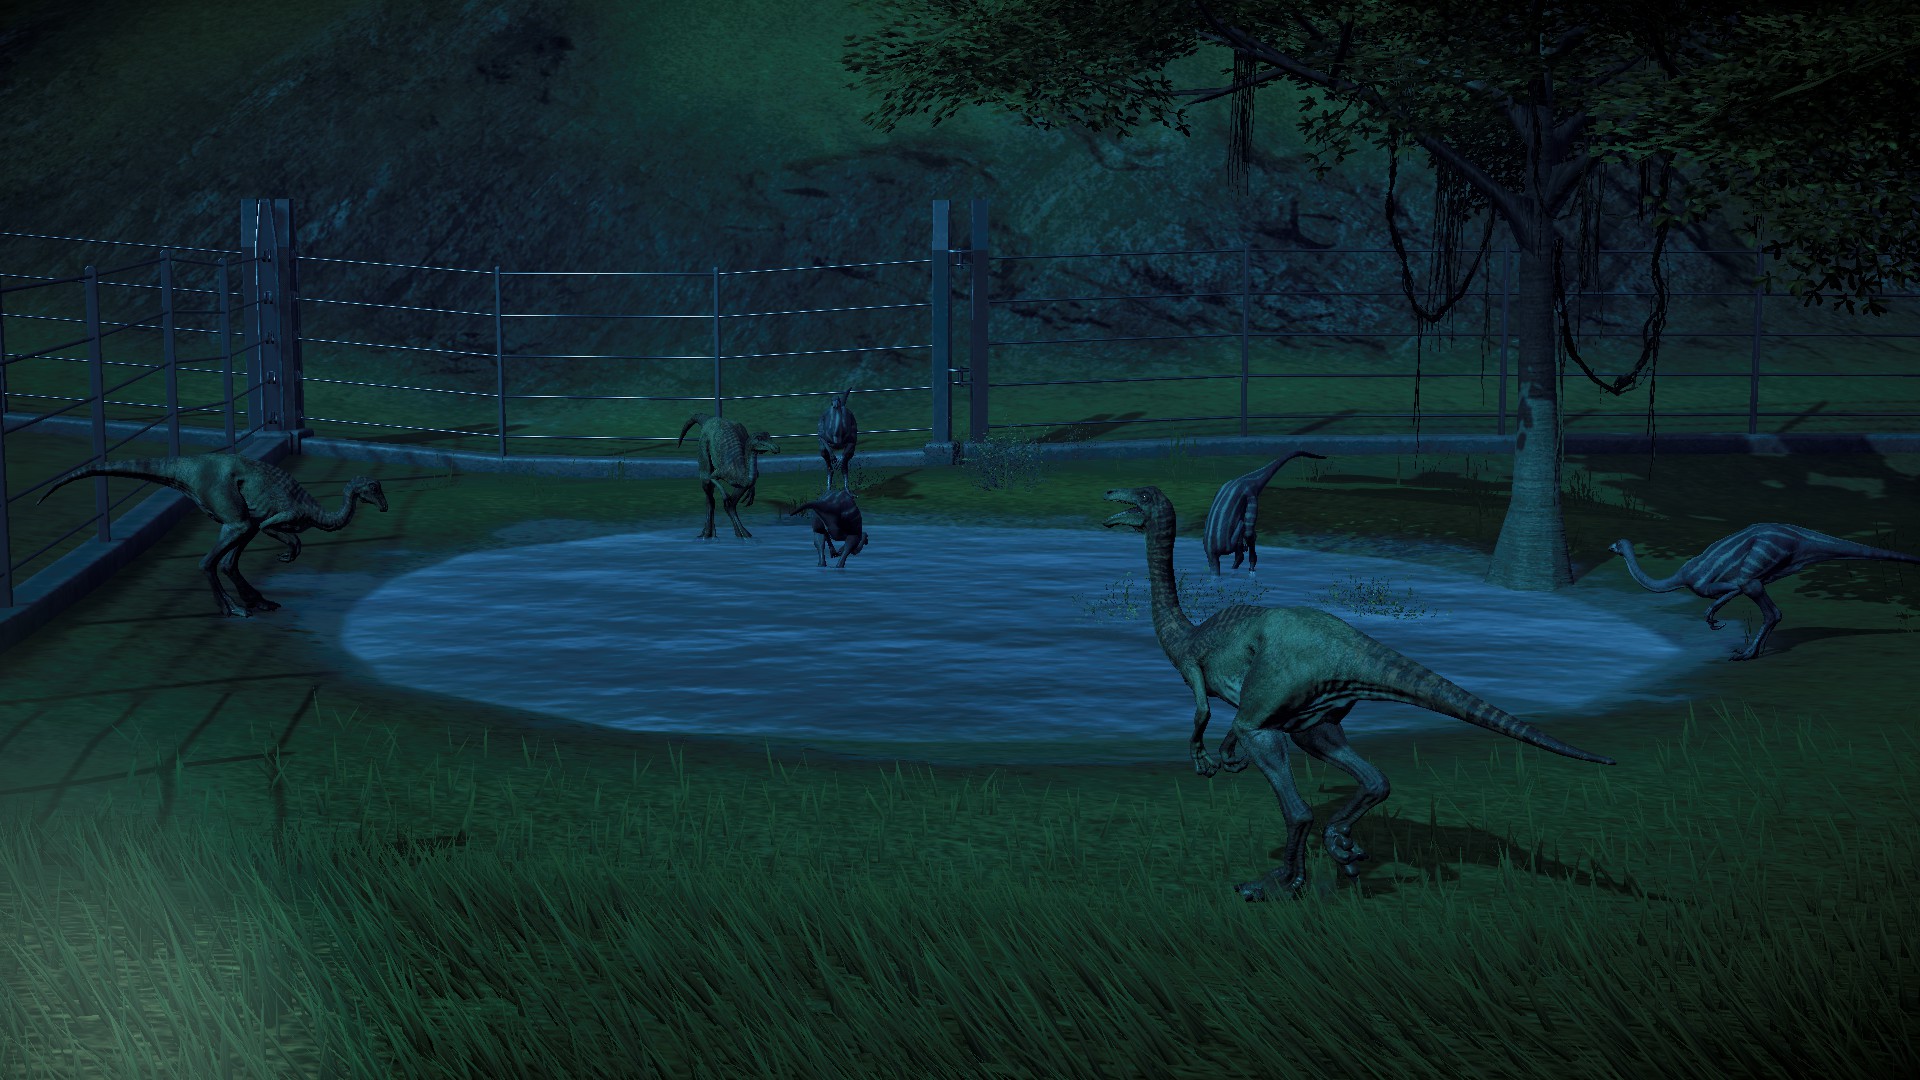
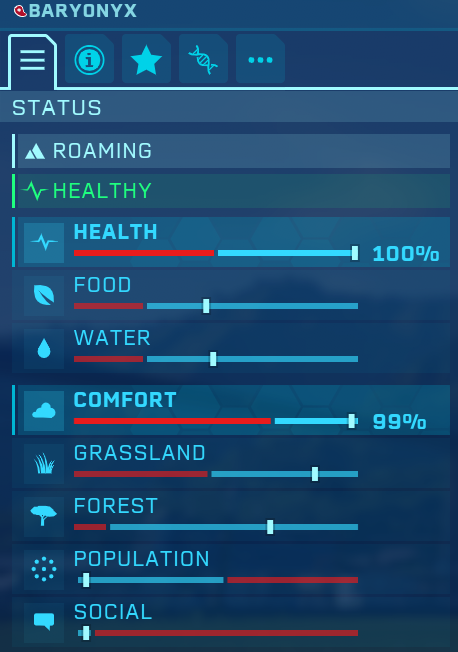
Baryonyx

Brachiosaurus


Camarasaurus


Carnotaurus


Ceratosaurus


Chasmosaurus


Chungkingosaurus


Corythosaurus


Dinosaurs D – G
Deinonychus


Dilophosaurus


Diplodocus


Dracorex


Edmontosaurus


Gallimimus


Gigantosaurus


Gigantspinosaurus


Dinosaurs H – N
Huayangosaurus


Indoraptor


Indominus Rex


Kentrosaurus


Maiasaura


Mamenchisaurus


Metriacanthosaurus


Muttaburrasaurus


Nodosaurus


Dinosaurs P – S
Pachycephalosaurus


Parasaurolophus


Pentaceratops


Polacanthus


Saurapelta


Sinoceratops


Spinosaurus


Stegosaurus


Struthiomimus


Stygimoloch


Dinosaurs T – Z
Torosaurus


Triceratops


Tsintaosaurus


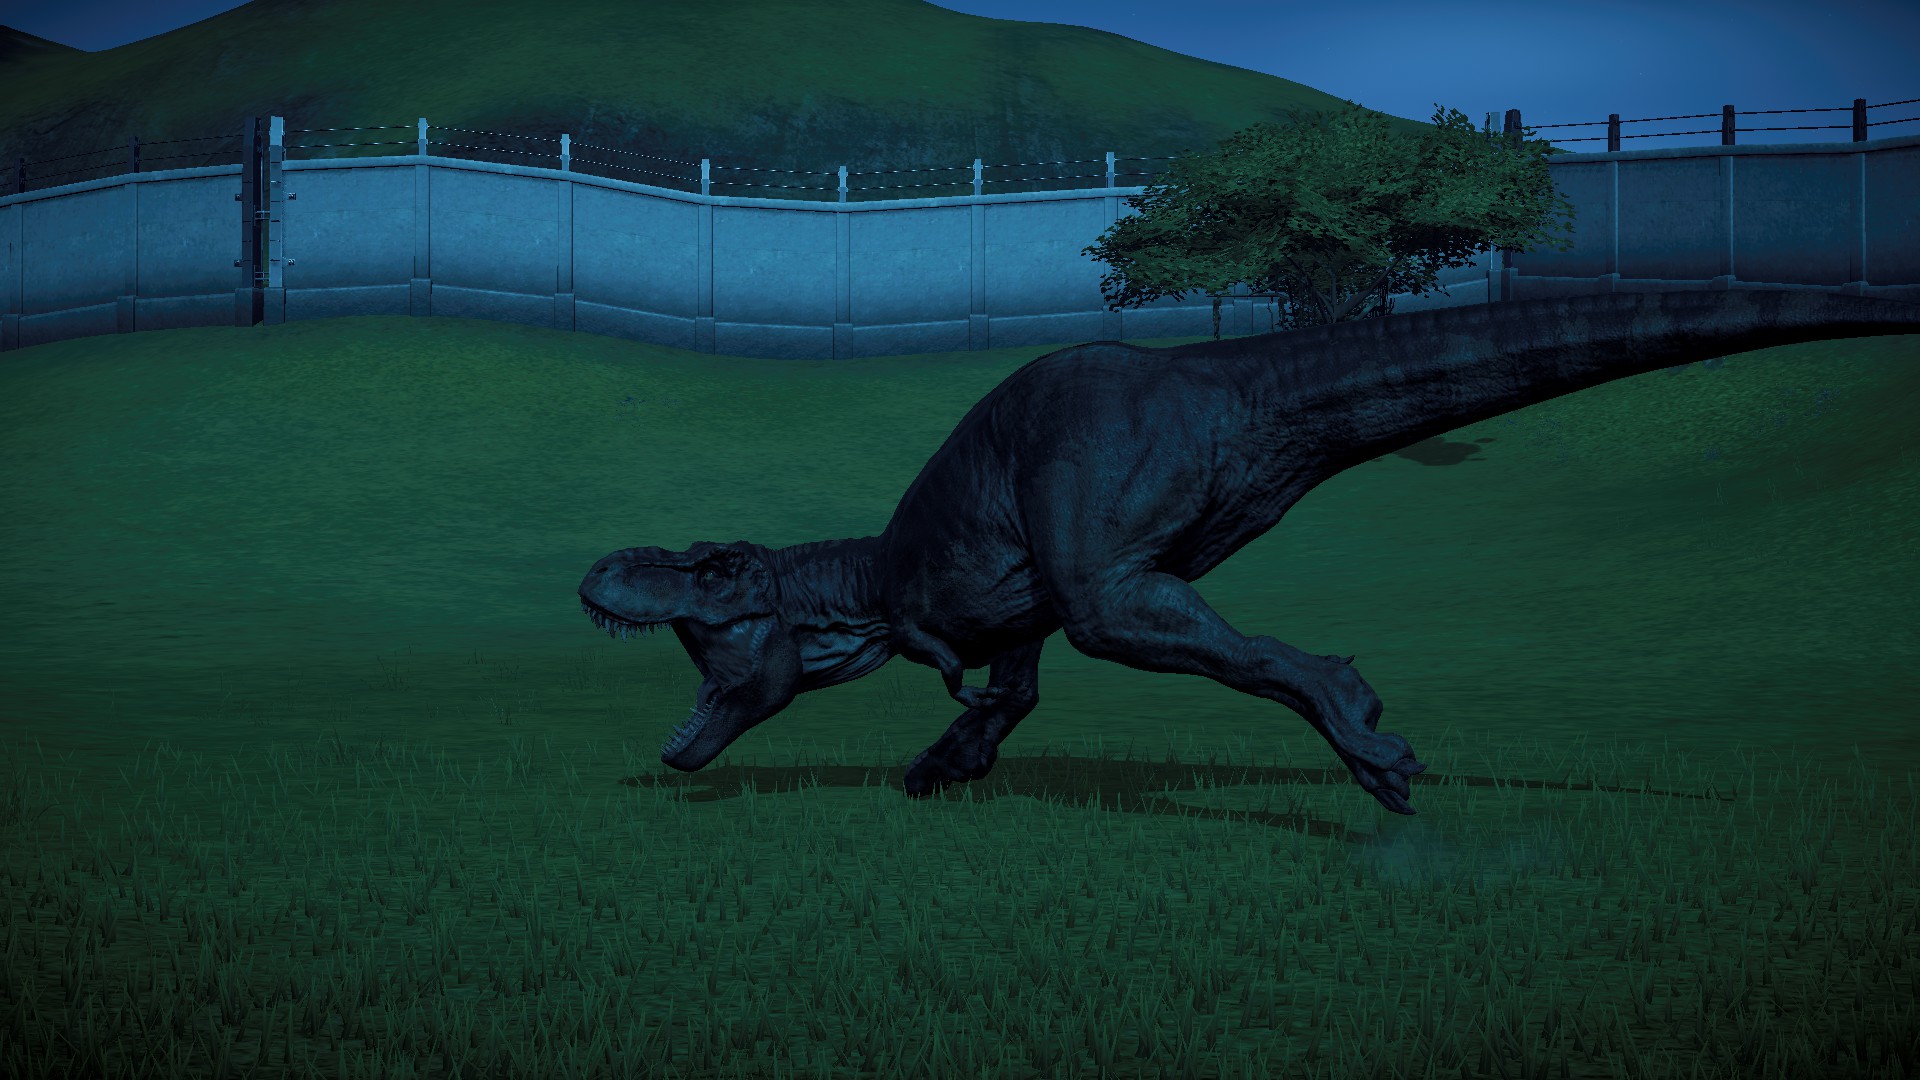
Tyrannosaurus Rex


Velociraptor


Dinosaurs by Area
This is a more in-depth look into the dinosaurs by grouping them via minimum space. It includes the precentage split between grassland and forest, as well and population requirements and social constraints.
Anything with a star(*) is a carnivore.
10 000sq ft
10 001 – 20 000sq ft
20 001 – 30 000sq ft
30 001 – 40 000sq ft
40 001 – 50 000sq ft
Dinosaurs by Social
Dinosaurs sorted by area needed under each category of social population sizes.
Less than 10
10 to 19
20 or more
Dinosaur Reccomendations – WIP
Ankylosaurus + any small carnivore pack
Large Herbivores + any carnivore(s) excluding Indominus Rex
Medium to Large carnivores + any small carnivore pack seems to work well
A busy Indominus Rex is a SAFE Indominus Rex. Having an excess of goat feeders and even an attached Hammond Creation Lab to keep feeding new dinosaurs to slaughter will keep it too busy to smash walls.
Velociraptors with the Indominus Rex work very well and are rather thematic to the movies, probably works for other small raptors but have not confirmed.
Lonely Few [4 MAX]
Sauropelta 0-2
Pentaceratops 3-5
Skull Kids [10 MAX]
Dracorex 2-8
Stygimoloch 4-12
Pachycephalosaurus 3-6
Armored Patrol [6 MAX]
Nodosaurus 0-4
Polacanthus 0-3
Ankylosaurus 0-4
Sauropelta 0-2 [4 MAX IF INCLUDED]
Triceratops and Friends [11 MAX]
Triceratops 1-6
Sinoceratops 2-12
Torosaurus 2-5
Chasmosaurus 3-5
Pentaceratops 3-5 [9 MAX IF INCLUDED]
Stegosaurus and Friends [15 MAX]
Mix and Match
Stegosaurus 5-9
Kentrosaurus 3-11
Huayangosaurus 1-13
Chungkinosaurus 2-12
Gigantspinosaurus 4-16
Medium sized cage – Population cap 20
Mix and Match
Struthiomimus 0-20
Gallimimus 0-23
Corthosaurus 2-13
Parasaurolophus 4-14
Muttaburrasaurus 6-12
Edmontosaurus 1-15
Tsintaosaurus 4-15
Maiasaura 4-12
Huayangosaurus 1-13
Large sized cage – Population cap 20
ANYTHING FROM PREVIOUS TIER
Mosty forest
Camarasaurus 2-7
Mamenchisaurus 2-4
Mostly Grass
Diplodocus 1-8
Split
Apatosaurus 0-3
Brachiosaurus 1-5
Big and Small Teeth [10 MAX]
Biggun’s [PICK ONE]
Baryonyx 0-2
Metriacanthosaurus 0-2
Giganotosaurus 0-2
Allosaurus 0-1
Indoraptor 0-1
Tyrannosaurus Rex 0-1
Spinosaurus 0-2
Indominus Rex 0-1
Ceratosaurus 0-3
Gitz [PICK ONE]
Dienonychus 3-8
Dilophosaurus 1-12
Velociraptor 2-6
Too big to fail[10 MAX]
Mosty forest
Camarasaurus 2-7
Mamenchisaurus 2-4
Mostly Grass
Diplodocus 1-8
Split
Apatosaurus 0-3
Brachiosaurus 1-5
ANY BIG AND ANY SMALL CARNIVORE!
POP CAP 10 LIKE LAST GROUPING
Too much armor?[ [MAX 8]
Ankylosaurus 0-4
Any one small carnivore
Dienonychus 3-8
Dilophosaurus 1-12
Velociraptor 2-6
Genetic Modifications
*All cost increases are based off the BASE dinosaur cost
*Viability reduces from your total genome precentage (change to create)
*Rating bonuses are based off the BASE rating of the dinosaur
Research
This is all the things you can research, excluding things obtained by Division milestones, Missions or Island milestones.
Please see islands tab or each individual division mission tabs.
ENCLOSURES
BUILDINGS
GENETIC RESEARCH
BUILDING UPGRADES
FOSSILS
Complete missions
*Indoraptor cost is redundant. You need 100% Tyrannosaurus + 100% Velociraptor for Indominus Rex in the first place.
MEDICAL
Islands
Tutorial island where nothing goes wrong
UNLOCKS: 3 stars Isla Muerta + 4 stars Isla Nublar
SCIENCE
30% – extraction speed
40% – incubation speed 1
60% – Science center
ENTERTAINMENT
20% – savannah cosmetic
40% – restaurant
50% – innovation center
SECURITY
20% – tooth hardness 2
30% – skin toughness 2
50% – security center
Example 3 Star Park (before leaving for first time)
Example 4 Star Park (before leaving for first time)


Aggressive storms will strike, but nothing too severe. Largest threat being upset dinosaurs.
UNLOCKS: 3 stars Isla Tacaño + 5 Stars Dig Team Bravo
SCIENCE
20% Hatchery Capacity
30% Mission: The Cure
40% Dig Yeild
ENTERTAINMENT
20% Toy Shop
30% Mission: Hazardous Holdings
40% Research Speed
SECURITY
20% Dig Speed
30% Mission: Survival of the Fittest
50% Medium Power Station

Example 3 Star Park (before leaving for first time)
Example 5 Star Park (before leaving for first time)


Climb out of 950k in debt
Remove: Every building and set up cage around the creation lab and make some herbivores of choice. Carnivores if you’re feeling lucky as you may not be able to afford ACU and Rangers.

*I finished the cage with light fence, put in a speed,chance and slot mod and made 3 Triiceratops, then relied on the income gained to slingshot off with missions and expeditions as soon as I could build both buildings.
UNLOCKS: 3 stars Isla Tacaño + 5 stars Costal Cosmetic
SCIENCE
20% Large Substation
30% Robust Digestion 4.0
40% Mission: Confinement Studies
ENTERTAINMENT
20% Research Cost
30% Arcade
40% Mission: Cosmetic Enhancements
SECURITY
30% ACU Accuracy 2
40% Mission: Aggressive Engineering
50% Ranger Accuracy
Example 3 Star Park (before leaving for first time)
Example 5 Star Park (before leaving for first time)


Hope you like tornadoes with no space to build
UNLOCKS: 3 stars Isla Sorna + 5 stars Woodland cosmetic
SCIENCE
30% Improved output 3
40% Mission: Needs Management
50% Intensive repair 2
ENTERTAINMENT
20% Bar
40% Mission: The Star Attraction
50% Wetland Cosmetic
SECURITY
40% Mission: Field Testing
50% Electrified Concrete
60% Large Power Station

Example Starting park using the 6 million:
Small power station swapped for medium*
Example 3 Star Park (before leaving for first time)
Example 5 Star Park (before leaving for first time)


Lots of starter dinosaurs in the wild.
Many things will go wrong.
UNLOCKS: 3 star Drivable Gyrosphere + 5 star Jungle Cosmetic
SCIENCE
40% Mission: The Scientific Community
50% Rapid Metabolism
60% Success Rate 3
ENTERTAINMENT
10% Fossil Zone
40% Mission: A Jurassic World
80% Rainforest
SECURITY
30% Reaction Speed 3.0
40% Intuitive Learning 3.0
40% Mission: Hybrid Research

Example Starting park using the 6 million and scattered dinosaurs:
Example 3 Star Park (before leaving for first time)
Example 5 Star Park (before leaving for first time)
Bottom sector of map has 3 Hotels and the last stations to the Monorail loop with required amenities.


The sandbox island.
You CANNOT research, recover or analyize fossils here!

Power
Almost all buildings in the game require power. Without it you cannot do anything when “nature finds a way”.
Power works by setting up a Power Station and connecting the Power Station to Substations with wires. Substations are what provide power to an area, without them nothing will run, but strategic placement of substations is key as each one cost 1 power.
Open the management view to see your total power, power costs and power availible, as well as the areas with electrical coverage.
Powered Fences
For whatever reason it costs 3 POWER for the initial fence segment and 2 POWER for ever segment after that ORIGINAL segment.
Small Power Station

Medium Power Station

Large Power Station

Power Upgrades
Outage Protection +10/20/45% protection
Improved Output +14/18/22% output at 5/10/20% increased risk
Reduced Upkeep -400/800/1600 to running cost
For 40/60/100k each
Substation
Provides small area coverage for power output.

Large Substation
Provides large area coverage for power output.

Operations Buildings
ACU (Asset Control Unit) Center
This building provides 1 ACU Helicopter for asset control. One building is required to allow transport helicopters (only 3 will spawn at any time)
Upgrades
5 Slots
ACU Reload Speed: + / ++ / +++ reload speed for 2 power and 20/40/60k
ACU Accuracy: + / ++ / +++ accuracy for 2 power and 20/40/60k
ACU Scheduling: +1 task slot for 2 power and 20k

Expedition Center
This building is used to send out teams to dig up fossils.
Upgrades
3 Slots
Dig Speed: +10% Global speed for 2 power and 20k
Dig Yeild: +10% chance to rare minerals for 2 power and 20k

Fossil Center
This building is used to get genomes from fossils.
Upgrades
3 Slots
Extraction Speed: +10% Global speed for 2 power and 20k
Inventory Space: +1 Global for 2 power and 20k

Hammond Creation Lab
This building is used to create dinosaurs.
Upgrades
3 Slots
Reaction Speed: +10/20/30% growth speed for 2 power and 20/40/60k
Success Rate: + 10/20/30% success chance for 2 power and 20/40/60k
Hatchery Capacity: +1 hatching bay for 2 power and 20k

Innovation Center
Large building that increases profit based off Entertainment reputation

Ranger Station
Provides up to 3 Ranger Teams to repair buildings/fences, resupply feeders, take photographs and medicate dinosaurs. Additional teams for $50 000 each.
Upgrades
5 Slots
Ranger Reload Speed: + / ++ / +++ reload speed for 2 power and 20/40/60k
Ranger Accuracy: + / ++ / +++ accuracy for 2 power and 20/40/60k
Ranger Team Scheduling: +1 task slot for 2 power and 20k

Research Center
This building is used to research Fossils, Genetic Research, Medical Treatment, Enclosures, Buildings, and Building upgrades
Upgrades
3 Slots
Research Speed: Global +10% speed for 2 Power and 20k
Research Cost: Global -10% cost for 2 Power and 20k

Science Center
Medium building that increases profit based off Science reputation

Security Center
Medium building that increases profit based off Security reputation

Storm Defence Station
Helps protect nearby buildings from storm damage. Tornadoes are still likely to make a dent.

Guest Buildings
Arcade
Product Costs: 2 / 6 / 14
Capacity: 320 / 580 / 800 / 1000 / 1200

Bowling Alley
Product Costs: 4 / 10 /20
Capacity: 240 / 435 / 600 / 750 / 900

Clothes Shop
Product Costs: 4 / 10 / 20
Capacity: 320 / 580 / 800 / 1000 / 1200

Emergency Shelter
Put these at key locations or hubs of entertainment so you can keep the maximum amount of people safe from storms or the occasional angry dinosaur.

Fast-food
Product Costs: 2 / 6 / 14
Capacity: 240 / 435 / 600 / 750 / 900

Fossil Zone
Product Costs: 6 / 14 / 26
Capacity: 160 / 290 / 400 / 500 / 600

Gift Shop
Product Costs: 4 / 10 / 20
Capacity: 240 / 435 / 600 / 750 / 900

Gyro Station
Product Costs: 4 / 10 / 20
Capacity: 320 / 580 / 800 / 1000 / 1200
Provides guests with a rather large circle of vision from within the dinosaur cages with the gyrospheres.

Hotel
As the name entails, it allows for more people to be at the park but requires access to food, drink, fun and shopping like everything else.

Monorail Station
The best way to ensure transportation rating stays high by putting these at key locations or hubs of guest outlets and attractions. Also provides some viewing of dinosaurs from the shuttles!

Restaurant
Product Costs: 4 / 10 / 20
Capacity: 320 / 580 / 800 / 1000 / 1200

The Bar
Product Costs: 6 / 14 / 26
Capacity: 320 / 580 / 800 / 1000 / 1200

Toy Shop
Product Costs: 2 / 6 / 14
Capacity: 240 / 435 / 600 / 750 / 900

Viewing Gallery
Provides short and wide guest viewing coverage.

Viewing Platform
Provies long and narrow guest viewing coverage.

Missions Science
Science
Mission 1: Prehistoric life
1. Acquire 50% genome: Triceratops
2. Incubate and release Triceratops with at least 50% genome
3. Construct an operation Ranger Station
4. Incubate and release a Triceratops with 70% genome
5. Research: Hookworm Parasite
6. Cure the triceratops using a ranger team
1 MIL + Cardio Strength 2
Mission 2: The Cure
1. Prepare for sick dinosaurs: Construct Research center and Ranger Station
2. Sick Diplodocus in 3min (delayable by 2min each time)(costs 200k)
3. Ensure it has access to food and water.
4. Research Cryptosporidium Parasite
5. Cure all dinosaurs affected
6. Sick Metriacanthosaurus in 3min (delayable by 2min each time)(costs 300k)
7. Ensure it has access to food and water.
8. You should already have the incoming disease researched.
9. Cure all dinosaurs affected
1.5MIL + Research Team Bravo
Mission 3: Confinement Studies
1. Incubate and release with 80% genome: diplodocus, velociraptor
2. Ensure each is housed securely
3. Velociraptor below comfort threshold 3min
Diplodocus below comfort threshold 3min
4. Velociraptor above comfort
Diplodocus above comfort
2MIL + nodosaurus
Mission 4: Needs Management
1. Incubate and release with 85% genome
Metriacanthosaurus, Dienonychus, Charmosaurus x2, Gallimimus x2
2. Ensure all carnivores are housed together
Ensure all herbivores are housed together
Ensure all carnivores and herbivores are housed seperately
Ensure all dinosaurs are housed securely
3. Cure all mission dinosaurs
2.5MIL + Tundra Cosmetic
Mission 5: The Scientific Community
1.Incubate and release with 100% genome
Pentaceratops x2
Kentrosaurus x3
Metriacanthosaurus
Triceratops x4
Apatosaurus x 2
Ensure all are housed together
2. Keep them secure and alive for 5min
3MIL + Mamenchisaurus
Missions Entertainment
Entertainment
Mission 1: A commercial park
1. Acquire 50% genome: Ceratosaurus
2. Construct and power a Fast-food restraint
3. Research: Clothes shop
4. Construct and power a clothes shop
5. Construct and power a viewing gallery
1 MIL + Dracorex
Mission 2: Hazardous Holdings
DON’T LET 5 PEOPLE DIE DURING MISSION
1. Incubate and release: Dilophosaurus, Velociraptor and Ankylosaurus
2. Power grid will be sabotaged once all 3 are made – repair
3. Make sure the 3 dinosaurs stay enclosed for 5 minutes
*Velociraptors tend to be overly aggressive in this time
1.5MIL + Steppe Cosmetic
Mission 3: Cosmetic Enhancements
1. Research: Cosmetic gene savannah
2. Incubate and release with savannah skin gene: maiasaura, parasaurolophus
3. Achieve guest count of 3500
2MIL + Gyrosphere Station
Mission 4: The Star Attraction
1. Achieve guest count of at least 1000
2. Incubate and release a T-Rex with 300 Rating
3. Maintain safety protocols for 5min (t-rex is a bit angry)
2.5 MIL + Kentrosaurus
Mission 5: A Jurassic World
1. Incubate and release
Brachiosaurus Rating 135
Triceratops Rating 50
Stegosaurus Rating 80
T-rex Rating 340
Spinosaurus Rating 350
2. Freak storm in ~5min
3. Survive storm
3MIL + Vivid Cosmetic
Missions Security
Security
Mission 1: Security Protocols
1. Aquire 50% genome: Edmontosaurus
2. Construct ACU Center
3. Incubate and release Edmontosaurus
4. Open enclosure gate or let the dinosaur loose to attack guests
5. Tranquilize the dinosaur and secure it
6. Research ACU Reload 1
1 MIL + Storm Defence Station
Mission 2: Survival of the Fittest
1. Incubate, release and enclose together: Dilophosaurus + Velociraptor
2. Let them fight to the death
3. Ensure the Victor stays enclosed for 5min (she likes smashing fences)
*Makes it easier if you meet the victorious dinosaurs needs ASAP
1.5MIL + Electrified heavy steel
Mission 3: Aggressive Engineering
1. Research Aggressive Instincts 2
2. Incubate and release: Deinoychus w/ aggressive instincts 2
3. Ensure it remains contained for 5min
*I used heavy electric steel because the subject is hyper aggressive and constantly agitated
2MIL + Metriacanthosaurus
Mission 4: Field Testing
1. Incubate, release and enclose:
Metriacanthosaurus with Increased Bone Density Mod
Ceratosaurus with Aggressive Instincts mod
T-Rex with Tooth Hardness Mod
2. Loan out 3 with transport helicopters
3. Await their return (~5min)
4. T-rex returned: Ensure Food/Water and cure
5. Ceratosaurus returned: Ensure Food/Water and cure
6. Metriacanthosaurus returned: Ensure Food/Water and cure
2.5MIL + Giganotosaurus
Mission 5: Hybrid Research
1. Ceratosaurus with Intensive Repair mod
Indominus rex with Intuitive Learning mod
Spinosaurus with skin toughness mod
Tyrannosaurus rex with Aggressive Instincts mod
2. Ensure each is securely enclosed for 5min
3MIL + Strong Muscle Fibers
Contracts
Here is a list of contracts you may come across. There seems to be no uniqueness between divisions.
Expedition Based Contracts
Dinosaur Based Contracts
Control Center Based Contracts
Gameplay Features – WIP
FACTIONS
Make sure to not neglect the factions on contracts!
If you’re trying to get one or two up dont forget to finish a contract for the other about every 3-5 missions.
Here’s my experience with sabotage:
SCIENCE
Power sabotage, easy to reboot.
Spread disease, easy to cure if you react fast.
ENTERTAINMENT
Power sabotage, easy to reboot.
SECURITY
All dino gates are opened and must be closed manually… Depending on park size, many will die.
NEVER neglect Security, I’ve let the Science department down many times and they have not caused any damage as bad as Security did.
Achievements
Not alone on this island
Unlock Isla Muerta
Going to make a fortune with this place
Unlock Isla Tacano
On this island there’s no such thing as safe
Unlock Isla Pena
Thank God for Site B
Unlock Isla Sorna
Spared no expense
Unlock Isla Nublar
How did you do this?
Achieve a 5-Star Island Rating on every island in Las Cinco Muertes
Using sophisticated techniques
Complete All Missions: Science
You got them eating out of your hand
Complete All Missions: Security
An aim not devoid of merit
Complete All Missions: Entertainment
Shoot her!
Manually tranquillize a dinosaur with the ACU helicopter
Tenacious
Manually medicate a diseased dinosaur with the Ranger Team
It’s all about control with you
Add a task for an ACU or Ranger Team
I think we’re back in business
Manually repair a building with the Ranger Team
You’re the top minds
Research an item
Fill in the holes and complete the code
Complete a genome to 100%
You think that kind of automation is easy?
Add an upgrade to a building
Get a clear shot
Manually perform a headshot with the ACU helicopter
War is a part of nature
Manually tranquillize a dinosaur while it is fighting another dinosaur
Nobody move a muscle
Manually tranquillize a dinosaur while it is running
Shoooot heeer!
Tranquillize a dinosaur from a distance of at least 125m
I thought you failed your driver’s test
Manually drive a total distance of 25km in the Ranger Team’s vehicle
Must go faster
Drive the Ranger Team’s vehicle at top speed for 5 consecutive seconds
Accept you are never actually in control
Power slide with the Ranger Team’s vehicle for 3 seconds (within a 5-second window)
Life finds a way
Release a dinosaur
Nothing in Jurassic World is natural
Release a genetically modified dinosaur
Mommy’s very angry
Release a modified dinosaur that has over 150 Attack
Follow the screams!
Release a T. rex
Clever girl
Release a Velociraptor
My favorite when I was a kid
Release a Triceratops
A beautiful, but deadly addition
Release a Dilophosaurus
A super-predator
Release a Spinosaurus
Is this even possible?
Release a Stegosaurus
Flocking this way
Release a Gallimimus
Veggiesaurus
Release a Brachiosaurus
That’s no dinosaur
Release an Indominus rex
Creation is an act of sheer will
Release at least one of every dinosaur genus in the game
Learning where she fits in the food chain
Photograph an Indominus Rex fighting a T. rex
Whatever you study, you also change
Take a Photograph worth more than $30000
Smarter than primates
Photograph two Velociraptors socializing
Where’s the goat?
Photograph a T. rex eating ‘live bait’
Who’s hungry?
Photograph a carnivore attacking a visitor
I hate being right all the time
Photograph a herbivore attacking visitors
I don’t understand this Luddite attitude
Reach maximum Science Reputation on an island
Instinct that we can program
Reach maximum Security Reputation on an island
Bigger. Louder. More Teeth.
Reach maximum Entertainment Reputation on an island
I read your book
Unlock all InGen Database entries in the game
Hold on to your butts!
Get 5 seconds of air time with the Ranger Team’s vehicle (within a 20-second window)
Now you’re John Hammond
House at least 50 live dinosaurs on a single island
This is very dangerous territory
Photograph a Spinosaurus fighting a T. rex
A kind of biological preserve
Take a Photograph worth more than $100000
Look how it eats!
Photograph a T. rex hunting a Gallimimus
Tips and Tricks
Money
You gain money every 10 seconds and is tracked as per minute income.
ACU / Rangers
Everythings is faster if you do it manually.
If you get good at tranqulizing dinosaurs, do it yourself if you’re tight on cash. It costs 5k every shot taken. Either GIT GUD or let the AI throw away money
Same with medicine it costs up to 20k a shot.
Building Addons
Money should not be a problem at all if you’re doing the right things.
Power station
- Power Station: Reduced Upkeep – Useless. Just use Improved output and balance the power outage resist with Outage Protection
- Research Center: Research Cost – Useless. You usually want to research fast, and when you’re at the point you can research regularily you already make enough money.
- All ACU/Ranger upgrades are worth the costs
- All Hammond Research Lab upgrades are all extremely useful but situational.
- All Expedition Center upgrades are extremely useful with dig yeild being situational. Depends how much sellable extras you want to find; for cash or achievement logs.
- All Fossil Center upgrades are extremely useful with inventory space being situational. Remember to keep track of them since they are global and you don’t need more than 10-12 slot availible when you use 3 Dig Teams.
Guest Buildings
Make sure you up the staff before building more of a building type
Charge double what you pay for to get the product you’re selling, possible to up it by a few dollars on top of that.
DO NOT charge more than 0-5$ more than costs for Gyrosphere! You will not be making big bank off them
Dinosaur feeding
Appetite is the max amount of food the dino will eat, while metabolism is how fast their hunger goes down.
Ex: appetite of 100 would keep the dino full with a metabolism of 2 for about 25-50minutes (rate not confirmed)
Transport Helicopters
Transport helis always come off the closest corner of your screen. Minimize that distance to speed up their arrival.
Division Special Buildings
Heavily dependant on standing with the division in question and guest count.
SEC center 0 – 40k a min
Innovation center 0 – 100k a min
Science center 0 – 40k a min
Dinosaur Cage Design
Try to keep to more square cages for larger dinosaurs. They will be extremely picky if you have a more spread out and shallow cage. Dinosaurs seem to have an invisible circle of detection and streched cages do not work well with those who need larger spaces.
Random Notes
each segment of fence is approx 6.7-7m
The data given on area minimums seems highly innaccurate across species.
I used to think each fence was 15m so:
– for example a Struthiomimus can barely live comfortably in a 4×4 – 5×5 box.
But using the same logic for a Brachiosaurus, Mamenchisaurus, Camarasaurus, Indo-Rex and Ceratosaurus, I required x5 more area than the minimum suggested.
So IF you want to use exact measurements for minimum cages use ~6.5m/fence segment for best results
*Personal opinion*
Avoid LARGE herbivores in general. They have messed up detection ranges that are smaller than the cages required to house them. This will result in them being highly tempermental and require too much player attention.
If you want high rating dinosaurs, carnivores exist.
[expanding later]
If you have any relevant information put it in the comments and I’ll attribute it to you where necessary