Overview
So you’ve conquered the ruins of La-Mulana, beaten Hell Temple,done it all on Hard Mode… And are wondering what to do next with this game? Why not try to beat it super fast! That’s what this guide is for!This is NOT an In-Depth Guide to the Game!
Section One: Overview and Credits
La-Mulana Remake Steam Version Any% Speedrunning Strategy Guide!
This Guide has been tested and works with the current version of La-Mulana Steam Version 1.5.5.2
This guide is here to serve you as an overview of what you need to do to efficently complete the game, using any means necessary. This guide covers all the items and important tricks/strategies necessary to effectively run the game, and a few that aren’t technically ncessary, but are very helpful (Such as the Flail Whip, Gauntlets, Ring, Holy Grail, and so forth)
Important to note: This is NOT an in-depth guide to the game! If you are having trouble completing the game or with certain puzzles, please consult other Guides or the La-Mulana Wiki.
This Guide contains spoilers, notably how to kill bosses or do things not originally intended by the
game designers. Consider yourself warned, for there will be spoilers.
COMING SOON – VERSION 4.0 – A BRAND NEW ROUTE WILL BE UNDER CONSTRUCTION ONCE A CONCEPT RUN IS FINISHED.
Thank you for your attention. Below lies the old Version 3.0 Route.
———————————————
Credits:
Version 1.x and 2.x: Major props and credit to the La-Mulana Remake Wiki, in which the original form of the speedrunning guide was found. I had to modify this and do some editing to bring you this guide. I also found a few minor route improvements and have reflected those in this guide.
Version 3.0: Credit to Narumenhai and HiddenDistance putting together the current WR route. The first part of the new route follows along up until the Flail Whip, then the guide deviates to account for the Steam version
Coming Soon: Version 4.0: RaindropDry for finding the Grapple Claw Clipping Sequence Break. With this, we can go almost anywhere!
———————————————-
Guide Version History
Version 1.0 – Guide Created
Version 1.0.1 – Minor spelling mistakes and formatting corrected.
Version 1.1 – Checkpoints added in more places. Added one minor puzzle in the Graveyard of the Giants that wasn’t mentioned before.
Version 1.2 – In exploring a 100% run I found a very useful coin chest in the Temple of Moonlight that you can pick up just before entering Eden. It has been added to the run notes.
Version 1.2.1 – Added one minor puzzle point in the Gate of Illusion. Also updated with new Personal Best times!
Version 1.3 – Screenshots now added at major benchmarks! So you can track your progress easier! Minor puzzle addition and a few small grammar mistakes fixed.
Version 1.4 – Upon discussion in the comments and in the Speed Demos Archive Forums, the route has been improved slightly. Now you purchase the Pistol before Argus when you’re back up at the Surface anyways, and the 4 pistol shots previously used on Anubis have now been moved to be used on Baphomet’s Second Form instead to make that fight easier and safer. Also the Baphomet and Viy sections have been updated with a more in depth strategy.
Version 1.5 – Tiamat Quick Kill has been found and section updated, complete with Youtube video! Full credit to SneakyCanuck of SDA for finding this time saving gem.
Version 2.0 – There are several changes that go along now with HiddenDistance’s Sub-2 hour La-Mulana Any% Run. In addition to posting a link to the youtube video at the end, the Speedrunning Route has been updated with some time-saving optimizations. Some things have been moved around and a few things have been removed
Also, the Coins Routing has been made much more clearer now, because money is tight for most of the Speedrun, knowing roughly how many Coins you should have from breaking pots, opening Chests and killing sub-bosses to purchase required items is very important.
Version 2.0.1 – The Any% Worlld Record is obsolete, and a newer more difficult route is now in use that is about 10 minutes faster.
Version 2.0.2 – Updated World Record at the end of the Guide (Will stay up until I’m ready to update with v3.0)
[OBSOLETE] Version 3.0 – Major Update regarding new routes, boss strategies, and things found since the last major update to this Guide by the speedrunning community. 2.0.2 has been saved for legacy purposes in case it needs to be reverted or modified..
COMING SOON – Version 4.0 – Completely new Route with a major new sequence break found on October 15, 2016.
———————————————
Game Version Differences ( Steam version 1.5.5.2)
The following glitch was fixed in version 1.5.x of La-Mulana, and cannot be used, so I constructed a new route to make up for this.
The main difference between this Guide and the version speedrunners use is the use of clipping into pots and blocks. At first, it was used only to get into the Flail Whip Room, but is now used in numerous spots through the game to go places the developers did not originally intend for you to go, saving travel time and skipping some puzzles.
Known useful pot clips:
– to get into the Flail Whip room without the Lamp of time or by talking to the Philosopher (Intended solution)
– To clip from the top part otf the Twin Labyrinths to Peryton’s Room in the lower half. This allowed you to do all the backside Twin Labyrinths stuff much earlier than you otherwise normally would (Normally, you’d have to come from either Temple of Moon or Inferno Cavern, or by solving the poison puzzle to unlock the area)
– To wedge yourself into a pot and clip up one room in the Chamber of Birth near where you fight Mr. Sandman. This saved you from having to go all the way back around to reach the mini-boss fight. (The intended solution)
– To skip two uses of the Cog of the Soul in the puzzle area of Chamber of Birth
– (Block Clip) To get into Amphisbaena’s Room without pushing the blocks and unlocking the room the normal way
———————————————
Timing Measurements
All time measurements are IN GAME TIMER only! Speedrunning this game will take you far more than 2 hours REAL TIME to put this speedrun together with resets, dying, and bad luck.
THIS IS A DIFFICULT GAME TO SPEEDRUN! You will get frustrated, die a lot, get screwed by bad luck, and maybe ragequit a few times before your sub-2 run is successful. Don’t give up hope!
The most important factor in doing this is speed. Things have to be done fast – there’s no time to lose in the Ruins of La-Mulana!
———————————————-
Copying and Pasting
I have created a handy checklist, feel free to copy and paste this to Notepad or something, and check them off as you go through the game. Please do not post this guide anywhere else without asking me first!
Without further ado, load up La-Mulana and hit the Start button to begin the adventure!
Section Two: The Adventure Begins
Surface (Start)
[ ] Break the pot and grab coins, Talk to Xelpud
[ ] Buy 5 weaights in the shop
[ ] (Optional) Before entering the Ruins, you can make a detour now to grab the Shell Horn if you are still new to the game (Or the speedrun)
[ ] Before you enter the Ruins, grab deathv.exe from behind the Xelpud Statue
[ ] Open the shortcut by whippping it 6 times
[ ] Ensure you have 6 weights before entering the ruins
– You can get extra weights from the pot near the ruins and one from the left of the reader shop if needed, or by killing the birds.
Exit to Gate of Guidance (10 coins, 6 weights)
————————-
Gate of Guidance
[ ] Grab the Sacred Orb
[ ] Head straight for the the Holy Grail, grab 30 coins from pots along the way.
[ ] Grab 30 more coins from the Grail Room and the room directly below it
[ ] Solve the Ankh Jewel Puzzle
– Whip the tablets in the proper order
– tag the dais that unlocks the switch that reveals the Ankh
– tag the switch that unlocks the Ankh, collect 10 coins form a pot along the way
– Warp back to the surface after unlocking the Ankh Jewel – 80 coins, 4 weights
————————
Surface
Purchase from shops:
[ ] reader.exe, yagomap.exe, and Hand Scanner
MENU
[ ] Equip Hand Scanner, turn on reader.exe, turn off xmailer
Proceed back to the Gate of Guidance, 0 coins, 4 weights
———————–
Gate of Guidance
[ ] Scan the Grail Tablet
[ ] Pick up the Shuriken
Exit to Spring in the Sky, picking up 20 coins from pots along the way
20 Coins, 3 weights
————————
Spring in the Sky
[ ] Pick up the Caltrops
[ ] Scan the Grail Tablet
Warp to Gate of Guidance after scanning the Grail Tablet, 20 coins, 2 weights
———————–
Gate of Guidance
[ ] Grab 10 coins from the Map Room
[ ] Push the block to reveal the Ankh Switch
Exit to Mausoleum of the Giants, 30 Coins, 2 weights
———————–
Mausoleum of Giants
[ ] Open the coin chest at C-1 and grab two coin pots along the way to the Grail Tablet (80 Coins)
[ ] Scan the Holy Grail Tablet
[ ] Purchase Pegasus Boots and 2 sets of weights (10)
[ ] Press the left Nebra Sky Disk platform once (Star on top)
Warp to Mausoleum Grail
[ ] Anlock the Ankh Chest
[ ] Unlock the Sacred Orb but don’t pick it up yet (We’ll grab this one in a little bit)
[ ] Pick up the Ankh Jewel
Warp to Gate of Guidance, 0 Coins, 9 Weights
———————–
Gate of Guidance
[ ] Pick up the 50 Coin chest (Place weight and time a jump to get it)
[ ] Grab the Ankh Jewel
Exit to Temple of the Sun, 50 Coins, 7 weights
–
———————–
Temple of the Sun
[ ] Scan the Grail Tablet
[ ] Solve the Knife Puzzle
Warp to Sun Grail
[ ] Pick up the Knife and a coin pot below it
[ ] Kill the Bats to unlock the Sacred Orb, then collect the Sacred Orb
[ ] Unlock the Temple of Moon
Exit to Temple of Moon, 60 Coins, 6 weights
———————-
Temple of Moonlight
[ ] Take the lightning hit and break the 50 coin pot on the way to the Axe
[ ] Enter Axe Puzzle Room, solve puzzle, Grab the Axe
[ ] Scan the Holy Grail Tablet
[ ] Scan the first Eden puzzle point in the Grapple Claw room
[ ] Grab the Grapple Claw and a 10 coin pot before warping away
Warp to Mausoleum of the Giants, 120 Coins, 1 Weight
——————
Mausoleum of the Giants
[ ] Press the left Nebra Sky Disc twice (Sun on Top)
Exit to Endless Corridor, picking up 30 coins from pots along the way
(one in grail room, two on the way to Enless Corridor from Sky Disc
150 Coins
——————-
Endless Corridor
[ ] Scan the Holy Grail Tablet
[ ] Speak to the Fairy Queen
Collect 30 Coins from pots along the way, then warp to Mausoleum, 170 coins
——————
Mausoleum of the Giants
– Grab the Coin pot from the Grail Room
[ ] Pick up the Sacred Orb
[ ] Tag the switch that unlocks Sakit’s Ankh
Exit to Twin Labyrinths, 180 Coins, 0 weights
——————
Twin Labyrinths
[ ] Purchase the Helmet and 3 sets of weights (15) (90 Coins)
– From the Helmet shop, exit up the right staircase and go back down to reach Big Brother’s Shop
[ ] Purchase the Dragon Bone (100 Coins)
– Note: you may have picked up 10 extra coins from killing enemies along the way, but if you’re short, there’s a 10 coin pot in Big Bro’s Shop Room to pick up.
Warp to Spring in the Sky, 0 coins, 15 weights
———————-
Spring in the Sky
[ ] Defeat Jackrabbit (Laser Cyclops)
[ ] Grab the Origin Seal
Damage boost off a caltrop to make the jump onto the rising platform safe from the bat
[ ] Grab the Scalesphere
[ ] Activate Spring in the Sky water flow
[ ] Grab the Gloves
Warp to Temple of the Sun, 50 Coins, 13 weights
———————-
Temple of the Sun
[ ] Hit the mine cart switch
[ ] Defeat Buer (Lion)
[ ] Unlock and pick up Isis’ Pendant
Exit to Inferno Cavern, 90 Coins, 11 weights
——————-
Inferno Cavern
[ ] Solve Block Puzzle, grab the Flares
[ ] Scan the Holy Grail Tablet
[ ] Grab the Ice Cloak
Warp to Endless Corridor, 10 weights
————-
Endless Corridor
[ ] Turn in Isis’ Pendant to unlock Fairies
Warp to Spring in the Sky
——————–
Spring in the Sky
Caltrop boost down the ladder
[ ] Obtain the Ankh Jewel
[ ] Solve Ankh Puzzle
[ ] Solve Flood Puzzle
Exit to Temple of the Sun via Flood Room, 8 Weights
——————–
Temple of the Sun
[ ] Release Origin Seal to open Chamber of Extinction, then enter Chamber of Extinction through lower door
———————
Chamber of Extinction
[ ] Unlock the Bronze Mirror, then head back and grab it from Temple of the Sun along with all the Coins (50 Coins)
[ ] Defeat Centimani, Grab the Chakrams
[ ] Scan the Holy Grail Tablet
[ ] Ensure you have at least 100 HP, we are going to be fighting a boss next! Heal at the Surface Spring if necessary.
Warp to Spring in the Sky, 140 Coins, 7 weights
BENCHMARK 1: Opening to Save before Bahamut: 24 minutes (In-game timer)
Personal Best: 20 Minutes, 45 seconds

Section Three: Boss Rush!
This section will cover the game’s first several bosses in one segment. The speedrun does not fight the Guardians in the game’s “intended” order, but they will all need to die at some point, so we might as well get to work, as they unlock things that we’ll need to both go fast and complete the game.
Spring in the Sky
[ ] Summon a Key Fairy at the fairy point. This will take a number of attempts, it’s a 5% chance to spawn.
– Note, if you’re having trouble with this, get a Healing Fairy first, go kill Bahamut first, then come back after he’s dead and you have the Birth Seal.
[ ] Obliterate Bahamut
Bahamut has 48 HP, so we will need 9 Axe hits and 3 Flares to put this oversized fish down. Aim for two to three Axe hits and a flare every time he springs up near you, and a single Axe hit if he splashes towards you. You can’t hurt him during the fireball attack, so just try to avoid it and stay near the middle.
– If you’re bringing a key fairy through this fight, you must beat him fairly quickly (Around a minute to a minute 30) for the Key Fairy to unlock a door after the fight.
Surface after the boss fight:
[ ] Grab the Birth Seal
Warp to Chamber of Extinctoin
———————-
Chamber of Extinctoin
[ ] Use the Key Fairy to unlock the Gate of Time (One room right of the Grail Point), but don’t enter it yet.
– If you used a Healing Fairy for Bahamut, return to Spring in the Sky and warp back after you have one.
[ ] Unlock the Life Seal by navigating the invisible Jump Maze
Warp to Temple of the Sun
————————
Temple of the Sun
[ ] Push the cart once
Grab 10 Shuriken from the pot near where the cart landed
[ ] Push the cart again
[ ] Fall onto the Cart Platform, then Push the cart into Ellmac’s area
[ ] Solve the Ankh Jewel puzzle, grab the Ankh Jewel. Grab 10 coins from a pot along the way
[ ] Obliterate Ellmac
Like Bahamut,this guy has 54 HP. Stay to the right as he jumps in, then tag Ellmac with 4 Flares right away. While his mouth is open, liberally apply your Axe to it. 10 hits with the Axe will bring him down. Try to avoid his flames and charging attack and you should be OK.
After the fight, warp back to Temple of the Sun.
Exit to Temple of Moonlight through the now-revealed Mirror Door, 150 Coins , 6 weights
———————–
Temple of Moonlight
[ ] Scan the remaining 3 Eden puzzle points
[ ] Use Shuriken to upen the way between the top and lower halves of this area (Near one of the scannable points, hit the top face with one)
[ ] Open the way to and enter the room where Anubis spawns. There’s 10 coins in a pot along the way
Warp to Temple of the Sun, 160 coins, 2 weights
———————–
Temple of the Sun
[ ] Activate the ability to and speak to Mulbruk, until she forks over The Book of the Dead
Return to Temple of Moonlight through the Mirror Door
——————
Temple of Moon
Make your way to the Anubis Room
[ ] Defeat Anubis with the Axe, then Grab the Snake Staff
– Jump up and use the Grapple Claw to cling to the left hand wall until he uses his magic attack, then while he stands still smack his head with the Axe until he dies.
Warp to the Surface, 180 Coins [+30 for killing Anubis]
———-
Surface
– Equip the Serpent Staff you just picked up in the menu
[ ] Buy 35 Weights from the Shop (-70 Coins)
[ ] Head over to Argus and kill him, claim the Feather as your prize [+60 Coins, 50 for boss and 10 from a pot]
Warp back to the Surface
[ ] Purchase the Pistol [-100 Coins]
Warp to the Chamber of Extinction, 70 Coins
————
Chamber of Extinction
[ ] Pick up the Life Seal
Exit to Gate of Time through the door that was previously revealed by the Key Fairy
————-
Gate of Time
Take the secret exit to Tower of the Goddess
– The secret exit is one room up and three rooms to the right of where you enter the area
– Knife the floor where the Giant is 20 times. This is the same exit that would take you to Twin Labyrinths in the Mausoleum
————
Tower of the Godess
Note: This area is dark until you light it up from the intended inteance.
[ ] Light up the Tower
– Knife the wall in the top right corner of the room directly below where you spawn until it breaks open, this is the only way out of the area
– Proceed down to the lowest level and jump on the platform above the water to turn the lights on
[ ] Activate the Water Flow Puzzle
[ ] Climb up to the top of the Tower on the right side until you reach the Grail Tablet, then scan it
Warp to Mausoleum of the Giants
———
Mausoleum of the Giants
[ ] Obliterate Sakit
– Wait for the punch attack, then smack him in the face with your Axe 6 times to make the mask fall off, then when he goes Saiyan, take out your Pistol and shoot him twice in the face to finish him for good
– After the fight, take the secret pot exit to Spring in the Sky
Continued in Section 4!
Section Four: Powering up to the Max!
Now that the first few bosses are down, the spoeedrun is going to focus on obtaining the best stuff for your character, such as mirai, the Flail Whip, and move.exe, then finally opening up another boss at the end. Along the way, we’ll be fixing the money shortage.
Spring in the Sky
[ ] Solve the first part of the water flow puzzle
Warp to Spring Grail
[ ] Solve the second part of the water flow puzzle
Warp to Mausoleum of the Giants
———–
Mausoleum of the Giants
Take the Mirror Door exit to Graveyard of the Giants
———-
Graveyard of the Giants
[ ] Solve the block puzzle that unlocks the Gauntlets
[ ] Unlock and grab mirai.exe
Exit to Tower of Ruin
———-
Tower of Ruin
[ ] Unlock and pick up the Sacred Orb
Exit back to Graveyard of the Giants
———-
Graveyard of the Giants
[ ] Grab the Gauntlets
Equip mirai.exe and warp to Tower of the Goddess
————
Tower of the Goddess
[ ] Defeat both Vimani
[ ] Press the switch in the fairy room to reveal the coin chest, but don’t get it yet.
[ ] Unlovk the Eye of Truth
Warp back to the Grail Point
[ ] Obtain the Eye of Truth
Warp back to the Grail Point again
[ ] Solve the Plane Model puzzle, obtain the Plane Model
Heal your HP to full before making the top-left exit to Graveyard of the Giants
===============
STOP!
Before attemping the next part, ensure you are fully healed, as we will be dealing with a very deadly mini-boss next!
================
Graveyard of the Giants
– As you go, unlock the way to the Kamatachi miniboss fight, collecting 30 coins from pots along the way
When you unlock the central ladder leading up to the boss, exit to the Chamber of Birth
————-
Chamber of Birth
[ ] Scan the 20% Translation Tablet
Exit to Graveyard of the Giants
————–
Graveyard of the Giants
[ ] Defeat Kamatachi and claim the Bombs
Warp to Tower of the Goddess, it’s time to get rich quick!
———–
Tower of the Goddess
[ ] Summon an Item Fairy from the fairy point here
– Open the Coin Chest and a pot in this room
Warp to the Grail Point
– Open a Coin chest in the room right of the Grail Point
Warp to Temple of Moon
————
Temple of Moon
– Use the Chakram duplication glitch to get yourself 10 Chakrams fast
– In the room that exits to Gate of Illusion, break open the wall while the Item Fairy is still active, and claim the massive 500(!) Coins Chest
Note: After the 500 Coins, you should have 999 Coins, or pretty close to it!
[ ] Solve the Eden puzzle and claim the Fruit of Eden
Take the upper right exit to Twin Labyrinths
————-
Twin Labyrinths
[ ] Scan the Reverse Grail Point
Warp to Endless Corridor
————
Endless Corridor
– Open the Shop with the Seal
[ ] Purchase 3 Caltrops and more weights until you have 50
Warp to Twin Labyrinths (Reverse)
———–
Twin Labyrinths
[ ] Make your way up and defeat Peryton
– This fight is actually skippable if you jump correctly
– If you skip Peryton, there’s a 50 Coin chest in the next room before the Witches (Optional)
[ ] In the witch room, kill the witches until the black one appears
Warp back to the Reverse Grail Point
[ ] Solve the first half of the Ankh Jewel puzzle for later
[ ] Usiung a Bomb, solve the block puzzle and unlock the Lamp of Time shop
[ ] Purchase the Lamp of Time (200 Coins)
Walk to the lamp of time charge in this room and equip the Lamp of Time in the Menu
Warp to Tower of the Goddess
—————
Tower of the Goddess
– As soon as you arrive, use the Lamp of Time and fall down the tower, hugging the left wall. Three screens down, you should fall into the Flail Whip Room
[ ] Activate and Solve the Flail Whip Puzzle, claim the Flail Whip as your prize
– Two left, three right, two left, and you on the right
Warp to Temple of Moonlight
———–
Temple of Moonlight
Take the top exit to Eden
———–
Eden/Gate of Illusion
[ ] Place the weight and reveal the Gate of Illusion
[ ] Progress until you get to the tablet, scan the light next to it to continue on.
[ ] Take the Warp, dive down where a pot is, and make your way to the Anchor Room
[ ] Use Caltrops to damage boost through the water, skipping the Anchor sidequest
[ ] Unlock the Mini Doll and pick it up from the guy in the room
Warp to Tower of the Goddess
————–
Tower of the Goddess
Take the left Exit to Gate of Illusion (Upper Area)
—————
Gate of Illusion (Uppper Area)
[ ] Talk to the Cog of the Soul Guy to activate the Gate of Illusion Puzzles
[ ] Carefully fall down the pit, hug the right wall and/or use Grapple Claws, take the left open area and scan the Grail Tablet
[ ] Solve the Sacrificial Maiden puzzle
Take the exit to Tower of Ruin
———
Tower of Ruin
– Head for the Grial Point, pick up a Lamp Chage along the way
[ ] Unlock the torude shop
[ ] Scan the Grail Tablet
Fire off the Time Lamp Charge, then immediately warp to Gate of Illusion
————
Gate of Illusion
Walk left to go through the floor while time is stoppped (This only works if you stop time BEFORE warping to the Grail
[ ] Purchase move.exe from the shop (300 coins)
[ ] Solve the puzzle that is supposed to block your way from the Grail Point
Warp to Tower of Ruin to grab another Time Lamp Charge, then
Warp to Inferno Cavern
————
Inferno Cavern
– In the Grail room, burn another lamp charge, and hurry straight to the left, you should just make it into Viy’s area before Time is restored
[ ] Tag the first part of Viy’s Ankh Puzzle (Wait a few moments before warping)
Warp to Temple of the Sun
———–
Temple of the Sun
Exit to Inferno Cavern
———
Inferno Cavern
[ ] Tag the second switch that unlocks Viy (The one deep in the lava)
– Warp to the surface and heal to full, boss time ahead!
– Turn off mirai in the menu and Equip deathv+move
When you’re ready for the fight, return to Inferno Cavern, drop a save file off and prepare for the Viy fight
Continued in Part Five!
Section Five: Puzzles and Platforming
[ ] Obliterate Viy
– With your new Flail Whip, it only takes 10 smacks with it to bring this ugly sucker down for good.
After taking the tentacles out, drop some caltrops, then smack the eye like crazy. You should get at least 5 hits in, preferably 7 or more
When the eye retracts, drop more caltrops and use them to damage boost yourself onto the boss itself when he fires his laser
Quickly murder Viy with the Flail Whip before he drains your Hp to 0
After the fight, warp to Mausoleum of the Giants
———-
Mausoleum of Giants
[ ] Equip and Use the Mini Doll in the room next to the Grail Point
Warp to the Surface
———
Surface
[ ] Purchase the MSX 2 (250 Coins)
– Buying the MSX 2 will give us enough space to equip all remaining Software we need for the speedrun, except for Torude, but we’ll handle that when the time is right.
[ ] After buying MSX, re-enter the shop, buy more weights until you have 50 again
[ ] Re-equip mirai in the menu and warp to Tower of Ruin
———-
Tower of Ruin
[ ] Grab a Lamp Charge while equipping the Lamp of Time in the menu
Warp to Grail Point
[ ] Defeat Thunderbird with the Flail Whip
[ ] Use the Lamp of Time in the next room; kill the fast guys, then press the switch (This is for a puzzle much later, but since we’re here we might as well do it now)
[ ] Scan the 60% Translation Tablet while you’re here
Warp to Grail Point again
Refuel your Lamp of Time
Warp to the Grail Point yet again
[ ] Solve the Ankh Jewel Puzzle, grab the Ankh Jewel
Warp to Tower of the Goddess
———-
Tower of the Goddess
Exit to Gate of Illusion (Upper Part)
———–
Gate of Illusion (Upper Part)
[ ] Scan the tablets
[ ] Use the Lamp of Time to solve the breakable pot puzzle
Warp to the Grail Point
[ ] Solve the Lizard Light Puzzle
[ ] Scan the Mini Doll Tablet
[ ] Defeat Chi You and grab the Endless Key
Equip the Endless Key, then Warp to Endless Corridor
——-
Endless Corridor
[ ] Using the Endless Key, make your way through the Endless Corridor
[ ] Pick up the Key Sword
[ ] Summon a Healing Fairy at the Fairy point, this will heal you up and allow you to tank your way through the area.
[ ] Scanthe Tablet that activates ____
[ ] Tag the switch with the eyeball guy
– Pick up a Time Lamp charge on the way back, as well as 100 Coins in the pot
[ ] Tag the second switch, then use the Lamp of Time to defeat ____ [Dark Sun]
[ ] Defeat _____ and exit to Shrine of the Mother
———-
Shrine of the Mother
[ ] Make your way down and scan the Grail Point
Warp to Gate of Guidance
———-
Gate of Guidance
[ ] Solve Amphisbaena’s Ankh puzzle and unlock the Ankh room
[ ] Obliterate Amphisbaena
– Lemeza used FLAIL WHIP!
A critical hit!
It’s super effective!
Enemy Amphisbaena was obliterated!
After the “fight”, warp to Gate of Illusion
———
Gate of Illusion
Exit to Gate of guidance via the Mirror Door
———
Gate of Guidance
[ ] Hit the switch, then go pick up yagostr.exe
Warp to Temple of the Sun
——–
Temple of the Sun
[ ] Head over and pick up the Talisman
Exit to Twin Labyrinths via Ellmac’s Room
——–
Twin Labyrinths
[ ] Solve the puzzle to lift the poison
[ ] Tag the switch in the Witch Room
[ ] Pick up the Ring
[ ] Tag the switch that unlocks the Ankh Jewel
[ ] Scan the Grail Tablet (Front)
Exit to Shrine of the Mother
——-
Shrine of the Mother
[ ] Pick up the Map
Exit back to Twin Labyrinths
——-
Twin Labyrinths
[ ] Pick up the Ankh Jewel
Warp to the Surface
——-
Surface
[ ] Equip the Talisman and talk to Xelpud about it
——
Shrine of the Mother
Equip yagomap, yagostr, and the Dragon Bone, then look at the Shrine’s map
[ ] Use the Dragon Bone to unlock the area, then re-equip the Talisman
Warp to the Grail Point
[ ] Make your way to the Diary room
Warp to the Surface and talk to Xelpud
[ ] Warp to Shrine of the Mother and go pick up the Diary
[ ] Warp to the Surface and talk to Xelpud again to get the Mulana Talisman
Warp to Shrine of the Mother again
[ ] Unlock and pick up the Crystal Skull
Warp to Tower of Ruin, refill your Lamp of Time
Warp to Tower of the Goddess
Exit to Gate of Illusion (Upper Area)
——–
Gate of Illusion (Upper Area)
[ ] Use the Lamp of Time to kill Ba
[ ] Claim the Cog of the Soul and use it on the tablet here
Warp to Tower of Ruin for another lamp recharge
Warp to Twin Labyrinths (Reverse) Grail
——-
Twin Labyrinths
[ ] Use the Lamp of time to skip the Zu fight
[ ] Pick up the Sacred Orb
[ ] Murder the witches to spawn the Ankh
[ ] Obliterate Baphomet
First Phase: Double Jump and smack her in the face with your whip (Two to three hits per jump)
The second phase is made much safer with use of the Pistol ammo, you should have >100 HP and only a few hits to land! Four pistol shots is about 60% of Baphomet’s HP in the second form.
Second Phase: Jump to the top left corner, smack the witch, then take out your Pistol and empty it into Baphomet’s face. After your gun is empty, use a combination of Flail and Axe hits to put her down for good.
After the fight, warp to Chamber of Extinction
Continued in Part 6!
Section Six: Everything Comes Together
We resume in the Chamber of Extinction having just removed Baphomet from the picture, this part will take us up to the climatic battle with Tiamat!
Take the Mirror Door exit to Gate of Time
Take the secret exit to Tower of the Goddess
———
Tower of the Goddess
[ ] Equip the Serpent Staff while grabbing a Time Lamp Charge
Exit to Chamber of Birth
——-
Chamber of Birth
[ ] Use the Serpent Staff
[ ] Equip and use the Crystal Skull
[ ] Equip and use the Dragon Bone
[ ] Use the Chakram to open the passage
– on the far ladder, use that to throw the chakram and climb up when it hits the other side
[ ] Continue on, scanning the Knowledge Mural
[ ] Perform the Dance of Life
[ ] Make your way back around to the Chakram Room. This time, head for the Grial Point
[ ] Scan the Grail Tablet
[ ] Equip and use the Cog of the Soul
[ ] Take the portal, tag the switch, and smack the wall opposite it
Warp to the Grial Point
[ ] On your way to Skanda, buy the Ankh Jewel from the shop (150 Coins)
[ ] Use the Lamp of time to kill Skanda, claim the Pochette Key as your prize
– After the fight, take the right hand exit here
[ ] Solve the puzzle and pick up the Woman Statue
Walk back out, head up and take the portal
[ ] Unlock the hidden mural, take the portal to Chamber of Extinctoin and tag the switch that releases the Pochette Key switch
Warp to Temple of the Sun
———
Temple of the Sun
[ ] Equip the Woman Statue and get her pregnant. 45 seconds, guaranteed or your money back!
Exit to Temple of Moon via the Sun Room
———
Temple of Moon
[ ] Use the Woman Statue, sleep in the middle and claim the Ocarina
[ ] Talk to the Philosopher
Warp to Spring in the Sky
———
Spring in the Sky
[ ] Talk to the Philospher
[ ] (Optional) Pick up the Sacred Orb
Warp to Chamber of Birth
——-
Chamber of Birth
[ ] Place the Maternity (Woman) Statue
[ ] Equip and use the Endless Key in the same room
[ ] Finally, Equip the Mulana Talisman and claim the Dimensional Key
Warp to Chamber of Extinction
——–
Chamber of Extinctoin
– Head for the Lamp of time Charge on your way over to the Pochette Key Switch, equip the Pochette Key while waiting for a Lamp Charge
[ ] Grab the Sacred Orb on the way over to the Pochette Key Switch
[ ] Use the Pochette Key to unlock Palenque’s Ankh
Warp to Inferno Cavern
——–
Inferno Cavern
STOP! Save your game here, a dangerously powerful boss is next!
Exit to Chamber of Extinction from Viy’s room
——-
Chamber of Extinction
[ ] (Optional) Buy 20 Flares from the shop here (100 Coins)
[ ] Obliterate Palenque with Chakrams
– As the strategy suggests, as soon as you gain control in the fight, swap to Chakrams and smack him in the face until his ship explodes. The faster you kill this guy, the more likely you’ll survive. And Chakrams are the most powerful thing we have against this beast!
After the fight, warp to Tower of Ruin for a lamp charge, then warp to Twin Labyrinths (Frontside)
Twin Labyrinths (Front)
[ ] Equip and use the Crystal Skull to enter the Dimensional Corridor
——————————
Dimensional Corridor
Note: You can’t warp out of this area until Tiamat’s dead, only manual exits. Be prepared and save often if you must.
Note: Grab the money and green orbs from killing the bosses As much as you can anyways. You will get at least one HP refill from killing the mini-bosses here
[ ] Equip Scanner and Scan the Holy Grail Tablet
[ ] Defeat Girtablilu (scorpion)
[ ] Defeat Ugallu (lion)
[ ] Defeat Lahamu (fish knight)
[ ] Defeat Ushum (Worm) with the Time Lamp . He dies offscreen and doesn’t drop anything.
Exit Dimensional Corridor to Endless Corridor
———-
Endless Corridor
Make your way to the Shrine of the Mother exit
———-
Shrine of the Mother
[ ] Scan the 100% Translation Tablet
[ ] Unlock and Pick up the Death Seal
Warp to Tower of Ruin to equip and refill your Lamp of Time
Also completely heal yourself at the Surface hot springs, you will need as much HP as possible for the next set of Sub-Bosses…
Warp back to the Dimensional Corridor when you are prepared!
Checkpoint: SUB-BOSS RUSH! 1 hour, 30 minutes
——-
Dimensional Corridor
Note: You will refill your HP by grabbing EXP orbs once, it’ll be a matter of when you decide to take it.
– The following is based on having 256 HP.
– Grabbing all EXP orbs will refill your HP before fighting Dabrutu (Bird)
– If you skip one orb, your HP refill will come before fighting Mushussu
– If you skip two of the orbs, your HP refill will come after Mushussu, immediately before fighting Tiamat
[ ] Defeat Kuusarikku (ox) with the Lamp of Time
[ ] Speak with Philosopher Fobos
[ ] Equip the Scanner, Scan the Death and Birth Mantras
[ ] Defeat Kulullu (mermaid)
Exit the Dimensional Corridor and grab another Lamp Charge, then warp back
[ ] Defeat Enlil (wolf)
[ ] Hit the first Angel Shield switch
[ ] Defeat Mushnahhu (Moon and worm minions)
[ ] Defeat Ushumgallu (dragon) with the Lamp of Time
[ ] Defeat Umu Dabrutu (bird ridley) with Chakrams
[ ] Drop the weights in the Shield Room and Grab the Angel Shield
Release the first Chimera Seal, then Return to Holy Grail Tablet to Save.
If your health is below 50 HP, ensure you heal to at least 100 HP before challenging the Chimera.
BENCHMARK 5: Save at Final Sub-Boss before Tiamat: 1 hour, 36 minutes
Personal Best: 1 hour, 23 minutes, 32 seconds
[ ] Release the remaining 3 Chimera Seals
[ ] Defeat Mushussu (chimaera), Grab the Ankh Jewel as well
If youe health is not completely full after this boss with an HP refill, go heal and save, then…
[ ] Obliterate Tiamat
A new strategy has been found to Quick Kill Tiamat! Full Credit goes to SneakyCanuck of SDA for finding this gem:
So as you can see, the general idea is to work your way to Tiamat’s Shoulder during each of the phases and spam the Flail Whip to destroy her HP. If you damage boost on the second and third forms after she does the Water attack, you can get several hits with the Flail Whip in before getting knocked off.
Alternate Strategy:
Bring lots of Caltrops and your Axe. Use the Caltrops to damage boost as much as possible, and smack Tiamat with your Axe through all three phases. Walk to the left or right when she does the water attack, and use Caltrops to dodge her giant laser attack.
Checkpoint after Tiamat: 1 hour, 40 minutes
After Tiamat:
[ ] Equip the Mulana Talisman, Grab the Magatama Jewel
Warp to Tower of the Goddess and Head to Graveyard of the Giants
CONGRATULATIONS! YOU’RE ENTERING THE HOME STRETCH!
Continued in Section Seven!
Section Seven: The Home Stretch and Grand Finale
Picking up where we left off, Tiamat is history and we’ve entered the Graveyard of the Giants via the Tower of the Goddess!
Graveyard of the Giants
[ ] Equip the Magatama Jewel while refilling Time Lamp
Head to the Chamber of Birth
—————————
Chamber of Birth
[ ] Equip the Angel Shield to deflect the laser, Grab the Vessel
Head to the Chamber of Extinction through the Mirror Door
—————————-
Chamber of Extinction (Mirror Side)
[ ] Defeat Ox-head & Horse Face
[ ] Re-enter the room and Use the Magatama Jewel
Activate the Laser Giant and head to the Surface
—————————-
Surface
Head over to the Inferno Cavern
—————————-
Inferno Cavern
Navigate the Spike Pit over and exit to Tower of Ruin (Top) via the Mirror Door
—————————-
Tower of Ruin (Top)
[ ] Release the Death Seal (Be wary of getting knocked down below this room)
[ ] Activate the upper Tower of Ruin Shortcut ladder
[ ] STOP TIME, Climb back up the ladder and enter the Mirror Door. In the Inferno Cavern walk behind the snake statue and spam down when Time resumes. You shuld be able to deposit a weight here.
– Doing this means we get to skip having to read/chant three Mantras, saving a significant chunk of time! The game only checks if you’ve chanted LAMULANA in the right place to give you the powered Key Sword needed to start the final boss, but none of the others are actually necessary, except they’re unlocked in reverse order.
Warp to Tower of Ruin Grail Point
[ ] Buy torude from the shop (200 Coins)
Grab a Lamp Charge
Warp to Chamber of Extinction
———
Chamber of Extinction
Note: Lights need to be ON for Torude to work
[ ] Equip and Use Torude to scan the mural and reieve mantra.exe
Warp to Temple of the Sun and exit to Inferno Cavern
Inferno Cavern
[ ] Equip the Scanner, turn off torude, turn on mantra.exe
[ ] Scan the VIY tablet
Warp to Tower of the Goddess
———
Tower of the Goddess
Make your way down and exit to Tower of Ruin
———
Tower of Ruin
[ ] Drop the Weight to open the full shortcut
[ ] Use the Lamp of Time to kill Nuwa, then use the Mulana Talisman to claim the Djed Pillar
[ ] Equip the Djed pillar, chant the Death and Birth mantras on the appropriate fairies
[ ] Chant the Viy mantra on the way back
[ ] Eqip the Vessel and obtain the Medicine of the Mind
Exit to Tower of the Goddess
———
Tower of the Goddess
[ ] Scan the BAHRUN Mantra
Warp to the Grail Point
– Note: You will need a Lamp Charge to get back into the Flail Whip Room
[ ] Chant the BAHRUN Mantra in the Flail Whip Room
Warp to Temple of the Sun
———
Temple of the Sun
[ ] Scan the WEDJET tablet
Warp to Temple of Moon
——–
Temple of Moon
[ ] Chant Wedjet in Anubis’ room
Warp to Tower of the Goddess and exit to Graveyard of the Giants
——–
Graveyard of the Giants
– Pick up one last Time Lamp charge while we’re here
[ ] Scan the ABUTO Tablet
Warp to Mausoleum of the Giants and return to the Graveyard through the Mirror Door
[ ] Head up and chant the ABUTO Mantra
[ ] Scan the Holy Grail Tablet
Warp to Gate of Guidance
———
Gate of Guidance
[ ] Scan the LAMULANA Tablet
Warp to Gate of Illusion
——–
Gate of Illusion
[ ] Chant the LAMULANA Mantra
Warp to the Surface to heal up, then warp to Endless Corridor
———
Endless Corridor
[ ] Make your way all the way down to the bottom and take the exit to reveal…
SHRINE OF THE MOTHER: EXTREME HOME MAKEOVER EDITION
[ ] Tag the switch on the lef areat to unlock Mother’s Ankh
[ ] Make your way through the remodelled Shrine to the Beezlebub fight
[ ] Use the Lamp of Time to skip the Beezlebub fight
[ ] Scan the Holy Grail Tablet
Warp to Endless Corridor
———-
Endless Corridor
[ ] Speak with the Fairy Queen to remove the final barrier
Warp to the Surface
———-
Surface
[ ] Buy Pistol Ammo for the final boss (400 Coins, collected mostly from Dimensional Corridor bosses and Nuwa)
[ ] Ensure you are completely and fully healed, then warp to Shrine of the Mother when you are ready…
(Note: The Shrine of the Mother becomes a Reverse Field after obliterating all the other main bosses)
————
SHRINE OF THE MOTHER: EXTREME HOME MAKEOVER EDITION
======================================================
STOP!
BE ABSOLUTELY SURE YOU HAVE SAVED YOUR GAME MANUALLY BEFORE PROCEEDING TO THE FINAL BOSS! THERE IS A CHANCE THE GAME MAY CRASH TO DESKTOP DURING THE FINAL BATTLE, CAUSING YOU TO LOSE ALL YOUR PROGRESS SINCE THE LAST MANUAL SAVE!
YOU HAVE BEEN WARNED!
======================================================
[ ] Make your way to the final boss
[ ] Obliterate Mother
First Form: Stand uder the chin and whack it with your Flail Whip
Second Form: Stand under her to shoot flares, when she swoops down hit her with a Chakram. Ideally 3 chakrams or 2 Chakrams + Flare support
Thid Form: This one’s tough. Time your double jumps well and swipe her with two Axe hits when she’s closer to the ground. Damage boost if you must.
Fourth Form: Tank a hit and liberally apply your Chakrams to its eye to quickly eliminate this abomination.
Final Form part 1: Liberally abuse the Axe and Flail Whip to deal as many hits as you can to avoid her attacks. Use Flares if she tries a Bahamut attack and try to avoid the giant lasers. It’s not good for your health, really.
Final Form Part 2: For this one you either want Flares and the Axe or the Caltrops and Axe. She gets pretty tough now, so try not to touch her or the floor projectile columns. Because we bought a Pistol now’s a good time to unload it all into Mother to put her down for good (Sorry, Mom…)
Soon the baby will rise up and after a few more hits she will finally go down for the count!
———-
[ ] Escape!
A few shortcxuts will open up on your way out. One to get you back to Endless Corridor, and another to loop you back to the top of the Corridor. From there exit to the Giant’s Mausoleum, take the Spring in the Sky shortcut, drop down to the Temple of the Sun and lets blow this joint!
———–
Personal Best Escape Time: 1 minute, 45 seconds
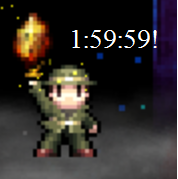
TARGET FINAL TIME: 1 hour, 59 minutes, 59 seconds or less!
PERSONAL BEST TIME: 1 hour, 49 mionutes, 58 Secon
Section Eight: Closing, Improvements, and Suggestoins
As of current, the Any% World Record RTA for this game is 1:40:15 (IGT of about 1:20) held by Narumenhai from Japan. It uses Version 1.3.3.1.
The 100% All Characters Ending Category is currently held by HiddenDistance with an RTA Time of 2:38:50, and can be watched here: [link]
Note, this run was done on Version 1.3.3.1 which does have the Flail Whip Glitch. and other pot/block glitches not usable in the Steam version.
And finally…
I’d like to thank the makers of this game for giving the world the best ruins exploration game ever made.
….That said I’m sure there might have been something I missed.
A better route, a specific Sub-Boss or Guardian Quick Kill?
Images and Screenshots to help this guide, to know what everything looks like?
Anythig else that you can contribute to the guide?
Please let me know or comment below!
I want to see more people pick up this awesome game and do it fast!
My NEW Personal Best is 1 Hour, 49 minutes, 58 seconds! Who out there thinks they can beat it! I’d love to see some competition out there