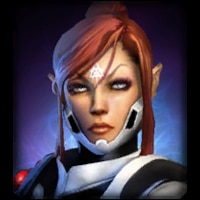
Overview
This guide for the farseer hero shows how fun and effective playing the farseer hero in the role of a tank can be! Building upon a core set of items, the tankseer can be customised to perform other roles besides simply refusing to die.
Rundown
The tankseer is perhaps the best build for the farseer in the Last Stand mode. It can be played several ways but the gist of it is always the same – spam the ward spell to achieve immortality to troll your enemies and become the best tank ever!
The tankseer is an Eldar build and thus tricky, annoying, and focuses on trolling the enemy instead of fighting fairly. You won’t ever be able to deal good damage to your enemies as an Eldar hero at least compared to the Tau or the Chaos Sorceror or the Tyranid heroes. You can deal small damage by using the thunderstorm or trick enemies from a distance through mass confusion causing them to attack each other. Alternatively you can smack them down with your staff one by one relying on your ward to make you unkillable (almost) forever.
Core Items
The tankseer revolves around a few core items which grant her immortality…
Weapon

Armour

The ward spell costs 18 mana to cast with the Laughing stave equipped. Your total energy regeneration should be at 2.3 to be able to regain this amount of mana by the time your ward expires. Getting a bit less like 2.0 is also an option but you will lose a few energy points and will be exposed for a second longer in certain situations.
Accessories


If the entire wave is shooting you for example you can be sure that you will die in that half a second interval and must escape. Situations can also arise when you are attacked by three dreadnoughts and there’s a high chance one or two of them will land their attacks in that half a second interval and kill you.
Commander Item


Third Accessory?
The third accessory slot can be filled with any item of your choosing if you’re going with Spirit Stone of Vigor! Runes of War or Runes of Wrath will make you stave pack a greater punch and help you be a bit more useful when smashing up enemies. Runes of the Harlequin are a solid choice to single out special targets and make them go berserk. This choice works better on the Bloody Colosseum to counter the clones.
Runes of Vigor?
Runes of Vigor are almost the same as the spirit stone of vigor. Thus, if you feel like taking the storm you can drop the spirit stone of vigor but pick up the runes vigor and attain the exact same energy regeneration. You can also use them if you want to take the Spirit Stone of Illusion which is very effective especially with all your boosts to energy regeneration.
Final Build – Bloody Colesseum
Laughing Stave, Ghosthelm, Runes of Warding, Runes of the Warp, Runes of Vigor, Spirit Stone of Illusion
Final Build – Anvil of Khorne
Laughing Stave, Ghosthelm, Runes of Warding, Runes of the Warp, Runes of Vigor, Spirit Stone of Eldritch Might
Alternative Items
There is an alternative that makes you an even greater tank at the cost of pretty much everything else.


Pros
+You’re much tankier and can cast ward on allies without fearing for your life
+You can now tank even 4 dreadnoughts for long periods of time since you don’t die from 1 or 2 hits
+Clones of Bloody Colosseum can’t use group teleport to troll you and your team mates
Cons
-You no longer have any utility at all and have become a pure avatar of tanking
-You sacrifice any and all damage sources excluding your trusty staff so you kill things very slowly
-It’s still possible to die in between ward casts in very serious situations though this is rare
Gameplay
Taking Damage
Playing the warding tankseer is not a job for the slacker. You have to be constantly casting ward on yourself to stay alive forever and carefully teleport away when there’s simply too many enemies attacking you. Gameplay becomes a lot about your skill and if you are skillful enough you simply will be unable to lose. Like mentioned previously, the cooldown of ward is half a second longer than its duration. This means that you are vulnerable for that time. To succeed you must make sure your farseer isn’t knocked back or doing some fancy melee move when the ward wears off so you can quickly cast it on yourself again.
Killing Foes
The tankseer has no time to waste on foolish enemies and simply lets her slave allies do the job for her. This makes you heavily rely of allies yet this can be remedied by taking Spirit Stone of Eldritch Might. The farseer is not built for killing so either way your killing power won’t be as great as that of the other heroes, even though you can spam your eldritch storm like crazy with all that energy for fun.
Reviving Allies
As the team’s immortal tank you have to revive every ally who dies. This is achieved very easily since your ward protects you from anyone who is trying to stop your farseer from reviving a dead ally. It is important though to time things right and ideally you should start reviving an ally right after you cast ward on yourself. This will insure your complete safety during the reviving ritual. Alternatively, you can teleport your ally to a far away place to revive him in safety. If your ally is far away from you and surrounded by a giant army you can do the teleport ward combo by teleporting in, casting ward on yourself, and teleporting out. Don’t worry, you have more than enough energy for everything.
Personal Vendettas
Sometimes a walker or a boss will have a personal vendetta against your ally and the latter will keep on fleeing from him like a coward. Tell him to stand still and shield him like you shield yourself to quickly end the chase and teach your foe a lesson for messing with your allies. However, don’t ever shield your allies when there is danger around that can damage you; you are frail and pathetic without your ward and sometimes a single ward on an ally instead of yourself can mean death for you. Your allies can die all they want, using your teleport and ward it is no trouble to revive them. If you are using the alternative build shielding allies becomes far less risky.
The Puny Clone
When your doppleganger comes to annoy you it will be a piece of cake to take care of that sucker. Unlike you she has not mastered the skill of warding and will be easily taken down by your allies due to her lack of armor and health. However, the clone can be very annoying by teleporting dangerous enemies on top of you or your allies so watch out. This can be remedied by killing the clone.
Alternative Playstyle
Using the alternative build you forgo any teleporting any thunderstorming for a smoother tanking experience. You can no longer teleport yourself or your allies away and have to revive them on the spot while being attacked by armies of enemies. That’s not really an issue as long as you time your wards properly. A bit of an upside though is that the clone won’t be doing any teleporting either so the final wave will be easier for your allies to deal with. In the later waves standing still becomes quite dangerous and you have to constantly run around to avoid dying though you can still survive even with every enemy on the map attacking you. You truly are the greatest tank of them all.
https://www.youtube.com/watch?v=T1YZtHK30S8
This has been my tankseer guide! Good luck and have fun! 😀