Overview
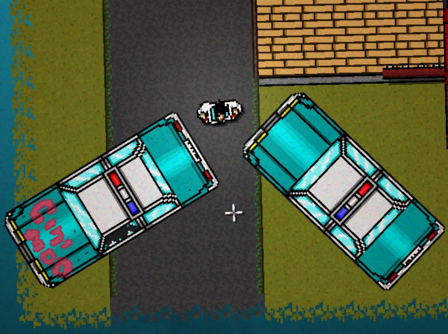
The Level Editor usually restricts you to only having one escape vehicle on the first floor. This guide will show you how to add as many vehicles as you want on any floor you want!
Getting Started
As with my last two guides, you will need Notepad++ for this to work. To download it, go to this website: [link].
I would recommend testing out any levels altered with this guide before publishing them anywhere. Crashes can occur if incorrect numbers are put into NPP, or if not enough/too many lines of code are replaced.
If you are unfamiliar with using Notepad++, here’s how it works: when you place down an item or enemy, its IDs are listed in the level.obj file for that floor. There are two main types of IDs to look for: the sprite ID and the object ID. Sprite ID determines how something looks, while object ID (located two lines below sprite ID) determines how it acts in-game. Between those two spaces is the direction (0-360 degrees) it is facing. By changing the sprite and object ID of an item you added to the level, you can add virtually anything to the Level Editor that isn’t there by default. Everything below has its IDs listed as (sprite ID, object ID).
NOTE: Changes from Notepad++ will not stay unless you save the level again in the Editor before playing it. Playing the level without saving it from the Editor will not show anything you just added.
ID References
You will be replacing or adding in sprite and object IDs to your level/campaign’s level.obj files. I covered unused vehicles and how to add them in my previous guide, which can be found below.
[link]For quick reference, here is a list of all vehicles you can add:
1. Fans Van (sprite 392, object 236)
2. Pardo’s Car (sprite 1258, object 764)
3. Jake’s Car (sprite 1432, object 870)
4. Jake’s Truck (sprite 3935, object 2267)
5. Taxi (sprite 1731, object 1049)
6. Golf Cart (sprite 3354, object 2349) – Only works for Pig Butcher
7. Henchman’s Car (sprite 1933, object 1147)
8. US Army Jeep (sprite 2225, object 1341)
9. Bus Stop (sprite 3485, object 2040)
10. SWAT Bus (sprite 3737, object 2174)
11. Son’s Car (sprite 2439, object 1366)
12. Mafia Getaway Van (sprite 3951, object 2284)
13. Jacket’s Car (sprite 4154, object 2345)
14. Biker’s Motorcycle (sprite 4094, object 2347) – Only works for Biker
15. Hammer’s Car (sprite 4271, object 2394)
Adding a Vehicle to a Higher Floor
If you’ve messed around in the Level Editor, you’ve probably been disappointed that you could never put an escape vehicle on a floor other than the first. Your options for ending levels on other floors were limited to cutscenes and fade-outs.
Thankfully, you can use NPP to add a vehicle of your choice onto the second through seventh floors of your level! To do this, open the level’s folder and open the corresponding .obj file. For reference, the first floor is level0.obj, the second is level1.obj, and so on and so forth.
To start off, create a level and place your character and vehicle down on the starting floor. Put the car as far away as possible so it remains out of sight.
WARNING: You can delete the vehicle on this floor using NPP, but I would not recommend doing so. Unless every line of code relating to it is deleted, your level may brick and be rendered unplayable until this is undone. If you really need to do this, delete lines 9-15 to remove the vehicle.
On the second floor, find a spot you want a vehicle and place down an item to mark it. I usually place down AcidBath1 as a reference point, since I never use that sprite in my levels. Its sprite ID is 2197 and its object ID is 1295 two lines below that. Search for that entry in your .obj file and replace it with the IDs of whatever vehicle you want. It will behave like a regular vehicle, and entering it ends the level as usual.
Something to keep in mind: “end level” cutscene actions do not transfer from the first floor to the second floor with this method. In order to allow the player to use the car as usual, add one of those at a point the player will have to walk through, like near the floor transition or around the car itself.
Adding as Many Vehicles as You Want
If you want multiple means of ending a level, or if you want to take advantage of certain vehicles’ unique abilities, you can use NPP to add as many cars as you want!
The same steps you followed in the previous section apply here: place down your character and vehicle, add an item you can easily identify and replace, and swap its IDs for the vehicle of your choice.
While this may not have as many uses as adding cars to other floors, it could be useful for campaign/cutscene creators. Jake’s Truck will automatically end a campaign early, while the SWAT Bus will end any level even if you haven’t finished it. With these factors in mind, you could create alternate endings or easter eggs by allowing the player to choose between leaving early or fighting on.
Conclusion
That’s all there is to it, really. Have fun adding all the cars you want to your Hotline Miami 2 custom levels!


