Overview
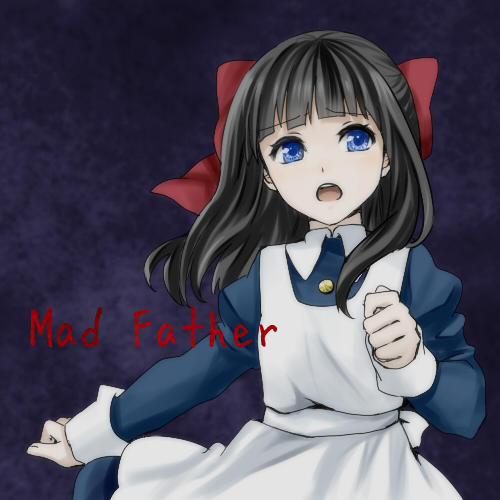
A walkthrough of the game Mad Father.In this walkthrough you will find the controls, where to find gems, and just a basic playthrough of the game. In this guide you will also find out how to get the achivements. Note: The picture for the walkthrough IS NOT MY PICTURE. I found it off Google so credits to the creator. ***Completed guide!!!***
Controls
To move: Arrow keys
To confirm: Enter
Inventory: ESC or X
*Later in game*
To pull out chainsaw: Shift
To use chainsaw: Enter
Getting started!
Unless you skip the prologe the only thing you can do right now is look around the room.
Look around the room and examine everything. Once that is done, try to go to bed. When you wake up you will hear a sound and worry about your father. You must find him!
FACT: Your room is called the nursery.
Exit the nursery. A crow will fly down onto the table.
This is a save point, so save your game whenever you can.
Go to your left and down the stairs.
Be careful of the zombie like things! Avoid them because they will hurt you.
Once you are down stairs go to your left and into the door on the left.
You are now on the first floor, in the East hall.
1F East Hall
Floor one, West Hall
Enter the door on the right.
It should be right infront of you.
Save.
Next, go to the painting.
If you are not attacked, go to the painting again.
Once you are finished with the getting attacked, you run out of the room so go back in!
Remove the painting and go through the hole-hallway like thing.
For now you can go forward, and to your right to get a gem.
Next, go back into the room and push the stool to the shelf.
Hop onto the stool, and get what is up there, down.
You now have a knife.
Jump down, and save again if you want.
Every chance I get, I save.
You don’t have anything left to do in this room. So go on to the one beside this one.
You are now in the bathroom.
Go to your left and above the toliet will be a shining light thingy.
Collect it, this will be the cafeteria key.
That’s it for the bathroom!
Cafeteria
Once you are done with the bathroom.
Avoid the Experiments and go unlock the Cafeteria
(The door on the bottom floor, in the middle.)
Once you are in go to the left, MAKE SURE YOU STAY AS FAR DOWN AS YOU CAN!!!
Once you are past the little stove thingy go above to the open cabinet and collect the oil.
You can’t do anything else for now but you will come back later.
Floor Two, East Hall
Go to the first room. – The bedroom.
You will exit but go back in.
Then go up and collect the key to the Archieves.
Go to the glowing thingy ontop of the book on the floor.
For now you can’t do anything so go to the West Hall.
Floor Two, West Hall
Now you should have everything you need for this side.
Unlock the first door – The door to the Archieves. And explore all the book cases.
There will be a door in the top left but you can’t go in there until later on in the game.
Also, explore everything on the floor (If something is there or if something drops).
Make sure you explore both sides of each bookshelf.
Once you get to the “Data on Live Experiment” there will be a scene where you can’t do anything. Once that is over exit the room and come back again.
Collect the glowing circle thingy, this will be a Pendant.
Exit the room and go to your left, then go up and to your left again.
THere will be a door. THis will be the doll room. Look around the doll room, and open the curtains then exit. (I don’t know if this has an effect or not on the Code Memo but i’ve done it every playthrough).
Next go into the room next to the Archieves. – The Changing Room.
Use the knife cut the spider web.
Go towards the glowing circle thingy and collect it. This will be an empty lighter.
You’re done with everything in this Hall.
Floor Two, East Hall, Part Two
Go back to the East hall and into the first room. – The Bedroom.
Go up to the window and click it. You should have the pendant and the lady/mom will come and be like this is her pendant blahblah and they will reuinite. Once that’s over you should get a gem.
Next you should open the yellow/gold dresser using the code memo.
The code is, 7482.
You will recieve mom’s perfume, and a lamp.
Exit the room and go to the cafeteria.
Cafeteria, Part Two + Storehouse
Stay to the bottom as best as you can to avoid being attacked by the dog.
Go all the way to the left in the food pantry thingy and move the rug by going to the corner.
Go down into the storehouse.
Use Snowball near the crack in the wall.
Being Snowball collect the glowing thingy – Lighter fluid.
For now the door is locked so go to Floor one, East Hall.
Floor One, Basement – Taxmidermy room + Lab
Now from the East Hall go down into the basement.
Something(s) will block your way.
Fill the lighter up with lighter fluid. Then use the oil and filled lighter on the something(s).
If it doesn’t work get closer and then it will ask if you wanna use it. You might have to open your inventory first for it to ask. And you might not. (I don’t remember).
You will exit the room but go back in.
Next go to your left.
Save if you want.
Go into the door on the bottom. (Taxmidermy) Collect the Wood Bucket, and then go to the shelfs and explore everything. Something (Eyeglass bottle) Should fall. Collect it.
Next exit the room then go to the door above. (The Lab).
In the lab Maria will be there. You can either interact with her or completely ignore her.
(For the true ending interact, for one bad ending interact, and for the other bad ending ignore her.)
She has fainted. Interact again and you should get a room key.
Go to the door on the top right. After the scene you will go up to the next room.
You can go back to collect the glowing thingy – The gem.
Keep going up until you reach the corridor.
Next Part
Go to the far left then into the door/doorway?? on the bottom.
Collect the ladder and then go down to the door on the bottom to unlock it.
Go back to the Second Floor, East hall. Go to the left, up, then left again to go to the attic.
Once you are in there place the ladder you found near the broken ladder on the wall.
Go up on the ladder and push the box in the middle off the ledge.
Go down to the box and collect the glowing thingy – the chainsaw.
Next go back up and chainsaw the barrels.
Go back to the corridor but instead of going down like you did go up and chainsaw the wooden door. You’re now in the hall and soon you will be completing the game.
Now that you are at the hall go to your left and through that door. Go up and try to open the door where the crying eyeless girl is. She can not hear you so you have to find another way to give her her eyes. Go out and into the Reception room. If you haven’t done so yet go out to the pond with the bucket and collect water. Put the water on the fire. Next crawl into the fire place. There is a hole where you can drop the eyeglass bottle and you can give her her eyes. Once you do that go back to the eyeless girl and go up to the door where she is. She’ll come out and thank you. Go into the room where she was and pull the lever to unlock that big door in the middle of the hall. Go through the door that just unlocked.
Next Next Part
Continue that way. Eventually you’ll notice something is holding you back. Keep trying to go down until a woman appears in the top left corner. Once she appears talk to her. She’ll “tell” you that she is the one holding you back. Go down one more time with her now following you. Go out into the hall, and go left and down outside. Now go left into the lab. There will be a cutscene. It shouldn’t start unless you move so move to start that.
After that is over with you can continue without the woman stopping you so go back and continue.
Once you continue you should come to this place where there is this man pointing. Go up and left
( Where he is pointing ). That will lead you to a place which is kinda like a lab I guess. Go to the left and up to where the bookshelf on the left is. There should be a crate on the right, chainsaw that to get Forceps.
Next go right and into that top left door. You’ll get scared and exit ( If I remember correctly.)
So if you do exit go back in. Go up the stairs and chainsaw the rope to let the guy free.
Now go back out to where that man was pointing and go down to the save point. Go right from the save point this will lead to the Toliet area. Once in there go towards the glowy thingy and use your Forceps to take the glowy thingy out of the Toliet. You now have a Rusty Key. Take the Rusty Key and dip it in the water on the left to clean it off so you are able to use it. Next go back out and try the door on the top(ish) left. Keep going left. The glowy thingy in the mirror room is a gem. Go to the middle of the bottom wall to collect it. Keep going and go into the door on the top right since the left one is locked. When you get into there I suggest saving. Next go up and chainsaw the meat, fry it and then go back and save again if you can. I don’t think you can save again so if you do die by that blue guy who should attack you any second now (If you were close enough to that door on the upper right which YOU SHOULD BE) then re-do those steps after you get that blue guy off of you.
Once you cook the ham and have it all cooked. Go through that door and go up. Next go back down once he comes towards you and press the Z button really fast. If you survive YAY if not cook the ham again. There should now be a boy (or girl idk) sitting at that table at the bottom of the room. Give the cooked ham to the child and you will recieve a napkin. Go through that door where you exited when the blue guy attacked you and keep going. Go to the left door.
Door puzzle – Opening that stupid door
You have to match both rooms. Here’s how;
Go up and take the flowers from the vase (You should be in the left room ahem).
Go up and through the top door and go to your right and down. You should now be in the right room. Put the flowers you collected from the left room into the vase in the right room. Move the knight to the side and give it the spear from that nun looking lady. Next go up and out the door where Orge and that blonde girl are. Chainsaw the girls head. (Don’t worry she’s a doll). Go into the right room and put the head on the headless body. Go down into the bottom of the room and correct the painting so it looks the same as the one in the left room. Now go left of the wall the painting is on and up. (Press enter so you make the same expression the doll in the left room is making. Expression? Way of Standing? Idk same thing.) That should be it to open that big door so go up out of the room and through that big door.
Continue…
Continue on and push the baby onto the mom.
Contine on and push the mom out the door and hide the corpeses in the dresser.
Continue on and give the kitchen knife to the boy (or girl idk). You will also want to use the napkin to wipe off the blood on the mom’s face.
Continue on and chainsaw the one girl (or boy idk) that isn’t bloody.
Continue on and you’ll pass out. It’s okay though! Go out the door once you wake up and to your bottom left into that dark room. You only have enough time and health to collect the glowy thingy and get back so only do that or you’ll die.
Once you’re back use that to unlock the right door. Once that girl is gone move the dresser to the side and chainsaw the crack in the wall. Go through it to collect Mom’s perfume. Hurry out the door because something will try to get you. Put on the perfume and go down to were you collected the key. Since you are wearing the perfume the animals won’t attack you.
Go through tie first door. Save. Go left. Go back and open the door that closed. Go up and hurry back to the save point. (This may take a few tries.) Once done rest in bed until it moves. SAVE AGAIN. And go through the hole.
Once you go through the hole, go right to the vase, move the vase to the right.
Go down into that entry way. Go down to the door and open it. Hurry back to where you came from and love the vase back to the left. This might take a few tries but you’ll get it. Go back to that room with the bed and save.
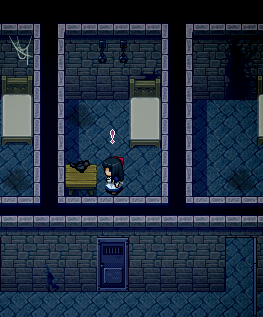
Now continue on right and up the hallway into B3F Outside Labortaory.
Continue… Part 2
Once you’re there go up to the doll sitting in the chair.


Big Tunnel, with pictures!
This part is really hard at first so try to follow along the best you can! This might take you a few tries and remember if you die, you have to start all over again!
When the doll turns it’s back to go left, run upwards.

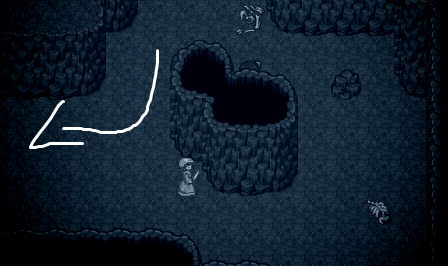
Run up the stairs but make sure the doll up the stairs doesn’t see you. There will be a hole, run into it.
When the doll moves to the left, exit the hole and go right then go up to the doll in the chair if you’d like. Go left and quickly go into the hole. Beware of the doll exiting the hole. Next go to the hallway/entrance/whatever that is right of the glowy light.

I found this really hard at first. Writing this walkthrough (While playing the game so I know what’s next) I died, haha.
The “circled” hole is your exit.
Neeext
Don’t worry about the zombie/corpse/thingy it’s afraid of you for now.
Go up to the door above you and pull the knife out of the girl’s chest.
Beware of that scene though.. *sobs* So hap- oH.
The door up above is locked but I just wanted to get through that cutscene.
I don’t know if you have to do that first or not but that’s what i’ve always done.
Next go back out and to your right.
Go through that hole

A dog will come out and you will hide. Since the dog ate the key you will have to get it back. Go left and save of course!
Now the corpse thingy is back so becareful of it and climb up the ladder.
1. Grab the planks and move them.
2. Grab the sand bags and move them.
3. Use your chainsaw to cut the rope right BEFORE the corpse thingy is under it.
Go down and to the right and into the FAR RIGHT door. If you go into the other one you’ll die.
Cultivation Room and right before the endings
First go up to the bookcase and read a book from there.
Next go right and to that puzzle. Solve it.
Now go back to the door and enter.
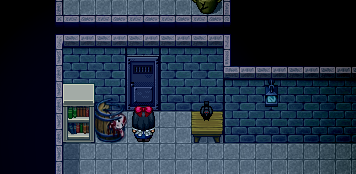
Go out and to your right and collect the hammer.
Beware of the dog, and go back to the Cultivation room.
Use the hammer on the cracked vase to collect ear plugs.

Go to the ledge and set the Mandrake pot there.
The poor dog will die, but atleast you can get the key.
Use the scapel on the dog to recieve the key.
Next go back to that door where the cutscene was with Aya’s older sister.
You can get the bone from the Mandrake before you leave!
Next unlock that big door and throw the doll in!
Go back to where that passage with the dolls were, don’t worry they’re dead now so they won’t kill you. Keep going until you reach the room where the doll (The one you threw in the lava) was sitting and open the big door.
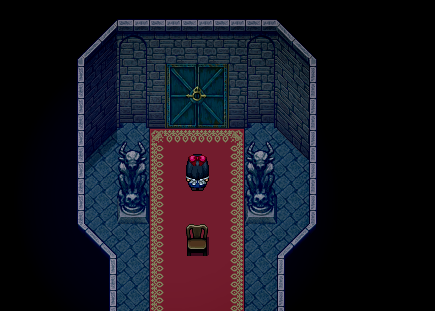
Aka;
Bad ending 1
Bad ending 2
True ending
Click on Orge (I hope that’s his name, if not oops) to go back to your room and collect any gems you may have missed. I suggest using this guide if you are missing some and need help,
[link]
Once you are ready jump into the black, dark blue, and purple portal.
(Sorry art folks if those aren’t the right colors, you know what I mean!)
Once in the other world go up to that mini portal.
The next thing you do will depend on the ending you recieve.
Read the part(s) about the endings to see which one you’d like to persue.
True ending
You have to click save father. So click that
After the scene you’ll arive at the hidden Lab out area.
There will probably be another scene if not go to Father and then there will be.
***Save at the crow***
Just gonna say now. You gotta run to the bottom and hit Enter or Z as fast as you can.
And then you have to run away from your crazy ass father.
What you gotta do is run all the way to the bottom to the door (It’s locked)
Now run back to the other end and do the switch.
AND THEN run back to the door.
***Tip: Hide behind the boxes***
Once you make it to the unlocked door there will be a scene. You will arive in the hidden hall.
Examine the door to find out it’s locked. Now examine the cot with no corpse on it to hide there. After the scene examine the bookshelf to get a bandage and then go to Maria and help her. Once you help her. Go to the top exit and then to the right. Maria will fall and you can not go back to save her since you “have to run” or is it “gotta run” idk. Anyways, keep going and avoiding father.
There will be another scene that marks the end.
Note: You have to read Maria’s diary in order to be able to do this ending. Then you can give her bandages on the shelf when you go to help her. I hope this cleared any confusion.
Thank you to a commenter who said this!
Bad Ending 1
At the choices of, Save Father or Grant Mother’s Wish.
Click Grant Mother’s Wish.
Then follow the pathway to the exit just like you did in the True Ending.
Bad Ending 2
At the choices of Save Father or Grant Mom’s wish.
Click Save Father and do everything you did in the True ending BUT do not interact with Maria. Completely ignore her, and do not help her.

