Overview
How to map an XBOX 360 controller or other compatible controllers for The Long Drive. Driving ONLY – does not function for walking or item interaction.
The Basics
Before we begin, this guide will cover the basics of using a controller (XBOX 360 or other PC compatible controllers) for DRIVING ONLY
Please note that these configurations that I use in this guide are completely interchangeable and can be tailored to your own personal preference.
Make sure you have previously installed all drivers + software and connections necessary in order to operate your controller.
Controller Mapping
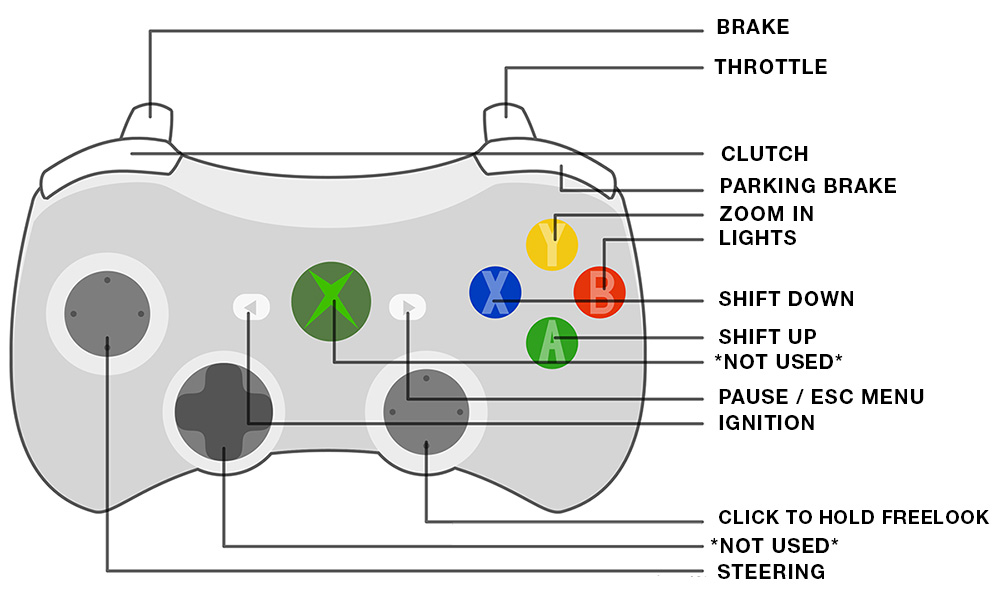
Below is an image of my current layout I will be mapping. Based on your controller you are using, and as your personal preference, please tailor this to your liking.
Key Mapping
Double-click on the game within steam to begin, once the game loads the Resolution menu, choose the INPUT tab next to the resolutions tab as seen below:

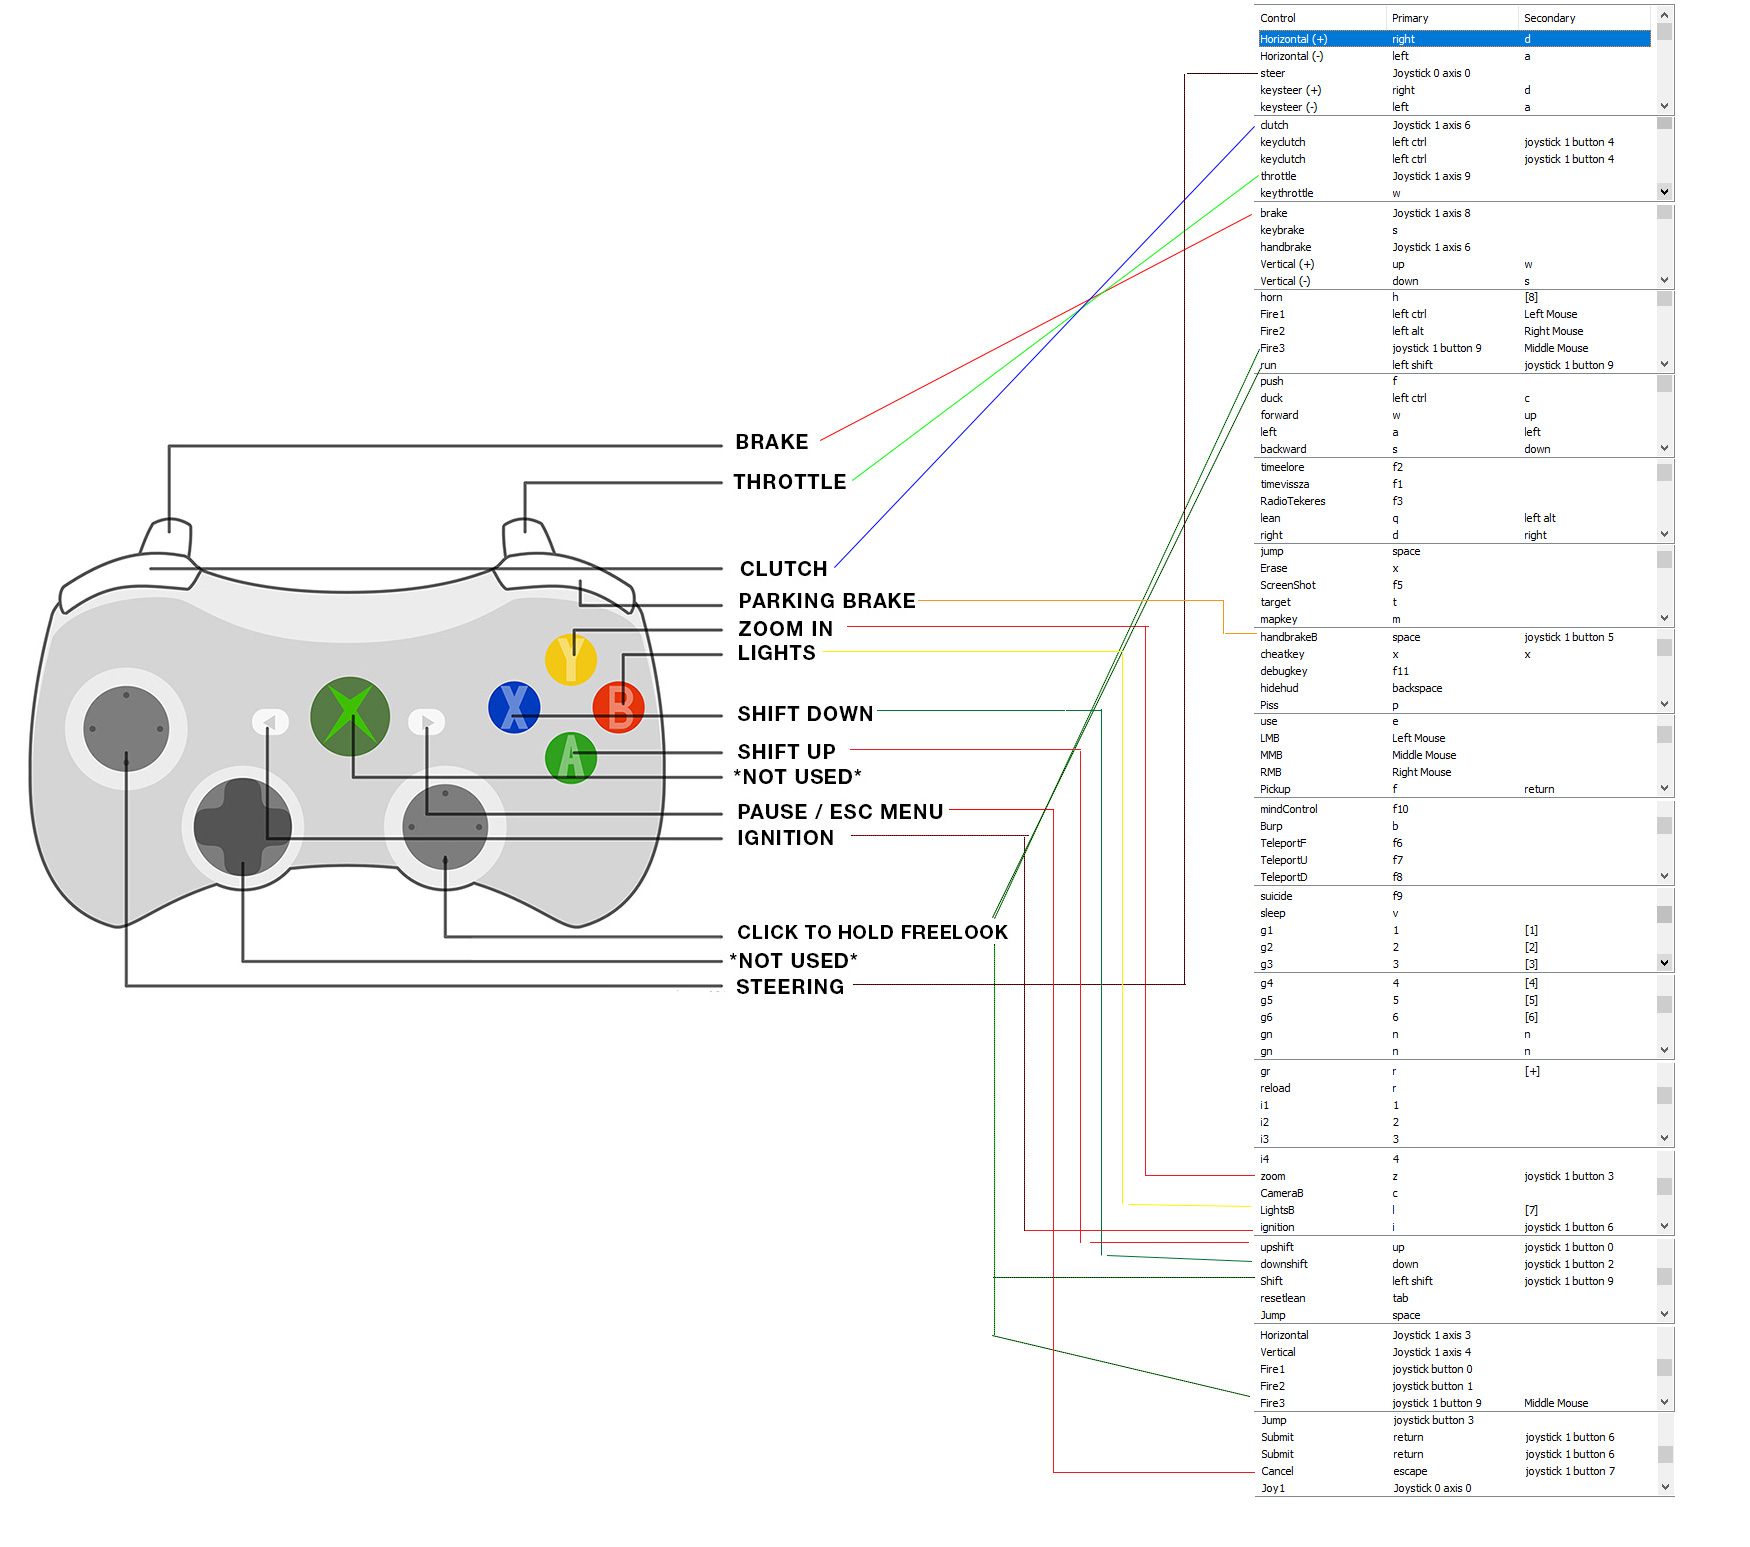
You will now see the keymapping screen as seen below:

Note in the image above that we see the grouping of Keysteer (+)(-) and as well as Steer – any keys that have KEY in front of the word correspond to a keyboard input (either on or off). This is not the case with every command here, but does differentiate which commands correspond to an X or Y variable input (think of your controller’s left stick for steering), or if the command is associated with the keyboard’s input (think of your keyboards A and D key for steering).
Along with that example, you cannot map the Steer to, for example, the X or B button on the 360 controller. Instead, you would change the Keysteer (+) and (-) to map to individual buttons (if you so wish). On that note, when you see any Keysteer or similar commands with a + and -, the negative(-) corresponds to the left, while the positive(+) represents the right.
Finally – feel free to change your desired inputs to either the first or secondary input. Keep in mind you will overwrite any command listed here, so use your discretion here in case you ever wish to play without your controller.
Based on my earlier image, here is is the controller + commands and a line diagram corresponding to which binding I’ve changed. Note – for freelook, I changed 4 separate commands to correspond to activating the push button free look while driving.
Changing In-Game Settings
Now that we’ve mapped all of the buttons, lets start the game and navigate to settings from the main menu.
Once you open settings, click on the steering section:
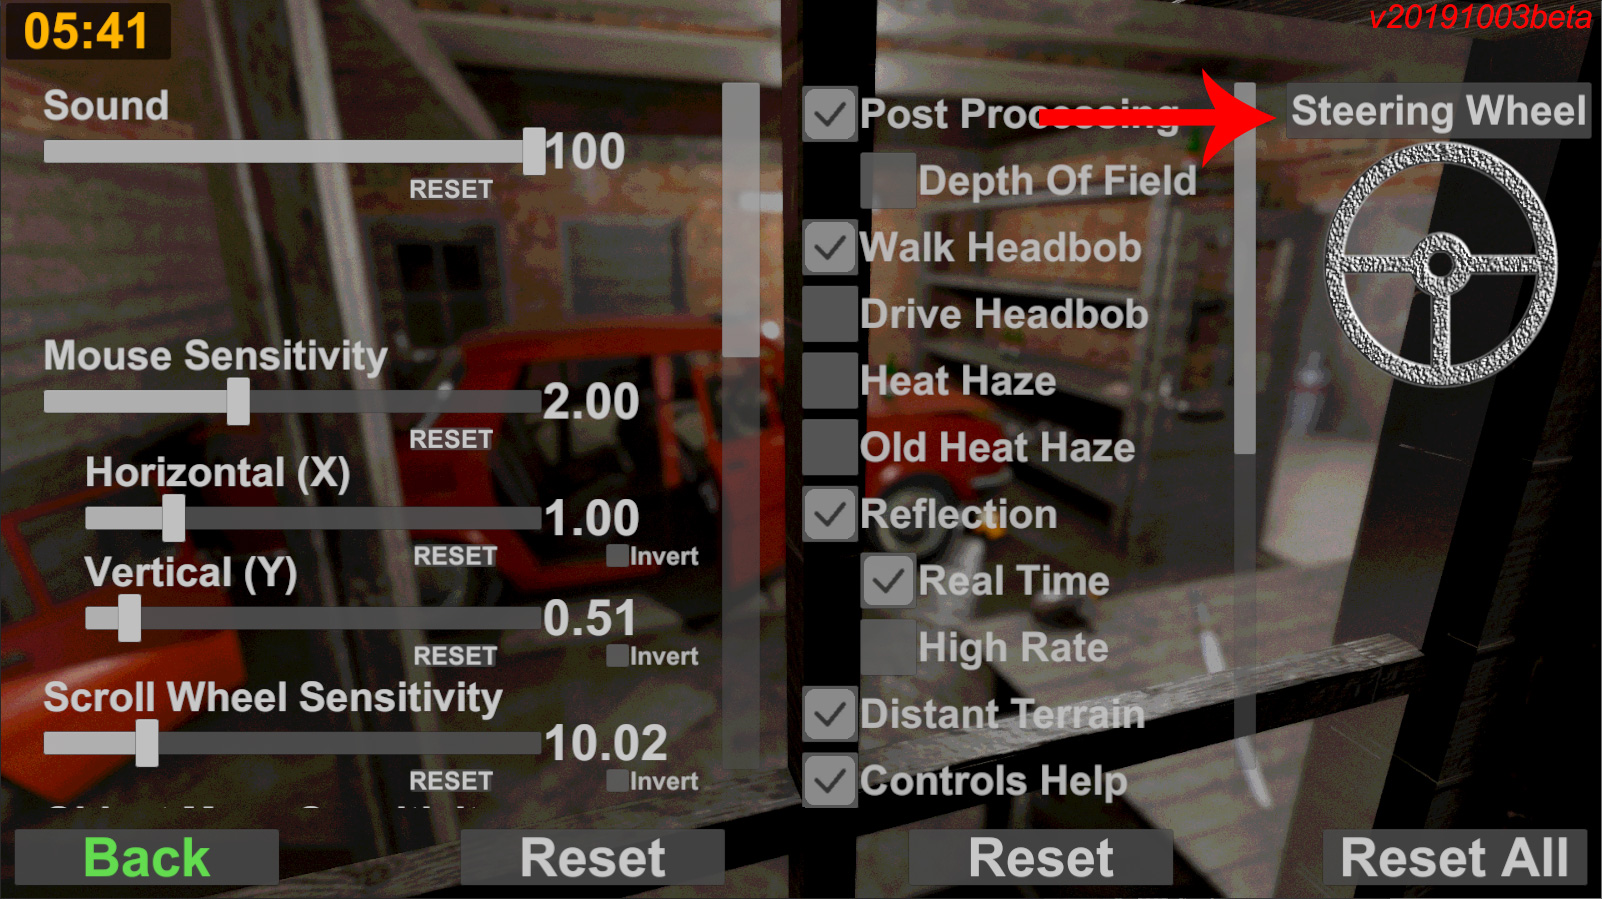
Once you have opened the steering settings, you will be greeted with a similar page to this, this page features my settings to my liking, but you may tailor to your preferences
(UPDATE: Please also note the deadzones and how they are set for the throttle brake etc. – be sure to set those appropriately and test out each function on this page before moving on) :
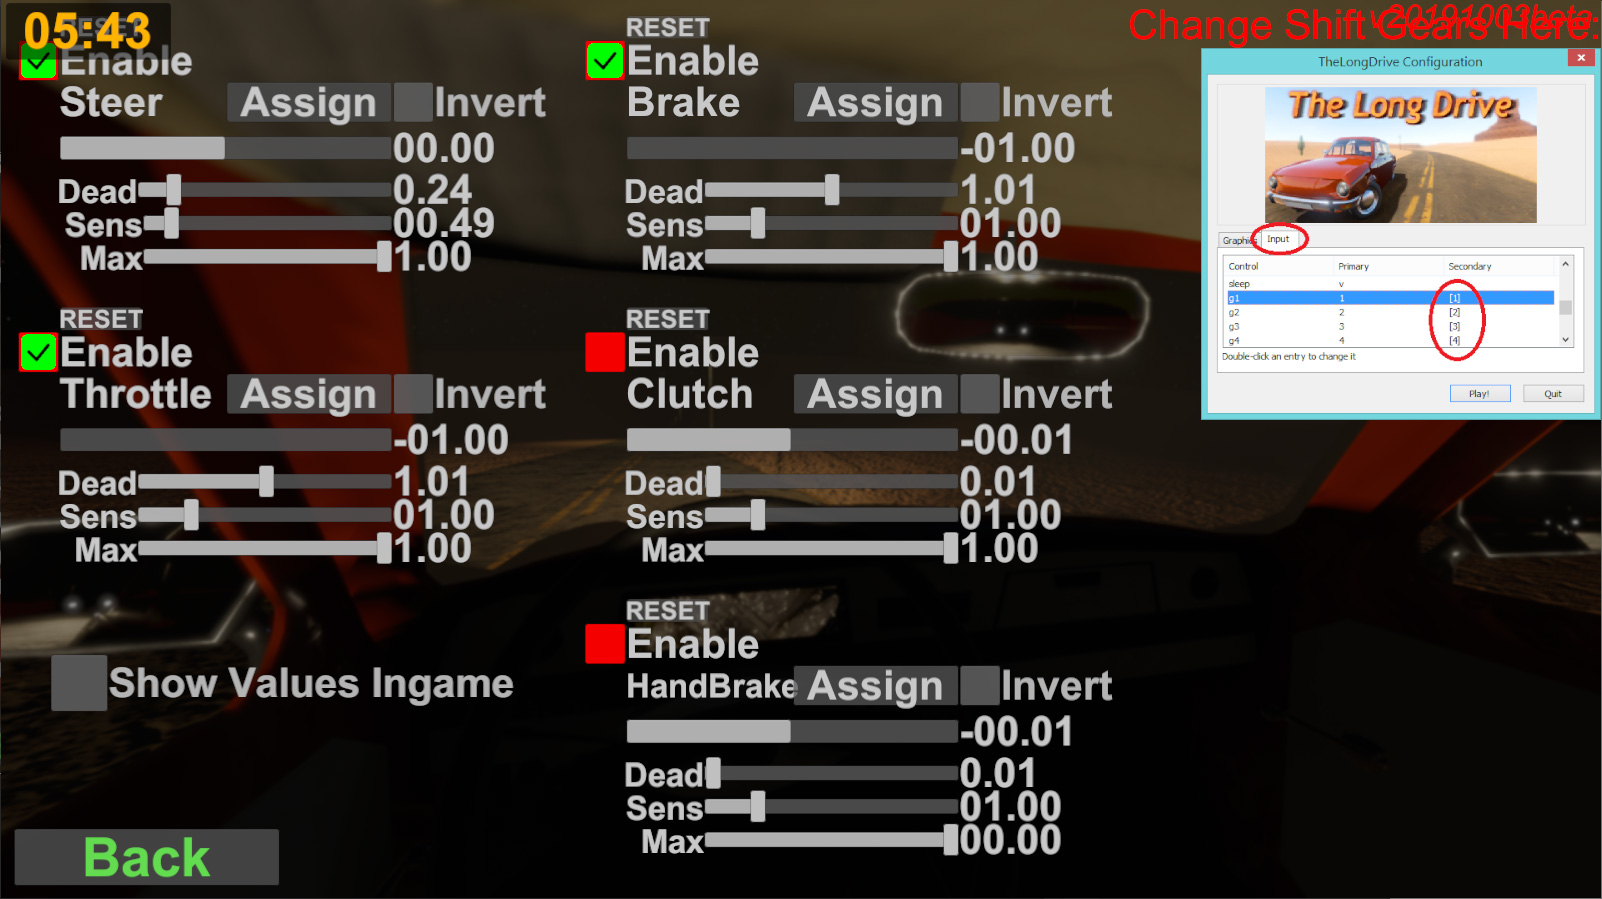
In this section, you will notice enable buttons. Click ONLY to enable functions that have an axis assigned to them. For example, if you mapped your steering to your joystick, enable the function here.
If you DID NOT map something to an axis that is shown on this screen, do not enable it. Here you can see that I did not enable handbrake or the clutch in this section – this is because I assigned these commands to a button, not a joystick or trigger.
Again, do not enable any of these settings for any function that is not assigned to an axis. Only enable those actions shown here if you used something other than a button.
This concludes the tutorial. Hopefully you found this helpful! Thanks for reading. Please feel free to comment if you have any suggestions or improvements or if something is not clear.
This is all of my original work and screenshots. Please feel free to share this with others, but please do not claim this as your own original work.
Now go out and drive!
How to RESET your joystick and key bindings without reinstalling the game
If you have run into an issue where you cannot change your key bindings or wish to change your controller to a wheel. There is no simple ‘Reset to default’ within the Input menu.
In order to reset your keys, you can either reinstall the game, or if you are comfortable using Regedit, you may delete the key values there.
Note: Regedit is NOT a game, you are at the risk of deleting very important registry edits for your operating system to run. Do not delete ANYTHING other than the keys I outline below. I am not responsible for any harm to your computer you may cause.
If you follow this guide, you will not harm your computer.
Go to your start menu and select Run – type in REGEDIT (alternatively you may use your search function on your toolbar to search for REGEDIT)
Open Regedit, and in the left hand window pane you will see a list of folders. You will navigate to the following path: HKEY_CURRENT_USERSoftwareGeneszTheLongDrive
Once you click on the folder TheLongDrive – you will see a list of keys like in this photo below:
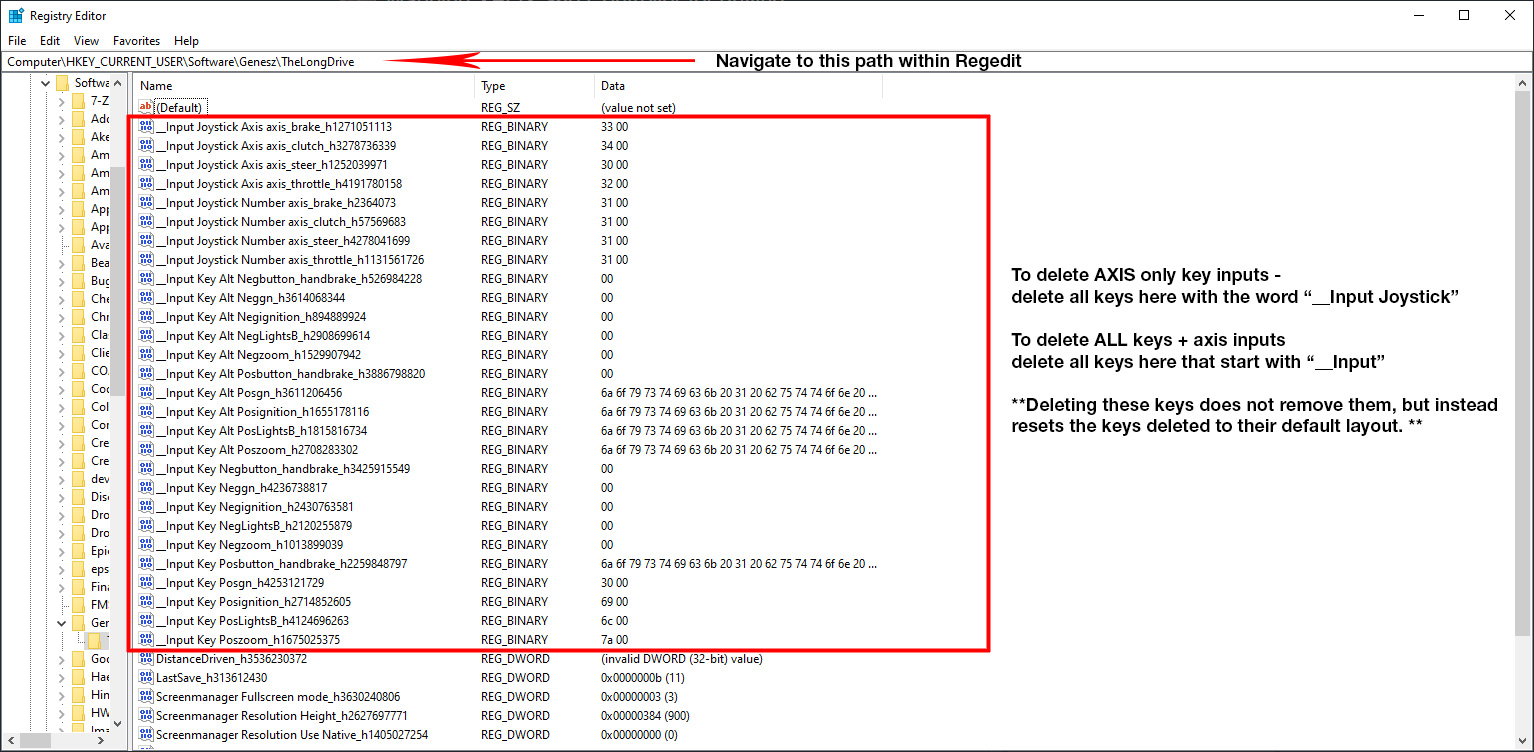
Using the image guide, highlight the selected inputs you wish to delete (making sure to select all that begin with “__Input” if you wish to reset ALL keys to their default inputs, or if you only wish to reset the joystick inputs, only select the keys that begin with “__Input Joystick”
Once you have highlighted all selected keys you wish to delete. Right click on the keys and select delete.
Regedit will ask you to confirm, select continue or okay.
You may now close regedit, and re-open The Long Drive. Navigate over to the Input tab, and you will notice all of the inputs you’ve deleted, have been reset to their defaults.
Now you may remap these keys to your preferenced input!