Overview
This can be done automatically with SteaScree[steascree.download] or manually by following the rest of the steps here.
0 Use SteaScree
With SteaScree[steascree.download], pictures from any folder can be copied into the Steam screenshots folder to be uploaded. Just close Steam first, and after using the tool go to section 3 Upload Screenshots.
1 Open the Steam Screenshots Folder
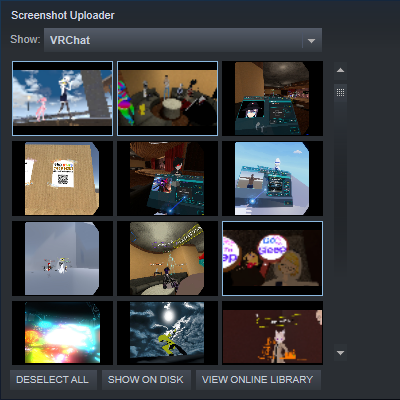
Open the Screenshot Uploader in View – Screenshots.
Choose VRChat and click Show on disk. If VRChat is not in the list, you have to take at least one screenshot in desktop or vr mode on this computer.


2 Convert Images to JPGs
Copy any images you want to upload to the folder from the previous step. The only requirement is that the images have to be JPGs. You don’t have to rename or resize them or make thumbnails for them. The images from the VR Camera are saved in the VRChat folder in your pictures.
NOTE: Because VRChat is a VR game, Steam expects the screenshots to have a stereoscopic copy, and uploading these screenshots without one will fail. A workaround is to make fake stereoscopic images by creating copies of them with a name ending in _vr.jpg
2.1 Use XnView MP to Convert The Images to JPGs
I will be using XnView MP[www.xnview.com] to batch convert the images to JPGs.
2.1.1 Select pictures to batch convert
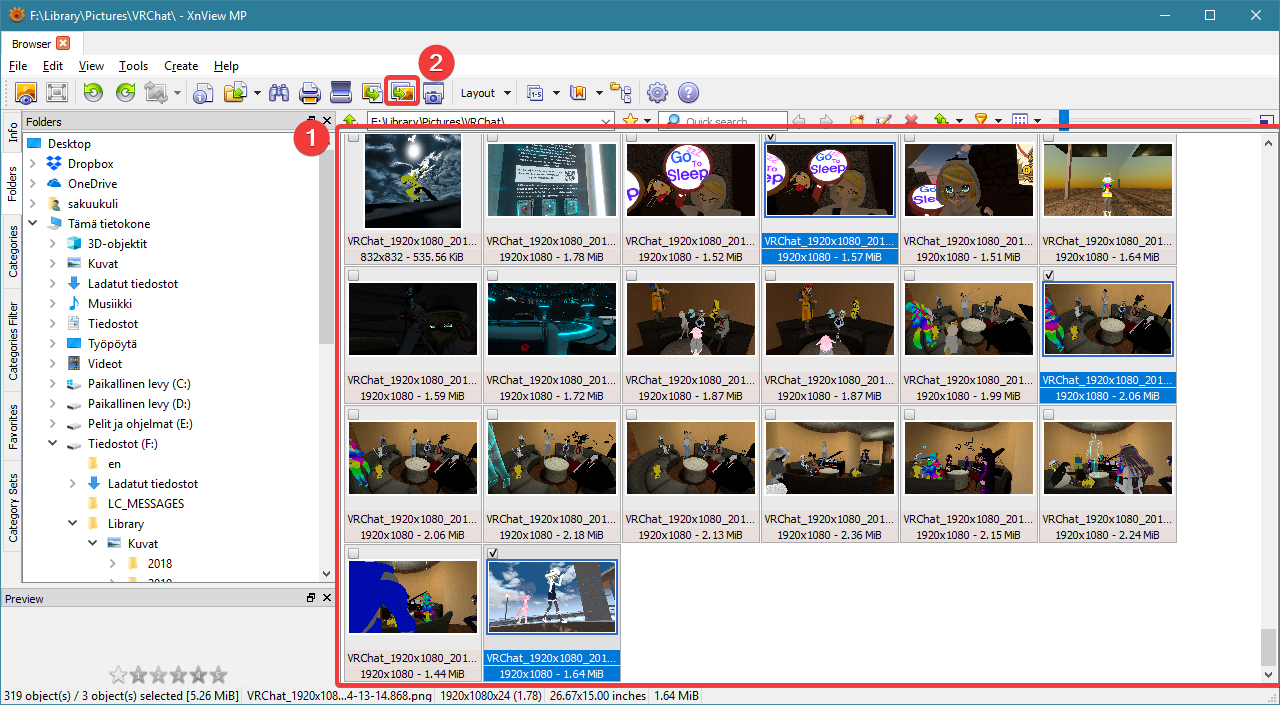
Open XnViewMP and browse to the VRChat folder in your pictures. Then select the images you want using Ctrl + click or Shift + click and press on Batch Convert.
2.1.2 Change convert settings
Copy and paste the Steam screenshots folder path to be the output folder and make sure the format is set to JPG. Then click Convert.

2.1.3 Make fake stereoscopic images
Because VRChat is a VR game, Steam expects the screenshots to have a stereoscopic copy, and uploading these screenshots will fail. A workaround is to make fake stereoscopic images by converting them again with a name ending in _vr.jpg.

3 Upload Screenshots
Now restart Steam and open the screenshot uploader again and the screenshots should appear. Shift + click or Ctrl + click to select the ones you want and then press upload. Note that the screenshots appear in the order taken.

Optional extras
By editing the screeshots.vdf in Steamuserdata<userid>760, you can add the lines Location and taggedusers to include the name of the world and tag users if you know their Steam ids.
You can type anything in the Location field, but for users you need the steamID64, which you can get from Steam ID Finder[steamidfinder.com].