Overview
A general guide for the various weapons found in the Max Payne 3 singleplayer campaign. Contains information on weapon properties, appearances, and specific tips for chapters.
Introduction
One of Max Payne 3’s biggest departures from its predecessors is the introduction of a limited arsenal, in which Max is limited to the amount of weapons he can realistically carry instead of carrying a whole armory’s worth of weapons in his jacket. This makes picking your weapons before getting into a fight a lot more important. Since I enjoy planning ahead (in video games, not in real life) and am a massive ♥♥♥♥♥♥♥ dork, I ended up writing a whole guide on weapon selection.
The guide will be sorted depending on in which chapter the weapon first appears. So the PT92 will appear under chapter 1, the Micro 9mm will appear under chapter 2, and so on.
Most of the images, as well as some tidbits of information, are taken from Maksus’ beginner’s guide, which is a far better resource if you want general gameplay tips. Go read it here: [link]
Updates:
29/8/2020: Added the FMP G3S after finally getting to take it for a spin. Also edited a few parts.
14/12/2020: Added random tips and edited some parts again.
The Rating System
Yep, this guide has a rating system.
This will rate every weapon on a 1 to 5 scale on Effective Range, Magazine Size, Rate of Fire, Damage, and General Usefulness.
Do note that these ratings align with my own opinion and playstyle, so take them with a grain of salt. Or a whole shaker’s worth, if you need to.
Effective Range
A measure of the distance within which you are likely to get kills without unnecessary ammo expenditure. This leaves out the occasional headshot from across the map with a shotgun, though distances where you are still likely to get headshots with shotguns are counted within their effective range.
- 5: Long: This weapon has near-pinpoint accuracy, and is likely to get kills from across long distances.
- 4: Medium: This weapon has fairly good accuracy. Struggles at the longest of ranges, but efficient for the majority of combat situations.
- 3: Mid-Short: This weapon has decent accuracy. You might miss shots in more wide-open areas, but not to the degree that it’s worthless outside of close quarters combat.
- 2: Short: Ineffective in wide open areas. This weapon is pretty much for close quarters combat only.
- 1: Sneezing Distance: You have to pretty much shove the weapon right into an enemy’s face to get any reliable effect.
Magazine Size
A measure of how large the magazine is. Quite simple, really.
- 5: Huge: This weapon can and will mow down whole squads of foes before having to reload.
- 4: Large: Can shoot for a decent amount of time before having to reload.
- 3: Medium: Not particularly big, but not particularly small either.
- 2: Small: Frequent reloads will be required, so you’ll want to keep locations of cover in mind and plan shootdodges more carefully.
- 1: Single shot: What it says on the tin.
Rate of Fire
A measure of how fast the weapon can fire. A high rate of fire means you will have to reload more often and burn through ammunition quicker, though it also usually corresponds with a higher damage output and a higher likelihood of getting headshots.
- 5: Very Fast: Throws lead and empties magazines faster than you can say “reload”.
- 4: Fast: A fairly high rate of fire.
- 3: Medium: An average rate of fire.
- 2: Slow-ish: A fairly low rate of fire. I don’t really have anything snarky to say about rate of fire for the most part.
- 1: Slow: A low rate of fire.
Damage
A measure of how hard the weapon hits. Enemies die from a single headshot, two if they’re armored, so this can be disregarded to some extend if you’re aiming for the head.
- 5: Very High: Can kill even armored enemies with hits to any parts of the body in one or two shots.
- 4: High: Hits quite hard, enough to down the majority of foes in a few shots.
- 3: Medium: Average damage. Nothing really much to say.
- 2: Medium-Low: Fairly low damage. Armored foes may prove to be a problem with this weapon.
- 1: Low: Low damage, will take a lot of shots to bring down heavily armored enemies. Of course, this can be circumvented by aiming for the head.
General Usefulness
A weapon’s adaptability, damage output, and ease of use all rolled into one rating.
- 5: Very Useful: Extremely adaptable and effective. I suggest you keep these in your weapon loadout whether possible.
- 4: Useful: A good choice to bring along with you, and effective in the majority of situations.
- 3: Semi-Useful: Can hold its own, but has significant weaknesses that prevent it from being versatile. You’ll have to play around these weaknesses to get the most use of it.
- 2: Niche: Useful for a specific purpose, but has huge gaping weaknesses that hinder its use in general combat situations.
- 1: Extremely Niche: Like 2, but occupies a niche where there are often far better alternatives available. Only use when forced to.
Chapter 1
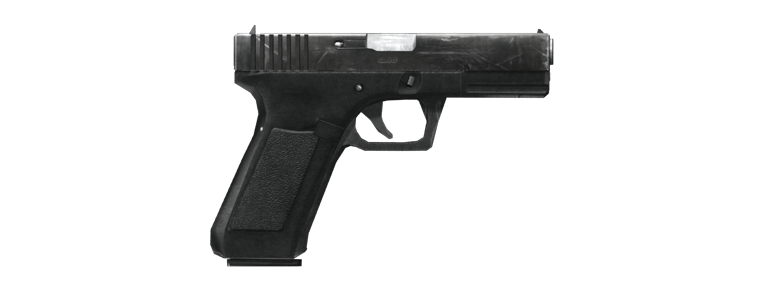
PT92

Ammo type: Pistol
Effective Range: 4
Magazine Size: 3
Rate of Fire: 3
Damage: 1
General Usefulness: 4
The PT92 is the basic handgun, with a hefty magazine size and a good rate of fire. It’s balanced out by a slight lack of stopping power, unless you go for headshots-which is where the PT92’s increased volume of fire comes in handy. Max’s signature weapon, and the most common pistol in the game early on, being the Crachá Preto’s standard pistol and also frequently seen in the hands of the Commando Sombra. As you progress, though, it becomes less and less prominent until it disappears entirely.
- In Chapter 1, the PT92 is used by almost all the enemies, and Max starts the level with one. You should have no problem finding the weapon or ammo for it here.
- In Chapter 2, Max starts with the PT92. This is the only time it appears in this chapter, though ammo can be scavenged from dropped .38 Revolvers. Max’s inventory resets after the helicopter section, so there’s no way to keep the PT92 through the whole level.
- In Chapter 3, Max again starts the level with a PT92, and it is frequently seen in the hands of enemies for the rest of the level. Several Crachá Preto members have PT92s with flashlights attached, which appear to serve no practical purpose aside from making Passos make funny comments if you point the beam at him.
- In Chapter 5, Max begins the level with a silenced, flashlight equipped PT92. It’s also used by some of the enemies in the level, though as you progress it appears less and less.
- Max acquires one by disarming a thug at the start of Chapter 9, and is the only pistol option there. The UFE notably use the PT92 in this level, instead of the 1911 that they use in all their other appearances.
- In Chapter 10, Max starts with a PT92 looted from Milo Rego, and it is also frequently used by the Crachá Preto squads hunting him and Giovanna.
- Max begins Chapter 12 with a unique, bottle-silenced PT92 with a slightly larger magazine. This is the weapon’s final appearance in the game. Pistol ammo is very scarce for the first half of the level, so you might want to consider using the 608 Bull instead.
M500
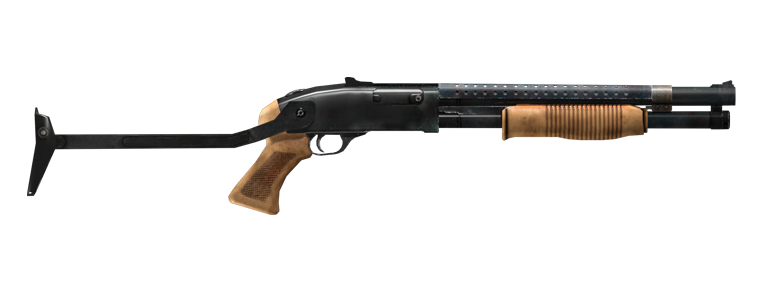
Ammo type: Shotgun
Effective Range: 2
Magazine Size: 2
Rate of Fire: 2
Damage: 4
General Usefulness: 3
A pump action shotgun. This weapon fills the same role as the pump action shotguns in the previous games, firing a spread of pellets at a fairly slow rate of fire. I’ve never been a fan of the shotguns in the Max Payne series, as they are poor at fighting multiple enemies due to their slow rate of fire and are weak at long distances. That said, the shotguns in Max Payne 3 have a much better effective range than before since enemies can be killed by a single pellet hitting their head, and ambushing enemies around corners is made much easier by the cover system.
The M500 has a fairly quick rate of fire, but suffers from a larger spread than most shotguns. Thankfully, the enemies you’ll be fighting with this weapon are quite weak, so aiming for center mass is a good way to use this weapon.
- In Chapter 1, the M500 is seen in the hands of a Commando Sombra goon after Max takes the elevator. It only comes with a few shells, so you’ll likely run out in the parking lot. Several of the enemies coming out of the van use the M500, but there’s no point in picking them up since you’re forced into using your pistols for the last two enemies in the game.
- In Chapter 2, several enemies after the helicopter section use the M500. It’s quite ineffective on the open walkway next to the sign, but the corridor after that is a decent place to get a few kills with it.
- This weapon appears for the last time in Chapter 5, both occasionally used by enemies and found lying around the environment. This level is also where ammo bags start appearing for the first time, so there should be no shortage of shells for most of the level. Of course, you should ditch this weapon for something with a longer reach once you reach the docks, due to the prevalence of long-range combat there.
Ruger Mini-30

Ammo type: Unique
Effective Range: 4
Magazine Size: 2
Rate of Fire: 3
Damage: 4
General Usefulness: 3
A precise semiautomatic rifle, highly effective at long range while still maintaining a decent enough rate of fire for close range combat if needed. Its main downside is it’s unique ammo type, which prevents you from using it for extended periods of time. This is a fairly uncommon weapon in the game, mostly either found lying around the environment or used by enemies in a sniping role.
- In Chapter 1, a Commando Sombra thug bursts through a door with this weapon in hand after the elevator ride. If this is your first time playing the game, the game will take this opportunity to demonstrate the “bullet-cam” feature. The Mini-30 is a solid choice for the parking lot battle after this, as it comes with enough ammo to last for the whole section if you make your shots count and hits far harder than the PT92.
- This weapon is used in the helicopter on-rails section in Chapter 2, and is the first weapon you encounter with a laser sight. Turn it off: the laser bouncing around doesn’t help you much, and you’ll be able to aim much better with the normal reticle.
- In Chapter 7, a Mini-30 with a red dot scope is provided in a room with an ammo pack in it. It’s good for picking off the goons firing at you, but it’s not really necessary as most of your weapons are accurate enough for the job.
- Mini-30s equipped with laser sights are used by a few Crachá Preto snipers on a rooftop in Chapter 10. With a bit of luck, they will drop onto the ground on the rightmost corner of the gas station, ripe for the picking.
- Several UFE officers use this weapon in Chapter 14, one with a laser sight. One is also available on the train.
Chapter 2
.38 Revolver

Ammo type: Pistol
Effective Range: 4
Magazine Size: 2
Rate of Fire: 2
Damage: 2
General Usefulness: 1
A revolver commonly used by the Commando Sombra and other gangs in Nova Esperança. This is, in my opinion, the worst pistol in the game: while it has better stopping power than the PT92, it’s still not particularly spectacular, and as a trade-off it only holds 6 rounds in its cylinder, and has to reload those 6 rounds one by one like a shotgun unless dual wielded. There are far better options if you’re looking for more damage in your pistols.
- The .38 Revolver first appears in the hands of the Commando Sombra thugs attacking the nightclub in Chapter 2. Even if you’re not a fan of it like I am, it’s your only pistol option after the helicopter section, so you might as well have it pull its weight.
- Used quite often by the gangs in Chapter 7. Still not great here. The 1911 is a much better option.
- Appears for the last time in Chapter 13, next to a dead gangster in the stairwell full of tear gas. There’s no real reason to pick it up, unless you want to go out of your way to cap Bachmeyer with the crappiest pistol in the game.
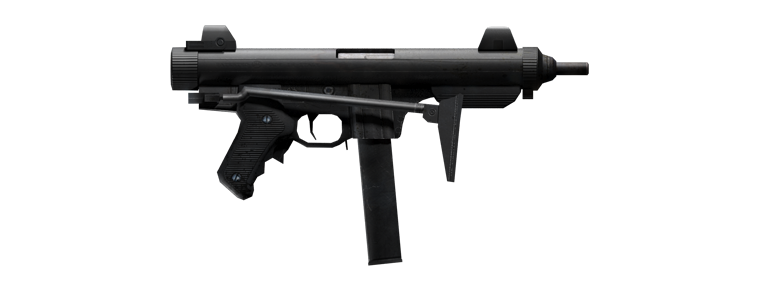
Micro 9mm

Ammo type: SMG
Effective Range: 3
Magazine Size: 4
Rate of Fire: 5
Damage: 1
General Usefulness: 5
The most common submachine gun in the game, used by every enemy faction in São Paulo. This weapon has decent accuracy and stopping power, a good rate of fire, a generous magazine size, and a hefty ammo reserve. Highly adaptable, this weapon will be your best friend wherever you find it.
• The Micro 9mm first appears in Chapter 2, frequently used by the Commando Sombra throughout the level.
• The Micro 9mm appears in the hands of both the Commando Sombra and the Crachá Preto in Chapter 3. Do note that SMGs and machine pistols share an ammo pool, which might come into consideration if you decide to bring an MPK along as well.
• In Chapter 5, the Micro 9mm first appears next to the first ammo bag in the level (on normal difficulty-when playing through on Hard it didn’t spawn for me). Predictably, it’s also used by many of the Commando Sombra.
• Max starts with this weapon in Chapter 6, and it’s also frequently dropped by enemies. It shares an ammo pool with the Auto 9mm, and given how similar the two weapons perform, selection is very much up to personal preference.
• Used by at least half of the gang members that you face in Chapter 7. There’s so much of it I’d wager that you could dual wield these for the entire level without ever running out of ammo.
• The Crachá Preto brings this weapon out in force in Chapter 10. It’s quite handy for the mostly indoor combat you will be going through.
• In Chapter 13, this weapon is used by three UFE officers that bust through the windows in the forensics lab, two with laser sights and one without. If you decide to not pick it up there, it also drops from an officer right before the fight with Bachmeyer. It’s handy for the cart sequence right after the lab, and as a backup if you run out of ammo for the assault rifles.
Chapter 3
M4 Super 90

Ammo type: Shotgun
Effective Range: 2
Magazine Size: 2
Rate of Fire: 3
Damage: 4
General Usefulness: 3
What the Micro 9mm is to SMGs, the M4 Super 90 is to shotguns. It is used by damn well near every enemy faction in the game, and appears so frequently you’ll be begging for more variety in your shotgunnery by the game’s mid-way point. For a weapon as common as it is, though, it’s not too bad: decent magazine size, good rate of fire, a solid wallop at close range, and a fairly tight spread for a shotgun.
- This weapon first appears in Chapter 3, used by both the Commando Sombra and the Crachá Preto, occasionally with flashlights in the case of the latter. It’s quite effective in the indoor areas, though its effectiveness drops heavily in the stands.
- Several DeMarco mobsters use this weapon in Chapter 4. It’s not too bad of a choice, given how much of the combat in this chapter is at a fairly short range, though it’s massively outpaced later in the chapter by the AK-47.
- Used by the Crachá Preto in Chapter 6. I don’t really recommend it for this level, since the offices are full of clutter that get in the way of the spread.
- Chapter 8 is shotgun city. Many of the mobsters use shotguns, Passos uses a shotgun, might as well join the party. As the only long arm option available for most of the level, this weapon is handy for blind-firing over or around cover, particularly during the sniper section.
- Appears in Chapter 10, used by many of the Crachá Preto. The prevalence of close quarters combat in this level makes this weapon particularly useful here, especially since the other long arm on offer, the FAL, does suffer a bit at such close ranges.
- Used by the UFE in Chapter 13, in its final appearance. Most UFE officers wear heavy body armor and helmets, making headshots more important than ever and making shotguns a very poor choice against them.
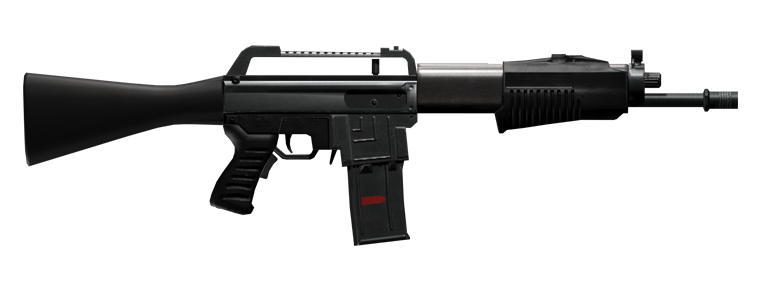
MPK
Ammo type: SMG
Effective Range: 4
Magazine Size: 3
Rate of Fire: 4
Damage: 2
General Usefulness: 4
A fairly common submachine gun, this weapon has good accuracy, good damage, and a decent rate of fire. The downside? A small magazine size that will result in you reloading very frequently, often at inconvenient moments. When it comes to a solid mid-range performer, though, this gun is never a bad choice.
- First appears in Chapter 3, primarily by the Crachá Preto. (The only Commando Sombra member to get his hands on one meets quite an unpleasant end at the muzzle of a Crachá Preto PT92.) A good choice for the wide open areas in the stands, though the small magazine size combined with a lack of cover means you’re going to have to make your shots count.
- Several DeMarco goons drop this weapon after the collapsing water tower section in Chapter 4. (They use AK-47s in the cutscene before the section and during the section itself. This game has a habit of transmogrifying guns for no reason.) A constant source of ammo from dropped M-10s makes it a viable alternative to the AK-47 that’s dropped by enemies later in the level.
- Two MPKs equipped with red dot scopes appear on the back of pickup trucks along with ammo bags and painkillers in Chapter 11. They’re quite handy for sniping enemies off the top of the tower.
- In Chapter 12, several enemies use this weapon on the pool deck and in the bar area after it. The prevalence of ammo packs in the following section of the level mean you can use pretty much any weapon you want, so feel free to bring one along when confronting Dr. Fischer.
- Used by the UFE in Chapter 13 near the end of the level. The low magazine size puts it at a disadvantage when compared to the assault rifles, SAF .40, and Micro 9mm, especially since the UFE typically take a lot more bullets to bring down without headshots.
- Appears again in Chapter 14, used by the UFE in the tram station.
M82A1

Ammo type: Unique
Effective Range: 5
Magazine Size: 2
Rate of Fire: 2
Damage: 4
General Usefulness: 3
A hard-hitting anti-materiel rifle, favored by the Crachá Preto’s snipers. While it is very large and unwieldy to carry around, the sheer accuracy and damage it offers is hard to resist.
- First appears in Chapter 3, used by several snipers over the course of the level. Max gets to use one for a sniping section, and it doesn’t disappoint, dropping any foe with one hit to any body part. (Makes him surviving a shot to the arm even more impressive.)
- Appears again, and for the last time, in Chapter 11, where Max grabs it to take down a few snipers on a faraway building. Nothing’s stopping you from taking it along with you after that section. It’s particularly handy for dropping the heavy at the end of the level, as all it takes is two shots: one to knock off his helmet, and a second one to kill him. Oddly, though, its damage is heavily reduced compared to its previous appearance, taking up to three shots to the torso to kill an enemy with regular body armor.
Chapter 4
1911

Ammo type: Pistol
Effective Range: 4
Magazine Size: 2
Rate of Fire: 3
Damage: 3
General Usefulness: 4
The gun that killed Tony DeMarco and forced Max out of the United States. That’s quite a pedigree. And it certainly lives up to it- excellent accuracy and damage combined with a good rate of fire more than make up for its low magazine size. Highly popular with crook and cop alike, with the UFE adopting it as their standard sidearm.
- First appears in Chapter 4 as the gun used by Tony to threaten Max. Appropriately enough it’s the same gun that kills him. It’s used by many of the DeMarco mobsters for the rest of the level.
- Several Crachá Preto goons use the 1911 at the end of Chapter 6 during the escape from the burning office. This is the only time they’re ever seen using this weapon.
- Max starts with this weapon in Chapter 7, courtesy of Da Silva. Definitely a better option than the .38 Revolver, and can pick off those faraway goons that the other weapons have trouble hitting.
- The starting weapon in Chapter 8, and predictably used by a lot of the mobsters you’ll be facing. M-10 ammo is a little scarcer in this chapter compared to Chapter 4, so you’ll want to make good use of it.
- Heavily used by the UFE in Chapter 13, and the weapon that Max starts off with. Highly effective when dual-wielded due to its accuracy and power.
- The UFE uses this pistol again in Chapter 14, but to a lesser degree than the previous chapter. Many pistol-wielding officers use the Auto 9mm or 608 Bull instead.
M-10

Ammo type: SMG
Effective Range: 3
Magazine Size: 4
Rate of Fire: 5
Damage: 1
General Usefulness: 5
The Micro 9mm’s American cousin. According to the multiplayer stats, this has slightly higher accuracy, but the difference is slight enough that you don’t need to alter your playstyle in any way.
- First appears in the hands of the DeMarco thugs sent to hunt Max down in his apartment in Chapter 4. Many mobsters use this weapon after this point, ensuring a constant source of ammo for both it and the MPK.
- A prevalent weapon in Chapter 8. The Mafia sure does love their machine pistols. Ammo is a little harder to come by compared to Chapter 4, so I suggest using the 1911 occasionally to conserve ammo.
- Max picks up the only M-10 to exist in Brazil in Chapter 10’s bus station offices and uses it for the following on-rails section. It has an infinite reserve of magazines, so fire away.
AK-47
Ammo type: Assault Rifle
Effective Range: 3
Magazine Size: 4
Rate of Fire: 4
Damage: 3
General Usefulness: 5
The most numerous firearm in the world, and for good reason. The AK-47 performs the same role as it did in Max Payne 2, being a well-rounded weapon in the fire rate, damage, and magazine size department at the cost of being less accurate than other assault rifles.
- First used by the DeMarcos in Chapter 4, inside the burnt-out apartment building after the water tower scene. The close quarters combat in this level essentially make the AK’s accuracy issues non-existent.
- The Commando Sombra use this in Chapter 5, though they eventually switch them out for FALs. The AK shines in the mostly short to medium range combat in the first part of the level, though once you get to the docks I recommend you swap it out for a FAL, as the AK has trouble hitting faraway enemies.
- The AK-47 is perfect for Chapter 7’s close to mid quarters favela combat, and evidently the local gangs think likewise. This is also the last time you’ll be seeing this weapon, so feel free to give it a rough farewell.
Chapter 5
608 Bull

Ammo type: Pistol
Effective Range: 4
Magazine Size: 2
Rate of Fire: 2
Damage: 3
General Usefulness: 4
The .38 Revolver, but better. Accurate, hits like a truck, and holds a decent amount of ammunition in its cylinder. Like the .38, it reloads round by round unless dual wielded.
- The 608 Bull first appears in Chapter 5, used by one of the Commando Sombra in the first mandatory combat section in the level. As you progress through the level, you’ll see less of the PT92 and more of this.
- In Chapter 11, this is the primary pistol used by the AUP goons on the yacht. Dual-wielding machine pistols burns through ammo fast, so bring a 608 along to make sure you don’t run out in the middle of a fight. Dual-wielding this plus the Auto 9mm in semi-auto is the best way to clear the tower section due to their accuracy.
- Used by the occasional enemy in Chapter 12. Pistol ammo is scarce in the first half of the level, so pick your shots carefully and use other weapons whether possible. An important note: if Max auto-equips this weapon while playing the piano and the cylinder isn’t full, the game will smash together the reloading and piano playing animations, creating a horrific monstrosity. Equip the PT92 or ensure that the 608 is fully loaded before playing the piano to avoid this.
- Appears on a crate in the UFE arsenal next to the evidence room in Chapter 13. A viable alternative to the 1911, if you don’t mind the slower reload when used singly. Can be combined with the .38 Revolver in the stairwell later for twin wheelguns, if that’s what you fancy.
- Used by the UFE in Chapter 14. Since you’ll be lugging around a rifle for most of the level, you might want to use the 1911 instead, as the reload speed can make or break a gunfight.
FAL

Ammo type: Assault Rifle
Effective Range: 4
Magazine Size: 3
Rate of Fire: 3
Damage: 3
General Usefulness: 4
A big, bulky battle rifle. The FAL is highly accurate and deals great damage per shot, but suffers from a low magazine capacity, heavy recoil, and an average rate of fire. Ideal for long range when fired in bursts, though it’s also no slouch at close range.
- The FAL first appears lying against a crate next to an ammo bag in Chapter 5. From this point onwards, all assault rifle wielding enemies switch from the AK-47 to the FAL, so if you decide to not pick it up here there’s plenty of opportunities to change your mind. One equipped with a red dot scope is dropped by the first enemy you meet on the docks, which comes in handy for the long-range combat you’re about to encounter.
- Used by the UFE in Chapter 9. Since the combat in the favelas is mostly close to mid-range, the G6 is preferable for its bigger magazine and slightly higher ROF.
- The standard rifle for the Crachá Preto in Chapter 10. Since much of the combat is in close quarters, using the M4 is arguably a better idea, though the FAL is still capable.
- Frequently used by the AUP in Chapter 11 from the yacht’s top deck onwards. Its accuracy is particularly handy in the tower section.
- Appears for the final time in the hands of the UFE for the first leg of Chapter 13, before they switch to more practical rifles later on. The FAL is good at scoring headshots, but the low rate of fire and small magazine put it at a pretty heavy disadvantage, especially against multiple enemies.
DE .50

Ammo type: Unique
Effective Range: 4
Magazine Size: 2
Rate of Fire: 3
Damage: 4
General Usefulness: 4
Super strong. Super shiny. Everyone loves the Deagle…except for the fact that it hardly ever shows up, and when it does it usually has only a few magazines’ worth of ammunition. Still, when you do get your hands on it, it doesn’t disappoint-it’s as powerful, accurate, and fancy as you expect any Deagle worth its salt would be.
- The DE .50 first appears in Chapter 5, on a table inside a shack next to the bridge leading to the docks. It only comes with 3 magazines worth of ammo, so try not to miss. If you don’t pick up the gun here, or drop it during the next section, Max will automatically have it in the scripted bullet-time section at the end of the level.
- The AUP has so much money that they don’t know what to do with it, so they’ve decided to make the DE .50 one of their standard pistols. As a result, you’ll be seeing plenty of it in Chapter 11. First obtained off an unfortunate goon on a zipline, who is promptly riddled with bullets by his comrades while you pick them off in a scripted section. This is the only part of the game where you’ll be able to dual-wield this weapon, and ammunition is plentiful in the visitors’ center, so feel free to go wild.
- One of Max’s two starting weapons in Chapter 14. Again, it only comes with 3 magazines worth of ammunition that cannot be replenished at any moment in the level. You can either use it up in the luggage handling area and ditch it for a different pistol, or hang onto it until the end of the level and execute Becker with it.
LMG .30

Ammo type: Machine Gun
Effective Range: 4
Magazine Size: 5
Rate of Fire: 4
Damage: 3
General Usefulness: 3
A massive beast of a gun, this will tear apart any foe you point it at-even if said foes are coming in speedboats or pickup trucks. Shame you hardly ever get your hands on it, and even if you do it usually has barely any ammo in it. Most often seen in the hands of “heavies”, enemies with extremely thick body armor that serve as minibosses.
- The LMG .30 first appears in Chapter 5 during the boat on-rails section, and what a way to make an entrance. Chapter 5 has the highest body count out of all the levels in the game, and at least half of those are thanks to this weapon. It has infinite ammunition, but recoil gets heavier and heavier as it overheats, so try to fire in short bursts for maximum accuracy and bullet time conservation.
- The LMG .30 appears again in Chapter 6 in the hands of the first heavy you encounter in the game. There’s no point in picking it up: all the other enemies in the area are likely dead once you kill him and you lose all your weapons after the next cutscene anyways.
- The first non-heavy enemy that uses this weapon is encountered in Chapter 12 on the rooftop, and is quite spectacularly dispatched by an explosion. It shares ammo with the RPD, so if you’ve been using that weapon, feel free to switch to this one and use it against the remaining Crachá Preto goons.
- In Chapter 13, this weapon is first used by the heavy that you face off against in the UFE offices. Two regular officers using this weapon later serve as Bachmeyer’s final backup.
Chapter 6
Auto 9mm
Ammo type: SMG
Effective Range:3
Magazine Size: 4
Rate of Fire: 5
Damage: 1
General Usefulness: 4
A full auto pistol! Well, in practical terms, it’s for the most part just like any of the other one-handed SMGs in the game. It has the ability to switch to semi-auto mode, which gives you accuracy equivalent to the regular pistols while sacrificing volume of fire – handy in situations regarding greater precision. Is slightly less precise and damaging than the Micro 9mm or the M-10, but balances it out by a slightly bigger magazine and a higher rate of fire. Overall, picking one over the other is really just up to preference.
- First appears in Chapter 6, used by the Crachá Preto in the attack on the Fábricas Branco HQ. As stated in the Micro 9mm’s entry, picking this over that is just personal preference. The Auto 9mm has one very specific edge over the Micro, though – against the heavy at the ground floor lobby, the greater accuracy in semi-auto mode makes it easier to knock his helmet off and kill him.
- Max’s starting weapon in Chapter 11. As with the Micro 9mm, picking this over the M972 is mostly a matter of preference.
- One of Max’s two starting weapons in Chapter 14, and used by the UFE throughout the level. The large magazine and high rate of fire makes it great for knocking off helmets and rattling off headshots, even at mid-range.
MD-97L

Ammo type: Assault Rifle
Effective Range: 4
Magazine Size: 4
Rate of Fire: 4
Damage: 2
General Usefulness: 4
Basically a FAL, but with a shorter barrel, a different magazine, and rechambered in 5.56. Those Brazilians sure do love their FALs: their most recent military rifle, the IA2, is basically a heavily modified tacticool FAL in 5.56. This is probably the most common assault rifle in the game, used quite frequently by both the Crachá Preto and the UFE. It’s also awfully plain, so don’t expect many funny comments.
- First appears in Chapter 6. It’s the only assault rifle on offer, and it beats the M4 Super 90, so I’m not complaining.
- Max uses one for the defense section at the end of Chapter 10. Like the M-10 before it, it has infinite magazines.
- In Chapter 12, it is seen in the hands of many of the Crachá Preto guards. It does its job well, but this level has the RPD in it. Probably not difficult to guess which one I prefer.
- Used by the UFE in Chapter 13 in the later half of the level. Again, it does its job well, but this level has the G6 in it.
- Used again by the UFE in Chapter 14, a few equipped with laser sights in the baggage area. Here’s a fun fact: despite the trailers describing the MD-97L as “compact and lightweight”, it’s actually abnormally heavy for a 5.56 rifle due to being based on the FAL. I thought that was interesting.
Chapter 7
Sawed Off

Ammo type: Unique (According to other guides I’ve read, this uses a unique ammo type. Not that you’d notice since it’s the only shotgun on offer in its chapter.)
Effective Range: 1
Magazine Size: 1 (yes, I know it holds two shots, but it’s low enough that I’m giving it a 1)
Rate of Fire: 3
Damage: 4
General Usefulness: 2
Say hello to the first one-chapter wonder! The sawed-off shotgun is pretty much unchanged from the previous games, firing two quick blasts of buckshot with a wide spread. I wasn’t a fan of it then, and I’m not a fan of it now. You have to get within sneezing distance to get reliable one shot kills with it, and frequent reloads makes you a sitting duck if whatever you’re shooting at is not dead in 2 shots. Still, you can dual wield these, which is a first for the series.
- Only appears in Chapter 7, first acquired from the bartender at the strip club. (Shame, he seemed like a nice guy.) It’s also used by the occasional gangster, sometimes bursting out of doors to get a sneaky shot off on Max. At one point there’s two lying next to each other on a shelf in a side room, practically screaming, “Dual wield us. Please.”
Chapter 8
Rotary Grenade Launcher

Ammo type: Unique
Effective Range: 3
Magazine Size: 2
Rate of Fire: 2
Damage: 5
General Usefulness: 2
A revolver-style grenade launcher. Fires explosive projectiles that instakill pretty much every enemy caught in their blast radius, but suffer from a heavy arc, self-damage, horrendous accuracy while moving, and a slow projectile speed. Stand still or use cover to prevent the projectiles from scattering all over the place. Do note that if you get Last Man Standing’d while using this weapon, you’re pretty much screwed-the projectiles are far too slow to get anything done while in slow motion.
- First appears in the hands of a “contract buying scumbag” in Chapter 8. He’s pretty easy to take down (either by just shooting him, or blowing him up by shooting one of his own grenades), and once you kill his friends, you’re free to either use the remaining ammunition within it to clear the graveyard up the stairs or blow up the group of enemies next to the cars after the next cutscene.
- One can be found lying on a cleaning cart in Chapter 12. If you really want to use it, it’s kinda okay for clearing the group of enemies before the locked door, but the MD-97L does that just as well without the risk of one of your grenades bouncing right back into you and killing you.
- In Chapter 13, it is provided next to an ammo bag in the parking lot with the APC. Since the area you pick it up in is wide open and getting killed means you have to destroy the APC again, using it there is not a good idea. The best way to use this weapon is to carry it with you after all the enemies in the area are dead. The ammo bags in the area provide you with a maximum of 16 grenades, and you can use the 1911 on lone enemies, saving the grenade launcher for groups. Moments where it shines are in the elevator lobby, where you can kill all the enemies in two shots while they’re still bunched up in the elevators, and in the offices, where it can kill the heavy in two direct hits.
- Used by Becker in Chapter 14, and appropriated by Max upon his death. It is then used for the final on-rails section in the game as Max and Da Silva pursue Victor’s jet, with a hefty 100 rounds of ammunition in reserve. A single grenade is enough to wreck a jeep or a helicopter-the primary challenge is getting the grenades to hit their mark in the first place.
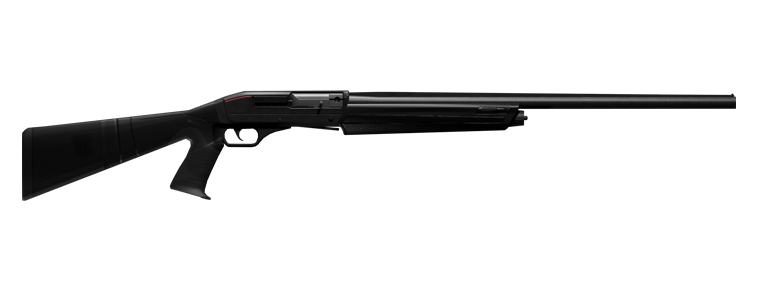
SPAS-15
Ammo type: Shotgun
Effective Range: 2
Magazine Size: 2
Rate of Fire: 3
Damage: 4
General Usefulness: 3
The ugly duckling of the auto shotgun family. The SPAS-15 has a large magazine size and reloads much faster than the other shotguns in the game due to it using a detachable magazine, but it suffers from having a fairly large spread.
- This weapon first appears in Chapter 8, used by a DeMarco hitman on top of a balcony. Once you go up the stairs and kill him, you’re free to take it and use it on his friends.
- Used by the AUP in Chapter 11, from the yacht’s top deck onwards. It’s a poor choice for the tower segment, but strong in the visitors’ center after it, so once the tower’s cleared of enemies you might want to pick up a SPAS-15 and backtrack a bit to one of the ammo bags before proceeding-while you’ll lose the gun after the zipline, you won’t lose the ammo you have in reserve, and you can just pick up a fresh gun from a dead goon.
- Found leaning against a trolley after the elevator shaft in Chapter 12, where it is best used to dispatch the three enemies right outside the door, saving valuable pistol ammo for the enemies who come from the other side of the pool.
- Used by several UFE officers on the airport trams in Chapter 14. Like the M4, this is quite weak against the heavily armored UFE, even more so due to the wider spread.
Chapter 9
G6 Commando

Ammo type: Assault Rifle
Effective Range: 4
Magazine Size: 4
Rate of Fire:4
Damage: 3
General Usefulness: 5
The UFE’s standard combat rifle. Probably the best all-round assault rifle in the game, with a bigger magazine and better fire rate than the FAL, better damage than the MD-97L, and better accuracy than the AK-47.
- First obtained in Chapter 9, next to a dead gangster behind a staircase. If not picked up here, it can be obtained from one of the many UFE officers that you will run into over the course of the level.
- In Chapter 13, the G6 first appears in the hands of one of the UFE officers busting through the forensic lab windows, and appears frequently for the rest of the level. Bachmeyer’s weapon of choice.
- Probably the best weapon to use in Chapter 14, due to its high accuracy and good damage. Can be looted from one of the many, many UFE goons you will encounter over the course of the level.
M972
Ammo type: SMG
Effective Range: 3
Magazine Size: 4
Rate of Fire: 5
Damage: 1
General Usefulness: 4
The submachine gun with an identity crisis. It’s a full-sized SMG! No wait, it’s a machine pistol! This weapon is not that different from the other one-handed SMGs, except Max holds it by the empty space between the grip and the magazine in cutscenes, which really irks me. I tend to avoid it as a result.
- Appears for the first time in Chapter 9, used by the UFE officers raiding Nova Esperança. While the cutscene thing grinds my gears, it’s also the only SMG option in this level, so you might as well use it to its fullest extent. Great for shooting helicopters out of the sky with their own rockets.
- The standard SMG of the AUP in Chapter 11. Like I said in the Auto 9mm’s section, selection between the two machine pistols on offer is up to preference. I prefer the Auto since it doesn’t have the really annoying issue with the grip.
Chapter 12
RPD

Ammo type: Machine Gun
Effective Range: 3
Magazine Size: 5
Rate of Fire: 4
Damage: 3
General Usefulness: 5
Let us welcome another weapon to the one-chapter wonder club! The RPD has a generous magazine size along with good damage and fire rate, with accuracy roughly equal to the AK. Probably my favorite gun in the game due to it being powerful in pretty much any situation.
- Only appears in Chapter 12, first by two Crachá Preto goons near a collapsed section of the hotel. You lose it after the elevator shaft climb, but run into it again in the room where Max picks up the C4, along with an ammo bag. This, along with a second ammo bag at the sniping section, will give you enough RPD ammo to last the rest of the level.
Super Sport
Ammo type: Shotgun
Effective Range: 3
Magazine Size: 2
Rate of Fire: 3
Damage: 4
General Usefulness: 3
Yet another one-chapter wonder. The Super Sport has a higher rate of fire and a tighter spread compared to other shotguns, but has a smaller magazine capacity. In my opinion, the increased precision is well worth the reduced magazine capacity since it makes getting those all-important headshots much easier.
- Like the RPD, only appears in Chapter 12. First appears with the RPD near the collapse, but it only comes with a few shells. Later on, after planting the first bunch of C4, a Crachá Preto member will come in with this weapon equipped, where you will be able to kill him, pick it up, grab ammo at the ammo bag at the sniping section, and use it for the rest of the level if you feel like it. I have a feeling that this weapon is the reason why so few people have the A Few Hundred Bullets Back achievement, since you really do have to go out of your way to get kills with it.
Chapter 13
SAF .40

Ammo type: SMG
Effective Range: 4
Magazine Size: 4
Rate of Fire: 4
Damage: 2
General Usefulness: 4
The game’s later levels are pretty heavy on the one-chapter wonders, and this is one of them. One of the UFE’s primary submachine guns, this weapon is quite well balanced overall, though damage-wise it loses out to the assault rifles.
- Used by the very first enemy you encounter in Chapter 13. It doesn’t show up for a while after that, until a squad of UFE decked out with gas masks and laser-sighted SAF .40s fill a lift lobby with smoke. It sees frequent use by the UFE after that.
LAW

Ammo type: Unique (this weapon is physically incapable of being reloaded, but whatever)
Effective Range: 4
Magazine Size: 1
Rate of Fire: N/A
Damage: 5
General Usefulness: 2
A single-use disposable rocket launcher, used for taking out armored vehicles-and armored humans, if necessary. This weapon packs one hell of a punch, but only holds 1 round before having to be discarded.
- Only appears in the APC parking lot in Chapter 13. Do note that the APC doesn’t count towards the A Few Hundred Bullets Back achievement-you have to kill a human enemy. Luckily, the parking lot has 2 unused LAWs available, one to destroy the APC, and one to kill one of the UFE cops coming though the gate under it. Alternatively, you can carry the spare LAW throughout the level and use it on the heavy in the office. The rocket will do a ton of damage and knock him down, and once he stands back up a few pistol shots to the head will be enough to finish him off. If you’re comfortable with the grenade launcher’s arc, though, that’s a much better option as it can carry much more ammo.
FMP G3S

Effective Range: 5
Magazine Size: 3
Rate of Fire: 3
Damage: 4
General Usefulness: 2
An incredibly elusive marksman’s rifle. This weapon is much like the Mini-30 mechanically, being a precise semiautomatic rifle with a decent rate of fire. Comes equipped with a scope.
- Only appears in the training course, used by two snipers on high-up positions. With a little bit of luck, the sniper on the shipping container will drop his gun onto the ground, where it can be picked up. You only get two magazines’ worth of ammo for it and the scope makes usage in the tight confines of the UFE headquarters rather awkward, so it’s really a weapon that you use once for the novelty of it. Thankfully, you don’t need to get a kill with this weapon for the A Few Hundred Bullets Back achievement.
Random Tips
- Rifles and other long guns take longer to swing around than pistols. This usually isn’t important, but if you intend to turn a lot while shootdodging, a long gun might be too slow to get shots off before you hit the ground. Switch to a pistol first if you intend to do such a shootdodge.
- Several aspects of the dual-wield system are based on which weapon is in Max’s right hand. Blindfiring is always done with the right-hand weapon, and switching away from dual-wield will always favor the right-hand gun, regardless of which weapon you actually selected. Cutscenes also favor the right-handed weapon.
- If you want to choose which weapon goes in which hand, select the weapon you want to be in the right hand singly, then press the dual-wield button to equip the other weapon in Max’s left hand. This can be handy if you want to switch back to a preferred single weapon quickly or if you have cutscene OCD.
- All semi-auto pistols are near-pinpoint accurate, making them the best choice if you want consistent headshots or if you’re engaging enemies at longer ranges. You can achieve similar accuracy with more accurate automatics by firing in short bursts.
Conclusion
So! You’ve reached the end of my too-long-for-its-own-good guide and hopefully learned something new along the way. Now you are free to go back to your normal life.
Or you can go back to Max Payne 3 and apply what you’ve learned here. That works too.
If you have any issues with what I’ve written here, or have any special strategies that I haven’t used, feel free to tell me in the comments. Toodles!