Overview
A simple guide designed to explain the types of mech roles (strikers, cavalry, general assault etc.), their individual strengths and weaknesses, and examples of chassis that fall within their bounds. Brief information is also provided on the varying ranges of movement, weaponry, and heat to better familiarize commanders with mech capabilities, and how they stack up against each other.
Disclosure
- Note some mechs in this guide may be type casted as another role when compared to the ingame description.
- This guide does not include the defacto strategies to use with each mech, but rather a general explanation or suggestion based on their capabilities.
- Every mech mentioned here is done so in regard to its stock loadout. This guide does not cover customization.
- Only a few common examples of mechs are listed for each classification. Not every mech will appear in this guide.
Movement Overview
Movement is an important aspect of Battletech, and is used to determine how far a mech can either Walk, Run, or Jump. Within this section I will describe broad movement ranges, and how they stack up against each other.
Trudging
Unbearably slow, mechs in this category might as well be crawling towards the opposition. Typically Assault mechs fall into this range.
- 2 Walk / 3 Run ~ 22 / 32 kph
- 3 Walk / 5 Run ~ 32 / 54 kph
Slow
Not abysmal, but not great either. Mechs with this speed often need to rely on medium long to long range weapons to reliably engage the enemy.
- 4 Walk / 6 Run ~ 43 / 65 kph
Average
A decent pace, mechs in this category can function in most situations without issues.
- 5 Walk / 8 Run ~ 54 / 85 kph
Fast
A good clip. Mechs start getting to the point where they are moving faster than a good majority of the cast. Often costs quite a bit in tonnage to get here, depending on how heavy the mech is
- 6 Walk / 9 Run ~ 65 / 97 kph
Very Fast
A great speed. Typically only Light mechs can reach these bands, but there are a few exceptions (that cost the mech dearly to reach)
- 7 Walk / 11 Run ~ 76 / 119 kph
Sprinting
Top of the charts. You will most certainly be outrunning anything you meet beyond 30 tons.
- 8 Walk / 12 Run ~ 85 / 130 kph
Plaid speed
They’ve gone into plaid! Don’t do it, just don’t. All jokes aside, at this point you will only be seeing vehicles reach these speeds.
- 9 / 14 + ~ 97 / 150 kph
Weaponry Overview
When engaging enemies on the battlefield, it will be important to be mindful of their equipment. This short section will familiarize you with the general capabilities of weaponry, and how to position yourself to either make use of or avoid them.
Close Quarters
Essentially the soldier’s knife / side arm. These weapons are typically only used in dire situations, when you have nothing better than your mech’s fist actuators. Like a knife however, they have the added benefit of being the only weapons in the game that can be used in tandem with melee. You’ll rarely find on opportunity to use these weapons, but they can be helpful in a pinch or with niche builds (Firestarter)
- Small Lasers
- Machine Guns
- Flame Throwers
Assault
The Shotgun… well howitzer. This weapon is placed in its own category due to its sheer amount of damage it can inflict at close quarters, and its massive weight / bulk. You won’t typically see mechs mounting it in open conflicts, but when you do, make sure you stay far away.
- AC-20
Short Medium Ranged
The Sub Machine Gun or Carbine as it were. These weapons are useful when fired in large numbers, being very effective for their damage to weight ratios. However, they tend to spread damage all across an enemy’s chassis, and their usefulness falls off quickly the further away a target is.
- Short Ranged Missiles (SRMs) 2/4/6
- Medium Lasers
Long Medium Ranged
The Battle Rifle. These weapons are effective at close ranges, while still being useful on longish range targets. They have no real accuracy penalties to speak of, but they are relatively heavy and heat efficient, making them unwieldy.
- AC-10
- Large Laser
Long Ranged
The Sniper Rifle. This category of weapon is when mechs arrive at the point where they can reliably engage targets out of individual sight ranges. Their damage, weight, and heat vary, but they all have two things in common: very long ranges and accuracy penalties at close ranges.
- LRM (Long Range Missiles) 5/10/15/20
- AC-2/5
- Particle Projectile Cannon (PPC)
Heat Overview
A short description of heat sink efficiency, and how the amount of them stack up against each other.
How heat works
Mechs are equipped with heat sinks (10 by default), which each reduce one point of heat the mech has built up over time. Practically every action a mech takes will build up heat. Thus a pilot will need to carefully manage how many weapons they will fire, the range the jump, and so forth. If heat builds past a certain threshold the mech will start taking internal damage, even with armor still equipped. If heat builds up even further (to the top of the bar) the mech will automatically shutdown to prevent catastrophic failure. During this state it is much easier to hit a mech, essentially making the pilot a sitting duck. It should be noted that factors such as the environment can negatively (desert / vacuum
etc.) or positively (water / snow / etc.) impact heat efficiency.
10 Heat Sinks
Meh, Every mech has this by default. Shots will have to be managed very careful to not over heat.
10 + 3 Heat Sinks
Passable, mechs can make use of a heat intensive weapon (Large Laser, PPC, LRM-20, etc.)) and walk / run / jump without issues, but firing groups of weapons can still be taxing.
10 + 5 Heat Sinks
Good, mechs can make use of a heat intensive weapon (Large Laser, PPC, LRM-20, etc.), and a cool weapon (Medium laser, SRM, AC 5/10, LRM 5/10) while walking and running.
10 + 8 Heat Sinks
Great, mechs can make use of a heat intensive weapon (Large Laser, PPC, LRM-20, etc.) and two cool weapons (Medium Laser, SRM 2/4/6, AC 5/10, LRM 5/10) while walking and running.
10 + 11 Heat Sinks
Fantastic, mechs can make use of either two heat intensive weapons (Large Laser, PPC, LRM-20, etc.) and or one and a series of cool weapons (Medium Laser, SRM 2/4/6, AC 5/10, LRM 5/10) while walking and running.
Scouts
Scouts are typically a classification of mech reserved only for lights, though a fast medium can take this role as well if needed. They specialize in locating the enemy, and marking them for units with longer range weapons.
- Very high movement range
- Smaller size, and thus harder to hit
- Spotting cababilities
Weaknesses:
- Lack armor
- Lack firepower
Strategies:
Scouts are typically used to get visual identification of targets, whether this be done with sensor lock or manually running in range. If a scout mech makes it into combat, it is inadvisable to use them in a combatative role, unless all other enemies have already moved.
A common strategy used with scouts is to move them infront of the lance, and to run just close enough to visually identify two or more mechs. This gives your fire support mechs the option to engage several targets, and prevents the opponent from fully retreating. From here the pilot should brace. The high evasion built up, combined with 50% damage reduction should keep the mech relatively safe from harm against modest sized forces, but some judgement is needed. Extra armor should thus be afforded to the scout in place of firepower, when applicable.
The greatest strength of scouts is that they can drastically increase the firing range of long range support units, as firing ranges often extend past individual sight ranges. This is especially true for LRM’s, and lower end autocannons like the AC-2 and AC-5. So while scouts may not deal much or any damage on their own, they can allow glass cannons such as Jaegermechs and Trebuchets to safely attack targets without fear of retribution.
Common Scout/Psuedo Scout Mech Examples:
Locusts – Extreme mobility allows the locust to see what it means to. It’s advised to scrap most weapons to uparmor it however.
Spiders – Can pratically jump further than most mechs can run in the game. Spiders are probably the best scouts in the current game, as they can easily bound off to safety in nearly any situation.
Jenners – While typically not considered a scout, Jenners can function as such when needed. They have a decent amount of speed and jump jet capability, which can allows them to get where they need to be to spot.
Griffins – Lacks the speed of a light, but still maintains a surprising amount of agility. In addition, these mechs have an entire shield torso which they can use to absord damage from the enemy while spotting. If you don’t have a light, a Griffin can make a great backup scout.
Cicada – Arguably a poor mech, the Cicada is essentially a fatter Locust. It has more internal structure going for it, but thats about it. Scrap its weapons, and improve its armor. Use it in a similar fashion to its lighter cousin.
Strikers
Strikers are typically fast moving mechs that favor high alpha strike load outs and hit and run tactics. To this end, they toss practically everything but the kitchen sink out in favor of more damage.
- High alpha strike damage
- Punch far above their weight
- Above average mobility
Weaknesses:
- Typically glass cannons
- Mounts primarily close range weaponary, requiring precise timing to use
- Usually heat inefficient
Strategies:
Strikers are ambushers by nature. They favor letting other allies move first, and taking the brunt of enemy aggression. At the end of the turn, these mechs will then pop out of cover, alpha strike an enemy, and on their following turn retreat back into cover. Thus it is advisable to use light chassis for these roles, or a pilot with a high enough initiative that reserving can be made use of to avoid reprisal.
During the start of battle, you should reserve strikers till the last phase, and then move them behind cover towards the flanks of the enemy. These mechs are prime sensor lock targets due to there low armor, so keeping them reserved is important. If an enemy does turn their attention to the striker, you should attempt to sprint them out of range or brace immediately.
When you are finally able to make your move, you should aim to strike at an enemy’s rear armor. Typically you won’t have enough power to instantly kill them, but the damage will penetrate their armor and usually tear something up inside. If you are unable to get behind the target, try to get on one of their weakest sides, and exploit holes made by allies. Strikers usually mount SRMs, so crit seeking is your second objective here.
It is extremely important however, to retreat on your next turn. This should preferably be the moment after the current one turn ends. Strikers lack armor and run hot, so lengthy engagements can be extremely dangerous for them.
Common Striker Mech Examples:
Commando – Commandos are the quintessential striker mech, the poster child as it were. While they lack the mobility of scouts, Commandos hit significantly above their weight, and when used properly can terrorize even medium to heavy mechs.
Jenner – Essentially an upgraded commando, the Jenner does everything the Commando does but better. Higher mobility and jump jets make this mech a valuable addition when C-bills are not a concern.
FireStarter – A side grade when compared to the Jenner, the Fire Starter offers more armor, and a load out specializing in overheating + shutting down targets. While their ability to do armor damage is low, they can slowly liquadize the enemy chassis from within, and allow allies to make use of called shots. They could also be considered a brawler against other light mechs.
Cavalry / Skirmishers
Cavalry and skirmishers are well rounded mechs that specialize in their jumping capabilities and high speeds. Mounting modest amounts of armor and firepower, they are also able to engage from most ranges to some degree. Due to this fact, these mechs typically exploit the battlefield to a higher degree than other chassis in the game.
- Good amount of speed
- Jump Capable
- Can easily flank targets
Weaknesses:
- Lack staying power
- Can’t hold up in combat when in a range that a target favors
Strategies:
Cavalry mechs are highly mobile units capable of exploting weaknesses in the enemy formation. As a battle begins, these mechs should attempt to move to the left and right most flanks of the opposition, while more heavily armored mechs push up from the center. This will force the opfor to choose a direction in order to engage a target, and leave at least one mech capable of firing at the rear arc of the enemy.
In more isolated cases, if facing brawlers or strikers, Cavalry distance themselves and pepper the target from afar. If facing artillary or fire support, they quickly close in and get under their firing arcs. In essence they modify their strategy as the battle develops. Seeking advantageous terrain is also extremely important with Cavalry mechs, as their high mobility allows them to both flank a target and position themselves for protection.
While flexible however, these mechs will usually run hot due to excessive use of jump jets. Their lack of armor and fire power when compared to other dedicated units also makes them wilt when in combat for too long. It is thus advisable to use Cavalry to dispatch of enemies as quickly as possible, or to fall back if this cannot be made to happen.
Common Cavalry Mech Examples:
Griffin – Commonly mounting long range weapons, Griffins are highly mobile units that can cleave holes in targets flanks and crit seek when provided the opportunity. They can dance around most targets with ease, but run hot if in combat for too long.
Wolverine – A tougher unit, capable of fighting at most ranges effectively. A good loadout, and if left to its own devices can wreck havoc when closing in.
Shadow Hawk – A mix between the Griffins long range potential, and Wolverines in fighting power. The Shadow Hawk has a diverse load out that allows it to handle nearly any situation. It is also very heat efficient, and can take a beating when necessary. Suffers the jack of all trades trait the most of the Cavalry mechs however, in that it is average at every role.
Quickdraw – A light end heavy mech, the Quickdraw lives up to its name. It has decent enough alpha strike potential when maintaining medium range, but lacks armor and heat sinking efficiency to last long in combat.
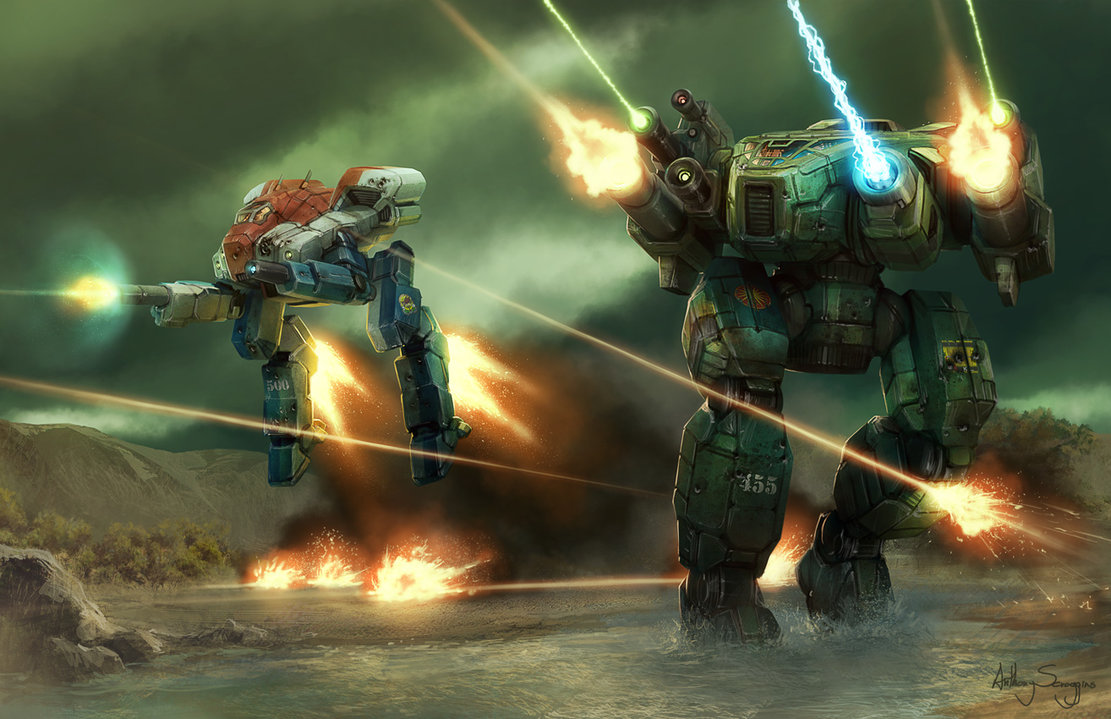
General Assault / Ranged Assault / Juggernauts
General Assault mechs are designed around punching through enemy defenses. They are heavily armored, have respectable firepower for varying bands, and have just enough mobility jog across the battlefield.
- Respectable firepower and armor
- Can flexibly engage and tie down most targets
- Consistent damage across multiple range bands
Weaknesses:
- Heat inefficient
- Reliant on mostly ammo based weapons, can explode
Strategies:
Similar to Cavalry, General Assault mechs are designed to be at the forefront of your formation. They soak damage away from your more vulnerable members of your lance, and generally soften up enemies as you approach entrenched or fleeing foes. They have ample weaponry for all ranges, and generally don’t mind fighting against anything except the most polarized of mechs.
During battle, General Assault mechs typically charge full speed straight at the enemy, laying down heavy fire on anything within sight, but usually on the targets closest to their position. They then lock into engagements with targets to keep them entangled, and unable flee / engage the rest of your lance. Upon taking heavy damage, the General Assault mechs will then flake off, allowing a second wave of mechs to finish the fight, such as Brawlers, Defenders, or Strikers.
As General Assault mechs typically throw most of their tonnage into firepower, armor, and modest engines, they often have to forgo ample heat sinks, leading them to run hot. Due to this restriction, General Assault mechs often have to rely on primarily ammunition based weaponry, which are cooler. This leads them to be very effective early on in conflicts, when they have a majority of their armor,but a liability as soon as things get thin. It is for these points that the General Assault mechs serve as the front line, but are one of the first mechs to disengage as combat drags on.
Common General Assault Examples:
Centurion – Mounting an AC-10, an LRM-10 launcher, and a pair of Medium Lasers, the Centurion can both punch holes and spread damage across enemies from a variety of ranges. It has a reliable shield arm that it can use to transfer damage away from its more important bits (through the use of proper angling), and sufficient, but not overly impressive mobility.
Marauder – Equipped with two PPCs, an AC-5, and a pair of Medium Lasers, the Marauder is less likely to spontaneously explode than its more ammo dependent peers, but it comes at the cost of excessive heat gain. Firing both of its PPCs will overheat the mech, forcing the Marauder to alternate its firing rhythm by using a single PPC, the AC-5, and Medium lasers
Stalker – Mounting a pair of LRM-10s, two Large Lasers, four Medium Lasers, and two SRM-6s, the Staker can choose to obliterate targets at range or up close. As with other General Assault mechs, the Stalker much carefully choose when to use its arsenal, as its 20 heatsinks can become quickly overwhelmed.
Highlander – A high end cannon, LRM-20, SRM-6 , and a pair of medium lasers make up the Highlanders arsenal. It is very heat efficient when compared to its peers, and also mounts jump jets, leading to interesting maneuvering capabilities. While its damage dealing capabilities may not be the best, a well placed Highlander can cripple the opfor.
Brawlers / Close Assault
Brawlers and Close Assault are designed solely around their outstanding armor and close range fire power. You’ll find fewer mechs that can take a better hit.

- Great Armor
- A powerful close to mid range arsenal
- Can stand toe to toe with mechs far above its weight for a limited time
Weaknesses:
- Slow, often has to choose between cover and closing in with the target
- Can’t really handle targets at long range effectively
- Unable to retreat when a situation turns sour.
Strategies:
Brawlers are most efficient at close range, where they can deal incredible amounts of burst damage. That said, they need to first get close to an enemy before this can happen. This severely limits their flexibility in combat, usually regulating them to sprinting from cover to cover, or bracing out in the open to reach another mech. Fortunately, brawlers mount excellent amounts of armor, allowing them to take a few hits before they need to worry about a future hull breach.
During the initial stages of combat, brawlers act as area denial units. Their mere presence forces enemies to move in another direction, as if they get to close, a brawler will be able to close and deal significants amount of damage. It is for this reason that you should aim to place brawlers strategically, such as between the opfor and a key objective, or some other more vulnerable mech in your lance. As the battle progresses, and mechs begin to heat up and slow down, you should aim to wade in and inflict as much damage as possible. Armor and firepower are your greatest strengths, so drawing out a fight is in your best interest. Upon inevitably overheating, melee can become a viable tool in dismantling the enemy.
A key concern to be mindful of when brawling however is your rear arc. While a brawler mech’s frontal armor might be thick, the rear is often still woefully bare. This is especially true for stock Hunchbacks, and to an extent Kintaros. When possible, attempt to fight near hills or other terrain, which you can place your back to. If no terrain is applicable, you can instead move an ally to guard your flank. In this manner, even if the enemy gets behind you, they will be forced to expose their own rear armor to your allies.
Common Brawler Mech Examples:
Firestarter – Equipped with a decent amount of armor and flamethrowers, the Firestarter thrives in close quarters combat, opting to overwhelm enemy mechs coolant systems rather than deal raw damage. Against other light mechs, few will be able to effectively combat the Firestarter, at least on 1 on 1 combat.
Hunchback – Makes use of an extremely potent AC-20, or large battery of medium lasers. It won’t do much until it closes it, but when it does you’ll be guaranteed to see fireworks. Has nearly unmatched armor for its weight, even when compared against some heavy mechs.
Kintaro – Very similar to the Hunchback, but mounts a series of SRMs. It runs extremely hot, but its armor and alpha strike potential won’t leave you wanting.
King Crab – The king of brawlers on the battlefield. Mounting a pair of AC/20’s, this mech can literally cleave other chassis apart with a one two punch. Thanks to its topped out tonnage, it is also able to mount long range weapons to support its advance.
Defenders
Defenders are known for their reliability. They don’t have many weaknesses, and are typically designed to function even after taking absurd amounts of damage. Their weaponry is often deadly at medium to long ranges, and are effective at halting enemy advances. is It is for this reason that Defenders are used to hold the battlefield.

- Relatively strong ranged arsenal, and can keep up in close quarters
- Heavily armored
- Good heat efficiency
Weaknesses:
- Average speed holds it back from securing advanced positions
- Can take on Brawlers, but will either end up losing, or coming out near totaled.
- Can fight back against fire support units, but will eventually crumble without support.
Strategies:
Defenders are typically average in speed, and thus are ineffective at leading charges. However, they are much better armored and equipped than those at the tip of your formation, and thus excel at supporting the rest of your lance. Their weapons systems typically border in-between medium to long range, lending them to be effective against both approaching or fleeing targets . Their sufficient infighting weaponry also allows them to engage in close quarters when needed. Due to these flexible range bands, Defenders are particularly useful at covering the flanks of Brawlers, setting up forward positions to intercept enemies approaching your fire support units, or as support for cavalry and strikers engaging targets at medium to close range.
When a battle begins, you should carefully examine your opponent’s composition. Defenders generalized nature leads them to be relatively weaker against brawlers and long range support mechs in one on one combat. As a result, you should aim to position Defenders in a way that the respective enemy mechs are not able to fully utilize their arsenal, or to single them out. It is important to also be mindful of ally weaknesses however. Brawlers can sometimes be flanked, or Cavalry can start running hot and get bogged down in combat. Thus, you should always attempt to keep Defenders near allies, not only so that you can support them, but so that they can cover your own weaknesses.
When battles progress, you want to start pressing with Defenders. Their speed hinders them a bit, but their good all around fire power, armor, and heat sinking efficiency allow them to stay in the fight more so than any other class. Another key advantage of these mechs is that they typically spread weapons evenly around their whole chassis. So even after losing a few limbs, they can continue to fight. That being said, keep evasion and cover up to limit damage taken, and pour fire down on enemies. Be sure to stay out of melee range however, as this will allow mechs that are overheating to fight back.
Common Defender Mech Examples:
UrbanMech – While the UrbanMech may be a meme due to it having glacial speed as a Light Mech, it is equipped with potent firepower and a respectable amount of armoring. It is designed to defend cities, where speed is not of a concern, and where visibility is minimal. In these environments, the UrbanMech can bring its high caliber autocannons to bear, dismantling light targets, and tearing armor off heavier foes.
Vindicator – The Vindicator is well armored, and mounts weapons to handle any engagement. It can additionally jump, and runs relatively cool, even when firing more of its weapons.
Thunderbolt – The Thunderbolt is extremely well armored, and has an excellent loadout in regards to weaponary. It can engage targets effectively from any distance, though it can run hot if you’re not careful.
Zeus – Fast for an assault, the Zues mounts a well balanced loadout utilizing an AC/5, LRM-15, and large laser for its primary weapon systems. It runs practically heat neutral as well, allowing the user readily make use of its arsenal whenever and where necessary.
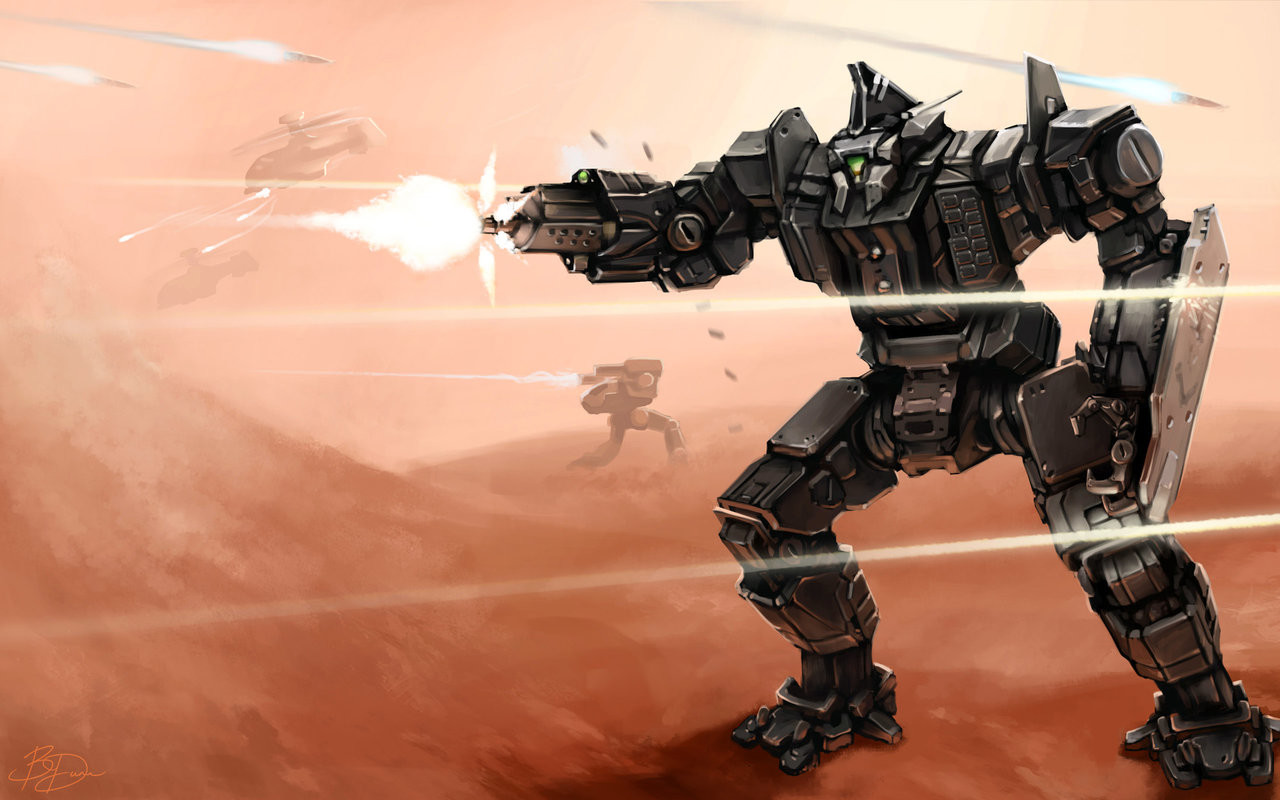
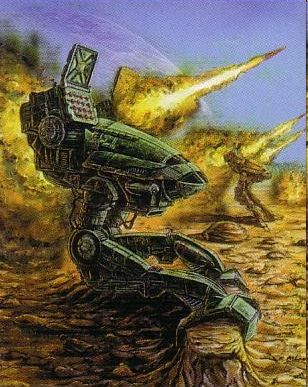
Fire Support / Sniper
Fire support mechs and snipers typically throw most of their tonnage into long range weaponary, allowing them to decimate targets from afar. Their speed, amount of armor, and backup weaponary often vary.
- Excellent firepower, allowing them to shred any target from outside of sight range
- Typically mounts a suite of weapons, allowing multiple targets to be engaged
Weaknesses:
- Slow
- Needs a spotter to be made use of effectively and safely
- Often suffers against targets that can get in close
- Typically little armor, but varies
Strategies:
During the initial setup of a battle, these types of mechs should attempt to find a position to anchor themselves to. This could be on a ridge, or behind some form of cover. The main point however, is to stay distanced enough from the enemy that they cannot get eyes on, without making significant advances towards your location. These mechs excel at long range, so your lack of armor does not matter as much if the enemy cannot even fire at you.
Once the battle begins and scouts locate targets, the fire support mech will focus on a particular target deemed the most critical to destroy, or barring that one that is exposed and fragile. If an enemy appears to be trying to close with you, keep back pedaling or moving far enough away so that they can not readily spot you. If your mech becomes sensor locked, immediatly sprint to safety, or brace. Again, lack of armor if a significant concern for fire support units. Do not try to out trade an enemy unless your mech specializes in such tactics, such as an Awesome.
Common Fire Support Mech Examples:
Panther – For a light mech, the Panther mounts a good amount of armor and firepower. It’s PPC can punch holes in most targets, and its SRM-4 provides a solid backup against anything that gets close. It’s incredibly slow for a light mech however, so positioning is key.
Trebuchet – A pair of LRM-15 launchers makes the Trebuchet a credible threat against even assault mechs due to both damage and stability. An array of three medium lasers also allows it to take on light mechs that get in close. Its armor is severely lacking however.
Catapult – Arguably the most well rounded fire support mech, the Catapult is fairly mobile in regards to its engine size and jump jets. Its well armored, and mounts an excellent amount of firepower for backup in case anything gets in close.
Jagermech – Mounting four autocannons, the Jagermech is a nightmare for targets on the battlefield. It has unprecedented reach, and thus when used effectively, will never even be seen by the opfor. Its armoring is atrocious however, so anything that can get in close will devastate it.
Awesome – Typically mounting three PPCs, Awesomes are capable of drilling multiple holes into targets at once. Its extremely well armored and heat efficient, and while it lacks backup weaponary, it can use its fists to good effect in tearing targets apart.