Overview
This guide will cover basic attacks, enemy weight types, the anatomy of juggles, juggle rotations, key ground combos and other miscellaneous tactics. Its goal is to explain the execution and usage of such abilities and to improve your knowledge of the various melee aspects of Castle Crashers.
Preface
This guide was originally written in September 2009 for the Xbox 360 version and is presented to you with minimal changes. As such, all Light Attacks are referred to as “X” and all Heavy Attacks are referred to as “Y”.
Additionally, due to constraints at the time I neglected to delve into combos specifically for Green Knight (modified YY), Saracen & Bear (Tornado combos). Expect this issue to be corrected in the near future with accompanying video demonstrations.
Finally, while this guide is thorough it does not encompass the full breadth of combos possible in Castle Crashers; rather, it will teach you the most consistent melee juggles and ground combos available while providing you with all of the information necessary to discover more optimized variants on your own.
Enjoy the guide!
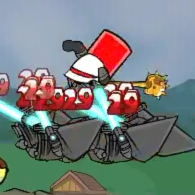
A+X
A+X is the most fundamental of attacks in Castle Crashers. It is used offensively to start juggles, defensively to stun nearby attackers, or evasively to stay airborne without slowing movement upon landing.
Unlike normal jumps, A+X jumps remove the half-second movement delay that occurs after landing. A+X is also visually different from normal jumps as they cause your crasher to roll in mid-air.
When paired with constant diagonal movement, A+X greatly increases your chance to dodge all incoming attacks.
Magic Jump A+X (Requires: 20 into Magic)
Magic Jump A+X is an improved form of A+X used primarily for evasive maneuvers such as escaping a swarm or recovering from a knockdown. I can with 99.9% assurance tell you that Magic Jump A+X will save you from just about any situation you otherwise can’t handle.
A+Y
A+Y is an alternate opener combo used to start juggles instead of A+X. Execution is similar, although it is important to press Y at the apex of the jump instead of immediately after jumping.
Using A+Y is double-edged sword. While A+Y results in a few extra hits and a more fluid initial startup of your juggles, missing with one will leave you vulnerable to a counterattack. Don’t use it in Ranked Arena; it will get you killed.
X and XX; Y and YY
Generally speaking, all combos in Castle Crashers start with an X and end with a Y. In terms of juggles specifically, juggle rotations are comprised of either X or XX, and Y or YY. The juggles covered in this guide include XXY, XXYY, and XYY.
X and XX are quick attacks that push enemies away from you. When using X attacks, you must move forward to stay in melee range of your juggle. The amount of times you hit X will determine whether your first Y is a slam or an uppercut.
Y attacks are heavy attacks that lift enemies up and increase your altitude. Since Y attacks do not push enemies away from you, it is good to use them whenever you need to turn your juggle around.
Hitting X an even amount of times (including zero) will cause the next Y attack to be a slam.
Hitting X an odd amount of times will cause the next Y attack to be an uppercut, assuming you are Level 8 or above.
Although the first Y in YY varies due to the above, the second Y is always a sword-spin.
Controlling your juggle’s movement is possible by adding in any amount of extra XXs between your Ys. For instance, if you want to quickly move across the room to catch another enemy in your current XXYY juggle, you can add two more XXs to it.
The result, XX-XXXX-YY, allows you to move more quickly across the room, but still executes the YY’s slam-spin necessary to maintain the juggle.
Bear in mind, adding extra XXs to your juggles is limited by your Agility and your altitude. If your Agility is too low, extra XXs may push enemies too far to continue juggling. If you don’t have enough altitude, extra XXs may cause you to land before you can use Y again.
Knowing how to turn your juggle around during a YY, as well as continuing in a single direction with extra XXs, is the biggest step towards becoming an expert juggler. After learning the basic rotations that will be discussed below, it would be wise to perfect these two tactics.
Green Knight’s YY
Unlike other characters, Green Knight’s YY is slower and gives you less lift. While this timing issue can be mostly compensated for with practice, it does prevent sustained use of the XXYY juggle (mentioned later).
Lightweight Enemies
Includes: Barbarians, Thieves, Trolls, Bears, Killer Bees, Killer Beekeepers, Skeletons, Ninjas, Aliens, Saracens, Iceskimos, most early-game Coneheads
Lightweight enemies are enemies that can be juggled indefinitely. In other words, they can be dispatched in a single well-executed juggle. The most effective juggles against lightweight enemies are XXY and XXYY.
XXY
The XXY rotation is the simplest juggle in Castle Crashers. It is comprised of a double slash followed by a slam and a short pause. A short pause is added between each XXY rotation to maximize the lift gained from said Y.
XXY is often referred to by others as XXXXY, but the two are one and the same.
XXYY
The XXYY rotation is an improved version of XXY that replaces the short pause with a sword-spin. Although XXYY gets slightly less altitude per rotation, it is able to deliver five hits in the same amount of time XXY does three.
Sadly, Green Knight is unable to execute this combo without losing altitude. He is forced to rely on the slower, simpler XXY.
Middleweight Enemies
Includes: Fire Demons, Snakeys, Wizard Minions, most Beefies, Ranked Arena players
Middleweight enemies are enemies that can be juggled, but only for a short time; they are too heavy to be killed in a single juggle. The most effective juggle against middleweight enemies is XYY.
XYY (Requires: Level 8)
XYY is the middleweight juggle, consisting of a single slash followed by an uppercut and a sword-spin. Unlike the lightweight juggles, XYY focuses on lifting enemies as high as possible while delivering as many hits as possible. As such, it is not recommended for use against lightweights.
XYY vs. Beefies
Beefies have two unique attributes:
One, they won’t flinch if you melee them in the torso. If you’re going to melee them, you have to hit them in the head.
Two, a Beefy won’t be knocked down until you hit them four times. On the fourth hit, they will bounce (and land if you don’t start the juggle immediately after said bounce).
Fortunately, these two attributes aren’t enough to stop you from juggling middleweight Beefies. Simply hit them twice (either with two ranged attacks or two melee swings to the head) and then go to your XYY rotation.
Keep in mind, however, that not all Beefies are middleweights. The Royal Guard Beefies, Stoveface Beefies and the Brute Beefy in Necro Wave 2 are all heavyweights.
XYY Hovering and Spellweaving
The XYY juggle possesses a unique property: it is self-sustaining. That is to say, it will function even if you’re not hitting anything. This property can be used to stay permanently airborne, and with practice even allow casting of Air RTYs while permanently airborne.
To spellweave Air RTYs, you’ll first want to reach an appreciable height with XYY. Once you do, start casting a few Air RTYs and go back to your XYY before you land. Repeat as needed.
For maximum height between XYYs, you want to shoot your Air RTYs after the uppercut (the first Y in XYY).
If the above seems confusing, here is an example of what the button input looks like:
A+XYY XYY XY AirRTY AirRTY AirRTY AirRTY XYY XYY…
Heavyweight Enemies
Includes: Royal Guards, Stovefaces, some Beefies, most end-game Coneheads
Heavyweight enemies are enemies that cannot be juggled for any duration of time. Once hit with a ranged attack or a heavy melee attack, they will fall straight to the ground. Since you can’t juggle them, you’ll have to go with the strongest melee combo: XXXYY.
XXXY (Requires: 15 into Magic)
XXXY is where the root strength of the XXXYY combo comes from. It relies on the elemental damage from the Y hit to boost overall damage. The Y’s damage is dependent on which character you are using.
If you are using the original Gray Knight, it does moderate non-elemental damage.
If you are using Red Knight, it does moderate lightning damage.
If you are using Orange Knight, it does moderate fire damage and inflicts a 1x Fire DoT.
If you are using Green Knight, it does moderate poison damage and inflicts a 3x Poison DoT.
If you are using Blue Knight, it does moderate ice damage and freezes the opponent in place. This specific XXXY is very useful for controlling normal heavyweight enemies, enough to warrant using just XXXY instead of XXXYY (described below).
If you are using any other character, it does heavy non-elemental damage. With the proper setup (Level 99, Snakey’s Mace, Beholder), this specific XXXY can hit for 220 damage. This is the best XXXY type for pure damage.
XXXYY (Requires: 15 into Magic, Level 50)
Once you reach Level 50, you get access to the full big damage boss-killing melee combo, XXXYY. It is comprised of three slashes, a magic fourth hit and a drill attack that does massive damage. The drill attack is particularly useful against bosses and stationary targets (and Cave Slimes, assuming you meet the below requirements).
Keep in mind, the XXXYY drill attack will not go off unless you make contact with the second and third X (you can miss with the first X). Also, you can switch the direction of the drill attack if you turn around before the drill activates.
XXXYY Pre-Lv50 (Requires: 15 into Magic, Level 49 or lower)
If you’re below Level 50, your XXXYY behaves a little differently. Instead of ending with a drill attack, it adds a sword-spin, which makes the combo easily repeatable. Against normal enemies, this variation is stronger, but against bosses it is somewhat lacking.
You can expect to get off two rotations of the Pre-50 XXXYY before the enemy you’re hitting fights back. Knock them down after the second XXXYY.
Sprint XYX (Requires: Level 4)
Sprint XYX is a bit of a niche combo. It consists of a sprint, a lunge, a sword-spin and a single slash. It delivers about six hits in a half-second, but since it takes two to start sprinting, Sprint XYX is mainly for hit-and-run tactics against Cave Slimes, the Ice King and Wizard Shield Form.
XY Pre-Lv8
The XY Pre-Lv8 ground combo is a barrage of slashes and sword-spins. You’ll never get much of a chance to use it beyond the Ram Boss on a low level character, but it hits hard and is pleasing to the ears.
Alternate between X and Y to execute. (i.e XY XY XY XY XY XY…)
Beefy X
The Beefy X juggle has relatively little use to the seasoned juggler, but it’s worth mentioning for completeness. Simply eat a sandwich, jump and tap X (or Y) like mad. If done properly, you’ll be spinning your arms and slowly rising up and off the screen while juggling an enemy.
Conclusion
There is nothing else. Should you have taken the guide to heart, you are fully equipped to handle Insane Mode on your own without so much as breaking a sweat.
I would like to thank Laura Bodewig and SilentBD for writing their respective combat guides, and would like to apologize for not placing this guide on Steam sooner. To those that still hunger for more combo advice, I encourage you to skim through their guides as well:
As said in the Preface, I WILL be revisiting Green Knight and Saracen to find and publish alternative combos for them. As for video tutorials, I will most likely make four total: one for XXYY, one for XYY, one for XYY Spellweaving in particular and a final one covering Sprint XYX, Pre-8 XY and modified combos for Green and Sara. Please look forward to them!
See you in-game!