
Overview
Feel like you’re stuck? Or just want to get greater completion percentage for The Phantom Pain? Then this guide is for you, covering everything from gameplay mechanics and cassette tapes to S-rank walkthroughs and achievements guide! If you like the guide, please rate it up and add to favorites – I would be very honored if you would do so.
INTRODUCTION
Welcome, ladies and gentlemen, to my METAL GEAR SOLID V GROUND ZEROES guide!
Below is the list of the sections that will help you get 100% completion ratio in the game. Enjoy! ^_^
- Weapons Guide
- Achievements
- Collectibles
- GROUND ZEREOS Main Mission
- ELIMINATE THE RENEGADE THREAT Side Op
- INTEL OPERATIVE RESCUE Side Op
- CLASSIFIED INTEL ACQUISITION Side Op
- DESTROY THE ANTI-AIR EMPLACEMENTS Side Op
- DÉJÀ VU Extra Op
- JAMAIS VU Extra Op
- The VU Secrets
- UNLOCKED Achievement & 100% Completion
- Ways to entertain yourself
WEAPONS GUIDE, PT. 1
This section of the guide is to highlight different weapons acquired throughout the game and give the players a better understanding of how each gun works.
SUPPRESSORS
In case your suppressor has deteriorated or is close to this state, you can replace it with a new one. Here is how to do it:
- Unequip your current suppressor;
- Find and unlock an armory;
- Look for ammo for your gun;
- Equip the new suppressor;
KNOCKING OUT
You can knock an enemy out in a number of ways if you’re spotted. However, most of them will not work unless the Reflex Mode is ON (go to “Options” => “Game Settings” => “Reflex mode: ON”).
- All thrown weapons (Smoke/Flare/Hand Grenades and Magazines) can be used as means of neutralising an enemy. When in Reflex Mode, aim for the head of the soldier who has spotted you and throw what you have at him.
- Tackling an enemy is also a good option. However, you will need to make sure that you hit him before he stands up and turns the alarm on. Holding him up is not an option.
- This is what I like to call ” A Cougar Jump”. It requires timing, but you will surely be satisfied with the result. The move itself is simple: jump on an enemy from above.
- Probably the most original one is to knock a soldier out by throwing another soldier’s body into him.
THROWN WEAPONS TECHNIQUE
This is applicable to all throwing weapons found in the game. Quick tap of the attack button while aiming will get Big Boss toss the grenade while releasing it after holding down will result in him performing an over-the-shoulder throw.
WU SILENT PISTOL

TECHNIQUE: While the effective range of this gun is the shortest in the game, you can shoot at considerably farther distances. The trick here is to lift your gun so that the ironsights are just a bit above the target. If you’re unsure whether you will be able to hit the head, make just two bodyshots – by the time the enemy’s animation “Why does it sting so much?” ends, he will collapse unconscious. Three bodyshots will knock him out mid-animation and four will instantly put him into sleep.
If your target is above or below you, just aim for the head and shoot – it is guaranteed that the bullet will hit the head. However, if attempting to take down an enemy who is above you from a distance (<60 m), keep in mind that the bullet will start flying in the arc trajectory, which is why you still need to aim the gun above the target.
BTS URAGAN-5 PISTOL

Here’s a fact: “uragan” is Russian for “typhoon”.
TECHNIQUE: Since it is more of an assault weapon, it is recomended to use this gun in third person mode. This is mainly applicable to Intel Operative Rescue Side Op, where you are sometimes required to shoot soldiers mid-reloading.
AM D114 PISTOL

TECHNIQUE: This pistol has no surprises for its user and therefore does not require special shooting technique.
SZ.-336 SUBMACHINE GUN

Here’s a fact: “Sz” stands for Sodomka zbrojovka, which is Czech for “Sodomka arsenal” (please correct me if I’m wrong).
TECHNIQUE: Not only is it because of reloads that you have to control the bursts of this SMG, but your silencer deteriorates pretty fast too. However, you can always replace it in the armories of Camp Omega.
If you have an enemy facing your direction, turn the light on your gun on (the default key is L) so as to blind him, then either shoot, grab or tackle him.
AM RIFLE TYPE 69

TECHNIQUE: Since it is carried by most of the Marines, you can disarm them with CQC in case you are spotted and close to the enemy. Run towards them, start doing the CQC grab (press and hold the Left Mouse Button for a bit), then press and hold the Right Mouse Button mid-grab to take the marine’s weapon and point it at him. Might save your life and mission rank.
AM MRS-4 RIFLE

TECHNIQUE: Much like with Sz.-336, you can blind an enemy by turning your flashlight on and pointing your gun in their direction.
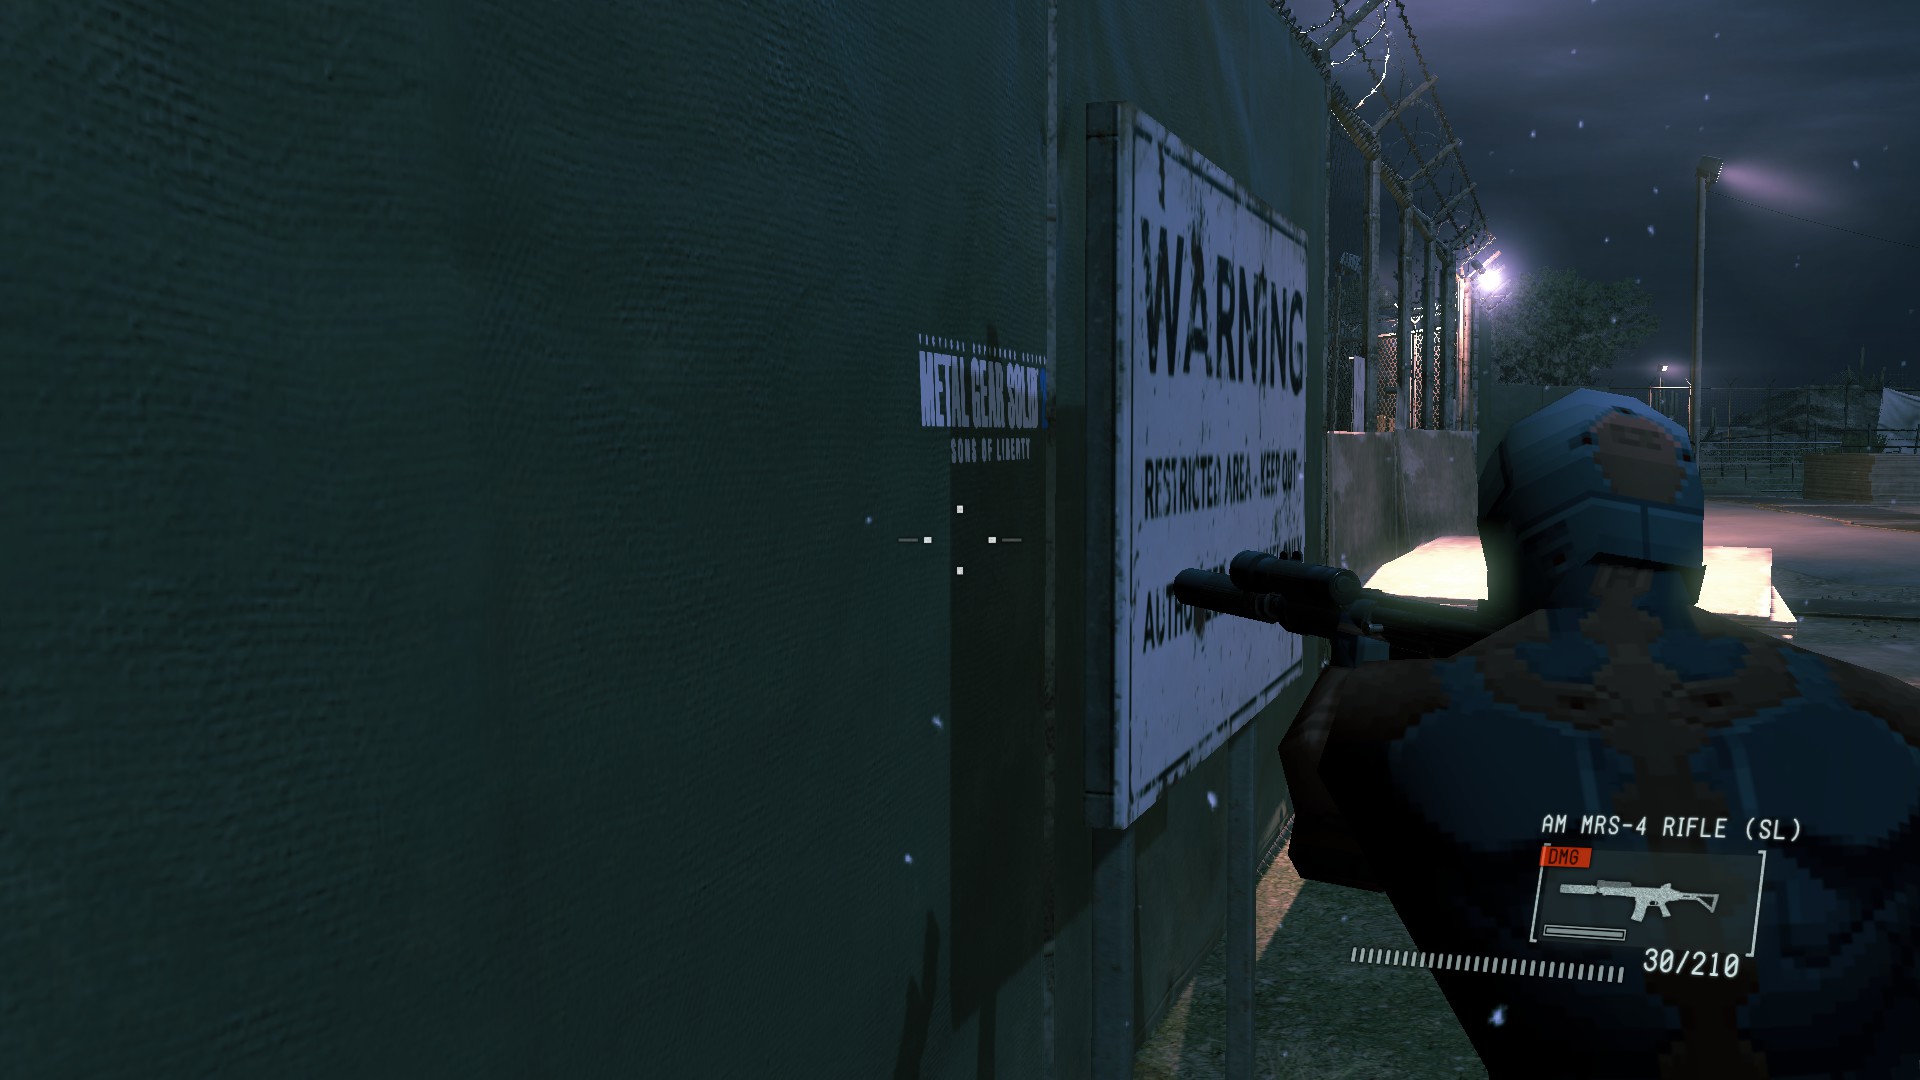
AM MRS-4 RIFLE (SL)

TECHNIQUE: Using the light is simple: just point it at the marking. If the title the marking belongs to is canon, it will erase, if not, the marking will not be affected.
WEAPONS GUIDE, PT. 2
AM-69 AAS RIFLE

TECHNIQUE: In order to use the grenade launcher, you simply need to tap E. Keep in mind the arc trajectory the grenade will follow when using it.
S-1000 SHOTGUN

TECHNIQUE: It’s a shotgun in every sense of the word: deadly, pump-action and with a huge knockback force. Perfect for close-range combat.
M-2000 SNIPER RIFLE

TECHNIQUE: Your shooting accuracy will heavily depend on how you use the rangefinder.

This rifle has been zeroed prematurely, meaning that you will need to adjust your aim if you want to hit targets from a distance. The table given below is to help you with this task.
FB MR R-Launcher

TECHNIQUE: The rocket will fly at a relatively straight line, so the only thing to do is aim the gun at a target and push the trigger.
TYPE 58 FRAGMENTATION GRENADE

TYPE 63 SMOKE GRENADE

TYPE 66 FLARE GRENADE

MAGAZINE

COMPOSITION C-4

M21 D-MINE

ACHIEVEMENTS

Below is the list of all the achievements present in the game in the alphabetical order.


COLLECTIBLES
There are only two types of collectibles in the game:

The map below perfectly illustrates the patches’ locations. Please note that there are only eight of them, since in order to get the ninth you need to roll on the ground a few times.

From bottom to top:
- On a small cliff to the left of the starting point.
- On a pile of garbage in the west refugee camp.
- Close to the door to the old prison. It’s impossible to miss this one.
- On top of a guard booth.
- On one of the regenerators after the three big buildings.
- In a puddle between two landing spots.
- In an entrance to a drainage channel close to the armory.
- On a roof of one of the buildings. You need to jump there from a regenerator.

The map below illustrates the locations of the cassette tapes in various missions.

From bottom to top:
- Eliminate the Renegade Threat Side Op – in the south armory. If you get there fast enough, there will be a soldier carrying this tape, if not, the tape wil be lying on the floor.
- Ground Zeroes Main Mission – in a cell where Paz was kept, opposite to Chico’s.
- Ground Zereos Main Mission – extract Chico before heading to rescue Paz.
- Ground Zeroes Main Mission – extract a POW from the western refugee camp. You will get the tape automatically after completing the mission.
- Déjà Vu/Jamais Vu Extra Ops – located on a rock near the cave. Use your Night-Vision Goggles if it is problematic for you to find them. This is important: in order to get both tapes, you need to get them in both these missions.
- Classified Intel Acquisition Side Op/Ground Zeroes Main Mission – in the watchtower of the admin building. Beware of the camera in the tower (in Classified Intel Acquisition Side Op).
- Destroy the Anti-Air Emplacements Side Op – extract the POW from the boiler room.
- Classified Intel Acquisition Side Op – hold up a bald soldier in the underground machinery room (close to the boiler room) and interrogate him.
- Ground Zeroes Main Mission – on one of the dumpsters. You need to get this tape before rescuing Chico.
Other tapes:
- Intel Operative Rescue Side Op – complete the Op.
- Chico’s Tape (All) – collect all 7 Chico’s Tapes.
- Zone Of The Enders: The 2nd Runner – complete all Missions and Ops on Hard difficulty.
GROUND ZEROES MAIN MISSION (CHICO – PAZ)

Kept you waiting, huh?
To start with, there are two drastically different playthroughs of this mission depending on who you decide to save first: Chico or Paz. Both these walkthroughs are provided below.
ROUTE: Chico – Paz
REASONS: Chico’s Tape 3, Bros Before Hoes
This pirate crackdown’s a go!
After the cutscene ends, equip the Wu Silent Pistol and hide behind the nearest rosk. Wait for the spotlights to face the metallic fence, then quickly run ti the right side and climb up the obstacle. When you get to a nice vantage point, tranq the guard manning the spotlight and contine forward on the obstacle. When you jump off it, hug the right side of the road and get in the bushes. Wait for the jeep to pass by and the spotlight to look away, then approach and climb up the tower and neutralize the guard – tranquilising him from the cover will be next to impossible and you would only waste rounds. Once you’re done with the spotlight guard, keep hugging the right side of the road and turn left. You will see a booth and a guard walking up the road. Hide in the booth and before neutralising the guard make sure the truck is not coming your way. Hide the body of the neutralised enemy, grab the tranq rounds from the booth in case you feel like it and proceed down the road.
That’s the old prison area. The targets are there.
There it is: the old prison area. Tag the two sentries guarding it, one walking among the cages and the other at the entrance. Get on the cliff with the sandbags and tranq the guard at the entrance – it’s easy to make a headshot from there. You can try and neutralise the other one in the same way, however there is a better approach to it: you need to climb on a roof near the crates and port-a-potties and from there shoot the guard in the head. So as to save time later, unlock the doors of all the cages with prisoners in them. Once you open Chico’s cage, a cutscene will play, after which Marines will change their shift. A couple of them will come down the further road. Go prone and headshot them both – it will be easy. Hide their bodies either in a booth or in the bushes – either way will work. Since the path to the RV point is clear, start extracting prisoners there. Grab Chico first and get him there. Another cutscene will play, and you will be instructed to call the chopper in. Do not do it yet. If you want a failsafe S-rank, you need to extract as much POWs as possibele. Get them all into the cave, call the chopper in and get all POWs on board before extracting Chico. Otherwise, a cutscene will play and the helicopter will depart, leaving you with the remaining prisoners.
She’s dead.
Chico’s Tape 3 will start playing, from which you will need to figure out Paz’s location (it should be obvious by now that she’s dead in the boiler room of the admin building). Go up the road where the two guards came from and you will notice a truck and a Marine. The truck’s driver will come out and face the Marine’s side, meaning that you will need to tranquilise the latter after the driver turns away. Don’t bother about hiding his body and get in the truck’s back. It is highly recommended that you go prone while riding it to avoid detection. When the truck stops, get out of it, neutralise its driver, hide his body and grab the tranquiliser rounds from the shelf behind the truck. Open the gate by using the switch left of it, then neutralise the guard closest to you and the one near the LAV. Hide their bodies behind the crates and enter the red door. There, tranquilise the guard. Make sure you do it outside the camera’s field of vision. Once you’re done with him, hide behind the crates close to the camera. Wait until it faces your side and starts moving, then climb over your cover and hide directly under the camera. When it turns around from the stairs, go down them. Two guards will be there, who will start moving shortly afterwards you see them, Neutralise them eithe by holding up and knocking down or distracting with an empty magazine. Hide their bodies behind the machinery and go into the boiler room. Find Paz’s cell and watch the cutscene.
Stay away!
The Marines’ shift will change once again, so you will need to excercise caution when extracting Paz. Grab her and walk to the exit of the boiler rooom. Neutralise a guard in the small room, then hide his body and equip empty magazines. You will notice tho Marines going down the lader. Distract and neutralise them, then hide their bodies behind the machinery. Get Paz and go to the truck the same way you entered. However, beware of the camera and a guard near the door. When you load Paz in the truck, tranquilise the guard manning the searchlight, then get in the truck and go the same road you infiltrated the building in the back of the truck. Stop near the bridge and wait until the Marine turns away, then move a bit further and quickly neutralise the guard who has detected the body of a Marine we have tranquilised earlier. Move the truck on the dirt road leading to the old prison and tranquilise the two guards who have somehow awoken. .-.
Note: make sure the farther guard is facing the ocean when you’re about to tranq him. This is essential for distracting the jeep driver.
When the jeep driver is asleep, get Paz and call the chopper to the LZ near the cave. After that tranq a guard on your way to the cave proceed to the LZ. Get on the chopper with Paz a-and…
S-RANK!
Congrats, you made it. :3
GROUND ZEROES MAIN MISSION (PAZ – CHICO)

Here’s another, more beneficial way of completing this mission.
ROUTE: Paz – Chico.
REASONS: Chico’s Tapes 2, 4 and 5, Rescue achievement.
Equip your Wu Silent Pistol and after evading the spotlight run to the obstacke on the right side of the starting point. From there tranq a guard manning it and return to the door left of the watchtower. Two guards will start discussing the choppers that have recently left off. Creep up on them and hide behind the crates and, when they’re done with the chatter and turn away, neutralise them. Hide their bodies away from the road and get into the west refugee camp. Approach its east side, neutralise the guard, after that climb up the tower and tranq the Marine manning the spotlight. Drop from there and run to the northeasternmost tent of the refugee camp. There you will find a POW whom you will need to extract in order to get an achievement “Rescue” as well as Chico’s Tape 2. Carry him over to the start point, call the chopper in and load him on board. After that run towards the admin building by the road between the refugee camp and the armory. There will be a guard near sandbags who will get into your way, whom you will need to tranquilise. Two more guards will stand in your way: on will run from between the buildings and the other will stand behind him. Tranquilise them as well and proceed to the helipad. Upon reaching it go prone and make yuor way to the left covering yourself from the spotlights with small roadblocks. There will be three guards near an anti-air emplacement, whom you can distract by throwing a magazine at the wall behind them and then tranq them. Don’t forget to hide them in a drainage channel left of the AAA.
As you enter the admin building, unlock the door leading to the power source, then disable the latter and climb on the roof of a building behind you. From there it will be easy to tranq a guard who will agree to check out the cause of the problem. Hide his body in the drainage channel next to the crates and climb up the ladder leading to the watchtower. After that, get close to the Marine manning the spotlight and neutralise him, then get in the watchtower and grab Chico’s Tape 4. After that drop down into the parking area of the admin building and restock on your tranq ammo. Distract the guard on the road, tranq him and hide him behind the building, then proceed down the road. Hide behind the regenerators and tranq the two guards near you, one with a flashlight among crates and the other near regenerators. Hide their bodies as well and run towards the northern wall of the building. From there turn left and you will run into dumpsters, one of which has Chico’s Tape 5 on it. Grab it and proceed underground, into the machinery room. Adter exiting it turn right and you will run into the boiler room. Slowly creep up on the guards from the right side of the room and, after they are done with chatter, neutralise them all. Hide them and unlock Paz’s cell.
Now that you have Paz, you will need to extract her to the RV point. Equip your magazines, pick her up and approach the rxit of the boiler room from the shadowy side, behind the machinery. Throw a magazine to distract the guards, then tranq them and proceed upwards by the staircase. There will be a guard near the regenerators, whom you will have to neutralise as well. Approach the red door and tranq the guard on the other side of it. You will most likely alert the Marines driving a jeep, so be careful when neutralising them. Doing so in Reflex Mode will greatly aid you. Once you’re done with them, hide their bodies, grab Paz and go to the old prison area by the norternmost road. If a guard on the bridge is facing your way, throw a magazine to distract him. Get under the bridge and tranq the guard near the turn to the prison, after that proceed down the dirt road. There will be a guard in the booth, whom you will need to neutralise. Another guard will be alerted by this and will approach him. This will create a perfect opportunity to ambush him as well. Once the road is clear, carry Paz to the RV point and put her down.
You’re only left with Chico and a bunch of POWs to rescue. Get back on the road and from there tranq the two guards in front of the gate to the prison itself. After that approach it and neutralise the guard in the watchtower. The only thing to do now is carry Chico and all the POWs to the RV point, load them on the chopper and exfiltrate.
Another S-rank for ya!
Of course, you can combine both playthroughs and, say, go for Chico’s Tape 4, rescue Chico and only then go for Paz. The problem is that it will take a lot of time, which in turn will lower your final rank.
ELIMINATE THE RENEGADE THREAT (EXTRACTION)

Just as with Ground Zeroes Main Mission, this Side Op features two drastically different ways of completing the objective. Here we will take a look at the non-lethal one.
WAY: Extraction
REASONS: Chico’s Tape 6, Depth achievement
As soon as the mission begins, run towards the dirt road, tranqing the guard on the cliff ahead of you. Once you’re on the hill near the road, neutralise a Marine walking towards the main road. Make sure he doesn’t collapse in the bushes, otherwise the twi guards in the jeep won’t be distracted by it. Once the jeep stops and the driver and the passanger get out, headshot both of them, then run towards the old prison. A guard will be standing near the entrance, and in order to eliminate him you will need to go prone and shoot from a small patch of grass. After you’re done with him, run to the main road by the other dirt road and you should run into a soldier travelling along the eastern refugee camp. Eliminate him as well as a Marine in the wooden watchtower, then run towards the metallic fence near an armory. Jump over it, equip a smoke grenade and walk towards the target on the other side of the building, then throw a grenade there and neutralise all the soldiers. Once you’re done with them, pick up the bald one.
The guy you have picked up is Palitz. Actually, he is supposed to be called Paletz, where the stress is put on letter “a”, just sayin’. If it’s your first time playing this mission, be sure to get Chico’s Tape 6 from the armory close to which you captured Palitz. Just be sure to do it quickly. Call the chopper to the start point and load the target once the heli arrives.
From this point on you need to act swiftly in order to reach Glaz in time. Go up the northernmost road towards thee admin building and tag the guards in front of the front gate. Do not get up, run, etc as it will be a lot easier for them to spot you. Go by the drainage channel near the northern armory to avoid detection and once you have crawled through it, exit and go behind the crates. A guard will be near the red door, whom you will needto disctract and neutralise. Once you are done with him, advance through the door and the machinery room to the inner area of the admin building, tranquilising every guard you come across. When you reach the stairs to the inner area, wait until a guard stands in your way, then neutralise him. This will attract the Glaz’s accompanying party, forcing them to come and chec out the situation. Neutralise them one by one or throw a smoke and deal with them in Reflex Mode. Be prepared to shoot the camera on one of the buildings as chances are that it will detect either you or the soldiers’ bodies. Get Glaz and carry him to the start point and board him on the heli along with two prisoners found in the old prison.
Another S-rank for ya, congrats!
ELIMINATE THE RENEGADE THREAT (ELIMINATION)
This way of completing the op will be extremely important for those who managed to score an A-rank with the Extraction method.
WAY: Elimination.
REASON: Easier S-rank.
The start off is similar to the Extraction method: go up the cliff, neutralise a guard and reach the hill near a dirt road. This time, though, you will need to tranq a Marine after the jeep passes. After that, go on tranquilising the following guards:
- A guard entering the eastern refugee camp near a wooden watchtower;
- A guard going down the road right to the eastern refugee camp;
- A guard standing near a truck right to the previous Marine. You will also need to climb into the truck to procure a sniper rifle.
- (Applicable to Hard difficulty level) A guard in front of the three long buildings. He can be seen stationed near the metallic fence.
Once all of the above are knocked out and you are on the wooden watchtower in the eastern refugee camp, proceed with eliminating the targets. Palitz can be seen accompanied by a bunch of soldiers towards the western refugee camp. Shoot him in the head once he’s in sight. Glaz is in the wachtower of the admin building, and in order to shoot him, you will need to aim so that his head is in bearing 4 of your rifle’s in-scope rangefinder.
Call in the chopper to the starting point once you’re done and board it as soon as it arrives.
Mission complete, and how! S-rank!
INTEL OPERATIVE RESCUE

What took you so long?
Probably the easiest level in the game, since you’re guided through the most part of it. Technically, it is an on-rail shooting gallery, so little skill will be required for achieving S-rank in this Op. Only the non-lethal way will be described here, since the lethal one takes no time to figure out.
REASONS: S-rank, Pacifist achievement
Before you meet the agent soldiers will pose virtually no threat to you, with the only exception being the rocket launcher-wielding Marines. However, it is recommended thst you stun as many guards as possible so as to have less on the helipad.
Once the agent requests escort and the heli starts following him, the Marines will start attempting to bring him down with the vehicles, which should be your top priority whenever they appear. Shoot them in the head while aiming in third person – this way it will be easier for you to take them down. During the course of escort you will encounter an anti-air emplacement. Do not worry about it, as it will only scratch your heli. A little more shooting and the agent will be knocked out by an explosion.
Now that he poses an easy target, you will need to protect him. After a little bit more on-rails shooting you will be prompted to get off the heli. Reload before that and do not stun anyone – an LAV will arrive to that place later, which you will need to destroy. Any Marine, alive or knocked out, caught in the explosion, wil count towards your kills count.
Run to the agent, quickly pick up a rocket launcher and carry the guy to the other side of the building he is lying near to. After that an LAV will drive out of the admin building, which can be destroyed with three hits from a recoilless rifle. After the coast is clear, pick the agent up and run towards the heli, stunning anyone who gets in your way. Board on the chopper and begin exfiltration.
Sonn after the takeoff an enemy helicopter will start chasing yours. Wait until it gets close to you and then unload at the recoilless rifle-wielding Marine. Try aiming either directly at him or a bit left/right. Once he’s gone, wait until you exfiltrate from the camp.
That was perfect! S-rank!
CLASSIFIED INTEL ACQUISITION

For the following Op retrieving the Agent’s Recording will be enough, however if you want to get the Information achievement, you will need to retrieve the Classified Intel (a.k.a. the fake tape) as well.
WAY: The shortest.
REASONS: Easy S-rank, Infiltration achievement.
You will start off riding in the back of a truck. As long as you do not stick your head out of the truck you are fine. However, you will need to be prepared to get off the truck when near the admin building, specifically when it starts moving after the front gate opens. From there, make sure the guard behind the red door has no chance of seeing you and enter the door. Neutralise the guard and head downstairs to the machinery room (the one with the open ceiling). A bald soldier will be there, on whom you will need to creep up and hold up. After interrogating him he will drop a cassette tape. Pick it up, tranq him and head back to the truck.
All you need to do is get in the back of the truck. From now it’s simply waiting until you are driven out of the mission area.
WAY: Both tapes + Extraction.
REASONS: Recovery of the agent and the bald soldier, both tapes.
As in the previous walkthrough, stay in the truck until it starts moving after the front gate of the admin building is open and retrieve the cassette tape from a bald Marine.This time, however, go to the inner area of the admin building. Go behind one of the buildings and tranq every soldier you see, just make sure the camera detects no threat. If it does, shoot it. Proceed up the ladder to the watchtower and, when you enter the area of the catwalk from where you can drop down to the truck, be careful as a soldier in that area might detect you. Distract or neutralise him if he poses a threat and, before entering the watchtower itself, shoot out the camera in it from the left window. Grab the cassette tape and return to the bald soldier, then pick him up and proceed to the LZ near the cave, then put him down there.
Go up to the old prison, neutralise the guard patrolling it and get all the POWs to the cave. After that, go into the eastern refugee camp, tranquilising the soldiers on your way. If the undercover agent is not there, try searching for him in the warehouse area or the helipad. Once you have him, call in the chopper and extract him along with the bald Marine and all the POWs, then exfiltrate.
Another S-rank! ^^
DESTROY THE ANTI-AIR EMPLACEMENTS (THE LONG WAY)
This op is the hardest one. Already scary, right? Hopefully, I have figured out a perfect strategy for this Op, which is:
- Do
- Not
- Even
- Think
- About
- Launching
- This
- Op
Jokes aside, it is strongly recommended that you keep your Reflex Mode on, since the whole camp will be on constant alert and you will be forced to sneak around the camp in broad daylight, hence why not getting caught will be simultaneously an issue and a necessity.
WAY: (probably) painfully long.
REASONS: Extraction achievement.
As soon as the Op begins, run towards the end of the cliff. From there, neutralise three guards: one near the armory, one inspecting the AAA and the last one near a watchtower. Once at least the first two are asleep, run towards the other side of the armory you are close to and CQC a guard stationed there. After you’re done with them, carry them over to where they would not be detected, with the exception of the guard near the watchtower – he will be fine lying in the shadows. Plant a C4 on the AAA and, having made sure no one is in its vicinity, proceed down the road behind the warehouses. Neutralise the Marines near the first and between this and the second buildings, then get to a cover close to the metallic fence. Around this time Miller will inform you that the Marines have noticed the Amphbious Assault Ship and hence will be on constant alert. If you’re lucky, a Marine with a recoilless rifle will pass through the nearest gate. That will be a perfect chance for you to tranq him and get the rifle, which you will need later.
Go prone before entering the helipad so as to avoid unnecessary attention, then crawl to the left until you reach a clearing, from where you can attack all the guards around an AAA. Carry and leave them in the drainage channel, grab ammo for the rocket launcher, plant a C4 on the emplacement and proceed into the admin building.
Now that you have escaped from the outside chaos into a calmer inner area of the admin building, climb up on one of the small buildings and tranq a guard near an armory. This will attract another Marine, who will approach him and try to wake him up. Do not let him do that, however make sure that, when you tranq him, he is outside the camera’s FOV. Once they are both asleep, make your way upstairs. There, go prone and neutralise both soldiers on the watchtower. After doing that, drop down, grab tranquiliser rounds and go down the stairs into the machinery room with a guard in it. Tranq him and proceed to the boiler room, where you will encounter two more Marines. Neutralise them too and pick up the Mother Base prisoner, then go up the stairs leading to a small area with a camera right at the exit. Sneak under it, neutralise the guard you will encounter and exit the admin building.
Once you exit the building, turn left and go behind the crates. Tranq a Marine near an armory and proceed down the road while avoiding the camera. Once you’re near the third AAA, put the prisoner down and make sure no one is near it, if otherwise, tranq them and carry away from it. Plant a C4 on it and go away, then pick up a prisoner and carry him to the cave. Beware of the landmines on your way. You can either pick them up, which will replace C4 in your inventory, or blow it up by shooting it. The latter will attract the Marines’ attention, so be ready to quickly flee the suspicious spot if you decide to go this way. Once the prisoner is in the cave, carefully proceed to the old prison. A guard might come near its entrance and notice you, which is why it’s crucial to tranquilise him. Once the coast is clear, get all the POWs from their cages to the cave, then proceed up the nearest dirt road and stop at the corner. Equip your C4 and detonate all three emplacements.
With the AAA’s out of commission, equip your recoilless rifle and aim south, at the watchtower. An LAV will come around that turn soon, which you will need to blow up. Once it is nothing more than burning metal, quickly call the chopper to the cave and wait for it there. A 3-minute timer will soon appear, which will require you to act swiftly. Board all the prisoners on the heli and get on it.
KA-BOOM!

Outstanding job, Boss! S-rank!
DESTROY THE ANTI-AIR EMPLACEMENTS (BLIND SNIPER)
There is also a shorter way of completing this op (originally found by https://www.youtube.com/channel/UCbLgW2xXoNmAdRO44QT4sQA), which requires blind sniping, therefore be prepared for trial and erroe if you decide to use this way. Also, you need to have at least a B-rank in order to have a sniper rifle at the starting point.
The original video by Covert:
Skip the cutscene and, after grabbing the sniper rifle, run to the entrance near a wooden watchtower (the place near which you start in the Ground Zeroes Main Mission). Unlock the gate and make ypur way tp the nearest AAA. Upon getting close to it, creep up to the gun so as not to alert anyone and place a C4 near it. After that make your way to the watchtower near the western refugee camp, plant the remaining C4 in the middle of the road, climb up the tower and equip your sniper rifle. Also call the chopper in to the cliff where you start in Ground Zeroes Main Mission.
Once there you will need to snipe the red barrels near the other two AAA’s. The problem is, they cannot be seen due to the fact that metallic fence obstructs the view. Luckily, the penetrative power of your sniper rifle is great, meaning that you will only need to remebmer their locations:
The first one is here…

And the second is here.

Now detonate the first C4 so as to destroy the third AAA.
You’re only left to deal with an LAV. Get off the watchtower and go down the road and as soon as you are far away from the LAV, go prone. Detonate the C4 when the tank passes it and run towards the cliff where you called the chopper in – it should be there by the time the countdown starts. Get on board and exfiltrate.
Mission complete! S-rank!
DESTROY THE ANTI-AIR EMPLACEMENTS (GUANTANAMO ♥♥♥♥♥♥♥♥)
This method by https://www.youtube.com/channel/UC04Vz1SjQ7lwK0Cw2KX3aPg is quite insane, but believe me, it pays off well if executed right!
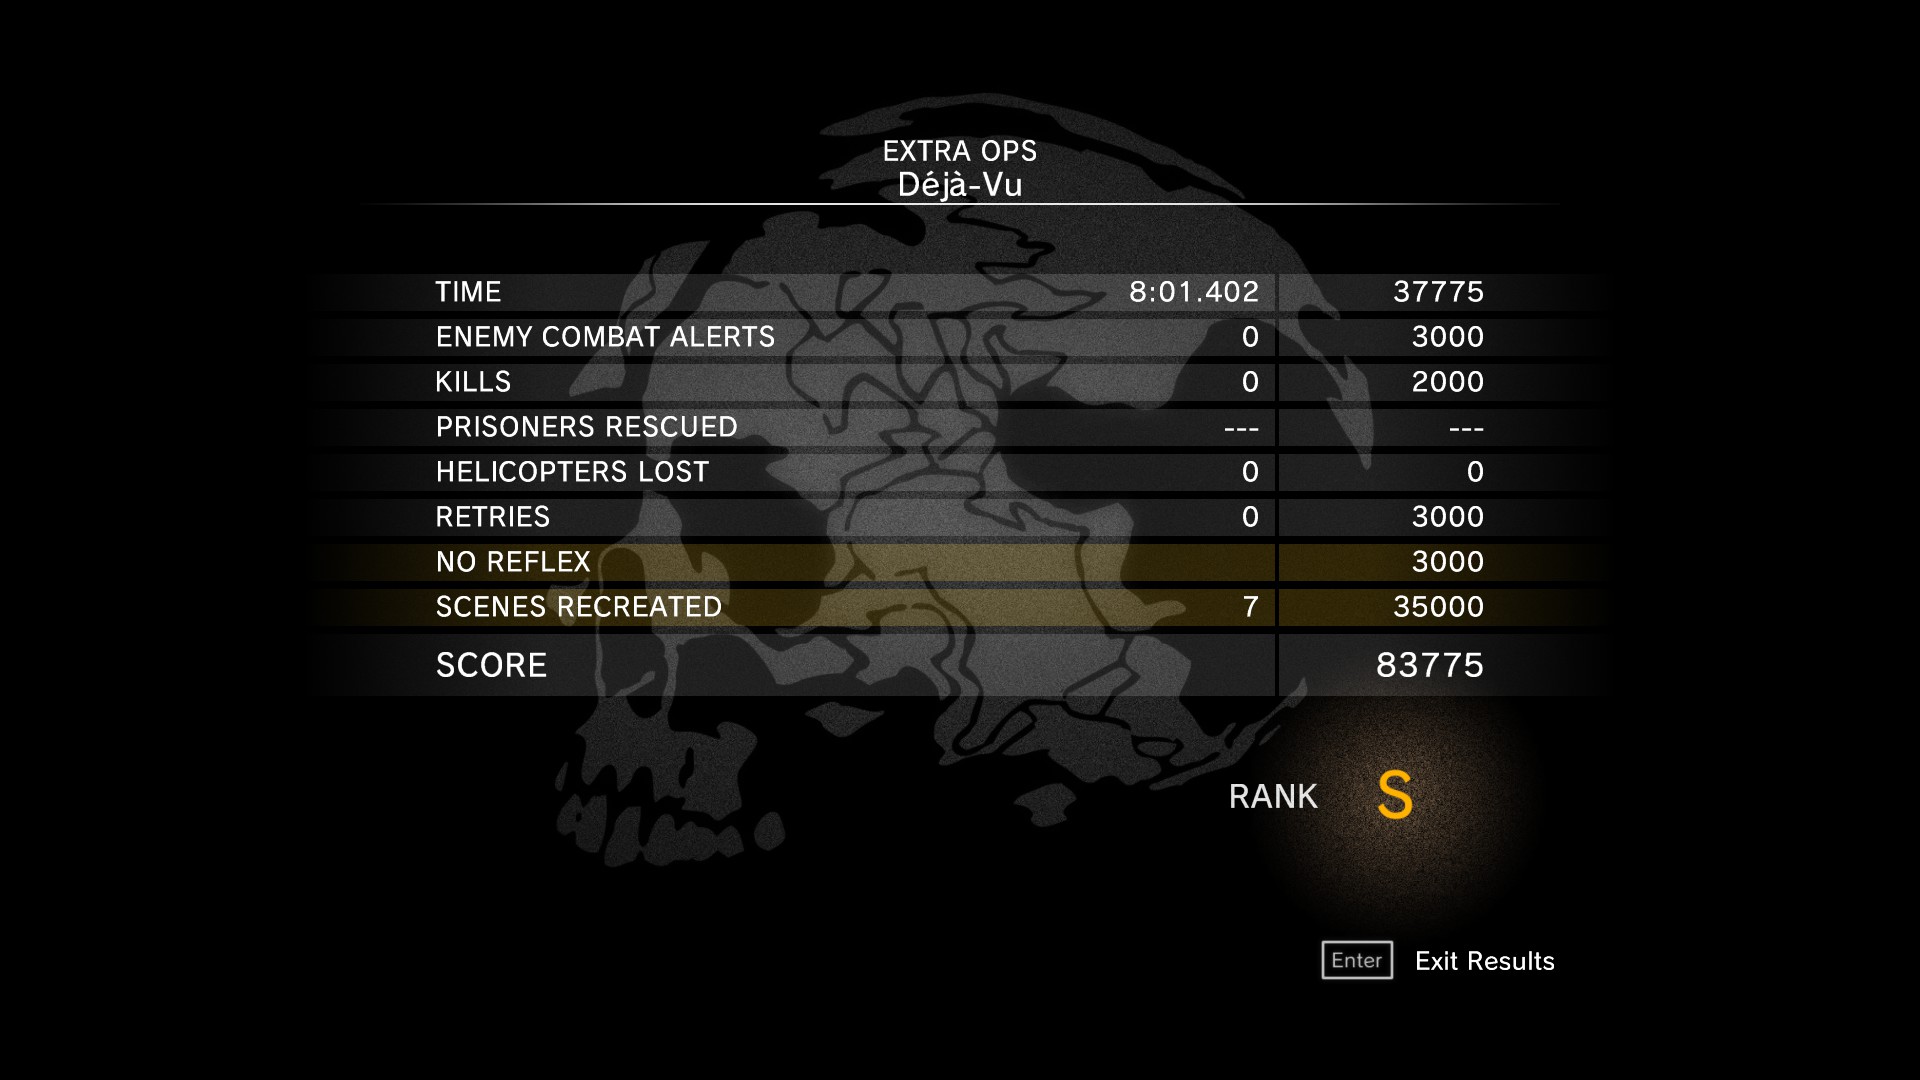
DÉJÀ VU
Alright, now that the Main Mission and all the Side Ops have been cleared, we can switch to the dessert. Why? Because the two Extra Ops we are about to take on are probably the most entertaining Ops in the whole game.

As usual, this is a one-man infiltration mission. Weapons and equipment OSP.
We start off with the nostalgia-filled, tactical espionage op DÉJÀ VU!

Upon starting the mission we will be greeted to a familiarly looking “Press Enter” prompt. After that we will appear on a dirt road near the old prison. Go to the cave while avoiding mines and collect a tape from a rock near it. Return to the dirt road and pick up an SMG from under the truck, then go up the further dirt road to the bridge. You will see a guard stationed there. Approach him and knock him out.

After that get on it, shoot out the camera, then wait until the guard comes to check it out, hold him up and knock him out.
Hide behind a barrier close to a heli. If you are fast enough, you can make it before the suspicion starts. You will recreate yet another SCENE – “Gunship”.

After that you will need to enter the red door. A guard will be patrolling an area near the staircase to the boiler room. Knock him out and proceed downwards to the room with the open ceiling. There you will find a Moai statue, another SCENE.


Blackout!
Oh, no need to ask who I am, for I am Psycho Mantis, the greatest practitioner of psychokinesis and telepathy in the world! And I have your PC under full control. Have you seen how I have turned your screen pitch-black? That is one of my powers! Now I will read you like an open book… Hm, your memory is completely clean. Or is the Steam Cloud too encrypted for me to read? Now put your mouse and keyboard down, as flat as you can… Yes, good. Now I will move them with the powers of my telepathy– What? What is that? No-o! Urgh, I’ll see you again!

Hey, are you alright? That’s good. We can continue with the op.


By now you should already have the Reminiscence achievement. Head to the admin building and locate an open ventillation shaft near the front gate. Get in it and crawl forward. Mission complete…
…Or is it?
You are now prompted to take a quiz about the original Metal Gear Solid from 1998. Get all questions right and you will earn yourself a bonus, but at least one wrong and the mission is over. Have at you, Snake!
QUESTION 1: MGS1 featured Solid Snake infiltrating which island?
ANSWER: Shadow Moses
QUESTION 2: The remote-controlled missile is known by which nickname?
ANSWER: Nikita
QUESTION 3: Who did you need to call on the Codec in order to save your progress?
ANSWER: Mei Ling
QUESTION 4: The Next-Generation Special Forces who took part in the uprising with FOXHOUND were given what treatment?
ANSWER: Gene therapy
QUESTION 5: On which floor of the Nuclear Warhead Storage Building was Otacon’s lab located?
ANSWER: 2nd Floor Basement
QUESTION 6: What was the Cyborg Ninja’s True Identity?
ANSWER: Frank Jaeger
QUESTION 7: Before being called back into action for the mission, Snake lived in Alaska as a…?
ANSWER: Musher
QUESTION 8: What was the maximum load of the elevator in Communications Tower B?
ANSWER: 650 lbs (300 kilograms)
QUESTION 9: What type of storage media did the ArmsTech president give Snake?
ANSWER: Optical Disk
QUESTION 10: What is the title of the ending theme?
ANSWER: The Best is Yet to Come
QUESTION 1: What did Snake call Otacon’s love for a certain female character?
ANSWER: Stockholm Syndrome
QUESTION 2: When Otacon visited Snake at his cell after he was captured, he gave him what level of security card?
ANSWER: Level 6
QUESTION 3: Which boss character was NOT a member of FOXHOUND?
ANSWER: The Cyborg Ninja
QUESTION 4: What was the name of the studio (later renamed Kojima Productions) that developed MGS1?
ANSWER: KCE (Konami Computer Entertainment) Japan
QUESTION 5: Who did Otacon fall in love with in MGS1?
ANSWER: Sniper Wolf
QUESTION 6: How did they censor Johnny Sasaki’s privates in the U.S. release of MGS1?
ANSWER: Pixelization
QUESTION 7: Snake attempted to give Meryl a handgun of what caliber?
ANSWER: .45
QUESTION 8: After escaping the base, Snake and Meryl encounter a family of which type of animal?
ANSWER: Caribou
QUESTION 9: In total, how many prototypes of the stealth camouflage did Otacon build?
ANSWER: 5
QUESTION 10: What did the “P.A.L.” in “P.A.L. Key” stand for?
ANSWER: Permissive Action Link
There is also the 11th question in both quizes:
QUESTION: FOX…
ANSWER: DIE!
JAMAIS VU

The last Op in this list and the noly one to allow you to massacre the whole base without consequences, the JAMAIS VU Extra Op!
As soon as the cutscene finishes, run up the dirt road and climb on the nearest wooden watchtower. There, hold up a guard, interrogate him and tranquilise him. Based on his information about the Marines’ location, jump off the watchtower and go into the estaern refugee camp. There you will find a Body Snatcher. Shoot him in the head and let him evaporate as you go on the road and take aim on the guard on the metallic watchtower close to the warehouses. He is a Snatcher, as well as his buddy near the warehouses – shoot them both and go to the helipad. A human guard will be stationed near the front gate of the admin building. Go prone and tranq him, then carry his body over to the armory.
Hide behind the barrier close to the front gate and take aim of the road near the helipad. A jeep will soon appear, which you will need to shoot in order to get the driver (human) and the passenger (body snatcher) out. Neutralise them and enter the red door near the front gate. Go down the stairs while evading the camera and carefully enter the boiler room. A snatcher will be there, whom you will need to kill. Exit the boiler room and enter the machinery room. A human guard might be there, if not, he can be found near a body snatcher in the inner area of the admin building. Eliminate him and his buddies, then make your way to the helipad.
Once there equip your rocket launcher and destroy all three AAA so that not to bother about them later. A snatcher invasion will soon begin with a guard on the admin building watchtower with a recoilless rifle. Shoot him as well as the first wave of body snatchers (grenades might be useful for taking enemies out from a distance, by the way). After the wave is gone, two RR-wielding snatchers wil appear from the south, whom you should not have trouble eliminating. When they are gone, a heli with an RR-wielding Marine will apppear. One shot from your rocket launcher will be enough. Once the second wave begins, shoot them with your RR so as to save a lot of time. The third wave will begin with a heli, which now needs to be taken down completely. It is recommended that you deal with (most of) the Snatchers swiftly first, then destroy it. Once the coast is clear, board on the chopper and exfiltrate.
Keeping your Reflex Mode on is a good idea for the waves, since it will be easier for you to be detected there. Also, when using your RR, make sure you are far from the snatchers as they will sound the alarm in case you are firing the rockets close to them. Moreover, completing this mission without triggering an alarm is the only way to get an S-rank, as well as a Hidden achievement.
THE VU SECRETS
We are not done with the Extra Ops yet, as they offer a little bit more than what you have read about before.
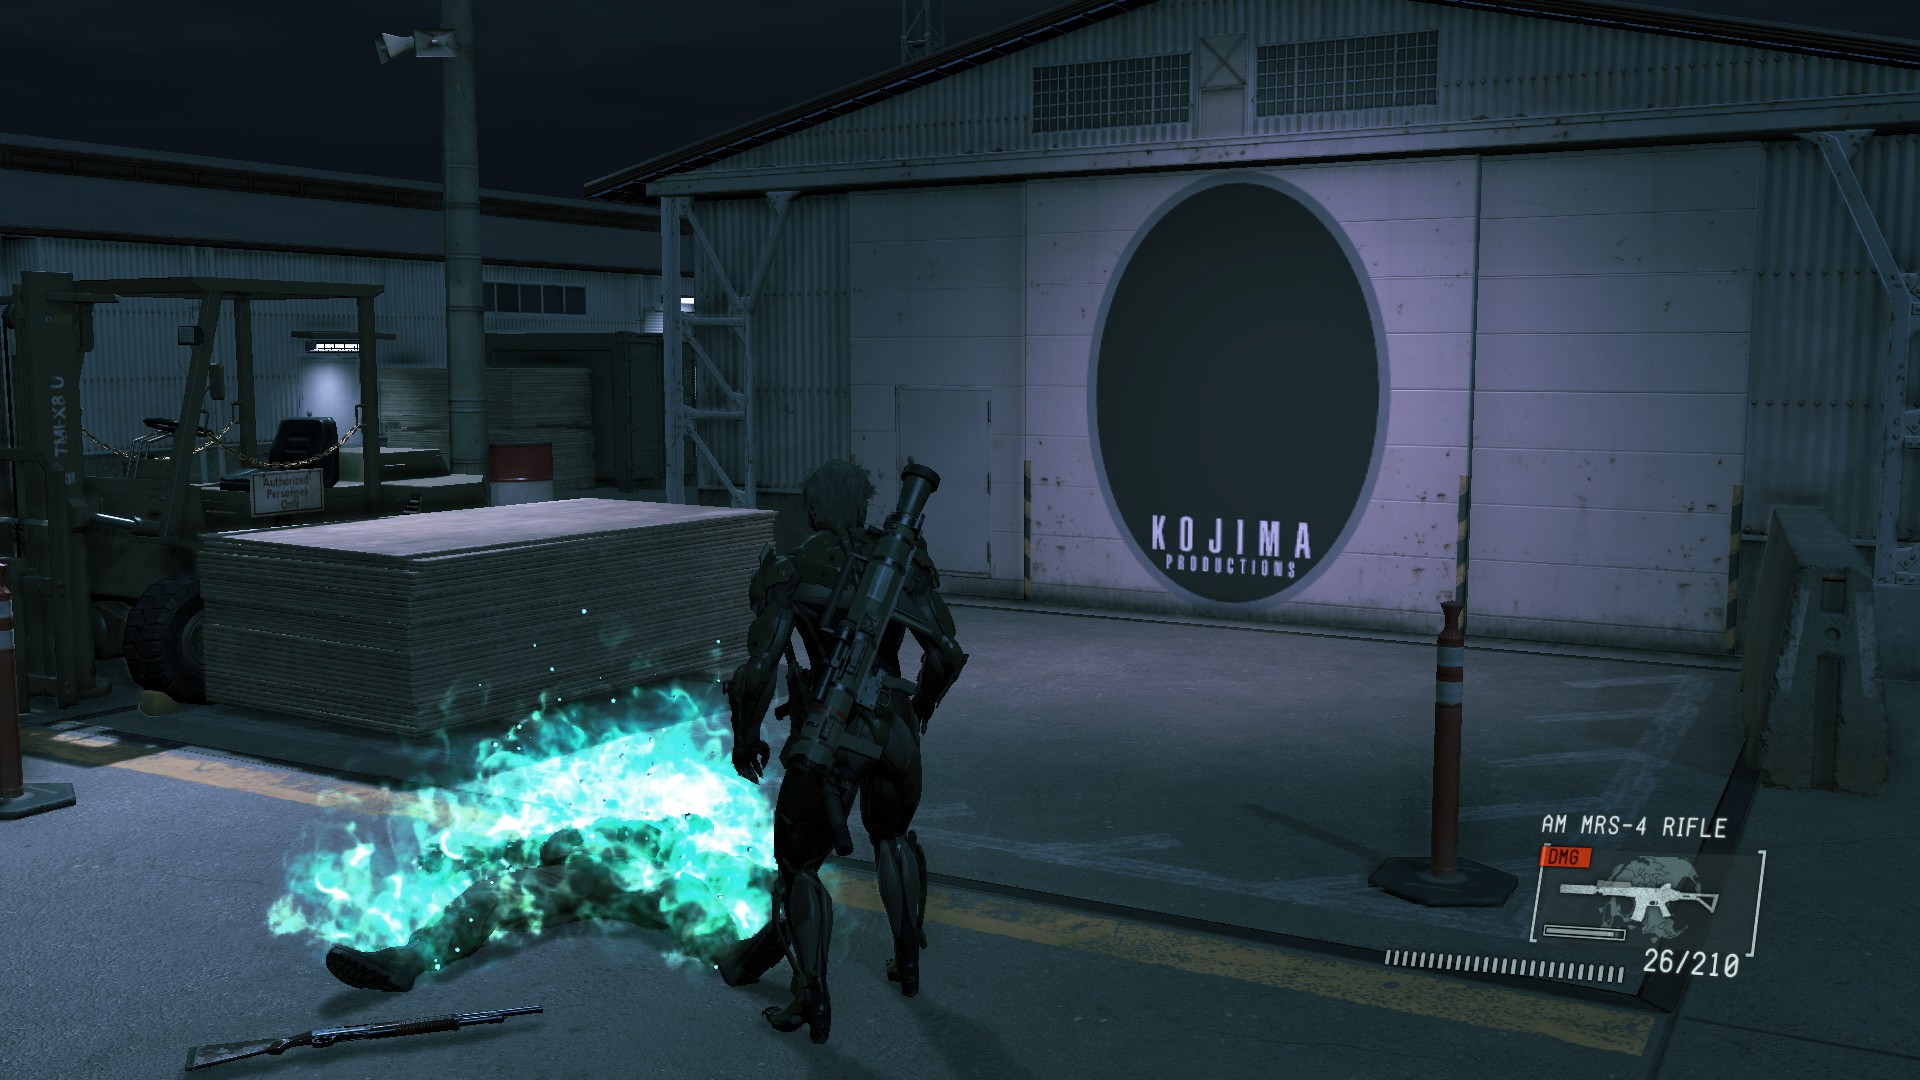
Completing the Metal Gear Solid quiz in Deja Vu on Normal difficulty gives you the Classic Snake Skin (the low-poly version of Solid Snake from the original Metal Gear Solid), while the reward for completing it on Hard is the Frank Jaeger skin, a.k.a. Gray Fox. Both these skins also tweak the experience of the Op a bit: snow is present (to which Kaz refers to as SNOW-9 pollen, a reference to Snatcher[metalgear.wikia.com], another game by Hideo Kojima) and all the Marines are turned into Genome Soldiers. Furthermore, the Frank Jaeger skin allows you to run at high speed, much like Raiden.
Getting a high score in the Jamais Vu Extra Op on Normal gives you the White Cyborg outfit, while doing so on Hard gives you the Green Commando outfit. Sadly, unlike in Metal Gear Rising: Revengeance, the purpose of these suits is none other than cosmetic decoration.
There are two prisoners to be found in the Deja Vu extra op, located in the came cells as Chico and Paz in the Ground Zeroes Main Mission.
Donald Anderson
Kenneth Baker
Both will succumb to FOXDIE upon contact, making their extraction not a plan. After both are dead, Fox Engine will too succumb to the virus, however it later manages to overcome it.


Thanks, Fox Engine.
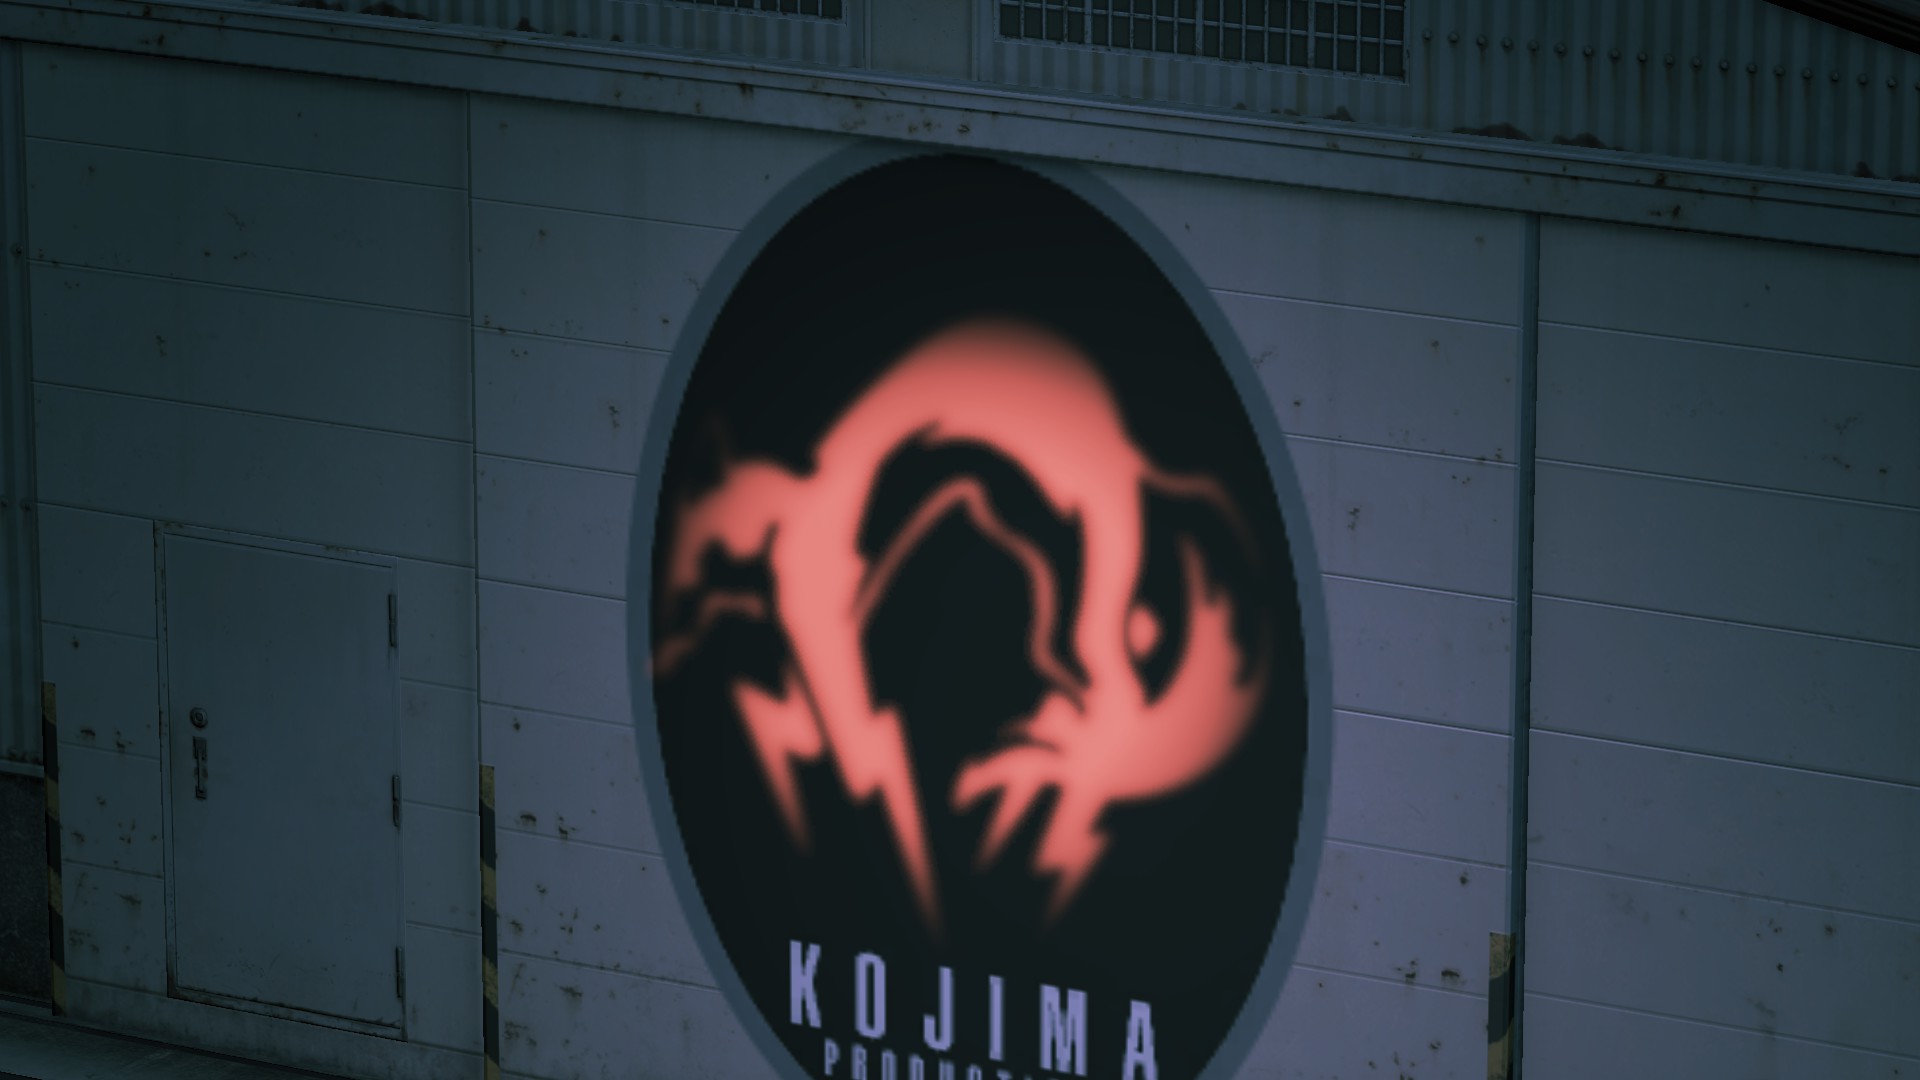
While not a necessary mission task, you can play around the camp in both Extra Ops and erase the Metal Gear markings. To do so, you will need to procure the AM MRS-4 Rifle w/ Special Light from the northernmost armory of Camp Omega.
The rules are simple: point that light at a logo and see if it will disappear, like in the opening cutscene of Ground Zeroes Main Mission. The METAL GEAR SOLID logo will…


Unlike the METAL GEAR RISING: REVENGEANCE logo, which can be found just opposite of the armory.

These two logos can be found on a regenerator adjacent to one of the warehouses. METAL GEAR SOLID 4: GUNS OF THE PATRIOTS will disappear, unlike METAL GEAR ARCADE.
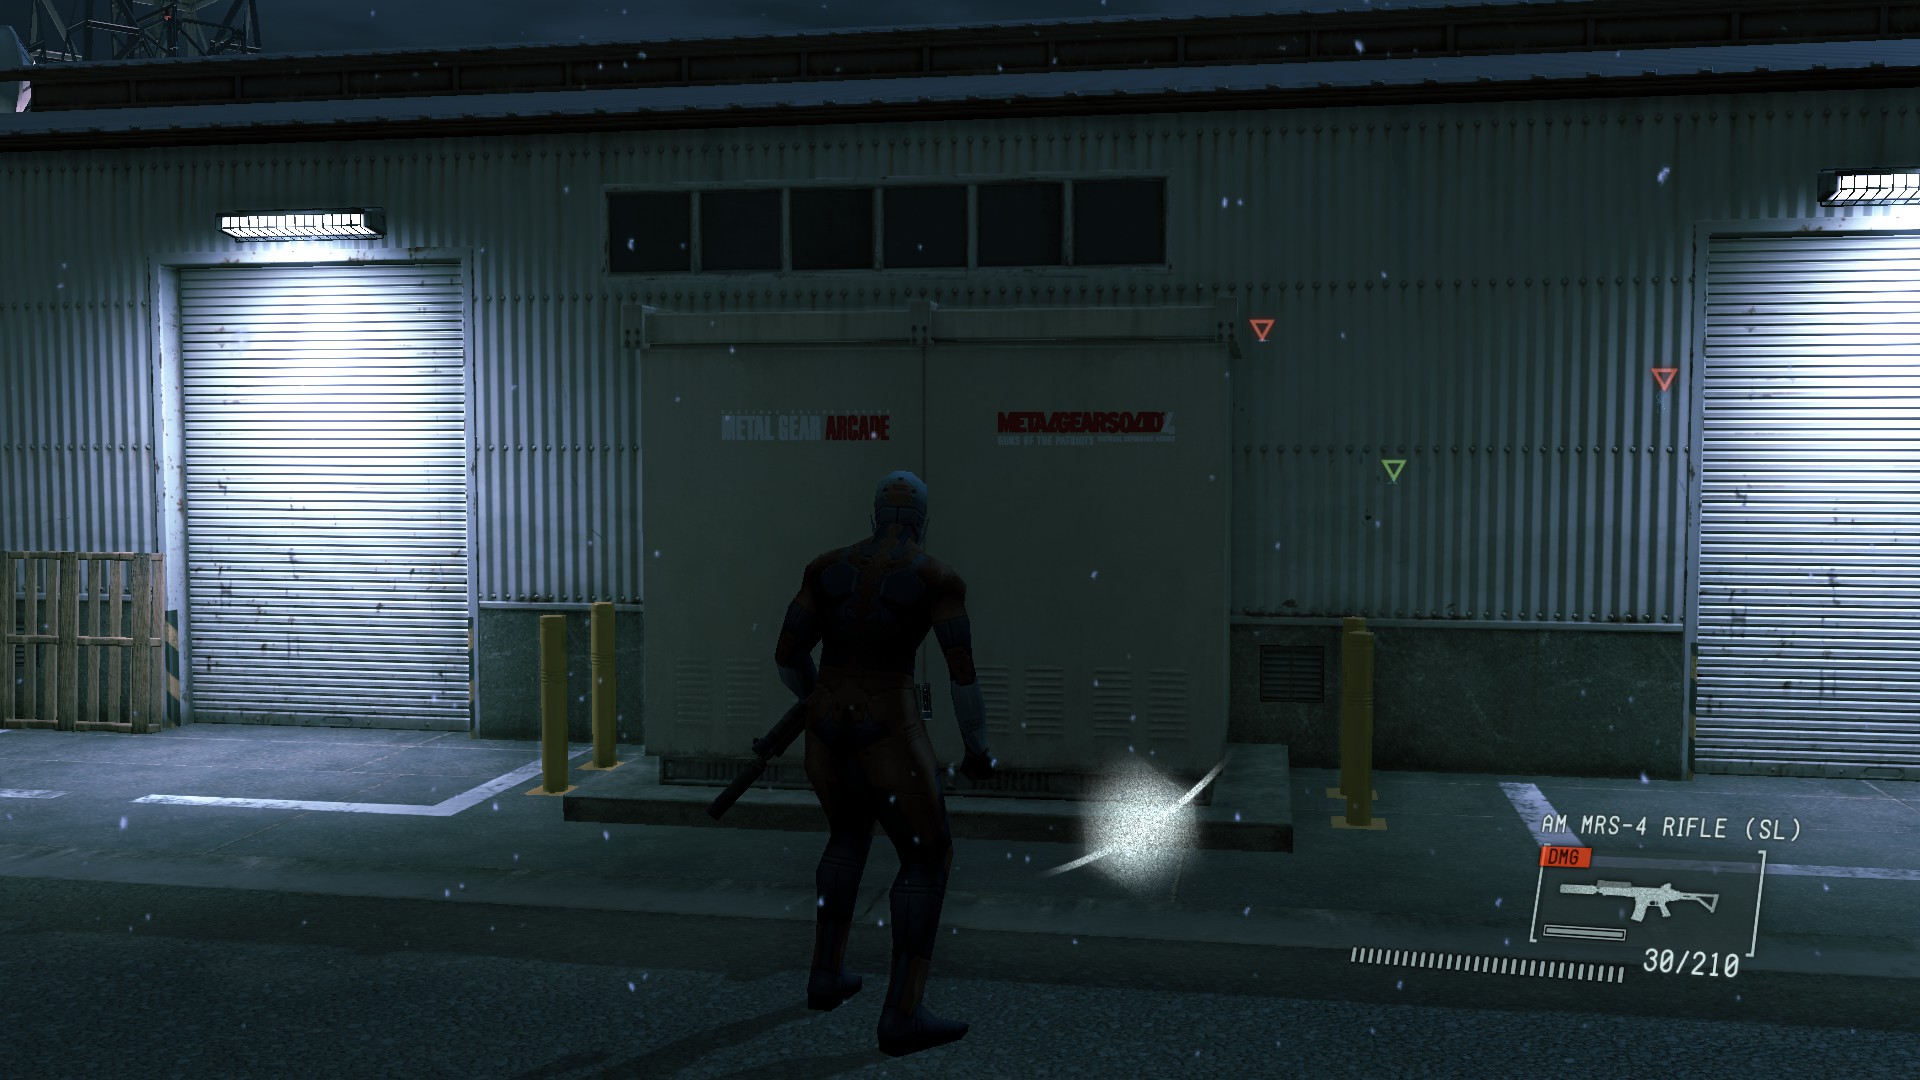
The would-have-been-canon MGS: PORTABLE OPS, found left to the previous two logos, sadly, will not disappear.

Climb up the wooden watchtower in the western refugee camp and you will find yet another removable marking, this time it is METAL GEAR SOLID 3: SNAKE EATER.

The logo of Metal Gear Solid 2: Sons Of Liberty can be found behind a sign at the T-intersection close to the starting point of Ground Zeroes Main Mission. It might be a good idea to blow the sign away with a hand grenade so as to easily remove the logo.
The logo of METAL GEAR AC!D 2 can be found to the left of the previous one, on a concrete barrier.

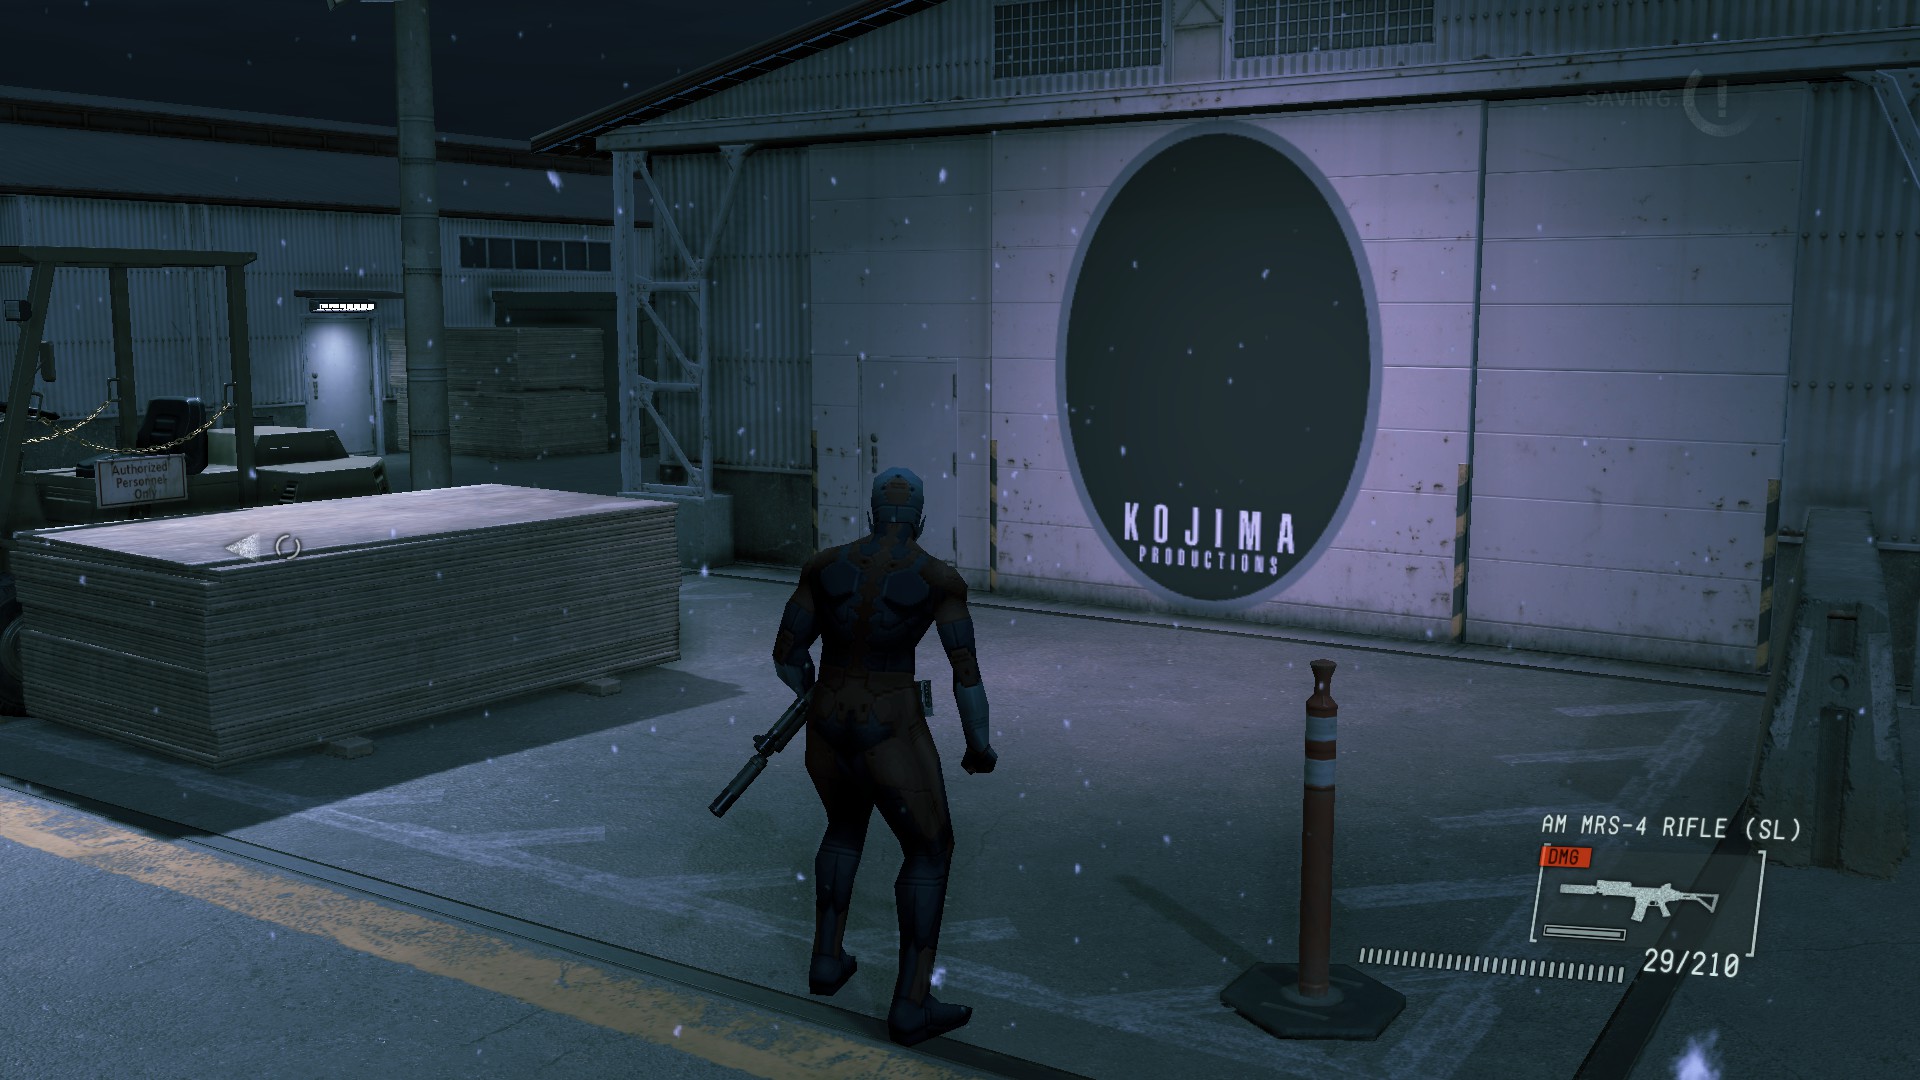
To find the removable METAL GEAR 2: SOLID SNAKE logo, go to the armory with KOJIMA PRODUCTIONS logo on it.

Climb up the armory where you have found the previous logo and you will locate the irremovable METAL GEAR SOLID: SOCIAL OPS logo.

The irremovable logo for METAL GEAR SOLID: TOUCH can be found on a metallic fence in the old prison area, next to port-a-potties, one of which is occupied by John Sasaki.

Climb the booth near the starting point of this Op and you will find a removable METAL GEAR SOLID V GROUND ZEROES logo.

The last logo, that of METAL GEAR SOLID PEACE WALKER can be found on your heli’s tail.
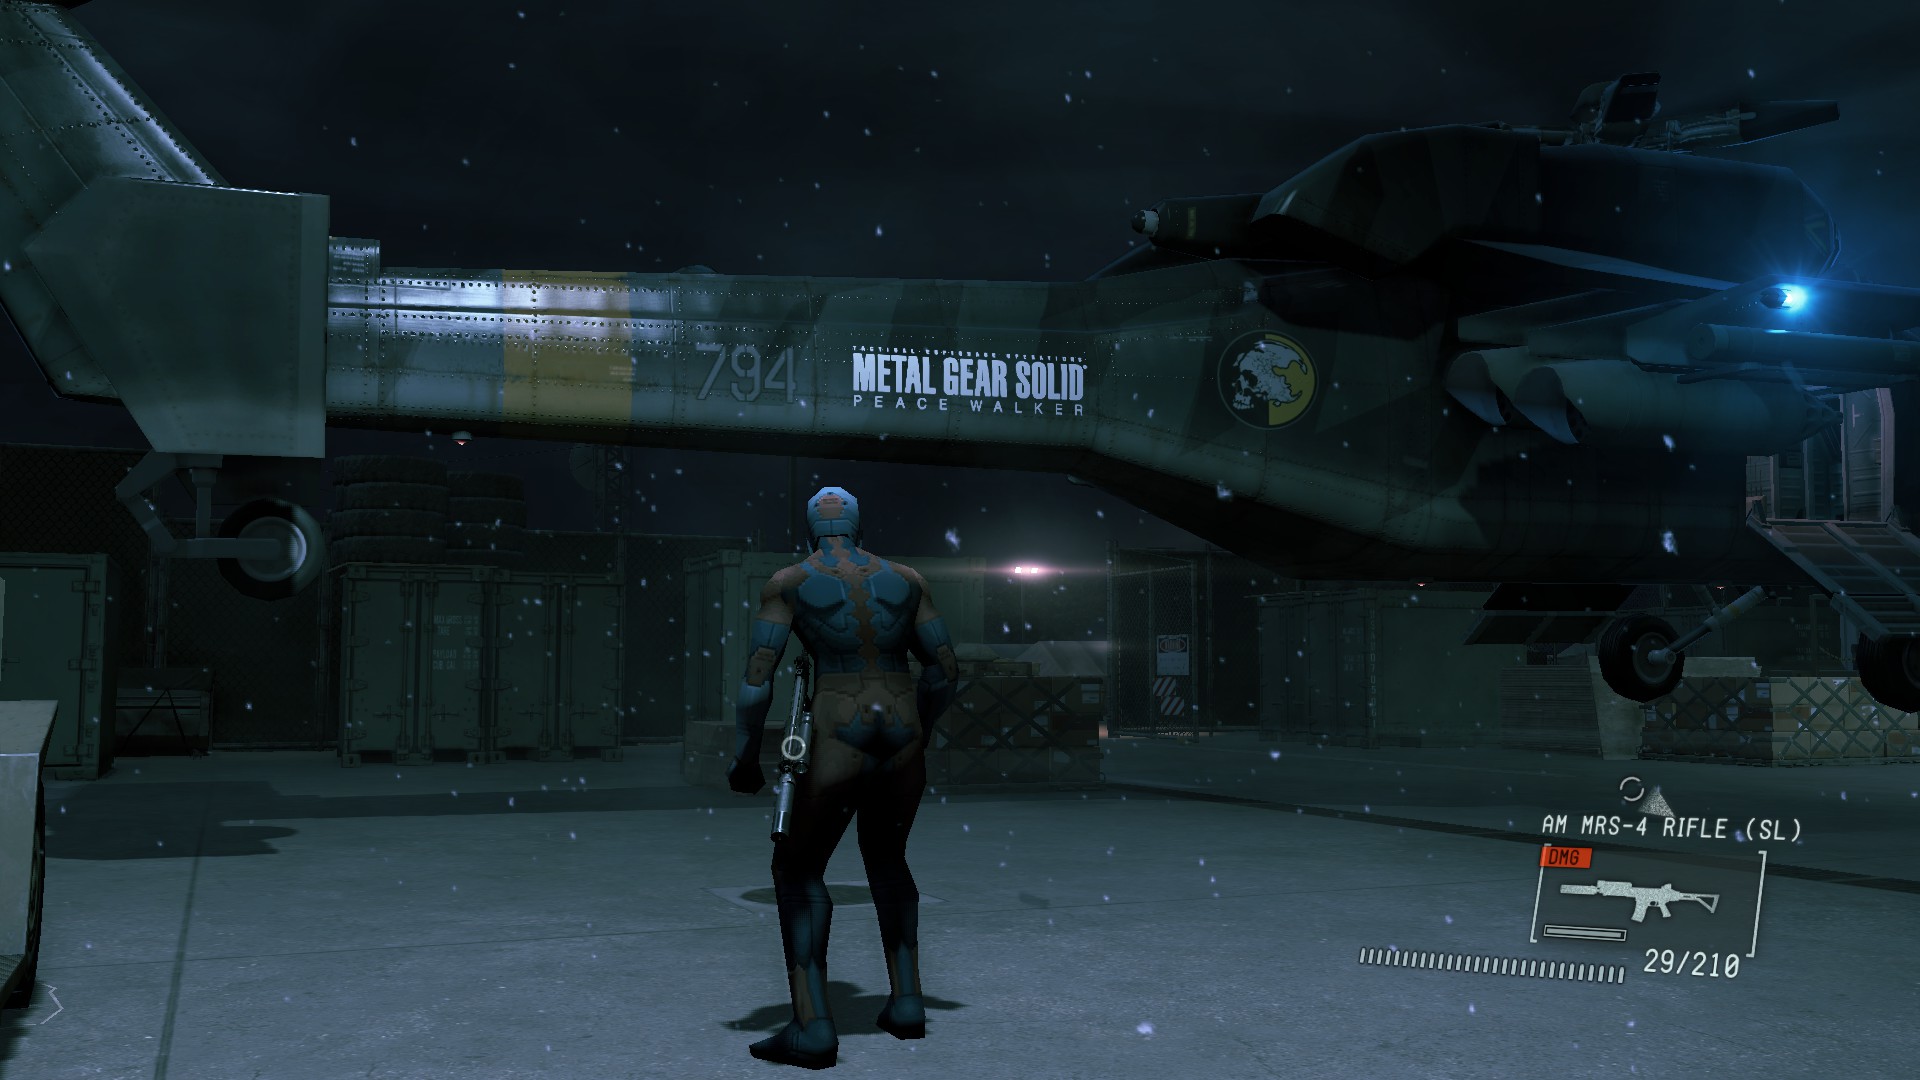
Upon erasing every logo Kaz will congratulate you, after which either Liquid Snake, Psycho Mantis or Hideo Kojima himself can be heard over the Codec.
While playing the Ops you will encounter the KojiPro ovals without a fox in them. To make it appear there, point one of the searchlights in the oval.
DEJA VU:
In the Warehouse area:
On the southernmost armory:
JAMAIS VU:


In the Warehouse Area:
At the Helipad:


“UNLOCKED” ACHIEVEMENT & 100% COMPLETION
If you have followed my guide, you should have already got all the achievements, save for one: Unlocked. This is the part of the game that might give you headache, since in order to get this achievement, you need to follow these steps:
- Complete the Op on Normal;
- Complete the Op on Hard;
- Complete the “Fastest Tagging of all enemies” trial on Normal;
- Complete the Op on Hard once again.
The only exception to this is the Intel Operative Rescue Op, where you will need to do the following:
- Complete the Op on Normal;
- Complete the Op on Hard;
- Complete the Op on Hard once again.
After that only one goal remains: completing the game with 100 percent clearance. To do that you need to:
- S-rank every Op both on Normal and Hard;
- Unlock every trial;
- Collect every collectible.
If you have met these three requirements, then, well…

CONGRATULATIONS! You have proven the capabilities and endurance beyond human and are fully ready for…

WAYS TO ENTERTAIN YOURSELF
Still, you might want to have revenge on the guards that caused you trouble on your way to victory (or simply screw around the camp). If you feel like it, then you might as well do the following:
EXECUTIONS:
Just gather some guards around, line them up, hold them up and unload. He-he-he. >:3
BRUTAL EXECUTIONS:
Why simply unload when you can blow the living crap out of them with a C4 attached to one of the poor guys. Also, it is a funny way of making diversions, like in Eliminate the Renegade Threat Side Op: creep up on one of the guards, attach a C4 on their back and blow it up when they are near the target. >:3
MODDING:
Because Chico wants revenge on XOF soldiers and Big Boss-like seagulls!
And many more…
POSTSCRIPTUM
I really hope you have enjoyed this guide. If you have any suggestions, wishes etc. then please write them in the comments below. Oh, and if you appreciate my work, then I would be very grateful if you would rate it up and add to your favorites. Thank you for your attention and have a nice day! ^.^
And while you are here, you might also check out a guide made by my friend, Weavoid. I personally recommend it! c:
[link]