Overview
How to unlock the full potential of Miko, Battleborn’s most valuable character.
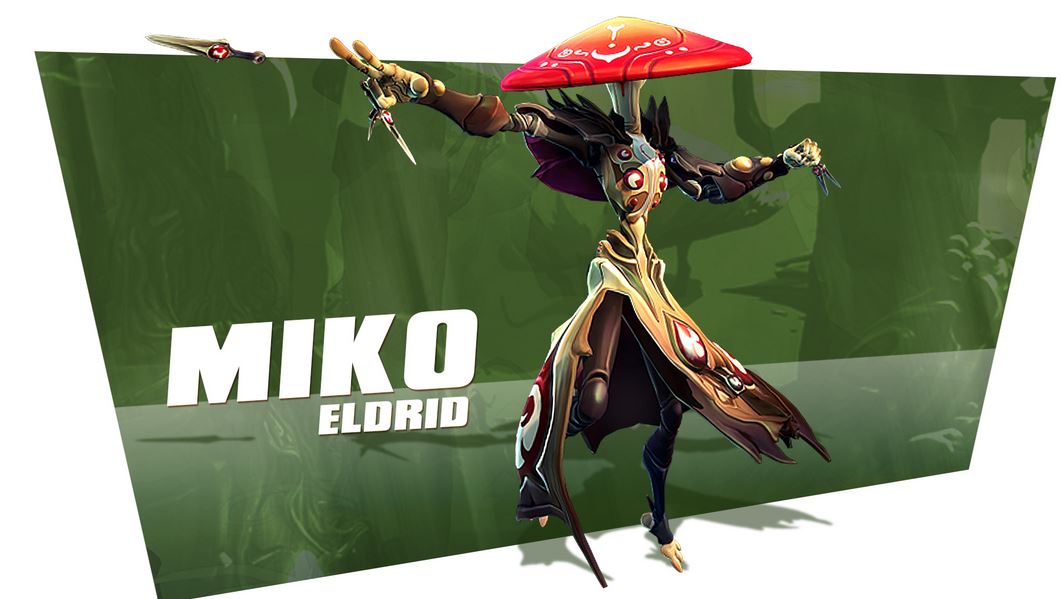
Miko – Overview

If you’ve played Battleborn for any amount of time, then you’re familiar with Miko, the basic healer class. An entire match can easily be determined by the skill of the Miko that is on your team, and a team with a good healer will almost always win against a team without one.
The reason I’m making this guide is because Miko is an excellent support character, but he is underused. Whenever I see somebody playing a Miko, they usually are terrible support for their team. I hope to encourage and help people with playing Miko, so that they can help their team be the best they can be.
In my opinion, Miko is one of the best team players in all of Battleborn. He has good CC, fair DPS, and above all, excellent support capabilities. If you’re interested in putting the wellfare of your team above your own personal XP, then I highly recommend putting some time into your Miko.
If you’re interested in a more aggressive playstyle, then consider checking out my guide for [color=#8519bf]Galilea[/color], the dark warrior from Bliss.
If you’re more interested in a healthy medium between friendly and murderous, check out [color=#24f0ed]Kleese[/color], the hair-brained master of science.
Without further ado, let’s get down to business.
Abilities

Miko’s primary attack hurls a barrage of poison-tipped Kunai, while its secondary activates a Healing Beam that restores health to target allies.
Both Miko’s Kunai attacks and his Healing Beam are powerful tools, but it’s important to know when to use each. We’ll get into specifics in a moment.

Miko has evolved to adapt and survive through natural toughness, rapid health regeneration and the ability to cover ground quickly.
Miko’s ability to cover ground quickly is, depending on your preference, the most important thing about being a Combat Healer. His passive health regeneration is also a plus, but not too significant in and of itself.

Miko’s kunai poisons enemies on impact, dealing 50-68 damage over 2 seconds.
Miko’s Kunai attacks are his primary source of DPS. They are excellent for support as they deal decent initial damage as well as fair DoT damage. If you become very skilled with these, you’ll find Miko to be surprisingly deadly.

Miko gains 260-350 health over 5 seconds. During that time, Miko’s healing beam grants 35% more health.
This is the skill that sets Miko apart from being a stereotypical weakling healer and makes him a proficient combat healer. This skill allows him extra healing power, as well as near invulerability when used appropriately.

Throw a spore sack that explodes on contact, dealing 139-187 damage and leaving behind a cloud of spores that slows all enemies that enter it for the next 4 seconds.
The primary purpose of this in Combat Healing is as a CC mechanic. It can be modified for different things depending on which game mode you are playing.

Hurl a mushroom to create an area of effect lasting 45 seconds. Allies gain 83-150 health per second while in range. Can be destroyed by enemies.
This is Miko’s Ultimate, or unlockable, Ability. It is an excellent compliment for any Combat Healer, and is especially helpful during a match’s end-game, as it allows your teammates to hold their ground with relative ease.
Helix Upgrades – Table
While Biosynthesis is active, healing an ally with the Healing Beam increases Miko’s movement speed. +15% Movement Speed.
Intensifies the slowing effect of Cloud of Spores. +100% Slow.
Biosynthesis’ healing-over-time effects are extended to nearby allies.
While Biosynthesis is active, healing an ally with Miko’s Healing Beam also heals Miko.
Reduces cooldown time across all skills. -15% Cooldown Time.
Increases the reload speed of Miko’s Kunai. +50% Reload Speed.
Increases healing granted to allies by Miko’s Healing Beam. +13 Health per Second.
Cloud of Spores drops spores along the way to a target covering a larger area.
If Cloud of Spores hits an enemy directly, that enemy is stunned rather than slowing all enemies in the blast radius. +2 seconds Stun Duration.
Cloud of Spores sticks on impact, bursting when enemies enter its blast radius or after 60 seconds.
A portion of damage dealt to enemy health by Molecular Mycology is returned to Miko as health. +15% Life Steal.
Molecular Mycology’s poison effects spread to nearby enemies.
Any damage dealt by Miko applies Molecular Mycology’s poison effect.
Increases Biosynthesis’ self-healing effects. +15% Healing.
Increases Cloud of Spores’ impact damage. +15% Damage.
Increases the effectiveness of Miko’s Healing Beam while Biosynthesis is active. +25% Healing per Second.
Briefly increases movement speed when taking damage. +15% Movement Speed.
Increases the firing rate of Miko’s Kunai. +20% Attack Speed.
Using the Healing Beam on allies reduces Biosynthesis’ cooldown. -30% Cooldown Time.
Increases the duration of Biosynthesis’ effects. +5 seconds Duration.
Enlarges Cloud of Spores’ area of effect. +50% Area of Effect Radius.
Cloud of Spore lingers longer after bursting. +6 seconds Duration.
Increases the maximum health of Fungus Among Us mushrooms. +214 Maximum Mushroom Health.
Fungus Among Us deals damage over time to enemies in range. +167 Damage per second.
Reduces the cooldown of Fungus Among Us at the cost of reduced mushroom health. -50% Cooldown Time, -214 Mushroom Health.
Helix Upgrades – Build

First Responder
This is an important first choice because it increases your survivability, your ability to get help to teammates fast, and your ability to keep up with teammates when healing during combat.
While Breathe Deep does give you a lot more control over the battlefield, it’s usually not worth the trade-off of extra speed, especially since your primary focus with Miko is a healer, not a controller.
Heal Thyself
This is the most important upgrade in the entire tree. If you get nothing else from this guide, pay attention to this choice. I mentioned earlier about how incredible Biosynthesis is, and this upgrade is why it’s so effective. We’ll go in detail about why this is important in the next section.
Evolutionary Emergence or Plentiful Healing
One of the most valuable buffs for any character is a reduced ability cooldown timer. This allows you to use your abilities much more often, and can easily be the difference between winning or losing a fight. You’ll also have more rapid access to Biosynthesis, which is vital to your survival.
That being said, a straight buff of your healing from 52 HP/Sec to 65 HP/Sec is also very helpful.
Try both and decide which one you like better. I go back and forth depending on what I feel would be most useful during the specific match. Unless there is a specific reason that you need Evolutionary Emergence, I’d always go with Plentiful Healing.
Trail of Spores or Sporeshock
Trail of Spores is incredible for Incursion, as you can bring the entire line of enemy bots (and players) to a near-stop by throwing your spore as far as you can, straight down the pathway. The only reason you might want to use Breathe Deep as your Level 1 Upgrade is if you wanted to exploit this as a controller in Incursion game mode.
Sporeshock is excellent if the enemy has a very large character, especially a tank. This upgrade allows you to completely stun an opponent for 2 seconds, but only if you hit them directly (not with splash/AoE damage). Spores don’t travel very fast, so this upgrade will only be useful at close range for helping to finish off weak opponents or for getting out of trouble.
My recommendation is to go with Trail of Spores for PvE, but Sporeshock is supreme for PvP and supporting against players/major enemies. Also keep in mind that you will have to use Sporeshock for a while to get one of Miko’s Lore Challenges.
Pandemic or Toxic Transfusion
For Incursion or Meltdown, I definitely recommend Pandemic, as this allows you to poison an entire cluster of enemy bots with a single kunai throw. It’s pretty much useless for Capture, though.
Toxic Transfusion is a decent bonus as it gives you about 3.6 HP/Sec regeneration when you have a single enemy poisoned. If you’re fighting several bots at once, you can stack this buff, but remember that it only lasts for 2 seconds. However, it is basically your only option when doing Capture.
Healer’s Oath
Healer’s Oath is an excellent straight 25% buff to your healing with Biosynthesis. Since most of your critical healing will likely be while Biosynthesis is being used, I highly recommend using this upgrade. With Plentiful Healing, your Biosynthesis healing will be around 97.5 HP/Sec without any gear. That means you /and/ the person you’re healing will recover nearly 500 health in 5 seconds.
If you haven’t unlocked this Mutation yet, go ahead and grab Probiotics. Since you’re a healer, Spore Strike’s damage buff shouldn’t really be useful.
Fight or Flight
Survival is vital for Miko, as any time he’s out of the game, his entire team is significantly weakened. With this upgrade, you get a good +15% speed boost when taking damage. Since you’re a combat healer, this is vital. All too often the teammate your healing will run away a little too fast, leaving you to the wolves. With this 15% buff and your 15% buff you get with First Responder, you should have no problems getting out of hotspots safely as long as you use your Biosynthesis properly.
Biosynergy
Since a large portion of your time will be spent healing other teammates, this is an excellent skill to have. Since using your Healing Beam doesn’t slow you down at all (you can even sprint while using it), if you stay by a teammate, you can constantly have your Healing Beam on them to speed up your cooldown timer. This is also excellent as it means that when you’re healing during combat, you’ll get that boost 30% faster, which can easily determine whether you or your teammate survives or not. If you used Evolutionary Emergence, you’ll have this 30% boost on top of your 15% boost, plus any gear you have equipped.
There are some circumstances where I could see Residency being preferable as it effectively doubles the time this abilty can be used, but 90% of the time, I’d go with Biosynergy. It’s up to you, though.
Resilient Strain
This upgrade causes your Spore cloud to last for an additional 6 seconds. If you used Breathe Deep and/or Trail of Spores, this will be the icing on the cake for CC.
I don’t recommend Spore Storm as it seems fairly underwhelming, but if you find yourself getting into a lot of 1v1’s (which you shouldn’t), then you might consider trying it out.
Vicious Strain
Vicious Strain adds a staggering 167 Damage/Sec within the radius of the Mushroom while allies get 75 HP/Sec, and it lasts for up to 45 seconds. This skill is a /massive/ game-changer in terms of controlling the conflict. With any luck, tossing your Fungus down in the middle of a battle can easily turn the tables on the enemy.
Remember, though, that your Fungus can be destroyed with only minor difficulty if the enemy notices it, so it’s best to place it down either in a reletively safe area for a healing base, in the middle of a battle that’s already begun, or behind an obstacle right next to a strategic location (such as a hallway or another chokepoint).
Tactics
While having the right upgrades for your build and understanding your abilities is incredibly important, it’s nearly useless unless you can apply them properly.
Healing, Healing, Healing! Miko’s job is to keep his teammates at or around full health. If he can’t do that, then his job is to keep all of his teammates alive. If he can’t do that, then his job is to keep his most valuable teammates alive for as long as possible. My point is this: Your job is to heal your teammates. Everything else is secondary. If you don’t fire a single kunai and don’t use Cloud of Spores once in a match, but you are constantly healing your teammates, that is way better than not healing and just trying to PvP the whole time.
That being said, there are some circumstances where Miko will need to PvP in.

There’s really only 4 times when Miko should be fighting.
1. He’s doing support or killing bots
2. There’s a wounded enemy that can be easily killed
3. He’s been rushed by an enemy and can’t run
4. He’s failed at his job and all his teammates are respawning
Support is pretty easy. Whenever your teammates aren’t hurting for health, you should be throwing some Kunai towards the enemy.
If there’s a wounded enemy, you have to make a judgement call as to whether or not you can kill that enemy without neglecting your teammates for too long. If you go after them and you get too far away, turn back and return to your teammates. They get lonely after a while.
If you’re being rushed by an enemy, keep your Cloud of Spores ability in mind. Slowing the enemy down or stunning him could be enough to let you run to safety. If you have to fight, spam Kunai attacks while you move and jump as quickly and randomly as you can without sacrificing accuracy. The Kunai can be hard to get the hang of at first, but with practice they are far deadlier than people realize.
If you’re the last friendly player on the field, just slow the enemy down as much as possible. There’s no way you’ll actually win any battles with 1v3-4-5, but you can at least keep them from walking right over you. Be careful and run away when you need to. When your team respawns, they’ll still need their healer.
Also keep in mind that Miko’s melee attack can be very useful for manual crowd control, as it pushes any enemy you hit with it away. I often use this attack to push enemies over cliffs or you can spam it in buildings to trap an enemy in a corner where they can’t move, allowing my teammates to mow them down with ease. This can be especialy useful when the enemy team has a Miko, as you can push enemies and Miko away from each other to make healing more difficult, and there’s nothing worse for a Miko than being pushed straight into a group of enemy players.
Miko’s melee attack is also good if you’re forced to 1v1 with a ranged attacker, as they are at a severe disadvantage at close range. If you keep them in a corner and strafe right in front of them while spamming melee, that alone can often end the fight. It’s tricky to pull off at first, but with a little practice and skill, it’ll ruin the day of many ranged attackers. Check out “The End” section of this guide for more info about the technique.
One of Miko’s big bonuses is his speed. With the right upgrades, it’s pretty hard for somebody to catch your Miko if you want to run away. This is also very useful when healing, or if you decide to fight. Miko’s speed allows him to move in a very erratic fashion, which, in conjunction with his thin frame, makes him a target that’s nearly impossible to hit from any distance. When in combat or the line of fire, be sure to move around rapidly and jump often. It’s best to not be predictable, but any movement is better than standing still.
Practice this and see if your survivability doesn’t go way up.
Tip: Don’t forget that you can and often should sprint while using your Healing Beam.
It should be pretty obvious by now that Miko’s main purpose is as the team Healer. Because this is the case, it’s important to be able to heal well. Healing preferences will change with each match, and you’ll have to use some discernment to figure out how you want to focus your attention.
Usually my priority is to heal the person who I think is in most in danger first. If I’m helping a tank who’s doing fine and I see a skirmisher about to get annihilated, I’ll usually sprint to the skirmisher with Biosynthesis and save them before returning to the tank. In a fast-paced battle especially in Incursion, you’ll probably spend 90% of your time with your finger on the right mouse button.
Tanks
People are going to hate me for saying this, but don’t focus all your attention on tanks. If you don’t know what Tanks are, they’re BattleBorn who have a high capacity for absorbing damage and often high Max HP, such as Montana. Tanks are very useful for the team, but if you only heal the tank, you’re minimizing your usefulness to your team. If the tank is at high health and isn’t in immediate danger, there’s nothing wrong with healing another teammate, as long as you don’t stray too far away from your tank.
Dividing Attention
It’s important to be able to divide your attention between all your teammates. Like having children, you have to keep an eye on them or they’ll get in trouble. Some children are responsible and will return to the loving embrace of your Healing Beam before they get in too much trouble, and some will venture off alone and get immediately murdered. Most of your teammates will be somewhere in between. Idealy, you have enough speed and skill to juggle the HP of all of your teammates, but sometimes you have to just ignore that one guy who has no idea what he’s doing and isn’t really helping the team.
I like to cheerfully give pre-game tips to my teammates to make my job (keeping them alive) easier. Usually I’ll introduce myself and then give them some advice such as “Stay close to the fighting unless you’re going after a merc camp. If you’re about to die, get behind the line and find good cover until I can get to you.” Naturally if you tell them this, you’ll have to actually heal anybody who gets behind the line and finds good cover. Be kind to your peeps.
Heal Thyself
Until you get Heal Thyself for your Level 2 upgrade, you cannot be a combat medic. Do not willfuly engage the enemy in any capacity until you get this upgrade. To earn level two, take down enemy bots and heal teammates who are fighting (don’t get too close to the actual fighting, though).
If you’re healing teammates while they fight, it’ll count as an assist when they get the kill. A few of these and you’ll have Heal Thyself and you’re ready to become unstoppable.
Biosynthesis
This is a very important ability for Miko, and is mostly responsible for his survivability. Because of this, it’s extremely important to learn when to use it. With Heal Thyself, anytime you have an ally nearby is a chance to refill your Health bar. Just pop Biosynthesis and heal them for 5 seconds. This will usually get your health back up to acceptable levels.
Anytime you just need an extra boost to your healing, activating Biosynthesis will usually do the trick. Usually this would be when your teammates are actively in combat, you need to heal multiple teammates quickly, or when you have a tank who needs a recharge ASAP.
Also remember that, if you chose to get the First Responder upgrade, you get a significant speed boost while healing with Biosynthesis. Any time you need to get out of dodge, and fast, you can activate Biosynthesis and follow your teammates back to safe territory.
Often you’ll be faced with a combination of these examples, which is when Biosynthesis really shines. Be sure to use it appropriately.
Gear and Groups
As with all characters, you need gear to maximize Miko’s potential. Some gear attributes that are most helpful for Miko are Movement/Sprint Speed, Health Regeneration, Heal Power, and Ability Cooldown. Attack Damage, Attack Speed, and things like that are basically useless for Miko, since he shouldn’t be fighting too much.
Here’s the gear that I use when playing Miko:
Sportsman’s Massage Bots
This gives a really good +13.11% Heal Power. Since Miko doesn’t have a shield, he also always has the +6.56% healing power, making it a total of +19.67% Heal Power.

Sportsman’s Nano-Repair Injector
Since survivability is very important as Miko, this piece of gear is very useful. Miko already has +6 Health Regeneration per second, so with this piece of gear, Miko gets +15.33 Health Regeneration per second, which is excellent.

Symbiotic Spores
This is a great alternative to the Sportsman’s Massage Bots, though it is more expensive. Not only does it give all nearby allies +10% healing (from all sources, not just from Miko’s healing), but it also gives Miko +9.8% healing received, which will help his survivability a lot. Most notably, it also gives +14% Heal Power. At first glance, this may seem to be not as good as the Sportsman’s Massage Bots, but let’s do the math. Sportsman’s Massage Bots increase healing by 19.67%, so the healing factor is 1.1967, with 1.0 being the normal amount. Symbiotic Spores gives +14% healing, so the healing factor is 1.14. However, you have to take into account that it also gives all allies +10% healing. So 1.14 x 1.1 gives us a healing factor of 1.254, which ends up being significantly greater than the 1.1967 we saw earlier. However, it’s much more expensive, and thus not as good for shorter matches, such as Capture.

Channeling Spirit of Wind
This piece of gear is pretty handy for Miko. It gives him a very good speed bonus, making escaping from PvP a lot easier. It also gives Miko +6.89% Heal Power. Combine this with Symbiotic Spores and you’ll have 134% of your normal healing. That’s an extra 1/3rd healing given, which is a crazy amount.

If you’re making a lobby group, make sure that your designated Tank has some gear that Increases Healing Received. If the Tank knows what he’s doing he ought to have it anyways, but it’s good to be sure. It also can’t hurt for the rest of your team to have some Increases Healing Received gear on if it doesn’t take too much away from their builds.
Galilea – Tiny tank. When she gets low on health, she can put her shield up and get healed
Alani – she heals Miko, Miko heals everybody else
Reyna – she can grant overshield, which gives Miko some extra time to get to low-health teammates
Kelvin/Boulder/other medium-health tanks – They can take hits but don’t take forever to heal
Orendi/Mellka/Caldarius/other skirmishers – They can deal out DPS and fall back for health
Whiskey Foxtrot/Oscar Mike – They keep distance, which is good
Rath – Assassin with low health. Most Raths will go around to hit enemies in the butt, making him hard to reach. He also has extremely low health.
Marquis/Thorn/other snipers – They keep good distance, so they often take less damage than other members of the team, but can lag far behind the fighting.
Attikus/El Dragon – Pugalists have to fight in close-quarters and are giant targets, making them hard to keep at full health
Montana – takes forever to heal. He usually soaks up so much damage that Miko focuses him. People love to pair Montana with Miko, but then they stick together the whole time and instead of having 5 good teammates, you end up having 3 good teammates and 1 double-uber-tank who can’t heal the 3.
Rath – Don’t fight him. Just don’t.
Phoebe – Very fast, hard to run away from.
Marquis/Thorn – Your big fat mushroom head is a fabulous target for snipers.
Galilea, AKA the Anti-Miko – Pure evil. She’ll stop your heals, stun you, and rip you apart
Deande – If you play Deande, Miko is pretty much your prime target. Watch out for her.
Pendles – As a Pendles, a Miko who’s healing in the middle of a fight or running off alone is pretty much the perfect target.
Galilea, if built properly, has severely increased DPS when at full health. If you have a Galilea on your team, try to keep her at full health as much as possible.
This is what happens when you heal well and have a good team:

You can see that I had a sniper, a medium-health tank, a skirmisher, and Alani. We all helped each other when needed, and they didn’t just run straight into the cold embrace of death. If you can get a few teammates together who are good at their roles and know how to get healed, there will be very few matches that you can’t win.
Lore/Challenges
In order to grab the Master of Miko title, as well as Miko’s legendary gear, you’ll want to do the Lore Challenges.
Regrown Universe – Heal 30,000 damage with Miko’s Healing Beam.
This is basically the easiest thing ever. Just play as Miko for a wee bit and you’ll get this one. My best match’s healing was over 100,000, so this is probably the easiest achievement.
Two’s A Crowd – Play 5 matches on the same team as Kelvin.
This one can be a little tricky, as Kelvin isn’t a very popular Battleborn. You’ll either have to get lucky or do a few Capture matches with a friend willing to play Kelvin for a while.
Sporenado – Stun 100 enemies with Cloud of Spores.
This one can also be a little tricky. You’ll have to grab Sporeshock as your 4th upgrade in order to work on this challenge. If you use Sporeshock often, you’ll get this automatically after a while. If you don’t get very many stuns, I’d recommend solo-ing an easy story mission and then stunning a boss until you get the challenge. This seems like it takes a while, but it’s definitely the fastest way to grab this challenge.
Sowing Destruction – Assist in Killing 50 Enemies.
This is another pretty easy one, as Miko’s healing gives him tons of assists. I average about 10 assists per Incursion match, so this is pretty easy.
Hats Off To The Healer – Heal 3 allies at once with Fungus Among us, 30 times.
This one can be pretty easy, but it requires a bit of attention. Whenever there’s a 5v5 battle, just toss your Fungus down around your allies and you’ll get a few points into this challenge.

Miko’s Legendary Gear, Spores of Mikollopria, is a pretty good piece of gear, but I honestly don’t like it. I use a Blue-quality Heal Power boost that gives me just under +20% healing, and it’s much cheaper to activate than Miko’s Legendary. The Miko-Only boost doesn’t impress me very much, as any Increases Heal Power boost that is better than Miko’s Legendary will end up giving you more total healing than the 13.49% + Miko-Only boost.
If you want to use Spores of Mikollopria, that’s fine, but I much prefer using cheaper (and frankly, more effective) gear.
The End
This is a screenshot of my using the aforementioned “melee-into-a-corner” technique that you can do with a little practice:

He got the drop on me and all of our teammates are too far away to help. I popped Biosynthesis, stunned him, and melee’d him into the corner. Afterwards, I just kept meleeing him until death (took 5-10 seconds). You can see that my health is completely full, and his health in this SS is at about 10%. The reason this section isn’t included in the “Tactics” portion is because I hit the character limit. Sorry.
My current K/D as Miko is 92.7%. My best Kunai accuracy is 63%.
I hope you enjoyed this Guide for PvPing with Miko. Miko is my favorite character and I wanted to help people who are interested in being healers.
If you have any suggestions or requests for this guide, please leave a comment. I’ll do my best to answer you directly and change the guide to include your request.
If you enjoyed this guide, please consider giving it a Thumbs-Up and a positive rating, it really helps. Thanks. 🙂
Also consider checking out my guide for Galilea.