![[MOD GUIDE] Custom Character Creation for Total War: THREE KINGDOMS](https://steamsolo.com/wp-content/uploads/2021/07/mod-guide-custom-character-creation-total-war-three-kingdoms.jpg)
Overview
I’ve got multiple people requesting this so making it. This guide goes over making your custom character with instructions using RPFM. This guide will cover creating one without touching ceos/startpos data. I will update this guide with instructions for that as well as assembly kit instructions later.
Introduction
Hi, I’m the author of the Total War Dynasty Warriors mod and I’m here to show you how to make quick and easy custom portraits
Nexus Mod link: [link]
Steam Workshop link: [link]
This guide will cover how to make a custom character in Total War: Three Kingdoms. Currently I’ll only give out the instructions for doing this with RPFM and without touching the ceos_data and startpos data. This mean that we will not be making custom titles, traits, etc.
This guide assumes you generally know what you are doing or at least know your way around computers and programs as I will not be going into great detail on what exactly each step is. I will give an example pack file and art files and general information and guidance on what should be done.
In the future I will add a section for assembly kit as well as ceos and startpos data editing. The main reason for this is that it’s a magnitude more work and involved and I have a lot of things on my plate currently.
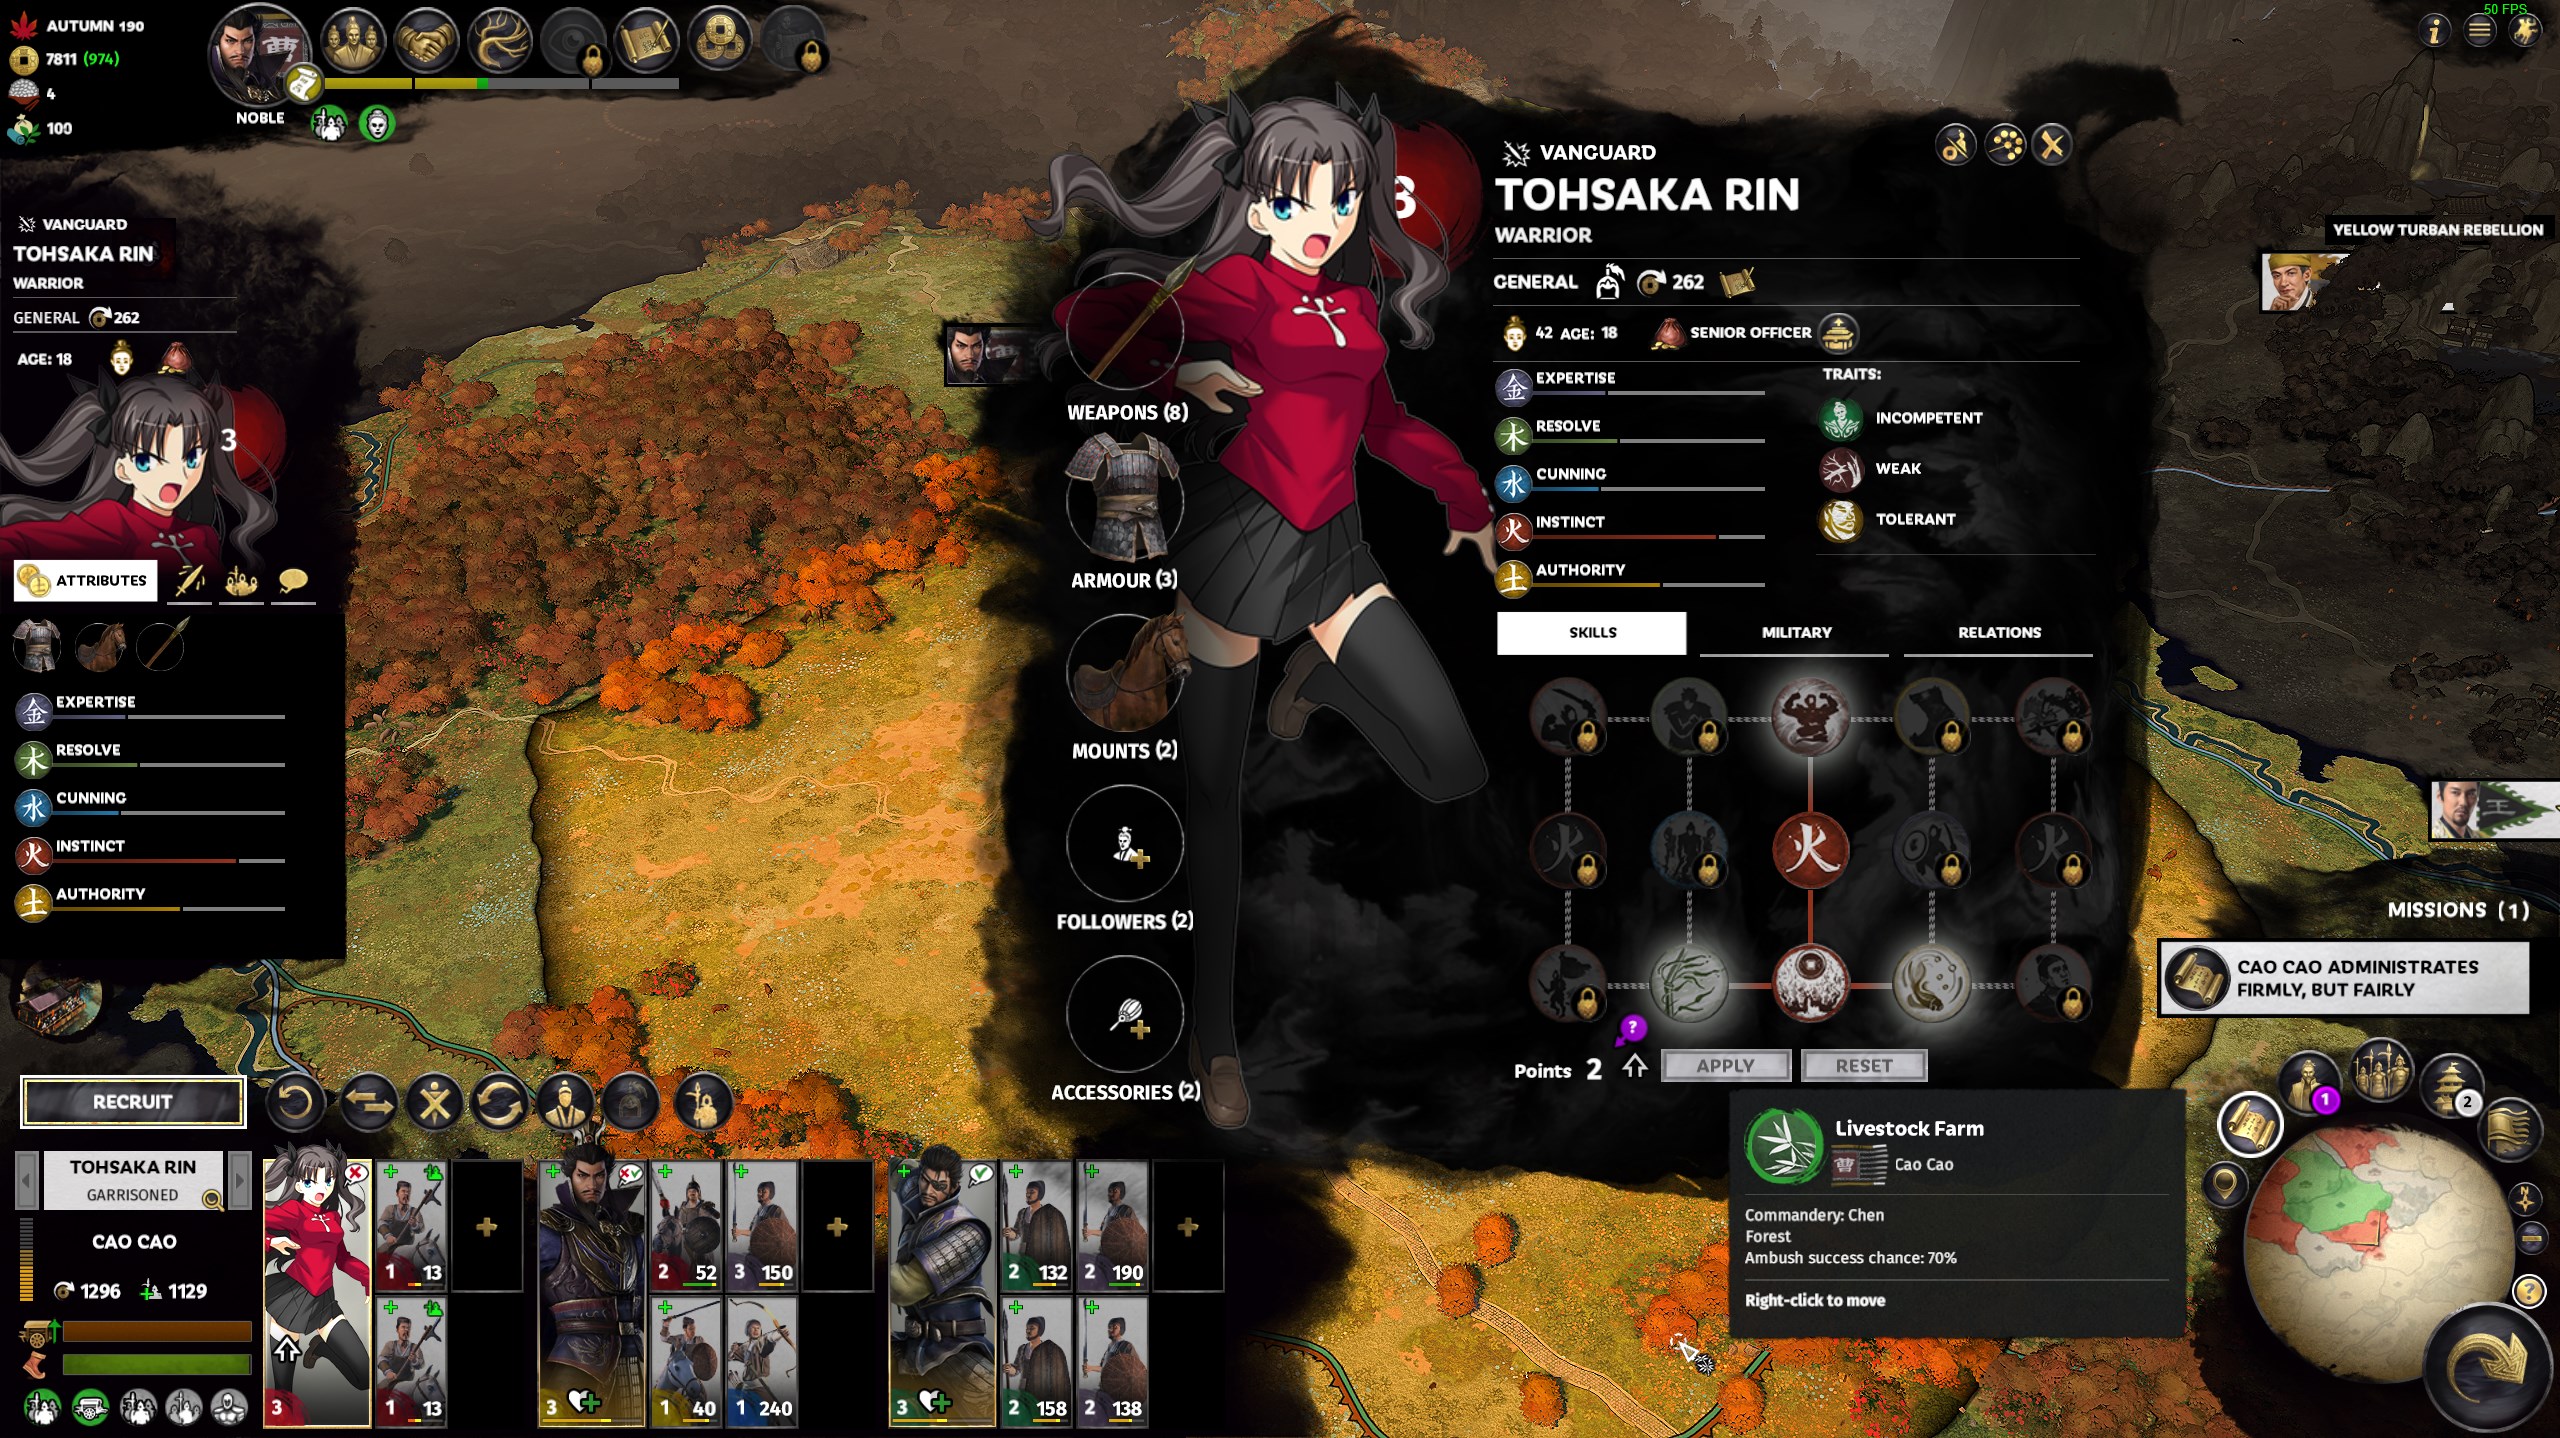
For this guide I will be adding Tohsaka Rin of Fate/Stay Night fame into the game. Why? Because I feel like it.
Requirements and Scope
Might host it somewhere else, for now, Google Drive:
[link]
UPDATE: Added Iskandar from Fate as a male example. DO NOT LOAD BOTH RIN AND ISKANDAR AT THE SAME TIME, BOTH EVENTS WILL MOST LIKELY NOT FIRE CORRECTLY.
Includes:
- Pack file for creating Tohsaka Rin and event to spawn her
- Art for Rin
- Art for Xin Xianying from my mod to compare against a generic
- Added Iskandar for for a male example since people requested
RPFM will be needed. Similar steps can be followed if you want to try it in assembly kit or PFM.
RPFM Github Page: [link]
PPFM direct download link for Windows: [link]
You will need something to edit images, either photoshop or gimp or something.
You will also need TweakPNG for adding metadata: [link]
3 of those tables are related to creating an event so that we can spawn our character, for character creation 7 is all we need, less if you don’t even need a custom name.

If a block has an arrow pointing to it, it means it depends on it. So for example, character_generation_templates_table depends on character_generation_spawn_age_ranges_table, names_table, and campaign_character_art_sets_table

Tables
The tables editing is pretty straight forward, we will start at the bottom. Note that I like to keep things standard and keeping with standards, so a lot of the names for variables and stuff will look at CA’s default values. This is intentional and you can technically name things whatever you want.
This contains the display names.

- key lists the id of each value. There are 2 types of key here, one is for the english name and the other is the alt name (chinese in the base game, I put Rin’s Japanese name here). Format must be names_alt_names_<ID> or names_name_<ID>. I don’t believe the alt_name is required.
- Text is the text that shows up in game
- checkbox I don’t actually know what this does. Just leave it checked
This contains information in regards to the names just we made

- Id this is the ID from before, keep them the same
- Names Group There is only one names group and that is 221 and it refers to Han Chinese I beleive
- Type This is if this name is a firstname, last name, courtesy name, or other. 0 is first name, 1 is last name, 2 is courtesy I believe, and 3 is other.
- Gender Gender of the name, I believe 0 is both, 1 is male, and 2 is female
- Frequency I think this pertains to the random character generator
Controls birth year and age spawn range

- Key Key for this row, name it whatever, don’t use spaces or special characters
- Birth Year Year that the character is born, set it to 172 if you want them to spawn to turn 0
- Max Age For Birth Year This deals with random geneartion of character, leave as is
- Max Random Age This deals with random geneartion of character, leave as is
- Min Age For Birth Year This deals with random geneartion of character, leave as is
- Min Random Age This deals with random geneartion of character, leave as is
- Has Valid Birth Year Check this box if you want it to have a valid birth year
Creates the key for the art set we will use

- Art Set Id Key for this row, name it whatever, don’t use spaces or special characters
- Is Custom Check this box
- Is Male Check this box if your character is male
- Leave everything else as is
Sets name, voice, art set, gender, pool spawn round

- Key Key for this row, name it whatever, don’t use spaces or special characters
- Name Checkboxes Check them all, even if they are not used
- Names Fill in the ids of the names you made above, if you are not using a name, leave it 0
- Unique Check this
- Art Set Override Make sure this is what you made above
- Is Male Check if your character is male
- Voices Set this to the correct gender/element. None exist for generic fire/wood females
- Keep everything else the same
Controls what pictures gets chosen and what model is used, and some other things
You need three rows, one for baby art, one for child/teen art, and one for adult

- Id Put in some random number. Number must be unique, do not put the same number as another row, another mod, or anything from vanilla.
- Art Set Id This is the id you made before, put it here for all 3 rows
- Level Level limit for art, just keep this 0
- Age Age limit for art, just keep this the same (0, 6, 18)
- Portrait This is the folder it will try to pull from. Keep baby and child the same (if you want a male child just do child_02_ male or any other number). For the adult one you can either follow my naming scheme (which is also CA’s naming scheme) or whatever you want, just remember what it is and put a / at the end
- Uniform This controls the 3d model, keep everything the same except for the adult one, you can just pick the a generic that has the element of your character (note that female fire and wood ones do not have generic models in the game)
- Card The image it pulls, keep everything the same except for the adult row, same principal as the Portrait row above
- Has Come of Age Check only the Adult row
- Keep everything else the same
Controls in game information for the character when it gets created.
One row is for historical mode and the other is romance mode. You need both if you want your character to be able to show up in both

- Character Generation Template same value as above
- Initial Ceos This controls stuff like starting title, items, traits, etc. Note that if you set this to a unique character, whoever spawns first will have the items and the one that spawns later will not. I usually just set it to a generic of the element of the character
- Retinue Starting retinue
- Min and Max Rank Minimum and Maximum starting level
- Attribute Set Controls base attributes. You can make your own attribute set and set it to that if you want.
- Skill Set Override Sets the skill tree for your character
- Undercover Character Chance Multiplier Not 100% sure that this does, either keep it the same or set it to 1
- Keep everything else the same
Now we go on to events. We will generate a event at turn one for the player for any faction and have it spawn our character, keep everything the same.

Change the value for the payload keep SPAWN_AGENT_OFF_MAP. Make sure the 3k_general_fire is changed to the element of your character and make sure the CHARACTER_TEMPLATE has your template in it

Keep everything the same

Set your pack type to Movie if you havn’t already. Then move the file to your <TT3K_folder>/data/ and launch your game. You should now get a blank event turn 1, and your character should pop up in your court with no art.


Art
I won’t go into great detail here. I’ll state what is needed and where and some extra caveats. How you make or get your images is up to you.
Your character folder will be the name you gave it in the arts_table. Tohsaka Rin example:
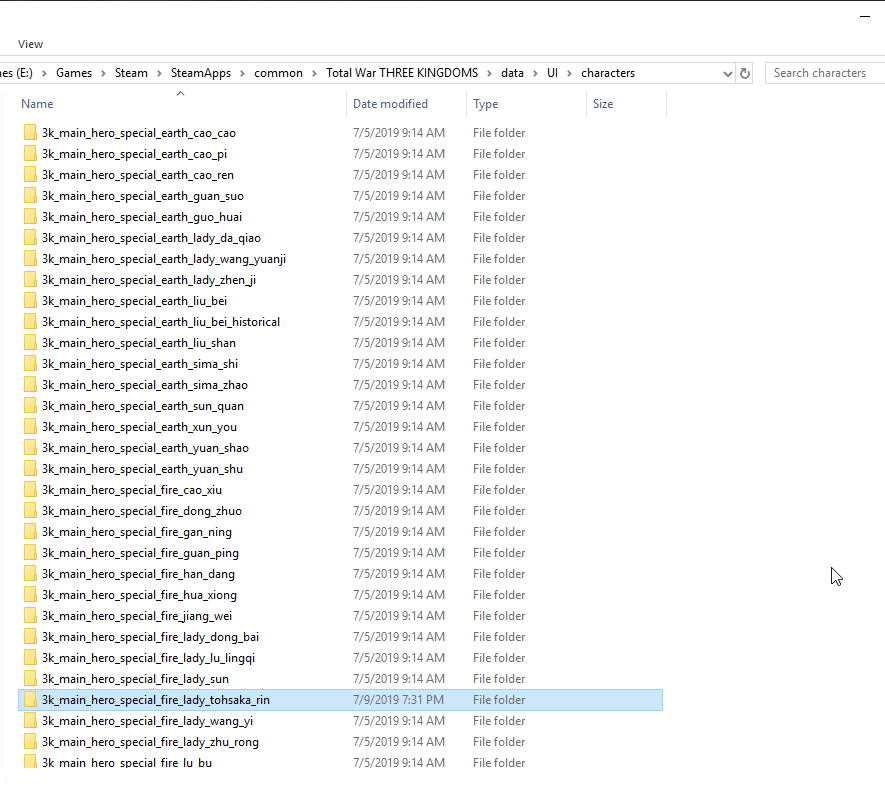
This is what the folder structure would look like:

Now, this particular structure is only for unqiue characters. Fire and wood females fall under this category simple because no generic fire and wood females exist. Whether or not the game determines if your character will have a “generic” or “unique” folder structure depends on the ceos initial data you put in the database table above.
For example, this is a sample of a generic fold structure (this is for Xin Xianying which will be included in the example package):

This is the image that appears when you open character details as well as the panel on the left.
Just follow the folder structure for either unique or generic depending on your character.
All images must be PNG24 or else the game will not take it. To generate a PNG24 image in Photoshop, hit CONTROL+ALT+SHIFT+S and select PNG24 and save.
All images in the composites folder will need to have meta data inserted into it. You can open TweakPNG and look at the images in the sample:
You will notice that they all have a line like this right below the header: [type:angry;x:-25;y:-75;z-order:0;pivot_x:0.5000;pivot_y:0.5000;]

The x and y determine where on the screen the image will appear, increasing x moves to the right and increasing y moves it down. I believe pivot is to tie together the other images if there are any, I just leave them at 0.5. There is a type for each mood, and it makes it so that the image will only render for that mood. I believe you can make one image with the comment being all 3 moods but I haven’t tried.
Unlike other parts of modding, the comments can be adjusted and the changes will be applied if you reload your graphics. Simply changing resolutions and letting the game load again will change the positions in game. It makes it easier to position.

- bobbleheads These are the heads that show up above units in the campaign map and in battle, the heads to the left of each unit tab, the head of the leader above the cities as well as the heads in the relationship screen (either that or the minis)
- halfbody There are shown in the relationship tab in character details, above the battle dialog and some other places I don’t remember
- mini These are the heads above units when you zoom really far out
- unitcards These are the cards that you see in the retinue at the bottom of the screen as well as the portraits in your court.
These don’t need to be in PNG24 format but I made everything PNG24 for consistancy.
This is pretty straight forward for uniques, just make images with the correct sizes and you are all good.
It’s a little more complicated for generics. First every subfolder will have 2 set (one normal size and one large) of armor ancillary images. These need to be blank. This is the armor/cloth switching you see when generic generals switch armor. Each element/gender will have a set of these and you need to have files of the same name to replace the vanilla one otherwise the game will go search for vanilla files. You can exact the game’s data to find the generics and copy the names over. The files just need to be blank pngs, size doesn’t matter. Or you can download my mod from the nexus and find generic characters with the same element/gender and just copy the blank images en-mass. Same thing needs to be done for the large folder in each sub folder. And the faces folder contains the actual image.


And then you have Rin
Enjoy your new character.


CEOs Example File
Same file as above, just posted here again for easy access
Contains Tohsaka Rin with changes and update_commands.txt for DAVE
[link]Campaign Effect Object (CEO)

Make sure you read the above warning and understand it. The game can only load one ceos data at a time and so any mod that modifies ceos_data.ccd is not compatible with any other mod that also do the same. Only way to make them compatible is to merge the changes into one giant ceos_data.ccd.
We will be modifying CEOs data to add a variety of things including titles, traits, personality, armor, weapons, etc. Updates to this guide will be rolled out section by section.
To edit ceos_data, we will need to use the assembly kit and open DAVE. You can open DAVE directory or open tweak and then open DAVE from there.
Some general location of stuff, not going to go over them in detail:

Importing update_commands.txt will allow you to see changes in DAVE. The example for the CEOs section should come with an update_commands.txt, import that into DAVE.


You can use the filter to filter out columns for the table. For this guide we will mainly be looking at Cao Cao for vanilla reference and Tohsaka Rin. Filter accepts regex, if you don’t know what that is, you can look it up, the entirety of regex is outside the scope of this guide.
2 regex operators I’ve used in this guide are $ and | (this is not i or l, this is pipe, its the key above your enter, it’s the shift version of the backslash key ). $ denotes end of line and | denotes OR. So cao_cao$ means that the line must end with cao_cao, and cao_cao$|tohsaka mean that the line must end with cao_cao or the line contains tohsaka. You can also add multiple filters for more complex conditions.
Please note COLUMN dropdown, sometimes you won’t be finding things in the default column and will need to change it.


Right clicking a field in a table should either show you an option to see references or show dependency. A reference is an entry that refers to the entry you are selecting. A dependency is what the entry you are selecting is referencing. So by jumping through references and dependencies you can see where things go. There is also an option to show dependency graph in DAVE.


Building Ceos data is easy. If your ceos building fails it means you have an incorrect table or an invalid table somewhere and you will need to dig through all your changes to see what is missing. As far as I know CEOs data does not need external tables to build so we can just put only the needed stuff in DAVE, build it, and add it to our pack file.


Title, Traits, Stats, Opinions
The main thing we are going to modify here is the career, which involves titles and traits, opinions, and stats. We do not modify the base stats. There are mods in the workshop that modify base class stats or create a new base class state in order to boost the character’s stats. We are not going to be doing that here. Instead we will do it like how CA does it for vanilla characters, stats will be added through titles, traits, armor, weapons, etc.
There are a total of 13 tables to edit. I’m lazy and there is a lot of tables so I’ll go over them briefly with some notes for the more important ones. If anyone has questions about tables I’ll add more info.

Defines the ceo, we just copy Cao Cao’s.
Defines the effect list

Defines the list of effects for the title. You can add more or add less, up to how many effects you want. You can add passive skills but active skills won’t work.
3k_main_effect_ai_hint_minister and 3k_main_effect_ai_hint_general tells the AI to use them, higher the value the more likely.
The effect_scope column dictates what the effect applies to. character_to_character_own applies to the character itself, character_minister_to_force_factionwide applies to the whole faction if ruler, hier, or prime minister. There are also options for own retinue, own army, factionwide without conditions, etc.
3k_main_effect_character_num_lives gives resilence

Defines the ceos node. Remember the text because we will need to add them to the text db later. Also the column on the far right that is missing in this image is for the opinions at the bottom at the title. I just set them to the same as Cao Cao because I’m lazy.

Defines threshold

Defines threshold nodes

Defines initial data, this is the value that gets put into the character_generation_template_game_mode_details_tables

Defines stages

Defines the different stages, explanation in picture. We will modify starting armor and weapons later, just use generic for now. If you use unique instead of generic, they will only be able to equipe unique weapons/armor and may end up not equiping anything at start or steal them from other characters. Note that there can only be 1 copy of any unique in the base game.

Set traits, element, and career. Note that base game limits traits per character to 7

Sets limit for this ceo to 1. That means there can only be 1 person with this title in the game. Don’t make this if you want it to be unlimited

Set the group this ceo belongs to

Set AI personality. Don’t need it but you can set it if you want.

Adding Ceos and Changes to Pack File
Follow steps from before to build ceos. Create a campaigns folder in your pack file and add your ceo_data.ccd there.


Add title name and description to your text db. You can use a different database file if you want, that’s what I do in my DW9 mod, but for here we will just dump it in one file.

Change the intial data to what you made above

Title is Added
Put the pack file in your data directory and load the game. Check out Rin.


Armor and Weapons
Follow the lovely guide created by Lilboss049 here: [link]