Overview
A Guide to all forms of Modding currently available in Teardown. Ranging from Scripting to Modelling.
Introduction
In this Guide I will first talk about Custom Maps and then go through all forms of modding not currently possible (Or how it could be possible) and then I shall go through all the currently known forms of modding. I’ll answer any questions in the comments so feel free to ask!
I have added a new Scripting section at the bottom which will include a bunch of tutorials on how to create various things, if you’re interested then check that out below!
Creating Custom Maps
Someone else already made an insanely detailed guide so go check this one out for a full in depth look of how to create a map.
[link]Not Possible
– Custom Missions (Technically possible for Custom Maps)
Currently as far I know this isn’t possible, the missions .lua files all direct to hidden .xml files that can’t be accessed so there is no way to actually add a new mission in however you can change the sections that the missions do appear in by changing the xml files to another area’s xml file. E.g. Swapping Lee with Marina.
Update
It is possible to write a script for a custom map that will direct you to go to certain areas, so if you wanted to make an escape mission using the Chase Chopper you could 100% do that, this will be included in the ‘Other Scripts’ section.
– Custom Weapons
I can’t find any script files that actually change how weapons fire (I tried finding the spray can to change the color but found nothing) however you can change the models which will be under ‘Custom Models’ section.
It is possible to override current weapons as seen with the Portal Gun mod I have posted in the ‘Other Scripts’ section.
– Custom Audio (Could be possible)
I’ve tried replacing the audio files and messing with the extensions but to no luck but perhaps someone else could have better luck with it.
This is possible! I haven’t got it to work myself yet but if you need any help let me know and I’ll take a look further.
–Local Coop, I have been messing with the custom map for a while and found out if you add 2 vehicles with ‘driven = true’ then you will start in the second car however both cars are now drivable using default controls at the same time and if you exit the car then the second car is still drivable. There isn’t a way to seperate button presses as far as I can tell but that could be useful in the future.
I will try to update the Guide when any of this is made possible and include steps on how to do them!
Custom Weapon Models
So this is actually quite simple, if you go into the Data folder of Teardown you should see a folder called ‘Vox’
Open that and inside should be 2 .vox models, I believe these are alternate models used after completing a mission and replaying it these are the physical world models (Thanks Golden for Clarifying this!), inside the tool folder are all the ones that you will be given throughout the campaign. Simply open them up using MagicaVoxel (Refer to the Custom Level guide posted above if you don’t know how to use the program) and adjust the model to your liking and save it. Once you re-load an area the model should appear!


Chase Chopper in EVERY Map!
So I found that by integrating the chase chopper into the main.lua file it forced the chopper to spawn and function on every single map including the Hub area!
Here’s a paste bin of the code
pastebin(dot)com/fgnwYHu8
Updated code With Sprite!
Make sure to change the line under init that says
sprite = LoadSprite(“gfx/doom.png”)
And change the doom.png to whatever image file you want. This version should also hide the sprite from view so it’s no longer visible through walls!
I was also going to change the period of how the rockets fire but I didn’t want to confuse people but here is a screenshot of what you could change it to if you want the rockets to fire more frequently, just add more of these to it if you want to slow the rate of fire down.
and math.random()<0.1

Otherwise you’ll need to delete the file and verify your game files to get it back to normal, otherwise it might make the Campaign a little tricky!

Simply go to this directory and copy and paste the main.lua like mine just so you have a spare, then open the original and paste the code in and now the chopper will spawn in every single map!
This isn’t the modified version below that will give it a sprite however just follow that section and it should be the same routine.
Custom Scripting (Mostly Possible, Now With Chase Chopper!)
This is currently a work in progress but it is possible to load in your own custom .lua scripts, for this example we will be making a custom main.lua file that will trigger the end screen when we take damage (This isn’t meant to happen in a custom map so it won’t actually fail but instead just re-spawn you).
First off we need to setup the custom folder, main.lua relies on various scripts in order to function properly so you can’t just put main.lua in this folder on it’s own so we shall be copy and pasting the entire script folder into our directory. We could just modify the default main.lua file however that would then effect the main game and you probably don’t want that.
You need to head over to ‘data’ directory at the root of Teardown and copy the ‘script’ folder and then paste it into the custom folder, so our custom folder should now look like this (My folder is named scripts but it doesn’t really matter what it’s called as long as you know how to get to it).

Now head into that and open main.lua using a text editor, I’ll be using notepad for this. Scroll down file and you should see the line
GetFloat(“game.player.health”) == 0
Simply change this to
GetFloat(“game.player.health”) <= .9
And then save the file, so it should now look like this.

Now one last thing is to actually tell the game to run this file instead, so open the custom.xml in a text editor and scroll to the very bottom and you should find
<script file=”../../data/script/main.lua”/>
Simply change this to this line (And remember to change scripts to script or whatever you named the directory)
<script file=”../../create/custom/scripts/main.lua”/>
And then save!
Now when you launch your map and take a bit of damage the game should fade to black and then respawn you.
I’m currently trying to get more things working such as the helicopter however I think it’s not possible due to objects needing tags which isn’t possible in the Voxel Software however I have managed to trigger the Timer to show 0 at the top of the screen so it’s a start.
I’ll update this when I am able to do more things but if you have any questions leave them below!
Chopper in Custom Maps! Now with a Visible Sprite
Adding the sprite is below, this part was written up before it was possible, you’ll still need this section to spawn it in
So this works however it will be invisible, I’m still looking into whether you can assign tags through code in order for the chopper to actually be visible but I’ll keep you updated!
For now however here is how to add the invisible chopper into your map and have it chase and shoot at you.
First, please follow the file structure I showed in the previous section, you just need to copy the script folder into the custom folder directory but follow the the previous section if you need help.
Now we’re 1/3 of the way done, simply open up chasechopper.lua in a text editor and scroll down to active and set it to true. Now close out of it!
Last step is to open custom.xml and add this line at the bottom
(Remember again to change scripts to whatever the directory your scripts are held is called)
<script file=”../../create/custom/scripts/chasechopper.lua”/>
Which should look like this

And there you go! Load up your level and the chopper should spawn and search for you and when it finds you, you better take cover!
So after a lot of extensive testing and reading through a bunch of lua files I came across a sprite function for the Goal Area which can be used for the helicopter to make it visible!
This is quite simple to setup and only requires a couple of changes, so following from where we left off all you need to do is re-open the chasechopper.lua file and in the init() section paste this line of code
sprite = LoadSprite(“gfx/ring.png”)
which should now look like this

Then scroll down to the bottom under the update function and paste this bit of code
Which should now look like this

And there you go! The helicopter should now have a ring around it as it fly’s around and should rotate as it turns, you can adjust the size of the ring by adjusting pRadius*insertnumberhere and the width I think is adjustable via the following 10’s but I haven’t tested much of that yet.

This isn’t of course perfect and I’m still looking to find a way to actually spawn an object or something physical but I’ll keep this guide updated!
Feel Free to also go into the gfx folder in the data directory and paste in your own image!

Vehicles and Custom Objects in Custom Maps
Something not addressed in the Custom Guide is how to add in Seperate Objects and Vehicles into your levels. I’ll try to explain it as best I can but if you have any issues let me know in the comments.
First off you make a model, I used a random clocktower file, and save the vox file and place it inside the ‘custom’ folder (or whichever map’s folder you are using)

So your folder should now look something like this
After that go to the ‘custom.xml’ file and open it with any text editor such as notepad and scroll down until you see this line.

<vox pos=”0 0 0″ file=”LEVEL/custom.vox”/>
All you need to do now is add this line just underneath it
<vox pos=”0 0 0″ file=”LEVEL/yourfilename.vox”/>
(You can adjust the numbers after pos to change the XYZ co-ordinates of where it will spawn)
So it should now look something like this

And there you go!
You should now have new model seperate from the base map!

Now this is pretty similar to what we did before except there’s a little extra code to deal with and we will have to adjust our model to fit with the code by renaming some things.
For this tutorial we will just be modifying an existing vehicle model but you can use the model you already made as long as you name everything correctly!
So first off let’s get the code out of the way, all you need to do is below our code we wrote earlier there is </body>, you need to paste this code directly under that part.
<vehicle name=”suv2″ pos=”5.7 1 -12.0″ rot=”0.0 0.0 0.0″ driven=”true” sound=”suv2″ spring=”0.8″ damping=”0.8″ topspeed=”5777775252500″ acceleration=”16425252520″ strength=”5″ antispin=”0″ antiroll=”0.2″ difflock=”0.5″ steerassist=”0.0″>
<body pos=”-0.05 0.6 -0.25″ rot=”0.0 0.0 0.0″ dynamic=”true”>
<vox pos=”0.05 -0.2 0.25″ rot=”0 180 0″ density=”2″ strength=”3″ file=”LEVEL/suv3bkup.vox” object=”body”>
<location tags=”player” pos=”0.35 1.25 0.25″ rot=”0.0 0.0 0.0″/>
</vox>
<wheel name=”bl” pos=”-0.5 -0.25 0.55″ drive=”1″ travel=”-0.1 0.2″>
<vox pos=”-0.1 -0.45 -0.05″ rot=”0.0 -180.0 0.0″ file=”LEVEL/suv3.vox” object=”wheel_bl”/>
</wheel>
<wheel name=”br” pos=”0.5 -0.25 0.55″ drive=”1″ travel=”-0.1 0.2″>
<vox pos=”0.1 -0.45 -0.05″ rot=”0 180 0″ file=”LEVEL/suv3.vox” object=”wheel_br”/>
</wheel>
<wheel name=”fl” pos=”-0.5 -0.15 -.55″ drive=”1″ steer=”1″ travel=”-0.1 0.2″>
<vox pos=”0.0 -0.45 -0.05″ rot=”0 180 0″ file=”LEVEL/suv3.vox” object=”wheel_fl”/>
</wheel>
<wheel name=”fr” pos=”0.5 -0.15 -.55″ drive=”1″ steer=”1″ travel=”-0.1 0.2″>
<vox pos=”0.1 -0.45 -0.05″ rot=”0 180 0″ file=”LEVEL/suv3.vox” object=”wheel_fr”/>
</wheel>
</body>
</vehicle>
Which should look like this
You will need to re-name all the .vox files (so change my suv3.vox and suv3bkup.vox) to your new models name (DO NOT LAUNCH THE MAP YET, the game will crash if the files don’t exist or if they are not named correctly, also do not change any non .vox file names, leave suv2 for both the name and the sound file name much like mine is)

Next if you using a vehicle template then you should already have wheels, if not you will have to add them and re-name them, I’ll go over naming in a moment.
I will be using the suv2.vox for this example which should now look like this
You can simply click on the car model and press the delete key to delete the model, now drag in your new model and rotate it if needed.

For this model I re-adjusted the wheels however I don’t think this is nessesary as the xml file will adjust them anyway.
Now the most important step is to re-name the model by clicking here


And then clicking on your new model and re-naming it to Body. For those who decided to make their own model without the vehicle template here is where you’ll need to add wheels and re-name them here.
Now for the final step is to look back at the Vehicle code I pasted, each wheel position needs to be adjusted to fit your model, this is mostly a trial and error thing so keep saving and re-loading your map until it fits correctly.

You only need to change this position for each wheel “<wheel name=”fr” pos=”0.5 -0.15 -.55″” the other one is for rotation and should work fine by default.
fr = Front Right
fl = Front Left
br = Back Right
bl = Back Left
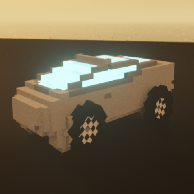
Now if everything worked correctly you should have your new car!

To adjust the car speed and handling refer to this part of the code
spring=”0.8″ damping=”0.8″ topspeed=”5777775252500″ acceleration=”16425252520″ strength=”5″ antispin=”0″ antiroll=”0.2″ difflock=”0.5″ steerassist=”0.0″>
I put it ridiculously high for testing purposes.
This is all that I currently know how to spawn in, I’m sure there is a way to add in propane tanks and the like however that’s not currently documented anywhere but as soon as it is I shall update this guide!
If I missed anything or it didn’t work let me know and I’ll try to help!
Here’s a photo of Cybertruck in Teardown

Props, Lights and Explosives
This one is quite short but I’ll update it with more information on different types of things you can spawn once we figure them out.
This one is quite simple, go into custom.xml and scroll down until you find the line that refers to main.lua which should look something like this
<script file=”../../create/custom/scripts/main.lua”/>
And add this line somewhere underneath it
<light pos=”0.0 2 0.0″/>
And a light will appear at those coordinates!
Go into your custom.xml file and find an object you’ve spawned in (If you haven’t done that yet please refer to that section on this guide to spawn in seperate voxel models) and copy and paste this line either over it or underneath it
<vox pos=”0 10 0″ file=”LEVEL/clockTower.vox” prop=”true” tags=”explosive”/>
And then change clocktower.vox to whatever model you want to explode and there you go!
You can also remove the explosive tag to spawn a prop that will automatically be given physics without having to wait for all supports to be destroyed.
Other Scripts (Cutscene and Test Objective)
If you have any requests for scripts let me know in the comments!
I am going to be continuing with showing off how to do more and more things so that people who are interested in the modding side can get a better understanding and an easier understanding without having to dig through all the scripts to figure things out. So keep an eye on this section if you’re interested!
Short version is just copy the scripts folder from teardown/data and paste it in teardown/create/custom
Inside Custom.xml
Simply copy and paste the main.lua line of code and change main.lua to whatever you need to run.

I would reccommend checking out Speedomtre + Debug Menu posted in the Other Mods section instead of this version!
So here’s a simple one for if you need to find the coordinates in your map while playing around.
Just make a brand new .lua file and paste this code in
function notify(str,t)
SetString(“hud.notification”, str)
end
function tick(dt)
local probe = GetPlayerPos()
notify(tostring(“X AXIS “..probe[1]..” Y AXIS “..probe[2]..” Z AXIS “..probe[3]), .1)
end
And remember to tell your .xml file to run this script and this should now appear in your game (Please let me know if I mixed up the X and Z axis!)

Thank you to Golden for the idea!
So this is something I quickly wrote up in order to test the possibility of custom objectives which are now technically possible.
This script will be quite basic but will start off with a camera pan with some text at the top telling us what to do and then a marker will appear and once the player gets close to it a second cutscene will play and then it will just freeze the camera looking at a specific area. There is no way to trigger the end screen as if you trigger the ‘Win’ state it will just fade to black and then respawn you so you’ll have to get creative, like drawing sprites at the location of where the camera is locked to display a message or something, but I’ll help with what I can.
So I wrote this script using a copy of the camerasweep.lua so make a copy and paste of that file and then re-name the copy to something like “cutscenehandler.lua”, now so we don’t forget make sure to add it to your xml file so it will run the file.
Now open the cutscenehandler with a text editor. So now we need to crate a few variables, these will tell the game what part of the mission we need to access, it doesn’t matter what you call them but just make sure you know what they are referring to, we need 4 variables, 3 for which cutscene to play and 1 to tell the game to activate a marker to show us where to go which should look something like this now.
intro – To play when the game launches
cutsceneEnd – To play when we reach the marker
markerActive – To display the marker
endMission – To freeze the camera once the final cutscene has played out

Now you need to copy a few functions into this file so that we can access them, just paste them below the init function, underneath the end.
function notify(str, t)
SetString(“hud.notification”, str)
end
function displayMarker()
local t = Transform(Vec(-40,3,20), QuatLookAt(Vec(-40,3,20), GetPlayerPos()))
DrawSprite(sprite, t, pRadius*.9, pRadius*.9, 2, 2, 2, 2, false, false)
end
function getDistanceToPlayer()
local playerPos = GetPlayerPos()
return VecLength(VecSub(playerPos, Vec(-40,3,20)))
end
function freezeCamera()
SetCameraTransform(Transform(Vec(0,20,90), Quat()))
end
We also need a sprite and our own timer so add this inside the init function
sprite = LoadSprite(“gfx/ring.png”)
delaytime = 0

Now we need functions for the cutscenes, here is what I have written up. What this does is tick the delaytimer up everytime it’s run, it then checks the value of the timer and if it’s below a certain value it runs the notify function which will display a HUD message and once it gets above 999 it will end the cutscene and trigger the marker variable and while it is Under 1000 it will move alone the X and for the end cutscene also the Z axis based on the timer.
Now we just need the Tick function so that we can run these scripts

And there we go, once you launch your map you should get a short cutscene and a marker appear on the map. Make sure you adjust the getDistanceToPlayer() function’s Vec() to change where you want the location to be and then make sure to set the same position to the marker underneath the displayMarker() function so that you can see it.
The code could definitely use some cleaning up and optimising because it’s quite rough as I’m mainly just doing this without much planning just to see what can be done but it’s just an example of what is possible!
I hope I explained that well enough but again if you have any questions let me know!
Various Game Variables
Other people have already documented some of this but you can look around the data folder and open any .lua files and adjust the values to your liking.
Here’s a handy guide to unlocking all weapons and things
[link]
Other Mods
As mods start to get released I want to use this section to Highlight some really good ones here, but there are still some other really good ones so if you want to check them all out here is the link.
[link]An insane mod that gives you access to a portal gun!
[link]
Awesome Debug menu which is far superior to my one that I quickly put together.
[link]Full file set for the Helicopter on every map packaged nicely.
[link]It’s Minecraft in Teardown, what else do you need!
[link]Conclusion
That’s about all that I can think of in terms of modding, if there’s anything you would like to know then leave a comment and I’ll try to respond as soon as I can.
Thanks for reading!