![[NEW] How to submit Scenarios to the Steam Workshop for Age of Empires II (2013)](https://steamsolo.com/wp-content/uploads/2021/07/new-how-to-submit-scenarios-to-the-steam-workshop-age-of-empires-ii-2013.jpg)
Overview
This guide will show you how to correctly submit your Age of Empires 2 HD scenarios to the Steam Workshop.
1) Getting your files ready
So you have finished your scenario and you are ready to put it on Steam Workshop.
First things first, you have to get your files ready and have them in the correct locations.
Go to your Age2HD directory and locate your Scenario folder, which for me is:
D:Program Files (x86)SteamsteamappscommonAge2HDresources_commonscenario
There you will find all of your saved scenarios that you’ve made.
(If you can’t find it, go to your Steam Library, right-click on Age of Empires 2: HD Edition, click Properties, click on the Local Files tab, click on ‘Browse Local Files’)
Copy the scenario files you want and go to the following location and make a folder for your scenario: D:Program Files (x86)SteamsteamappscommonAge2HDmods
So it would become something like this:
Age2HDmodsNameOfYourScenario
Then you have to make some additional folders. I will take the Iceland map I made as an example:
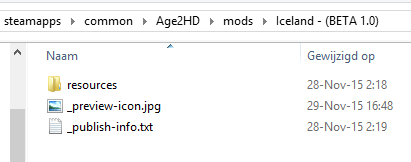
D:Program Files (x86)SteamsteamappscommonAge2HDmodsIceland – (BETA 1.0)resources_commonscenario
This is where you put in your scenario files.
Full preview

2) To the Workshop!

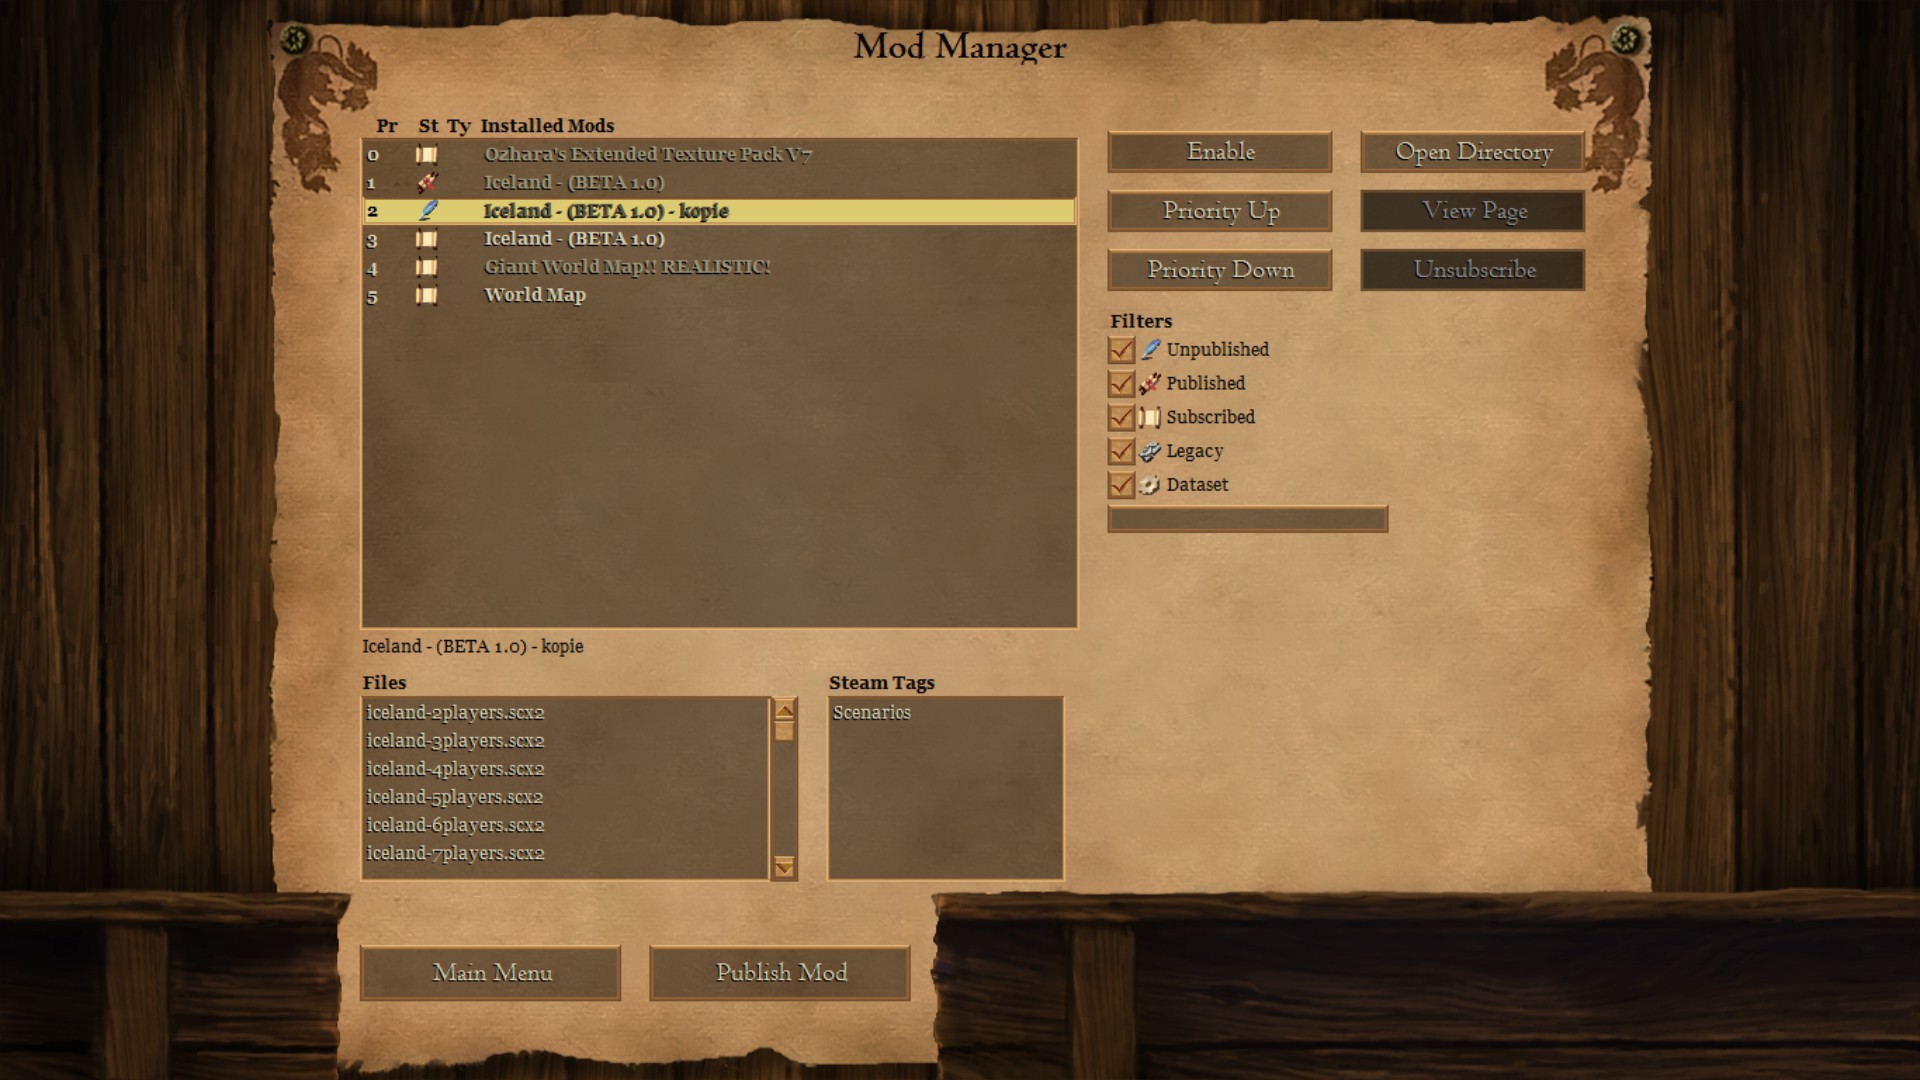
On the bottom you should see the scenario files that are in your folder, if there are no items listed then you did something wrong. If this is the case check the spelling of the folders you made previously. (like me, it didnt work first because i wrote ‘resource’ instead of ‘resources’)
Select your mod in the list and click Publish Mod on the bottom.
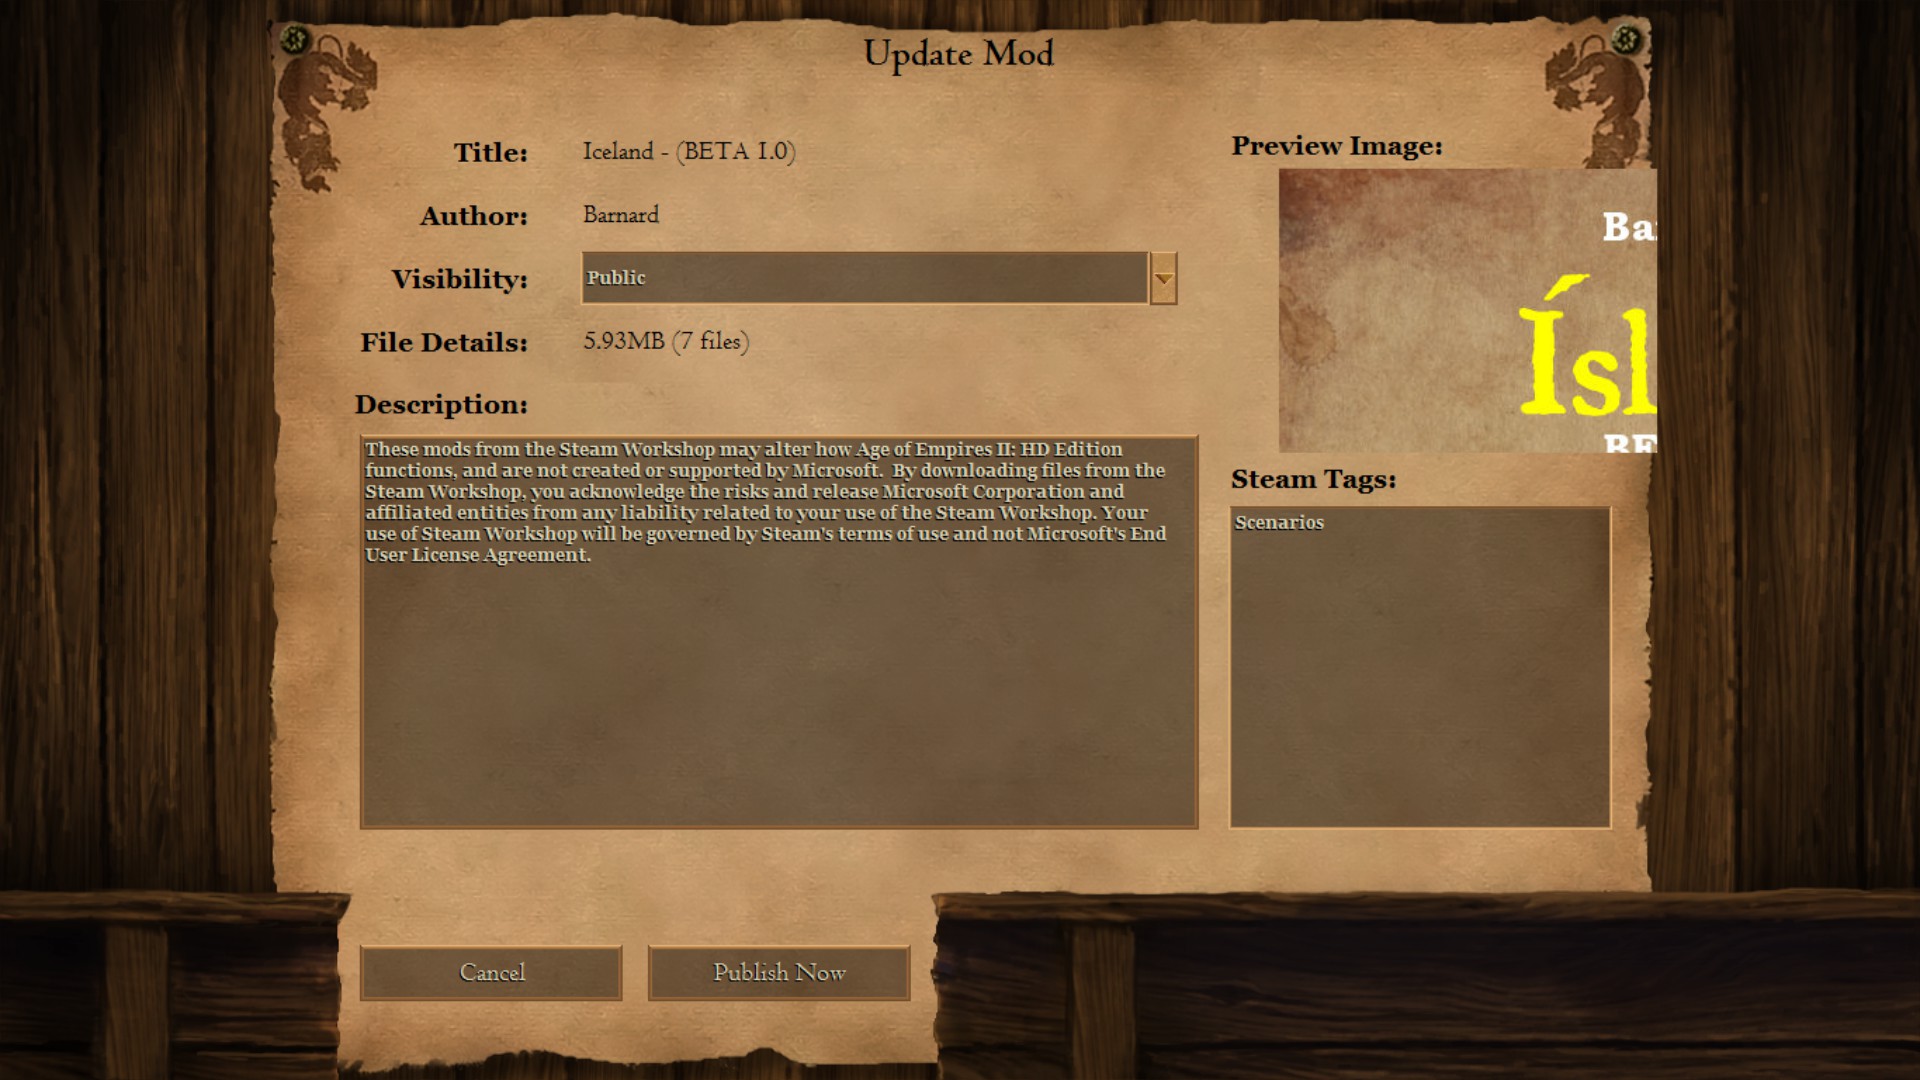
After you select Publish it will start uploading your stuff to the Workshop, after this you either go to the Steam Workshop and go to ‘Recently Added’ to find your Workshop Item, or you can go to the Steam Workshop cog/wheel inside the game, click on your own mod and select ‘Go to Page’ on the right.
From there everything is quite straightforward with adding Titles and Description and adding additional images. It is recommended to add a picture of the minimap to showcase your scenario.
**Thanks and credits go out to Ozhara for his modding guide which provided some information as well as Zetnus who also provided info.