
Overview
This guide will be intended as a simple, condensed walkthrough on some of procedures required to drive the New Haven “E-33” Electric, made by Reppo. This guide is NOT intended to be a replacement to the included manual(s), but as a “reading companion” to go hand-in-hand with them. I will also try and explain the braking system to the best of my knowledge, and giving a brief list of non-standard keyboard shortcuts. Most aspects discussed in the official manuals will NOT be discussed here.Without further adieu, let’s get started!
Step 1: Turning on the Locomotive!
So, turning on the locomotive is not as hard as some people make it out to be. I will break it down into simple, easy to follow steps with pictures guides for your ease!
- How to Raise the Pantograph.
- Make sure you have all relays flipped in the right order.
The first step to turning on the locomotive is to close the “battery knife switch”, located in the battery box in the nose of the locomotive. Push either the left or right arrow key until you get to the nose camera. Once there, open the “Battery Box” door and close the “Battery Knife Switch”.
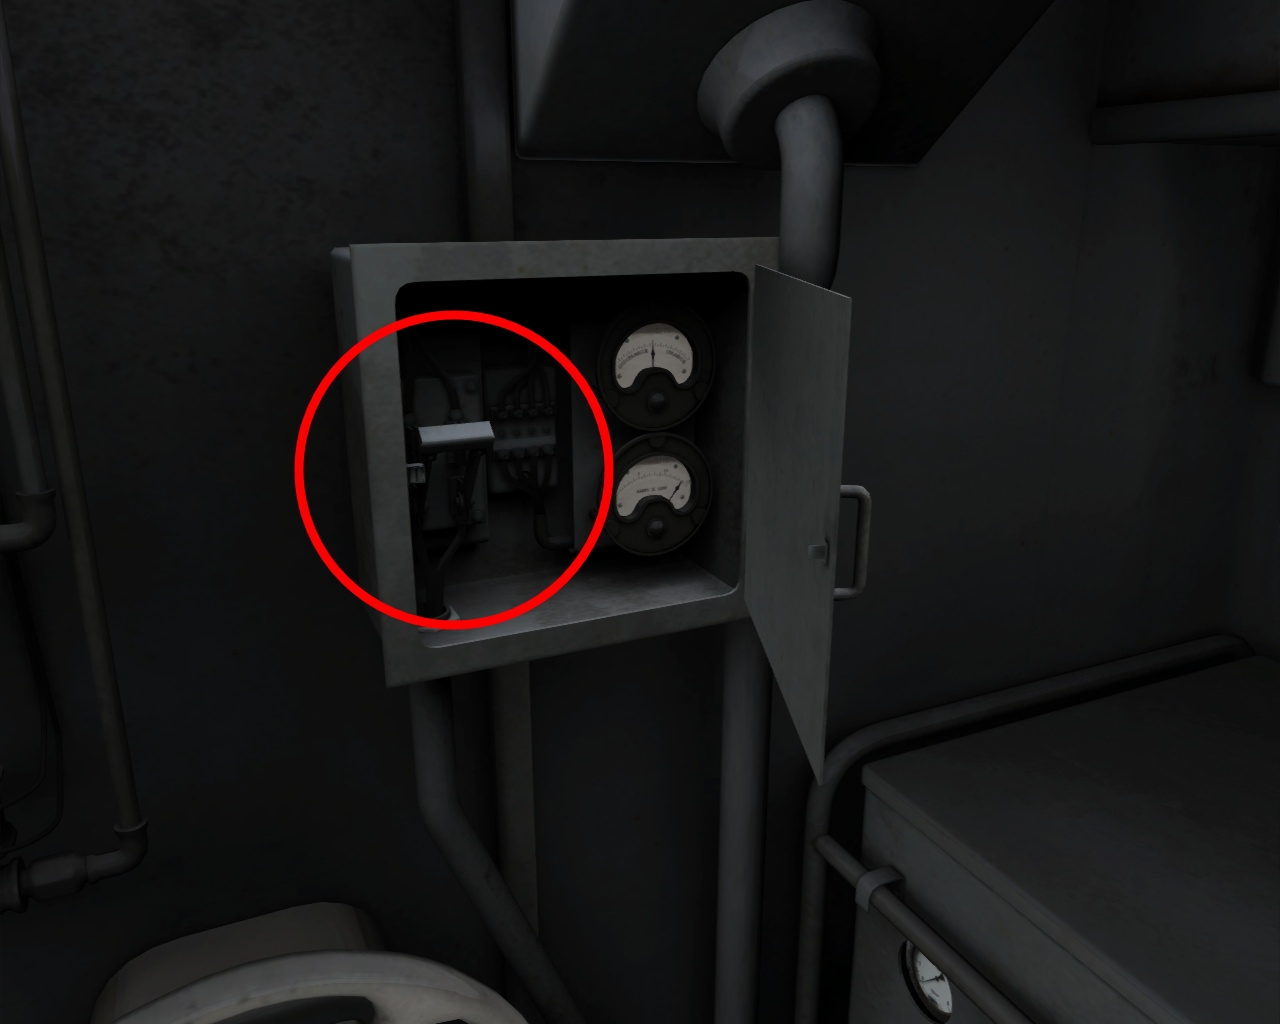
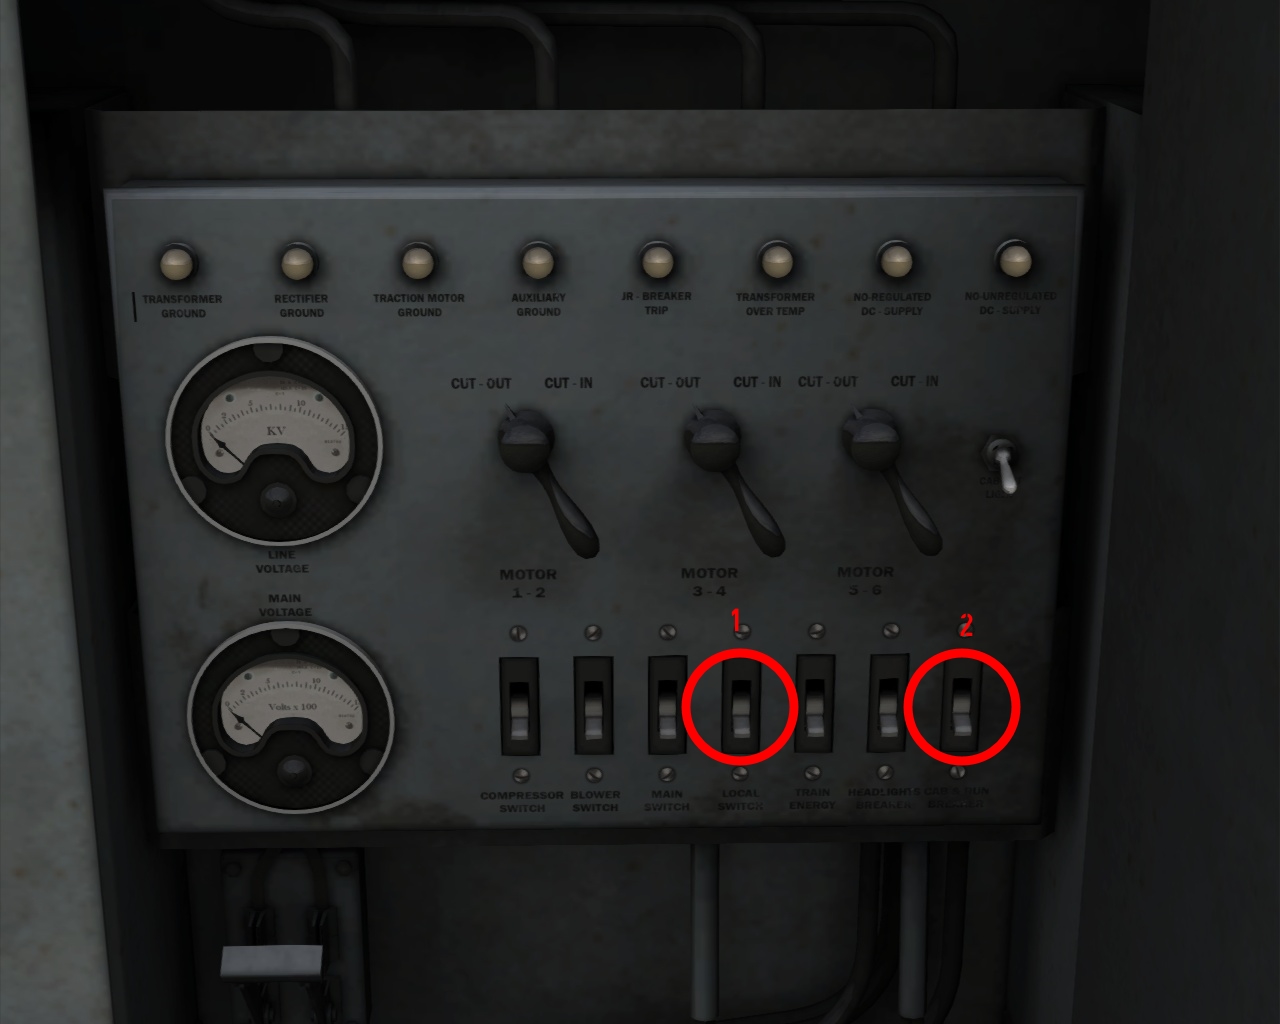
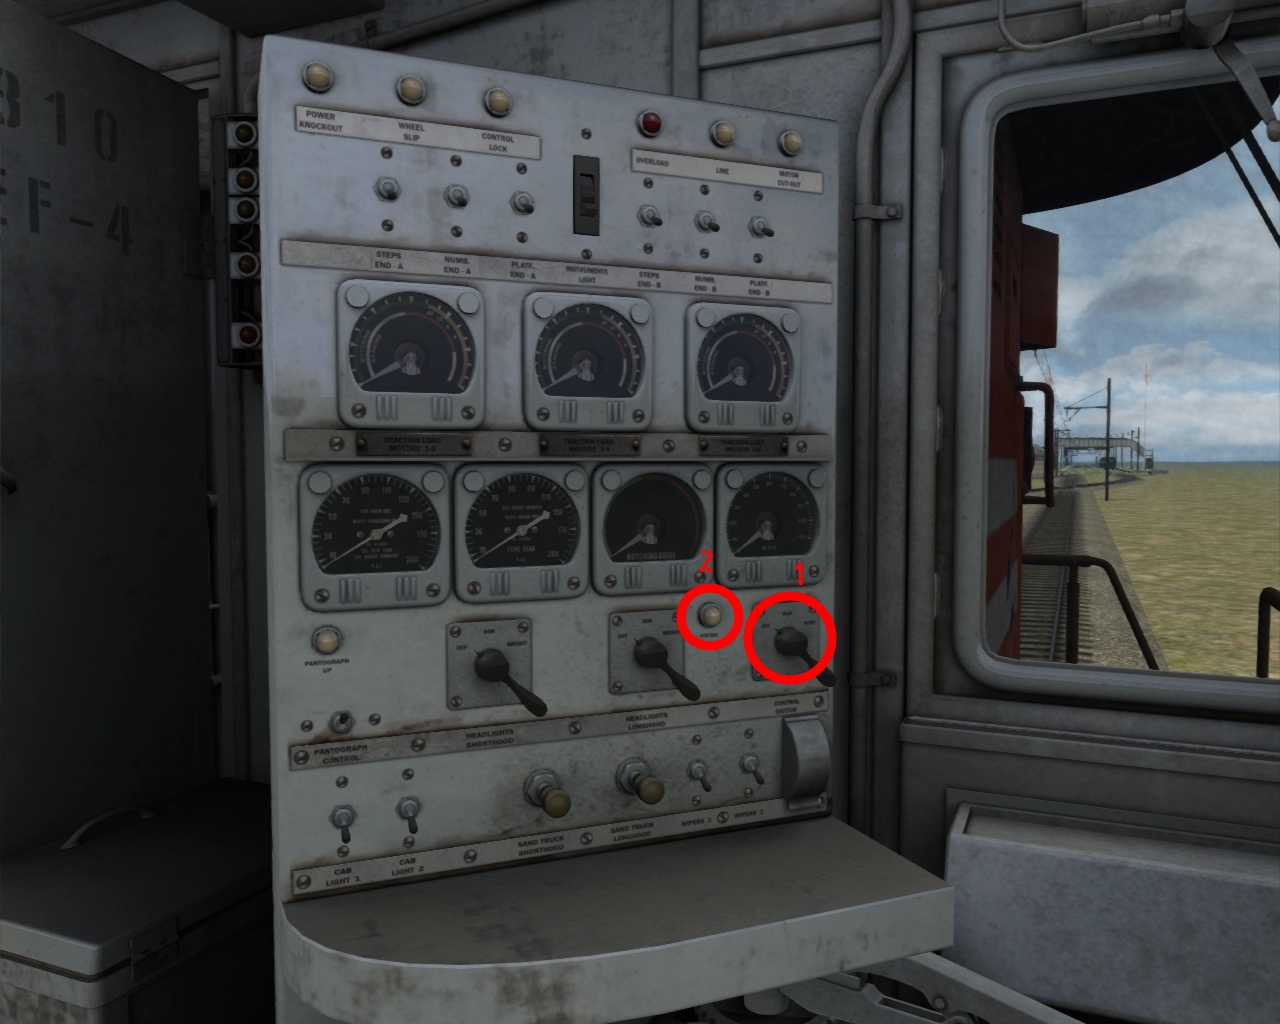
Once you do that, push either of the arrow keys until you reach the relay panel camera. Unlatch the cabinet door and open it. Flip the “Local Energy Switch”(1), and then the “Cab and Run Breaker Switch”(2).
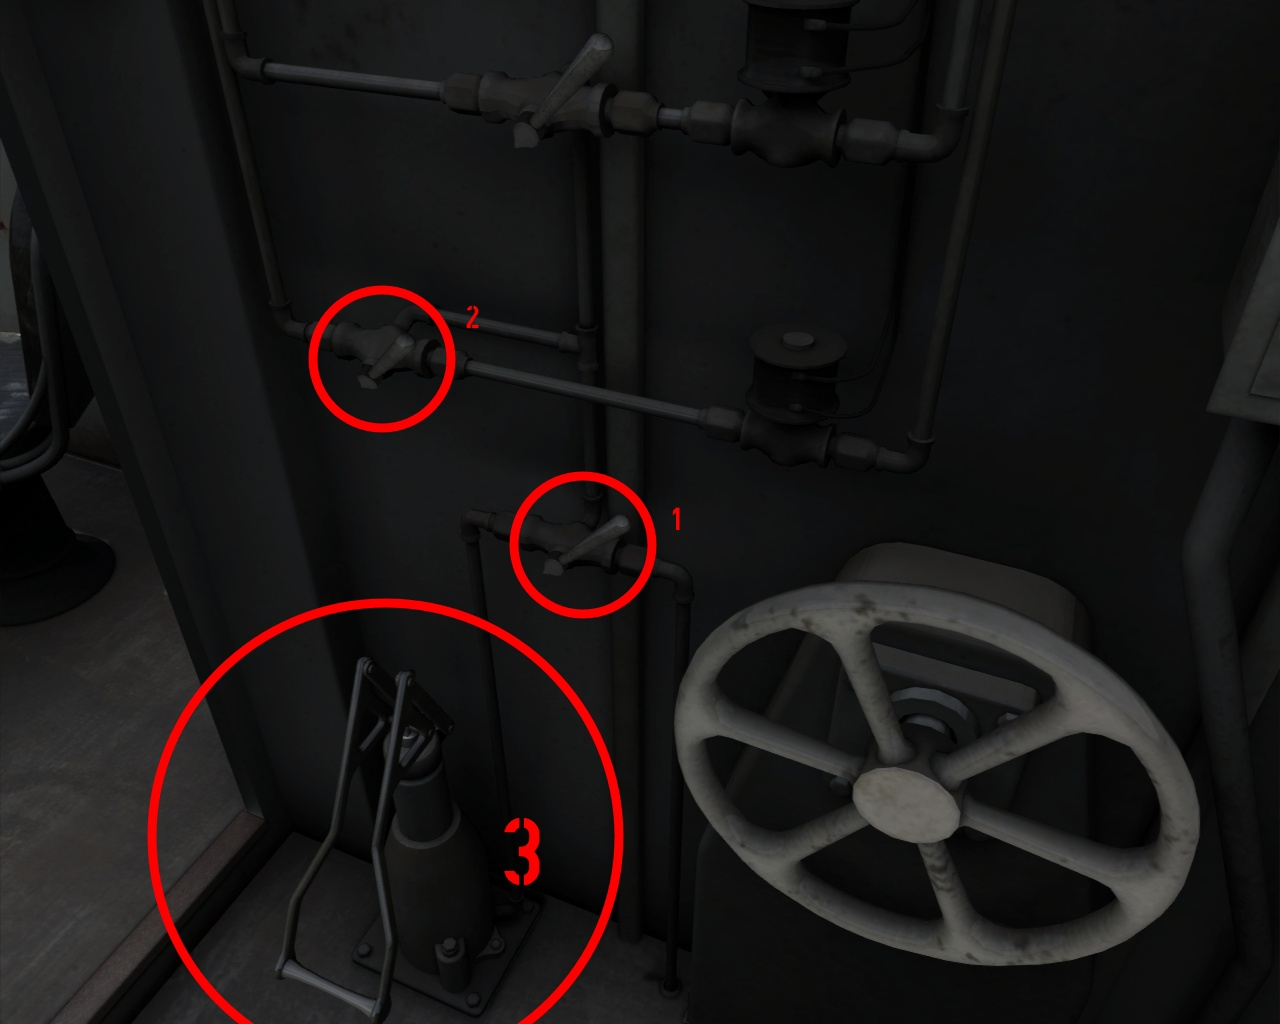
Once you’ve flipped both, in that order, arrow key back into the nose again. You need to turn both the LOWER(1) and CENTER(2) “Pantograph C o c k s”. Once they’re turned to the “Open” Position, you must grab the “Hand Air Pump” handle(3), and manually pump the pantograph up. This usually takes four to five FULL pumps, and you will hear a sort of “snap” noise when you make contact (of course, you could always go to the exterior camera to check).
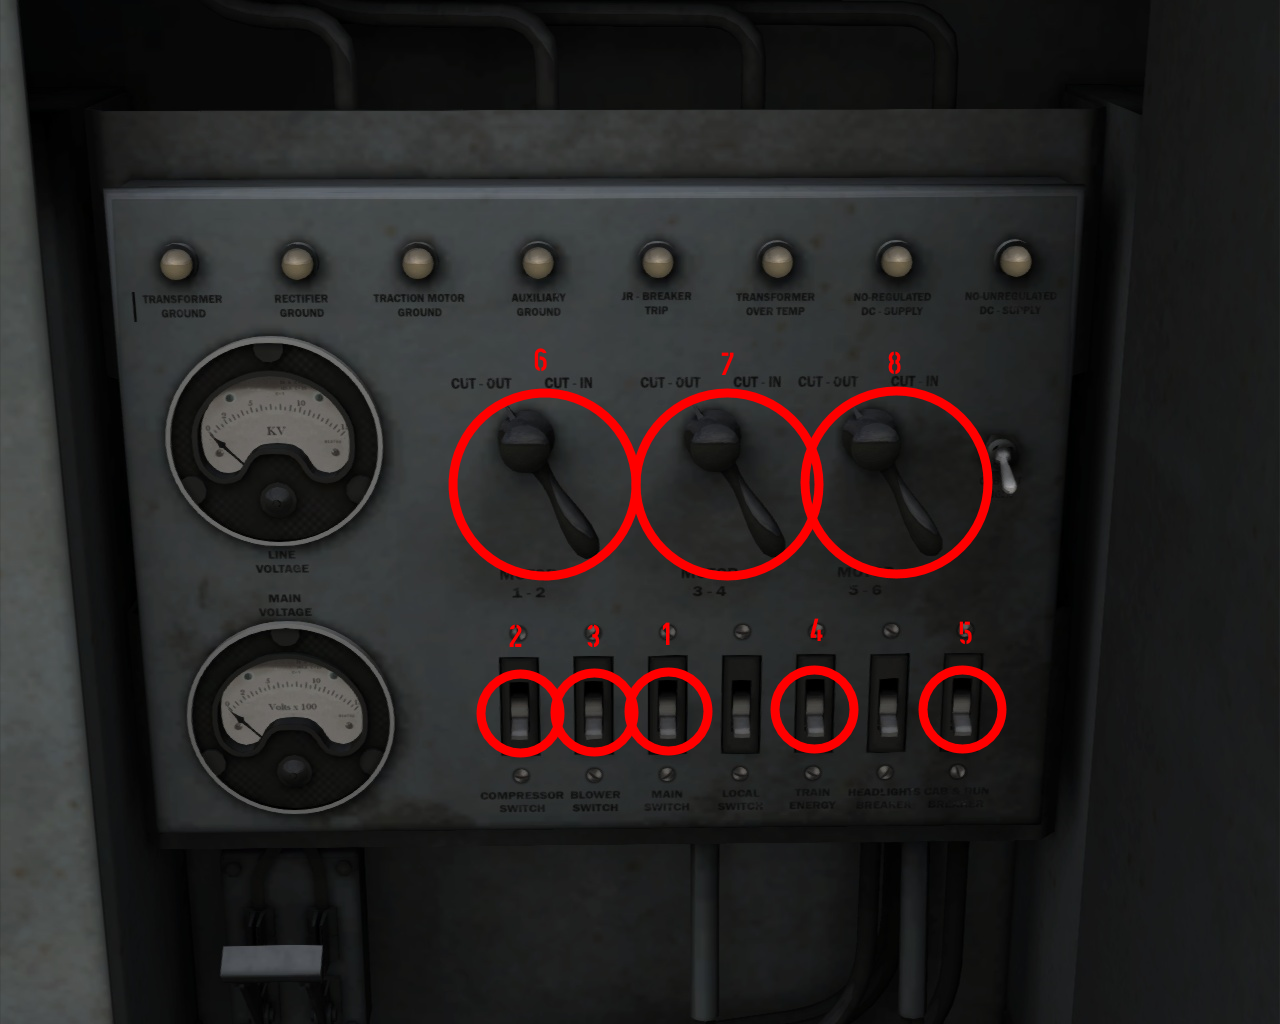
Once you get the pantograph pumped all the way up, you can now close both the c o c k s, and arrow key to move back to the relay panel. You must now flip, in this order, the “Main Energy” Switch(1), the “Compressor” Switch(2), the “Blower” Switch(3), the “Train Energy” Switch(4), and finally the “Headlights Breaker”(5). Once those are all flipped, turn all three “Motor Cut Ins”(6-8 to the “Cut In” position.
Now, arrow key until you are seated in the driver’s seat. Turn on any headlights/interior/auxilary lights you wish, and you are all set to move to the next section!!!
Step 2: Getting It Ready to Drive!
This section will not be long, as it’s not very complicated. I will not be explaining HOW to drive….as it’s essentially the the same as any other loco, just a few more things to do before you can drive.
So, you should be sitting in the driver’s seat. Good for you, you’ve made it this far! Observe the huge control stand to the front and slightly left of you. There should be a rotary switch titled “Control Switch”(1). Turn this switch all the way to the right, to the “Reset” position until the light directly to the left of the switch(2) illuminates. You can then let go of the handle.
From this point, all you have to do is RELEASE THE HANDBRAKE (located in the nose, you won’t need a picture to see what it is), set the reverser to whatever direction you desire, release your brakes and off you go (see Section 3 for help).
Info: Braking System!
The braking system is highly realistic on this locomotive, bear this in mind. As such, any explanation of this might seem a bit much for some people. I’ll try to make it as simple as I can.
**NOTE: FOR SOME REASON, THE “COLD & DARK” VERSION OF THE LOCOMOTIVE HAS A BUG WITH THE BRAKES….FOR THE TIME BEING THIS GUIDE DOES NOT APPLY TO THE COLD & DARK VERSION!**
Release is the farthest left position on the brake handle. Release has one use; bailing off the brakes. The release position should NEVER be used during regular operation. When first starting off the locomotive, a brake bail-off is required, but after which the handle should be returned to “Running”(see below). Release can also be used to bail-off after an emergency application, if need be.
Running is the position in which the brakes should normally be run in when not making an application, and is directly right of “Release”. Running should be used as a means to release brakes after an application, as the air is still able to flow through brake pipes and valves.
First Service is the position directly right of “Running”. First service is essentially a minimal application. When put into this position, a light brake application of anywhere from 6-8 PSI will be applied. Good for moving a few cars around a yard.
Lap is the position directly right of “First Service”. When in Lap, no pressure will be added or dropped from the application. The brake pressure will not change. This should be used in conjuction with “Service”(see below).
Service is directly right of of “Lap”. Service is the main position you should use when making a brake application higher than what “First Service” offers. To use this position, move the handle into the position, and watch the EQUALIZING RESERVOIR on the main control stand. When the desired brake pressure has been reached, move the handle left back into “Lap”, which will keep the brakes at the current pressure. Move back into Service to add more pressure.
Think this one is self-explanatory. The only thing I have to say is if you have Cab Signals turned on, (Ctrl-D) to toggle that, by the way, and you fail to acknowledge the alerter when overspeed for the current block, or changing to an adverse aspect, the brakes WILL go into emergency.
As you may be able to tell, the braking is a very complex procedure to learn, but after a while you will get the hang of it. Good luck!!
Info: NON-STANDARD Key Bindings
As this is such a complex locomotive (arguably one of the most complex so far for Train Simulator), there are many key bindings that aren’t standard for the game. I won’t be describing things like headlights, sander, normal wiper, etc, as those should be known controls by now. This list is directly from the manual:
Summary
So, in this guide I’ve described the following:
- How to start up the locomotive, including Battery, Pantograph, and Relays.
- How to get the locomotive ready to move, including a few miscellanious steps.
- The Braking System (to the best of my ability).
- NON-STANDARD Key Bindings.
Hopefully this guide has helped you gain a little knowledge! Please feel free to comment below if:
- This guide has helped you!
- If I’ve missed something, and you’d like to correct me!
- If this guide DIDN’T help you!
- If you have ANY questions, as I’d love to try and help you out (reminder, I’m no expert!)
If this guide DID help you, please feel free to rate it up, maybe even favorite it or share it!
Thanks for taking the time to read!
-Dash Seven Studios