
Overview
Guide for Pistol-zerking gunslinger Nisha (skills, equipment, guns)
Introduction
Nisha, the Lawbringer, is a bit of a glass cannon type vault hunter. A bit fragile but capable of putting out lots of damage. Her final capstone in the Fan the Hammer tree gives her a similar, but weaker, ability as Salvador from Borderlands 2; it lets you dual wield a copy of your pistol. Unlike Salvador’s, this is limited to only pistols and you can’t have two different weapons wielded, only a copy of your main hand.

Nisha’s action skill is Showdown

Showdown is basically aim-bot. When you activate the ability you’ll automatically aim at enemies and get boosts to gun damage, fire rate, reload speed, accuracy and bullet speed (gun damage does not apply to sniper rifles or rocket launchers). The screen changes colour when Showdown is active and you see a timer counting down located just above your exp bar and stack indicators.
Some players do find this a little dull as the skill sort of does a lot of work for you. You can just hold down the mouse and burn everything down without worrying about aiming.

The general goal of the gunslinger is to pump points into Fan the Hammer and The Riflewoman, ‘pistolzerk’, and keeping Showdown up.
Skills
Core Skills
Order – One point wonder ability, no reason not to drop the singe point here
Ruthless – Kills made during showdown extend its duration. The longer you’re in Showdown the better.
Faster ‘n You – Killing an enemy increases your Fire Rate, Weapon Swap, and Reload Speed for several seconds. If you’re using low magazine weapons, the extra reload speed will come in handy.
High Noon – You gain additional gun damage the longer you stay in Showdown. Excellent in long fights as you’ll be able to use Ruthless to extend Showdown duration and boost your damage further.
One For Each of Ya – Equipping a Pistol spawns an exact duplicate of that gun in your off hand. Lets you go ‘pistolzerking’. Excellent for DPS. Primary drawback is that you will burn through a lot of pistol ammo. With only a max ammo size of 900 you can burn through that fairly quickly.
Bona Fide Grit – Kill Skill. Killing an enemy grants you bonus Critical Hit Damage and Health Regeneration for a short duration. Better than Snap Shot, health regen is nice but critical hit damage boost is the real reward as you’ll be getting lots of crits as Nisha.
Quick Shot – For a short time after reloading, you gain bonus Gun Damage and Fire Rate when firing from the hip. You’ll be doing lots of shooting from the hip during Showdown and it’s easy to trigger.
Unchained – Shooting an enemy earns a stack of Unchained, to a max of 1 stack per second. You gain bonus Fire Rate for every stack of Unchained. Excellent for long fights and bosses where you can really build up the stacks. Very good buff to your fire rate. Faster you fire, the faster you can kill things. The faster you kill things, the longer Showdown is kept up and the more you trigger your kill skills.
Impatience – Killing an enemy grants a stack of Impatience. Reload Speed increases for each stack of Impatience. Only a single point, no reason not to pick it up.
Tombstone – After killing an enemy, all hits have a chance to count as Critical Hits for several seconds. This skill is insane. Your crit chance goes through the roof. Simply hold down the fire button and blow everybody away.
The Unforgiven – Shots during Showdown ricochet off of enemies into other enemies, dealing 10% damage. Every enemy hit during Showdown explodes at the end of Showdown. The explosions can clear enemies you haven’t managed to finish when showdown ends or help trigger second winds. 0 reasons not to pick up the capstone after maxxing out Tombstone.
Optional Skills
Saddle Up – Boosts your speed and damage on kills. Ruthless takes priority, late game you should have points free up to pick it up if you wish.
Magnificent Six – The last six bullets of any Non-Elemental gun deal extra damage. I tended to use larger magazine and elemental weapons during my playthrough. This is a good skill if you are using the Maggie or Flayer through.
Bottled Courage – Triggering Showdown restores some of your shields. While Showdown is on cooldown, you gain improved Shield Recharge Rate and Recharge Delay. Most useful for instantly buffing up your shields when you take a lot of damage quickly and need a breather before entering Showdown.
Hot Lead – Critical Hits with non-Elemental weapons have a chance to deal Incendiary damage, with a high chance of Igniting targets. Good with Jakob’s weapons and when comboed with Tombstone. I tend to use elemental weapons a lot
Trick Shot – Bullets that hit walls or objects have a chance to ricochet into enemies at reduced damage.
Useless Skills
Pickpocket – Melee attacks steal up to six bullets from an enemy, loading them instantly into your currently-equipped gun. This will not help with pistolzerking ammo issues and it’s time you’re not shooting.
Gunslinger – Reloads a portion of your gun’s magazine when Showdown begins, and when it ends. Very minimal effect for 5 points.
FYI, my final skills trees.


Equipment (Non-Gun)
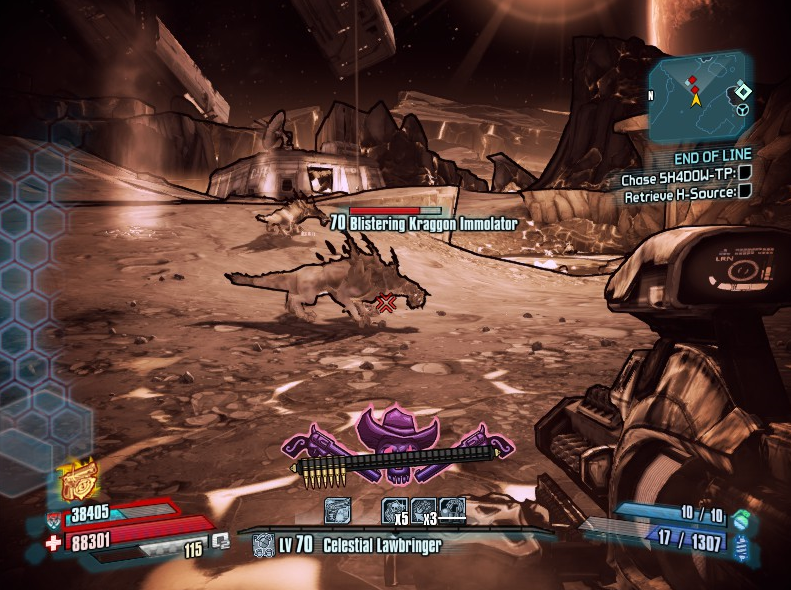
Class Mod: Two mods that come to mind. I primary used the Celestial Lawbringer for the heals.
[The class mod that takes away the ‘Glass’ part of the Cannon. The Celestial Lawbringer mod speeds up Showdown’s recharge letting you get back into Showdown faster, buffs a number of early skills and converts damage done in Showdown to health. Has an increased drop from The Empyrean Sentinel but you can moonstone grind 3x purple mods in the grinder for one instead.

Alternative mod, give up heals for pistol damage buff and high tier skills buffs.

Grenade: As you’re a DPS machine I prefer using a support oriented grenade type. I’m not a fan of Bouncing Betty or Rubberized delivery types while I tend to favour Longbow and homing.
(Claptastic Voyage)

The Meganade’s special effect, ‘Suck! Suck! Suck!’, creates three singularity pulls, approximately one second apart, before exploding. Makes for an effective CC grenade. The Meganade comes in multiple elements; Cryo is my favourite for even more CC. Drops from both Self-Loathing and Despair in Subconscious.
Transfusions grenades in general make for an useful healing support option if you’re not using the Celestial Lawbringer mod or have not acquired one yet.
Oz Kit:
The pretty obvious choice. 3DD1.E is an amazing all around kit and provides all sorts of buffs. Excellent Oz capacity, boots your shields, laser damage. As well, there is a random chance for shields or health to rapidly refill when low, when damaged by melee attacks, there is a high chance to release a brief shock tether, damaging the attacker(s). When killing an enemy, there is a random chance to release a care package, which can provide health vials, ammunition and/or money drops. Farmable from CL4P-L3K located in the Veins of Helios.

Until you can get one use whatever oz kit you find that gives you the best bonuses. Kits like Arctic can be pretty nice I think.
Shield:
I usually just bought upgrades off the vendor machines. Shields can be a little bit of a pain to get. If you want to get a world drop shield, your best bet is to farm 3x Shooting Stars from Lost Legion Power Suit Noob and save scrum at the grinder.
Adaptive makes for a good, generic shield. Extra max health gives you more cushion and you can heal it up during Showdown with the Lawbringer mod.

Laser-oriented absorb shield, the Prismatic Bulkwark boosts your laser damage and laser resistance. Unlike other absorb shields it can only absorb lasers. Nice option if you’re using lasers a lot or fighting against enemies that use lasers themselves. Farmable from the The Empyrean Sentinel.

(Claptastic Voyage)
The Shield of Ages has a huge shield capacity at the cost of health. Better numbers than the Fabled Tortoise without the movement speed penalty. Synergizes with the instant shield recharge from Bottled Courage skill. It is a mission reward obtained by following Gladstone’s instructions at the end of The Temple of Boom.

The Reogenator is an adaptive shield. Increased max health and health regeneration. High elemental resistance. Reduced shield capacity and recharge delay. Health regeneration scales inversely as damage is taken to the shield. Has a low shield capacity but big boost to health and massive resistance to elemental. It’s a world drop so grinder is best bet.

The Sham is an absorb shield. It has low shield capacity, recharge delay / rate but a huge absorption rate. Good for enemies that use guns, bad for creatures that don’t. Supposedly it’s supposed to drop from Raum-Kampfjet Mark V but I’ve never seen one drop so grinder is probably best bet.

Equipment (Guns)
While pistols are the main weapon, you’ll find that you can quickly burn through it’s entire 900 ammo pool. I generally used SMGs, lasers and shotguns as alternative weapons. Assault rifles felt kind of underwhelming to me. Sniper rifles and rocket launchers didn’t really fit my playstyle with Nisha but if you want to use a single slot for either of those go ahead.
As for damage types you should have an cryo and a shock weapon on you normally. Cryo is useful for dealing with mini-bosses using freeze as CC and shock is needed for dealing with shields. Corrosive is useful at times too so you should keep one on hand. Immolation is weak in a vacuum (ie, a lot of the game) so it’s pretty lackluster outside of killing Torcs and Stalkers when you’re in an atmosphere.
Guns listed in general order of when you can expect to find them. Mostly a list of guns I used regularly and found useful.
The Striker is a shotgun that gives big bonuses to crit with minimal spread. It’s a Jacobs so it fires as fast as you can pull the trigger. It has a really high recoil from my experience but you’ve got Showdown’s auto-aim to get around that. Farmable from Belly.

The Fatale is a SMG that is always cryo with increased accuracy, magazine size, critical hit damage and recoil reduction rate. Good early option for freezing annoying mini-bosses. Freeze chance is okay but nothing special. Farmable from Drongo Bones.

The zim is a pistol that is always cryo. It has an massive magazine size and improved damage and accuracy. Excellent CC pistol. The Fatale is probably a better choice until you get One for Each of Ya; with 2x zims firing you can freeze everything super fast which is good when you need to freeze a badass right away. Farmable from the Giant Shuggurath of Ice.

The Flakker is a rather unique shotgun. It fires a number of rounds in a wide spread that explode after a bit of time. It has a very long reload and isn’t designed to hit enemies very close or far away from you. Best for crowd control and flyers not single target. It takes a bit of getting used to but can be useful with practice. Farmable from the Even-More-Disgusting Tork.

The Machine is a rare unique Sniper Rifle. Can come in multiple elemental types or non-elemental. Has an increased magazine size and fire rate. Damage and fire rate increase the longer the trigger is held. Less of a traditional sniper and can be hip fired. World drop but can often be bought pretty cheap from vendor machines.

The Vibra-Pulse is an insanely good beam laser. It is acquired by starting the mission Home Sweet Home and opening the weapon crate located in Moxxi’s Up & Over Bar in Concordia. It’s always shock and will chain to nearby opponents if the initial laser hits an enemy making it good at quickly stripping shields. Like all Moxxi weapons it heals you. Showdown also gets around its main disadvantage by keeping the beam straight. It will easily last you from Helios to the final boss in normal.

The Torrent is an excellent SMG for hip-faring. It can come in different elemental types or be non-elemental. With its increased damage and decreased recoil, the Torrent excels at scoring critical hits. A corrosive Torrent makes a great option against Raum-Kampfjet Mark V. It’s farmable from Meg. Extremely fast run from Jack’s Office (<10s to get to her), excellent farming spot in general.

Always cryo SMG, Fridgia is obtained from the mission In Perfect Hibernation. An extremely high freeze chance combined with two bullets at the cost of one make it excellent for CC. It also has a low recoil.

(Claptastic Voyage)
The Flayer is a super-charged Coach Gun style shotgun. Large magazine size, damage and accuracy. My favourite shotgun, just hold down the trigger and everything gets smoked. Drops from Viruses. You can use normal Coach Guns as inferior alternatives.

(Claptastic Voyage)
The Thunderfire is one of my favourite beam lasers. It is always shock with an increased continuous damage bonus and shoots a beam that emits a small immolation nova upon hitting an enemy or object. Fire rate is reduced fire rate and consumes two ammo per shot. Good option for killing flesh enemies with shields. Drops from Despair and Self-Loathing (you can farm a Meganade at the same time)

(Claptastic Voyage)
The Omni-Cannon is a sniper rifle that deals bonus unlisted explosive damage and low scope sway. Used it only a tad but seems decent. Farmable from The Sponx.

Shooterang is a pistol with greatly increased damage and magazine size. Flies around like a boomerang when thrown with a reload, bouncing off surfaces and firing constantly before exploding. The high damage of the pistol is it’s main selling point, I had a Two-Fer shock version which I used to take down Bosun in UVHM without targeting the generators first. It’s a world drop only through so your best bet is grinder save scrumming.

Never found one bet I’ve heard it’s supposed to be amazing. It’s a Jacobs pistol that fires 6 projectiles per shot with decreased accuracy and damage per projectile. It’s a world drop only so grinder save scrumming.

Don’t have much experience with rocket launchers. From my understanding the following are good:
Nukem: Farmable from Flame Knuckle (Intro in TVHM, UVHM [don’t think can drop in normal], requires you to repeat fight until it drops before you go to Elpis). Only launcher I used much, mostly against Iwajira. Rockets fly in an arc and explode in a mushroom cloud. Increased damage with severely reduced reload speed. Consumes 2 ammo per shot.
Badaboom: World drop. Fires six rockets at the cost of one rocket. Reduced per rocket damage and greatly reduced accuracy. One of, if not, the highest damage launchers and is handy for getting second winds.
Q&A
If you have any queries leave a comment and I will respond when I have time.