Overview
This guide is an introduction to the functions of the Node Controller mod.
1 Intro
Node Controller (NC) is a mod that allows users to create and modify the appearance and some functionalities of nodes. All networks, including roads, railways, and decorative networks (such as retaining walls and curbs) can be modified.
Node controller requires the following dependencies:
Once you have subscribed to all of these mods, you will also need to go to
and enable all of them. You also need to subscribe to NC and enable it in the same way.
Optional mods for extra functionality: Unified UI (UUI)
Node Controller may be accessed from the road menu:
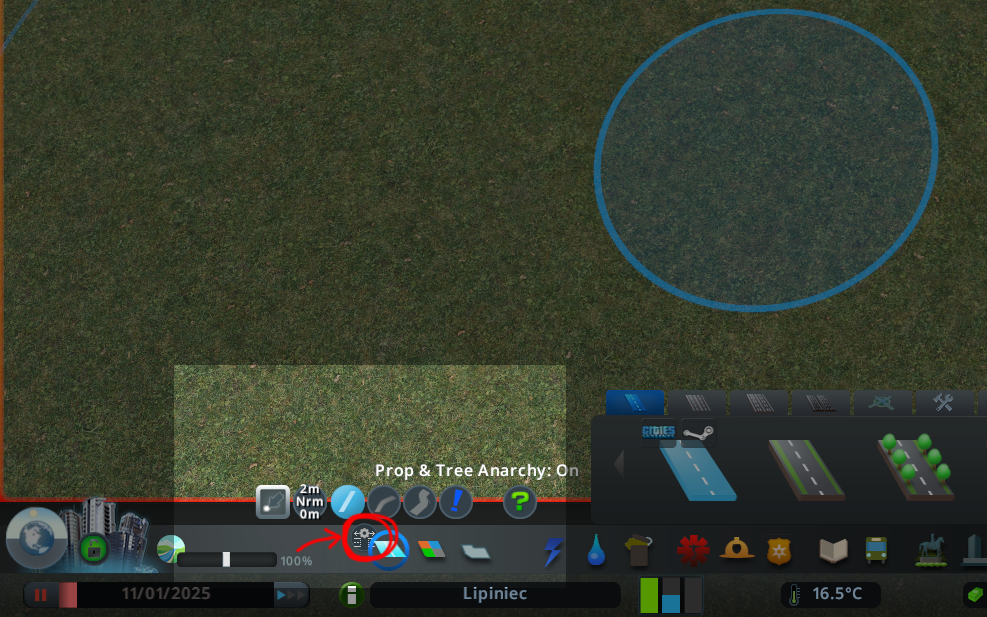

2 Selection
Node Controller can modify existing nodes that occur at intersections or bends. These nodes are shown with a yellow circle:
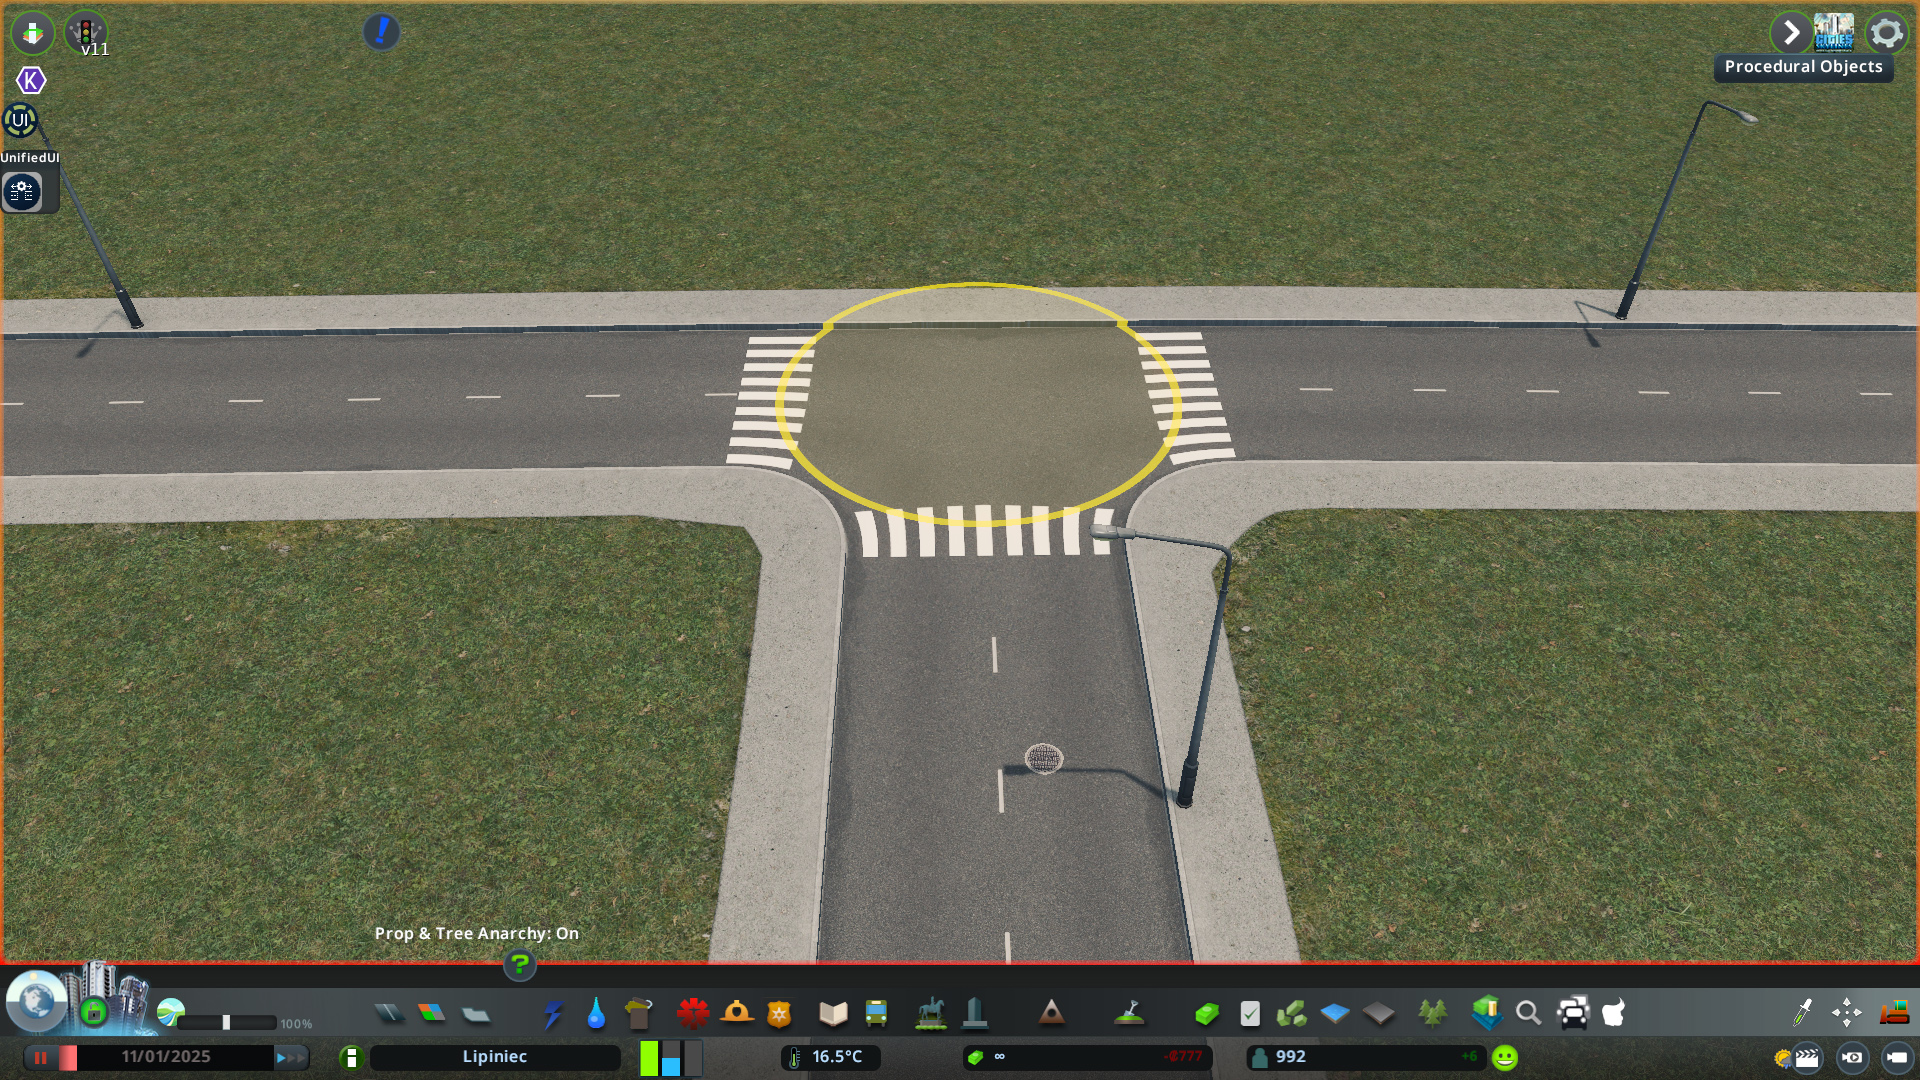

Additionally, you can click on a straight section of road to create a new node. This new node will display a yellow circle, as above, that NC can modify. When creating this node, the location of the new node is shown with a thin green rectangle:

You can also modify individual segment ends. This will modify only one side of a node. Holding ALT in the selection mode allows you to click to select segment ends instead of nodes. The segment end will be shown in yellow, like bend and intersection nodes, but only as an outline of the half of the segment that you are modifying:

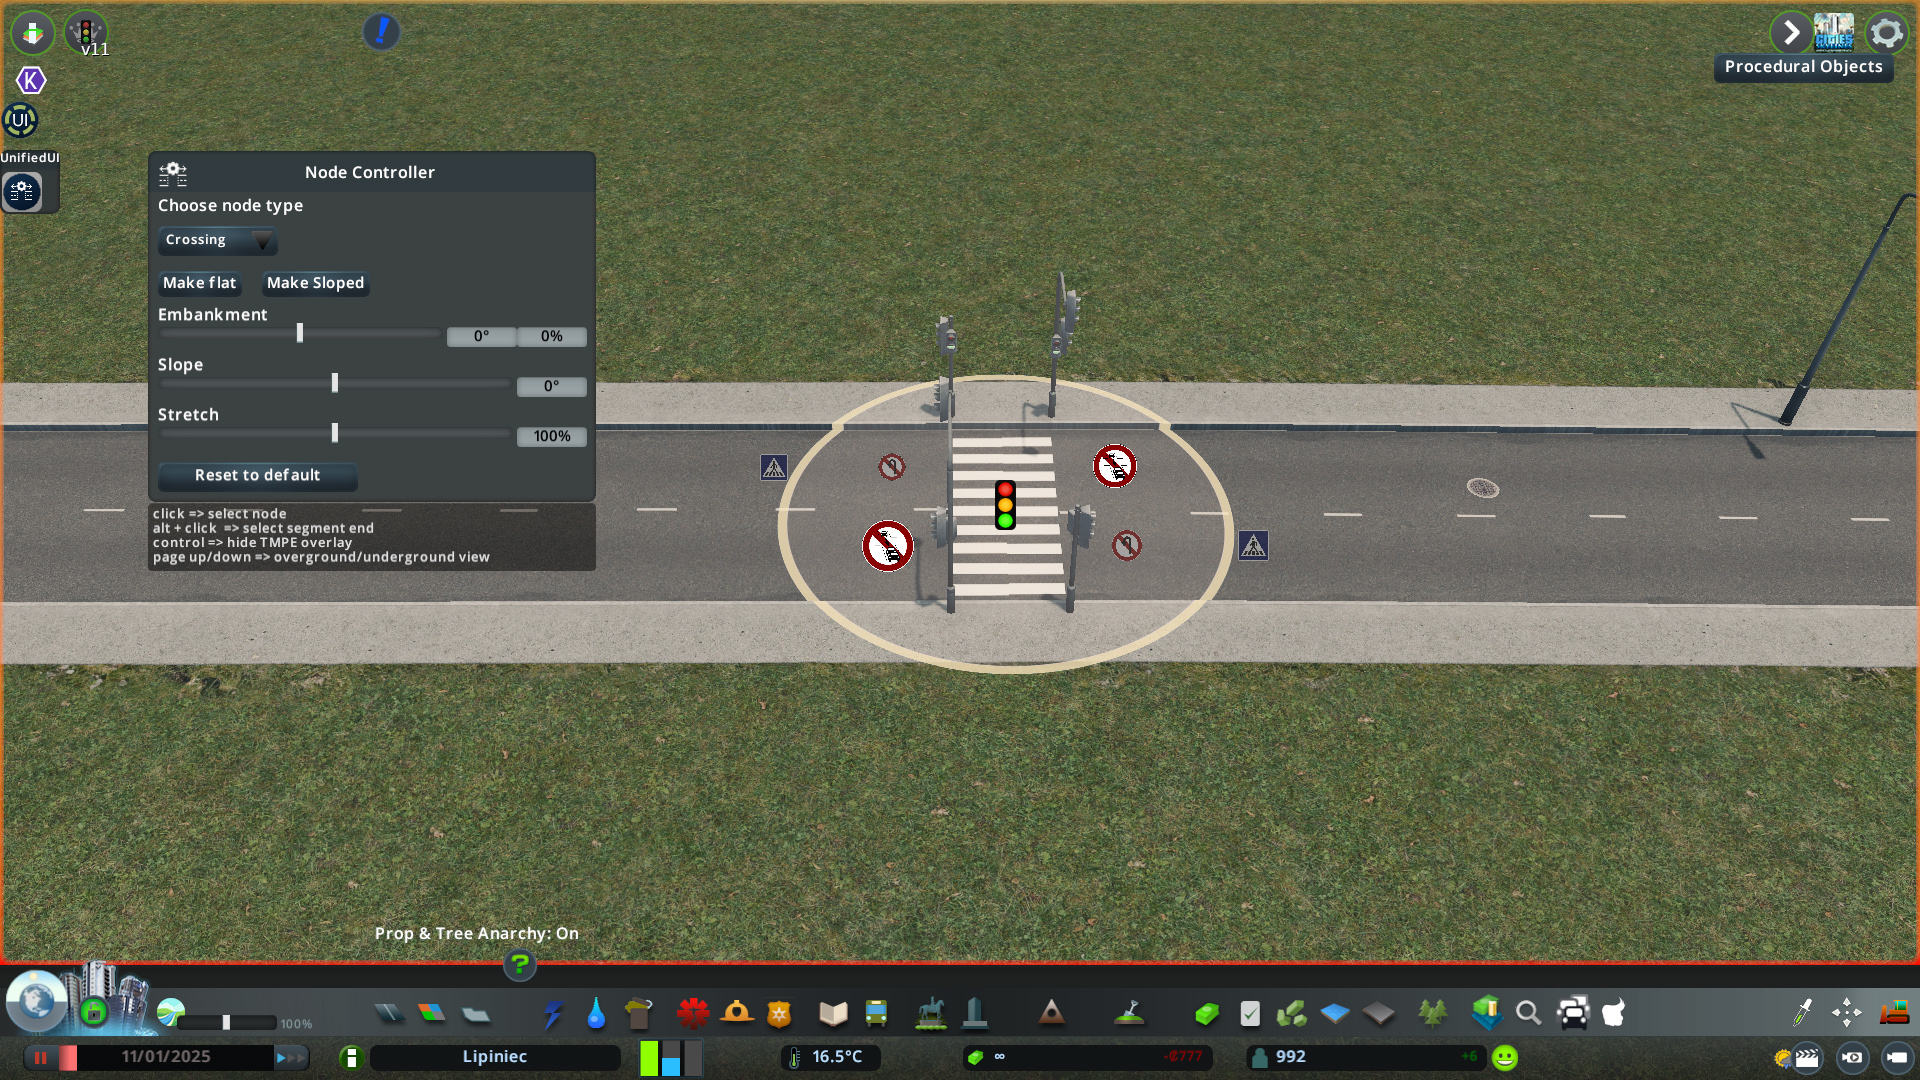
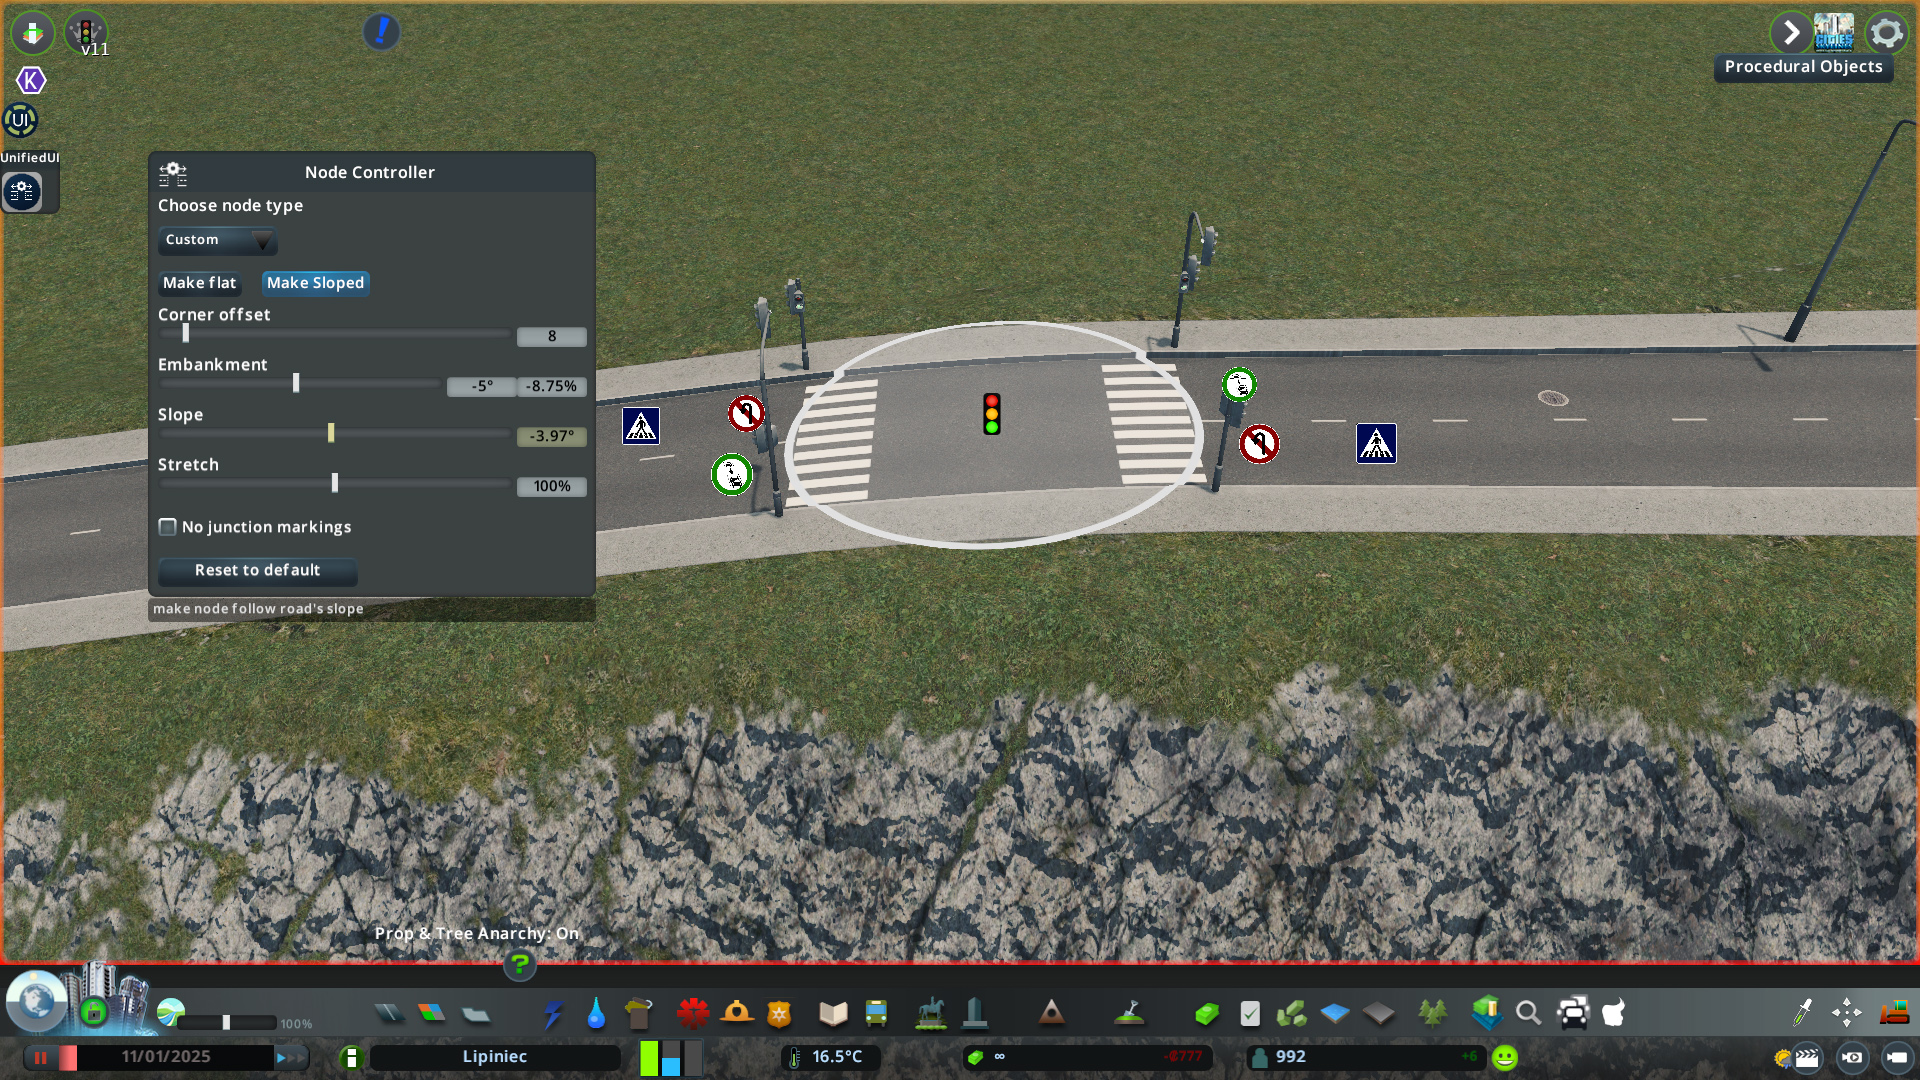
3 Panel Controls
Selecting a node or segment end will bring up a control panel that allows you to change the settings of the selected node or segment end. Depending on the type of node or segment end that is selected, different panels will appear with different settings. Each setting type is described below.
When a setting is highlighted in yellow, it means that the settings are different for each segment end of that node. For example, if the corner offset for one segment end is 0, and the corner offset for another segment end is 15, a corner offset of 7.5 will be displayed when the node is selected, and this value will be highlighted in yellow.
This allows you to choose the node type of a node. Node types are detailed further below.
his controls whether the middle of the node is flat or sloped:

This changes the size of the node corners:


Corner offset is very useful for creating smoother turns with tram tracks:


This changes the embankment (tilt along width) of the node:


This changes the slope of the node:


This changes the width of the node:


This setting visually hides the junction markings. It does not affect their functionality. To functionally ban pedestrian crossings, use the TMPE icons.
Flatten segment end causes the node to be flat when it is on a sloped road. Usually roads look better when this setting is off:


However, at an intersection, flatten segment end is best left off on the main road, and turned on (alongside twist segment end) for small roads feeding into the main road:


These controls allow users to manually set the offsets of the red selectors. They can be used to alter the way a segment end looks, including asymmetric transformations. For example, they can be used to adjust the shape of an intersection to look better:


Dir Length can (especially in conjunction with other settings) be used to create flat dead end roads or round cul-de-sacs:
→ screenshot thanks to kstsk


4 World Controls
Selecting a node brings up a number of on/off toggles that are connected to functionalities from the TMPE and Hide Crosswalks mods. These are not present for all networks: for example, decorative networks do not have these. The settings allow you to control whether the node does or does not:
- have traffic lights.
- have crosswalks.
- allow u-turns.
- allow queuing across an intersection.
When a segment end is selected, the corners of each segment end are highlighted with a red selector. This selector can be dragged around by the user to modify the shape of the segment end:
→ Hovering over the selector
→ After moving the corner


5 Node Types
There are 3 node types for nodes created on a straight road: “Crossing”, “UTurn”, and “Custom”. “Crossing” and “UTurn” nodes cannot be customised, and their names are self-descriptive: “Crossing” nodes are used to make a pedestrian crossing, and “UTurn” nodes are used to make a place where u-turns are possible for vehicles.
“Custom” nodes allow users to modify the other settings (corner offset, embankment, etc.) as outlined above in the Panel Controls section.
There are 3 types of nodes for a node created on a bent road: “Bend”, “UTurn”, and “Custom”. “UTurn” nodes work in much the same way as they do for straight roads. “Bend” and “Custom” nodes work very similarly to each other (both can be customised), with the major difference being that `Bend` nodes have road markings, and “Custom” ones do not.
There are no selectable types of node for junctions, as there is only one possible node in such a situation.
6 Options Panel
The NC options panel provides users with the following options:
- Activation Shortcut: allows users to change the activation shortcut.
- Snap to middle node
- Hide TMPE overlay on the selected node
- Apply universal slope fixes
Hovering over a setting with the mouse provides more details as to how each setting works.