
Overview
A guide on which NPCs that want something, where they are located, what to do for their quest, and what reward they give.
What are Side-Quests?
NPCs will appear around Conton City with a red question mark above their head. Some will ask for something or commend and give a reward; such as emotes, outfits, and material.
After completing the tutorial
- NPC: Nema
- Location: Reception Area
- What to do: Use the Gather Energy emote
- Reward: Kamehameha emote
- NPC: Tennille
- Location: Reception Area
- What to do: Use the Kamehameha emote
- Reward: Special Beam Cannon emote
- NPC: Isoss
- Location: Orange Star High School
- What to do: Use the Bow emote
- Reward: Elder Kai Dance emote
- NPC: Isstea
- Location: Time Nest
- What to do: Just talk to her
- Reward: Senzu Essence Capsule x1
- NPC: Dodo
- Location: Business District aka Patrol Headquarters (by the Bamboo Forest)
- What to do: Have Dodo run up to you and give her a Mr. Shape Up S
- Reward: High Mix Capsule x1
- NPC: Jisabok*
- Location: Inside Orange Star High School
- What to do: Just talk to him
- Reward: Chance for Energy Capsules
* This quest can be repeated
- NPC: Tosok
- Location: Near the Reception Area
They appear after defeating Raditz - What to do: Talk to them and pay Zeni or TP (depending on your level)
- Reward: 1 level up
- Location: Near the Reception Area
After completing the Saiyan Threat and Ruckus on Planet Namek chapters
- NPC: Hyoka
- Location: Reception Area
- What to do: Give him a Mr. Antidote S
- Reward: All Energy Crystal x1
- NPC: Jeeja
- Location: Business District aka Patrol Headquarters
- What to do: Use the Anguish emote
- Reward: Saiyuki outfit
- NPC: Resta
- Location: Reception Area
- What to do: Complete the Simian Battlefront Quest
- Reward: Chi-Chi’s outfit
- NPC: Zanilla
- Location: Reception Area
- What to do: Complete the Fierce Battle! Ginyu Force, PQ 19 (complete PQ 17 and then PQ 18 to unlock PQ 19)
- Reward: King Kai’s outfit
- NPC: Wazari
- Location: Business District aka Patrol Headquarters (on the stairs; South from Orange Star High School)
- What to do: Get your flying license (you’ll need to complete Frieza’s chapter in the story)
- Reward: Launch’s outfit
- NPC: Solani
- Location: Bamboo Forest (jump off the cliff, west from the house)
- What to do: Use the Kamehameha emote
- Reward: Galick Gun emote
- NPC: Amy
- Location: By the Accessory shop in the Business District aka Patrol Headquarters
They might appear sooner - What to do: Talk to her
- Reward: Amy’s Battle Suit
- Location: By the Accessory shop in the Business District aka Patrol Headquarters
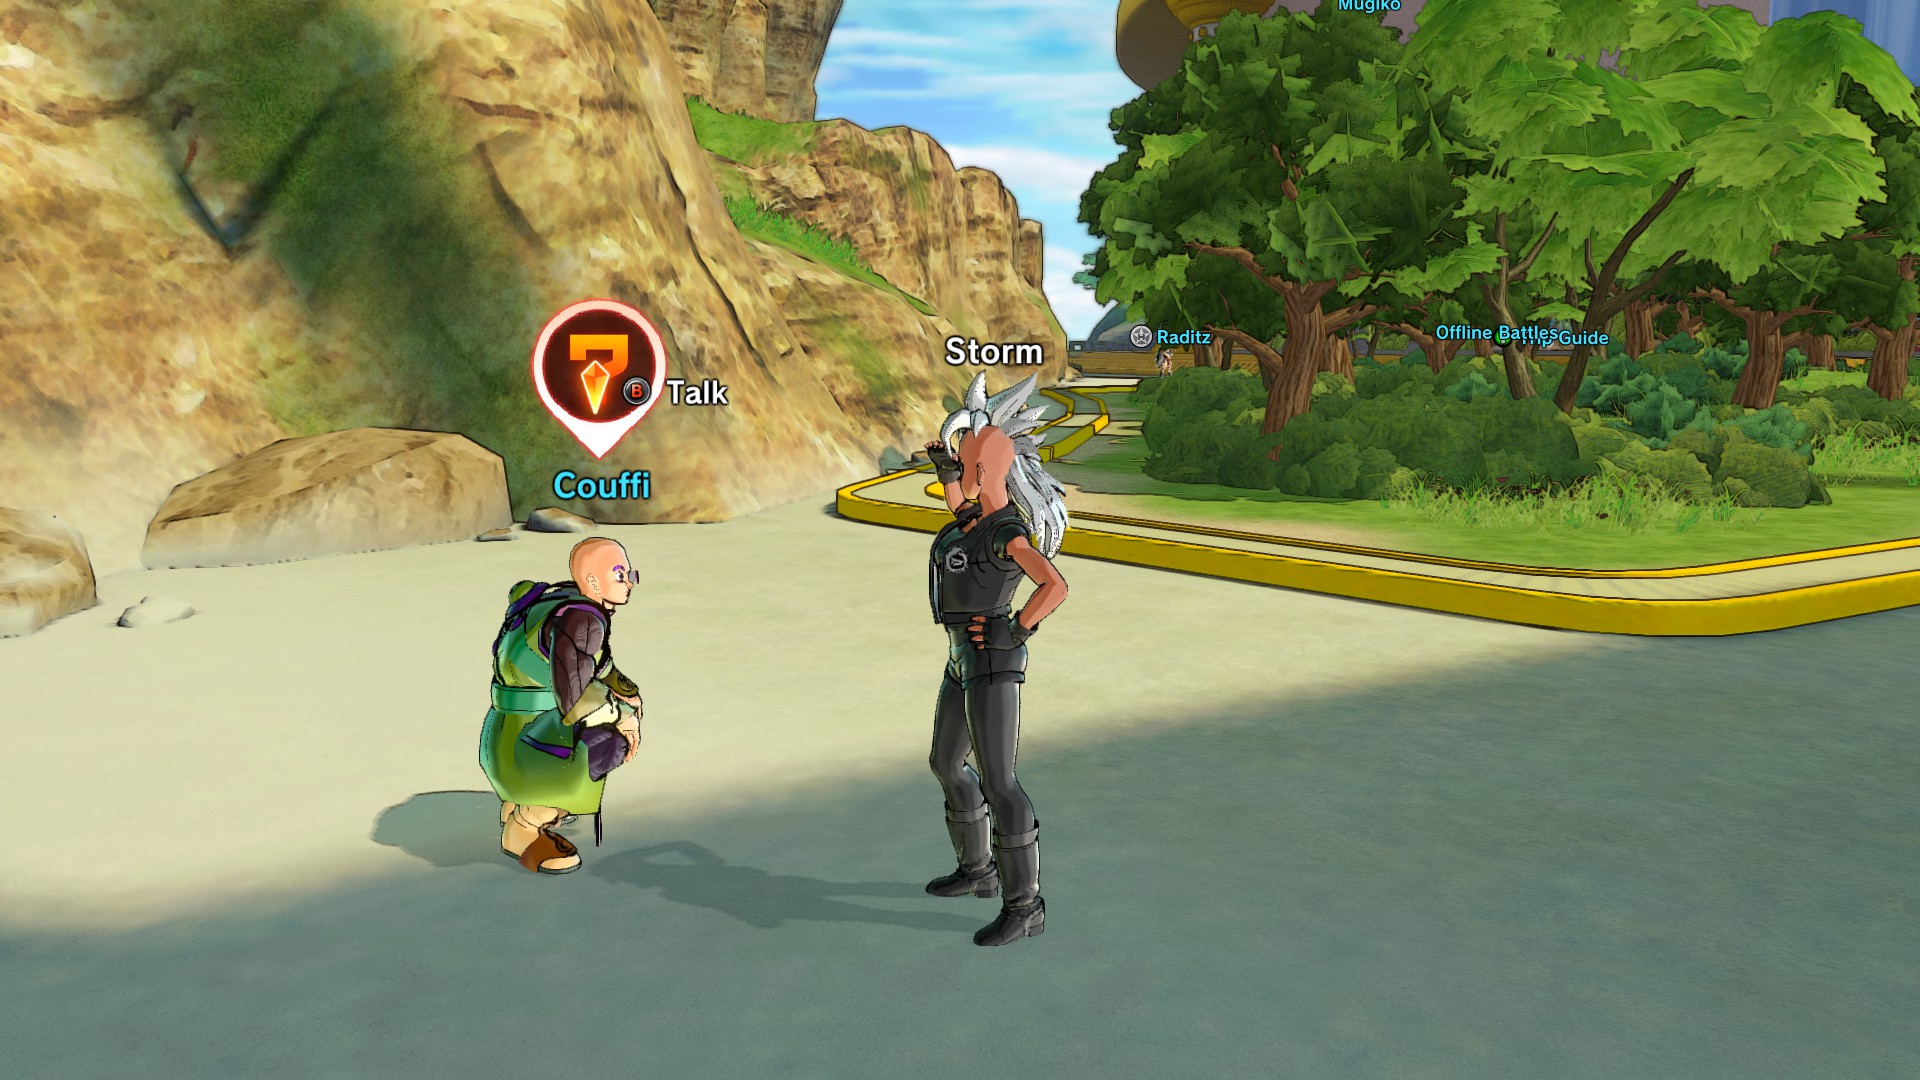
- NPC: Couffi
- Location: Near Reception Area and Shop Area (head left from Raditz)
They might appear sooner - What to do: Equip a vehicle
- Reward: Wild Rider outfit
- Location: Near Reception Area and Shop Area (head left from Raditz)
After completing the Ginyu Force Strikes chapter
- NPC: Mefla
- Location: Reception Area
- What to do: Complete 5 Expert Missions
- Reward: Karinga Tribe outfit
- NPC: Zukkini
- Location: Behind Orange Star High School
- What to do: Get to level 5
- Reward: Commander Red’s outfit
- NPC: Frappe
- Location: World Martial Arts Tournament Arena
- What to do: Give him an Energy Capsule S
- Reward: Mr. Antidote L x1
After completing the Galactic Emperor chapter
- NPC: Salma*
- Location: Mushroom Desert
- What to do: Use the What The?! emote
- Reward: Change emote
* They really appear after the Ginyu saga, but it’s easier to wait until you can fly to them
- NPC: Tennille
- Location: Near Mushroom Desert, by Tien
- What to do: Use the Stand Proud emote
- Reward: Giant Storm emote
- NPC: Nema
- Location: Near Mushroom Desert, by Tien
- What to do: Use the Kamehameha emote
- Reward: Frieza Stance emote
- NPC: Piccule
- Location: Ajisa District
- What to do: Just talk to her
- Reward: All-Aura Crystal x1
- NPC: Nema*
- Location: Resort District
- What to do: Use the Frieza Stance
- Reward: Burning Attack emote
* You need to exit out of Conton City and go back for them to spawn again
- NPC: Tennille*
- Location: Resort District
- What to do: Use the Burning Attack
- Reward: Spirit Ball emote
* You need to exit out of Conton City and go back for them to spawn again
After completing the Android Warefare chapter*
- NPC: Hercule
- Location: Shop Area
- What to do: Use the Applause emote
- Reward: Hercule! emote
- NPC: Taino
- Location: Business District aka Patrol Headquarters
- What to do: Use the Hercule! emote
- Reward: Ginyu Force: Ginyu emote
After completing A Desperate Future chapter (pt. 1)*
- NPC: Iaas
- Location: Business District aka Patrol Headquarters (where Taino was)
- What to do: Use the Ginyu Force: Ginyu emote
- Reward: Ginyu Force: Jeice emote
- NPC: Pima
- Location: Business District aka Patrol Headquarters (where Taino was)
- What to do: Use the Ginyu Force: Ginyu emote
- Reward: Ginyu Force: Recoome emote
- NPC: Fink
- Location: In the ravine (North of the Shop Area)
- What to do: Talk to Hercule
- Reward: General Blue outfit
After completing A Desperate Future chapter (pt. 2)
- NPC: Cresso
- Location: Shop Area
- Emote to use: Ginyu Force: Ginyu
- Reward: Cooler’s Armored Squadron: Salza emote
After completing A Desperate Future chapter (pt. 3)*
- NPC: Chirito
- Location: Business District aka Patrol Headquarters (where Taino was)
- What to do: Use the Ginyu Force: Ginyu emote
- Reward: Ginyu Force: Guldo emote
- NPC: Ukatz
- Location: Business District aka Patrol Headquarters (where Taino was)
- What to do: Use the Cooler Armored squadron: Salza emote
- Reward: Ginyu Force: Burter emote
- NPC: Yokkoi
- Location: Business District aka Patrol Headquarters (near Orange Star High School; on a rooftop)
- What to do: Use the Elite Pose emote
- Reward: Great Saiyaman emote*
* This emote is for male characters only
- NPC: Bologne
- Location: Business District aka Patrol Headquarters (next to Yokkoi)
- What to do: Use the Hercule! emote
- Reward: Great Saiyaman 2 emote*
* This emote is for female characters only
- NPC: Enyah
- Location: Resort Disctrict
- What to do: Talk to her on Friday
- Reward: Energy Capsule Z
- NPC: Mint
- Location: Mushroom Desert
- What to do: Complete 20 Expert Missions
- Reward: Kid Chi-Chi’s outfit
- NPC: Ushimitsu
- Location: Bamboo Forest
- What to do: Give him a World Tournament Gi (Buy the Training Temple Gi for Humans in the store, all four pieces)
- Reward: Krillin’s Orin Temple Gi
After completing A momentous Galactic Battle chapter (Majin Vegeta part)
- NPC: Flick
- Location: Shop Area (where Cresso was)
- What to do: Use the Cooler’s Armored Squadron: Salza emote
- Reward: Cooler’s Armored Squadron: Dore emote
- NPC: Pepero
- Location: Shop Area (where Cresso was)
- What to do: Use the Cooler’s Armored Squadron: Salza emote
- Reward: Cooler’s Armored Squadron: Neiz emote
- NPC: Yahan*
- Location: Orange Star High School
- What to do: Complete 10 Expert Missions
- Reward: Bandages the Mummy outfit
* I find it weird that he shows up after Mint appears
After completing A momentous Galactic Battle chapter (Super Buu part)
- NPC: Yakorah
- Location: Bamboo Forest (west from the house, behind the boulder)
- What to do: Just talk to him
- Reward: Gohan’s High School outfit
- NPC: Taban
- Location: Orange Star High School (head right from your instructor, inbetween the buildings)
- What to do: Use the Elite Pose emote
- Reward: Gohan’s Tracksuit outfit

After completing the God of Destruction’s Anger chapter
- NPC: Banko
- Location: Right outside of Ajisa District
- What to do: Give him a Power Capsule S
- Reward: Senzu Beansprout x1
After completing the Emperor’s Return chapter
- NPC: Omura
- Location: Above Orange Star High School
- What to do: Complete 15 Expert Missions
- Reward: Murasaki-style Ninja outfit
After completing the Masked Saiyan chapter
- NPC: Erillo
- Location: Dragon Ball Pedestal
- What to do: Just talk to him
- Reward: Aura Capsule M x1
After completing the Warrior from the Demon World chapter (last chapter)
- NPC: Oba #1
- Location: He’s flying around, clockwise (you could warp to Hercule’s House and stare upward-west until he passes by)
- What to do: Just talk to him
- Reward: Special Vehicle (Nimbus)
- A rough analysis of his flight pattern
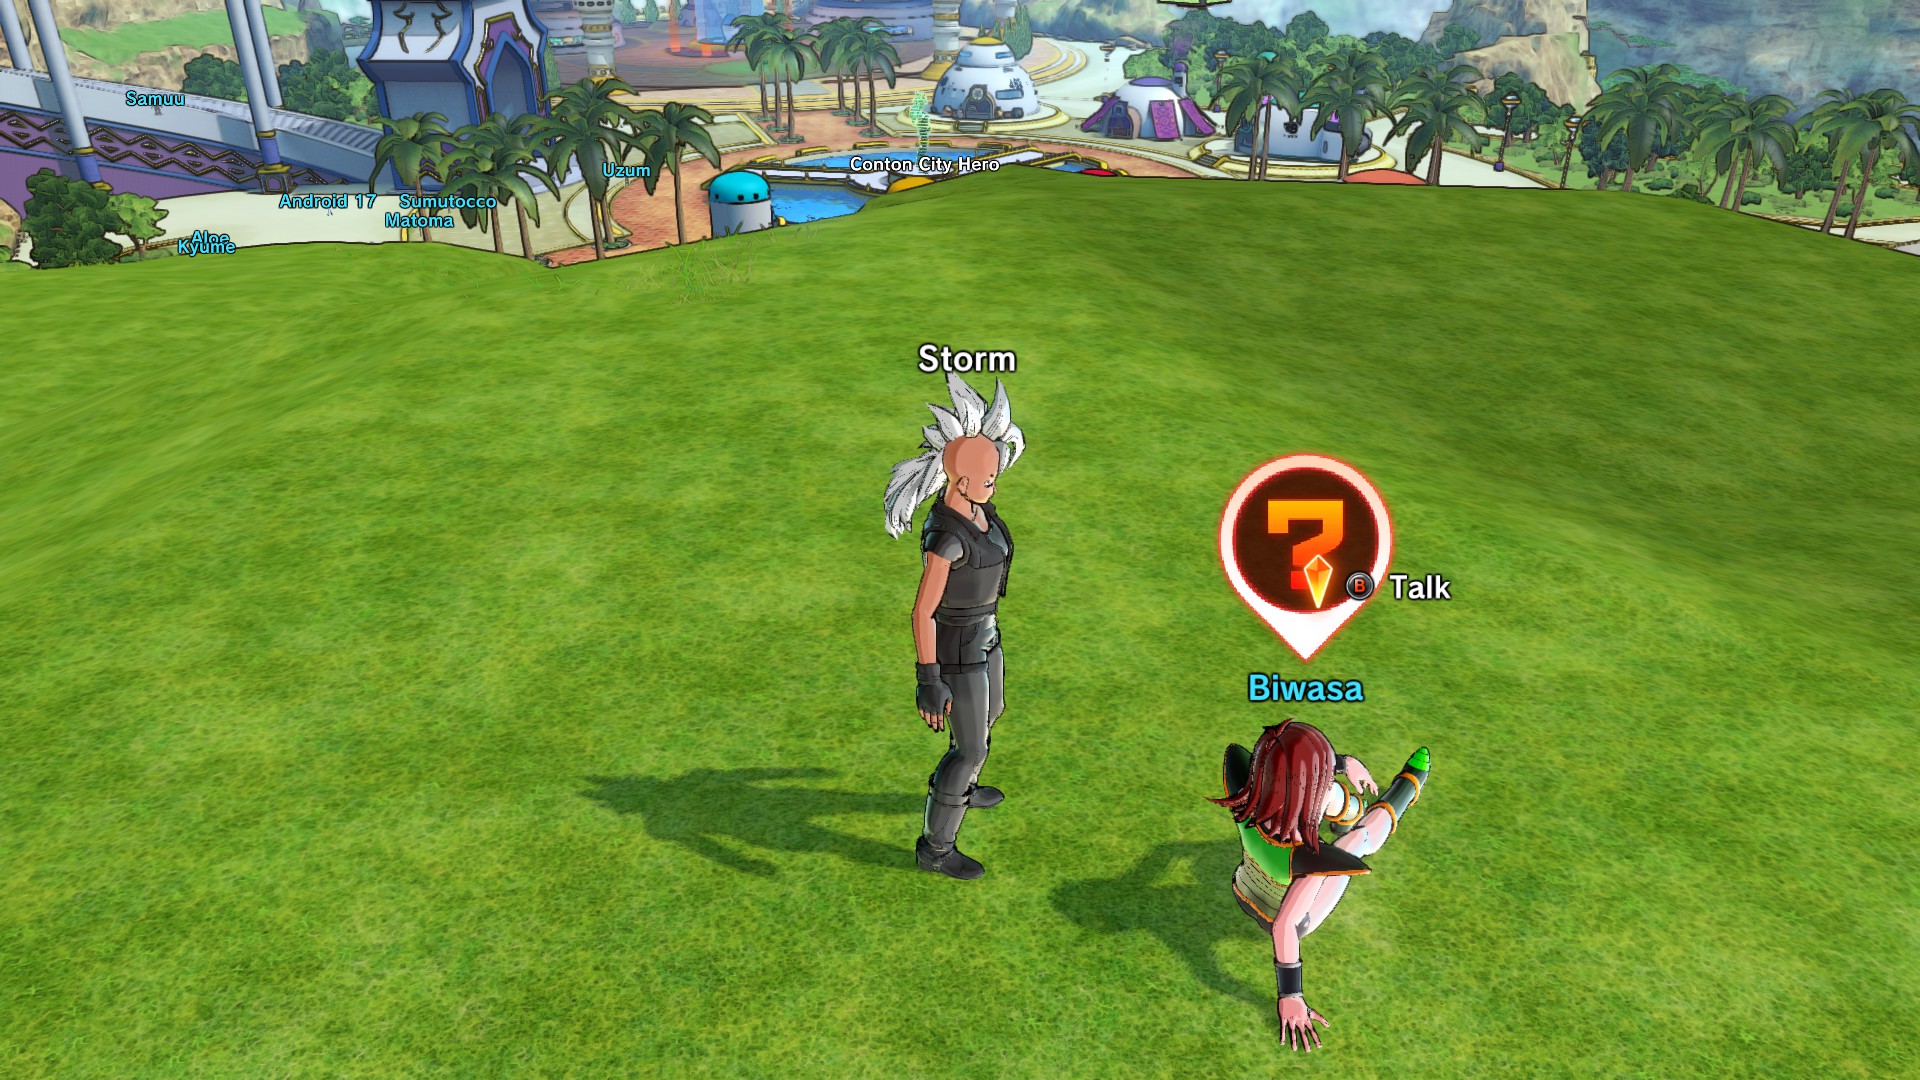
- NPC: Biwasa #2
- Location: North-West from Shop Area (fly over Great Ape Nappa’s rift)
- What to do: Just talk to her
- Reward: Gohan! Eat a Senzu Bean! x1
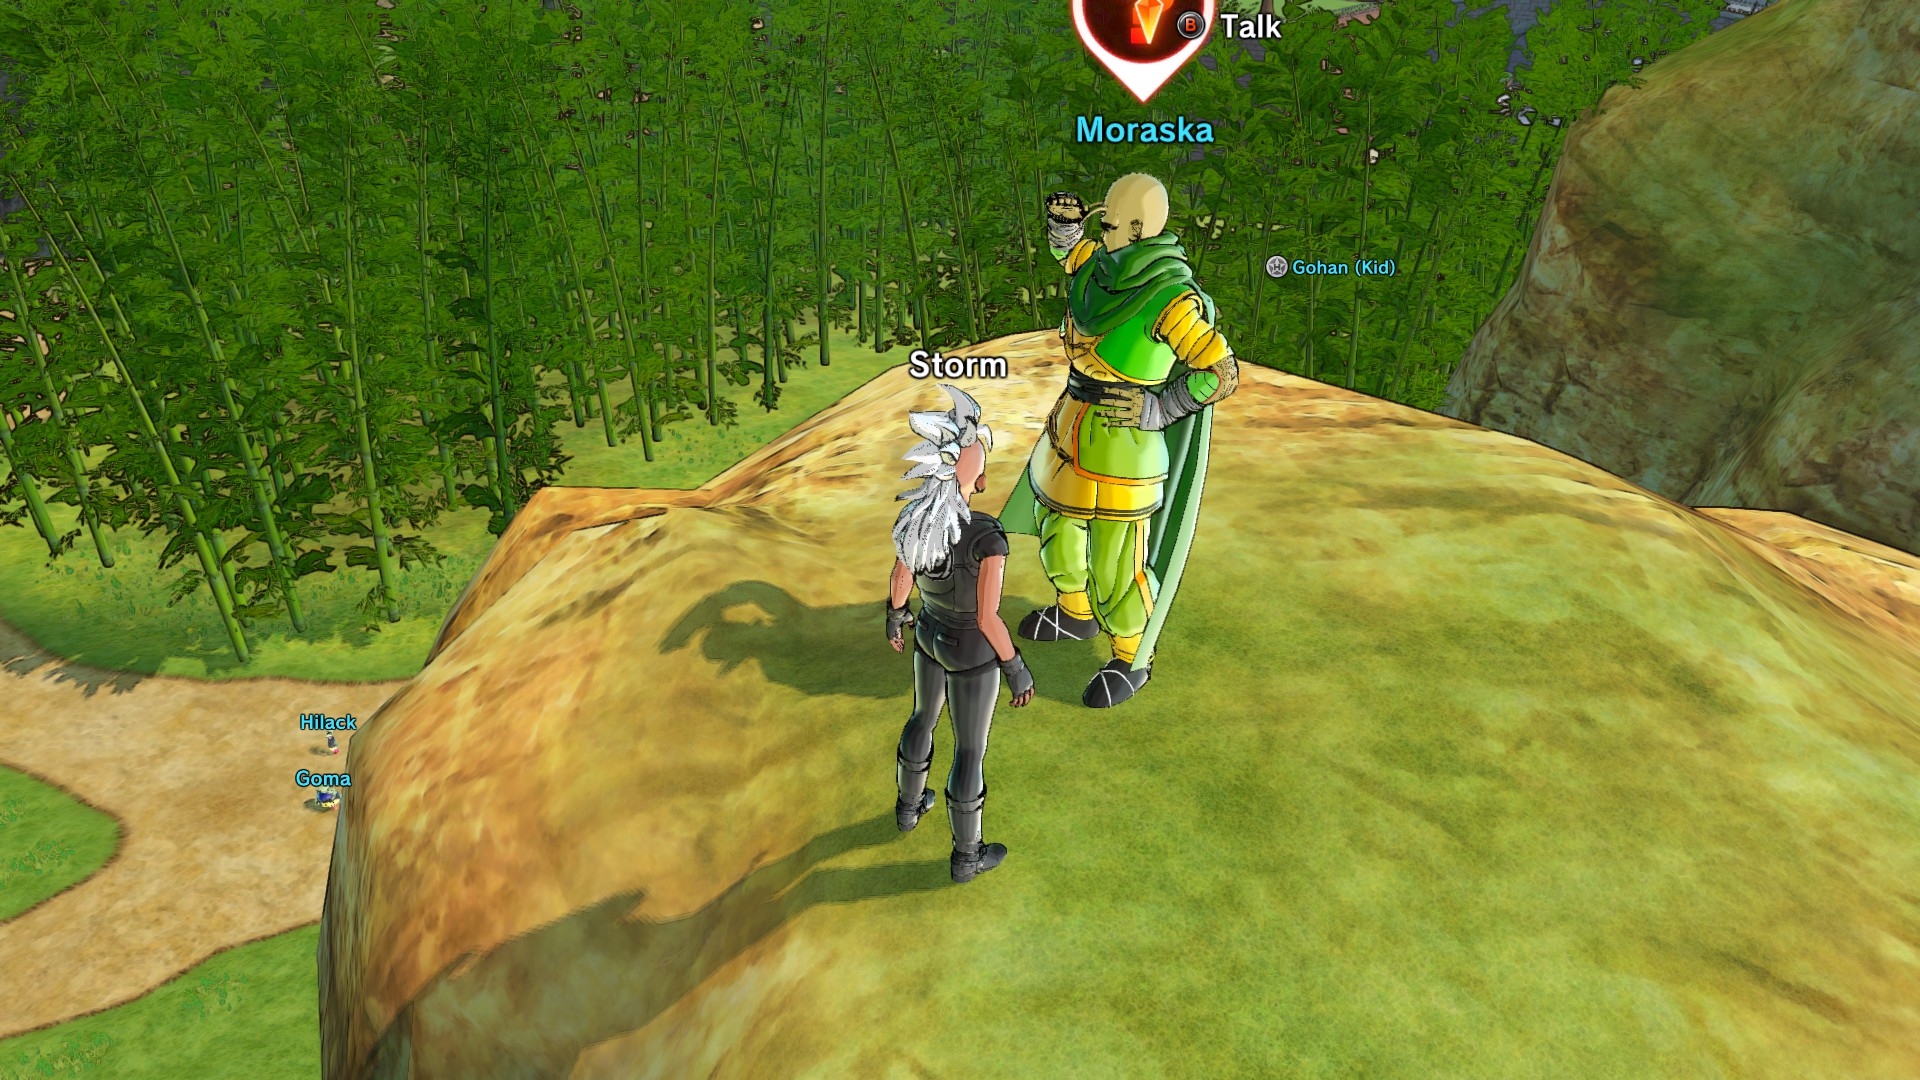
- NPC: Moraska #3
- Location: Bamboo Forest (on top of one of the boulders)
- What to do: Just talk to him
- Reward: Stop trampling on Namek’s peace x1
- NPC: Vuvuki #4
- Location: Ajisa District (behind Dodoria)
- What to do: Just talk to him
- Reward: Let’s just enjoy the game right now. x1
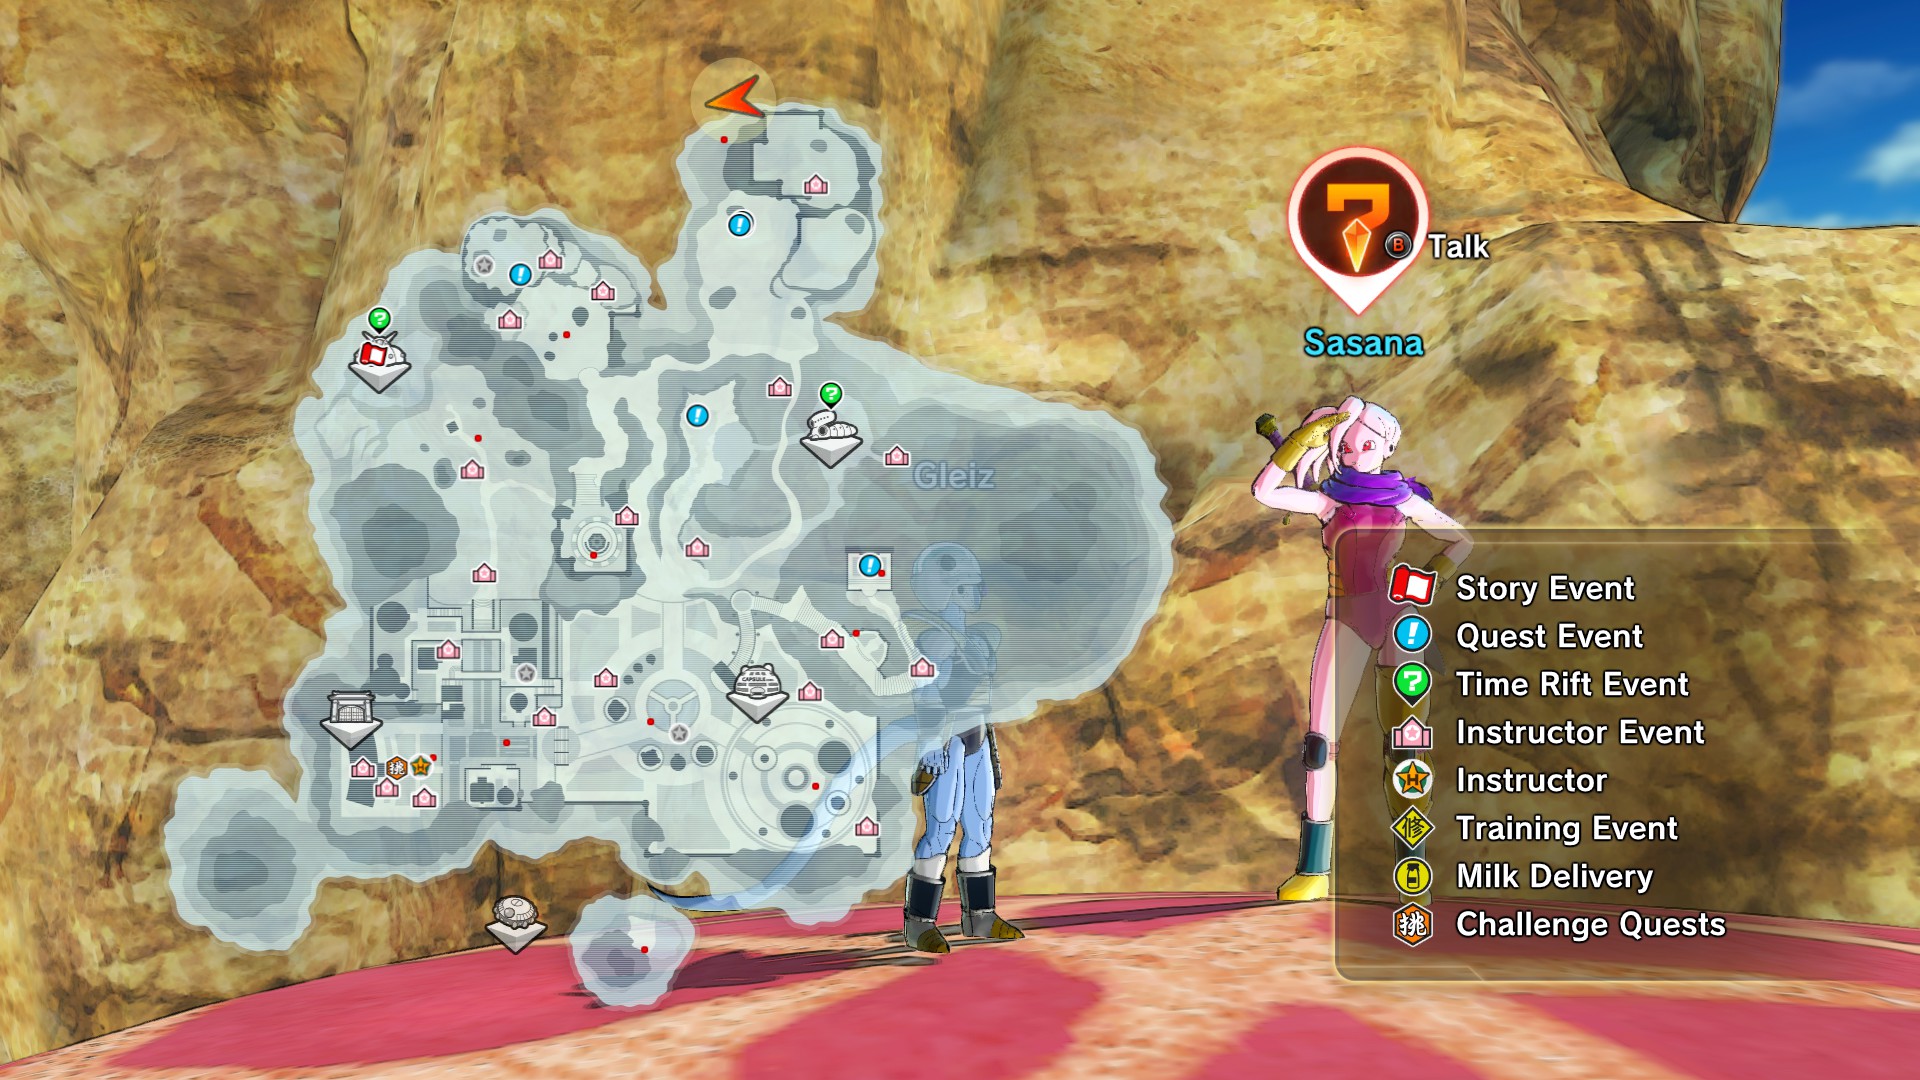
- NPC: Sasana #5
- Location: Mushroom Desert (on a mushroom on the west cliff)
- What to do: Just talk to her
- Reward: Popporunga Pupirittparo x1
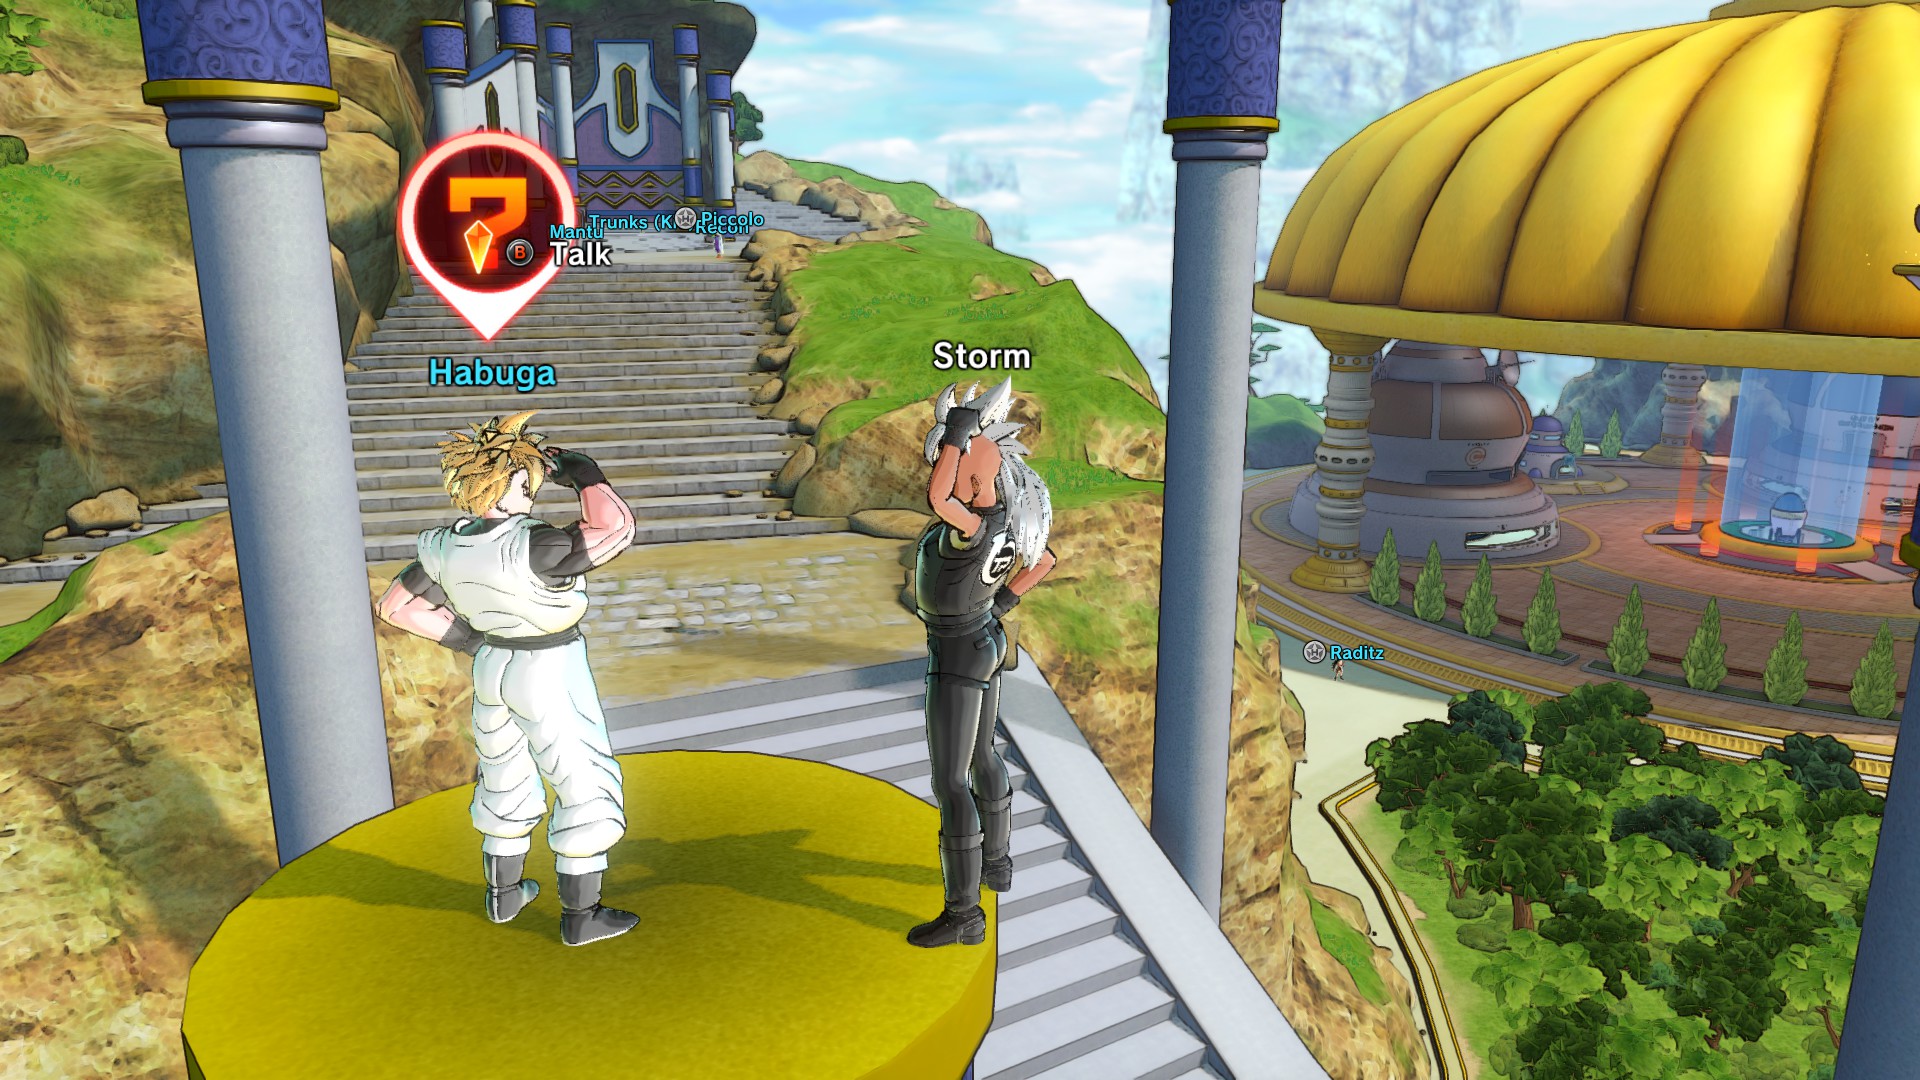
- NPC: Hambuga #6
- Location: On top of one of the pillars of the stairs to Time Nest
- What to do: Just talk to him
- Reward: I’ll send you to Hell!! x1
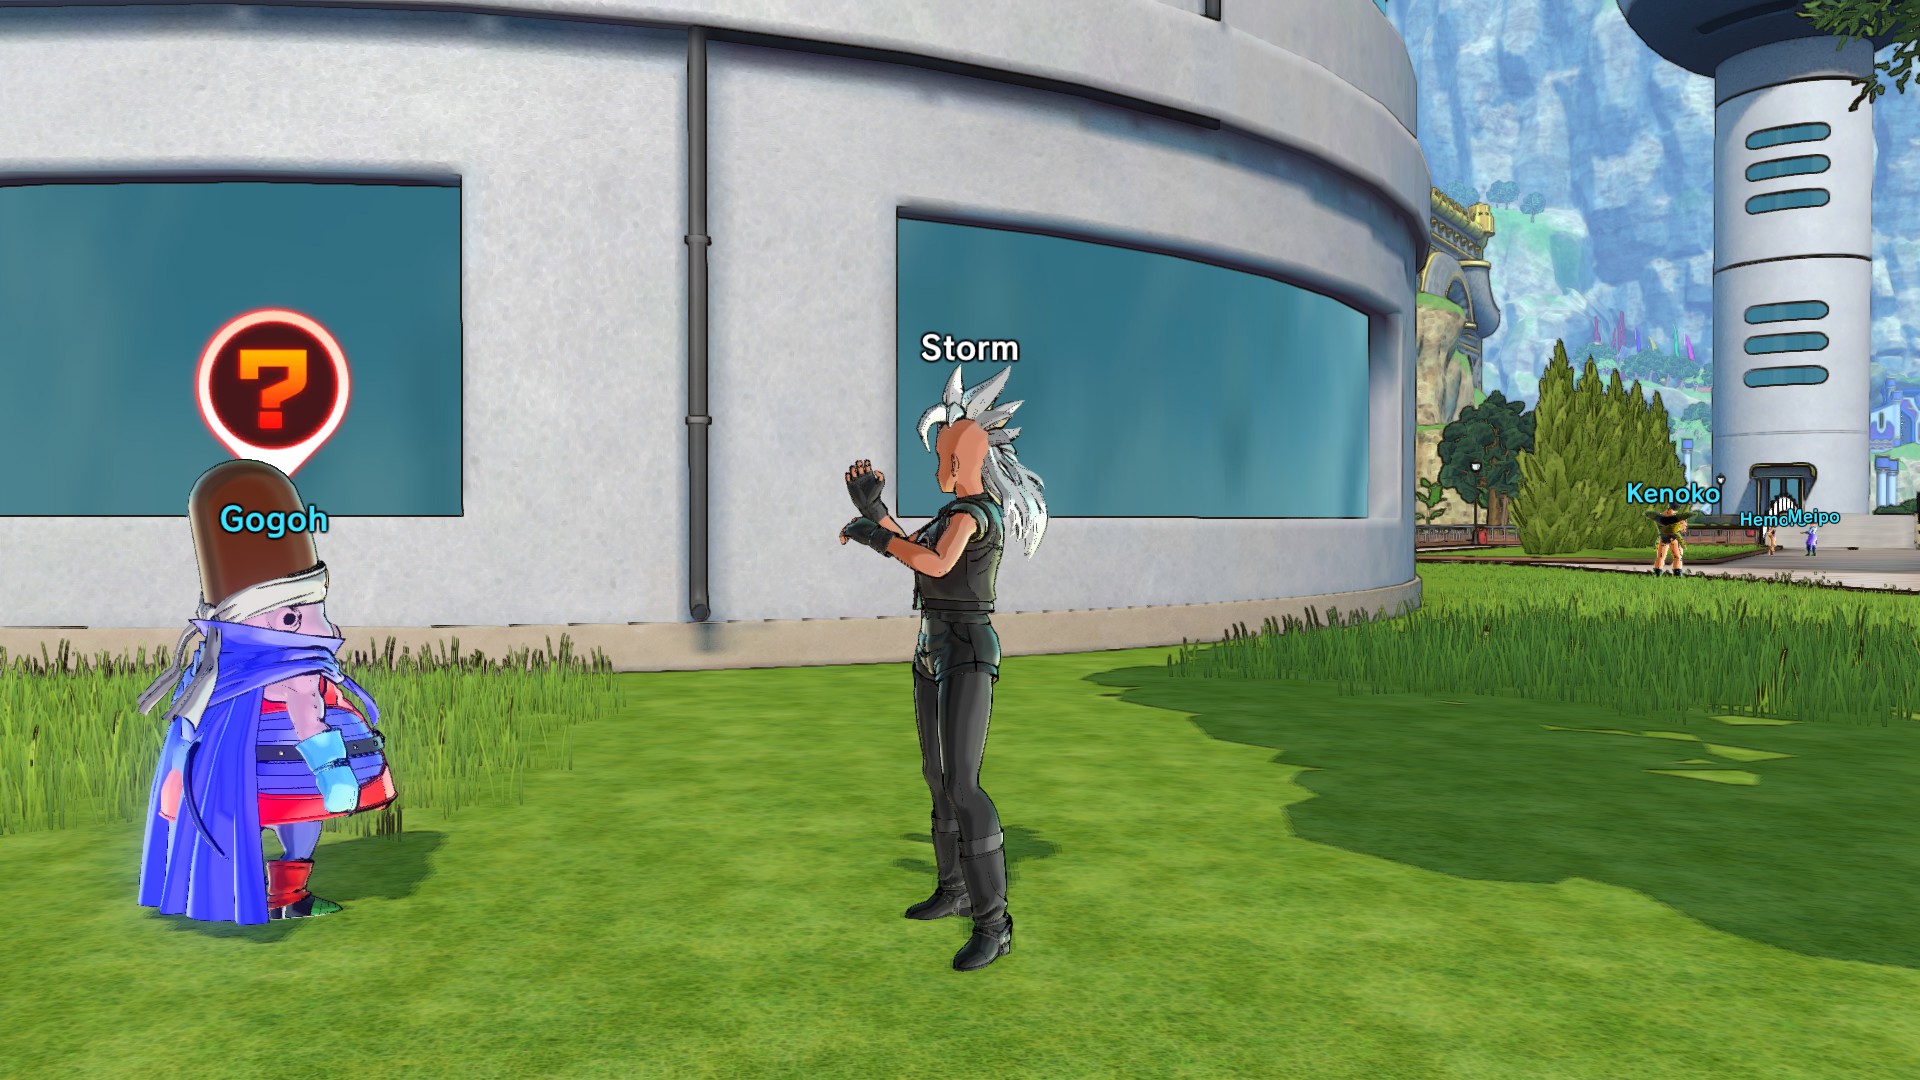
- NPC: Gogoh #7
- Location: South-West from Gohan in the Bamboo Forest
- What to do: Just talk to him
- Reward: I’m over 1,000 years old. x1
- NPC: Nit #8
- Location: Above the Reception Area (Inside the building)
- What to do: Just talk to her
- Reward: 40 ton weights! x1
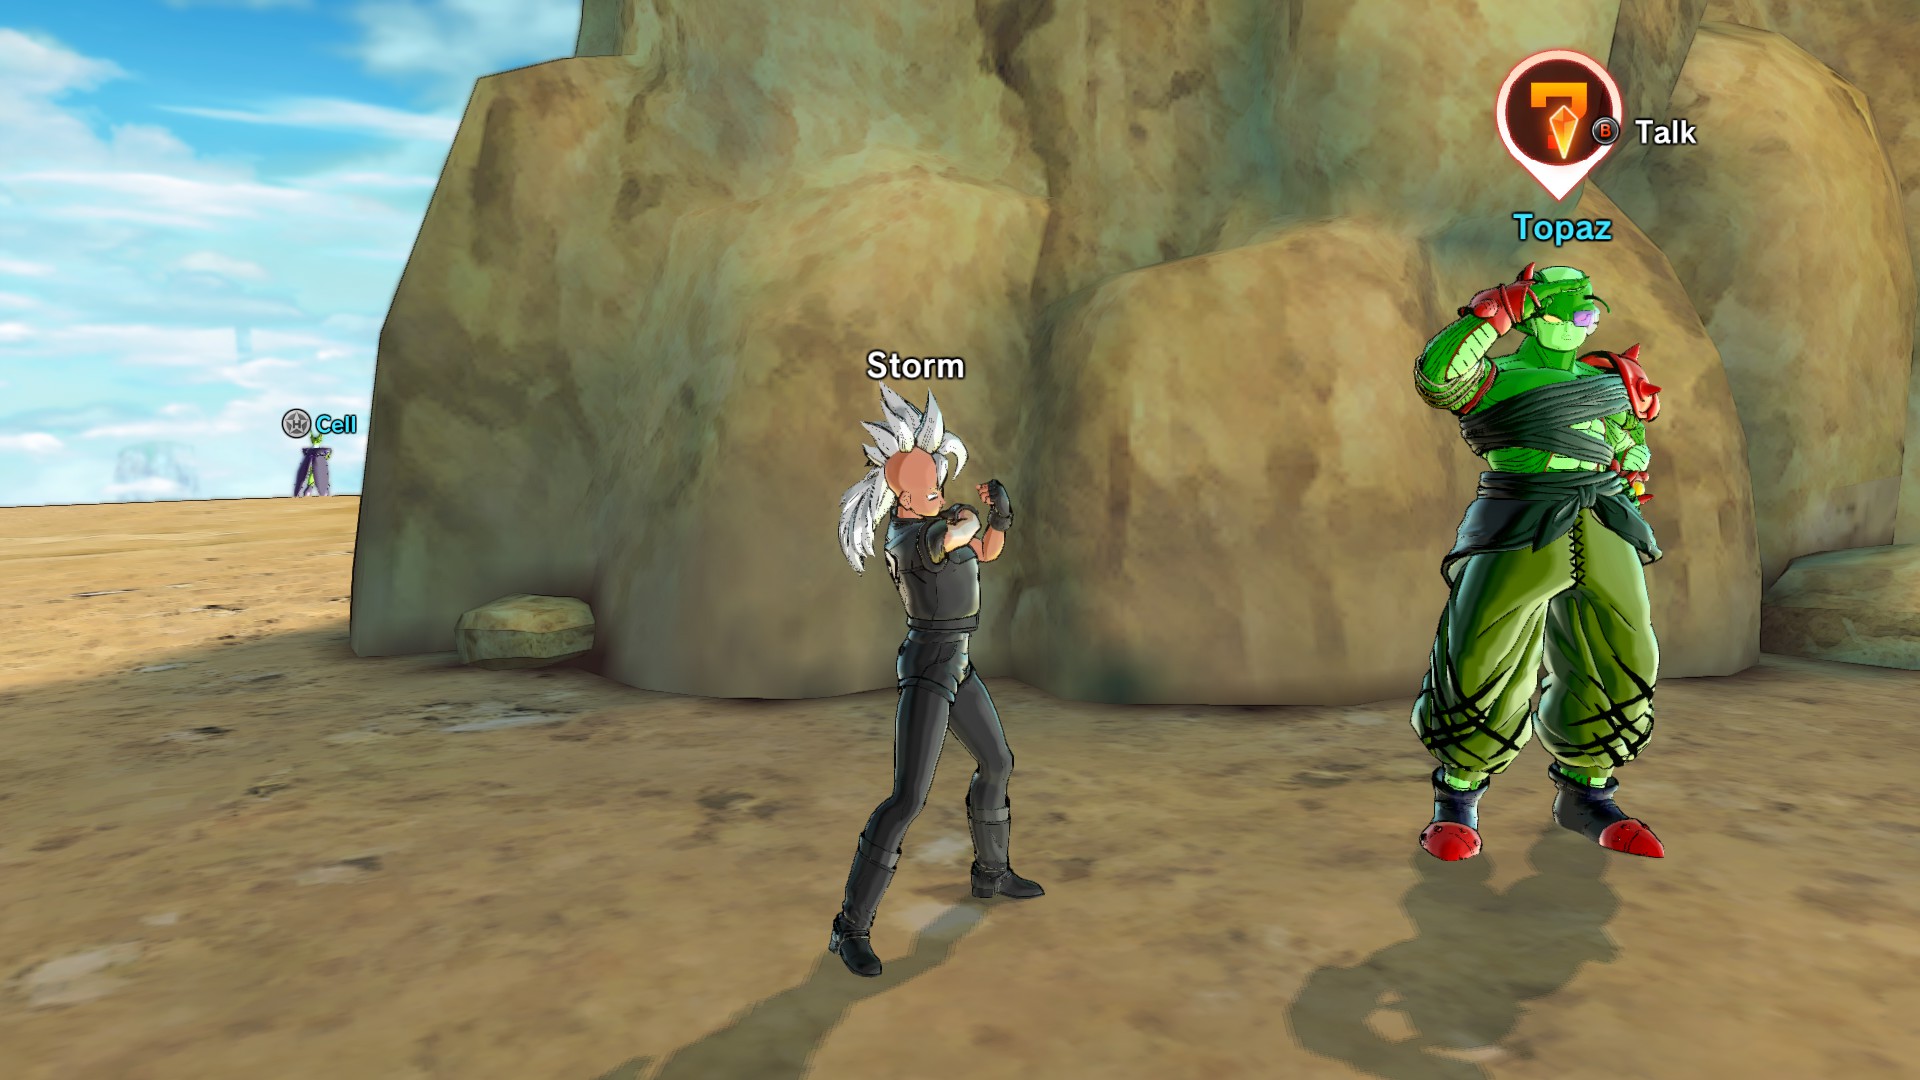
- NPC: Topaz
- Location: Mushroom Desert
- What to do: Complete 30 Expert Missions
- Reward: Turtle Hermit’s Aloha outfit
- NPC: Oshi
- Location: By Bojack near the Dragon Ball Pedestal
- What to do: Reach level 99, Collect 70 different figures in the Hero Colosseum, Finish all stories and Free Battles in the Hero Colosseum, Learn a Dual Ultimate attack from all instructors (except Hit, Bojack, and Zamasu)
- Reward: Hercule Badges and achievements
NPC that has a chance to give food*
- NPC: Sisitto
- Location: Shop Area (left from the Clothing shop)
- What to do: Just talk to her
- Reward: Chance for Pudding, Chocolate, or Candy
- NPC: Kolash
- Location: Shop Area (behind the Item Shop)
- What to do: Just talk to him
- Reward: Chance for Candy, Chocolate, or Pudding
- NPC: Natu
- Location: Business District aka Patrol Headquarters (in front of Orange Star High School)
- What to do: Just talk to her
- Reward: Chance for Pudding, Candy, or Chocolate
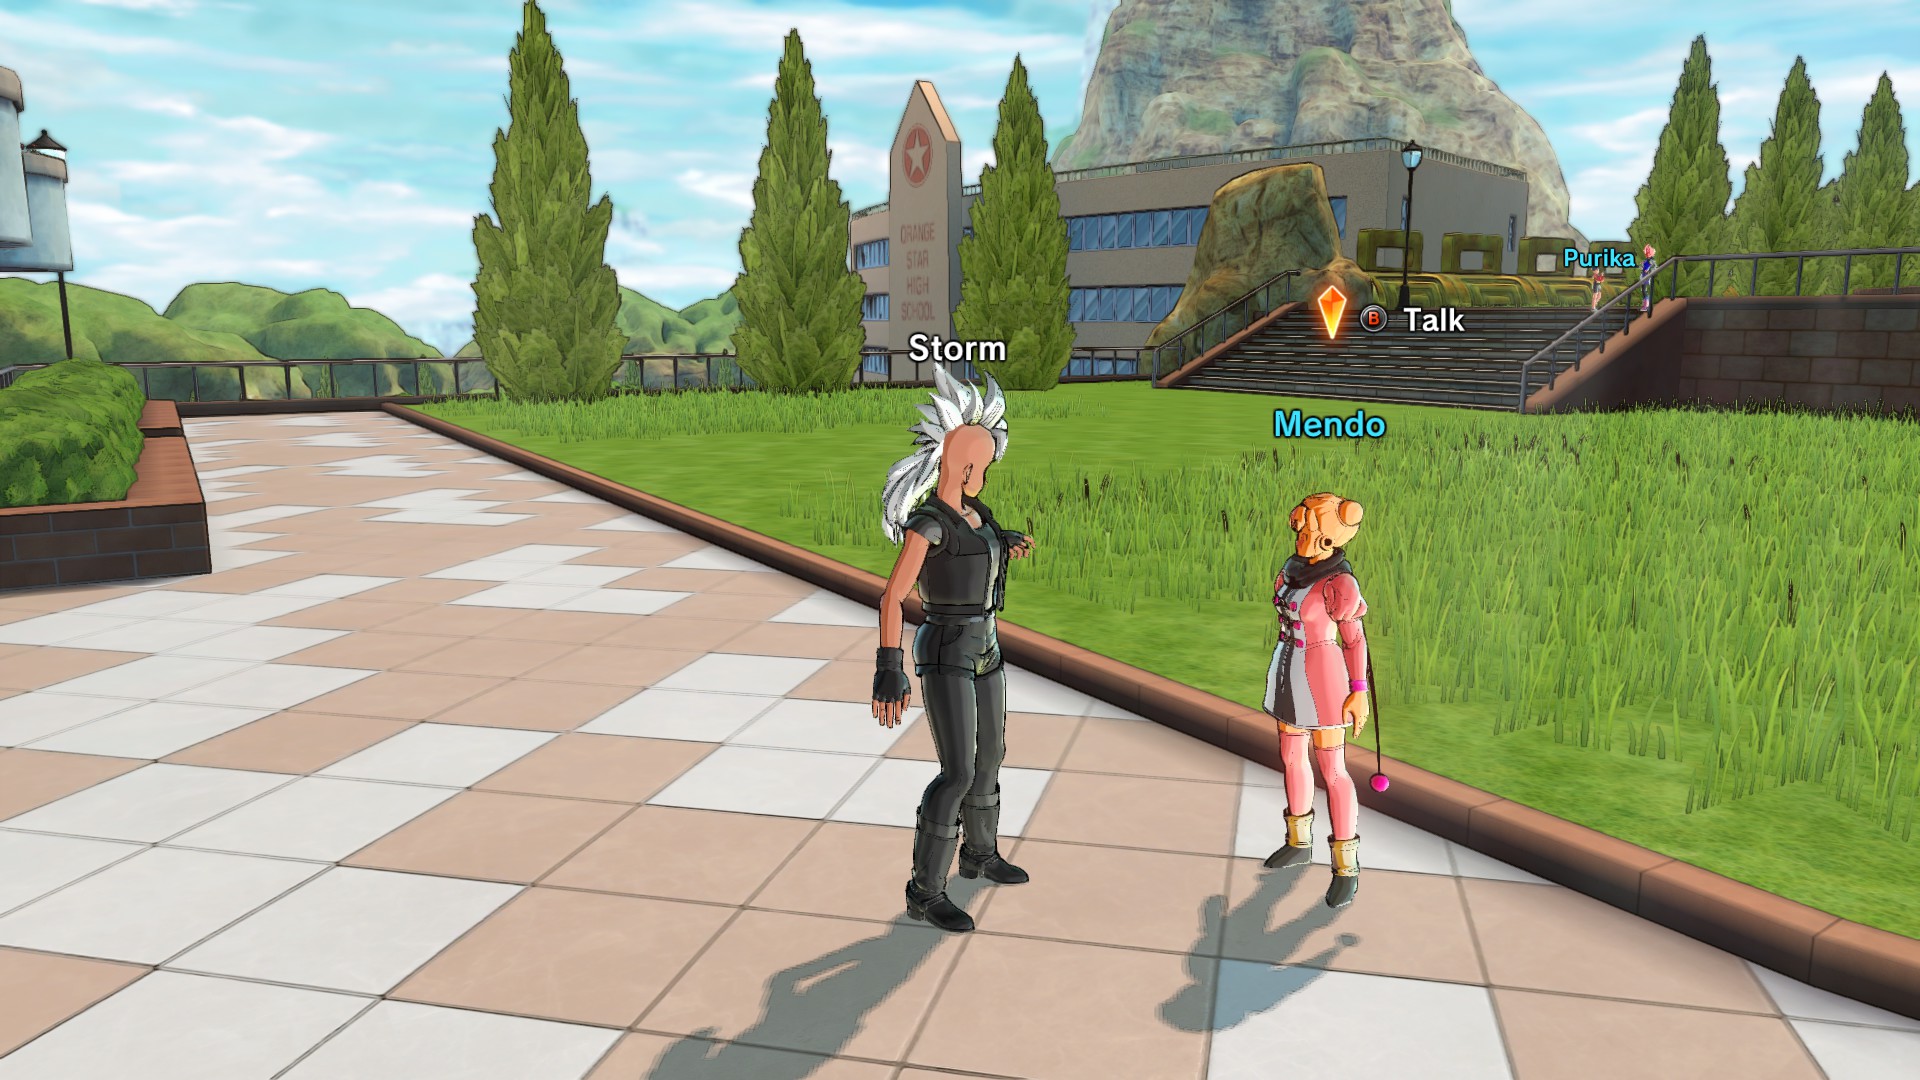
- NPC: Mendo
- Location: Business District aka Patrol Headquarters (north from Orange Star High School)
- What to do: Just talk to her
- Reward: Chance for Candy, Pudding, or Chocolate
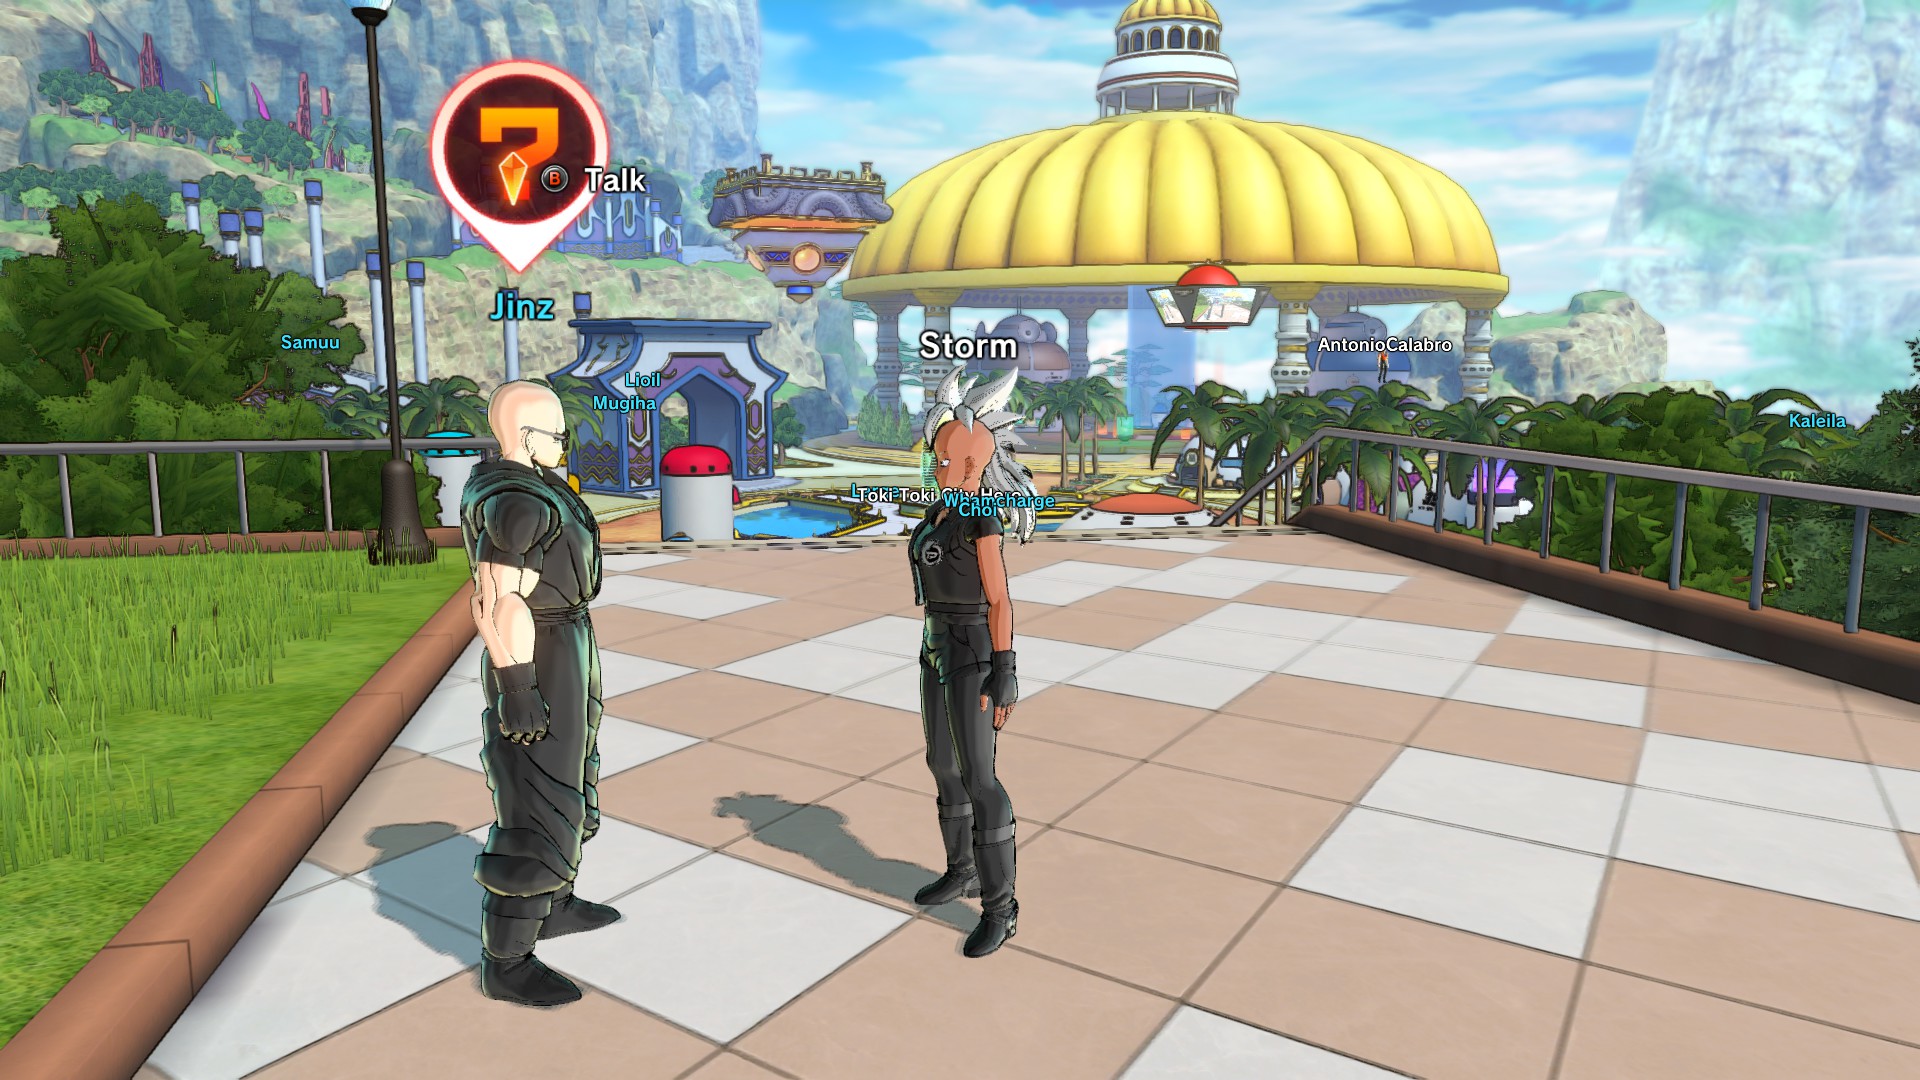
- NPC: Jinz
- Location: Business District aka Patrol Headquarters (fly over the Accessory shop)
- What to do: Just talk to him
- Reward: Chance for Candy, Pudding, or Chocolate
Guru’s House
- NPC: Mekuji
- Location: Behind Guru’s house
- What he asks for:
Energy Capsule MAll-Energy Capsule MMr. Antidote MMr. Shape Up M
- Rewards he can give:
Sweet Potato x3Water x3Carrot x3Giant Apple x3Battle Suit outfitShingi Demon Battle SuitEvil Sorceror Battle ToolsTrendy Work Outfit
Glossary
Notes
Natu wants a Toki Toki impression
She only teases you on doing an impression, but she then gives food as an apology.
Does Matoma want something?
As far as I know, she just runs up to the player and gives a compliment, depending on your race.
There’s a mistake or something was forgotten in this guide
I’ve completed the story and I see no more red question marks; other than the repeatable quests. If I made a mistake or missed information, please let me know.
A new update brought out new quests
I’ll try my best to keep this guide updated, but if a new quest is misplaced or wrong, please let me know. It would be a huge help.
This guide
This guide use to be for emote quests, but I decided to repurpose it into a side-quest guide.
I will also add side-quests that I missed, if I come across any.