Oblivion's Guide to Solo 50 (DLC Required)
Getting Started
This guide will easily get you to wave 50+ on passages.
(Use the screenshots to better understand this setup)
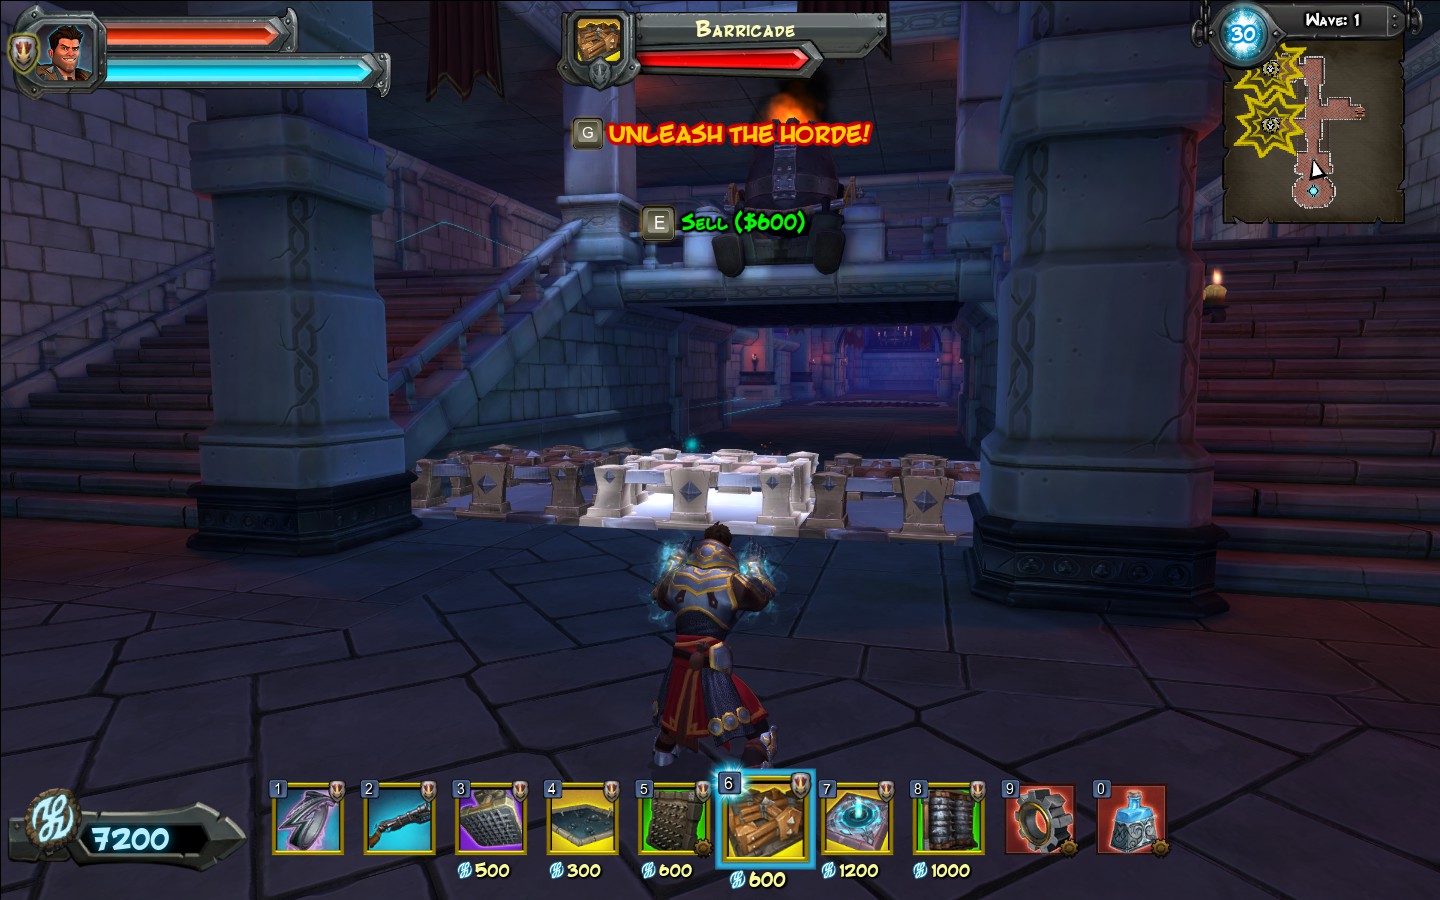
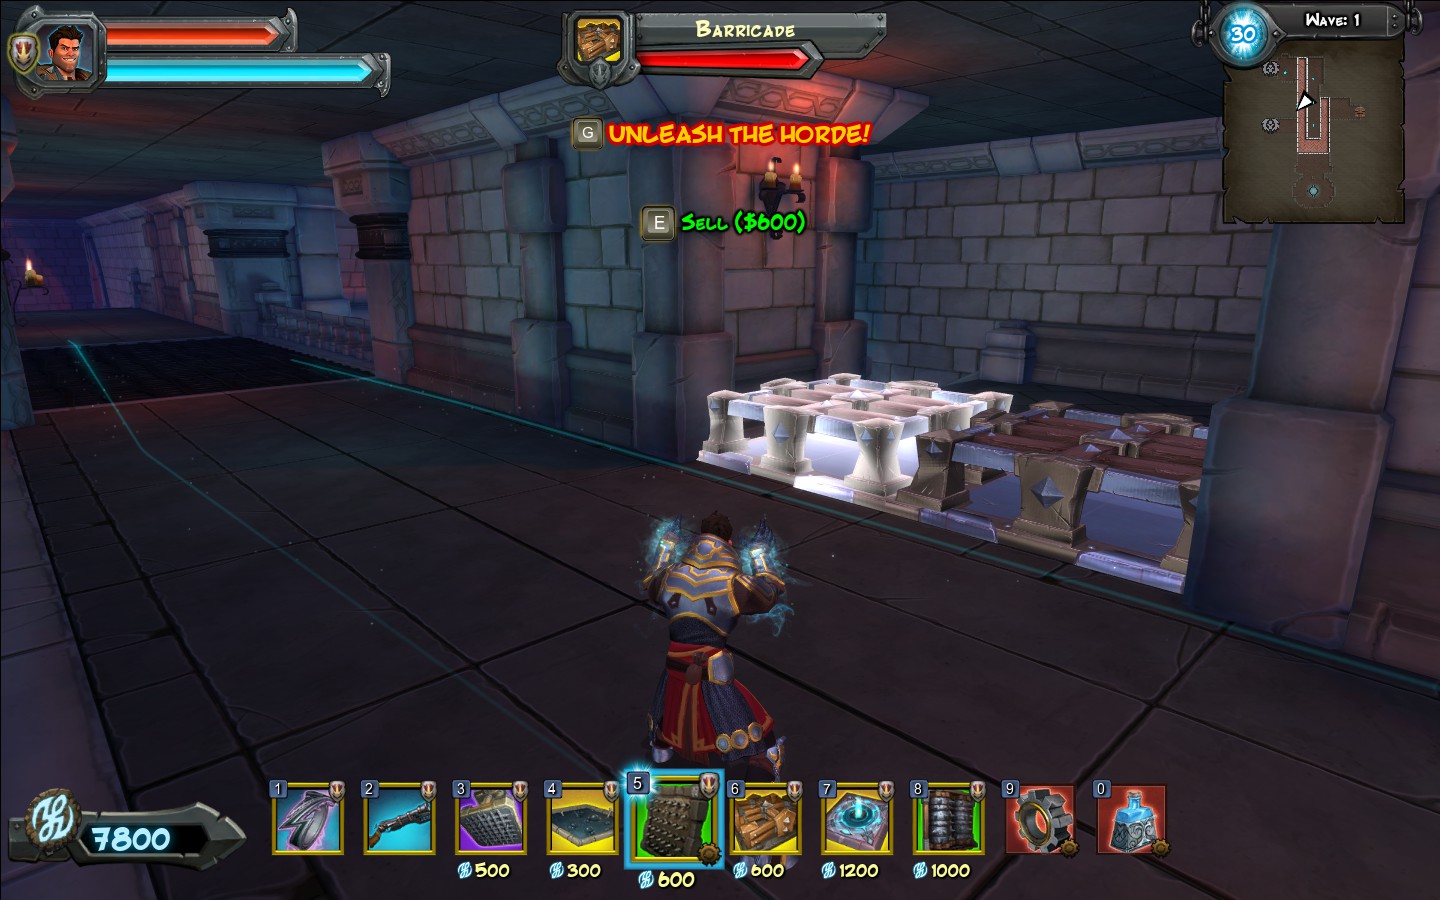
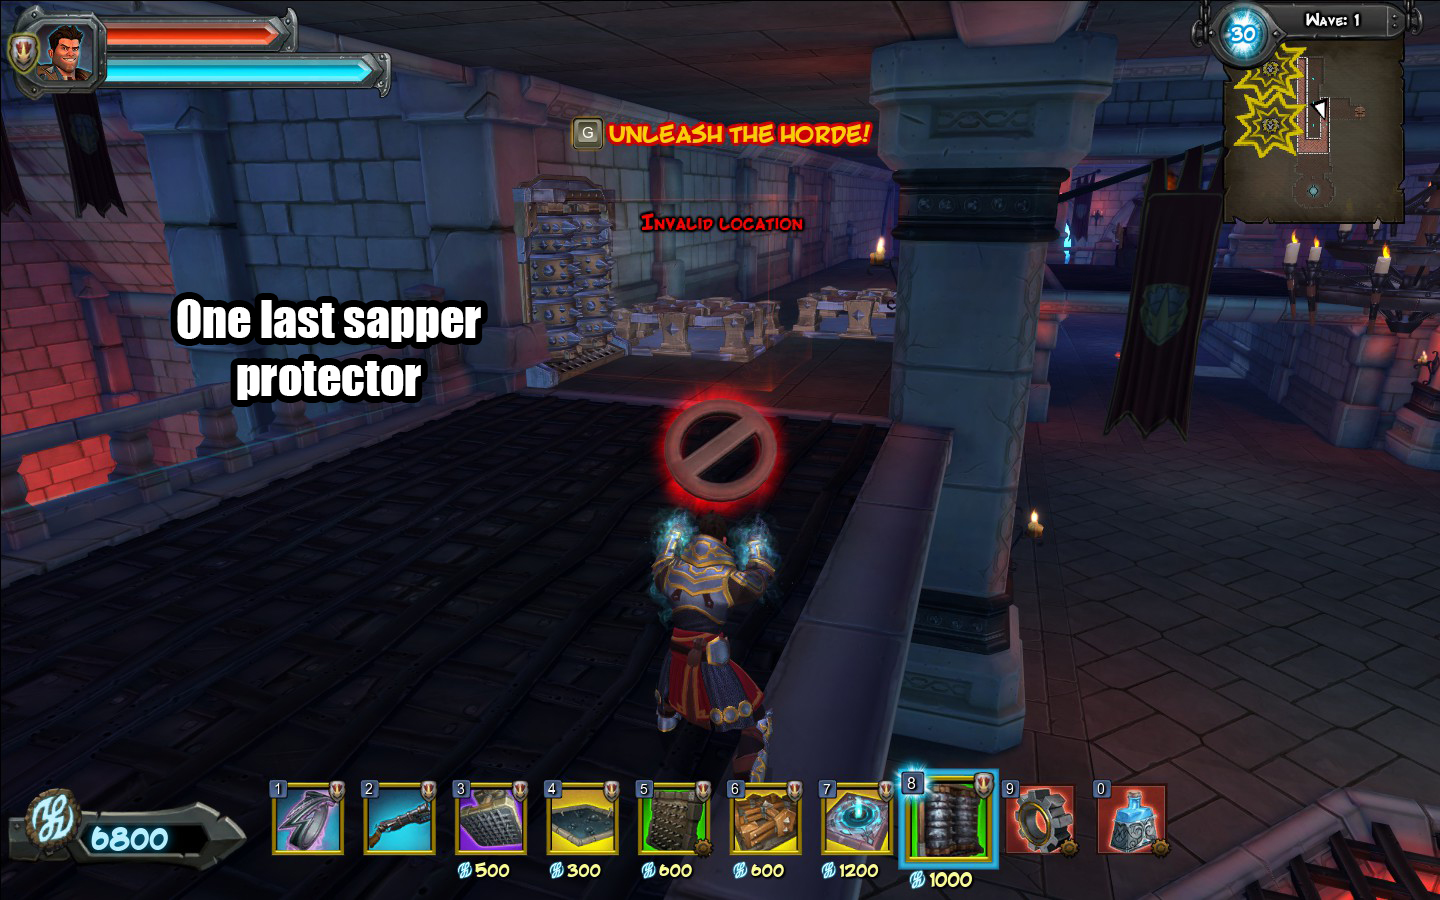
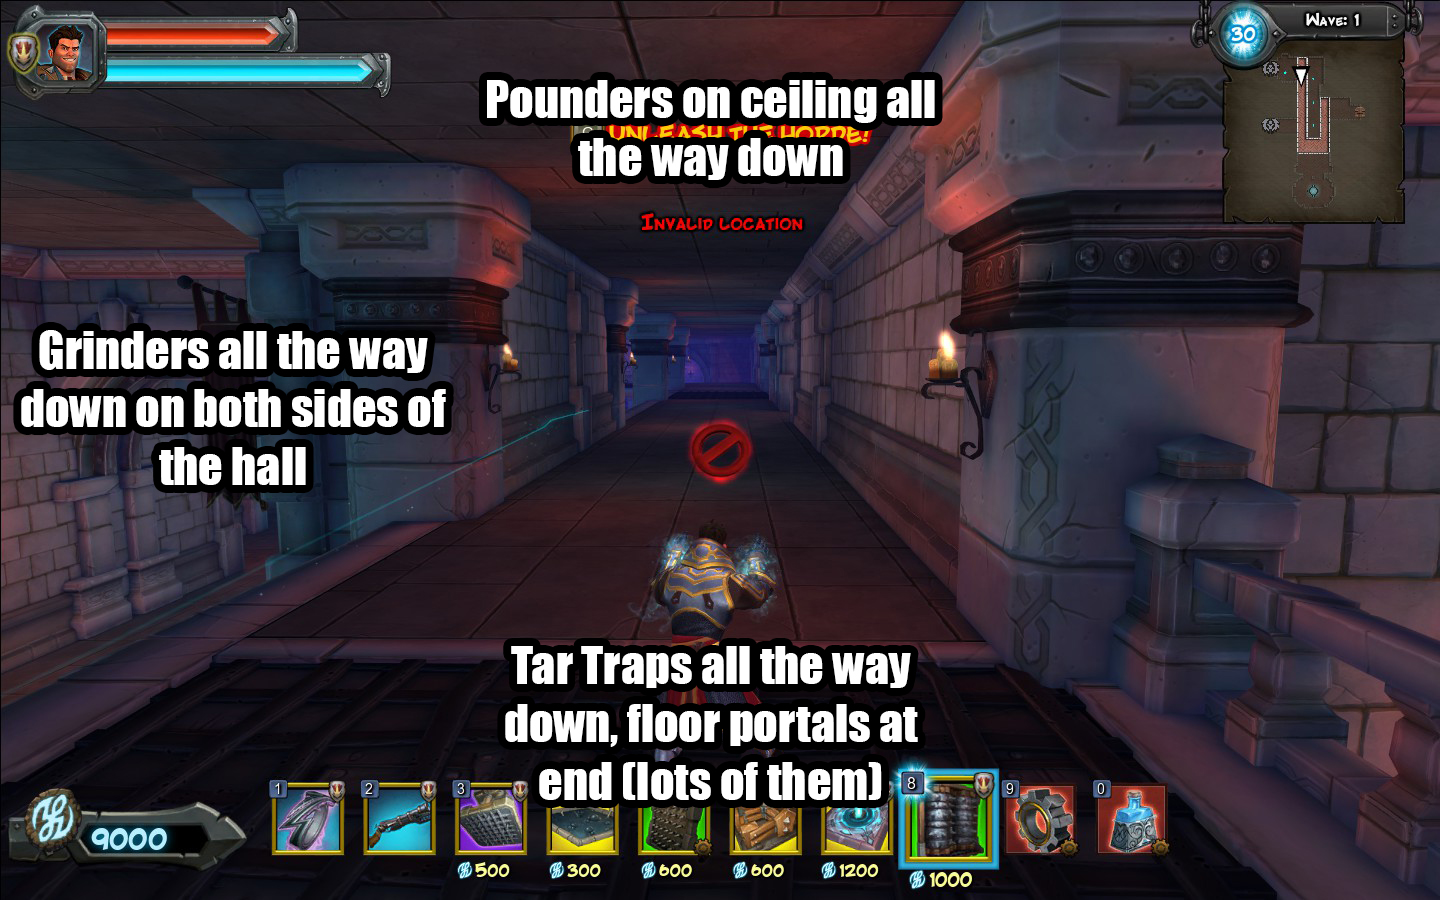
Note: Use the minimap in the screenshots to better understand my characters location.
Note: Use the Lightning Ring's secondary for larger enemies. If you get in trouble, use the Mana Rage Trinket's Secondary and lay down 3-4 lightning storms.
Note: Fill the hallway first, after that expand your traps the the main floor and such, you'll figure it out.
Note: Gnoll Hunters/Yeti can be a major problem at these higher levels. How did I deal with them? I used the Blunderbuss to knock them over then ran like a b*tch. These units never try to go in to the portal, they will just follow you. Eventually they all died from traps while chasing me all over the map.
Step 2: Block off both sets of stairs (on the sides) with barricades.
Step 3: Setup 3-4 Grinders in front (direction enemy comes from) of those barricades to stop sappers.
Step 4: Setup all hell in the long hallway.
Step 5: Setup Teleporters at the end of the hallway (closest to portal)
See the Weapons/Traps section to get the correct equipment.
(Use the screenshots to better understand this setup)
Note: Use the minimap in the screenshots to better understand my characters location.
Logic:
The basic idea here is to block off both sets of stairs (and under the third set) so that all the enemies will be forced to walk all the way to the back of the map and walk all the way down that super long hallway. That hallway, when lined with Grinders and Pounders will take care of virtually everything. All small things will die and the larger things (that happen to make it past that) will get teleported back to the gate and will go through the long hallway all over again.Note: Use the Lightning Ring's secondary for larger enemies. If you get in trouble, use the Mana Rage Trinket's Secondary and lay down 3-4 lightning storms.
Note: Fill the hallway first, after that expand your traps the the main floor and such, you'll figure it out.
Note: Gnoll Hunters/Yeti can be a major problem at these higher levels. How did I deal with them? I used the Blunderbuss to knock them over then ran like a b*tch. These units never try to go in to the portal, they will just follow you. Eventually they all died from traps while chasing me all over the map.
Setup:
Step 1: Block off the gap under the main staircase.Step 2: Block off both sets of stairs (on the sides) with barricades.
Step 3: Setup 3-4 Grinders in front (direction enemy comes from) of those barricades to stop sappers.
Step 4: Setup all hell in the long hallway.
Step 5: Setup Teleporters at the end of the hallway (closest to portal)
See the Weapons/Traps section to get the correct equipment.
Weapons/Traps
These weapons and upgrades should be selected:
 (Order them to your liking of course)
1. Ring of Lightning
(Order them to your liking of course)1. Ring of Lightning
- Max Base Level (3 of 3)
- Unique #2
- Max Base Level (3 of 3)
- Unique #2
- Max Base Level (3 of 3)
- Unique #1
- Max Base Level (3 of 3)
- Unique #1
- Max Base Level (3 of 3)
- Unique #1
- Special #1 (Optional)
- Max Base Level (3 of 3)
- Unique #2
- Max Base Level (3 of 3)
- Unique #2
- Max Base Level (3 of 3)
- Unique #1
- Special #1
- Special #2
- Special #1
- Special #2
More Orcs Must Die! 2 guides
- How to get Skulls!★ 5 (616)42k views361 ♥5 minUpdated Jan 24, 2013
- The Combo Bible★ 5 (327)27k views319 ♥24 minUpdated Dec 4, 2018
- The Order's Spellbook (Skull Farming, Traps, Weapons, Trinkets, Enemies)★ 5 (753)21k views646 ♥191 minUpdated Nov 3, 2024
- How to farm skulls in Orcs Must Die! 2, 15 skulls every 5 minutes! (Only need 2 traps!)★ 5 (236)18k views206 ♥1 minUpdated Jan 29, 2016
- [RUS] Выполнение достижений на русском★ 5 (529)12k views443 ♥4 minRussianUpdated Mar 15, 2018
- Pot of Gold (10x Combo)★ 4 (194)8.9k views90 ♥1 minUpdated Aug 31, 2015


This guide was created by its original author on the Steam Community. Are you the author and want it removed? Request removal.